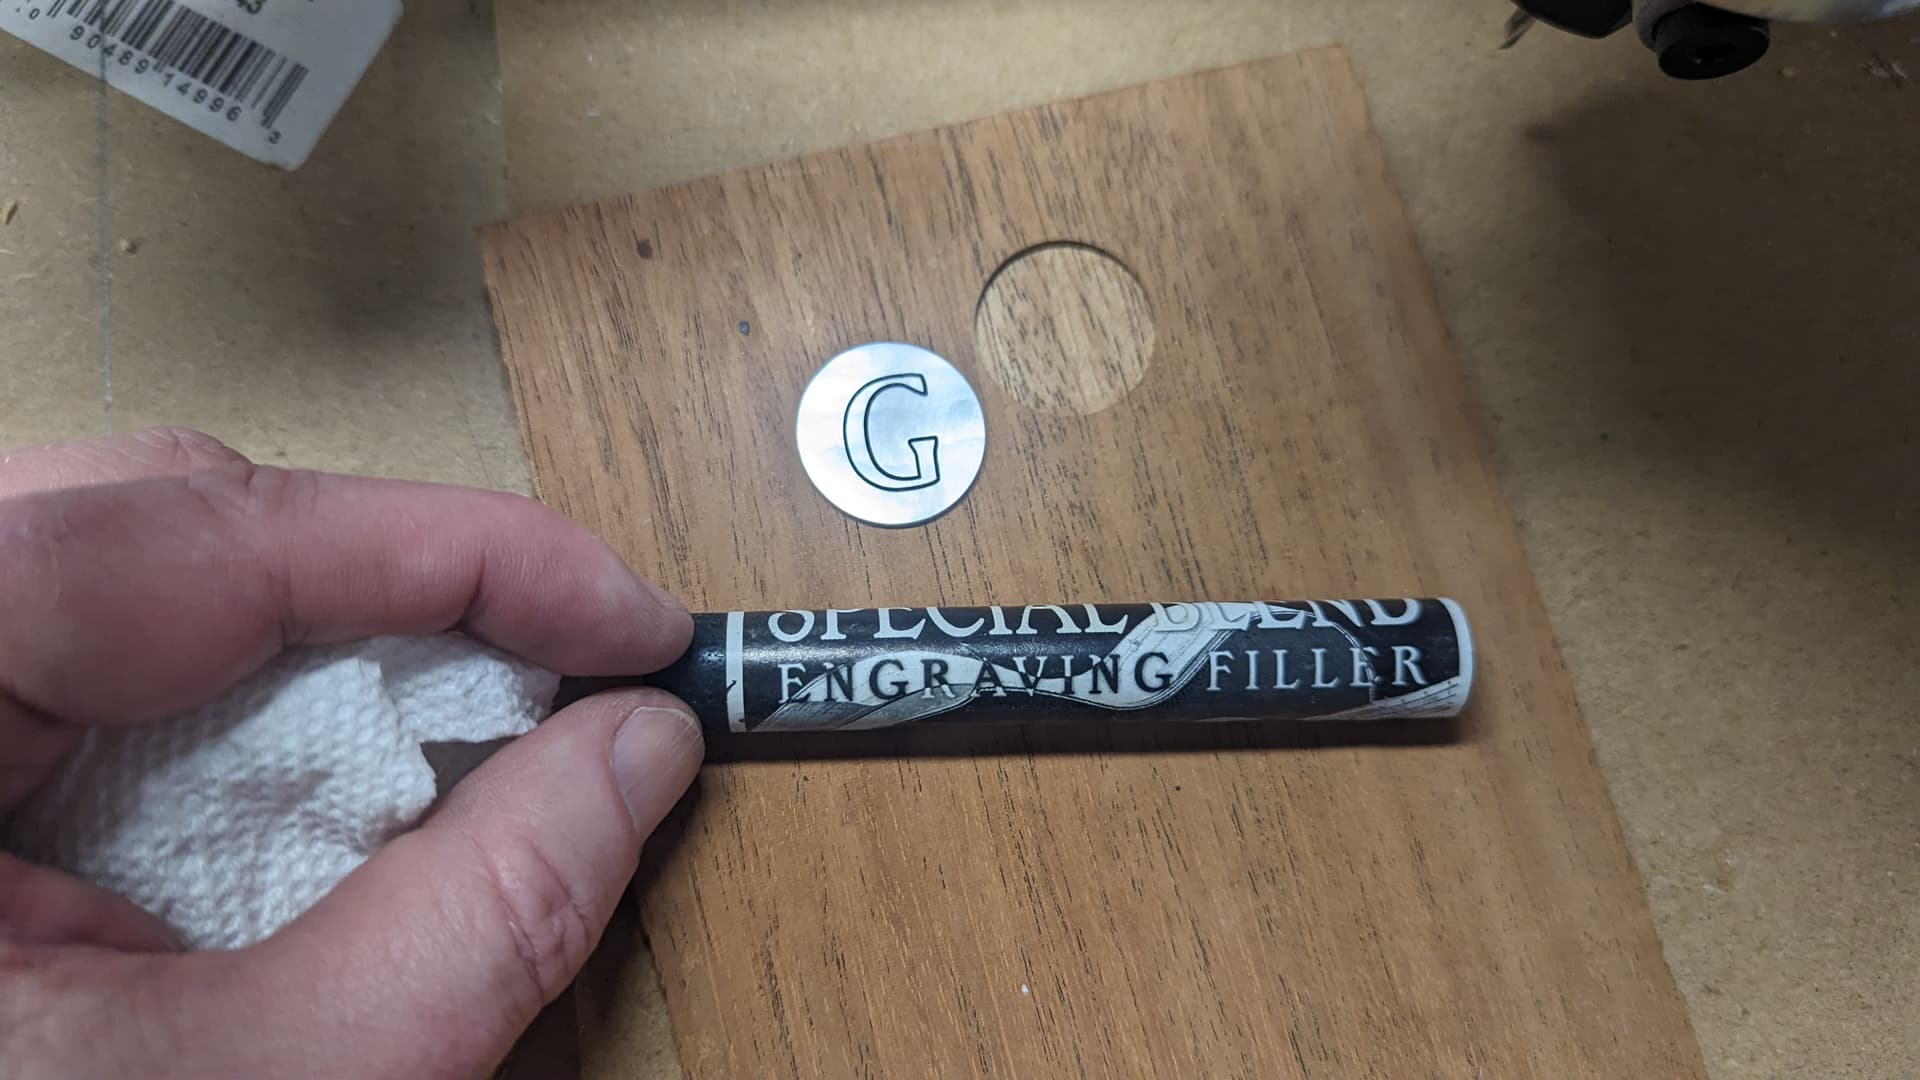
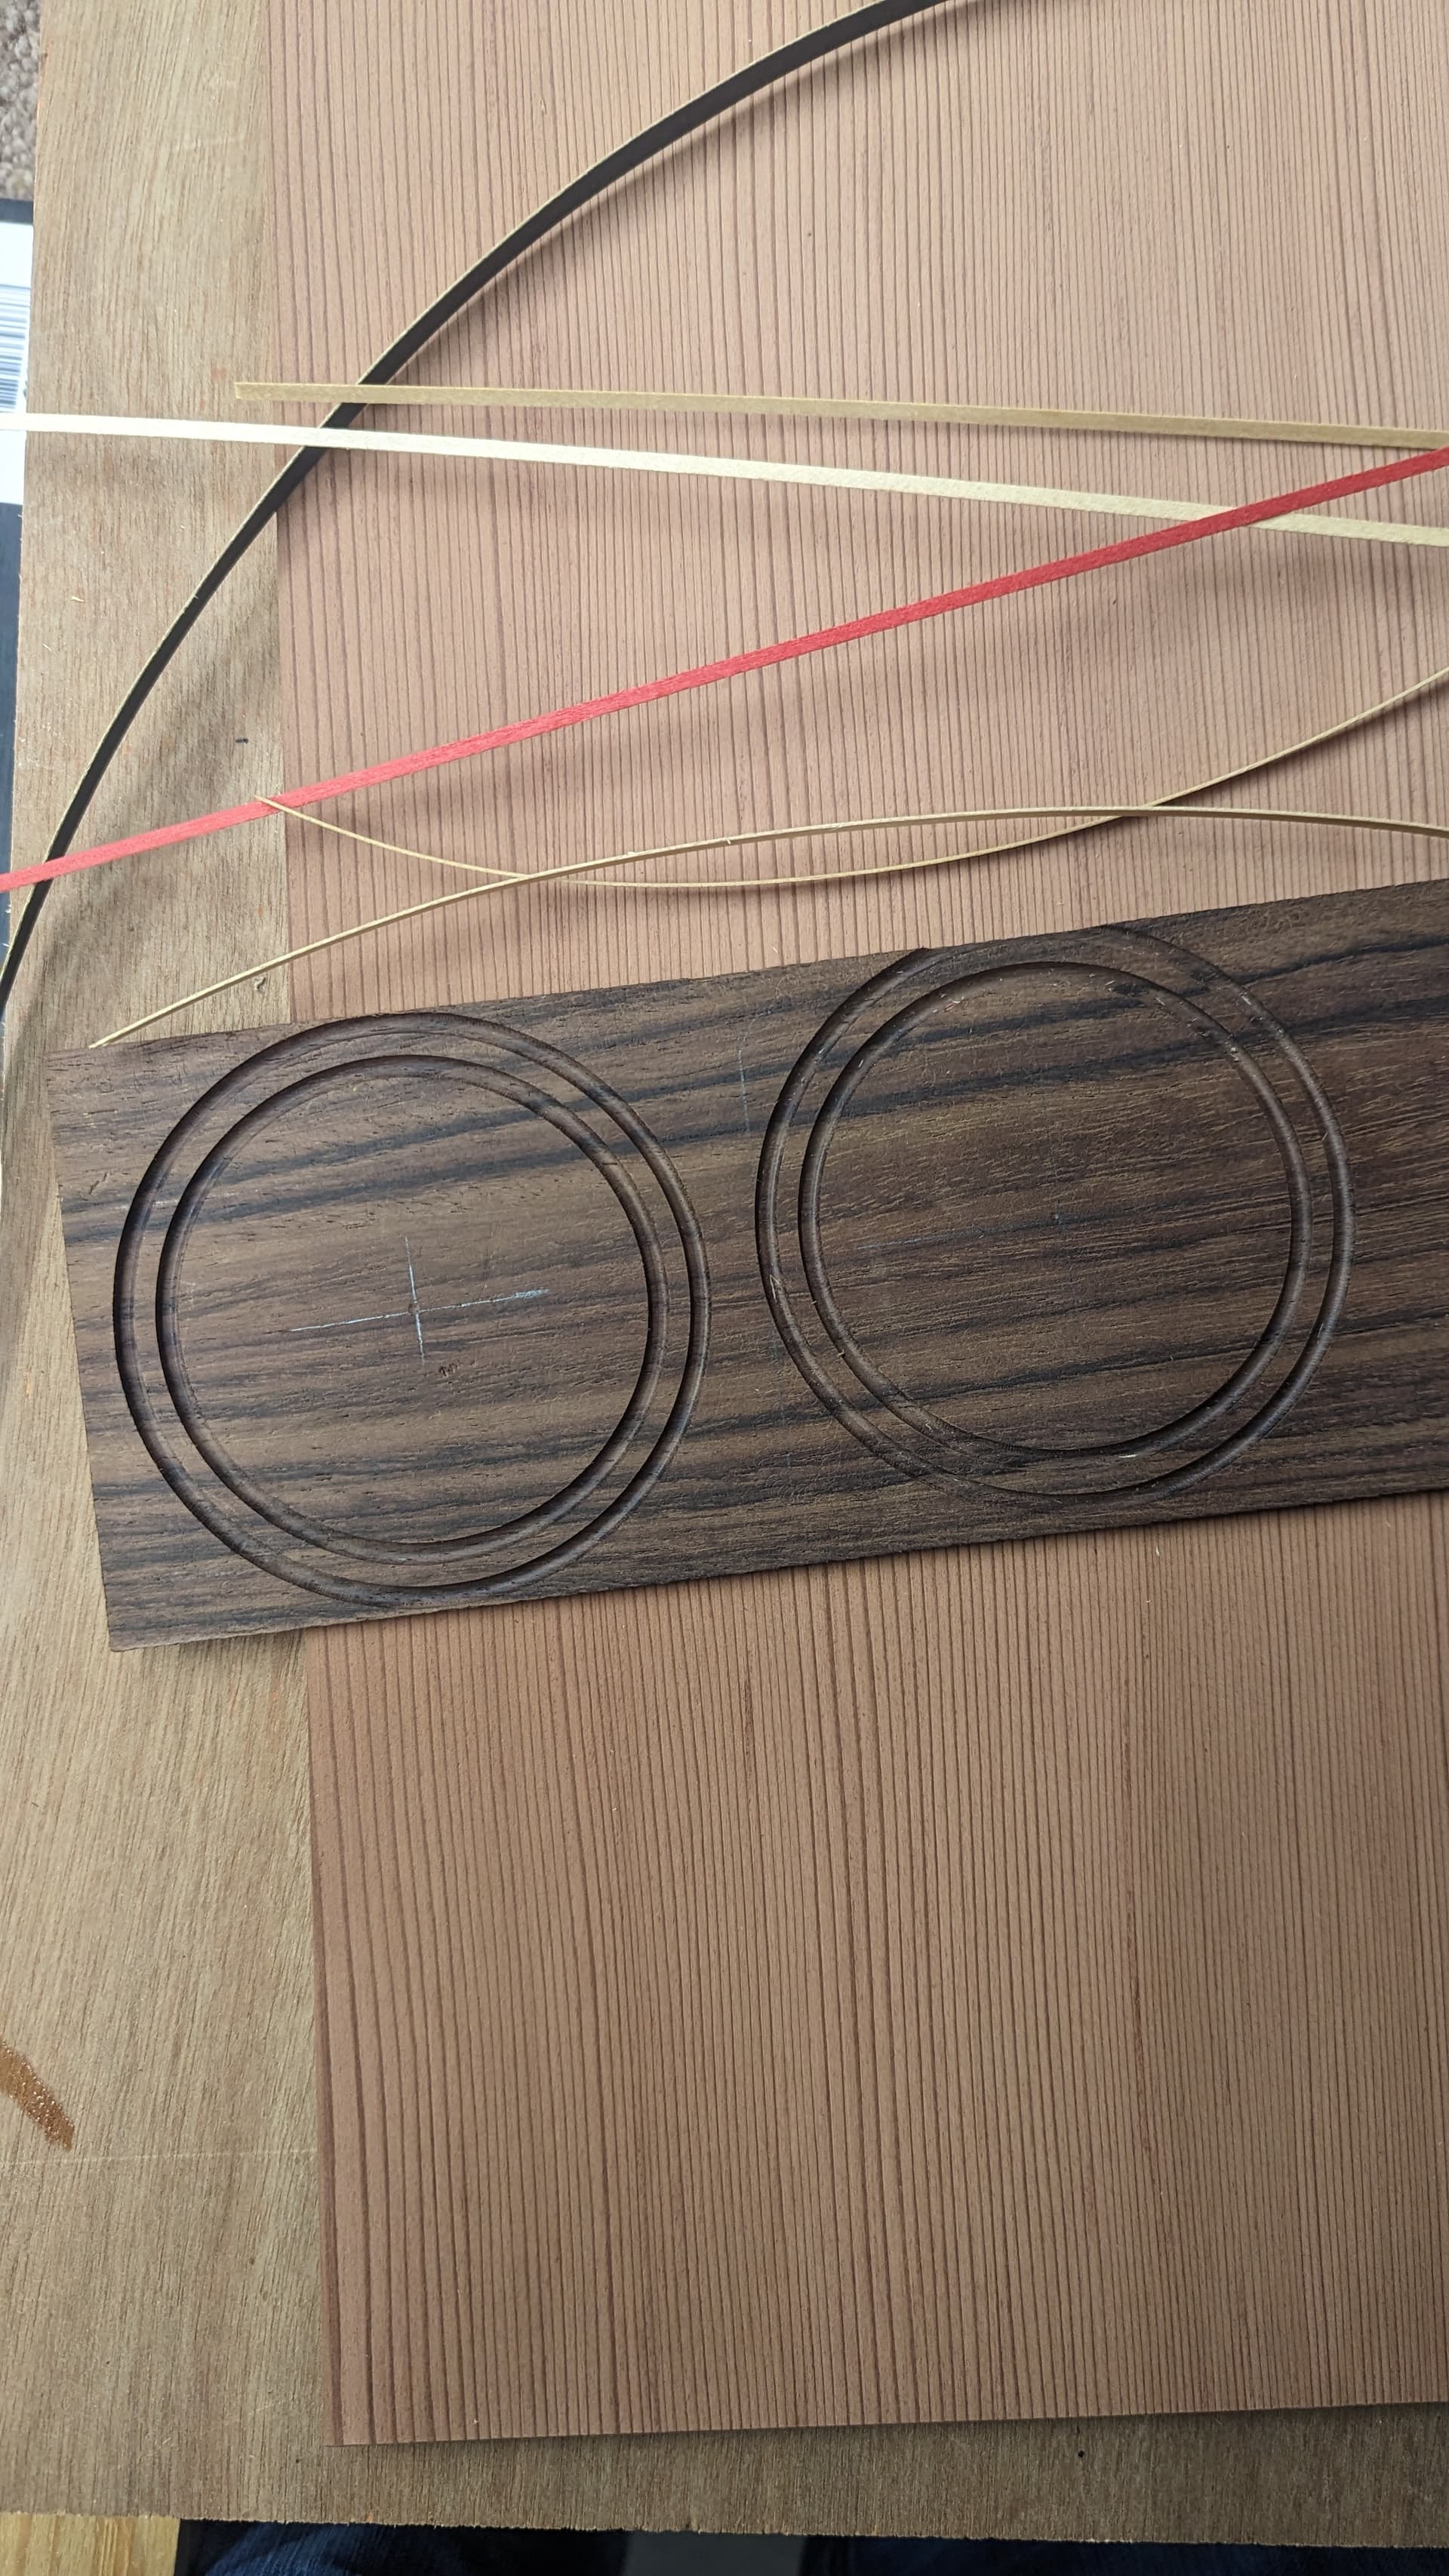
So I’ve made a little progress. Here is a MOP simple inlay test I did. I was getting ready to add some upgrades (dust boot, fan switch, etc) and cut some actual fancier inlays when I discovered some things.
It’s been cutting great with it broken I guess. I’m going really slow with this 1/32" bit in MOP and hardwood. Probably happened when the bit slipped and I got my deep plunge cut and I’ve cut out a couple decent tests since then. Granted these parts are not designed for such force with a high speed stop on a 1/4" bit (at what you all told me) was higher then normal hobby speeds.
So to even use this I have to either get a different shoe or come up with a different mounting method. I could rework Ryan’s part to work. Or find something on thingy-verse. Or epoxy/wood/fab? But, I am one of those people who don’t actually have a 3D printer, which greatly complicates things. Do I continue to beg from people who has been already more than generous. Do I add a 3D printer and another things to learn?
But I’m really getting the feeling that this project is more DIY and less of CNC. I accept some DIY but I’m here for CNC. I just way overpaid for plastic dust shoe because it looked like it would work better then the printed junk with the small hoses and save me some time. But ,alas it has issues with this design too.
I’m really starting to question continuing down this road. I mean I like that I could design and print something but not that a must. All of this takes precious time. All these issues to work out on your own like cable management mounting the LCD and board into an enclosure. parts breaking. I don’t know just feel like I am spending so much time on the DIY. there isn’t a “standard dust boot” to fit a standard router here so the only option is to spend time figuring it out.
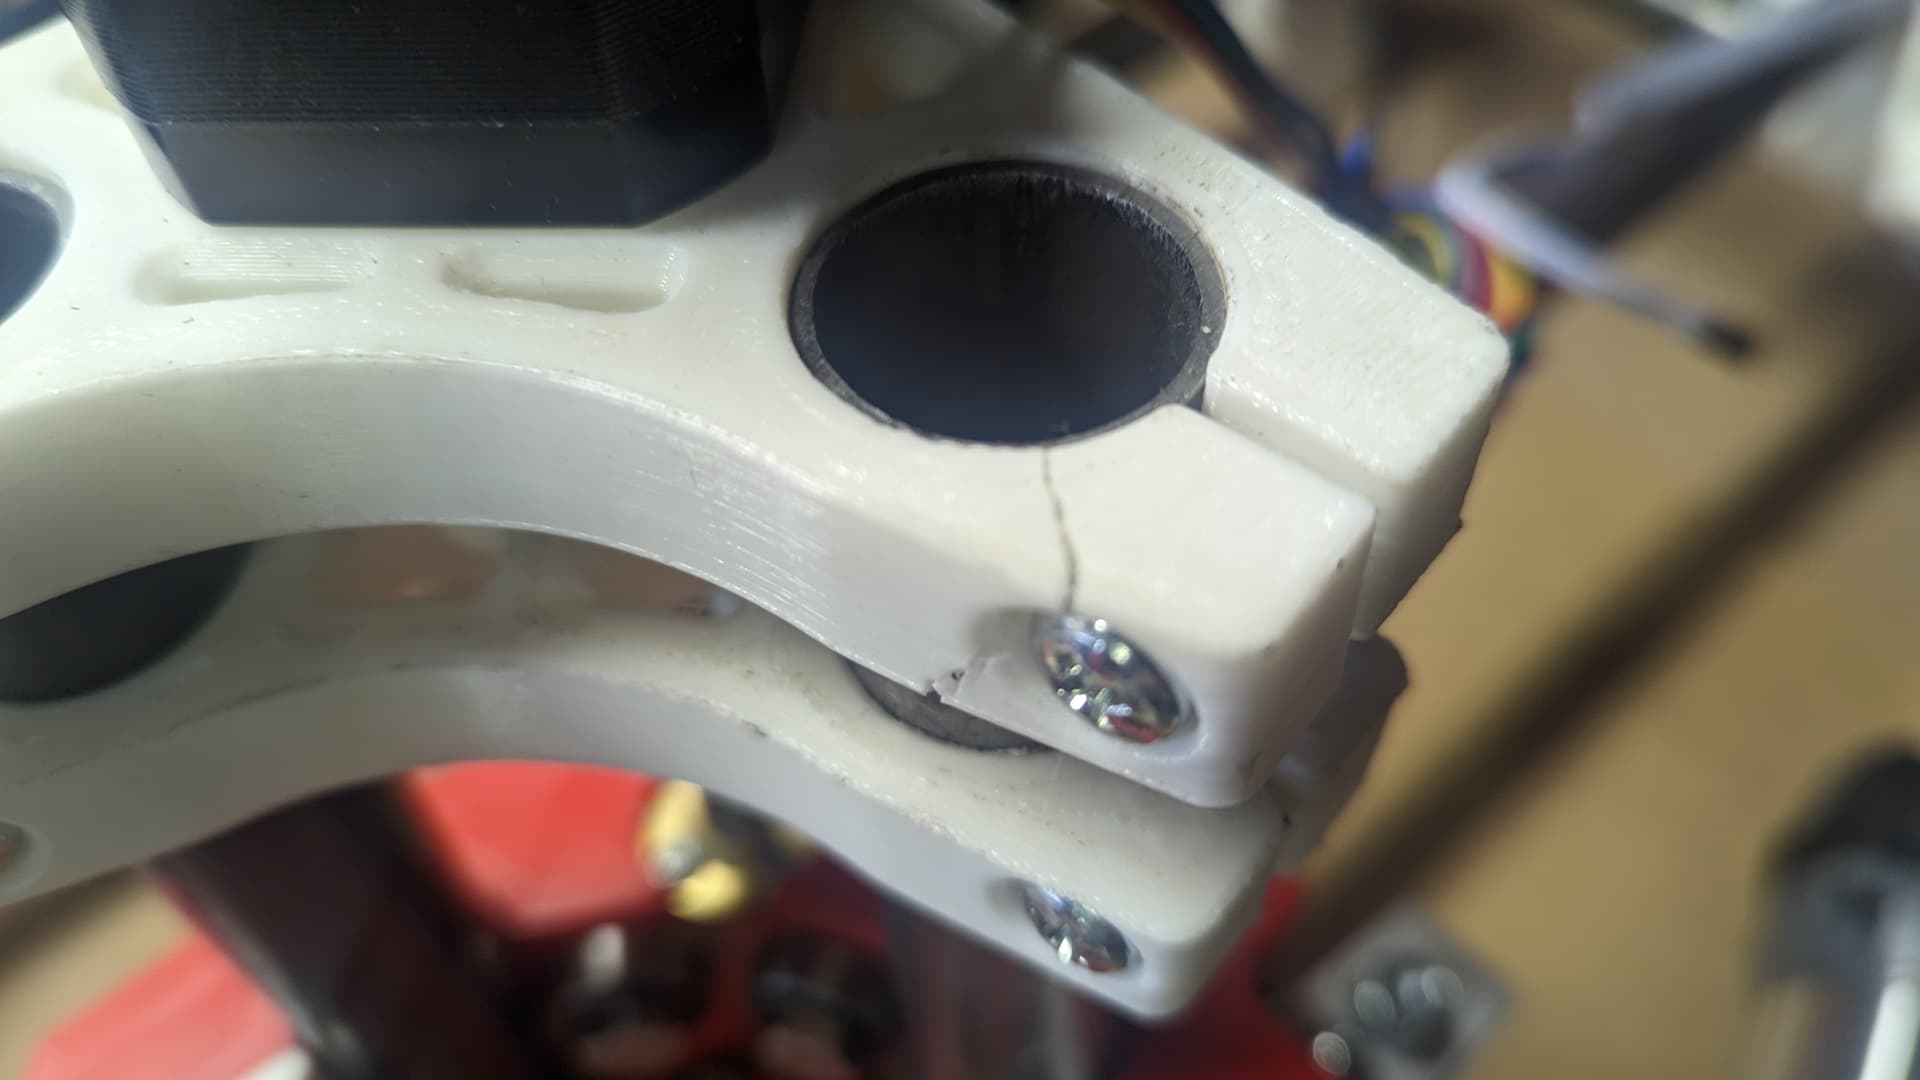
Oh I guess I have multiple broken parts. I thought I was careful tightening.
Do I just bail and order Brand X or Y and move on or is the grass not really any greener? If this happens on another brand will the metal hold up better or is it going to just be more costly to fix since I can’t just go print it. Or perhaps vendor A only allows B software to work? I am reasonably happy with inkscape/estlcam (inside a VM) for now. I’ve considered trying the vcarve/aspire/easel/etc stuff to see if it’s easier then manually setting up all this feed and speed stuff anyway.
I don’t know … I’ll have to let this sit for a bit and calm down.
Hey Rick, sometimes it is a bit of work until the MPCNC works, but I personally find it very rewarding to try and find a solution to a problem. I also like that you are free to use whatever you want. I for instance always use some boards that are very niche, not because it is useful but because I think the boards are interesting and I want to use Estlcam.
I also like that you can basically add whatever and someone will have come up with a part that fits. The dust collection on my Schneewittchen was great for instance. I agree with you though that it kinda sucks if you don‘t have a 3D printer, because nearly every part is printed.
The other advantage of the MPCNC is the price tag. I can build a 120x85cm build area Lowrider 3 for around 700-800€, depending on what I have and what I want. If you, for instance, bought an Avid CNC it would be like 10 000€ (or somewhere in that range). For that money I gladly fickle around with it and have a sense of achievement later. If that isn‘t for you, just slap the money on the table.
If you look what you can achieve with the Primo and the Lowrider, I think we can agree that a lot of professional tools can just match the abilities and maybe be better in some ways, but always with a hefty price tag slapped to it.
Completely different question: That tub in the first picture, is it to fill fine engravings? I always spray it black and then rub it off, but it is never getting really good.
Heh thanks for the reply. I really appreciated the tone of it. Got me a bit out of failure mode. Turns out my epoxy must be old or cold as it’s not setting up.
Yeah I’m going to stick with it for now. You make some good points about the cost and flexibility. I have been very happy with the cuts so far given a calculator standard build size. I am tempted to just order a 3D printer but I have other options too.
The filler is this stuff.
I’ve had it on hand for ages and it was sitting around. Black CA works well too or pigment in glue. This stuff works decent just kind of rubbed it across the gap and wipe off the face after. Worked pretty well.
So as it turns out, I decided to order a 3D printer. I ended up ordering a sovol sv06 which is very similar to the prusa MK3S+.
Took a while to get it and figure it out and work out some issues I was having, that of course turned out to be user error.
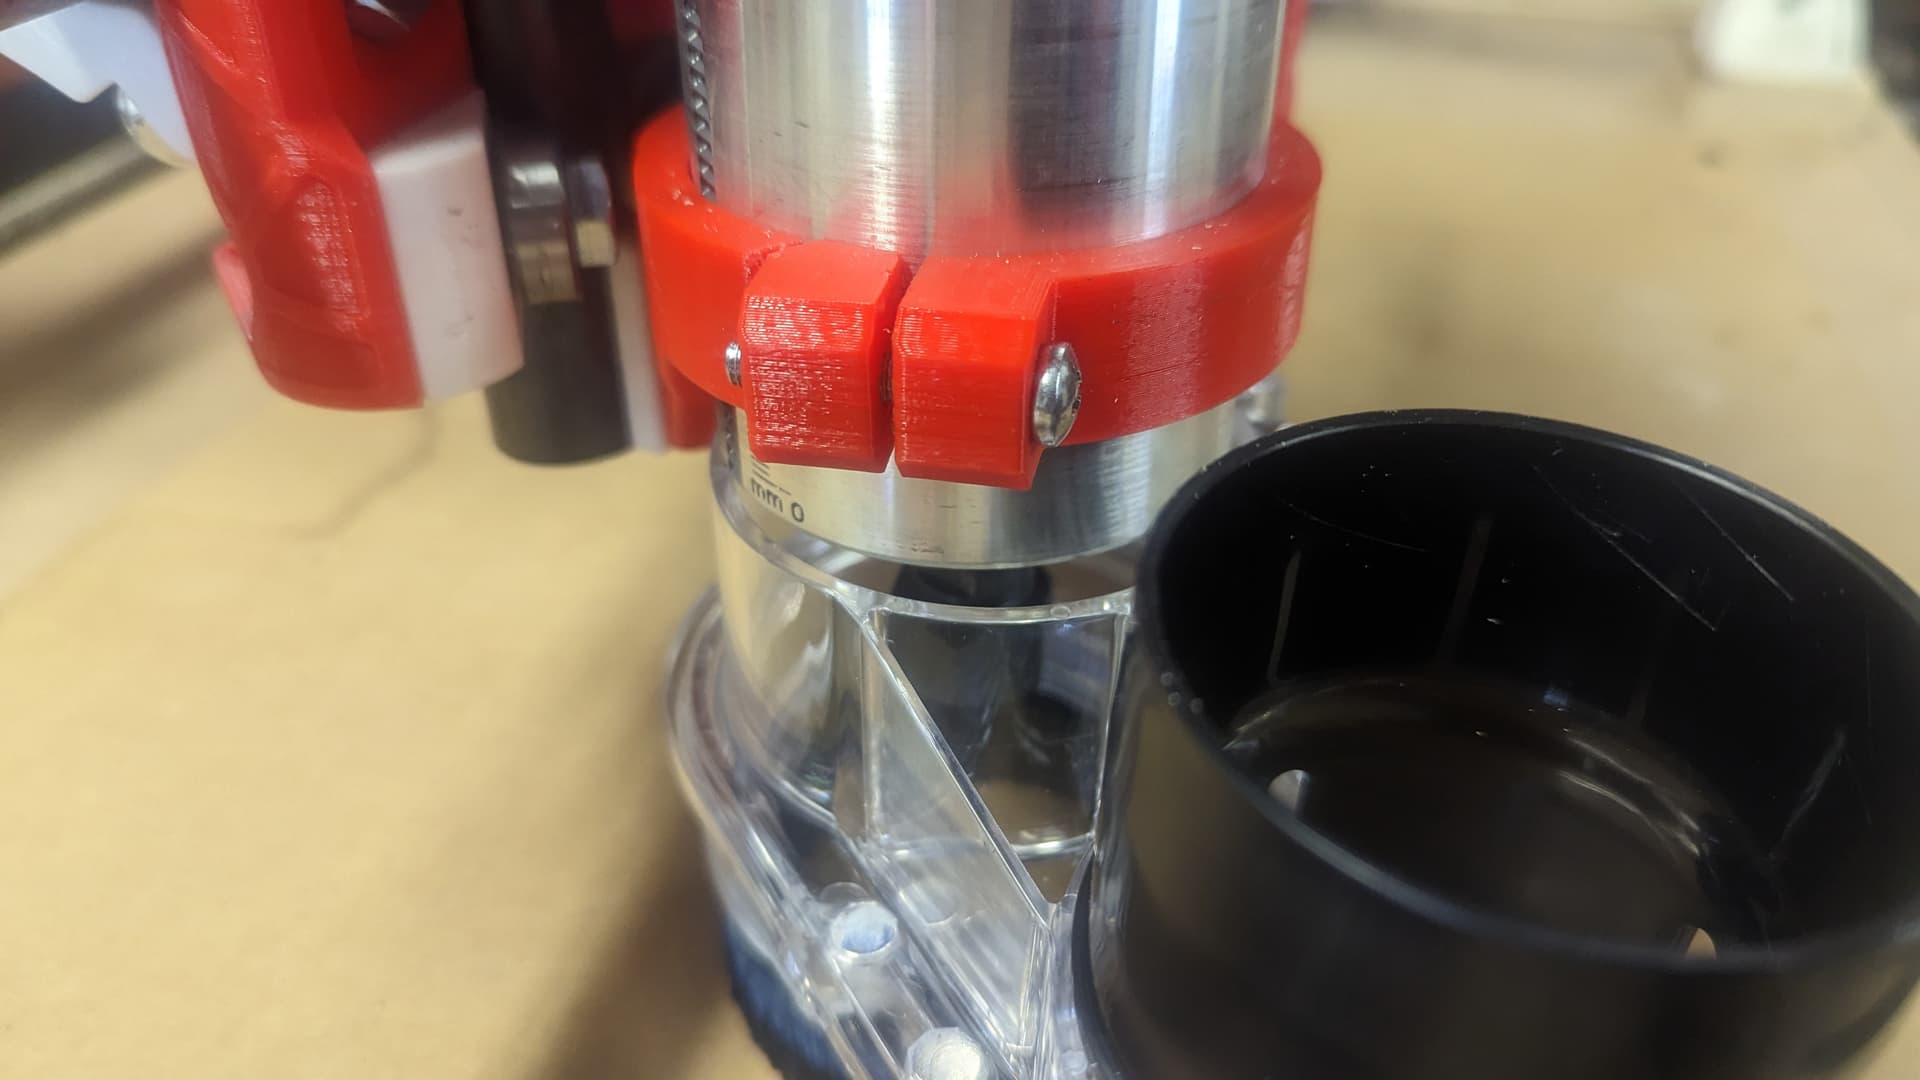
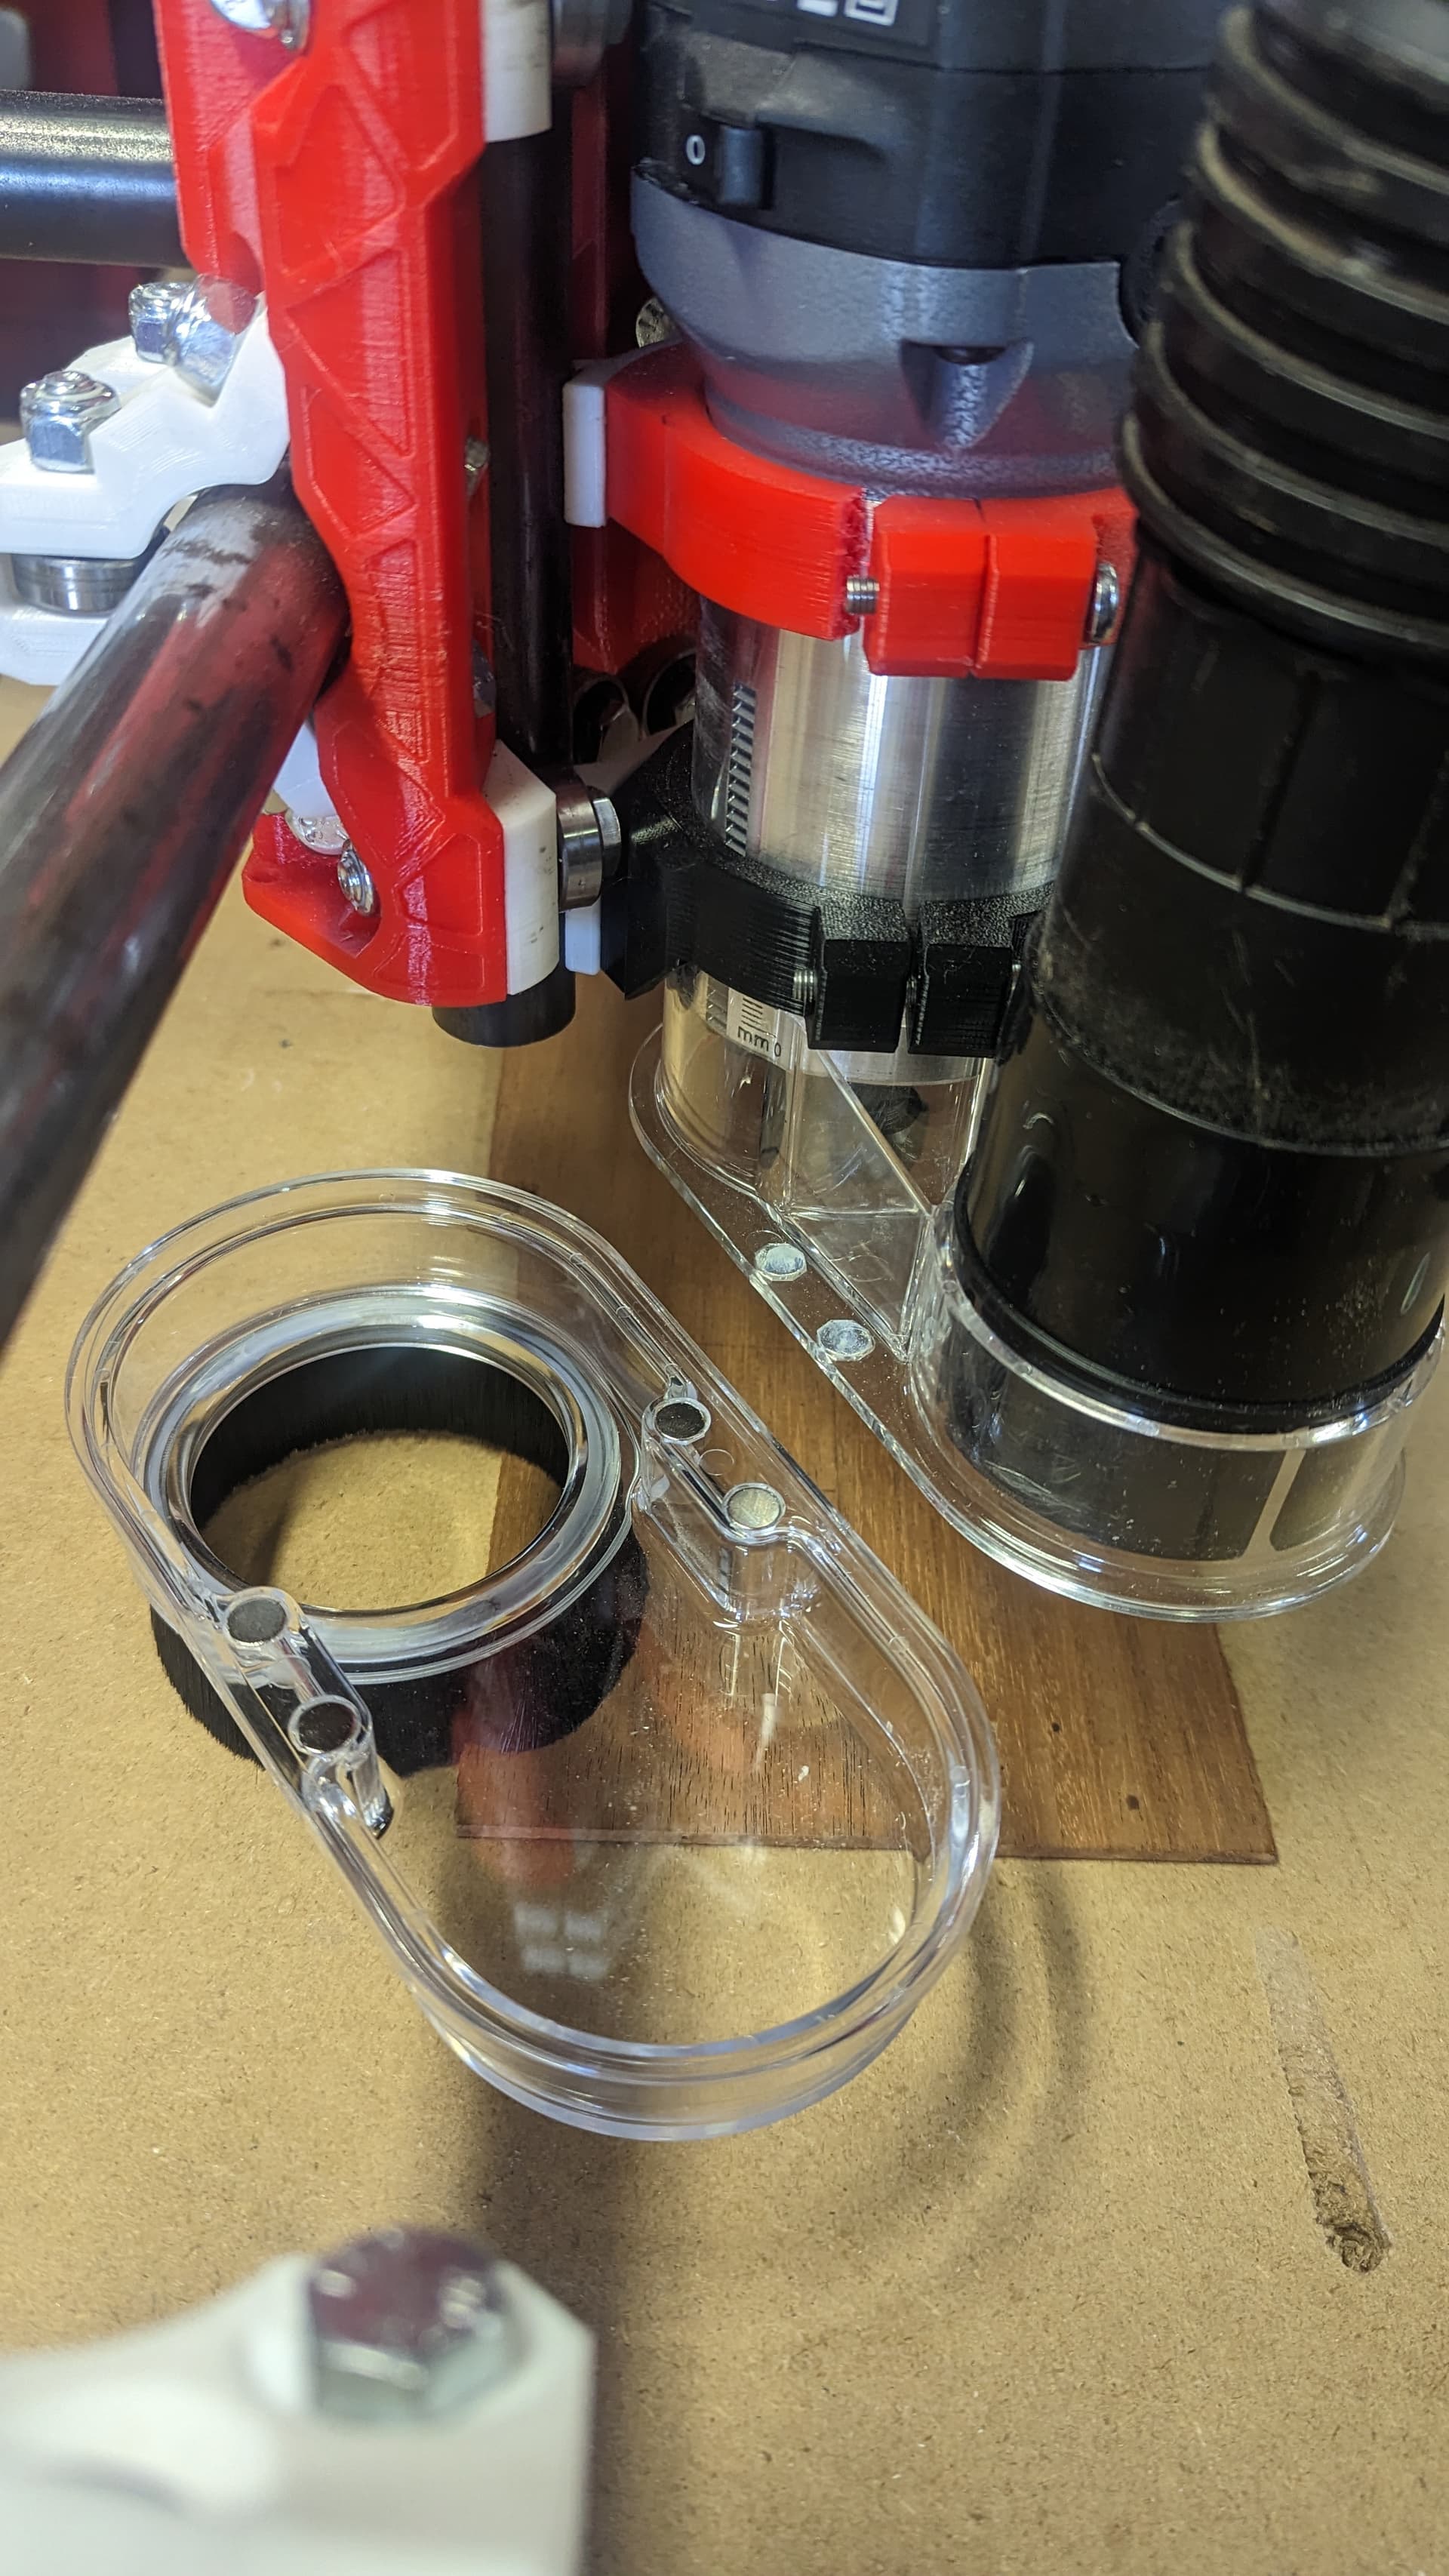
As I had ordered the sweepy dust boot before I had the printer to save time, I found out it would not fit the (broken) bottom mount. So, I took Ryans bottom mount from thingyverse and modified it in Tinkercad by removing a ring off the inner diameter and adding some support on the outside. I finally got it printed out and in between life and other projects I went out in the shop to test it today. The piece fit great on the first try with the sweepy as shown.
I took the time to resquare the frame and move and break and fix the limit switches and locations due to the loss of space from the hose.
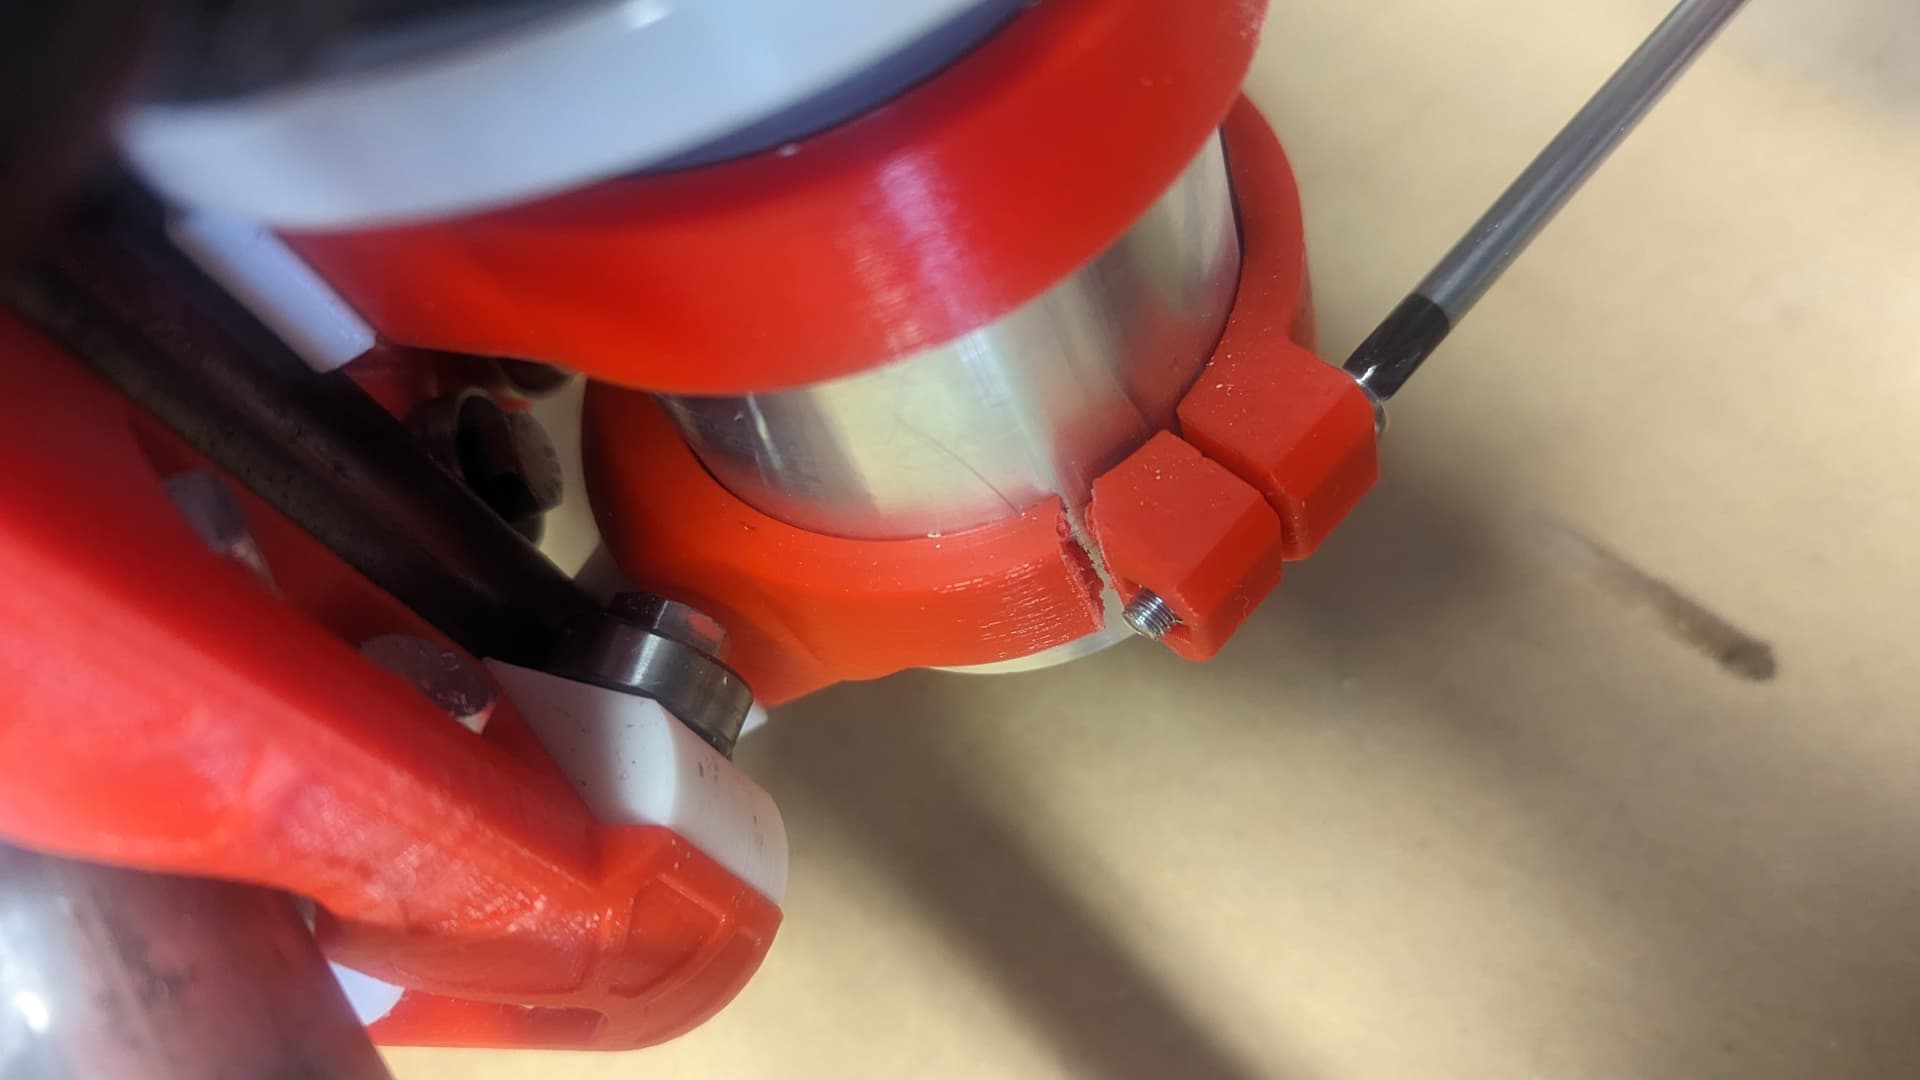
Came out pretty good, EXCEPT… you can see where I cracked the UPPER red mount in the process. Live and learn. Need to print another one. 2 steps forward 1 step back. I am glad I decided to get the printer, it all kinds of works this way and being able to customize and print what is needed feels quite liberating and powerful.
Side note on the sweepy, i love the removable base with magnets. Turns out the 1/8" O-flute inserted most of the way is a tad short. I’ll have to play around with that but it just might be too short. But otherwise it seems nice.
Yeah it’s pretty tall plastic wise for that boot if that is what you mean. Live and learn. I’d prefer more brush and less plastic. But that’s a 2.5"(?) Vacuum so not sure how smaller would affect flow.
At first most of my depths are not very deep. 1/4" is probably max for a while. if I go deeper I’ll be looking at larger bits anyway which are longer so maybe it won’t matter(?). I did drop the 1/8" O-flute down a bit and it does actually work. The brush hairs are tighter than desired against the workpiece and might cause issues. Even with that and the broken mount on top it seemed to cut well. Though I had to figure out how to cut from center instead of bottom left.