I upgraded my Primo to an LR4 last year and built it on the same table, using the same cutting size of about 20"x38". I always seemed to need more capacity. I am now in the process of upgrading it to a 48"x48" cutting area. I would love to make it a full 4’x8, but I cannot easily get full sheet stock into my basement, and my garage is used for cars (imagine that).
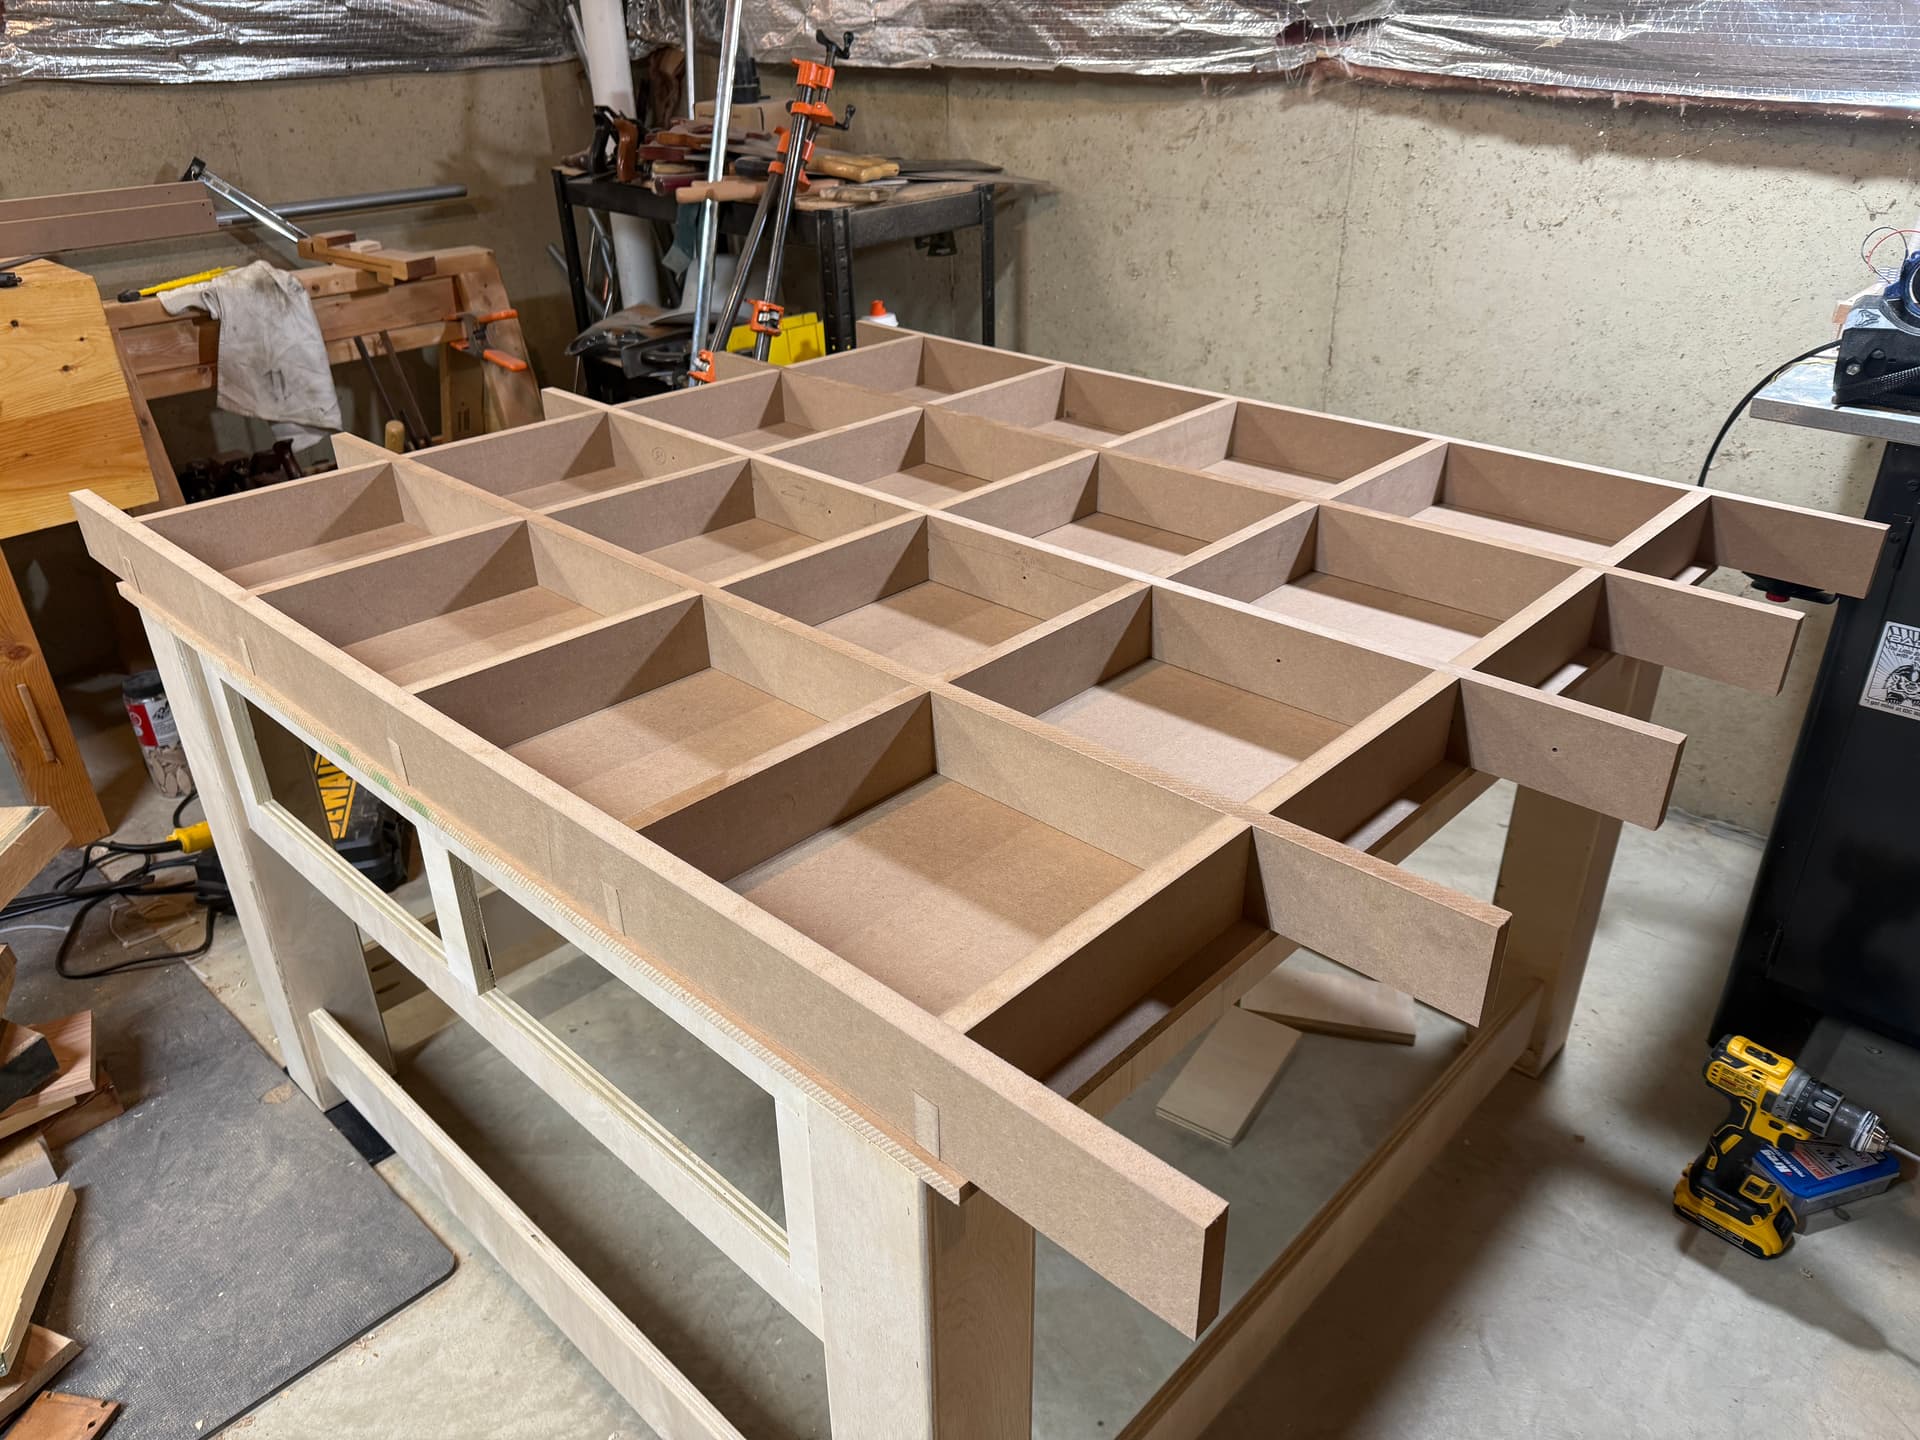
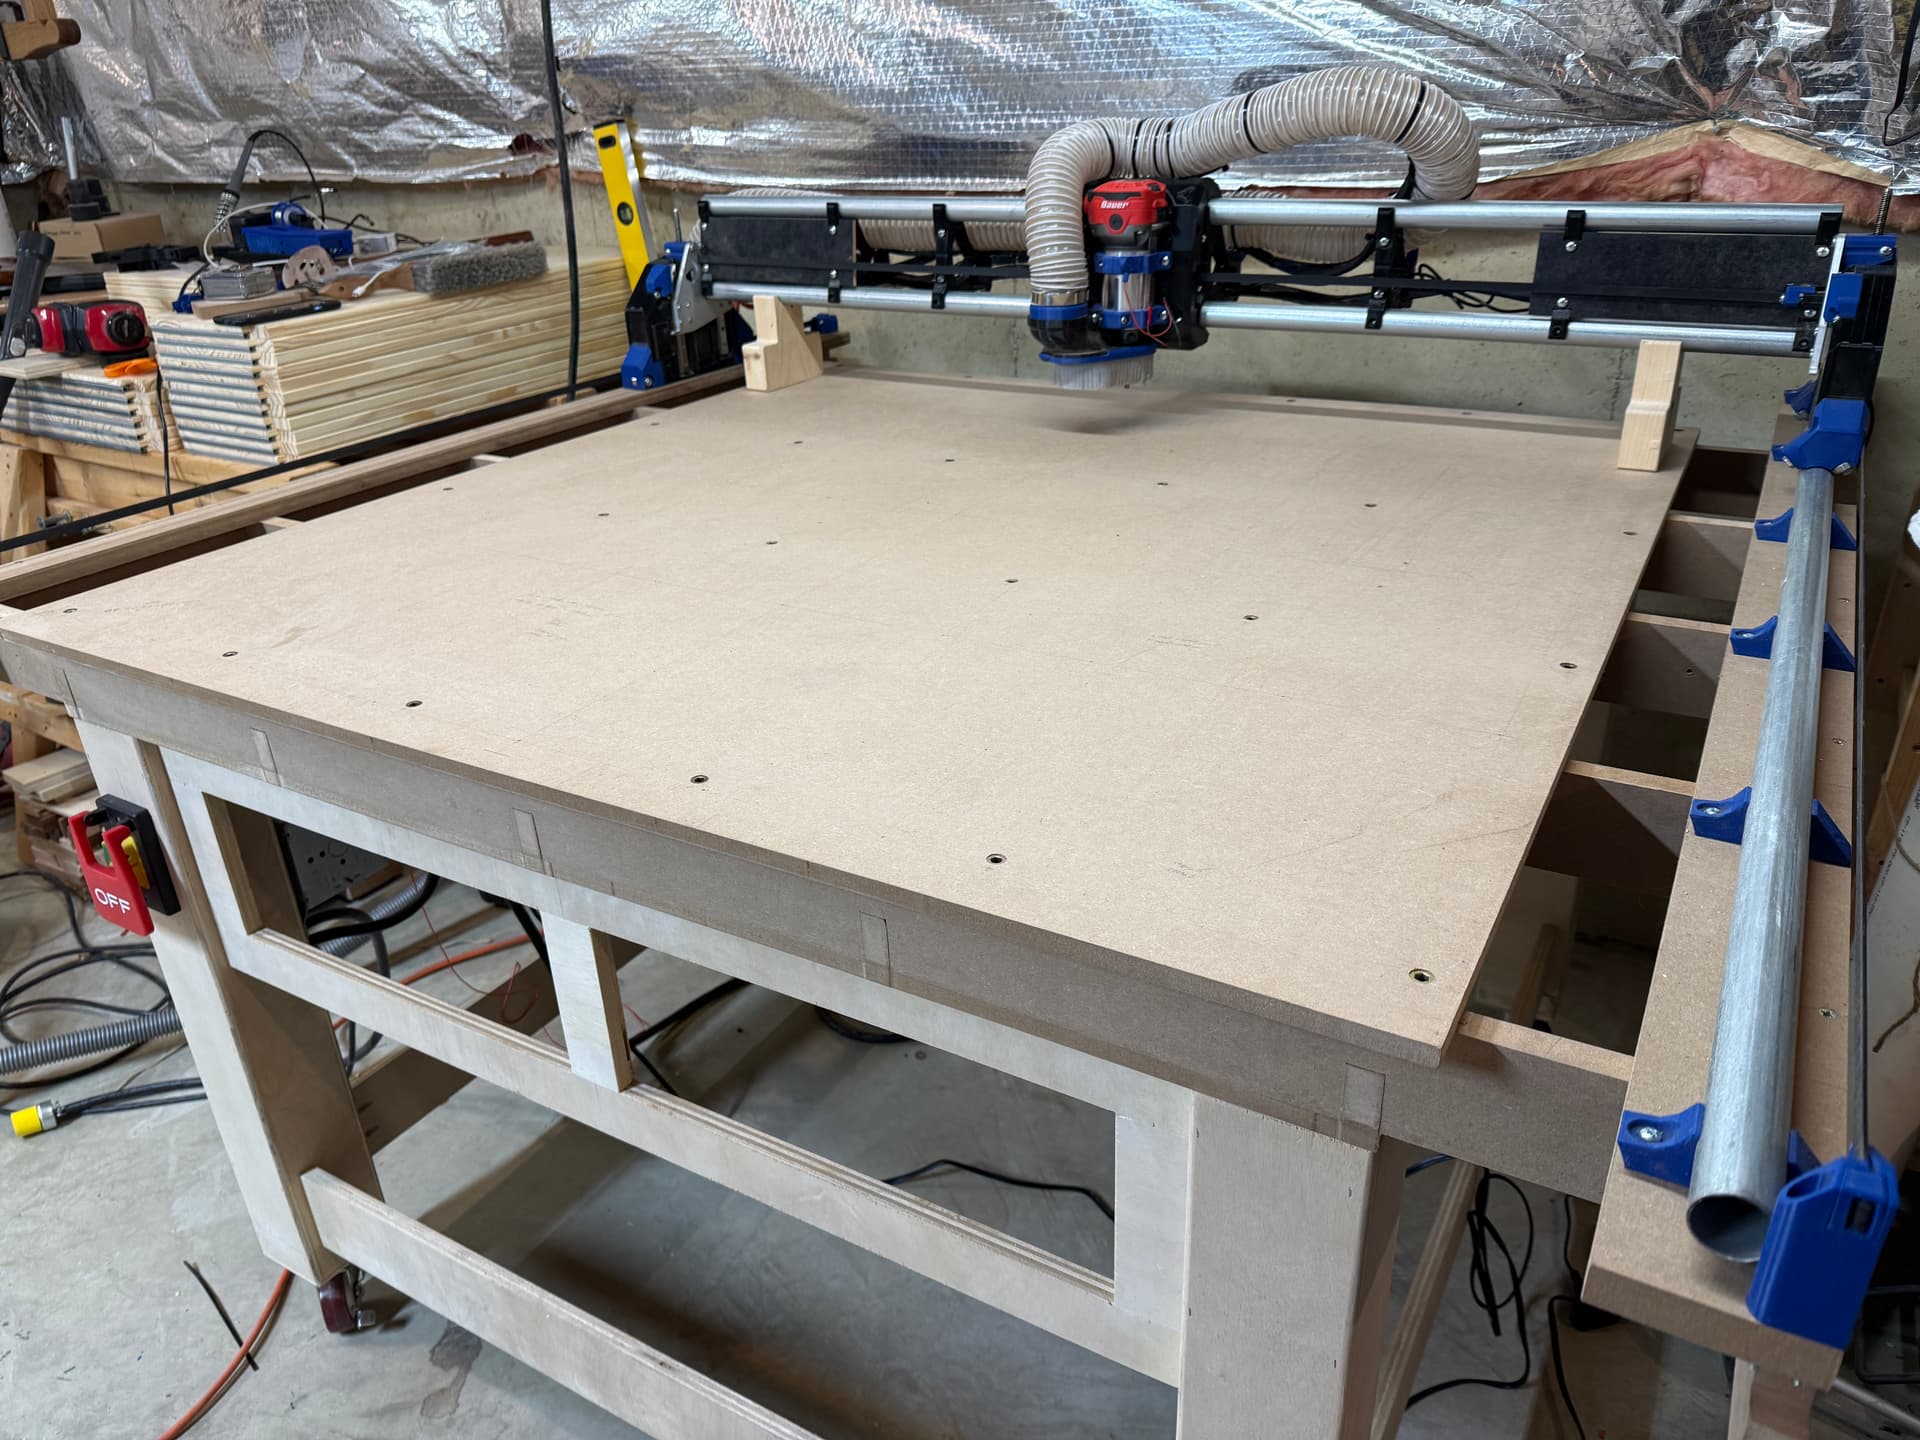
I began by working on a new table, and I thought that it would be nice to try the torsion box generator by @franklyrosalind. Before breaking down my existing LR,4, I set up tiled toolpaths in Vectric and started cutting the parts out of 3/4" MDF. Unfortunately, I could not get the alignment right and was unable to use those parts. So I bought another sheet of 3/4" MDF and used the dimensions from the failed set of parts, and cut new parts with my table saw. I used 1/2" MDF for the top and bottom of the torsion box. I built a rolling table following a video from Paw Paw’s Workshop on YouTube. Cut new lengths of 1" EMT conduit, extending the wires, tested motion, and squared it using @DougJoseph’s method with the Jackpot controller. I was pleased that, after some minor adjustments, I am now within my ability to measure (less than a millimeter) over the full table.
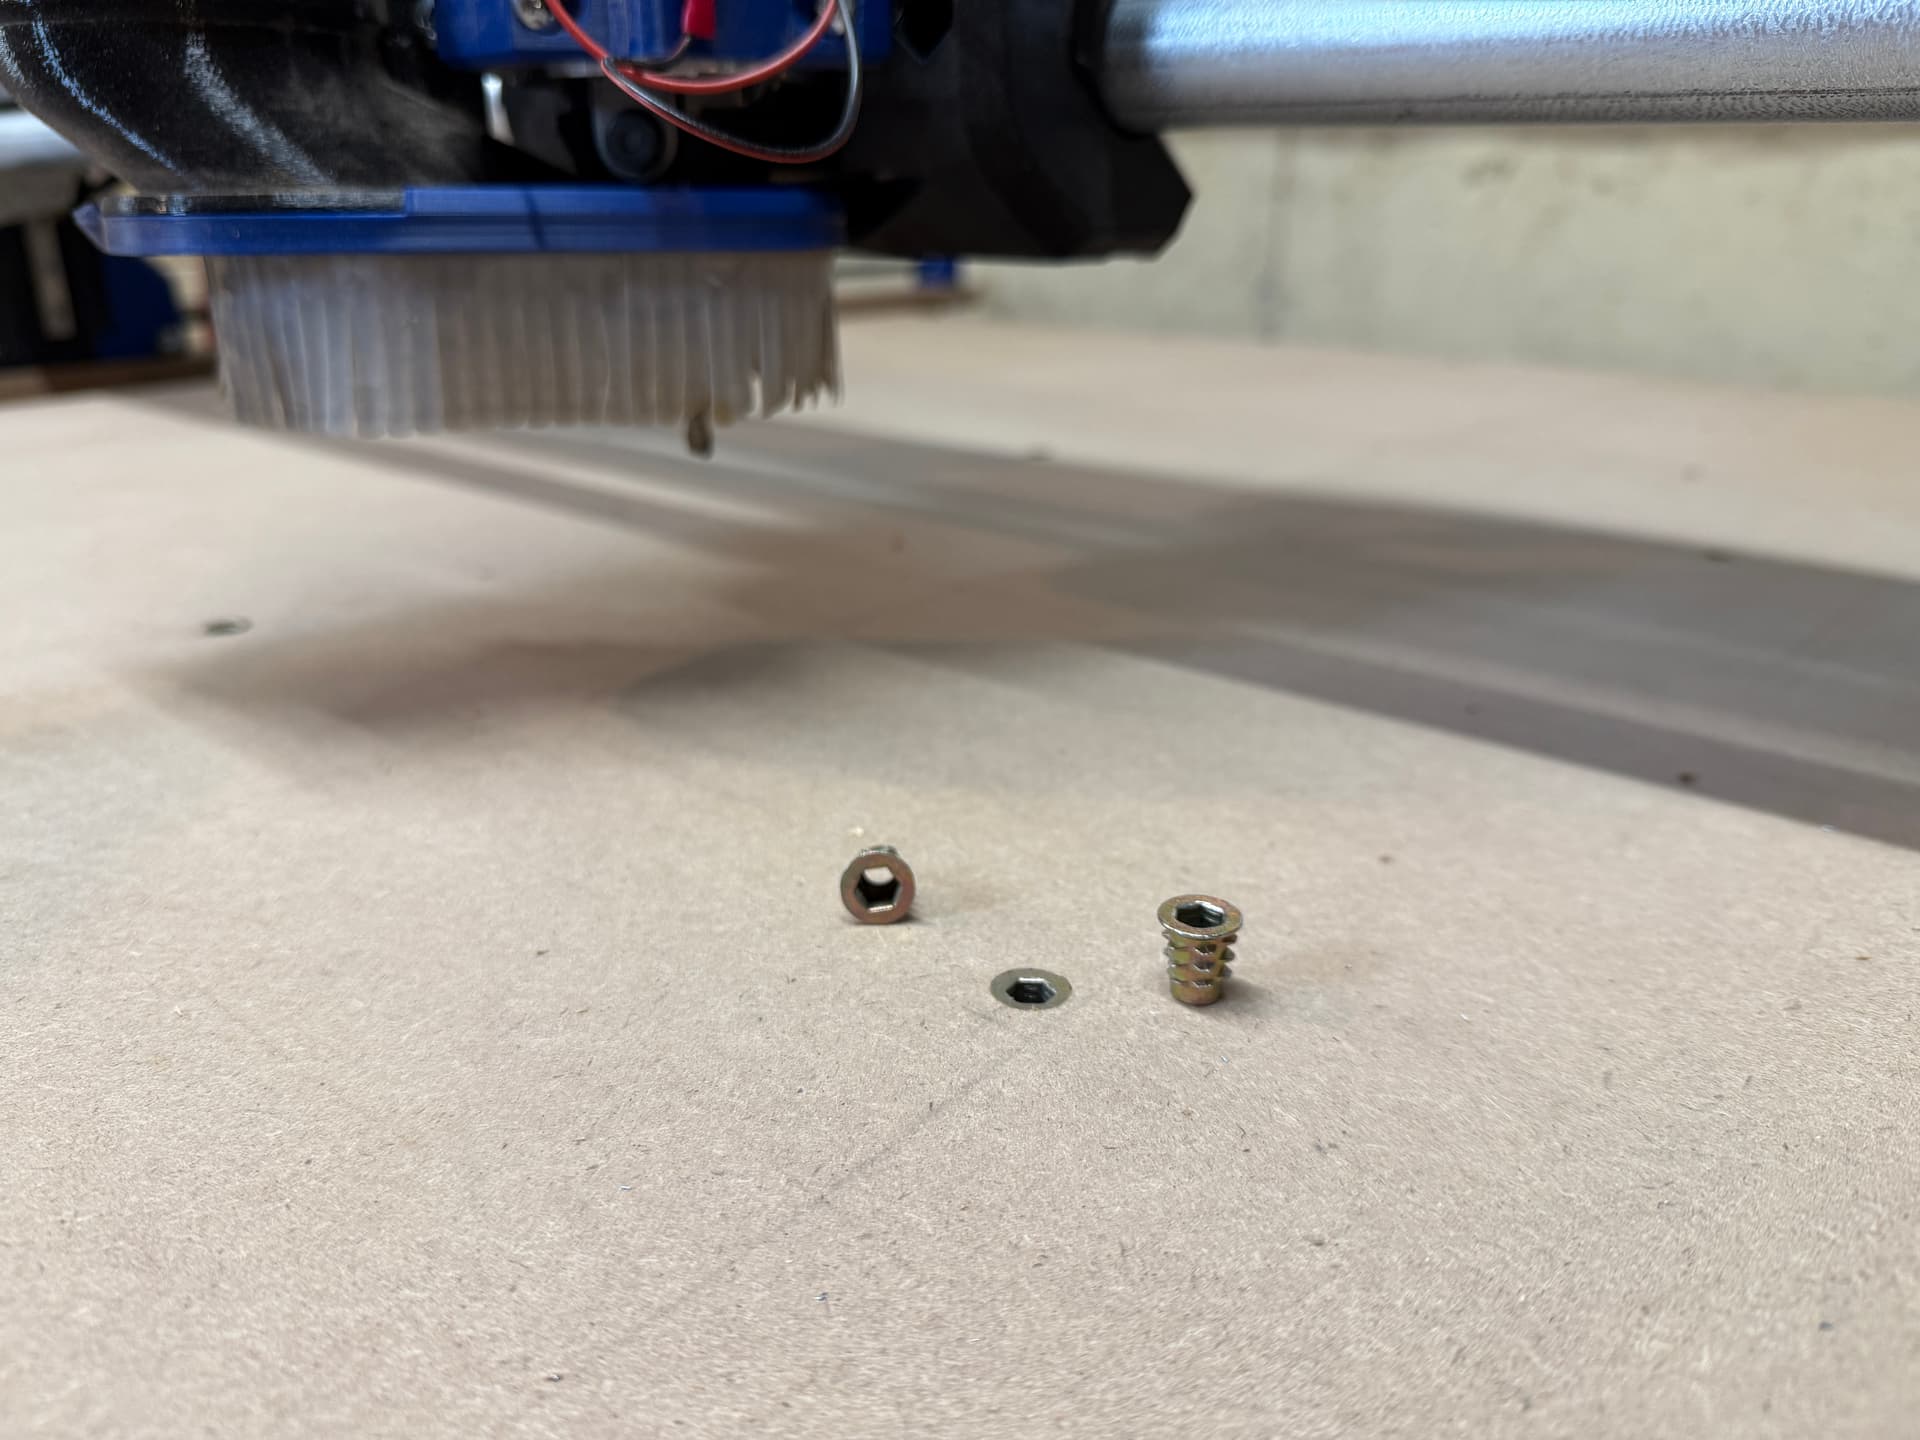
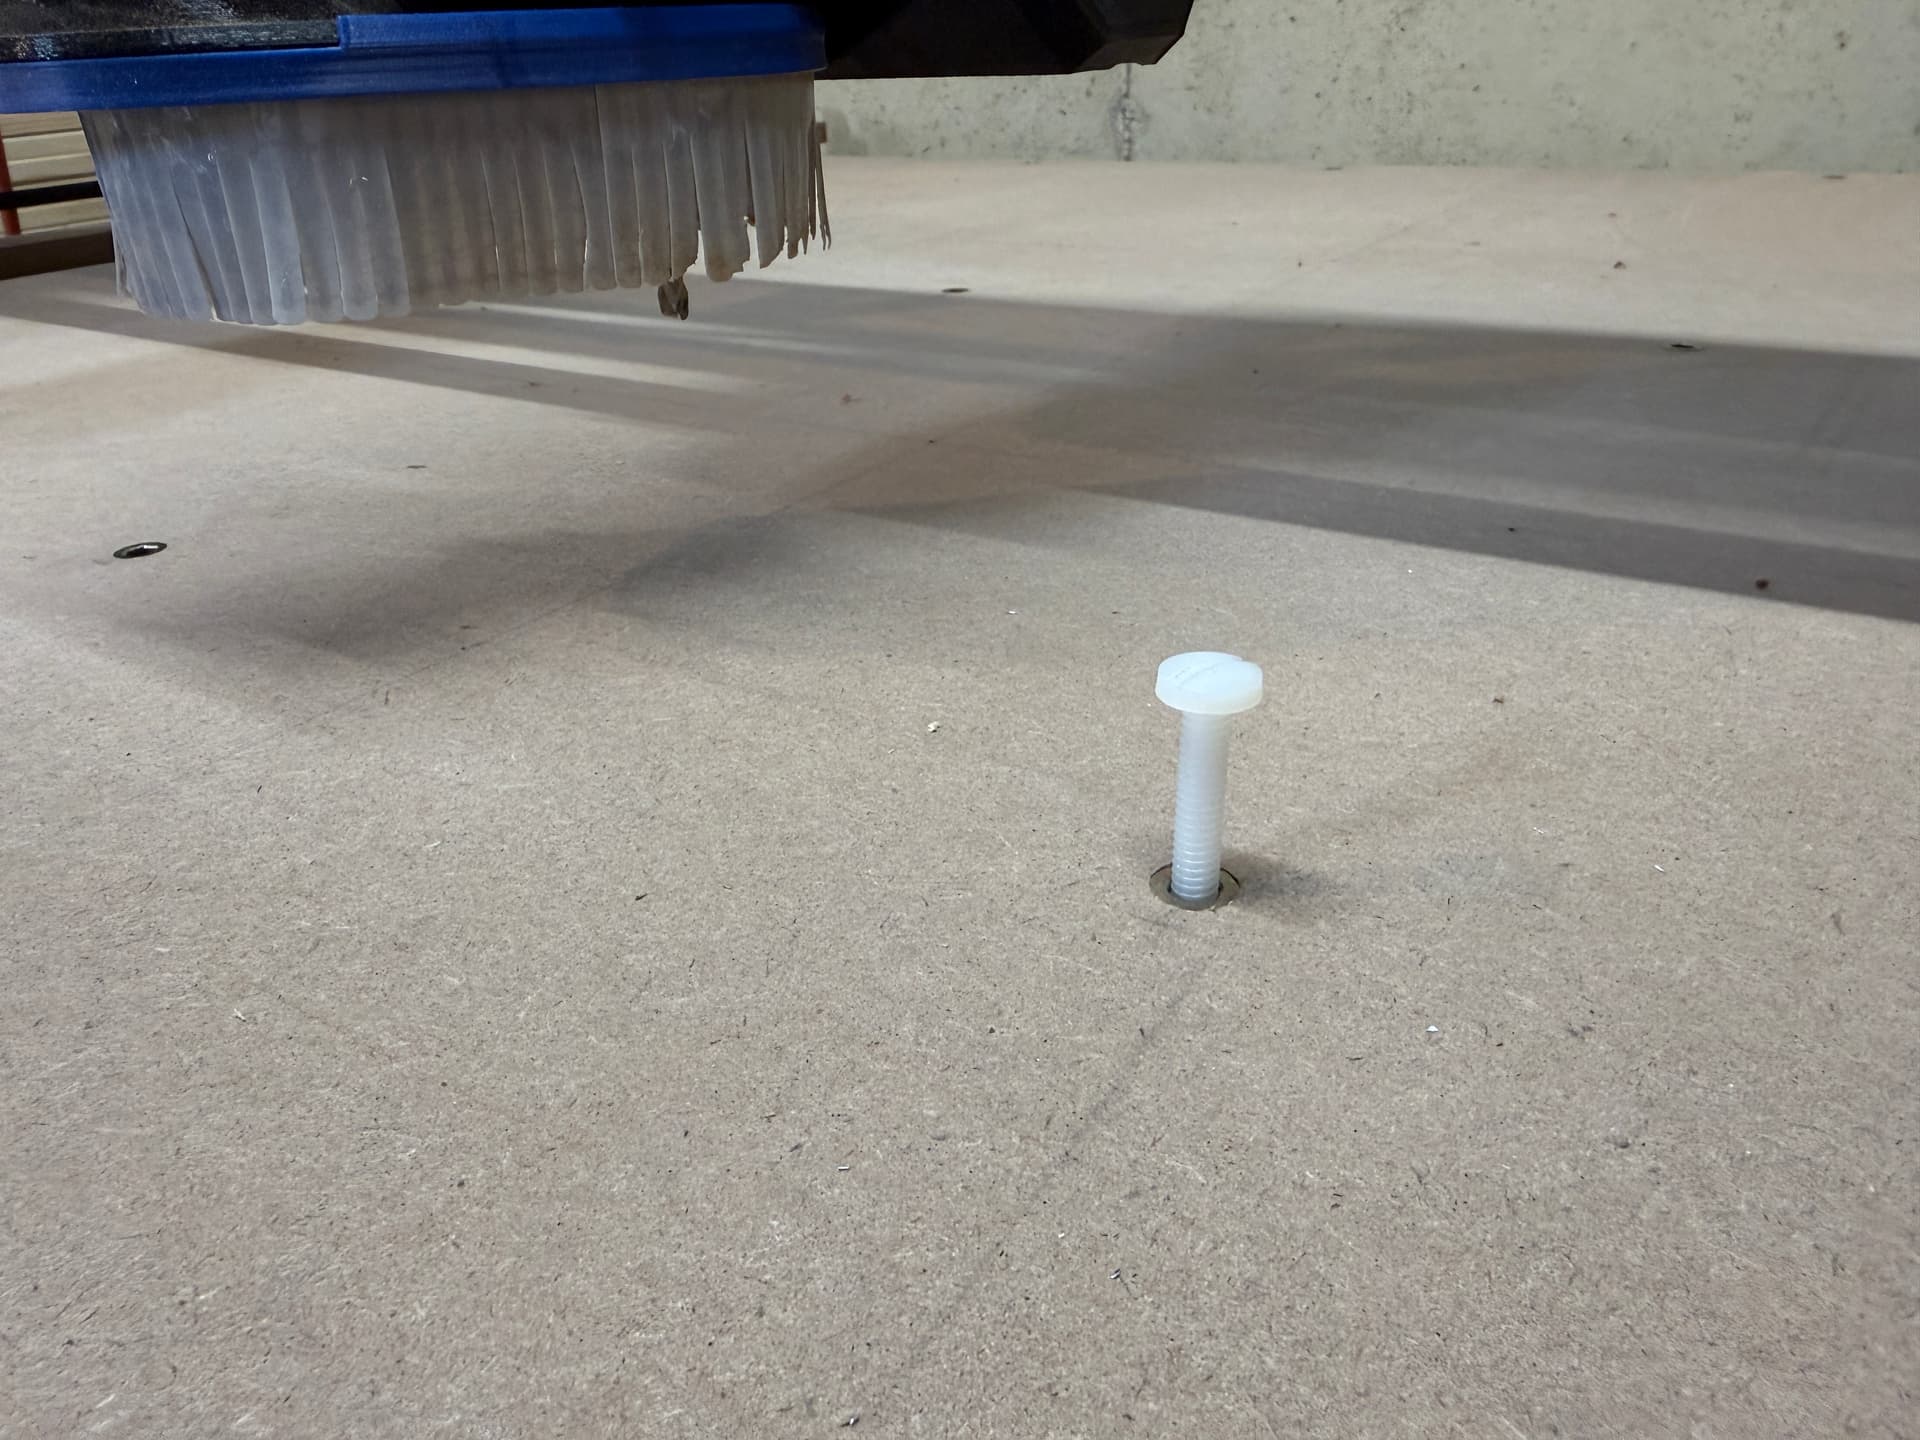
Next, I will start cutting the 3/4" MDF spoilboard that will attach to the table top with countersunk nylon screws and a MatchFit grid for holddowns. Then I will be able to cut the two strut plates diagonally across the table and install those along with the LED lights under the gantry.
Man, I love this machine. Thank you to everyone in this forum for the help along the way.
So far I like the table design. I still have a lot to do to complete it so I have the torsion box sitting on top with blocks underneath in the corners to keep it aligned. After the base is finished I might attach the top to it but it’s heavy so I don’t think it’s necessary. It’s so nice to be able to roll the table around when I need to get to the back or move it out of the way.
Are you planning to cut these with a router, or just cut a bunch of beveled rectangles on the table saw and attach to the table with the proper spacing?
I worked on the 3/4" MDF spoilboard today and cut it to 48"x49" with a circular saw. Added a spacer below it on the table and bored the holes and countersinks to mount the spoilboard to the table. Everything went well, and the holes aligned with the threaded inserts I cut yesterday. I attached the spoilboard with the 1/4" nylon screws, and aside from over-tightening one of them and breaking it, all went well.
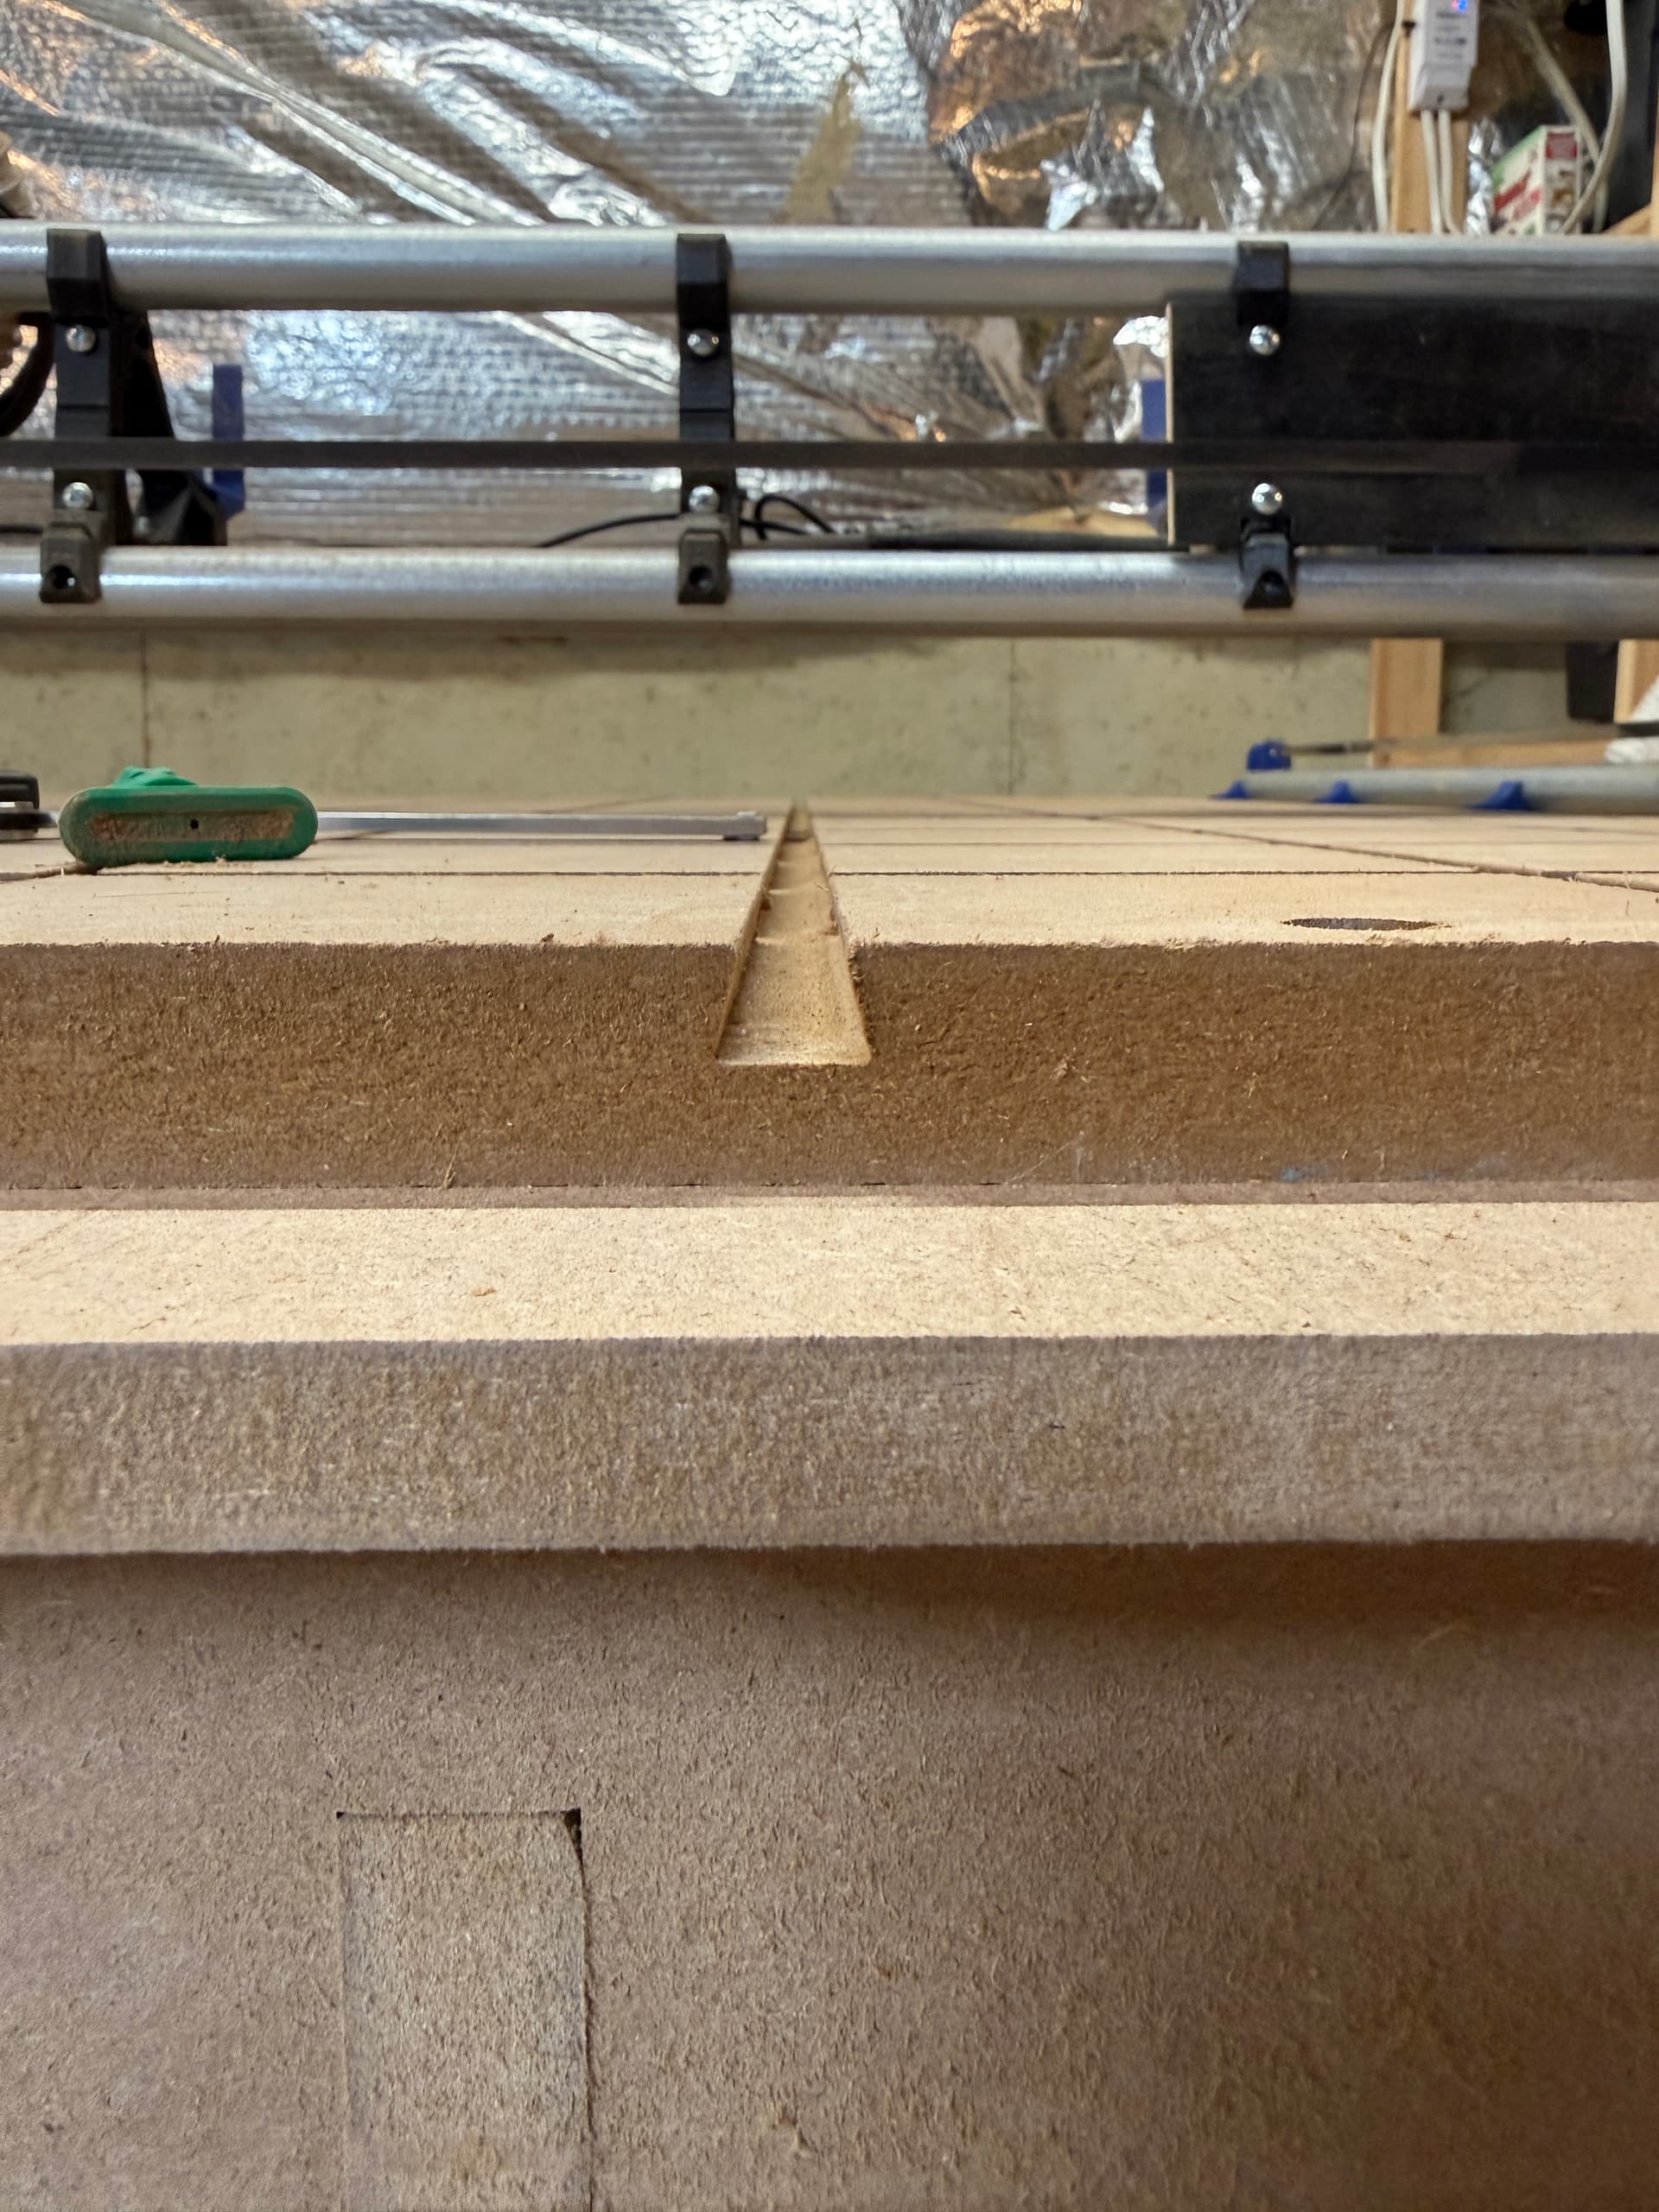
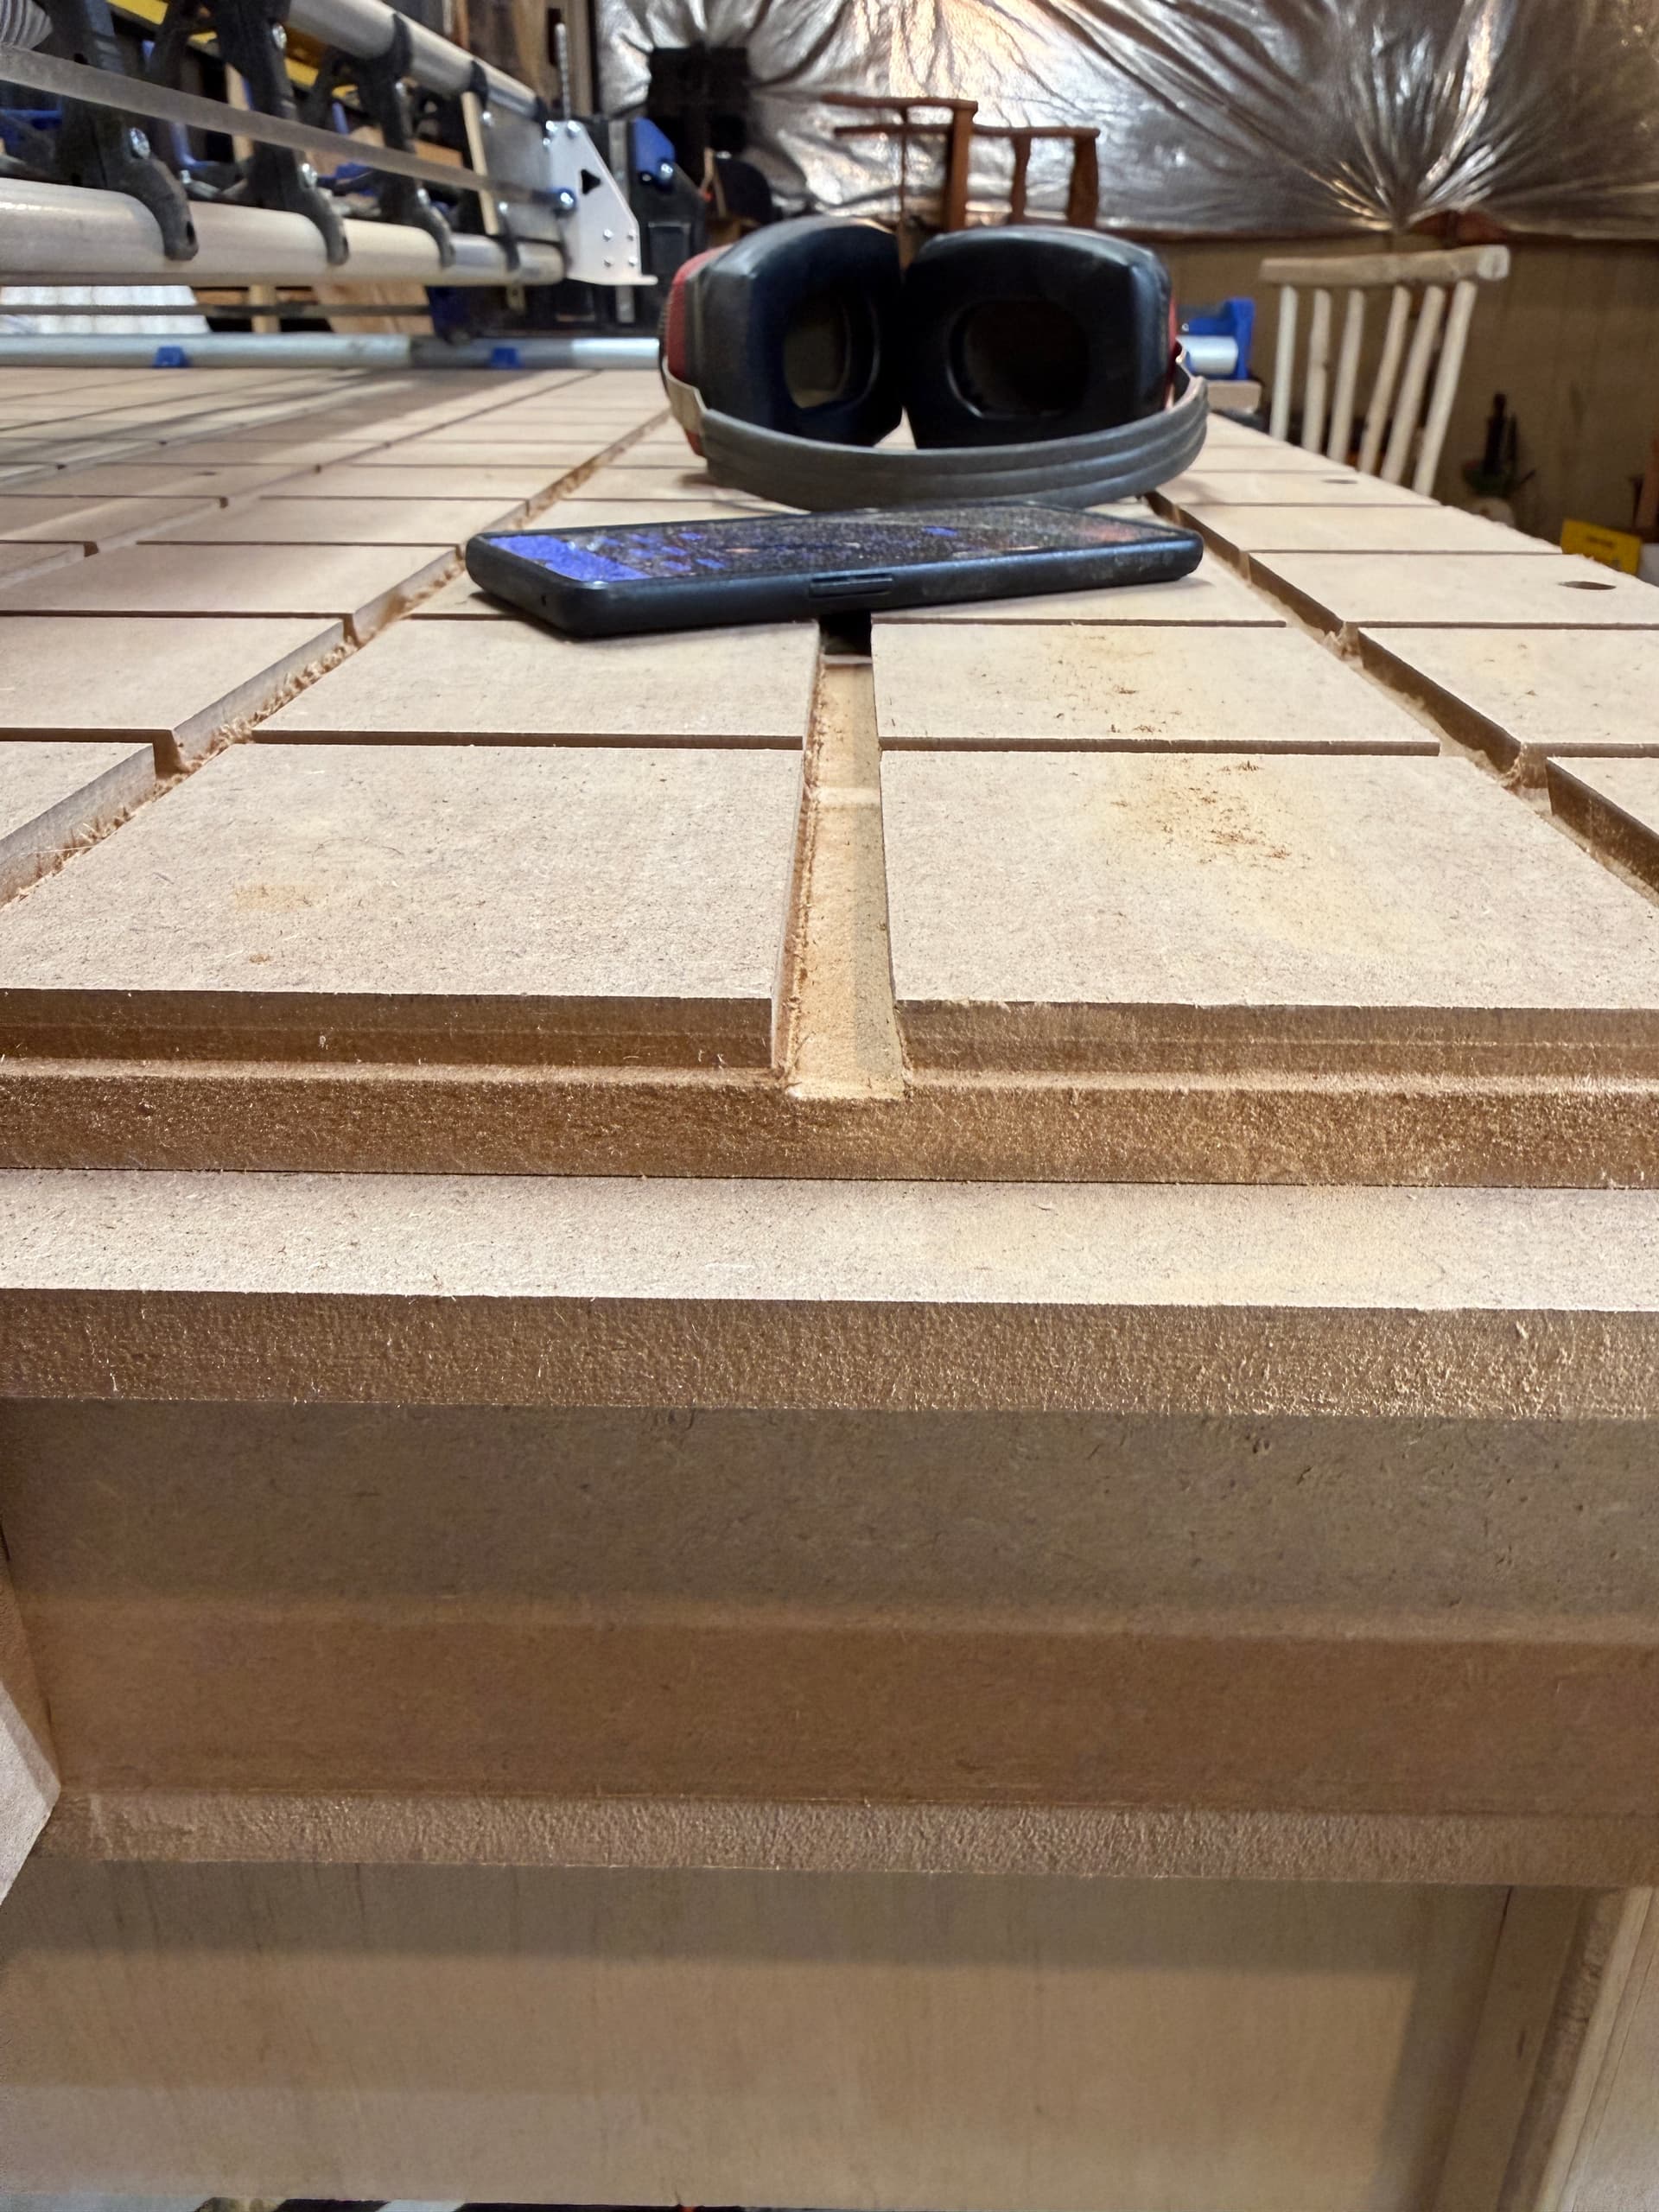
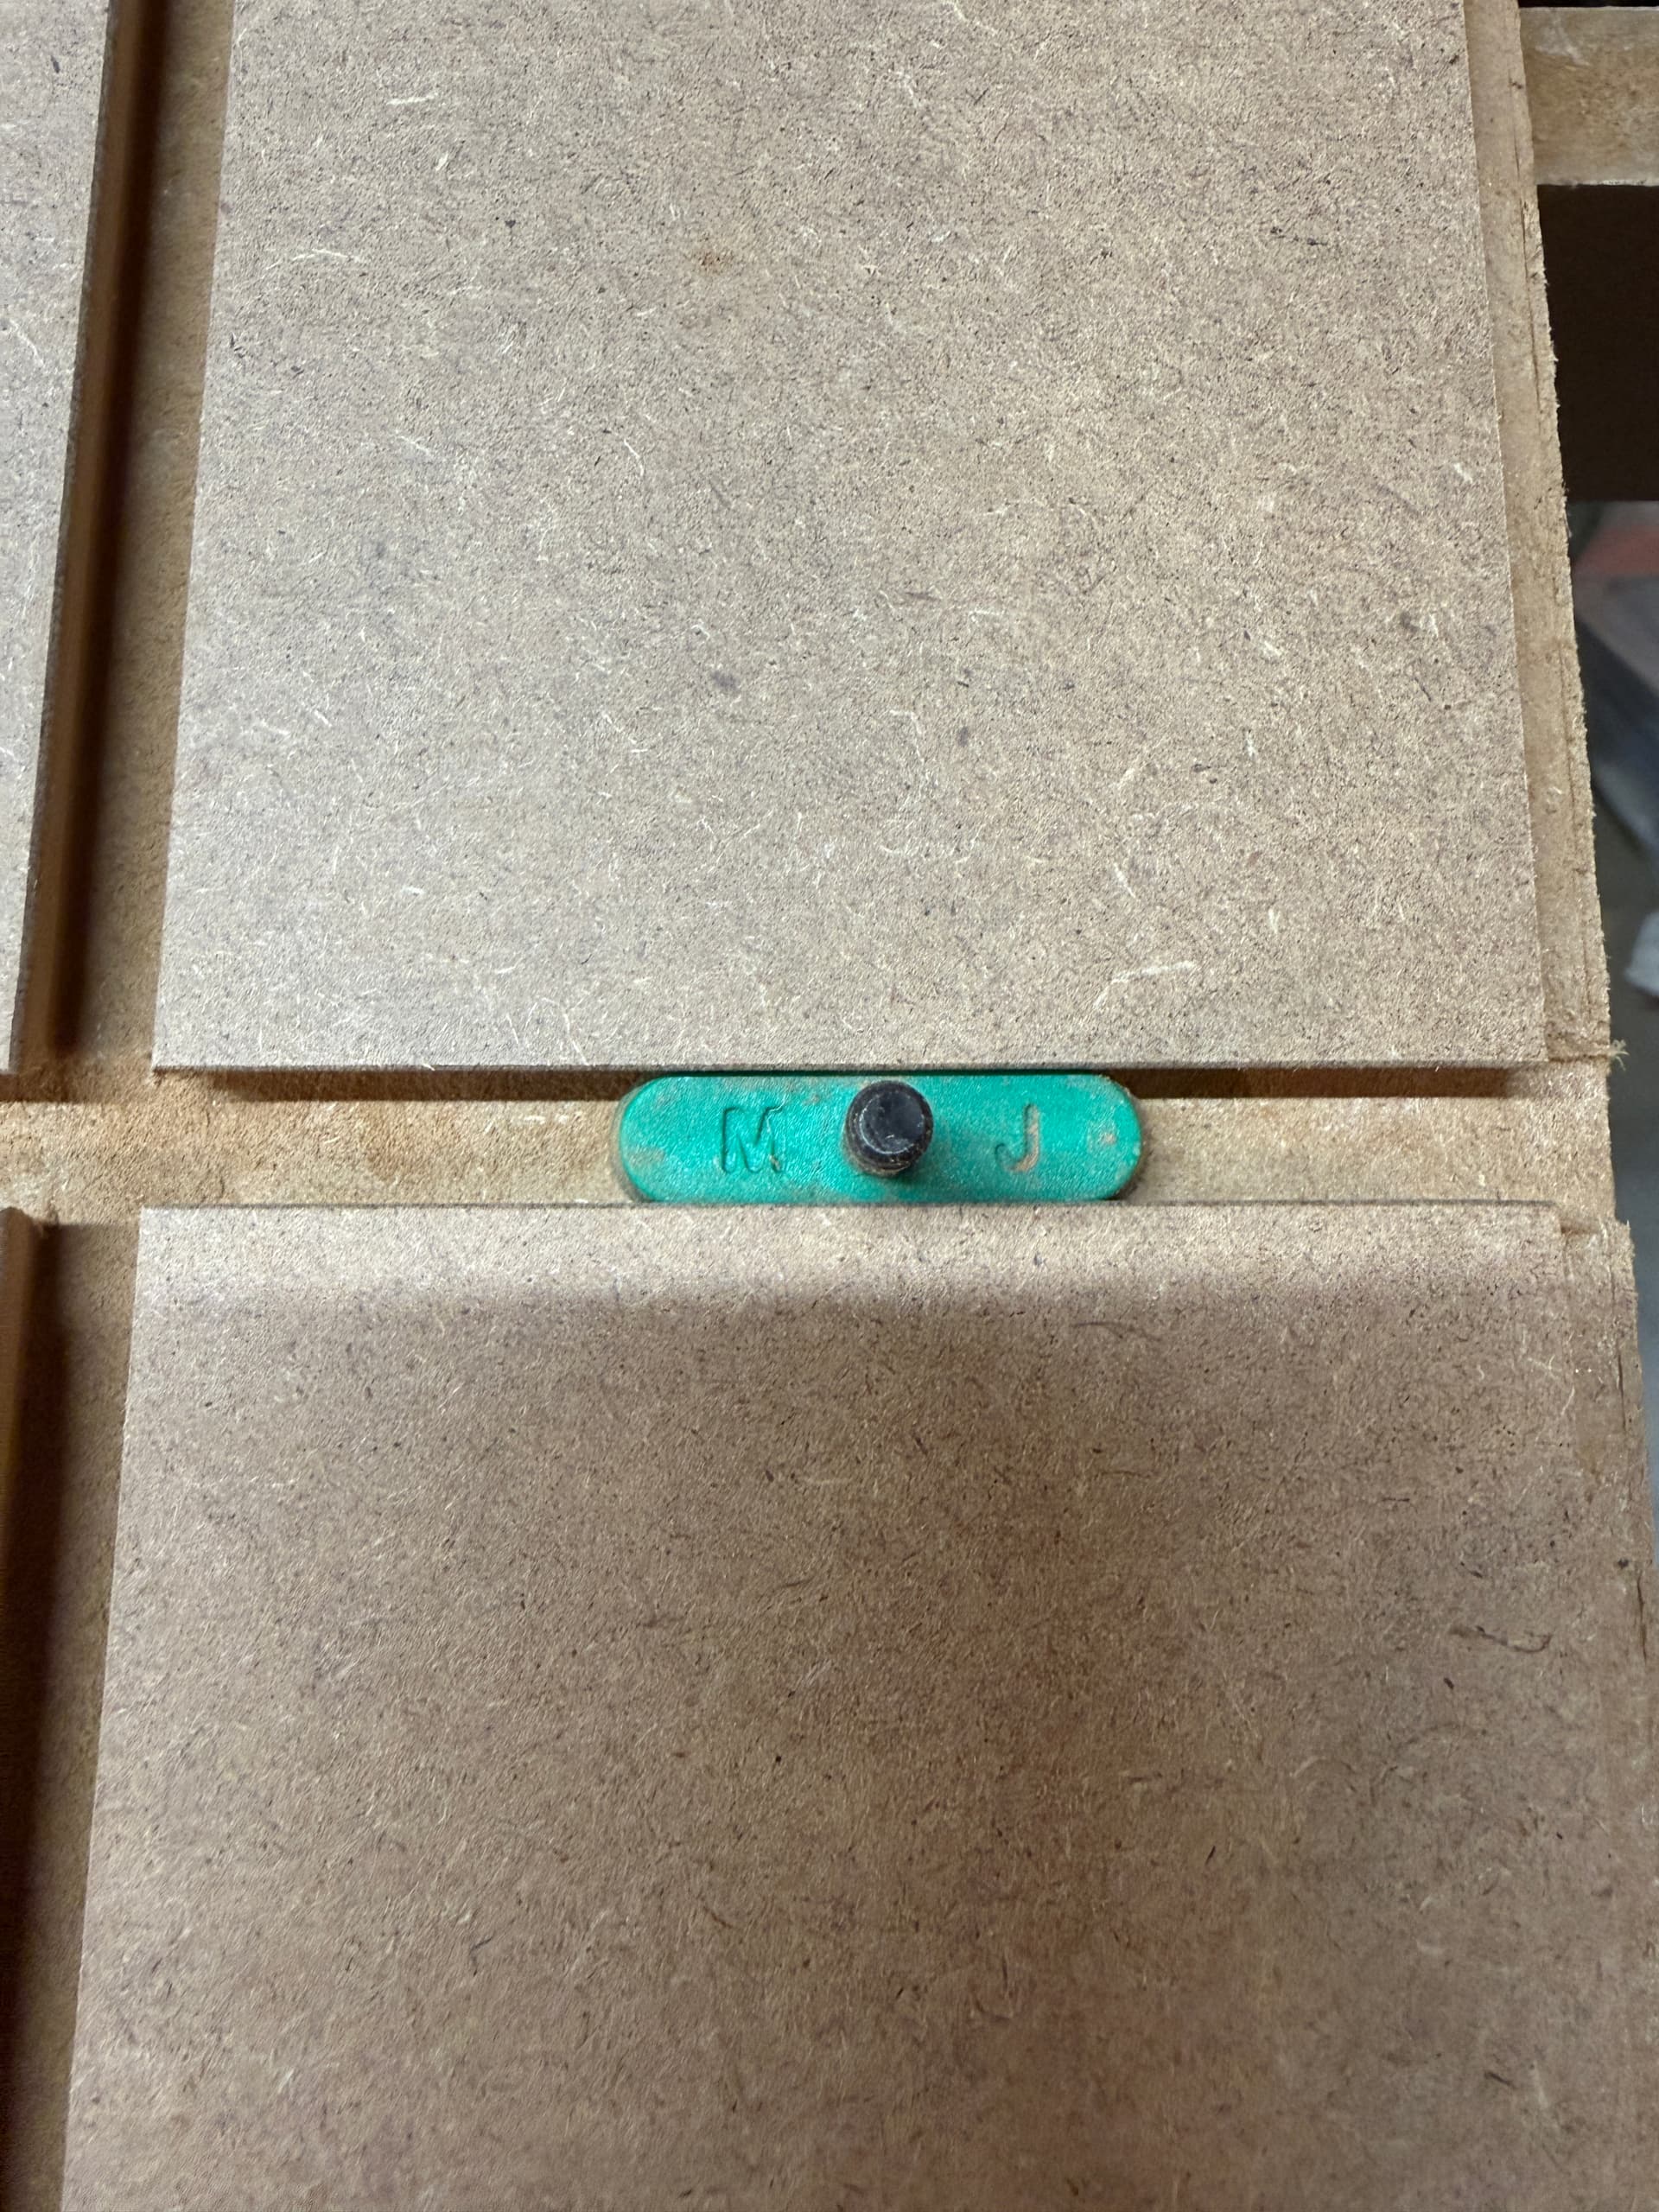
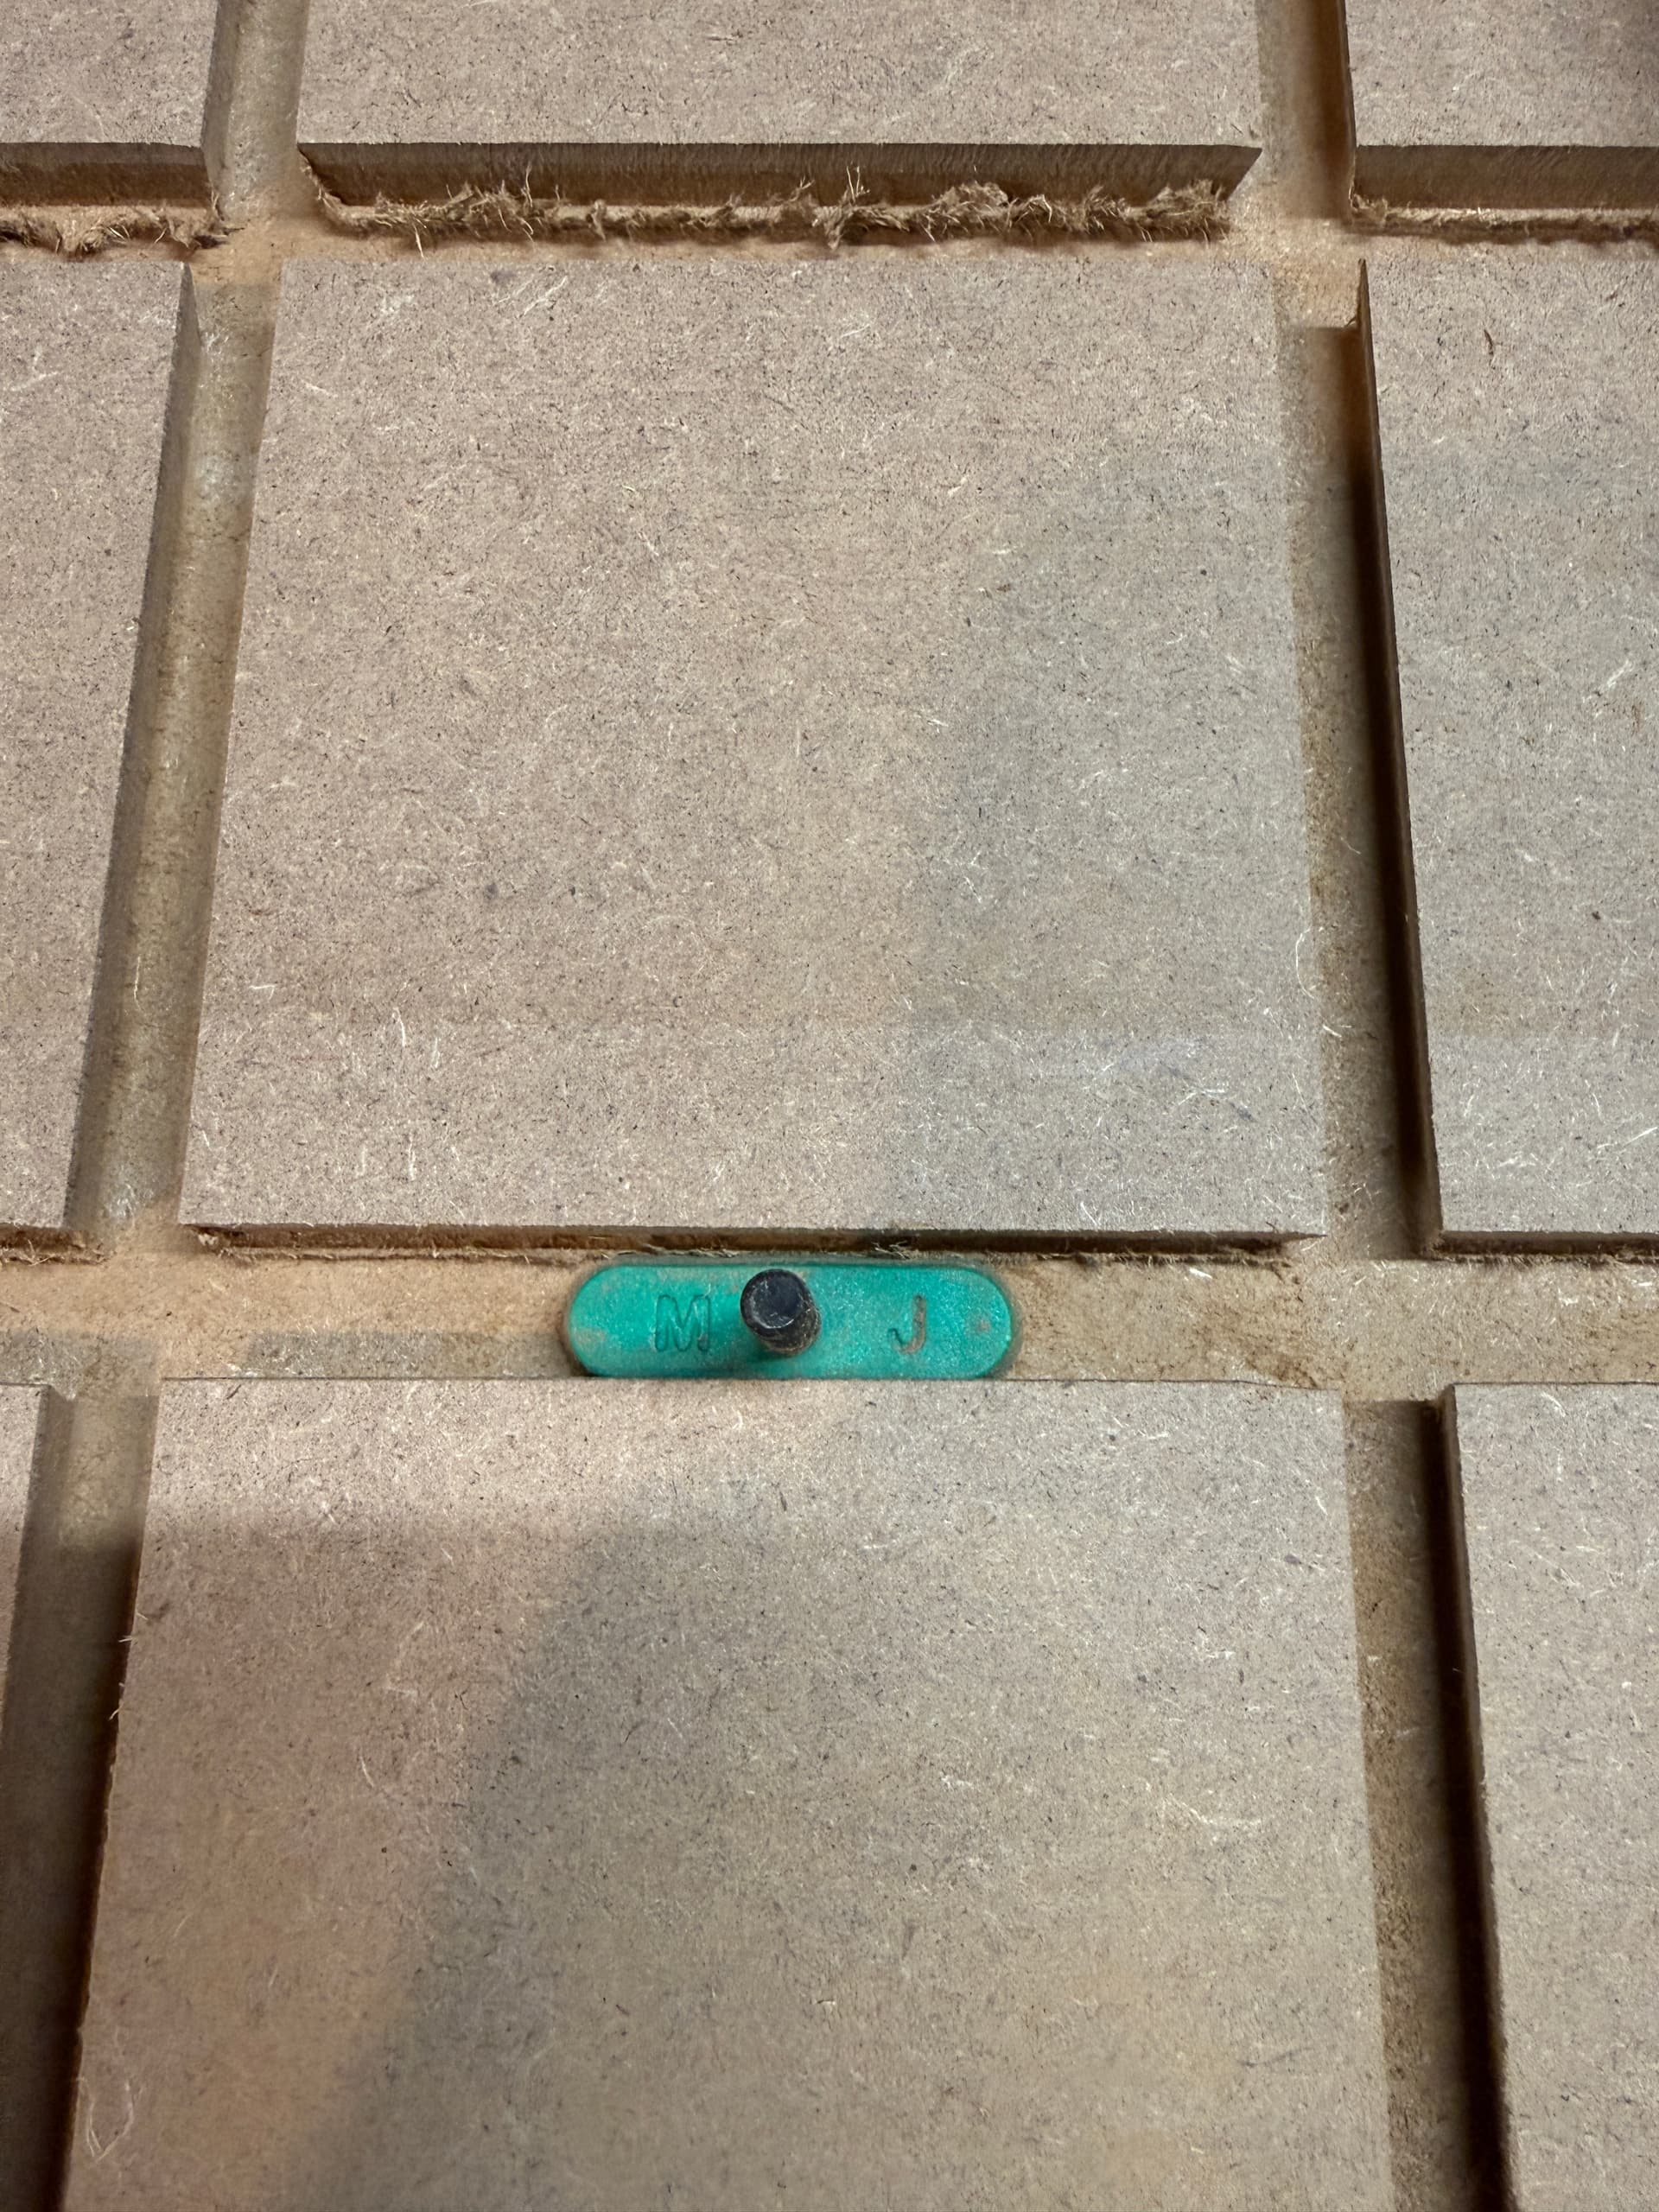
I used a scrap piece of MDF (13"x22") and programmed test cuts for the 1/4" wide, 5/16" deep straight relief cuts and a second file for the 3/8" deep MatchFit cuts. Everything went perfectly on this test piece. The MatchFit hardware fits properly in the dovetail grooves. So I programmed the full-size spoilboard the same way and ran it in the same order. However, the slots running from front to back (Y-axis) are perfect, but the slots running left to right (X-axis) did not cut in the center of the relief cuts, so they are wider on the left than on the right. On the far right side, the top of the dovetail slot is 8.71mm, and on the far left, it is 11.90mm. All of the Y-axis slots are around the 8.71mm size.
I suppose this is a post better suited for the troubleshooting section, but I wanted to keep my progress of this build in one place. Any assistance is appreciated.
Out of curiosity, was the issue with my table generator something to do with the generated design, or the machine? If there’s an issue with the tool, I would like to fix it! It won’t help you (sorry!!!) but it will help the next person.
Your design seems to be fine. The misalignment I was referring to was with the tiled tool-path cuts. I was cutting half of the torsion box frame to near capacity of my Y-axis on the old machine and then sliding the part forward. The second cut shifted a couple millimeters so it was not flat on the top and bottom of the rail.
My top is slightly off center to the X-min and X-max but that is likely from my error and not your generator. The only feature that would make your generator perfect is if it denoted the final dimensions of the parts so when importing it into various software we would know the proper scaling to use.