Just wanted to start out by saying thank you to Ryan for creating such an awesome machine and to the rest of the community for all your ideas and support that you provide.
I purchased my kit in mid September and started printing the parts. I’ve had the Ender 3 since 2019, and have printed a ton on it, but it has always been finicky. It was good enough to get me going though.
After fussing with it to get the YZ plates and the smaller parts printed, I ended up purchasing a ADM5(thanks Doug!) to print the core.
I worked on assembly here and there as often as I could, backtracking to reprint parts that I had printed in the wrong size for 29.5mm tubing when I had 30mm.
(I must admit that I did this more than once ![]() )
)
Finally, towards the end of November I had something to show for my efforts.
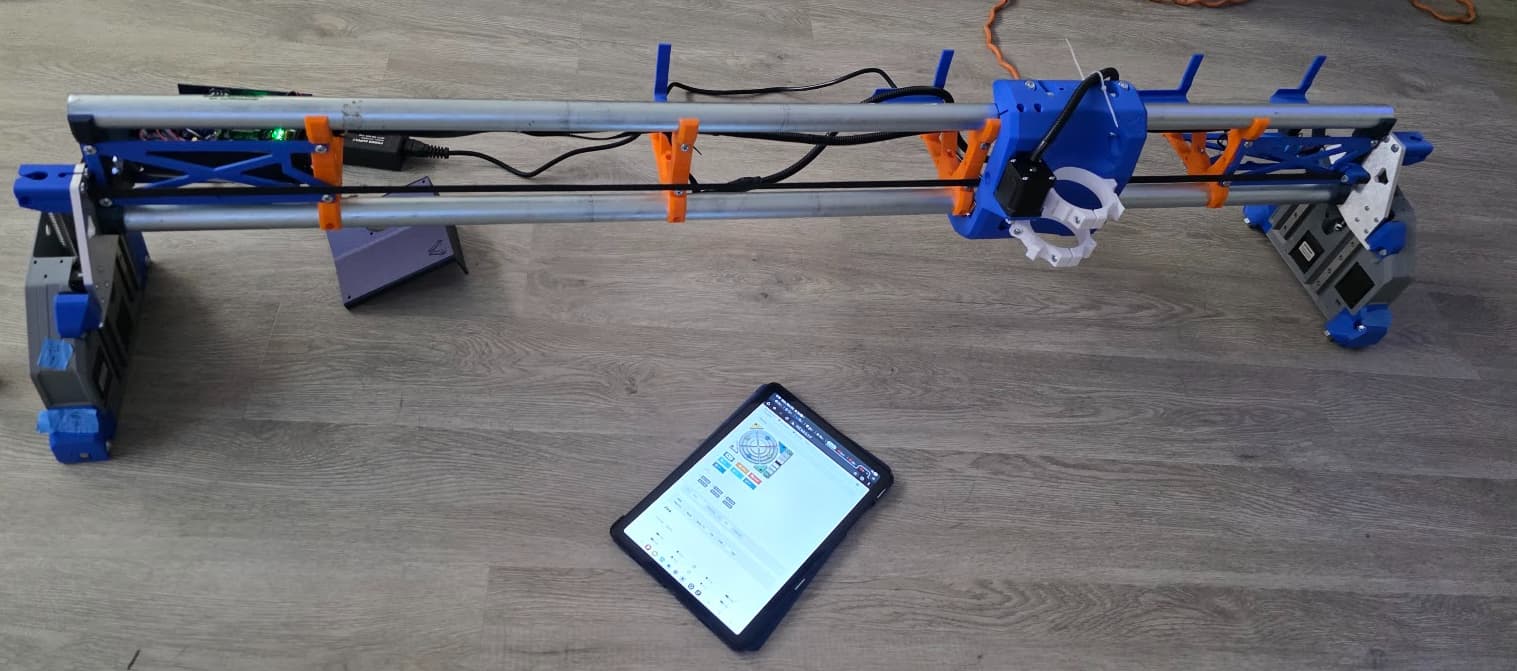
And a couple of days later…
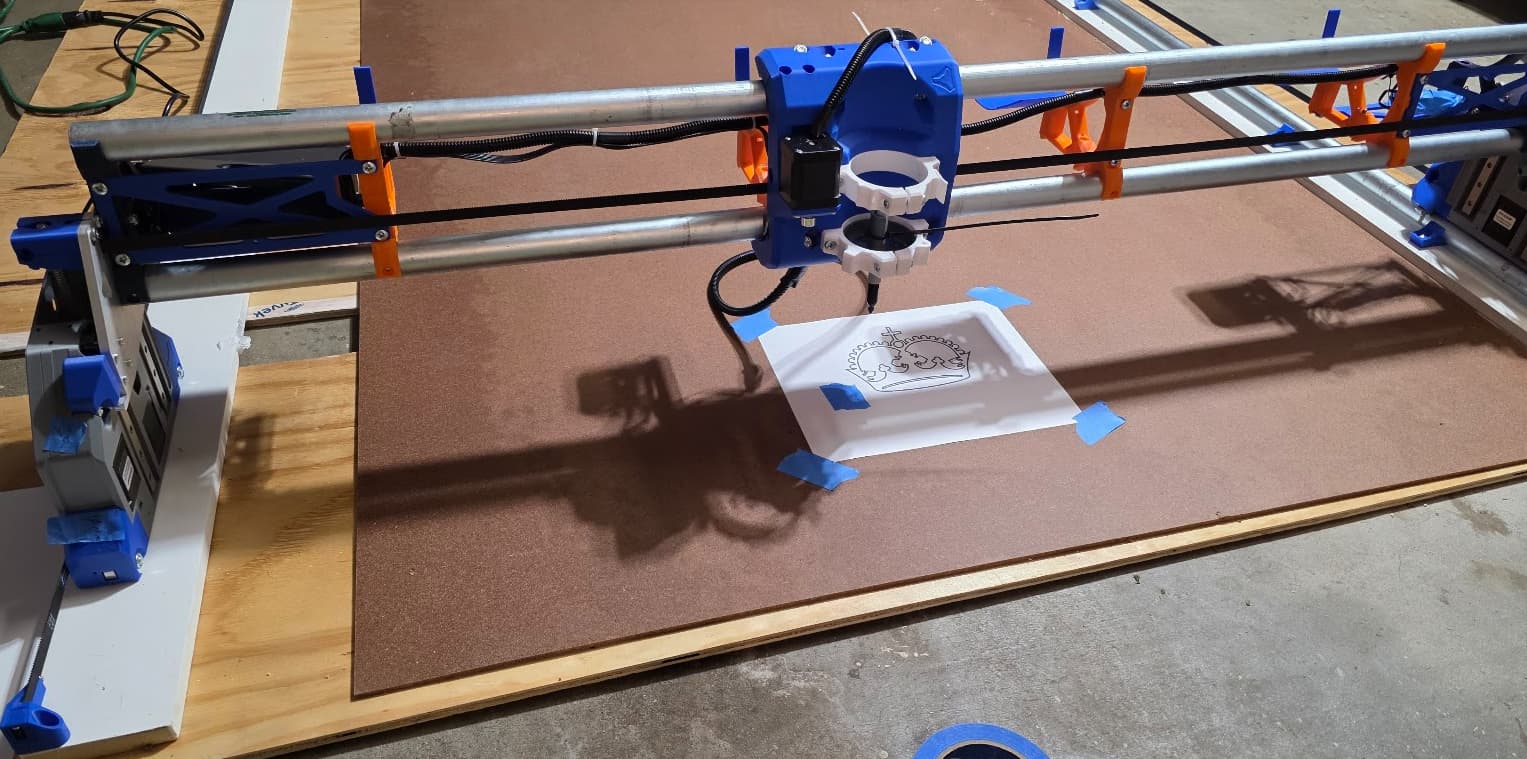

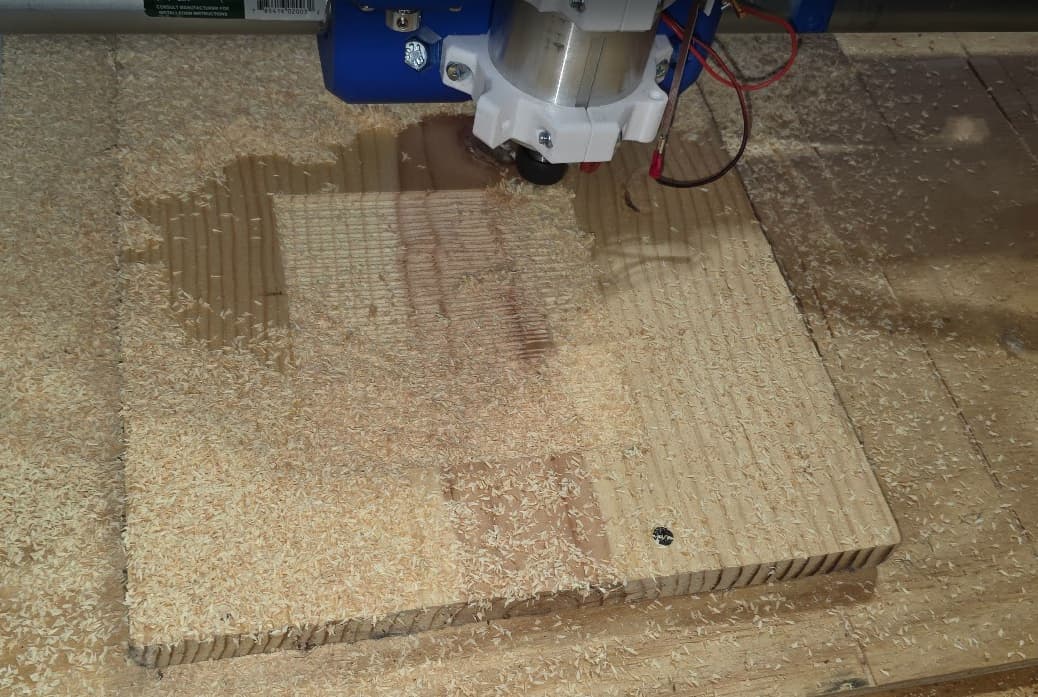
Then, the next weekend, after my router cam in, I started making cuts!
First a test in foam
And then a set of strut plates
After that, due to the aforementioned error in printing all my braces in the 29.5mm size, I completely dismantled the machine for a rebuild with the correct size braces.
I also had some rock in the core, but I wasn’t able to tighten up on the bearings due to the bolts spinning.
This was one of my most frustrating parts of the entire build process, until I wisened up and started running the bolts through the nuts to “break in” the plastic parts of the locknuts. Even after doing so I had trouble in spots. Nevertheless, I had to do something to stop the rock. After reading a bunch, pondering superglue, JB weld, different epoxys, etc, I was somewhere on the forum someone mention that the best thing to do would be to heat up some filament to fill in the gap. Then I remembered that we had bought my daughter a 3d pen a few years ago.
It sure ain’t purty, but it did the trick!

No more spin!
Tightened up ever so slowly on the bearings until the rock was gone.
Then time for another function test.
Making sawdust!
This whole time I have been reading up on and figuring out the CAM side of things.
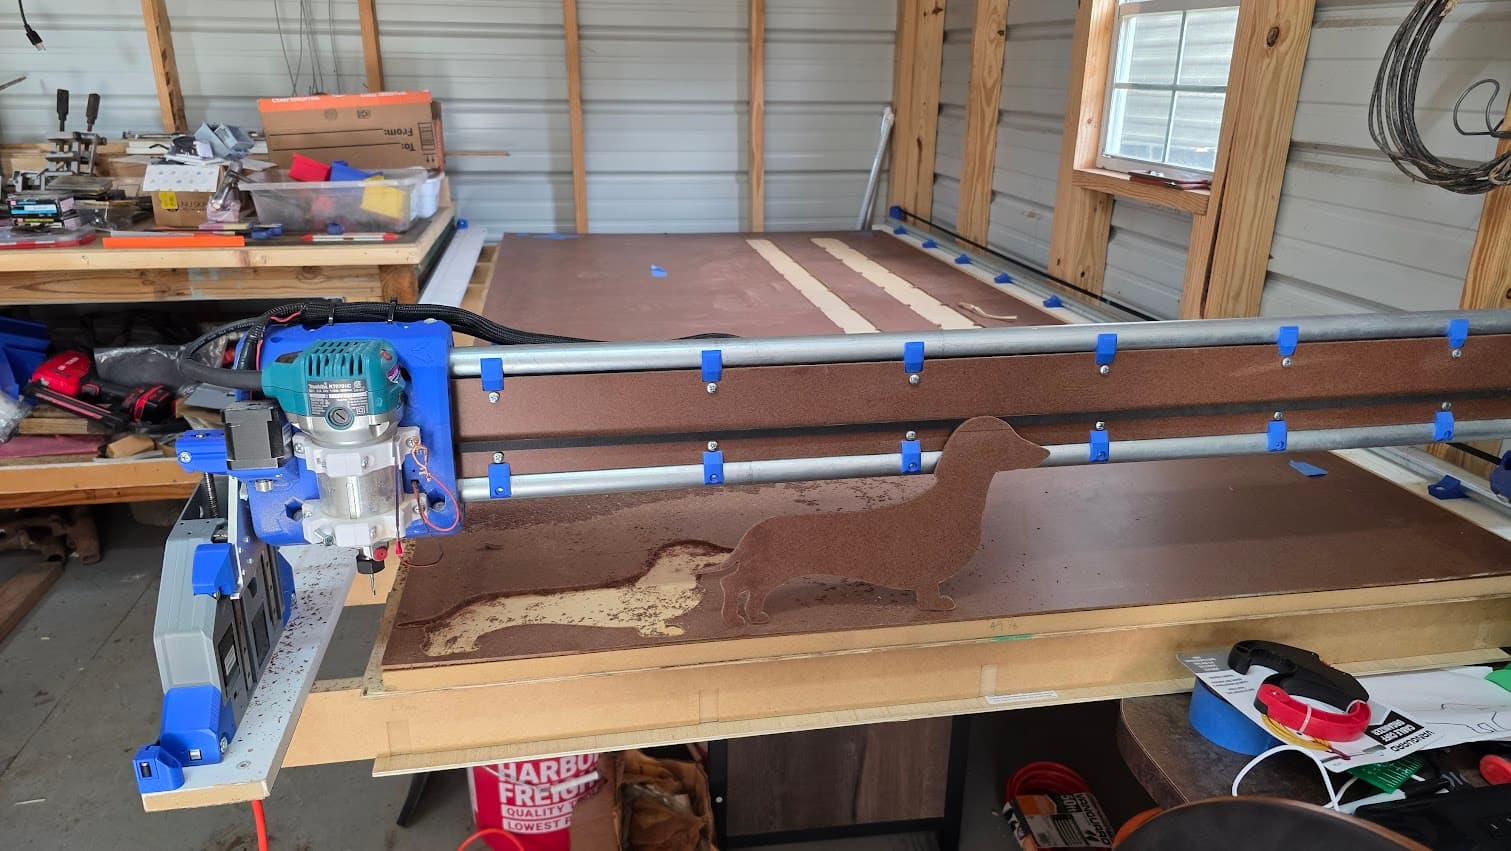
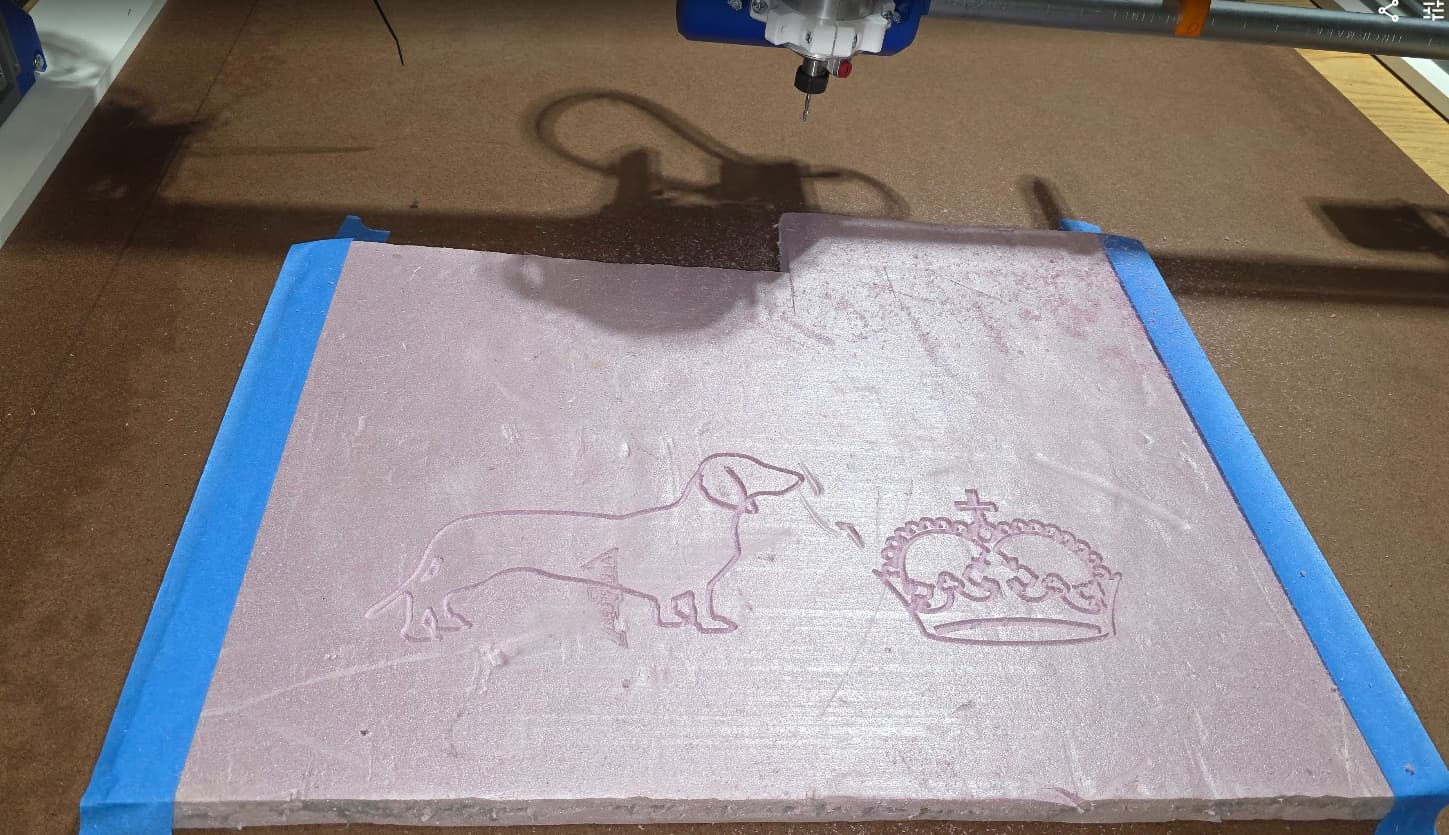
I took a picture of my dog, modeled it in Blender with the Sculptok plugin after reading about it here.
It was going pretty great until almost the very end of the roughing cuts. I did not have enough bit stickout for the full depth of the cut, and on the deepest layer the collet nut started rubbing on the edges.
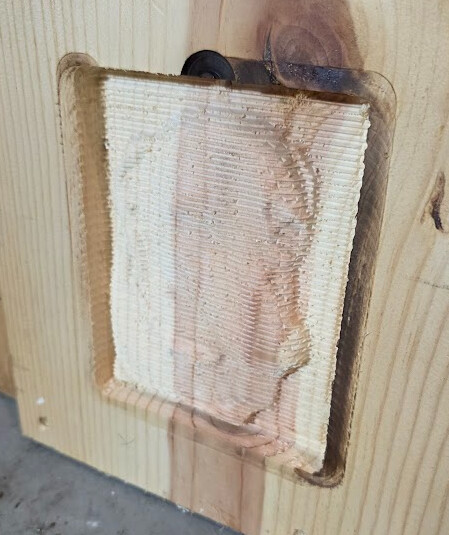
Stopped the job, exposed a little more of the bit, and re-ran it and was stunned at what came out.
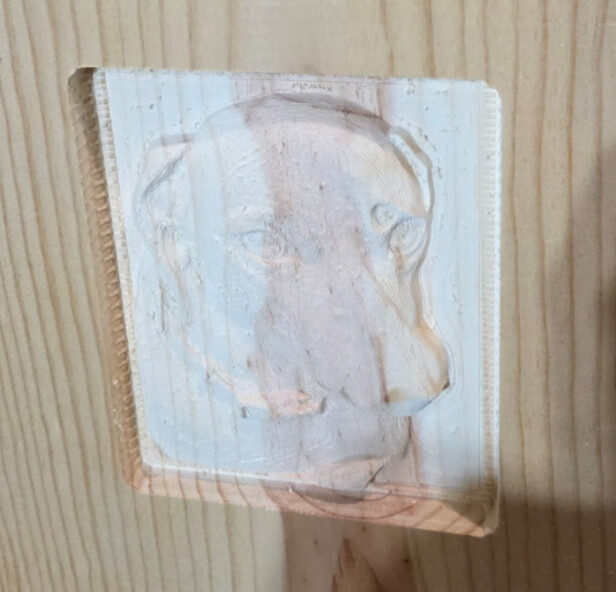
It’s definitely not perfect. I should have used a ball nose instead of the V bit, and the model could be improved some, but I am continuously amazed at the capability of this machine.
Now to get up off the floor of the garage. I ain’t no spring chicken any more.
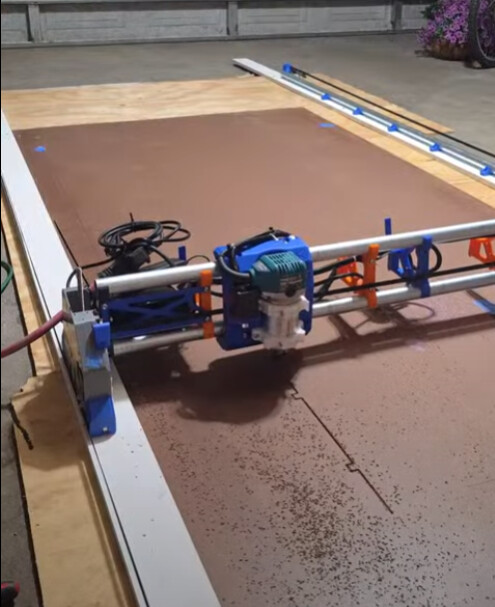
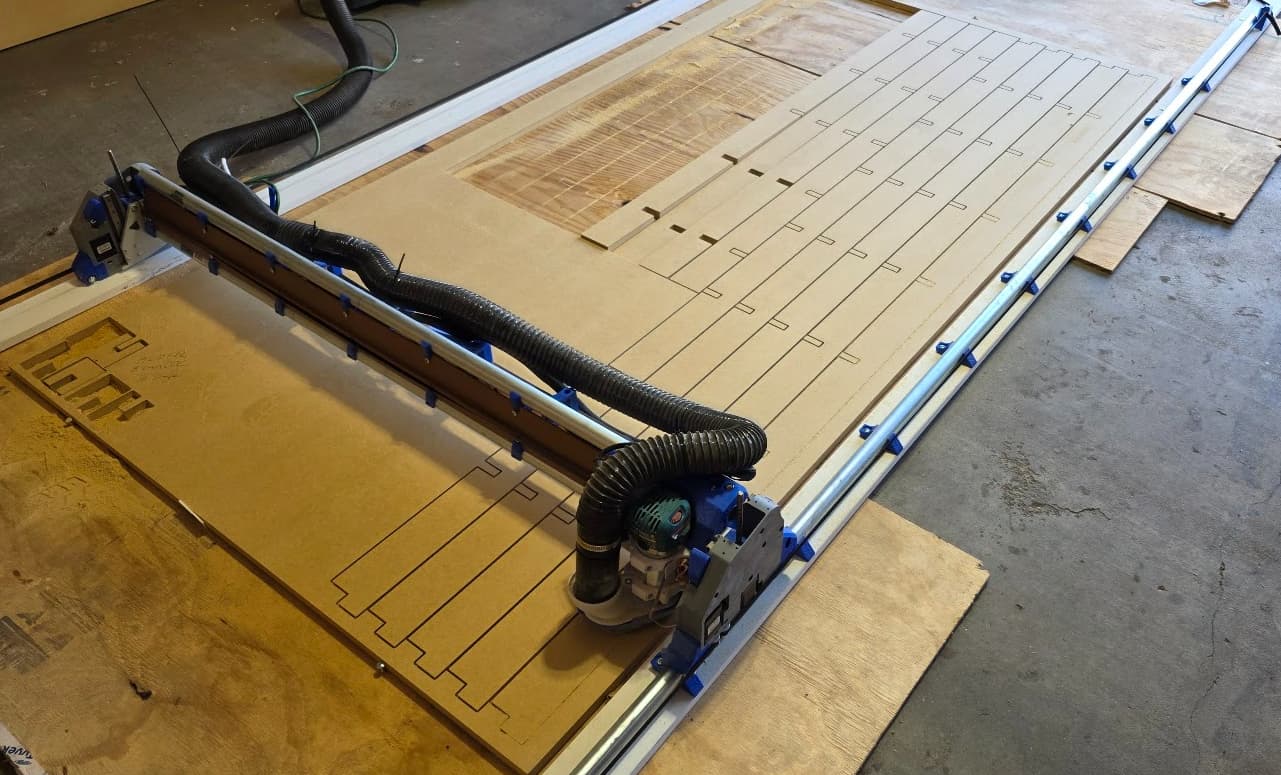
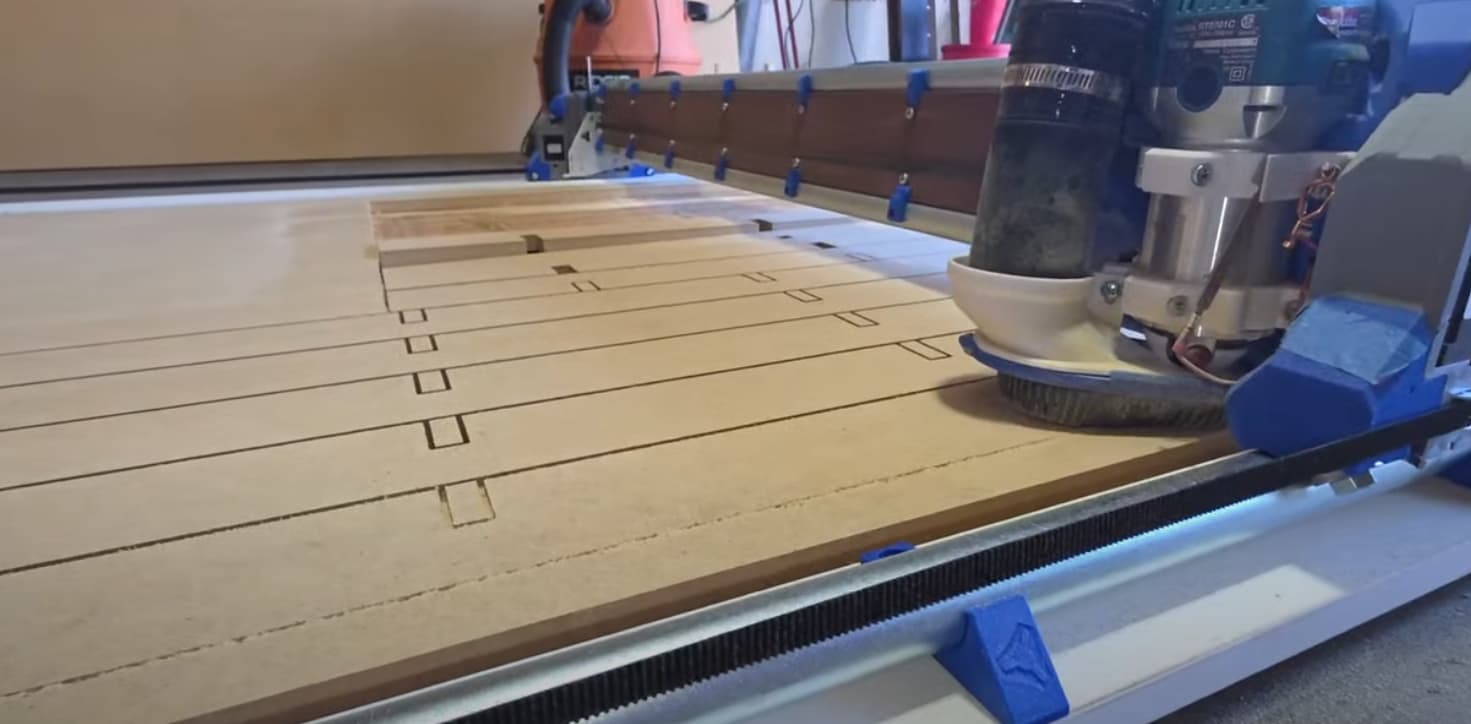
Yall know what that means, table time!!
Spent untold hours reading, contemplating, going back and forth between method and decided to go with the CNC cut table from Zach Zundel’s table generator.
https://forum.v1e.com/t/torsion-lr4-table-generator
I cut a few iterations of the the test parts, then went for the full thing.
Also, just before I got set up for the cut, I added updated to FluidNC v3.9.9 and WEBUI v3, and added Jason’s extensions.
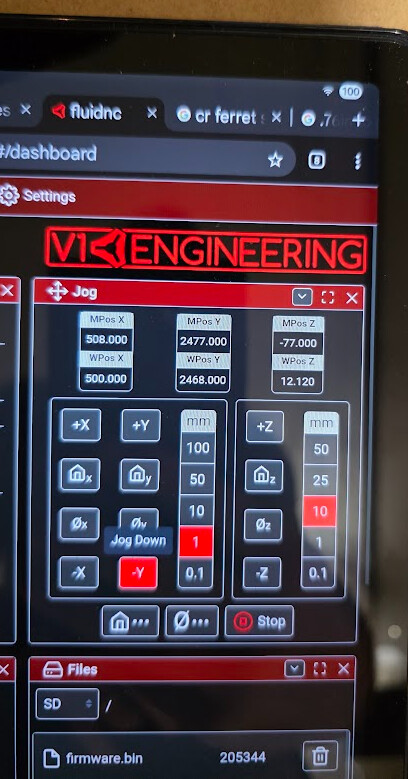
https://forum.v1e.com/t/webui-v3-extension-virtual-jog-joystick
I was not a fan of the old WEBui, and was looking forward to the joystick, but alas while I loved the new layout and larger buttons, the joystick and hold monitor are present, but not functional. That’s its own topic for another thread. I’m sure there is some small detail that I overlooked.
The core functionality was all working as intended.
I didn’t get through cuts on portions of the last few tables struts, closest to the Ymax axis. I think it was mainly due to garage floor wonkiness, but I need to recheck my X level adjustments. The past couple of nights I have been opening up the half lap cuts just a hair so I don’t half to fight them while assembling the table. I should have spent a few more iterations of the the test cuts dialing it in, but here we are.
Also, while I was working on them last night, I got a delivery from Elecrow!
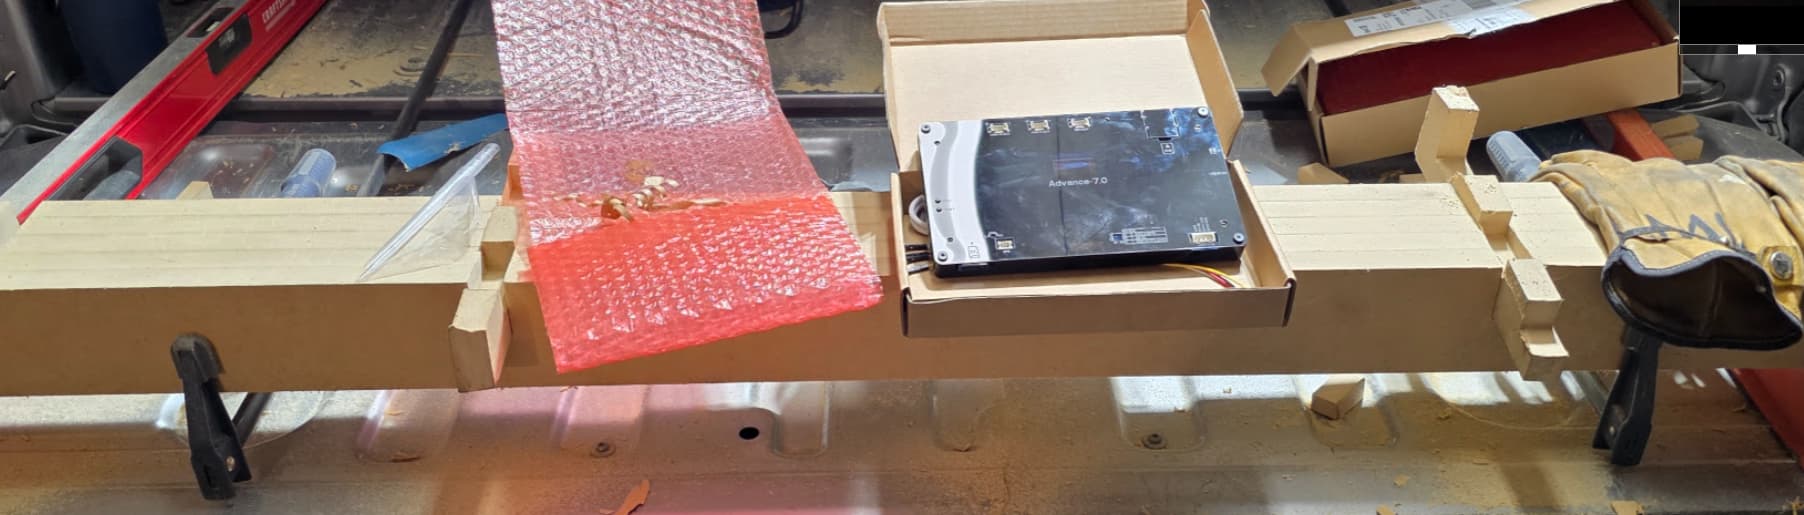
Jason, FTW, again.
When I came inside, I used his webinstaller to put FluidTouch on the display.
It installed just fine, but there is some…stuttering/jitteryness?, at the very bottom of the screen, maybe the bottom quarter inch or so, which was not there when I first powered the device on and the pre installed test widget came up. Anyway, I’ll post on his thread here to work out the kinks. Looking forward to those big beautiful buttons!
https://forum.v1e.com/t/fluidtouch-wireless-fluidnc-pendant
That was last night, it was getting late and I didn’t have the energy to look into it.
If you’ve made it this far, that brings us to the current day.
I haven’t mentioned but a small fraction of all of the great ideas and vicarious troubleshooting that has been incorporated into my build. Seriously, I cannot get over how much talent has congregated on this site. I sincerely wish I could thank every single one of you by name, but this post would probably double in length.
Every single one of you has been much appreciated. Thank you all.
I’ll leave you with this little diddy that has been playing in my head since I started this endeavor. (I alllways have a song in my head)