Have to agree with Riley. It can happen so much faster than you realize. And you say 10 seconds. But if you’re playing a game how long until you even realize there is a problem to start that 10 second journey? It’s just not worth it. Find something else to work on in your garage/shop while it’s running. Most of us always have 100 other projects so plenty to help pass the time. Or get you an old computer to set up in your garage/shop to play on while it’s running. Anything that keeps you within a few steps of the machine is way better than what you are doing. Bad things can happen so fast that your garage could be fully engulfed before you can make that 10 second journey. It’s just not worth it
8 Likes
Don’t do this.
You’re driving a kilowatt class murder robot and fire starter. You and the people around you are more valuable than a few moments of false comfort.
Bad, bad idea. You’ve been warned.
4 Likes
Yea, several of us have set fire to stuff with the router. It doesn’t take long at all for it to get out of hand.
4 Likes
Not going to lie this made me laugh! But noted fire extinguishers being purchased for the home shop!
3 Likes
Thanks for the warnings, everyone. I’ll figure out a different strategy.
8 Likes
Your insurance agent thanks you…
4 Likes
Glad the resident safety monkey squad is on the job. I’ve also filled a room with smoke a couple of times and had actual flames once. Doesn’t take much with that router happily pouring out power.
A good dust mask and safety glasses are good, though I would expect the dust to be pretty bad for a computer, so I just use my phone or tablet while my machine is working. Most incidents will be preceeded by/involve unusual sounds, so my yes can be otherwise occupied but I don’t play music. I can still hear with the ear defenders, but it cuts enough sound to prevent damage.
2 Likes
Been quiet for a while over here. I tried cutting the parametric table out of MDF, but honestly I had a bear of a time. The machine on the ground didn’t have the stablest frame, so it would sometimes get knocked out of square. So a bunch of the parts were incorrectly sized or shaped. I also had a loose grub screw on one side, which would cause it to skip steps occasionally, which usually led to a crash. Overall it was extremely frustrating and I almost just gave up on the project.
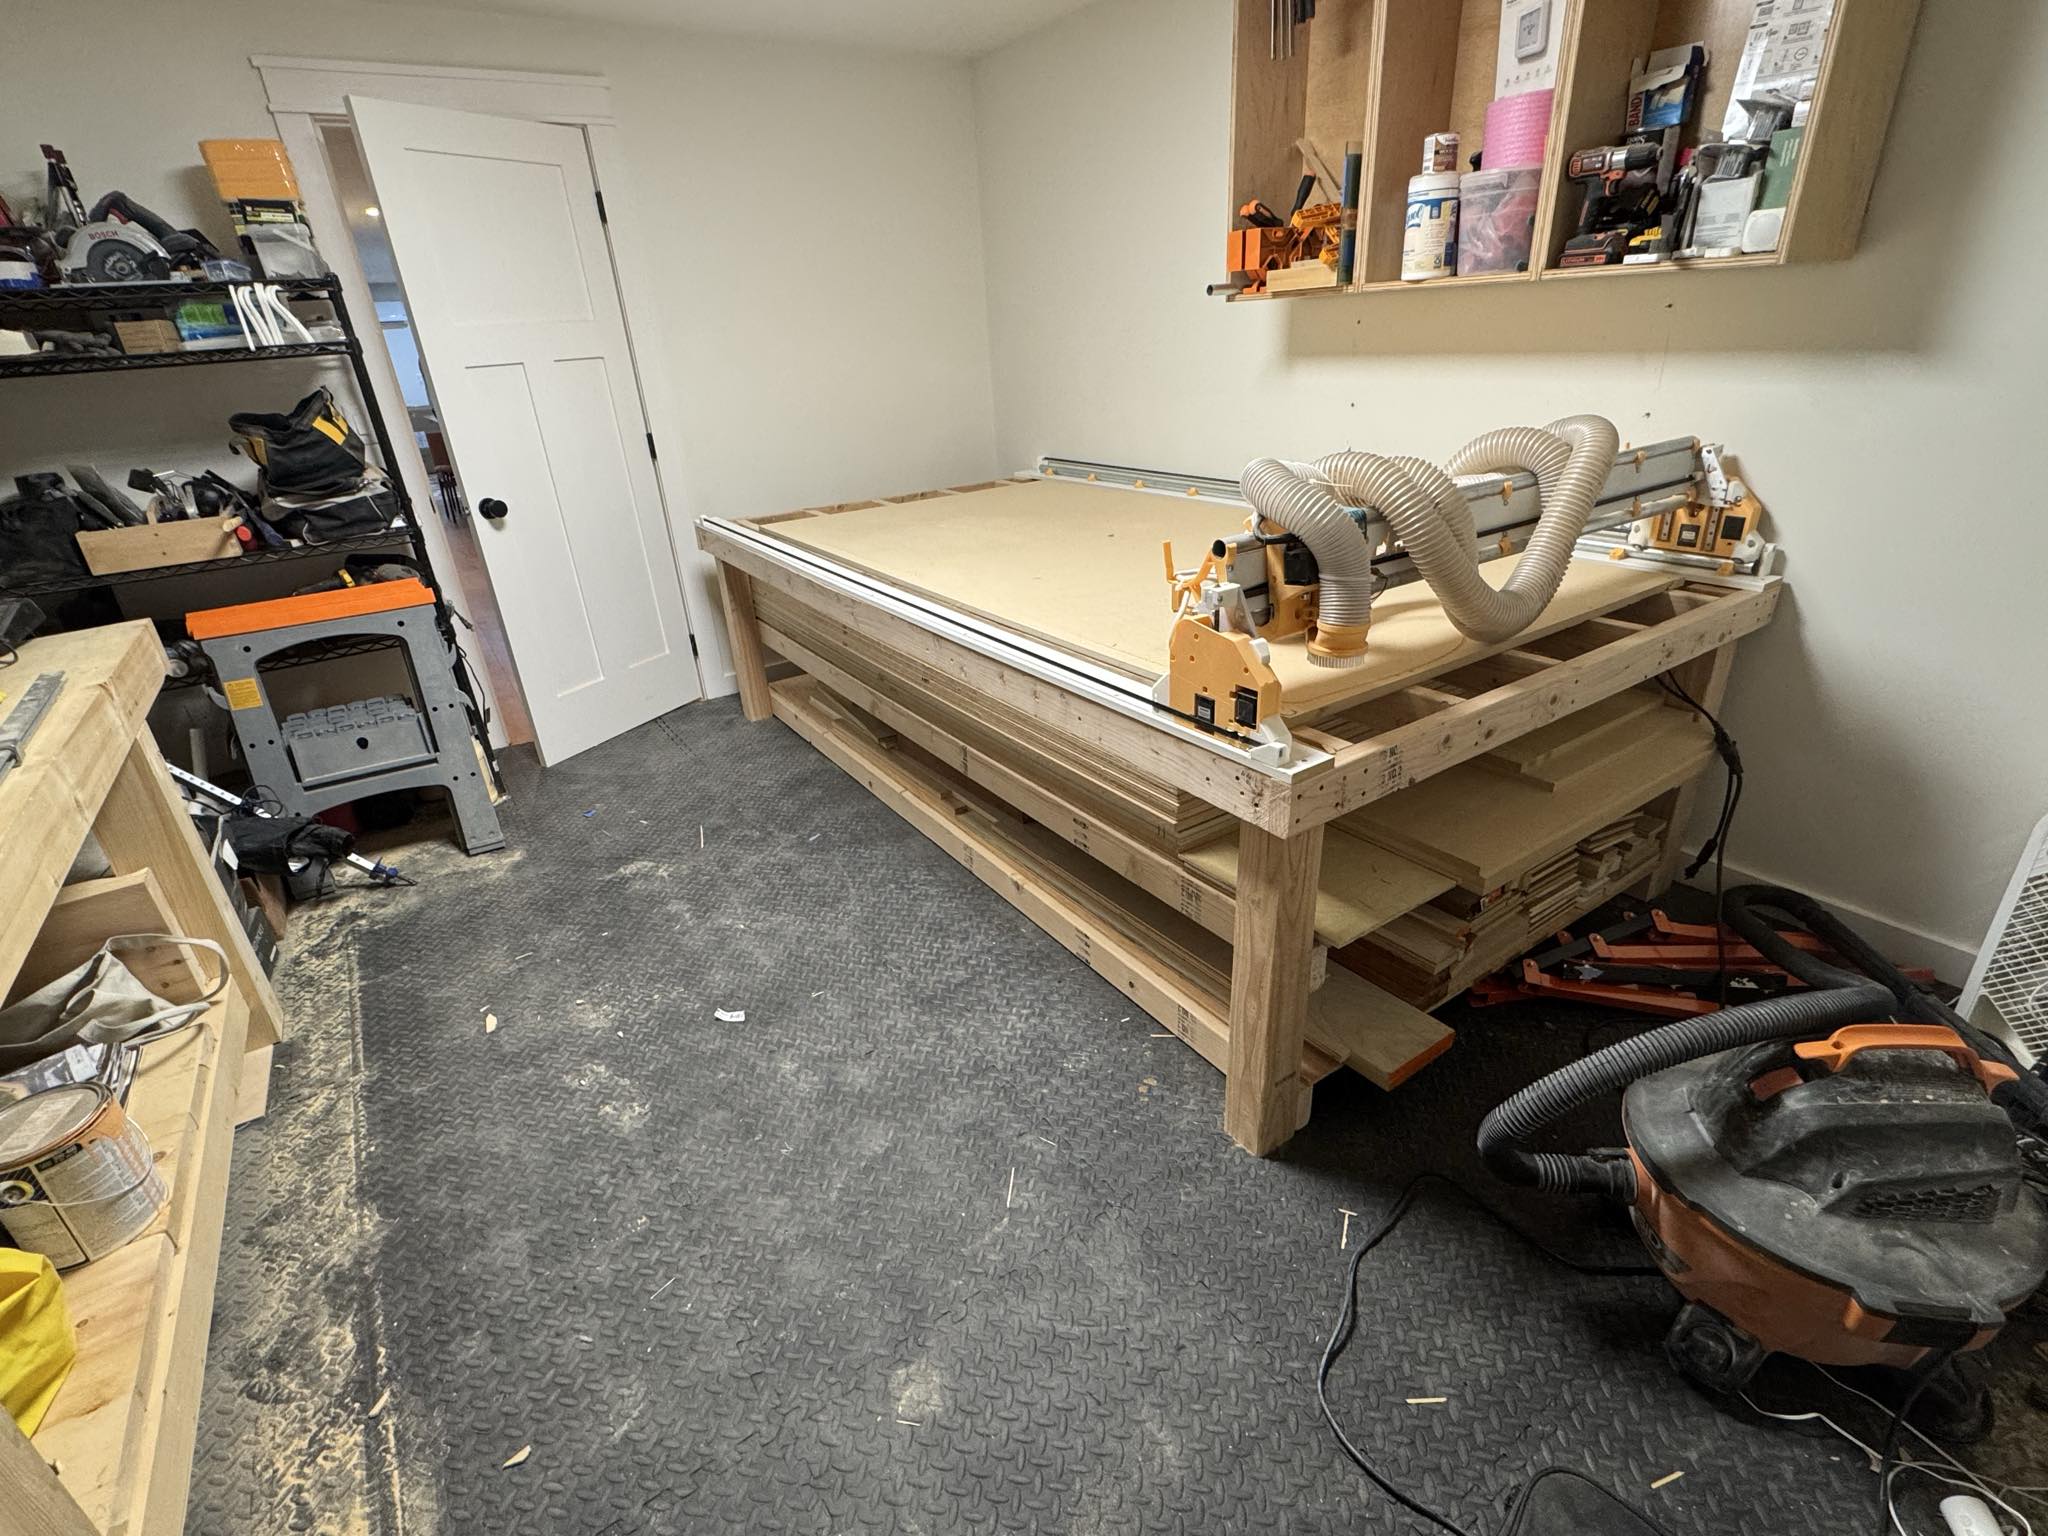
I decided that progress would be better than perfection, and built a tabletop with dimensional lumber framed like a wall with an MDF skin. I set it on some sawhorses.
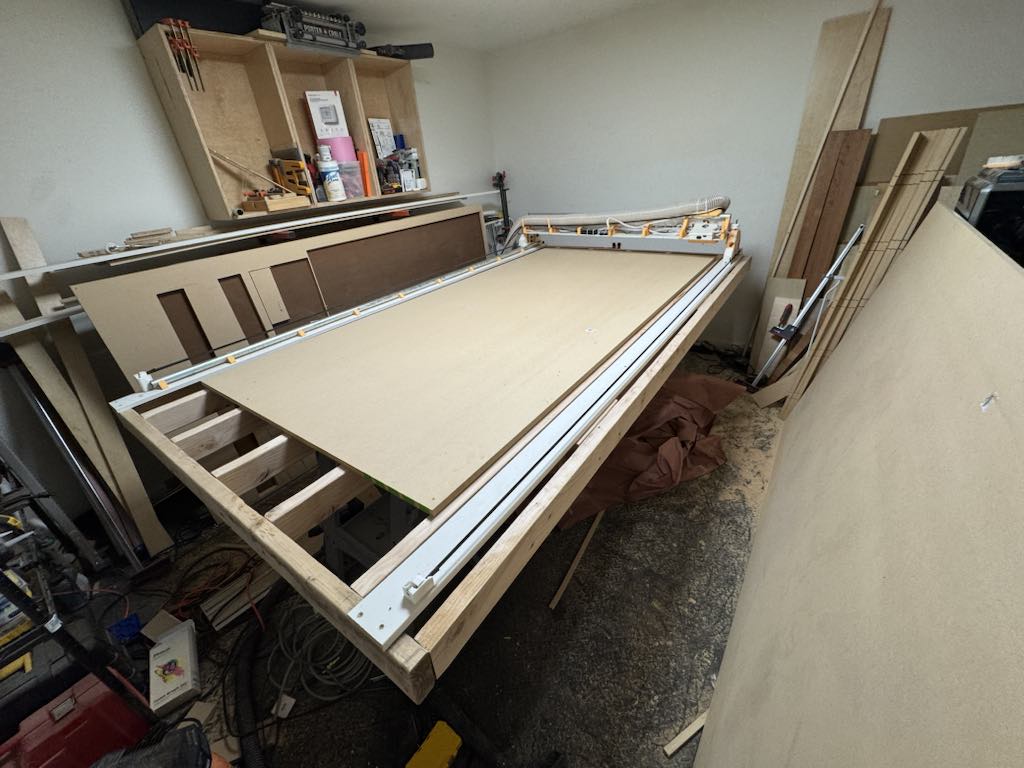
This was such a huge upgrade for being able to run and troubleshoot the machine. Having everything more fixed in relation to each other removed a bunch of confusion. And working at waist-height, instead of ankle-height, meant I could do it for longer without getting tired. On to squaring.
Squaring was another huge pain. I initially tried the recommendation from the docs (correcting the side by the difference in the diagonals) but I never got closer to square. I went through and dusted off my geometry to figure out the actual formula for the skew adjustment – still worse. Finally in desperation I measured the sides, not diagonals of my rectangle table. One was 4 inches shorter than the other. WTF!?
I took the side rails off and rebuilt them more carefully, making sure that the distance between the end caps was the exact same. I counted the teeth on the belts to make sure those were identical. I screwed the newly rebuilt rails onto the table top… and the first measurement was off by 2mm. With one correction, it was perfect. Oh, this was so exciting!!
Z-leveling was simpler, but I haven’t been able to get it perfect yet. I am not sure what is going wrong, there seems to be some chatter on the tube side Z (it shakes slightly moving up and down.) I can get it to within 2mm and sometimes it’s perfect, so in the interest of actually doing some cutting instead of calibrating I called that good. I ran a surfacing bit over the table and it felt ready to go (minus one mistake where I fat-fingered a Y extent of 3400 instead of 2400!)
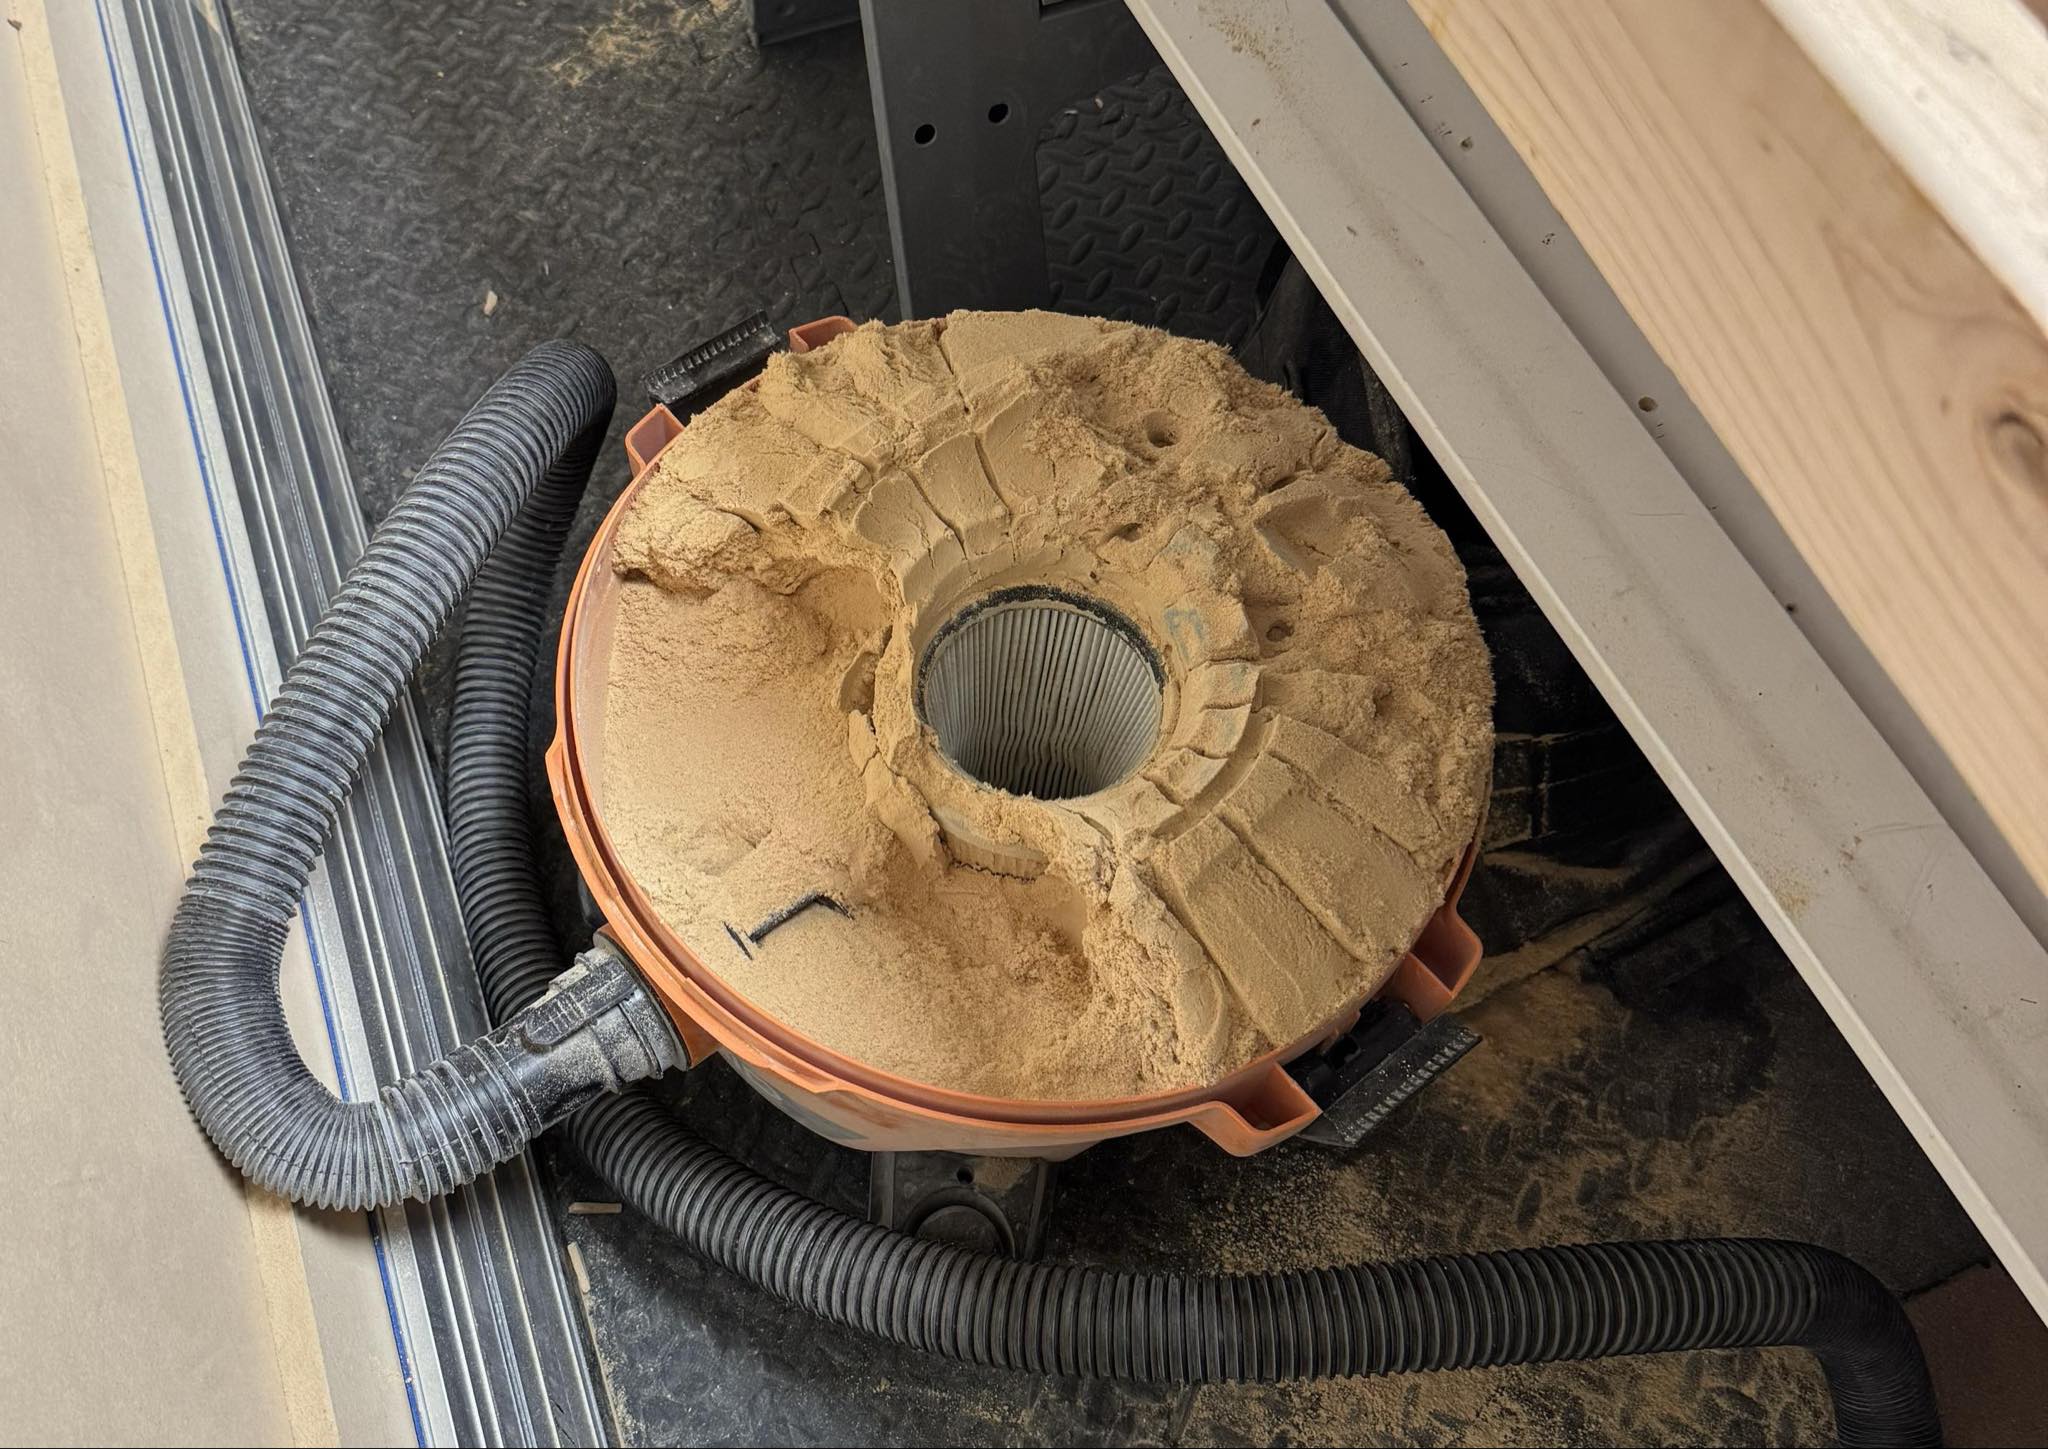
At the end of my surfacing, I noticed the machine was spitting out a ton of dust, way more than when I started. I looked in my vacuum and the reason why became very clear!
OK, back to cutting again after a lot of work. One of the first things I would like to do is cut some artwork to replace a mural in my bedroom that I had to paint over when I added a mini-split unit. So I worked up the design in Illustrator and exported it to EstlCAM. After running some air cuts to make sure I hadn’t really messed it up, I set the machine going.

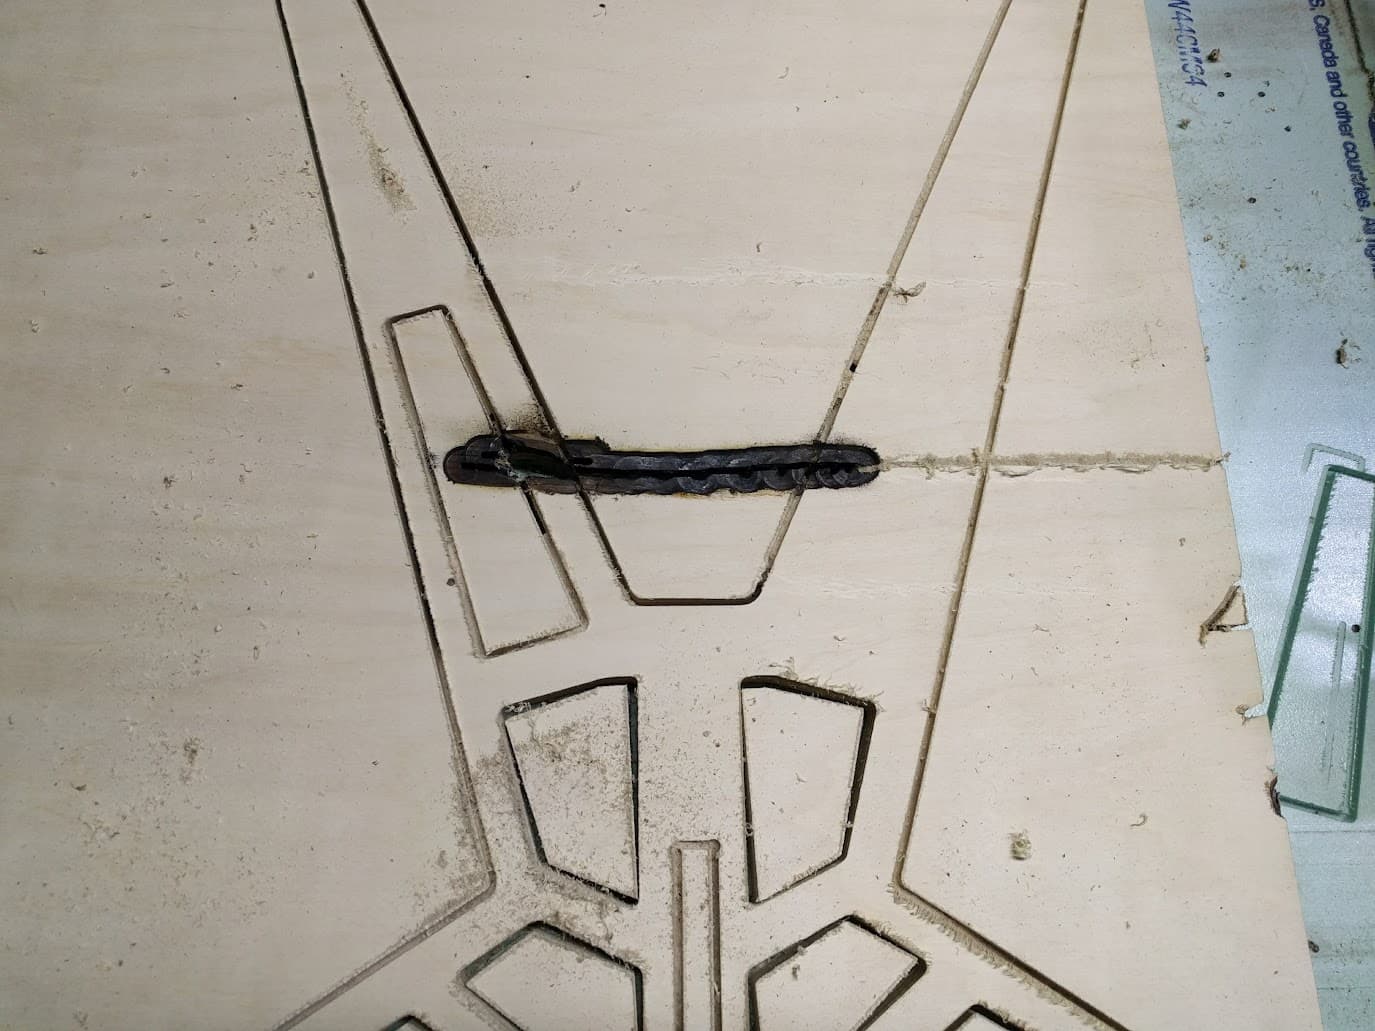
It’s moving! I noticed right away that there was something wrong. The first round of V-cut engravings was uneven – some barely scratched through the surface, and others looked much deeper than the programmed 1mm. So it looked like my incorrect Z-leveling came back to bite me, or something went wrong with surfacing. It looked like the cuts were running more or less fine, so I just watched it while it ran. I noticed that sometimes the rails would sag a bit where there were gaps in support underneath, and noted that to fix later.
My job finished! And some of the pieces wouldn’t come out. In places, I hadn’t cut fully through the MDF. I hacked at it with a utility knife and eventually got everything out:
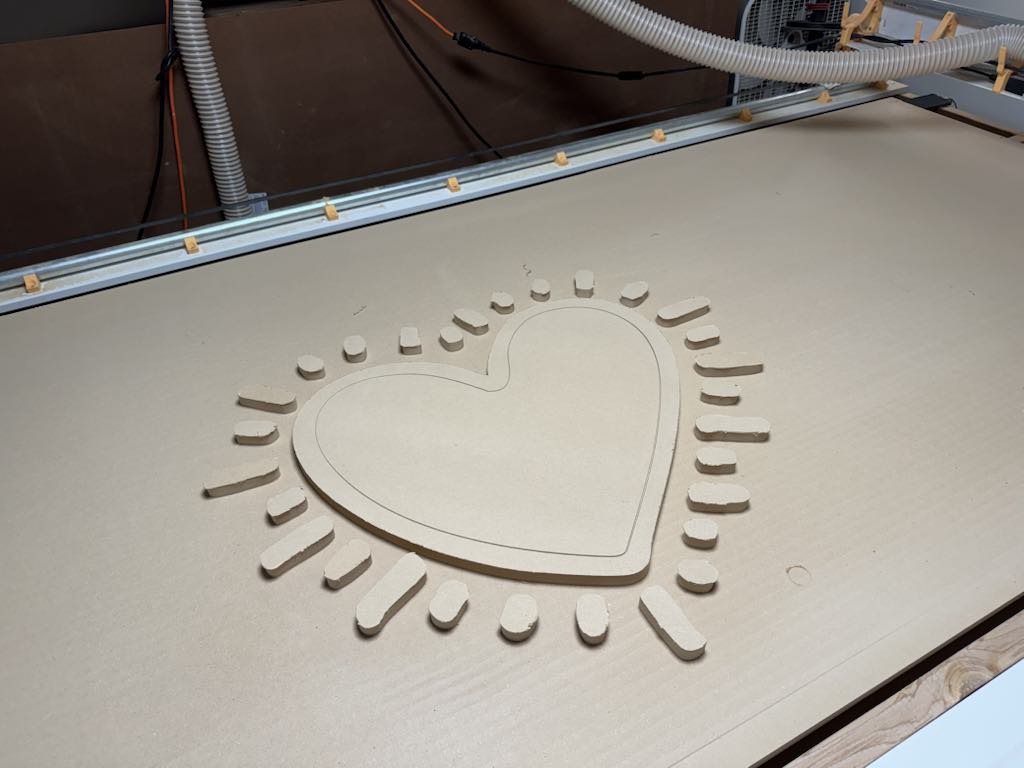
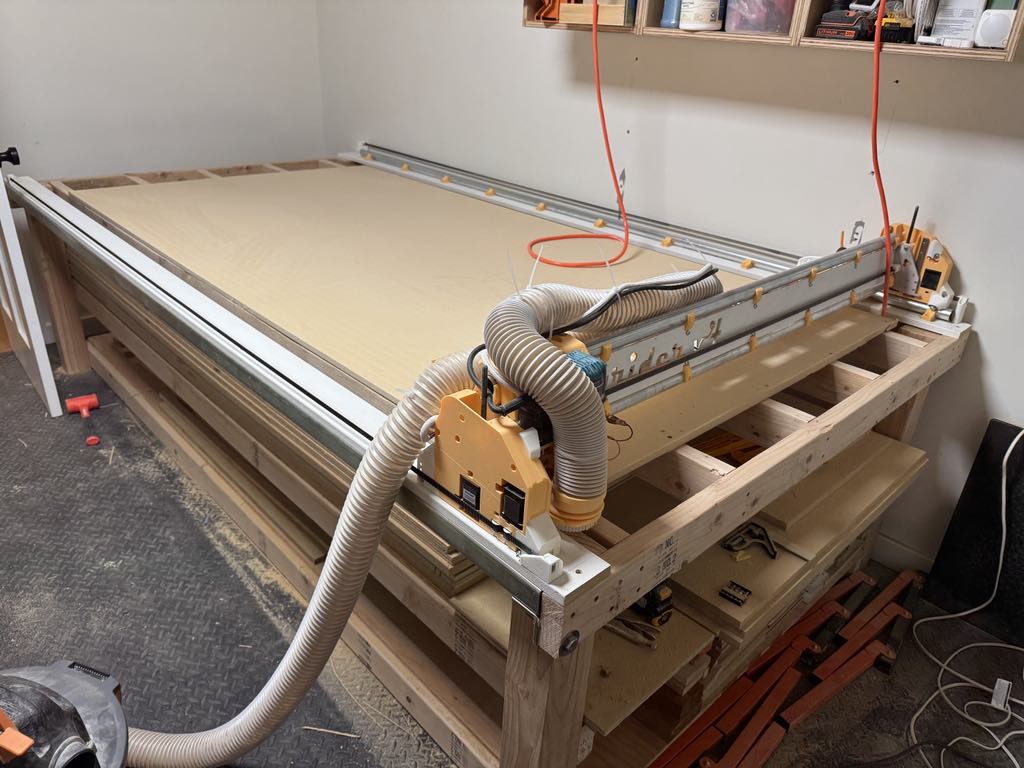
Honestly, despite the things that didn’t work well, this was really exciting to get pulled out of the sheet. It finally felt like I was making real progress on the machine. I decided to rebuild the end of the table to try and fix the sagging, better support the spoilboard, and add permanent legs (with wood storage) to the machine.
I used the long weekend this weekend to get the table finished, and tidy up the shop a bit so that I could move it to its permanent home. I’ll spend next week re-surfacing the spoilboard and running more test, and trying to figure out cable/hose management. I’d like to use the CNC to build workshop cabinets, so I need to get it working a little more precisely and reliably before I start cutting into the expensive prefin plywood.
Long update this time. I’m having more fun with the project now. It’s been frustrating trying to balance moving quickly and making progress with being precise/careful so the thing actually works, but I think I’m getting better. Progress, not perfection.
14 Likes
Great work in perseverance in the face of challenges! Congrats on your progress and success!!
1 Like
Your perseverance is inspiring. I too have already had to fix some issues and got that same feeling after fixing them. I’m very grateful for this community who will help at every turn as needed.
Great job so far!
2 Likes
I figured this out tonight. I have been calibrating and re-calibrating my machine to prepare for cabinet cuts maybe this weekend. I have nice ply which is both expensive and a pain to get home (I can’t fit sheets in my car, so it’s a dance between the wood store + Home Depot truck rental) so I really don’t want to mess it up.
The answer here: loose machine. I went through and checked grub screws (all correct.) I wiggled the machine around and noticed it was easy to twist in the struts and rock parallel to the X axis. I tightened all the strut plate screws, as well as the XZ plate screws, and the linear rail screws. No slop anymore, and no chatter.
And the machine is square and Z is level within 0.25mm. Maybe I should check again… I only did it four times already. XD
3 Likes
Resurfacing tonight it looks like the back of the table is nearly 5mm below the front. My table must just be bent or something. I am debating making one from metal unistrut or something.
One concept that might be useful is to put a 1/4” thick sheet of MDF or something similar on, and use a surfacing bit to flatten that, and then add your actual spoil board on top of it. It basically acts as a giant shim to get your actual spoil board so that it is flat and tram to your machine.
1 Like
I think this is what I’ll try next. I already have a partly-surfaced sheet of MDF on top, so I think I’ll just keep running that until it’s totally flat, then use it as the base for a “real” spoil board.
1 Like
I replaced my wonky side rail 2x4 with a metal strut today. It seems like there’s still a little flex in the middle but it’s under 1mm, and I am not sure the machine puts as much downward force as I was testing with.
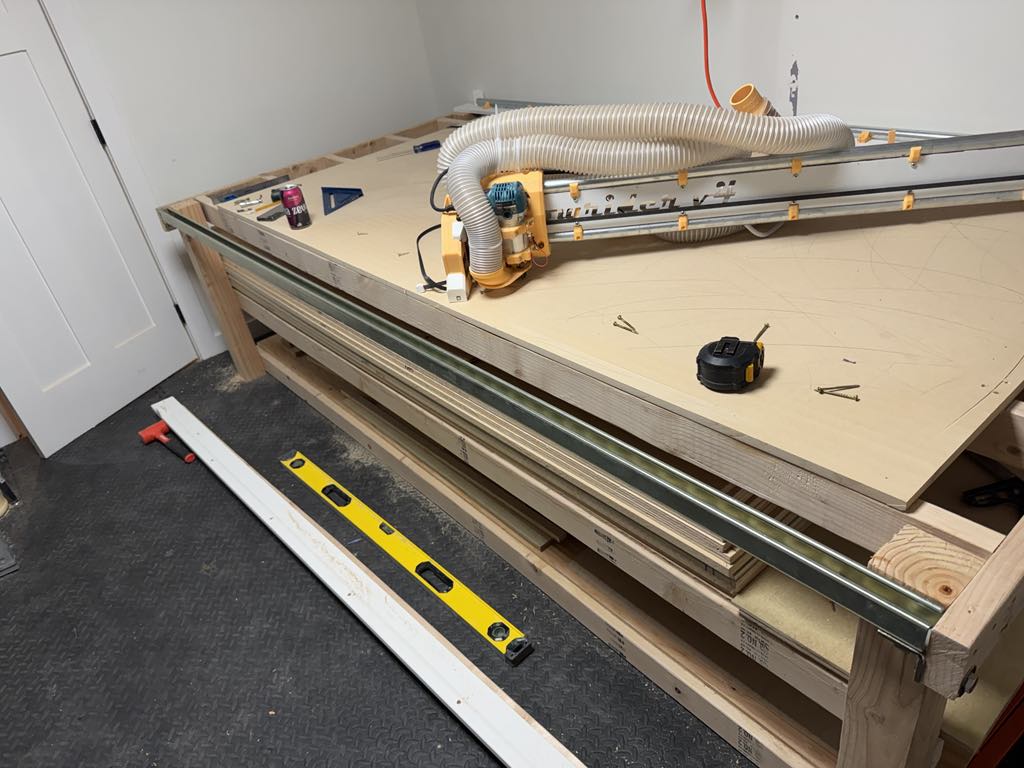
Then ran a couple of surfacing passes (mostly seemed like correcting the earlier bad surfacing done with the wonky rail) and the machine is ready to use.
7 Likes
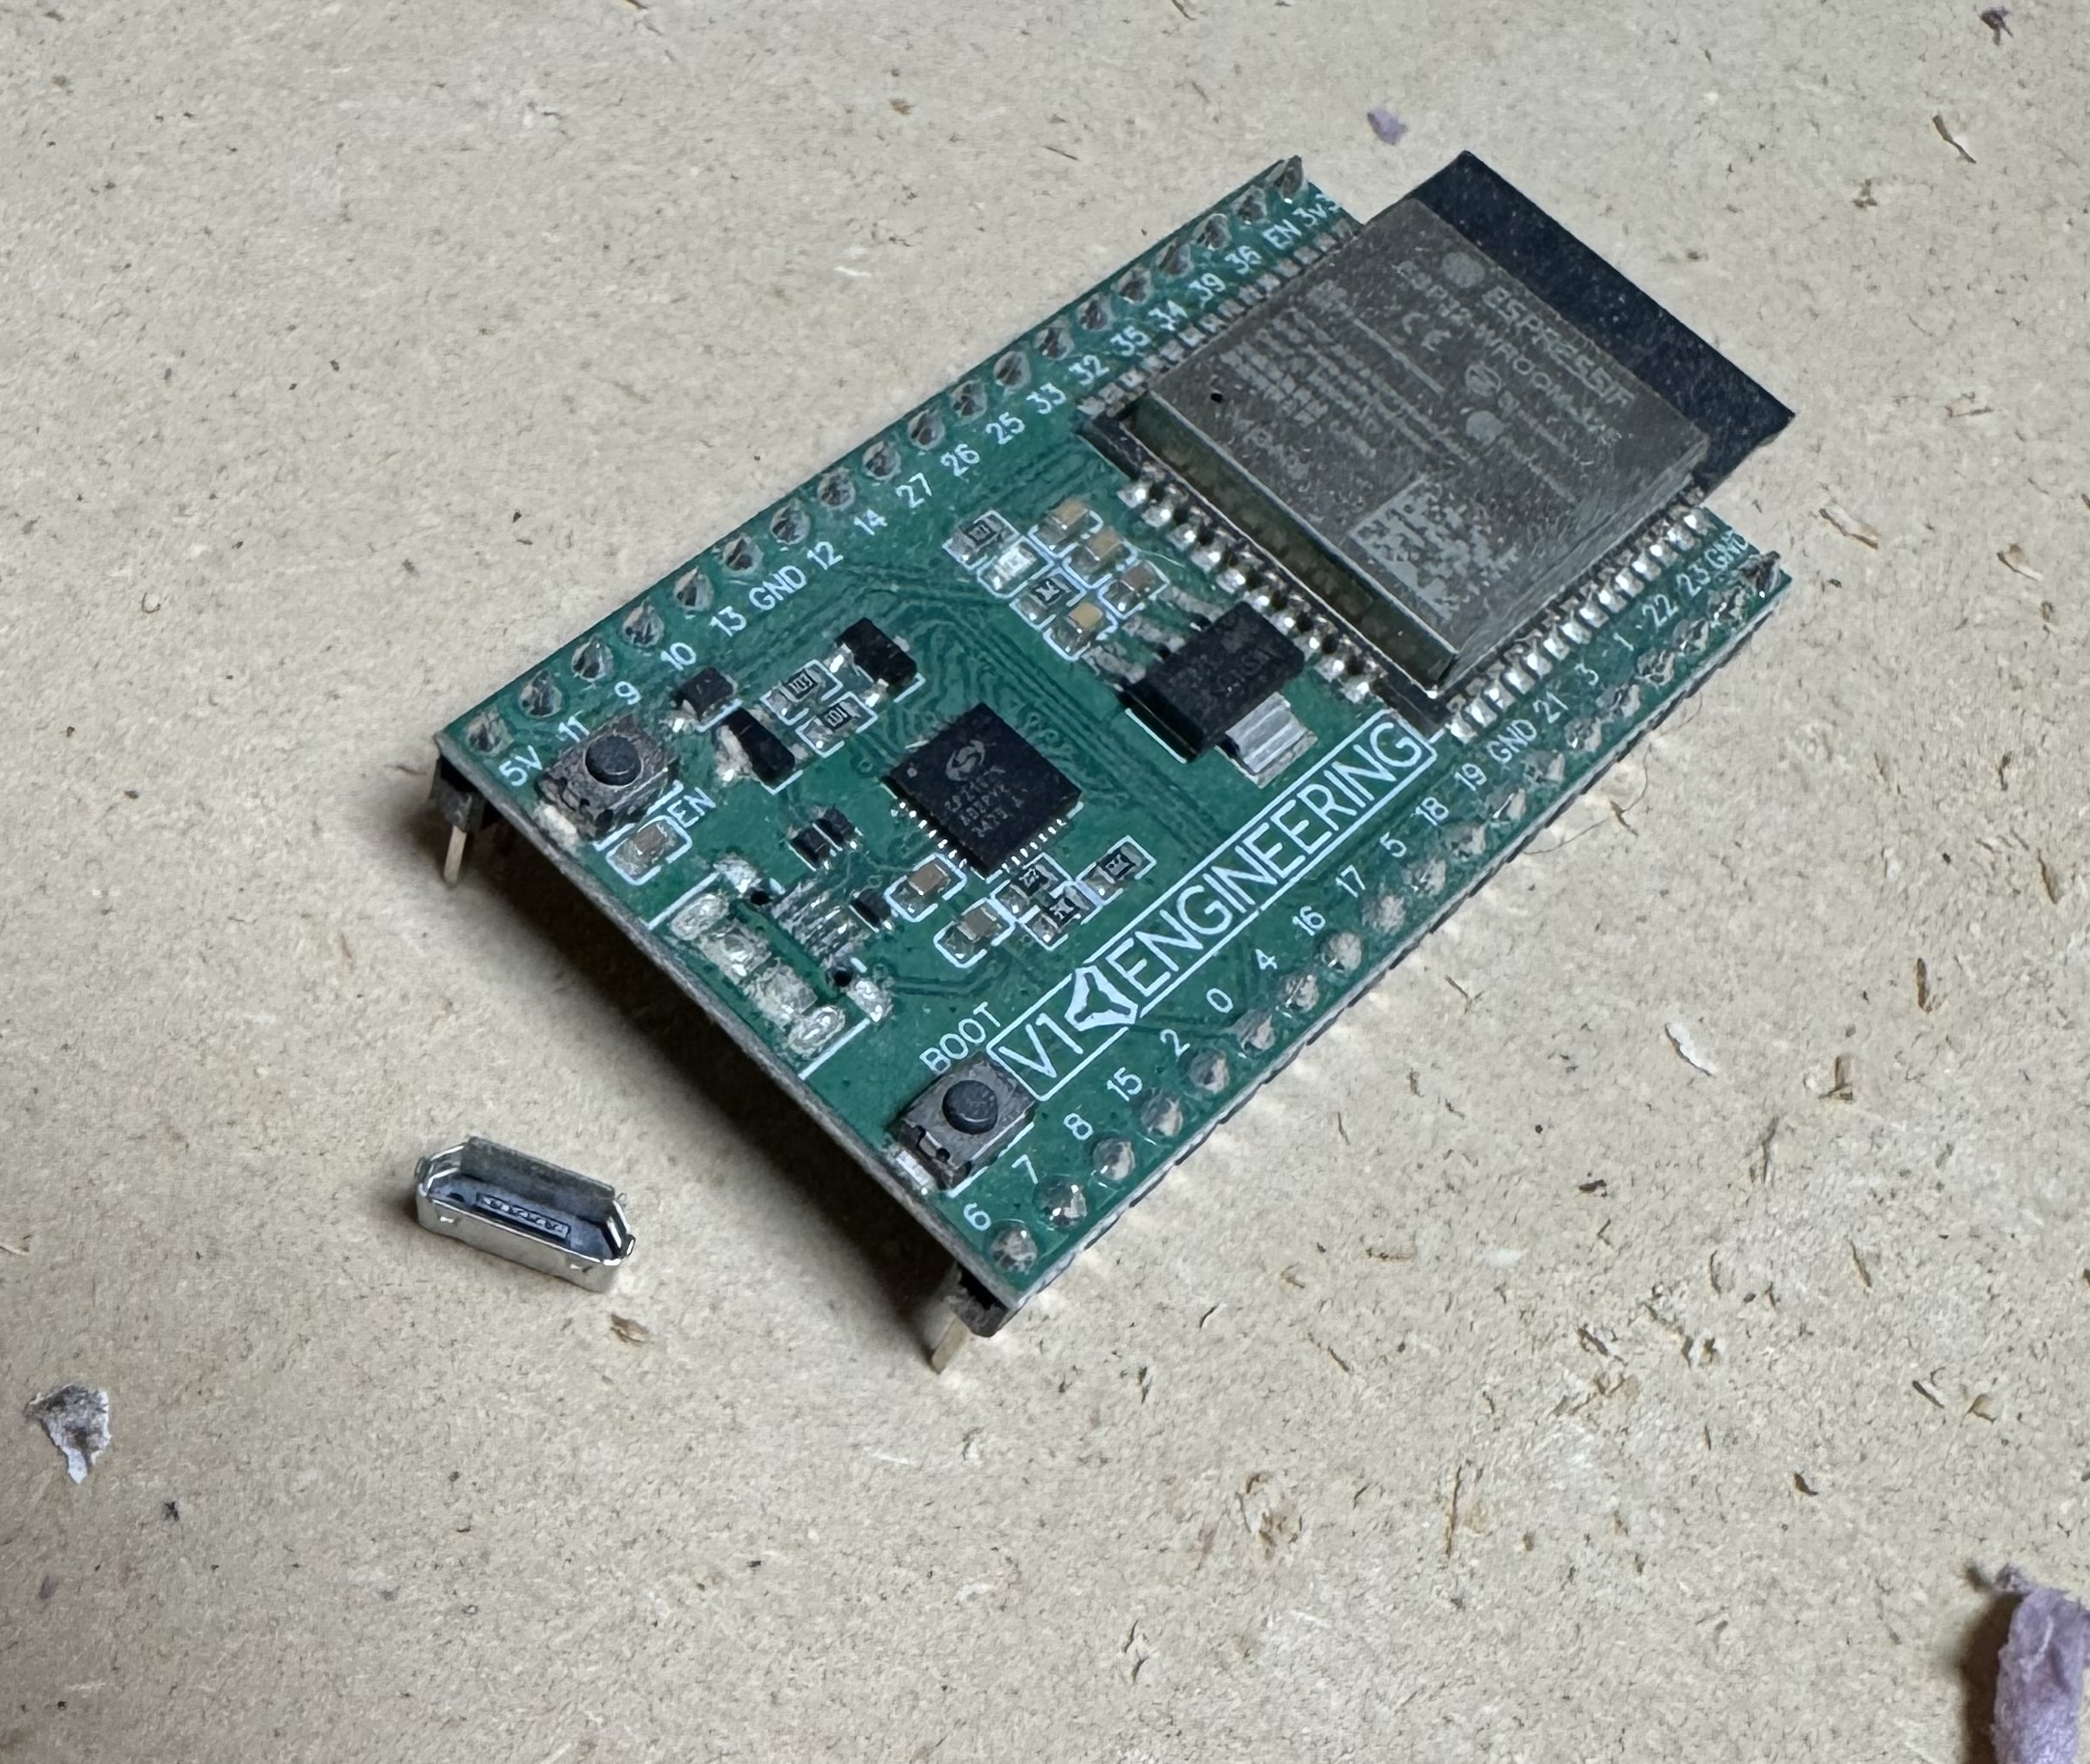
I’ve been having intermittent issues with my Jackpot. Trying to remediate them, I went ahead and tried to flash it with v3.9.1 of FluidNC.
Go to plug in my USB cable, and:
Awesome. After some looking around, I can see it’s possible to flash the firmware over the air. I try uploading the new .bin file, but it keeps dying in the middle!
Okay, maybe it’s an issue with STA mode. I flip the thing over to AP, and head to the upload screen. Wall of errors about JSON parsing! More searching, I see it’s a known issue with a fix! …in this new firmware. Great, a loop!
I’m having fun. I am doing this project for fun. If it feels like I’m not having fun, that’s wrong, this is fun. Fun fun fun.
It looks like the board is just sending me back garbage and the JS is my browser just can’t handle it. But it’s simple garbage, I can probably fix it by finding and replacing all the JSON.parse(e) with JSON.parse(e.replaceAll(/[^\x20-\x7F]/g/, “”)) in my browser console. Hm, this kind of feels like my day job. Ah, well, fun, I am doing this for fun!
Great! The new firmware uploads. My board boots again. Damn, that was much snappier in AP mode. Maybe I’ll have to keep it in AP. Too bad, I like browsing the internet while my things cut.
Get set up for a new test cut, aaaand boyfriend’s getting annoyed. I told him I’d be ready to go to the gym an hour ago and I’ve been locked in the basement since. Well, time to put this down and try again tomorrow.
1 Like
Bummer that you broke the connector off, but what an awesome recovery to OTA it.
Next ESP-32, if you’re going to do a lot of USB plug/unplug cycles, stake the USB connector.
You can use simple grey 2-part epoxy to do it.
This is at least the 5th time I’ve seen mention of this particular failure scenario. @vicious1
1 Like
fwiw, noticed slightly different mounting designs for micro USB connector on V1 Engineering’s ESP32…
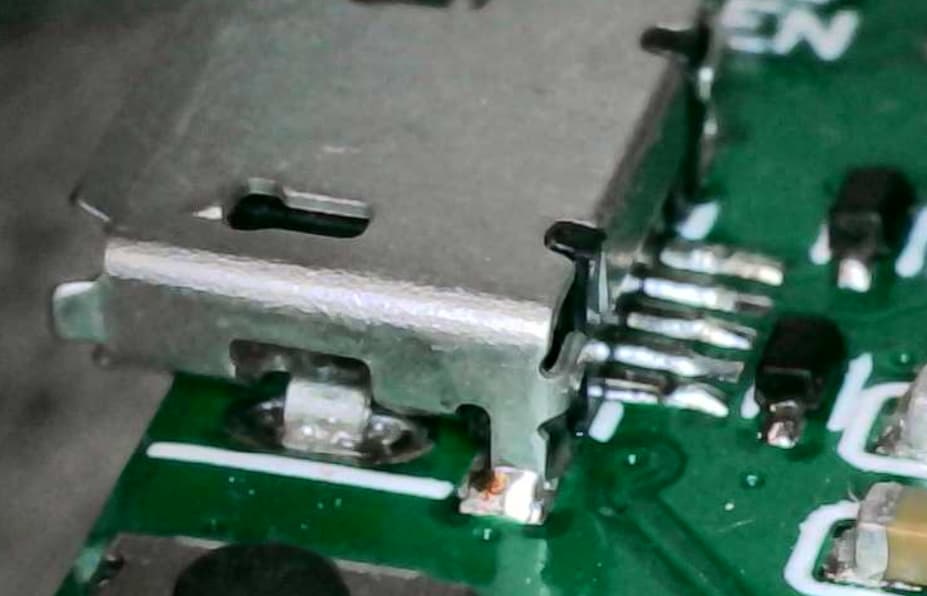
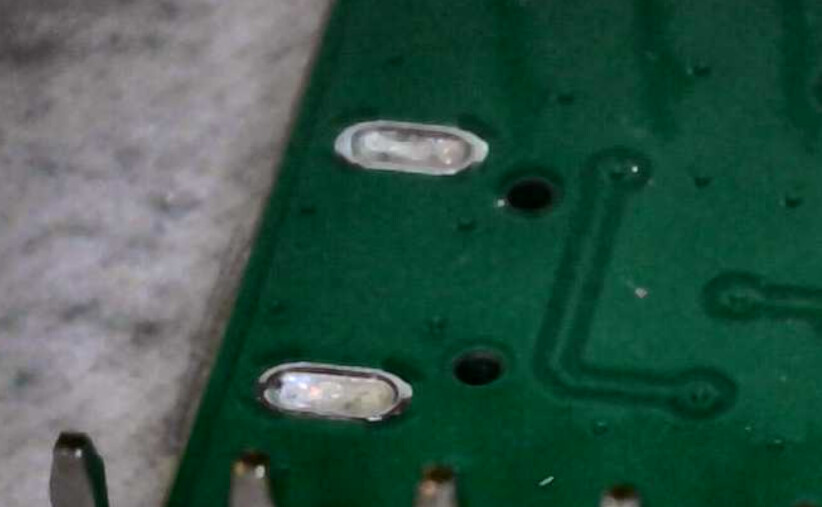
And mounts used on the official Espressif ESP32 boards I have…


Not sure if there’s much hold difference, or whether one approach is preferred over the other ![]() , or if there’s more preferred mount designs? Guess deeper wide spread through hole mounted connectors mechanically hold better.
, or if there’s more preferred mount designs? Guess deeper wide spread through hole mounted connectors mechanically hold better.
Yeah, I’ve got some from Amazon with USB-C that haven’t broken off despite dozens of plug/unplugs. This was the first time plugging this one in!
I should probably put up a PR for FluidNC to just have it always handle this bug a little more gracefully. The WebUI is easy to upgrade… OK. Fine!