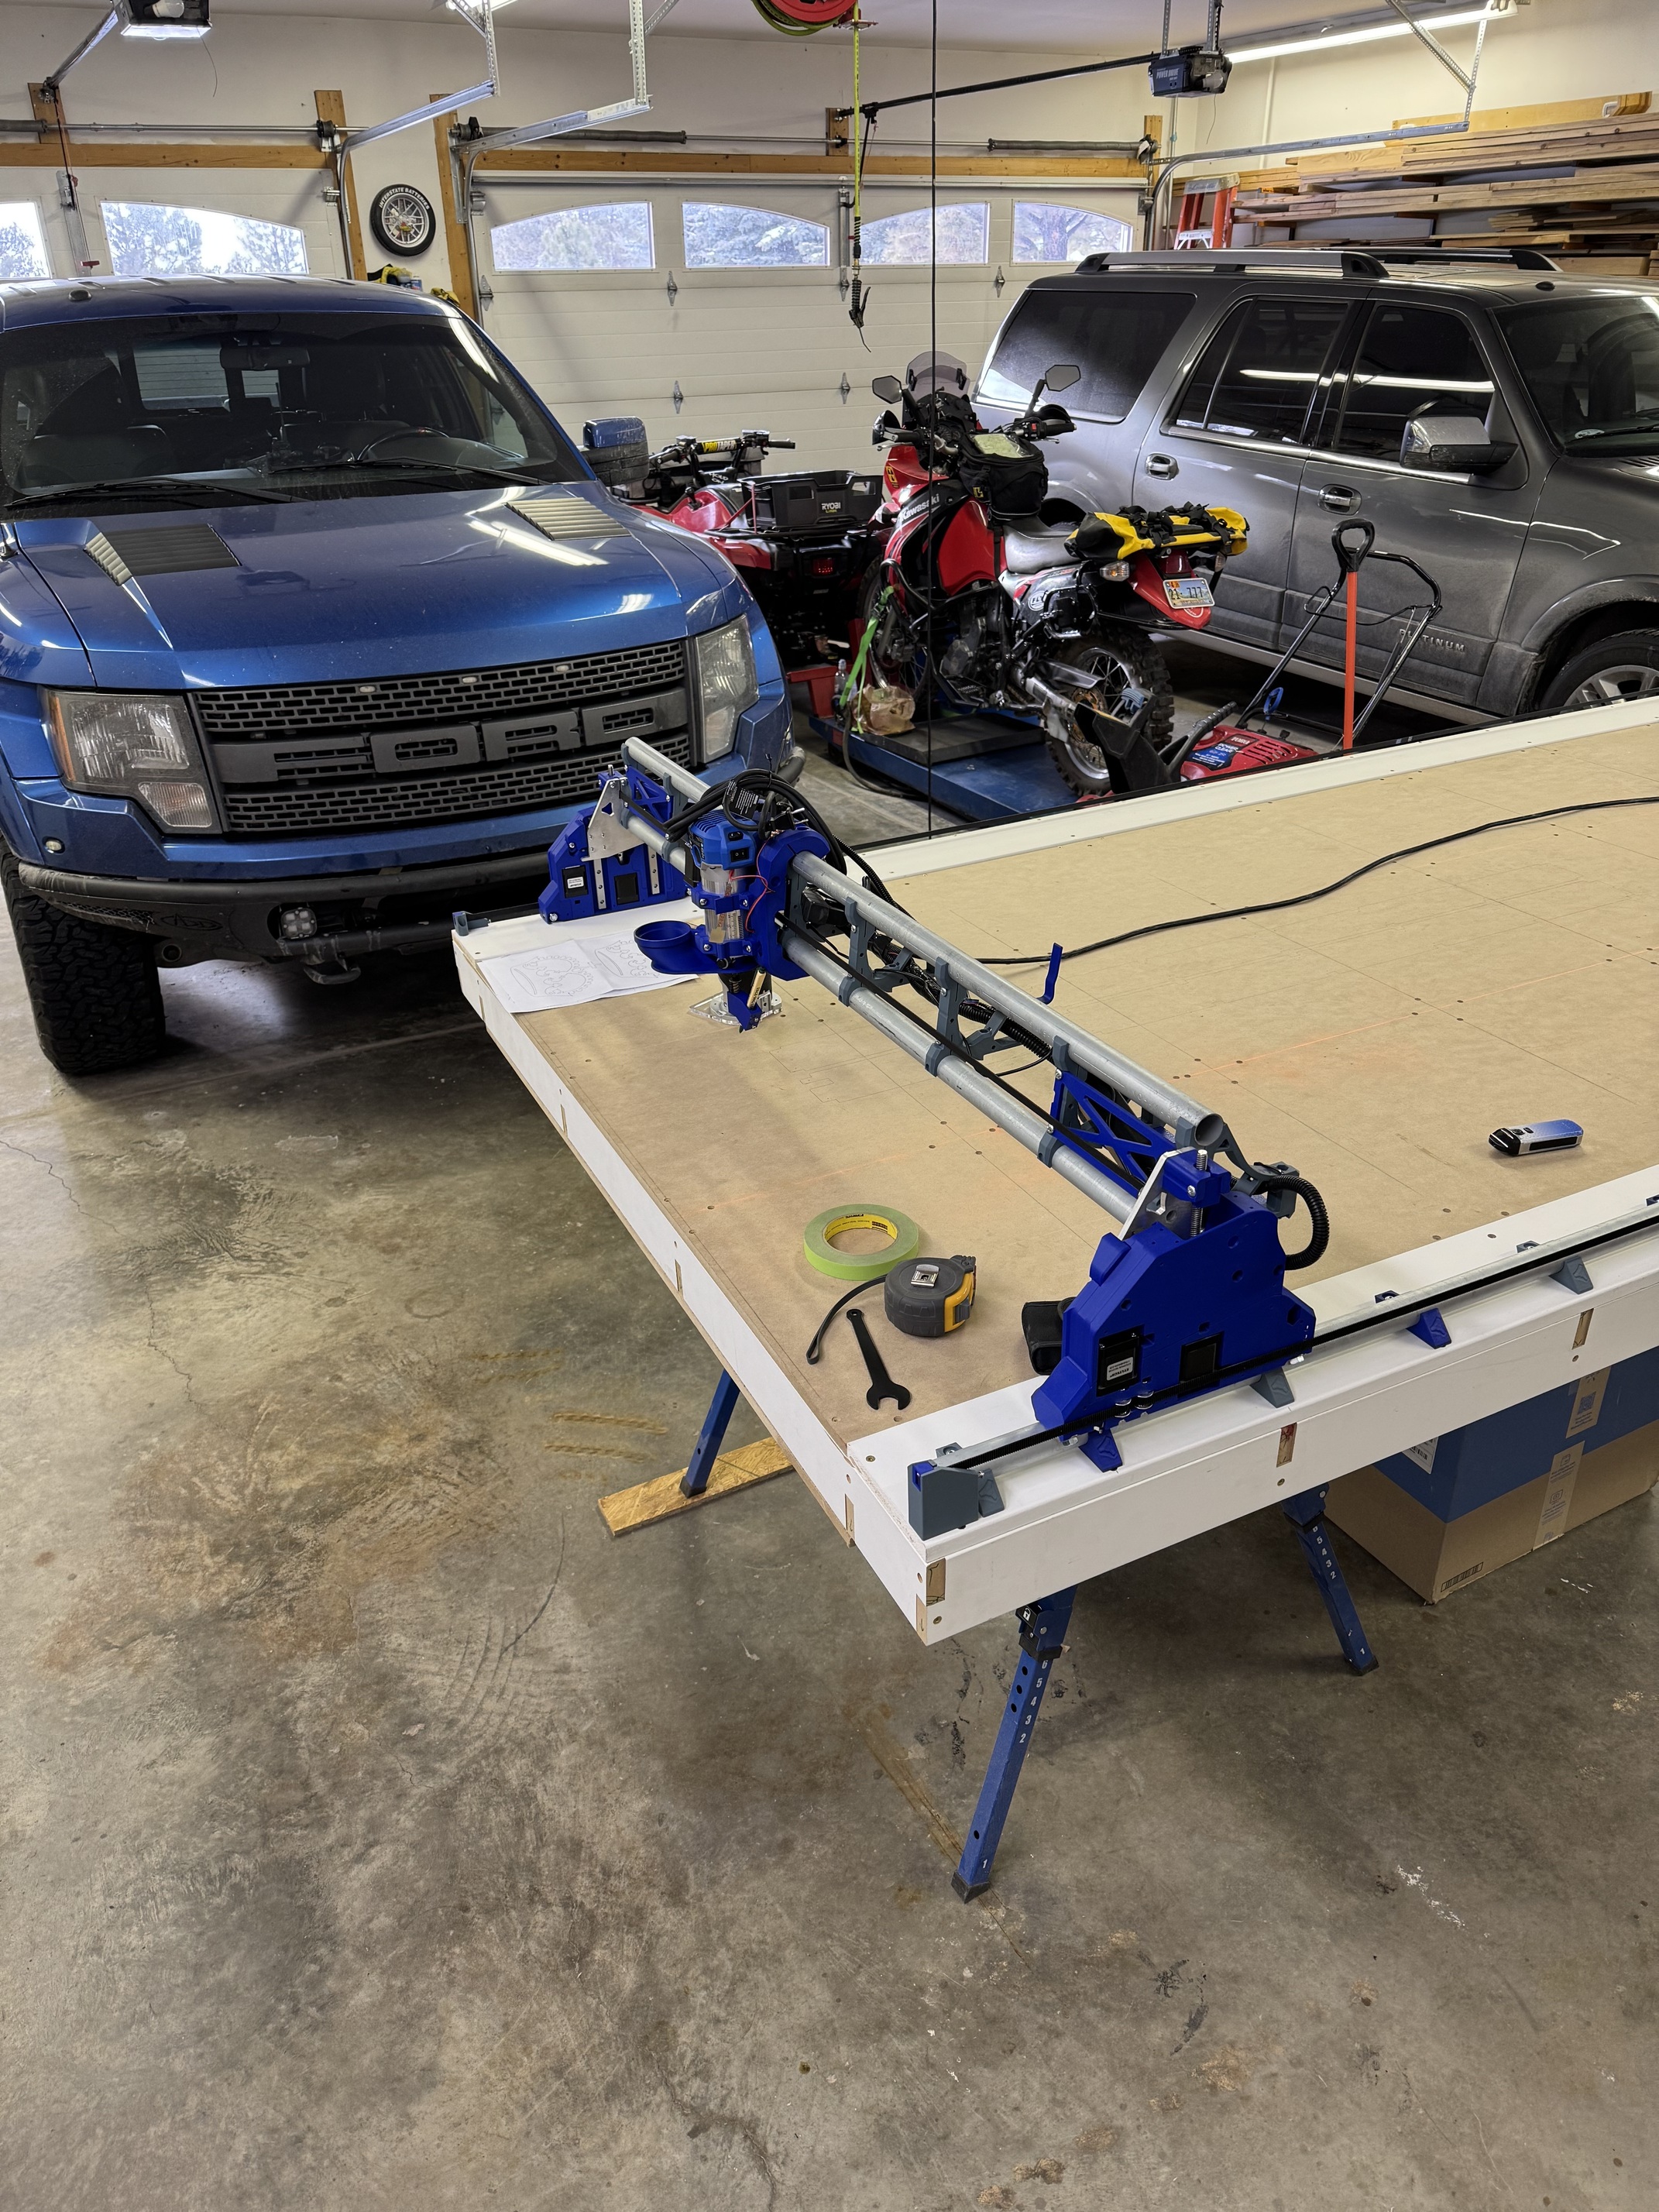
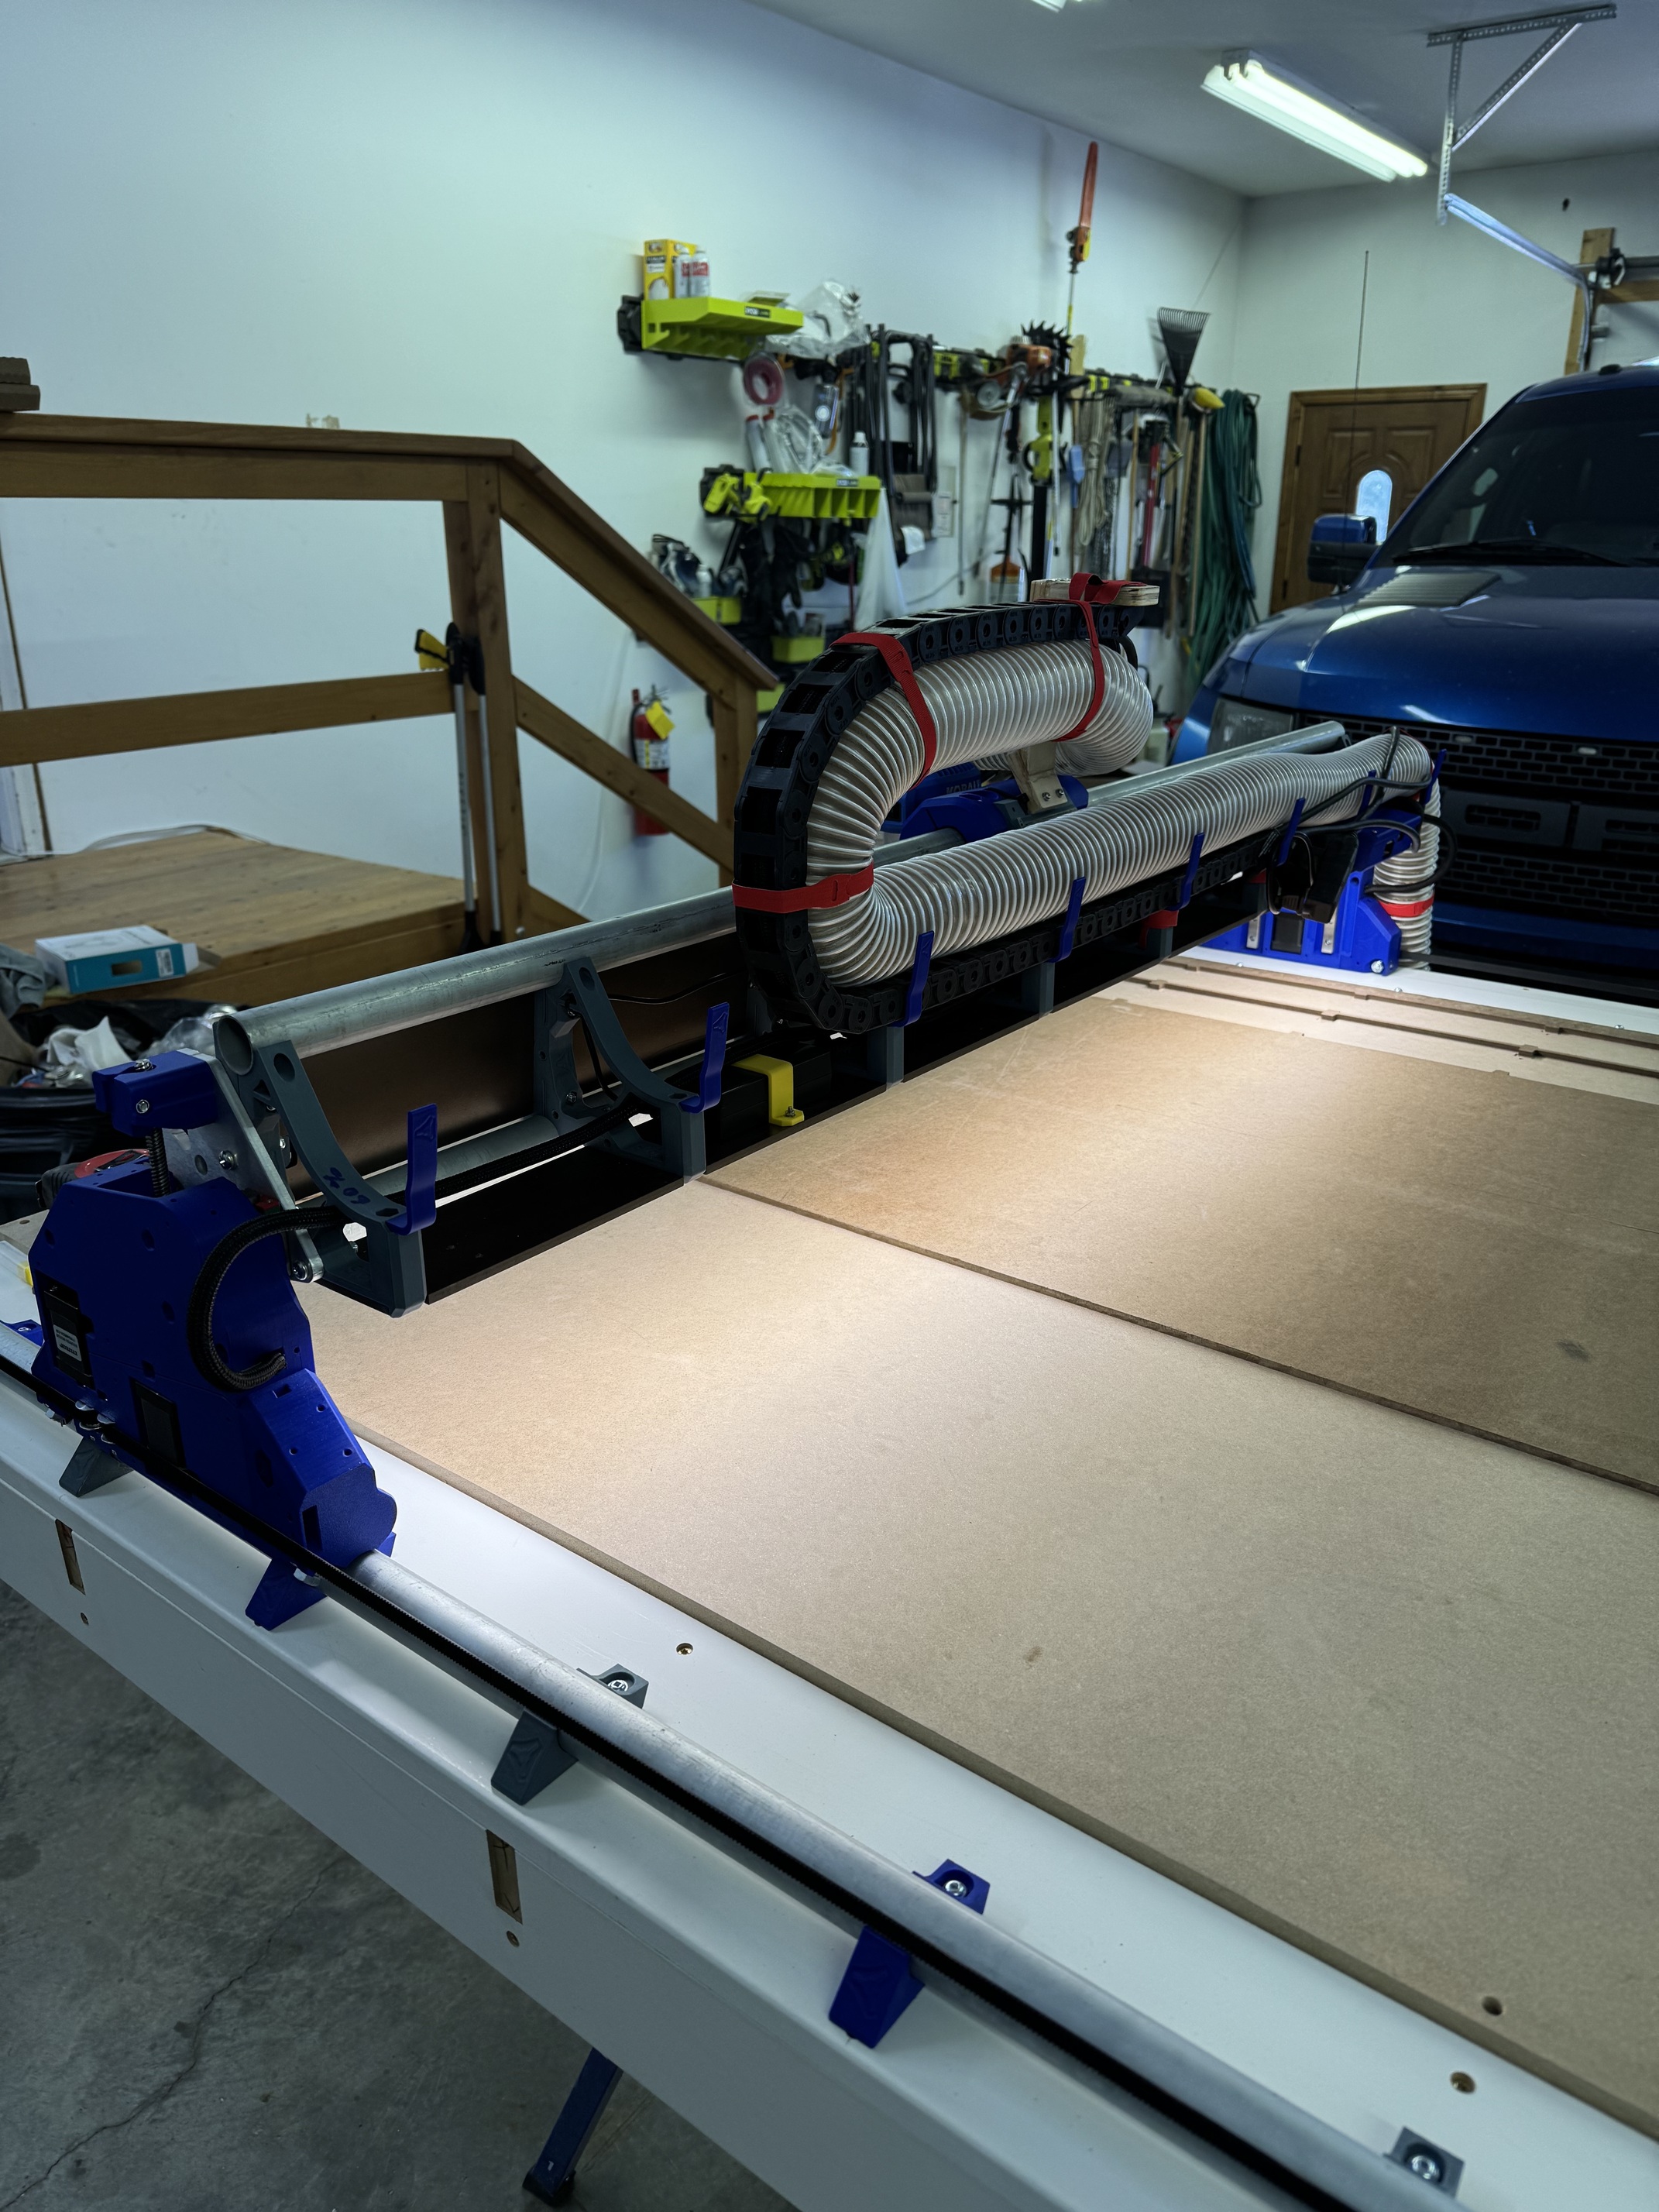
Wanted to chronicle my build for others however health issues didn’t allow the time. I did mange to make my first cuts today. The strut plates came out perfect! I’ve held out for years on 3D printing, CNC router, CNC plasma cutter mainly because software always has me scratching my head. I always knew it was something I could learn just never decided to put my time into it. Without the community here on the forum it would have been much harder and more costly to get to my first cut.
I still have to tidy up the wiring and dust hose and check the square and tram. I decide I would get the machine true after I installed the strut plates.
Definitely want to thank Ryan, beta testers and community members for a great machine!


15 Likes
Congrats! So nice! Thanks for the update.
I hope you’re doing well now.
Welcome to the community! We’ll help you as best we can all along the way.
Your machine looks great.
You’re probably too far away from those of us in NE Colorado to help in person, but as a community we always strive first and foremost to solve issues for our fellow builders.
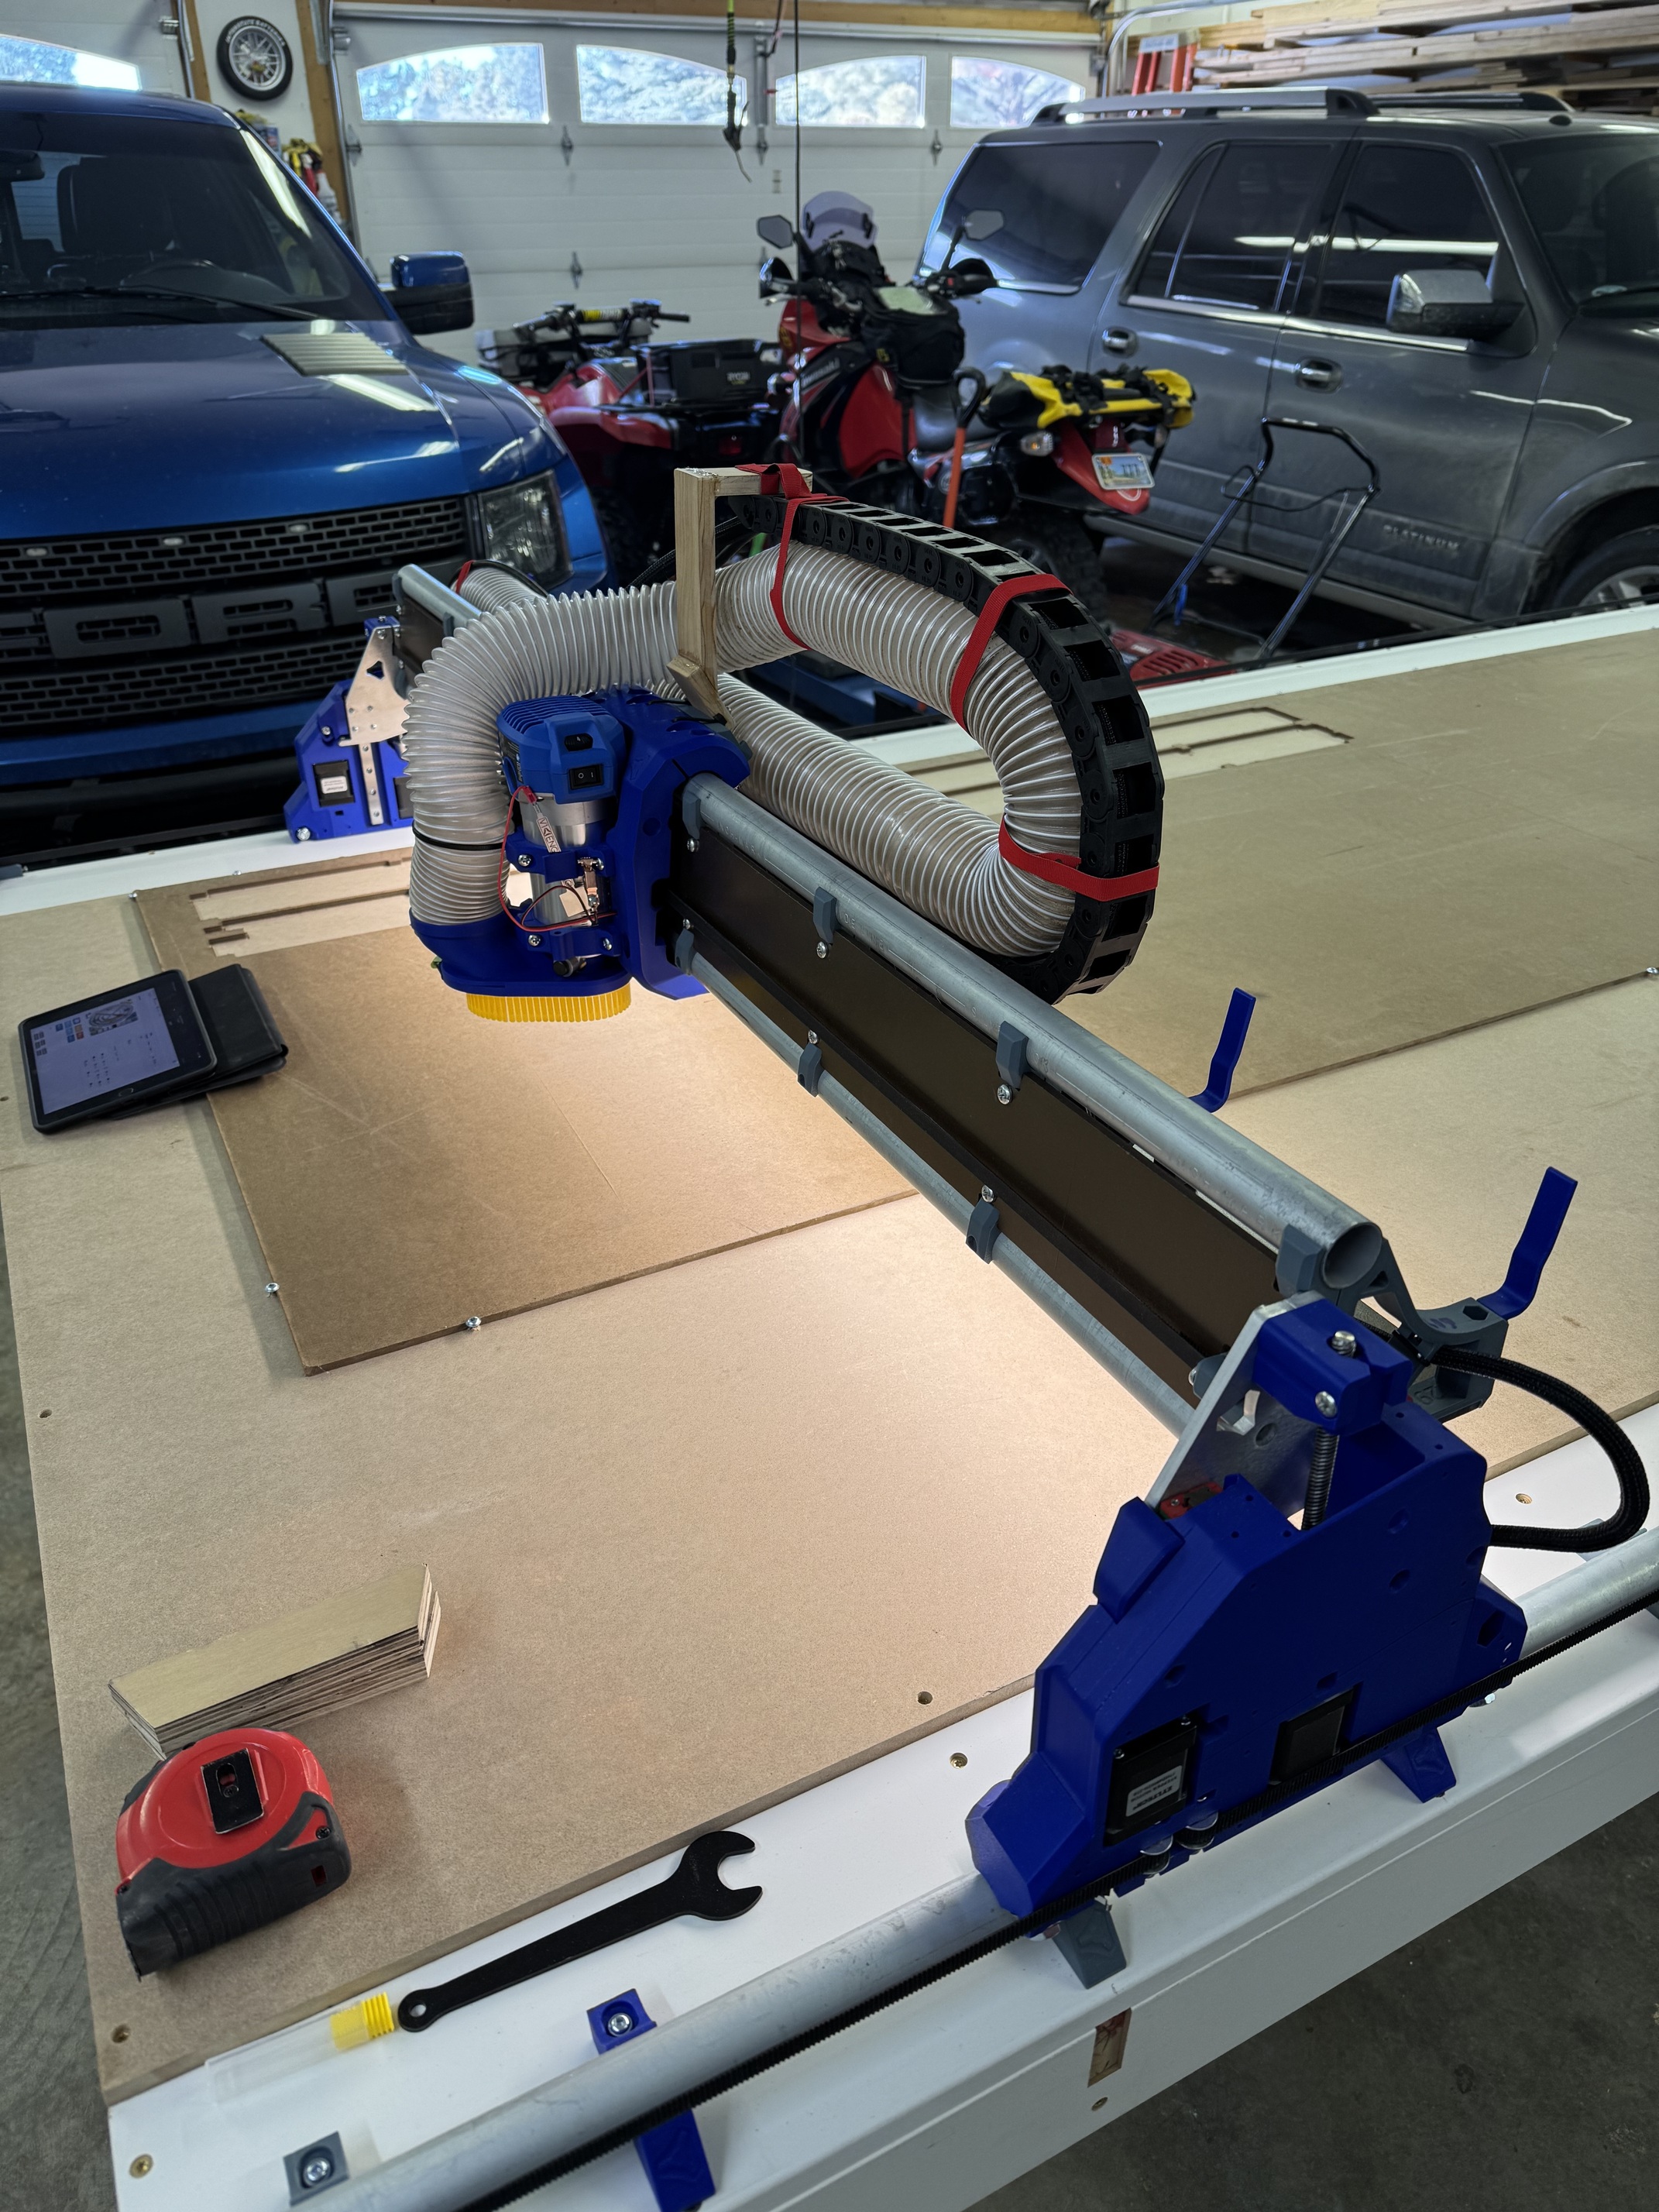
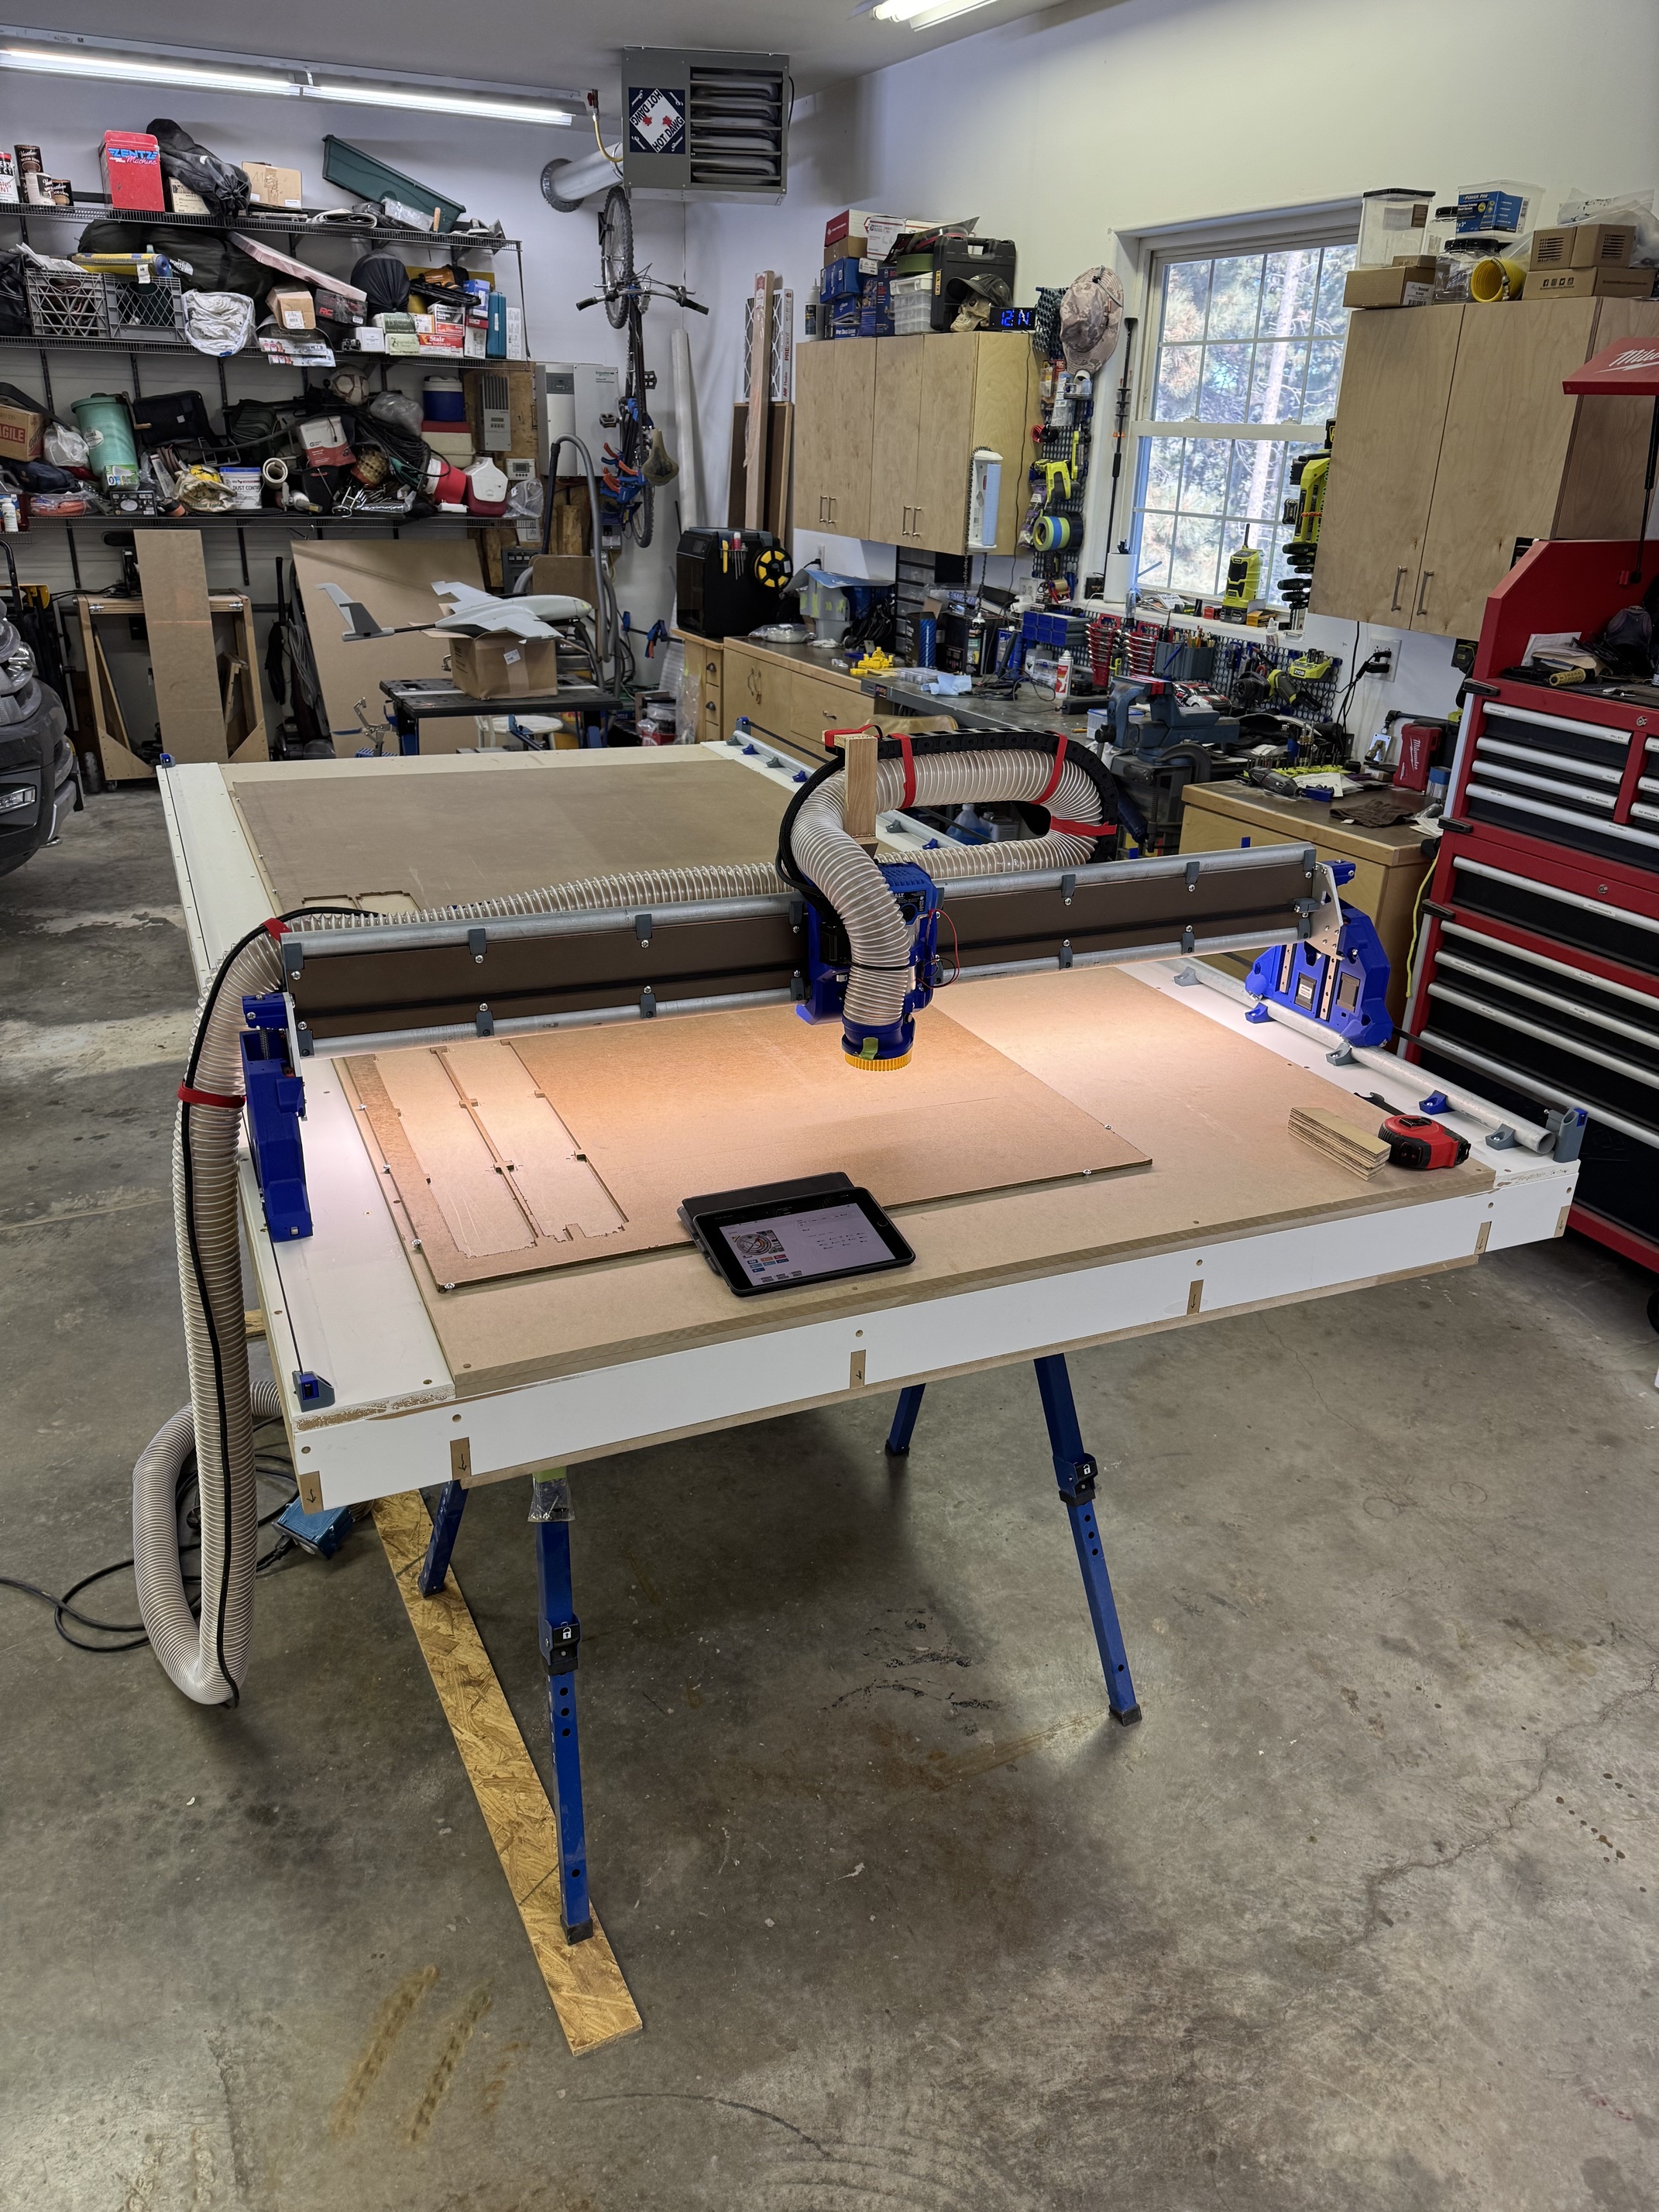
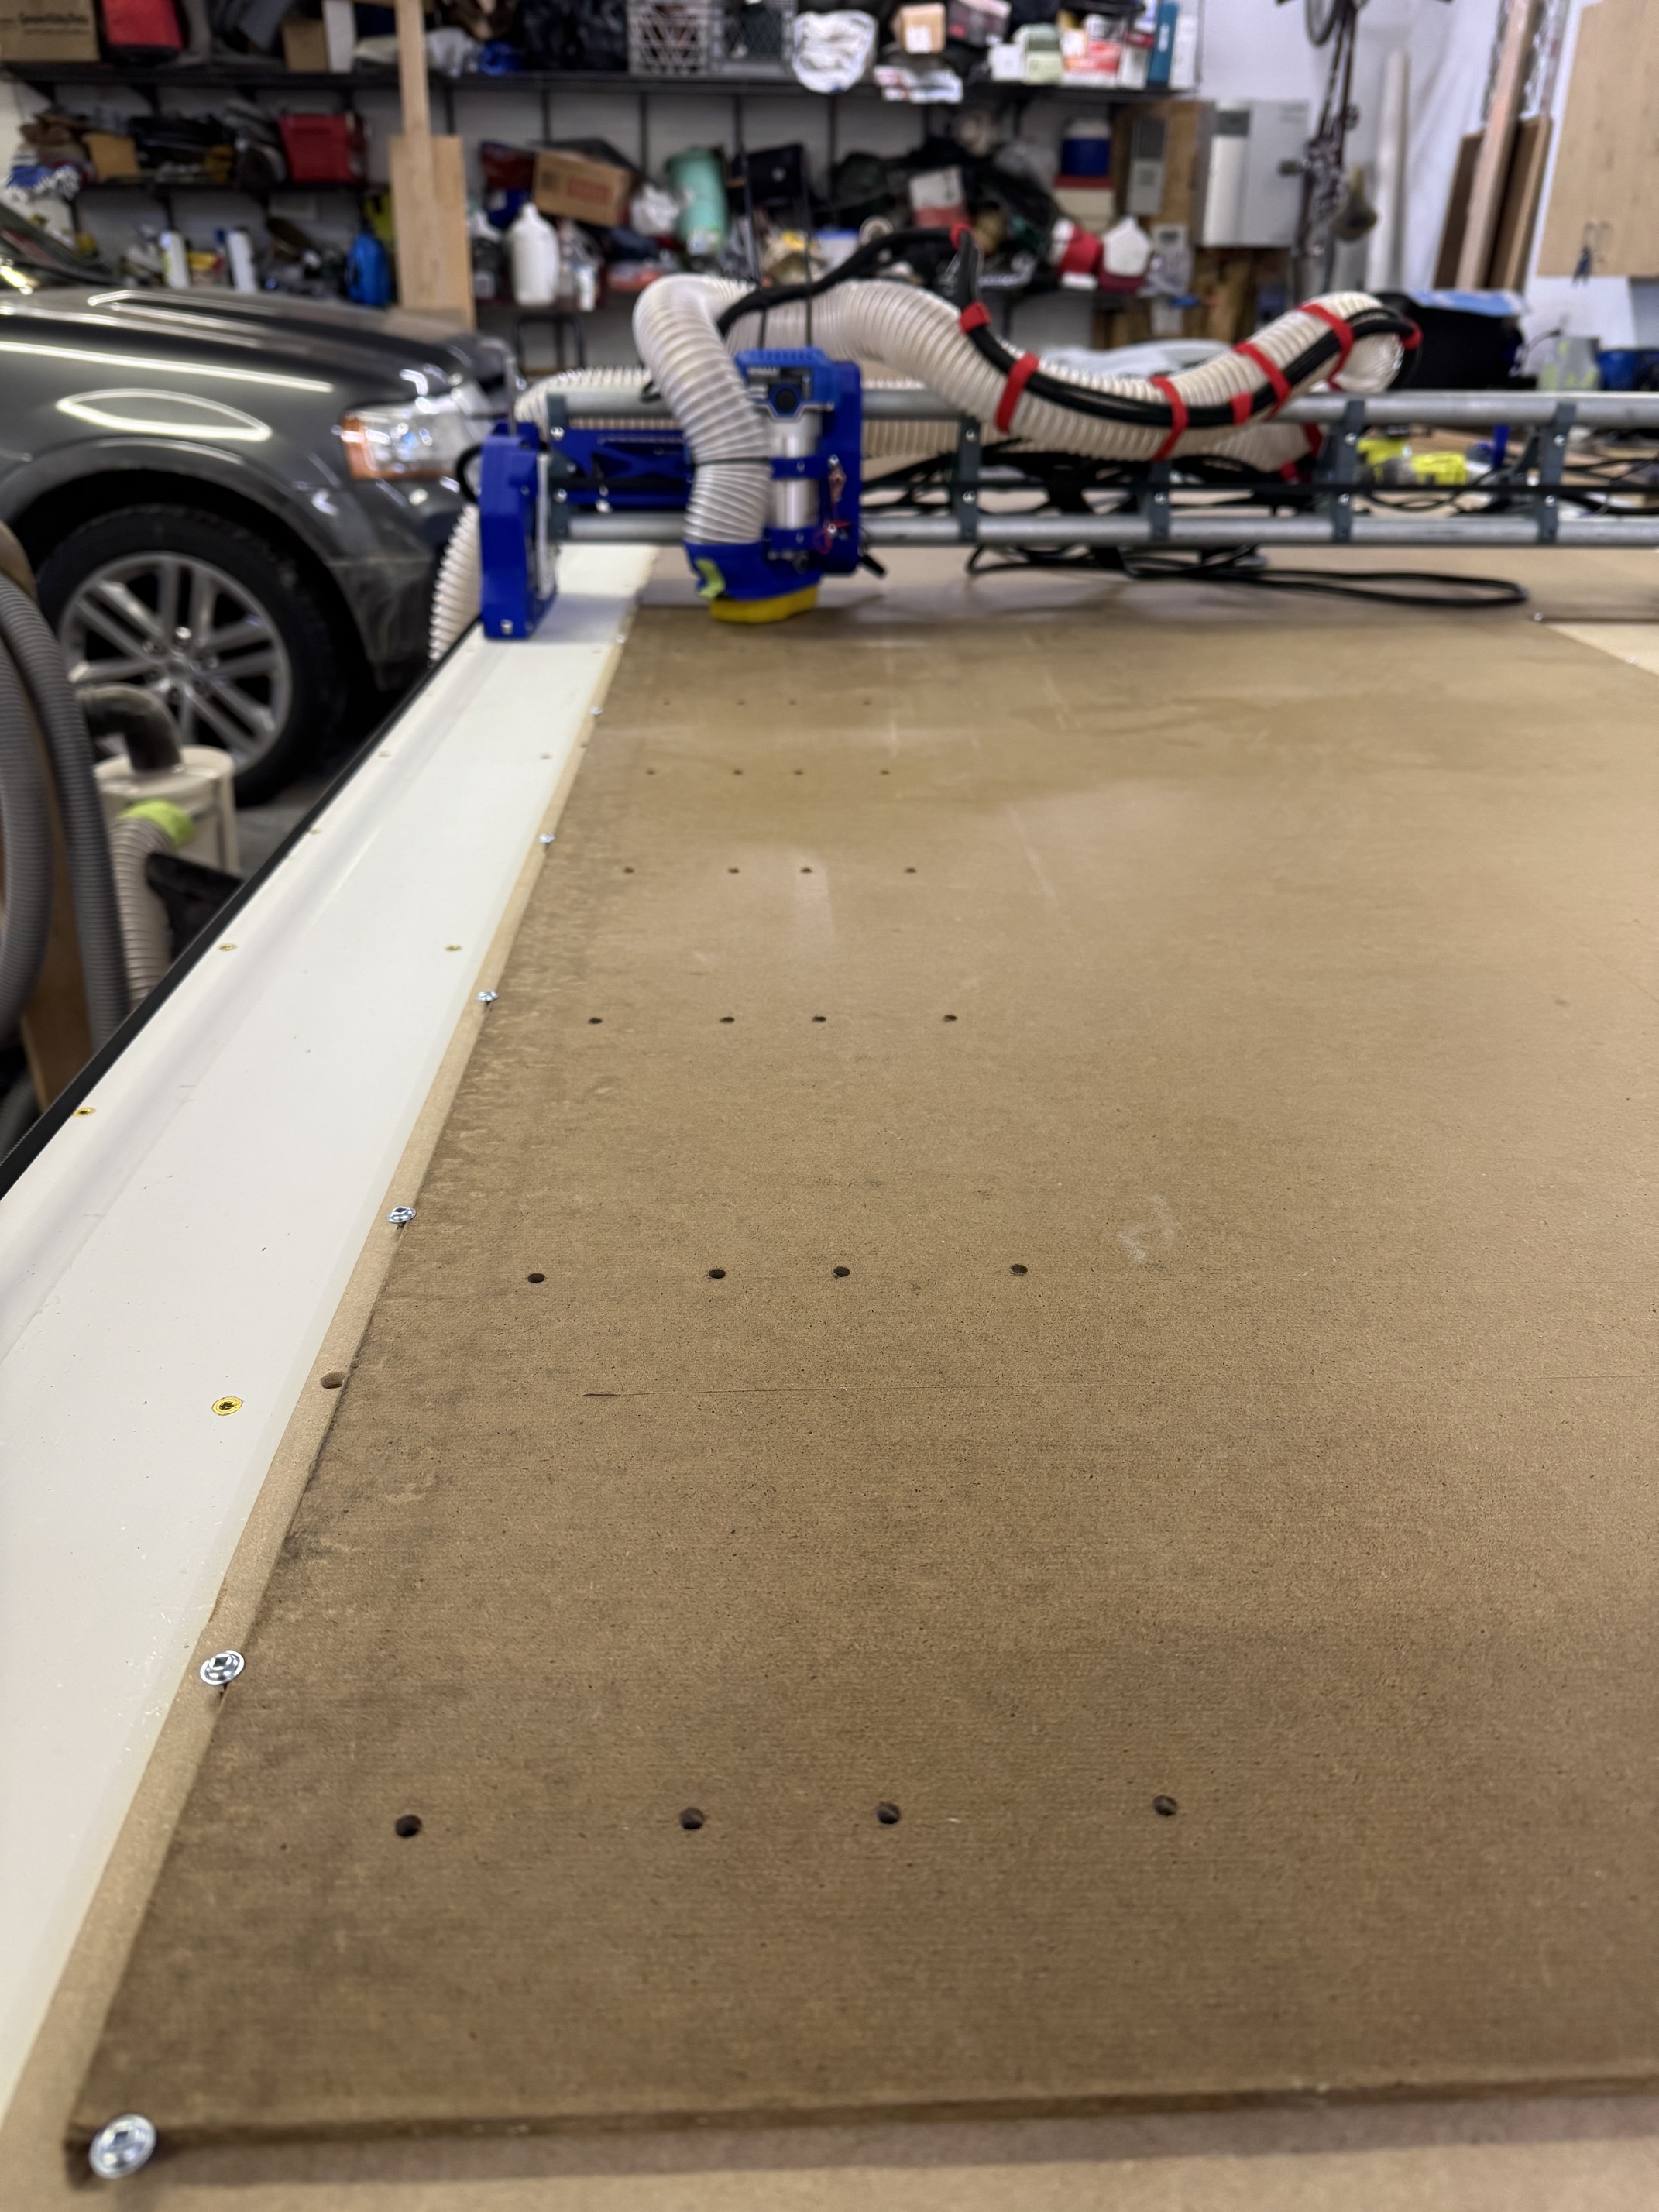
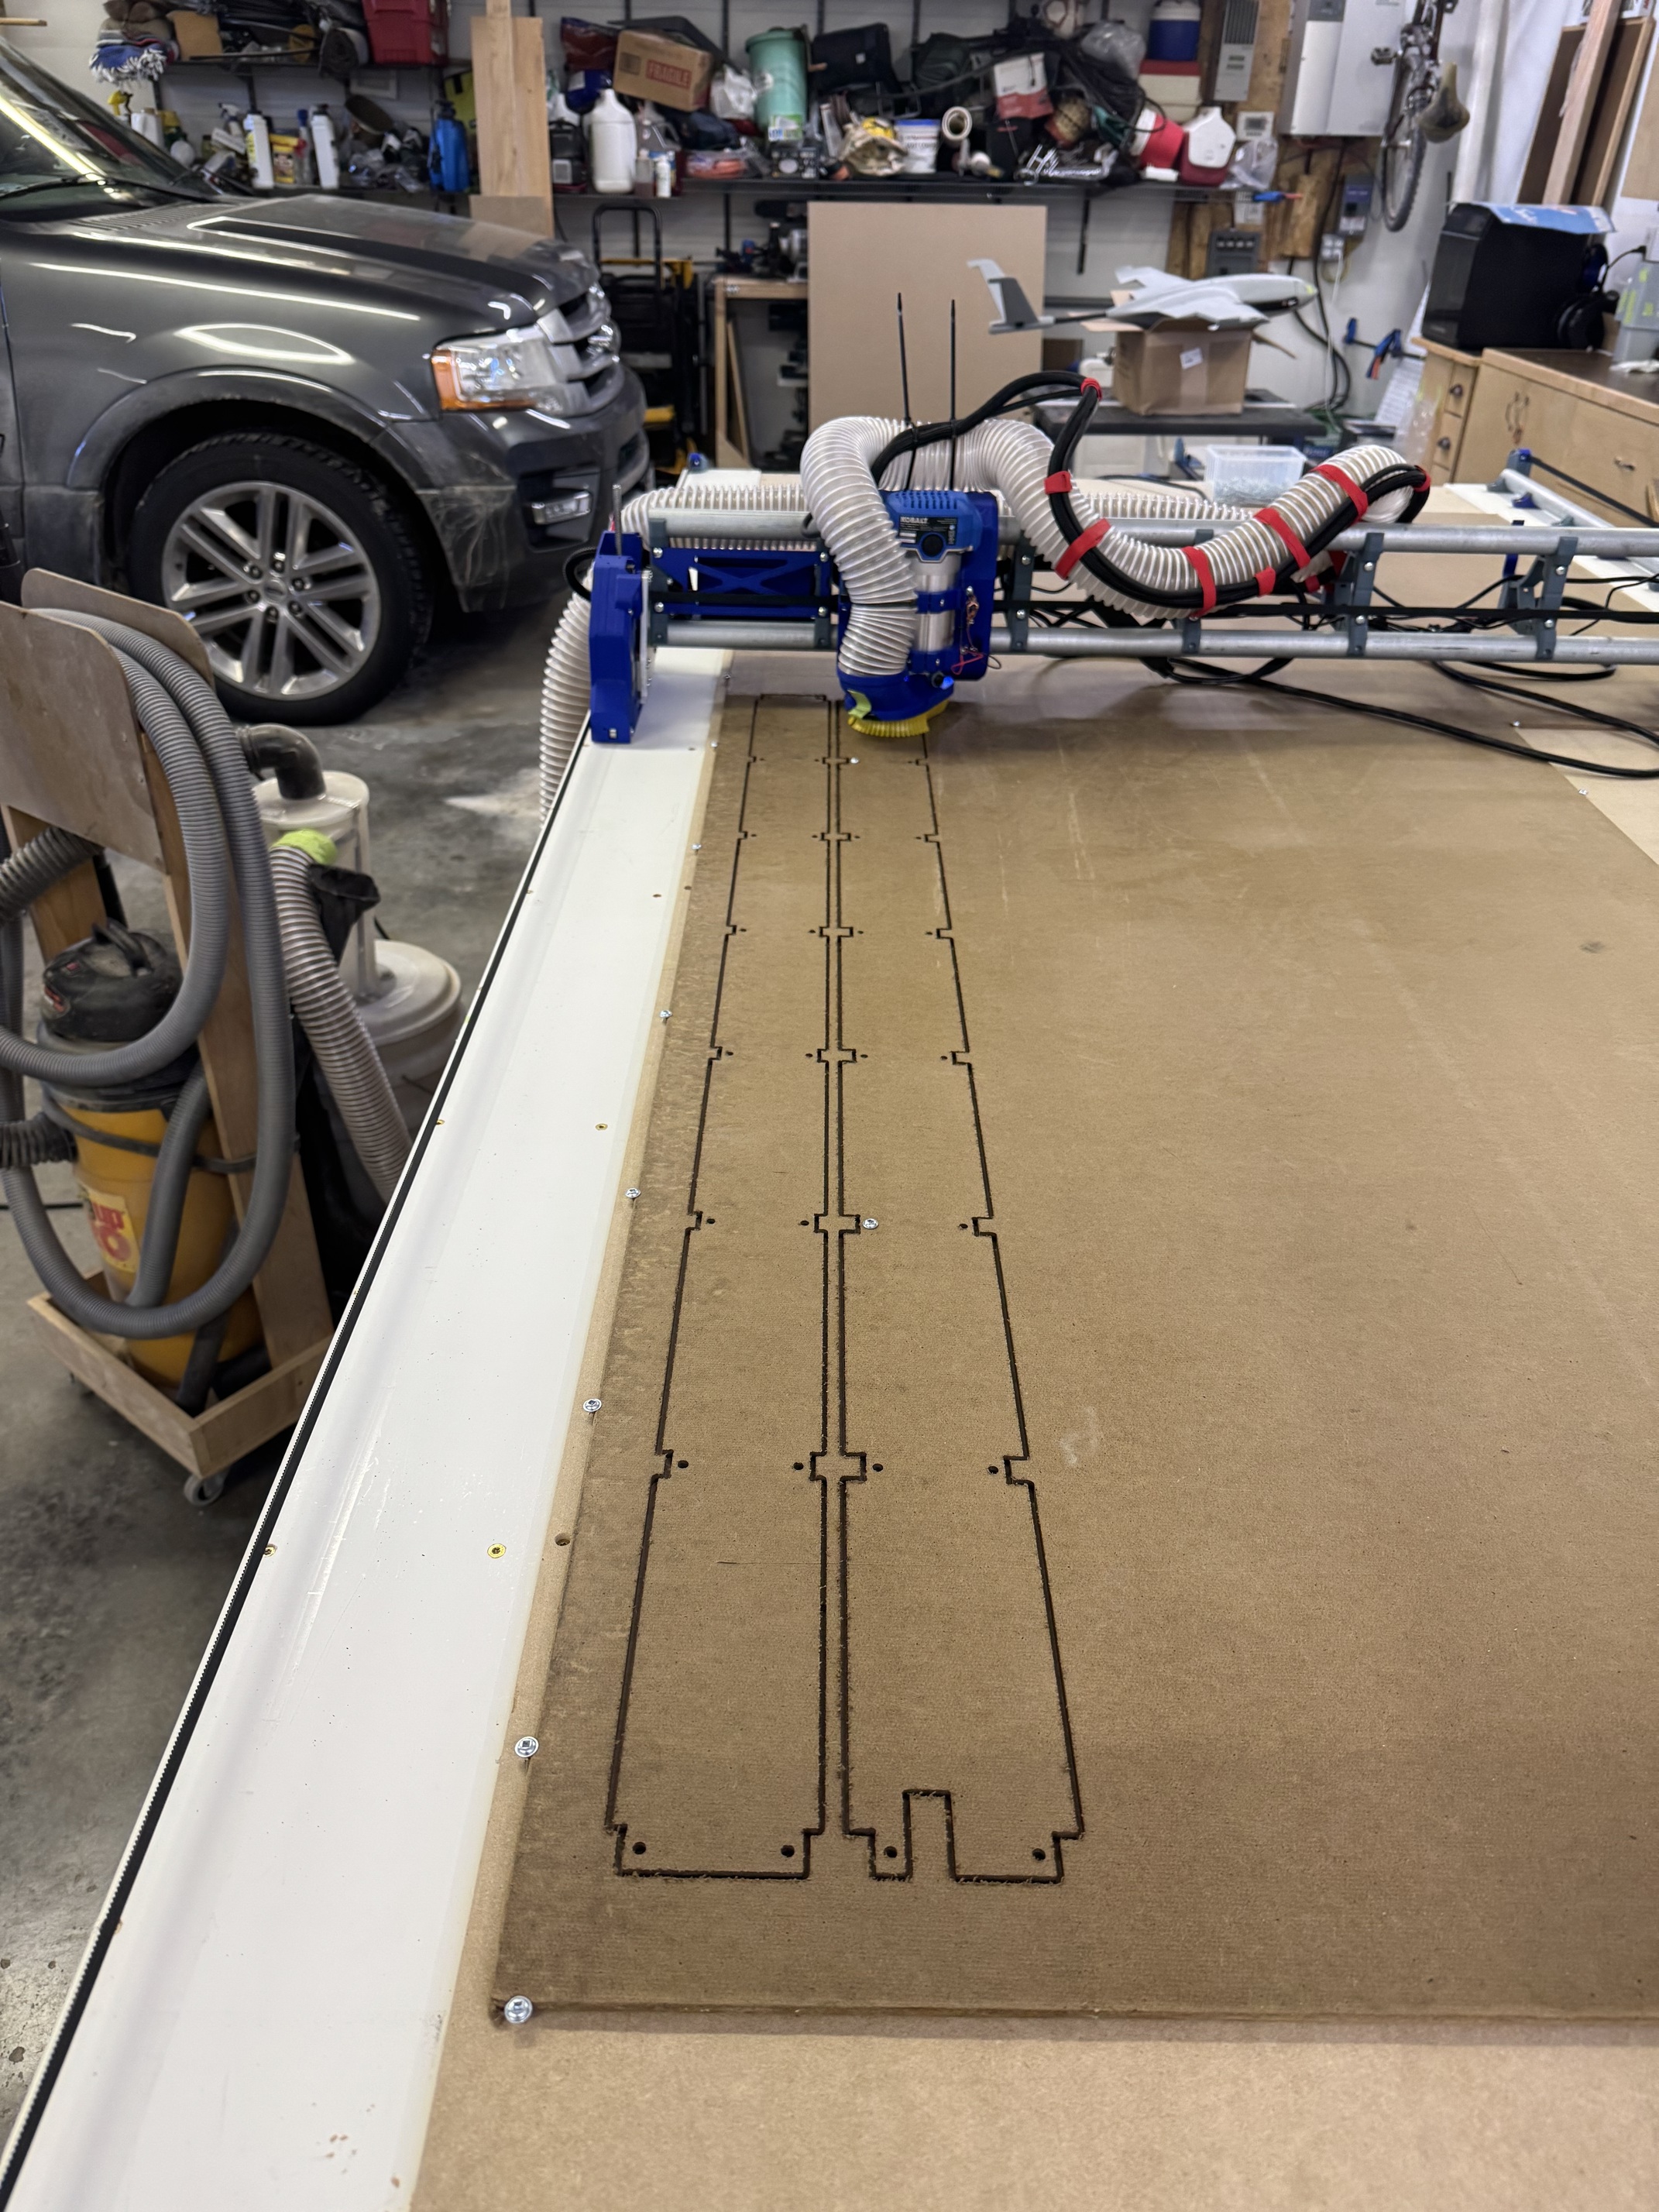
Well I have my LR4 complete. I made a redneck prototype drag chain mount to test and it seems to work well. Now I’ll check square and tram and we should be ready to make some cuts.
8 Likes
Looking good!
Congratulations, great looking build!
Can’t wait to see your first projects with your new machine.
Looks like my build came out square. I checked it today and measuring diagonals X=1200 & Y=2550 it was only 1MM difference!
Now I need to build some CAD skills. I seem to struggle on the software stuff. Used to hands on physical labor I guess.
1 Like


Success! Well I was finally able to get my Fluid dial pendant up and working. Man I struggle with software. Using VScode and all that was difficult for me to figure out. I was able to fumble through however I couldn’t tell someone how to do it. Thanx again to all the great people on this forum.
4 Likes
Nice work! I hope share projects and updates as you get going with your build.
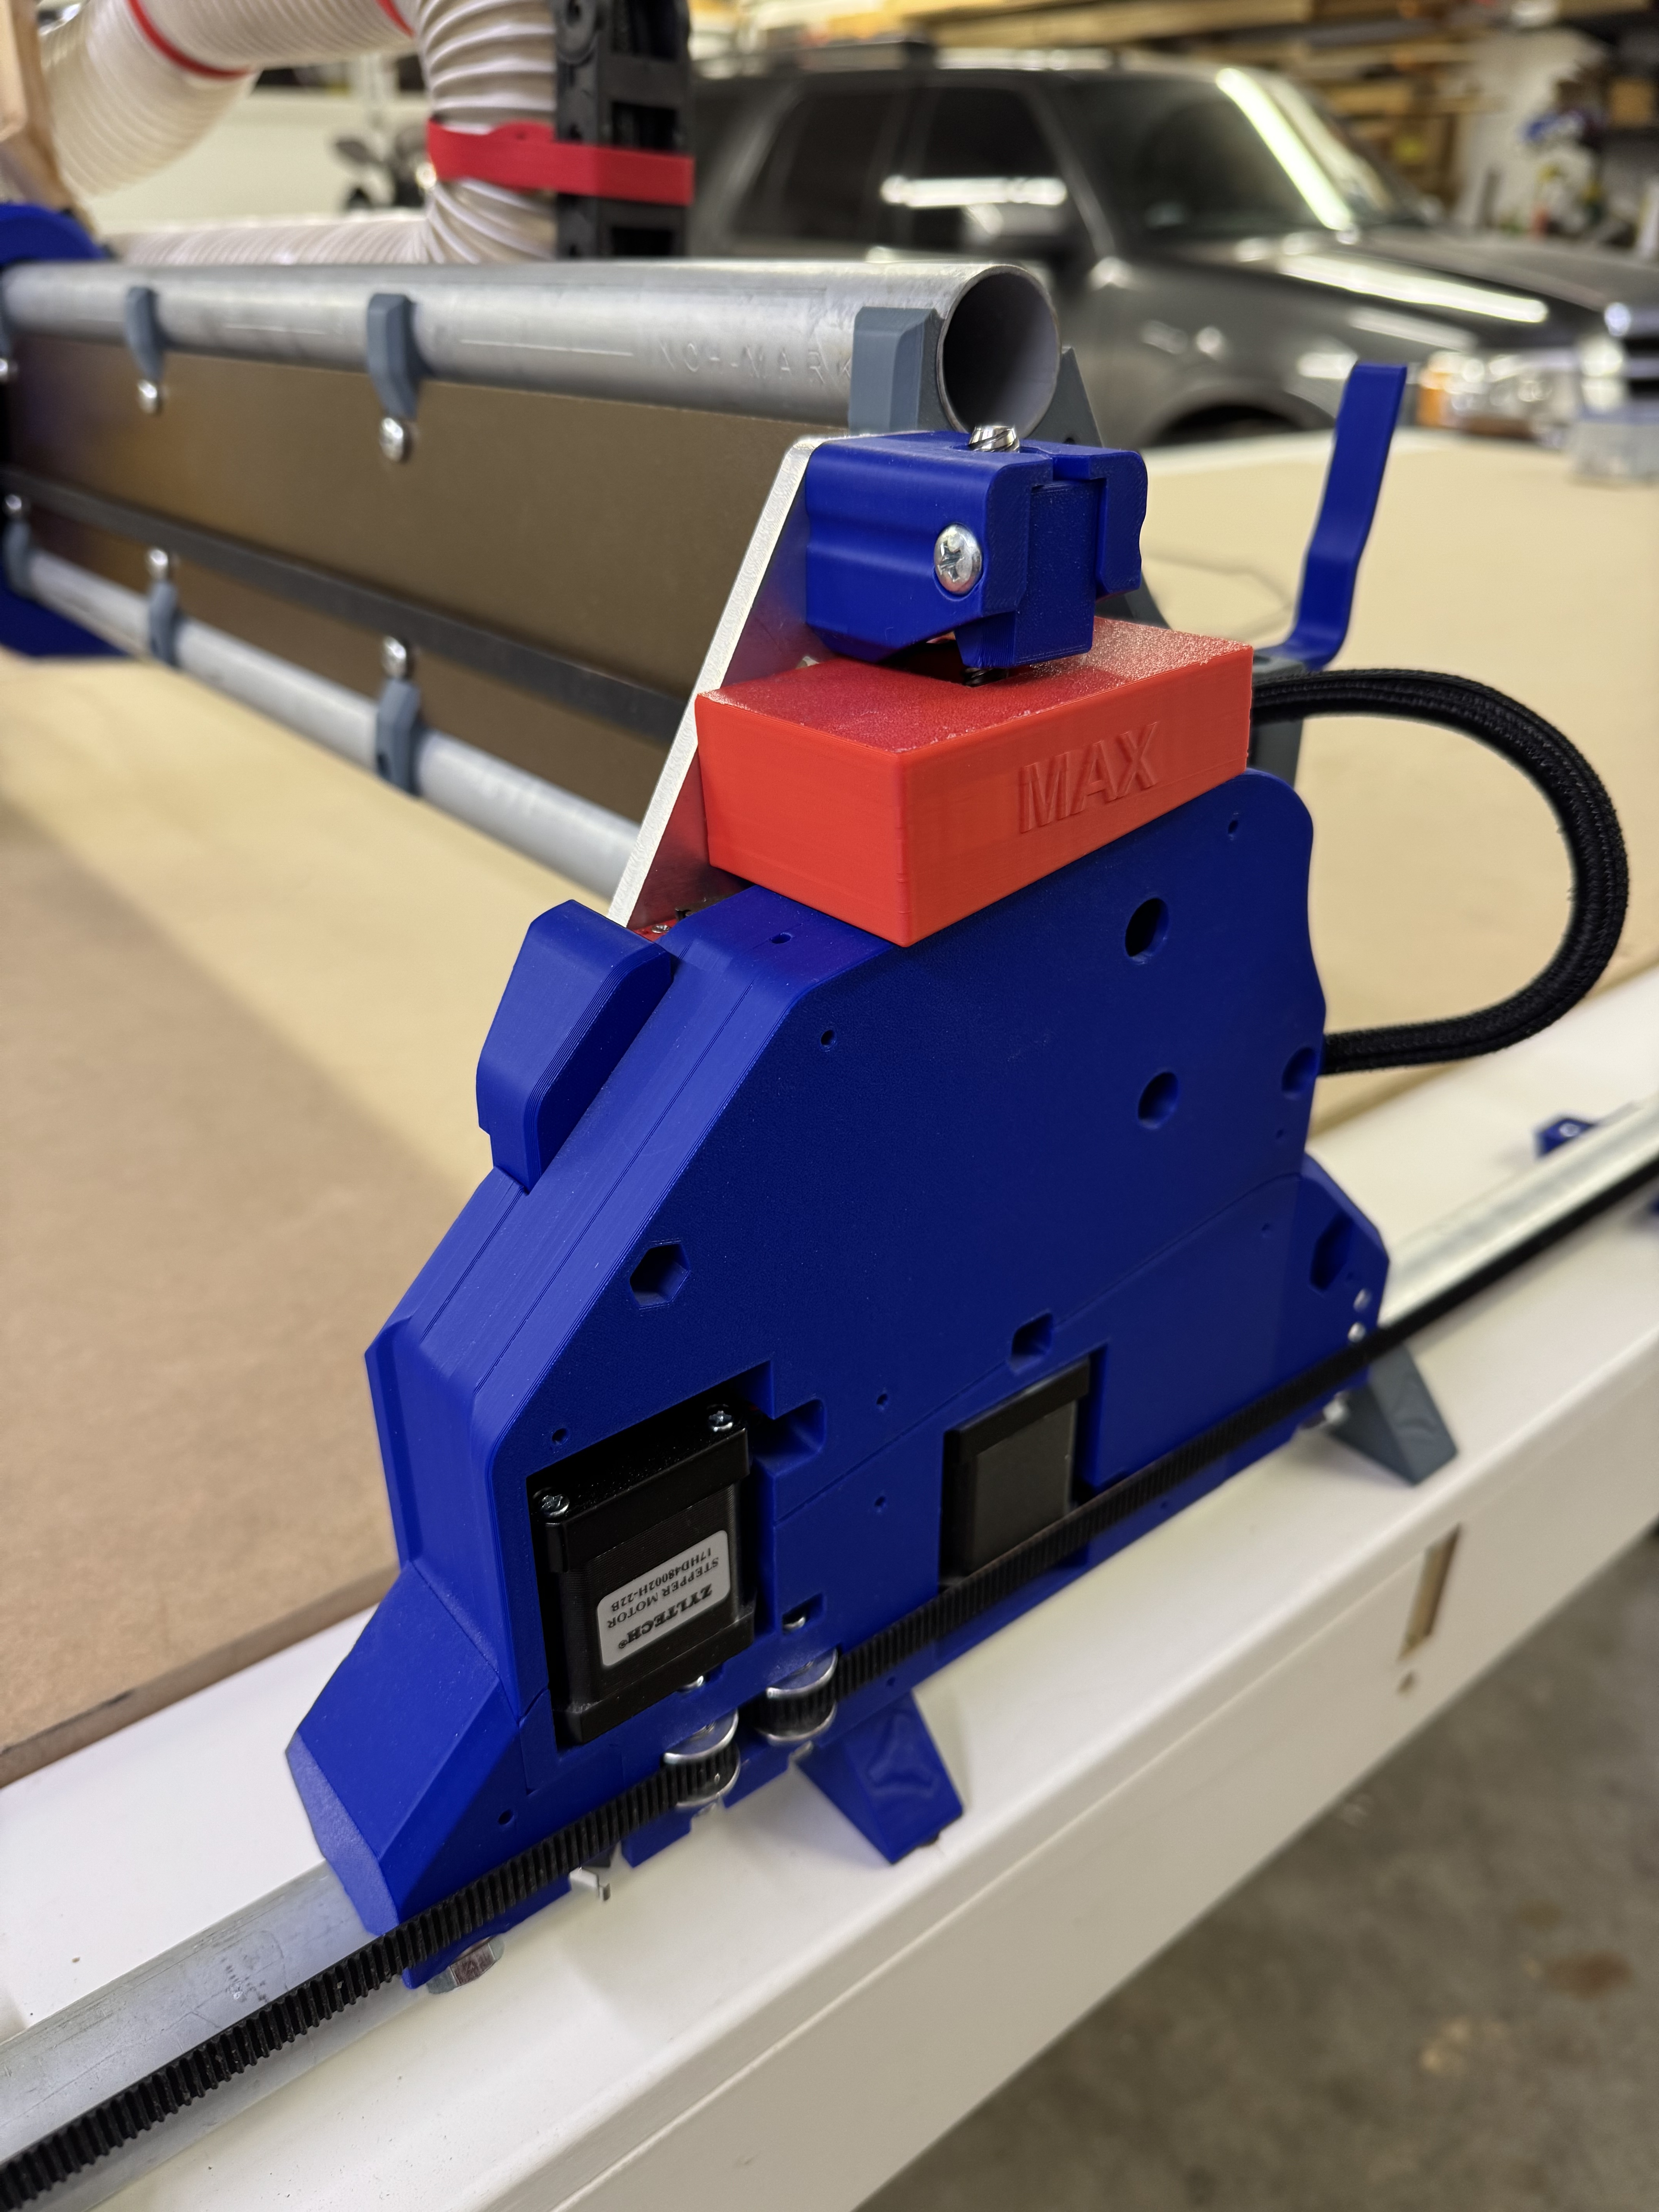
When I posted those pics I forgot to mention the Z blocks to hold the gantry up. I found the file on Printables and they work great. I know a lot of people have complained about the Z drop when powering down. If I knew how to post the link I would share it.
1 Like
Go to the site, click the browser’s address line, ctrl+a, ctrl+c, switch to forum, ctrl+v. ![]()
2 Likes
Thanx for the tip!![]()
2 Likes
I designed those Z-blocks. Glad to see them getting good use. Just get into habit of homing Z after turning machine on then IMMEDIATELY pull the blocks. Don’t ask me how I know that LOL. ![]()
I have it listed on makers world
4 Likes
Makerworld yeah I had Printables in my head. Thanx for posting those I was very happy to see them. I would have put the link up but I didn’t know how. I’ll have to try a link now that I received help from above. ![]() I prefer them over blocks under the gantry.
I prefer them over blocks under the gantry.
Could you upload it to printables? Not going to support makerworld. ![]()
1 Like
![]()
![]()
![]() but I did download them, find them a good addition while I’m building it too.
but I did download them, find them a good addition while I’m building it too.
Sorry Phillipp but I can’t remember my printable login. I’ve tried several times now.
2 Likes
I have the same problem to many different places and if i change on I’m sunk.
closing old topic to help fight spambots