Mistakes were made.
Patience was tested.
This build was down right abusive yet I kept coming back, and it paid off in the end.
On December 15, 2025, I bought my first 3D printer as a winter hobby to keep the SAD blues at bay. Almost immediately I started building collections on Printables of things I would like to print, and the LR4 made its way into one of those collections.
Fairly quickly I got bored of printing plastic stuff and decided, hey so that LowRider thing has solid documentation, a great and active forum and other community resources (FB groups, Discord, etc), and the estimated cost is less than $1000. I mentioned it to my spouse and they were immediately supportive of this endeavor. We have several projects that a CNC would make much easier, like new kitchen cabinets, homebrew pinball machines, and many more.
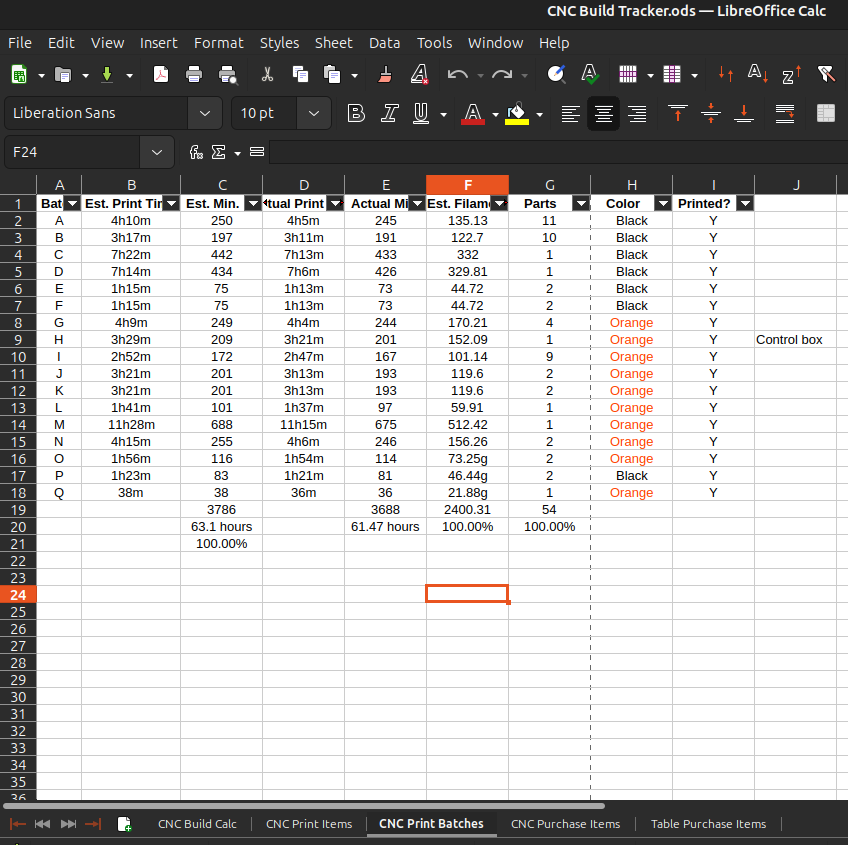
I started making a spreadsheet on December 20th to plan out my 3D part printing and all of the necessary parameters, another sheet to price out items I needed to source, and another to hold the measurements of this beast. Part printing started on December 21..7 days after that 3D printer came home from Microcenter!

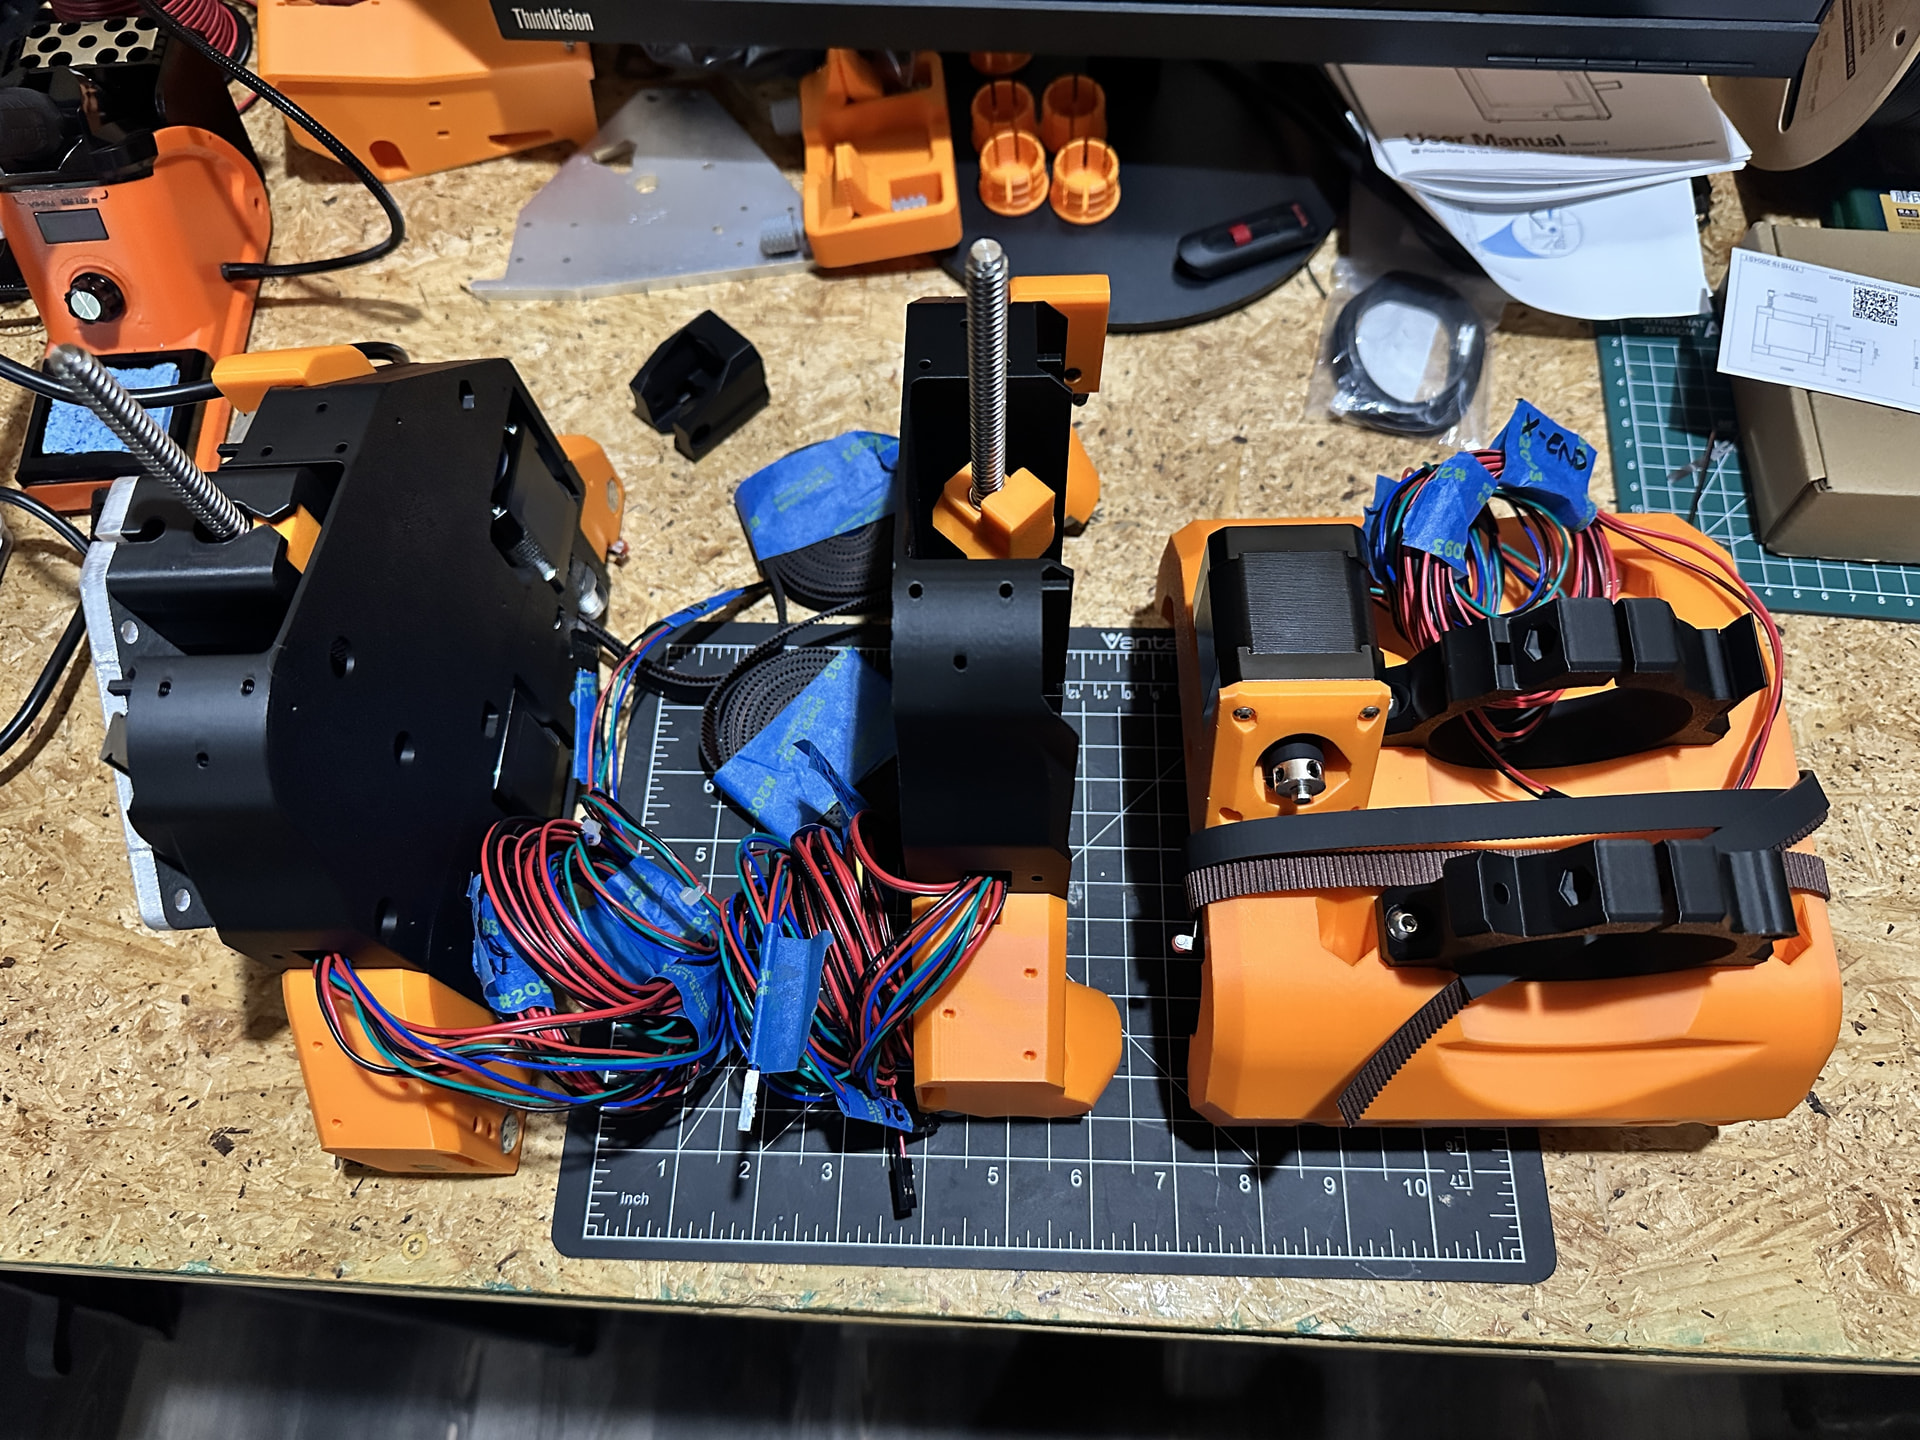
After everything got printed, I started ordering parts to assemble. Instead of using butt connectors for all of the wiring, I soldered the connections. Solid connections and no worries about them wiggling out of their crimps later (been there, done that, sold the car before attempting to chase the ghost).
Wired up and ready for assembly! Pic below is from February 10th. Between life, work, and waiting for parts to arrive, I got slowed down a bit but still decent timing in my opinion.
Lesson learned: do the Loctite on the grub screws during assembly. It becomes trickier later on.
By February 13th, I had the gantry assembled and I needed to get a temporary table thrown together to make strut plates and a permanent torsion table.
There’s actually a problem in this picture that wouldn’t become obvious until my temporary table was assembled.
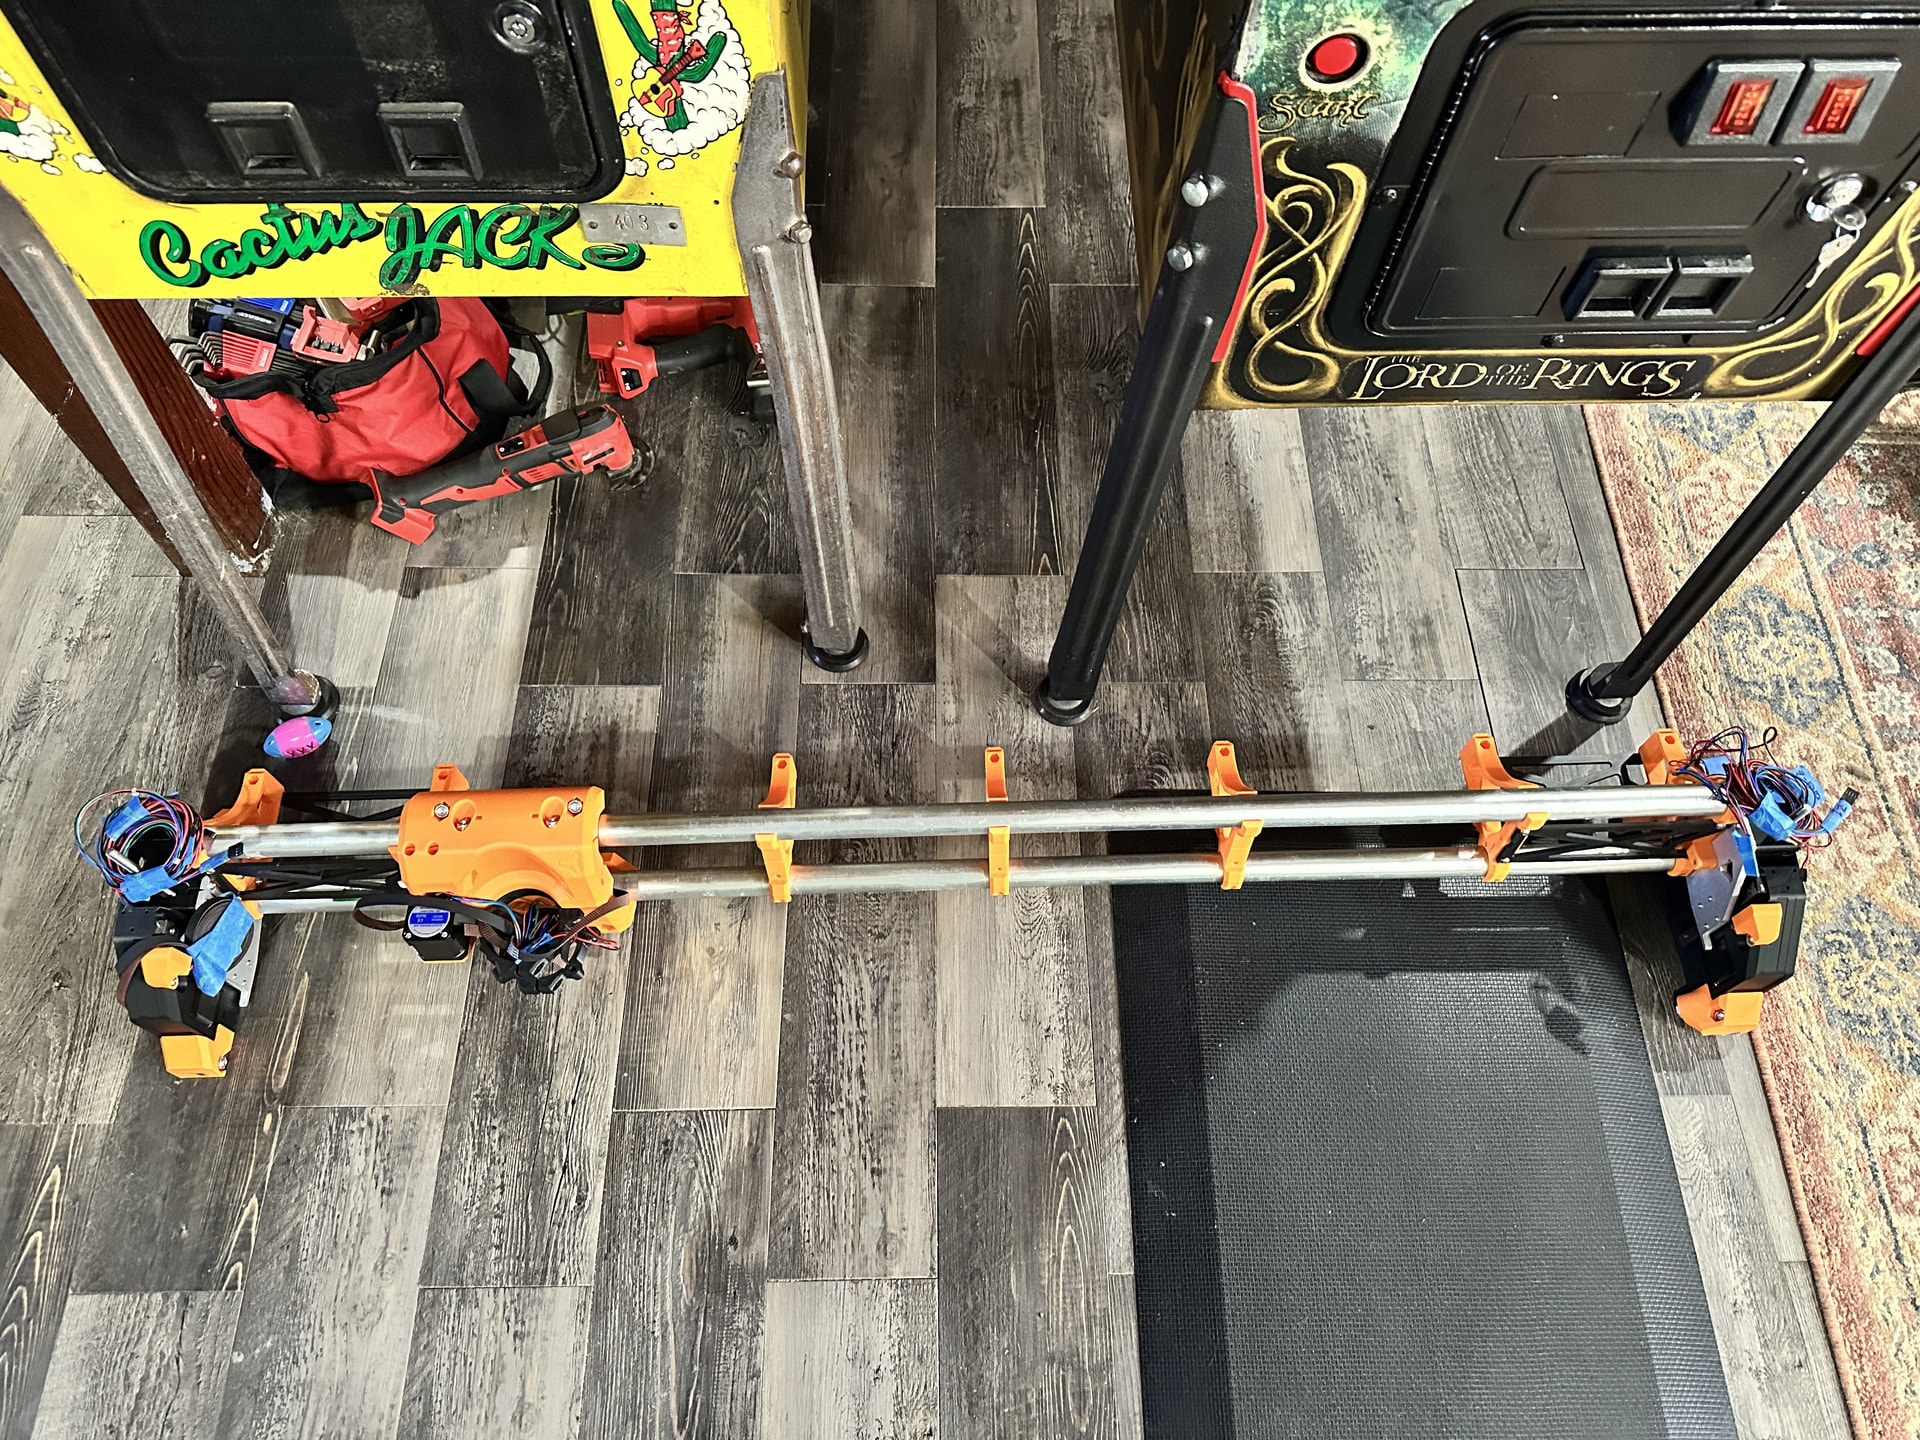
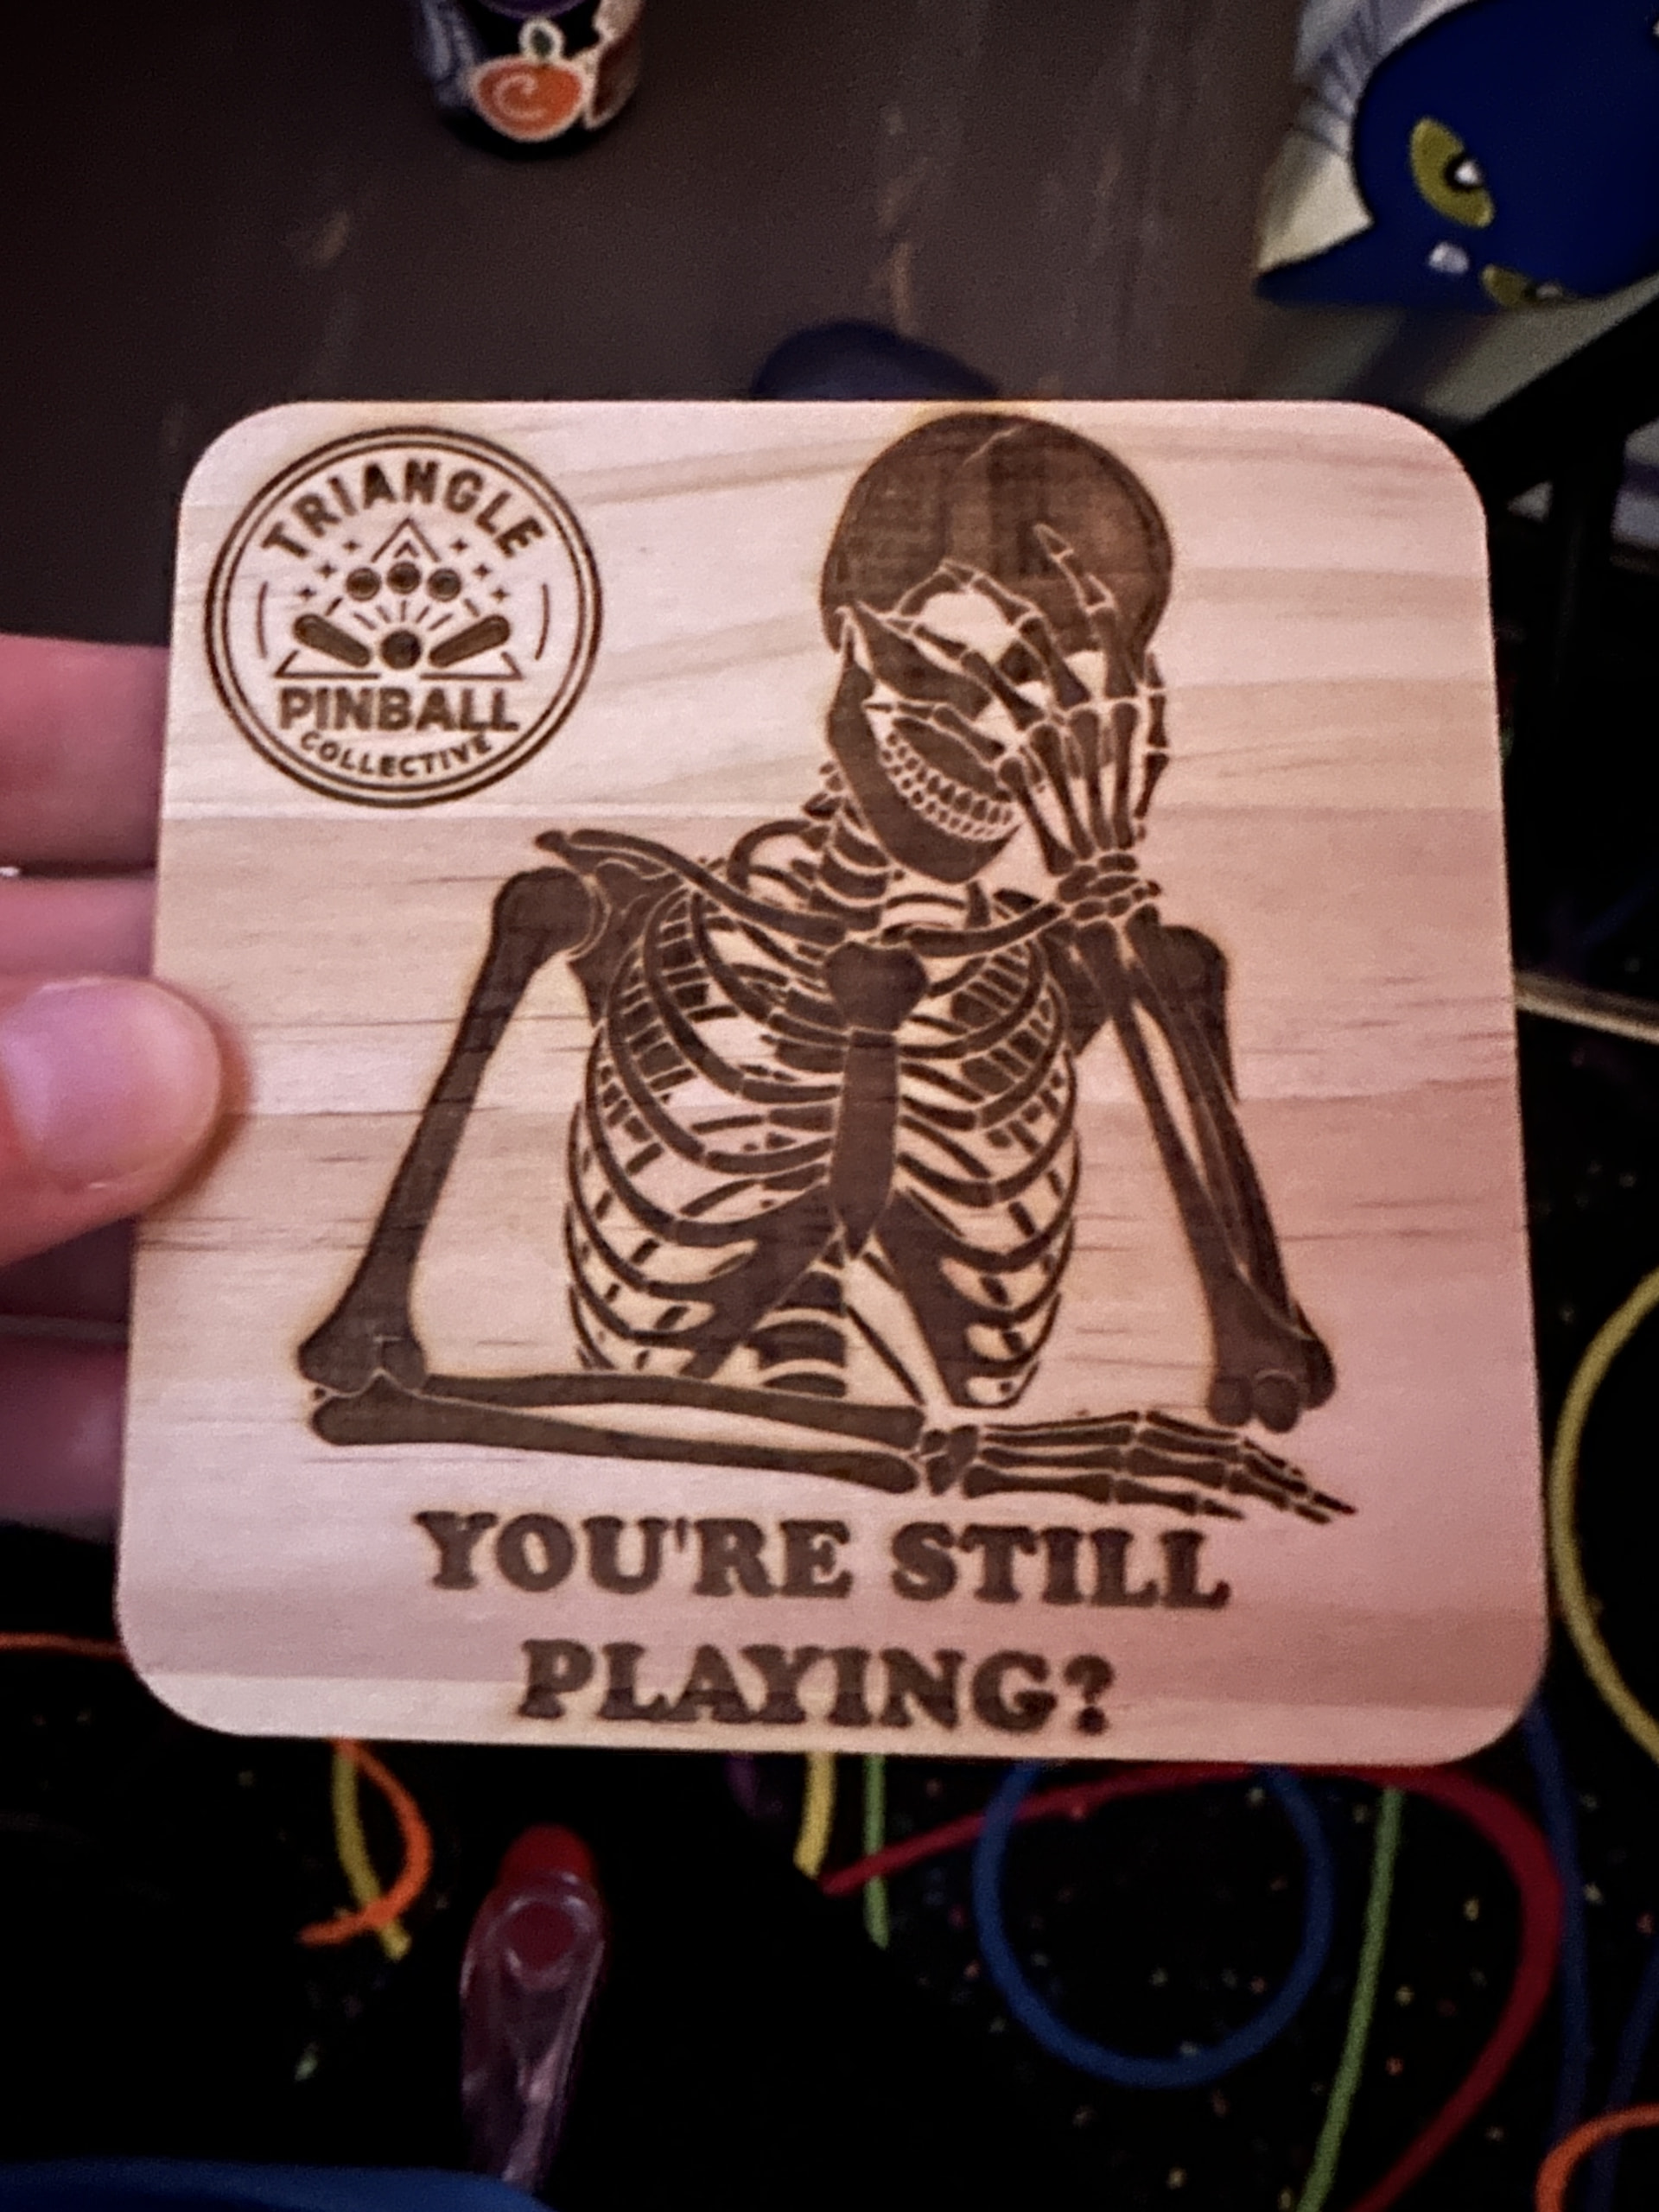
To keep me going on my build journey, I started seeing inspiration for future projects show up everywhere, including my local pinball spot:
On March 1, I got my temporary table thrown together:
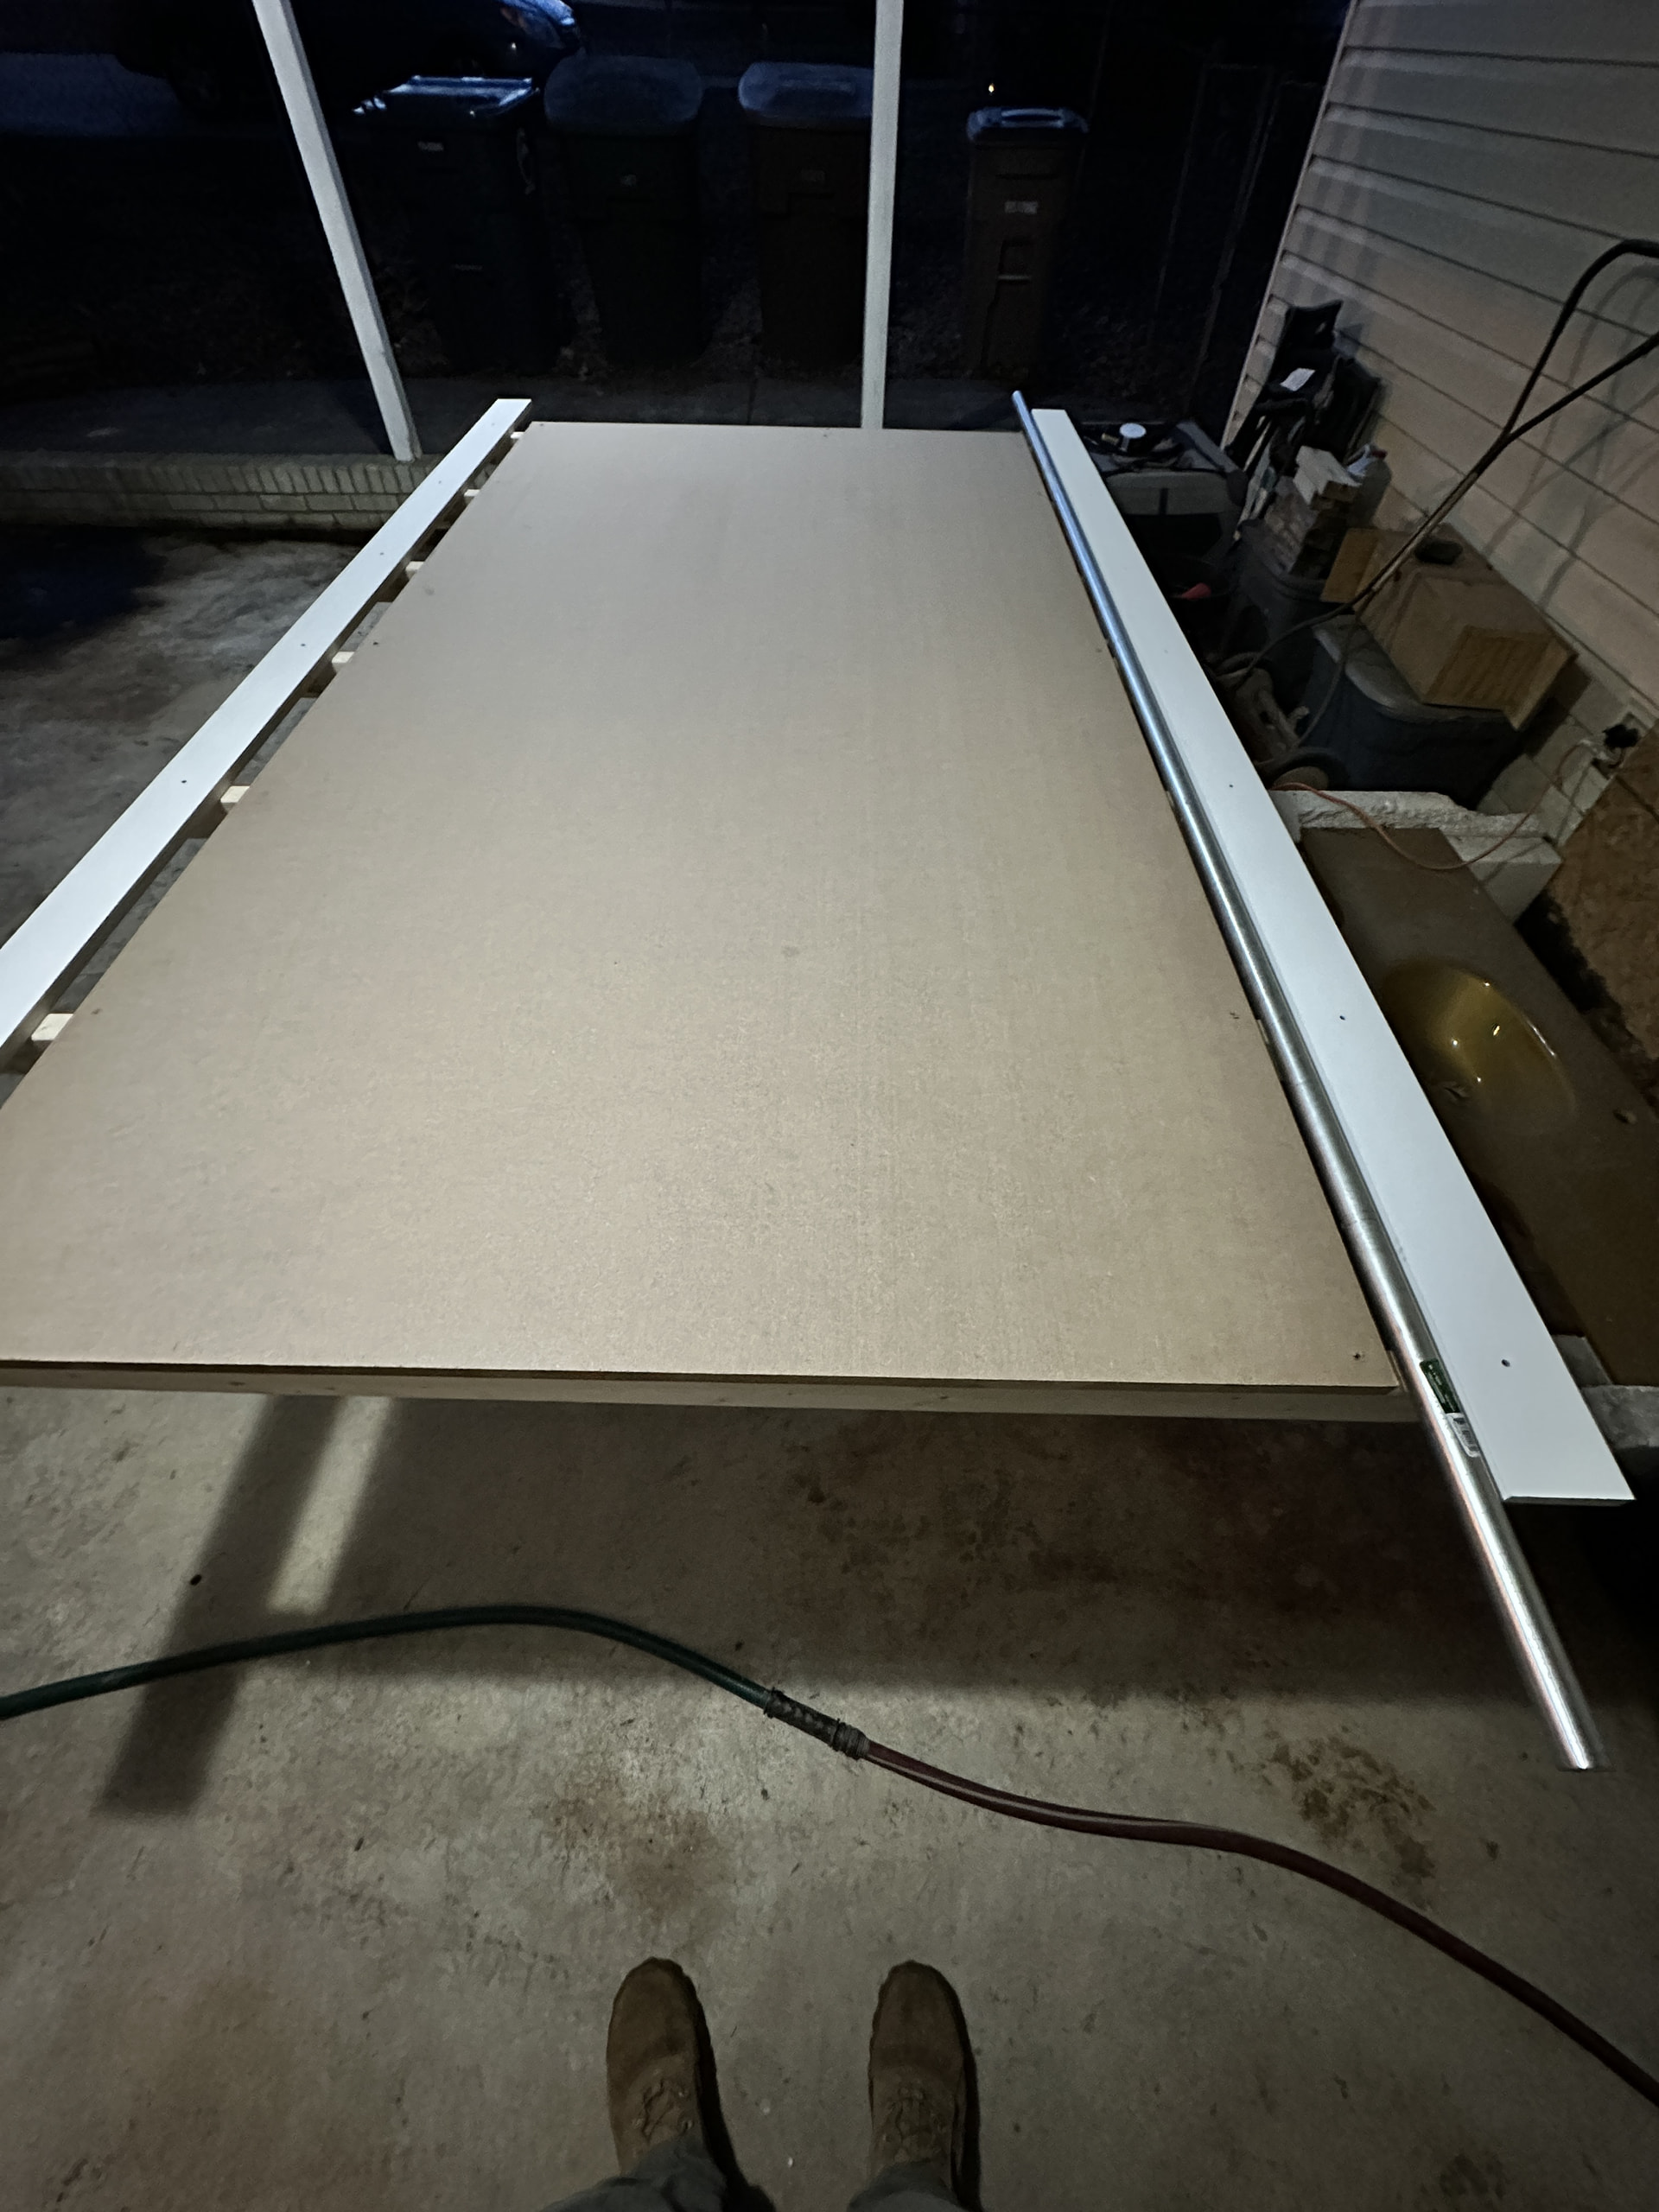
It’s a 4’x8’ sheet of 3/4” MDF on top of 7 - 2”x3” studs, I made sure to get the most twisted ones for good measure, and 2 - 1”x4” primed trim.
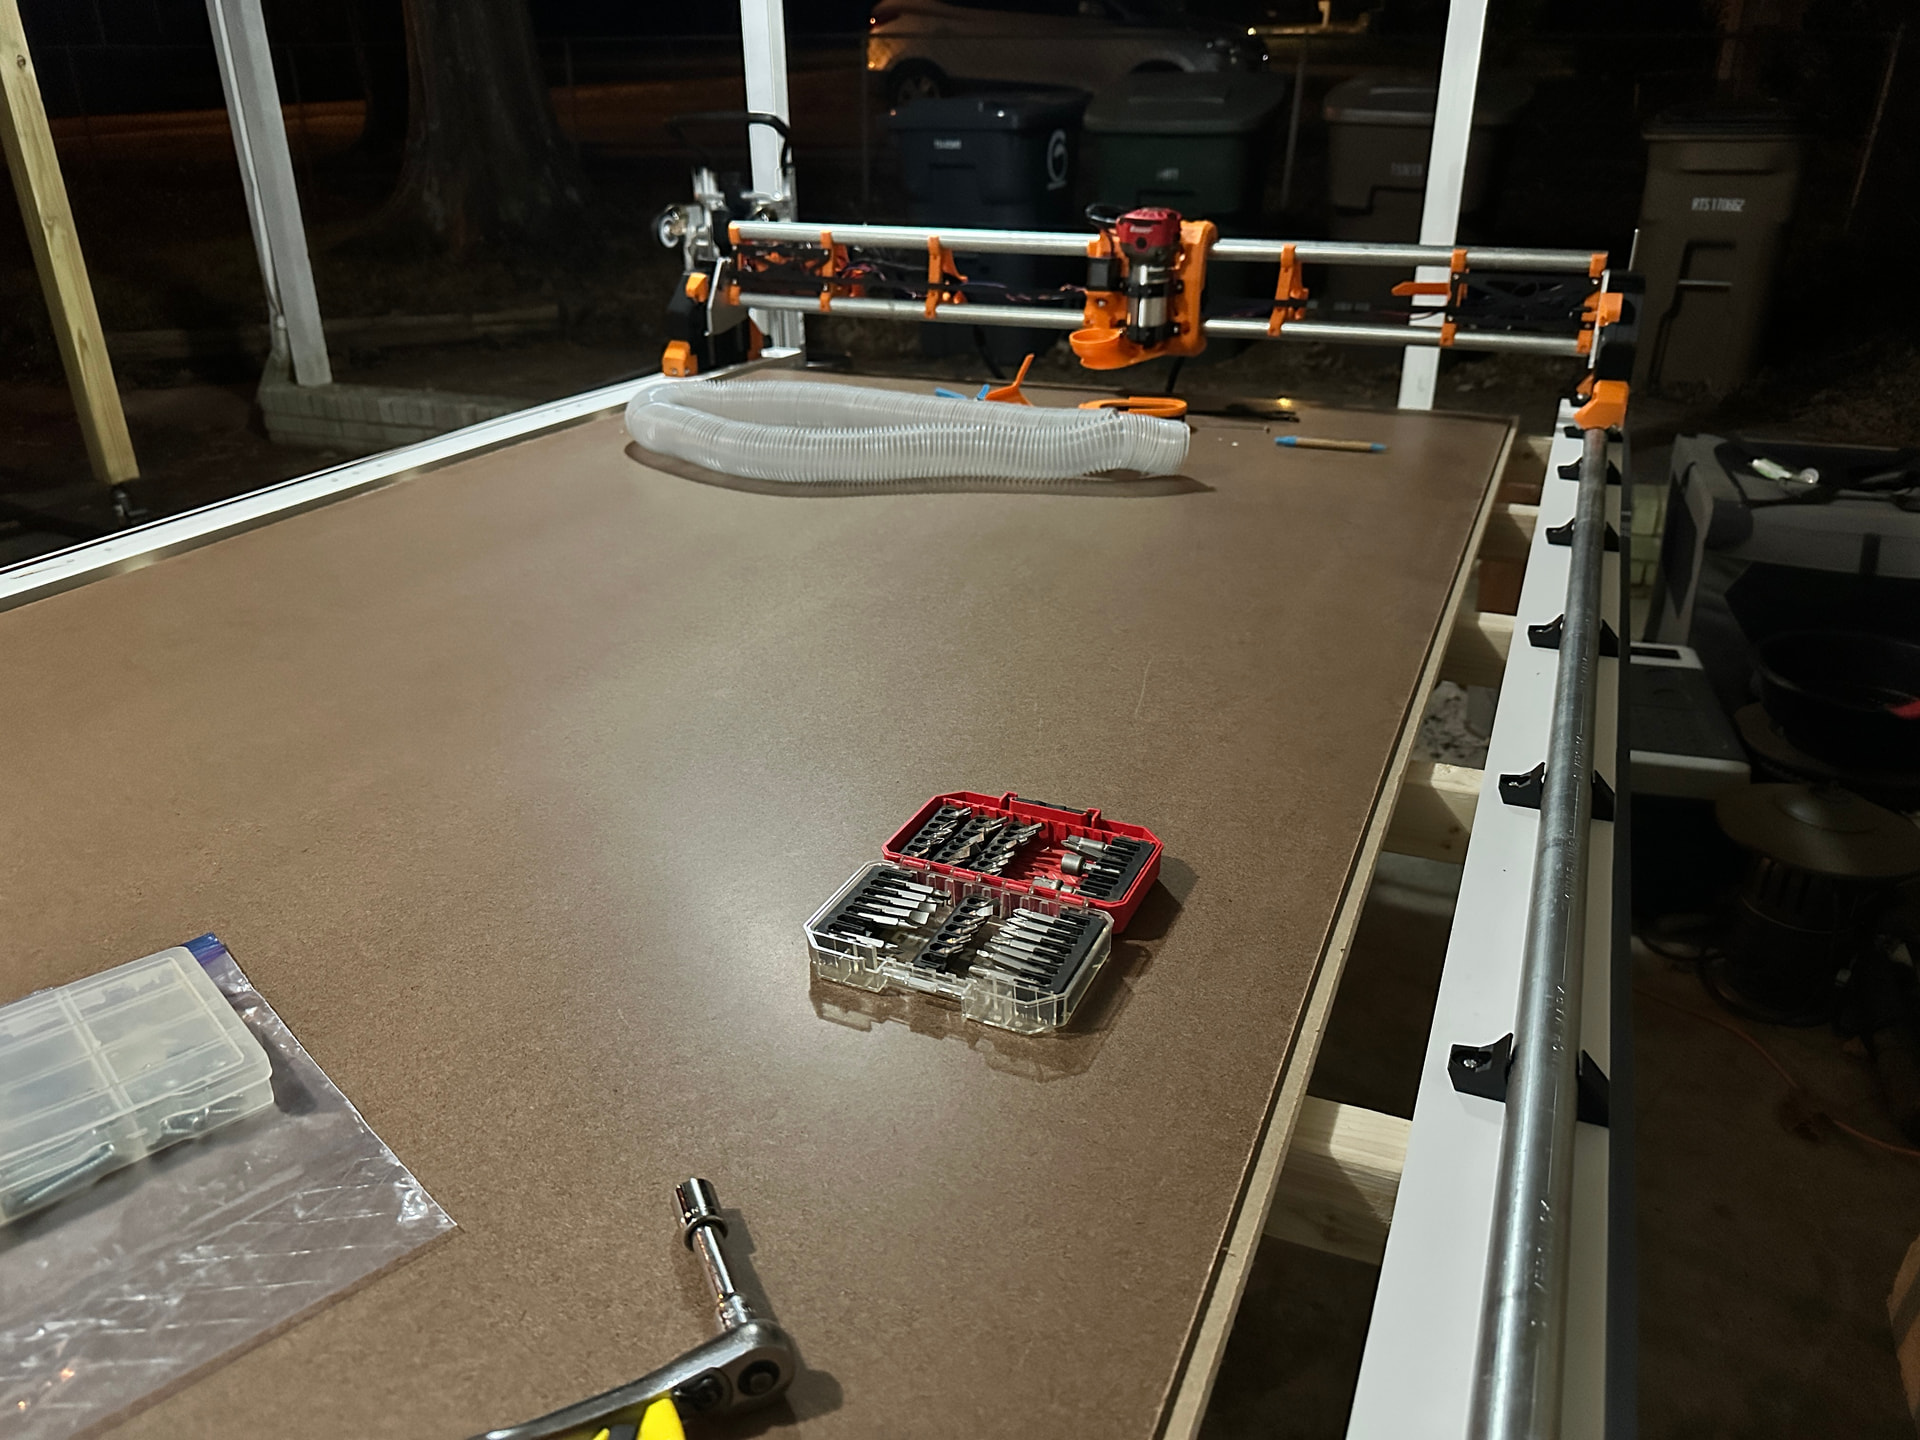
A week later I had the machine out on the table:


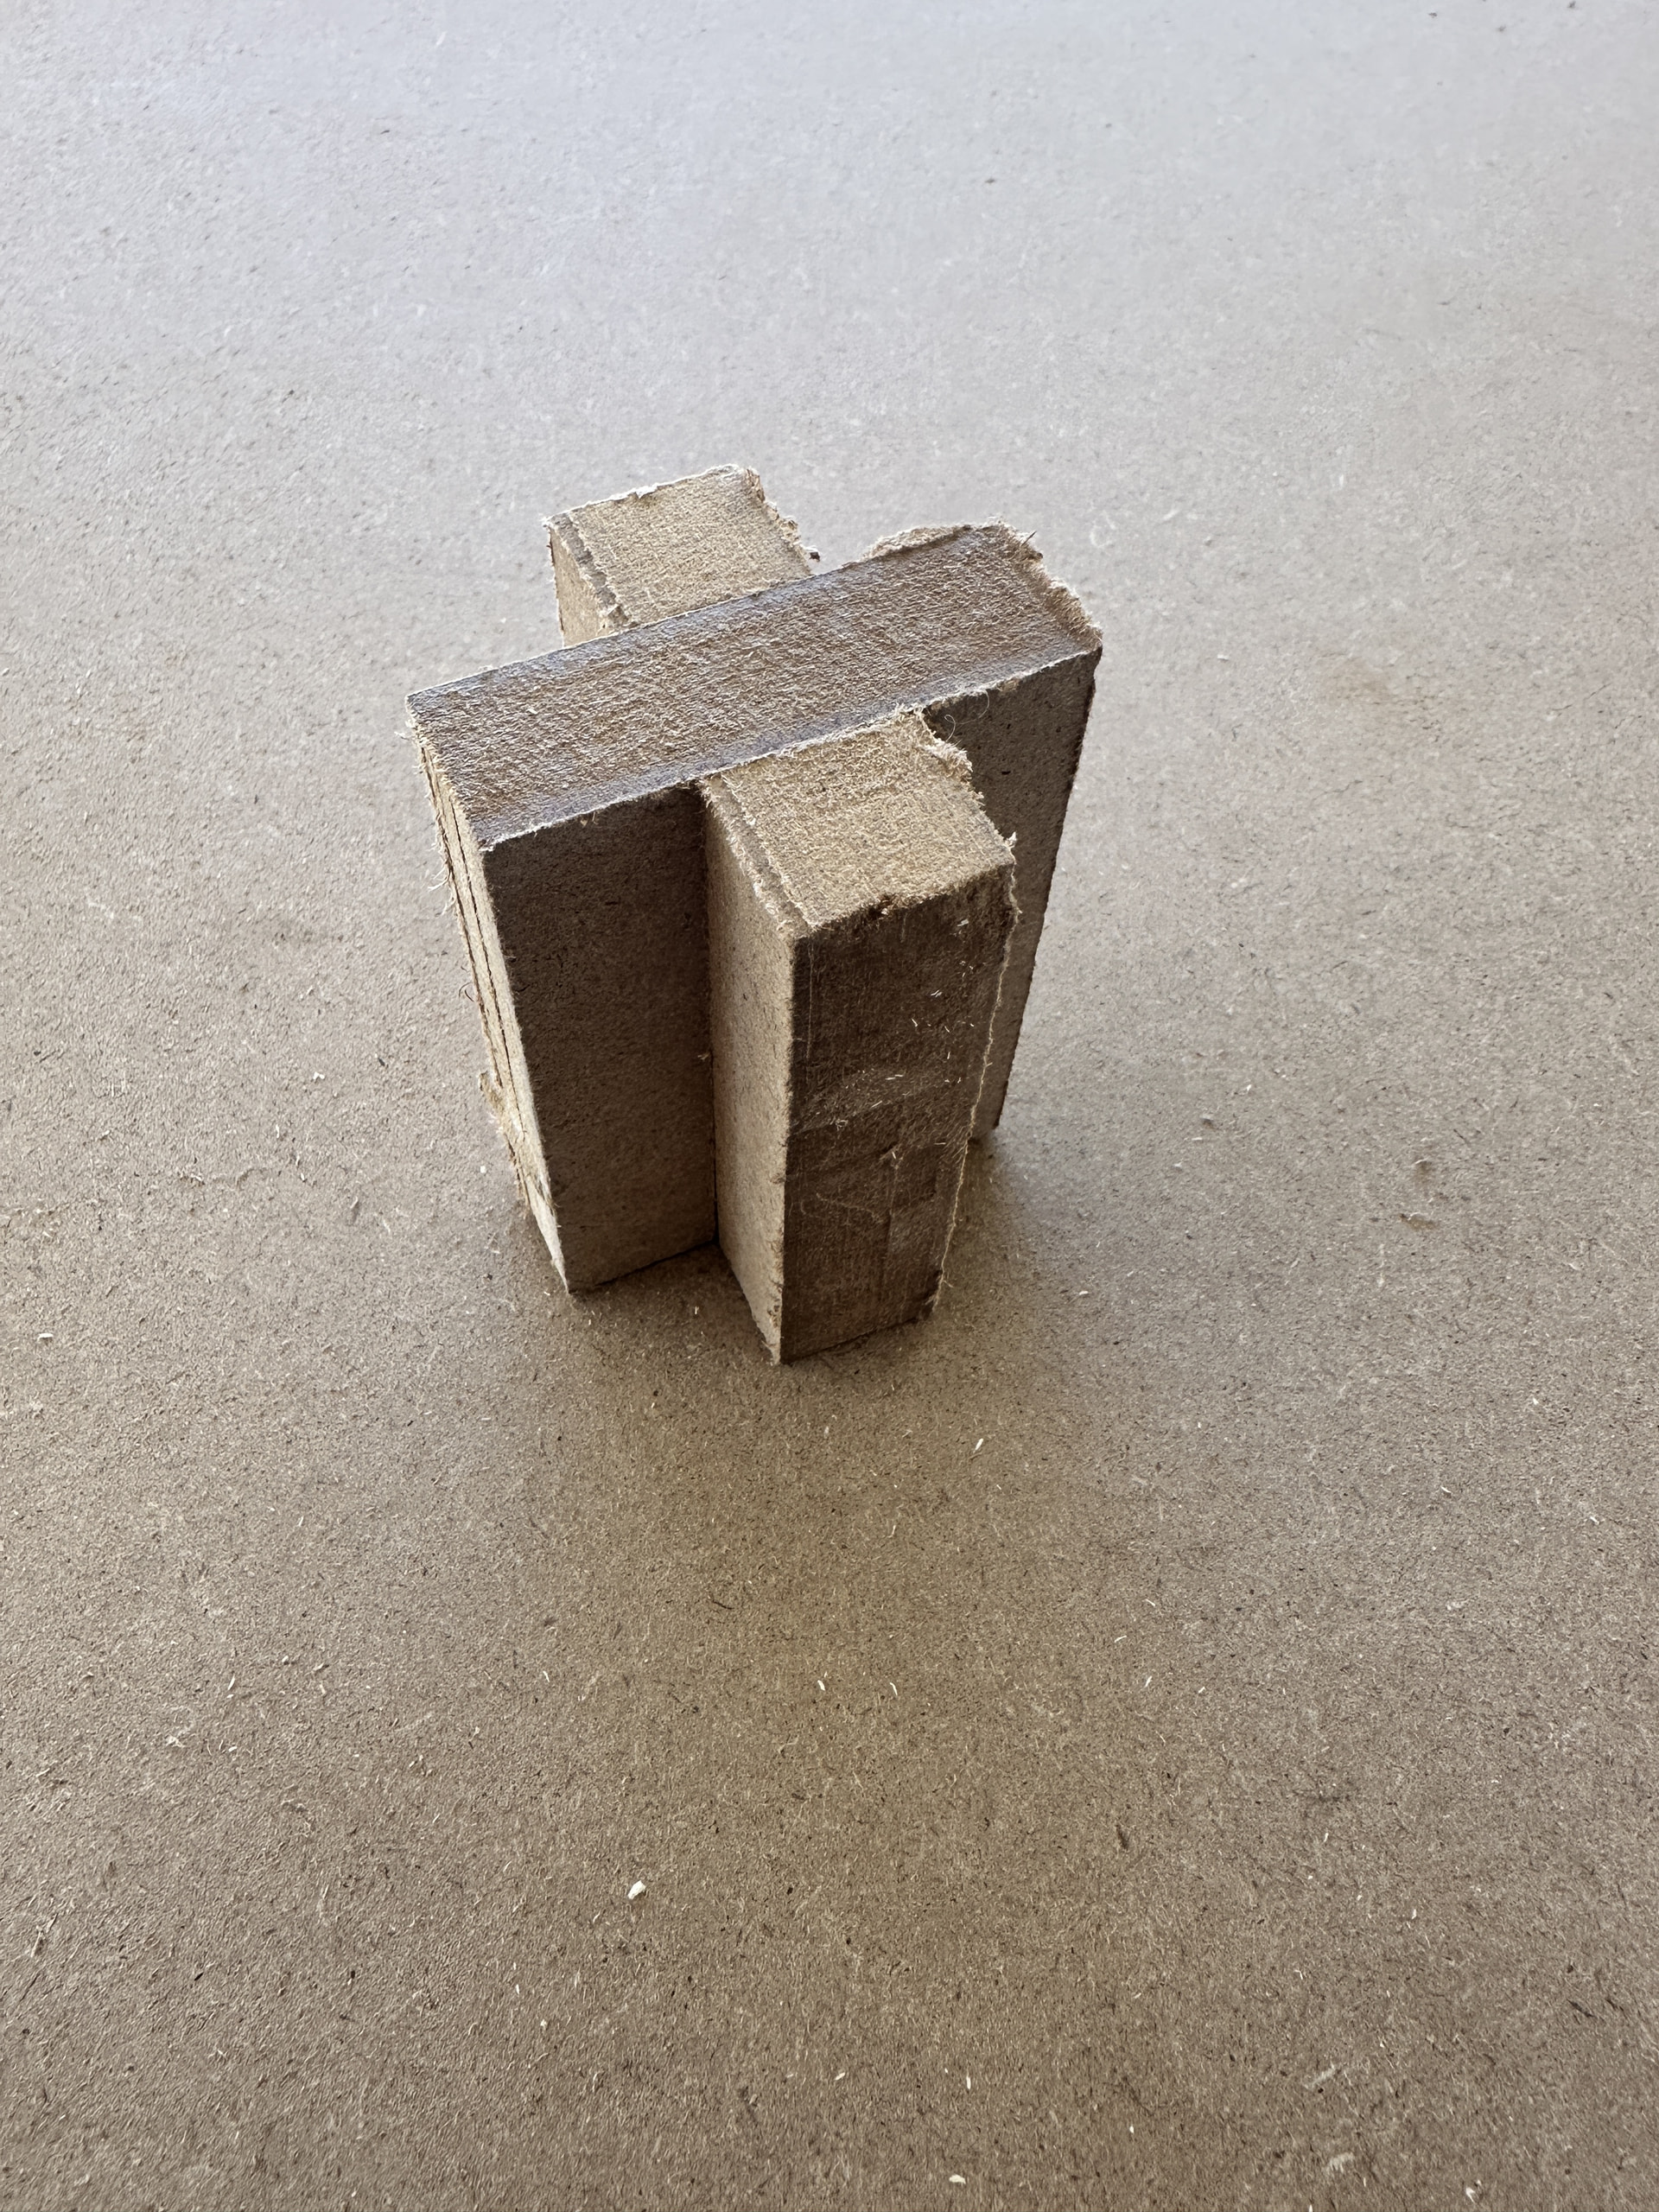
It was at this point I realized a pretty major mistake I made in printing my parts: I printed the wrong rail holders and braces. I mistook the “print the highest version # of parts with multiple versions” and printed the 32 mm braces and clips ![]() And in that mistake, I over-tightened my core.
And in that mistake, I over-tightened my core.
Lesson learned: if you print the wrong braces and rail holders for your rail OD size, you’re going to have a loose core..heed the “DO NOT OVER TIGHTEN THE CORE” warnings and DO NOT OVER TIGHTEN THE MF CORE, FAM! CHECK YO BRACES, CHECK YO RAIL CLIPS. Anyway, I reprinted the braces, the rail clips, and the now cracked core and got back to work.
And then I drew a crown!
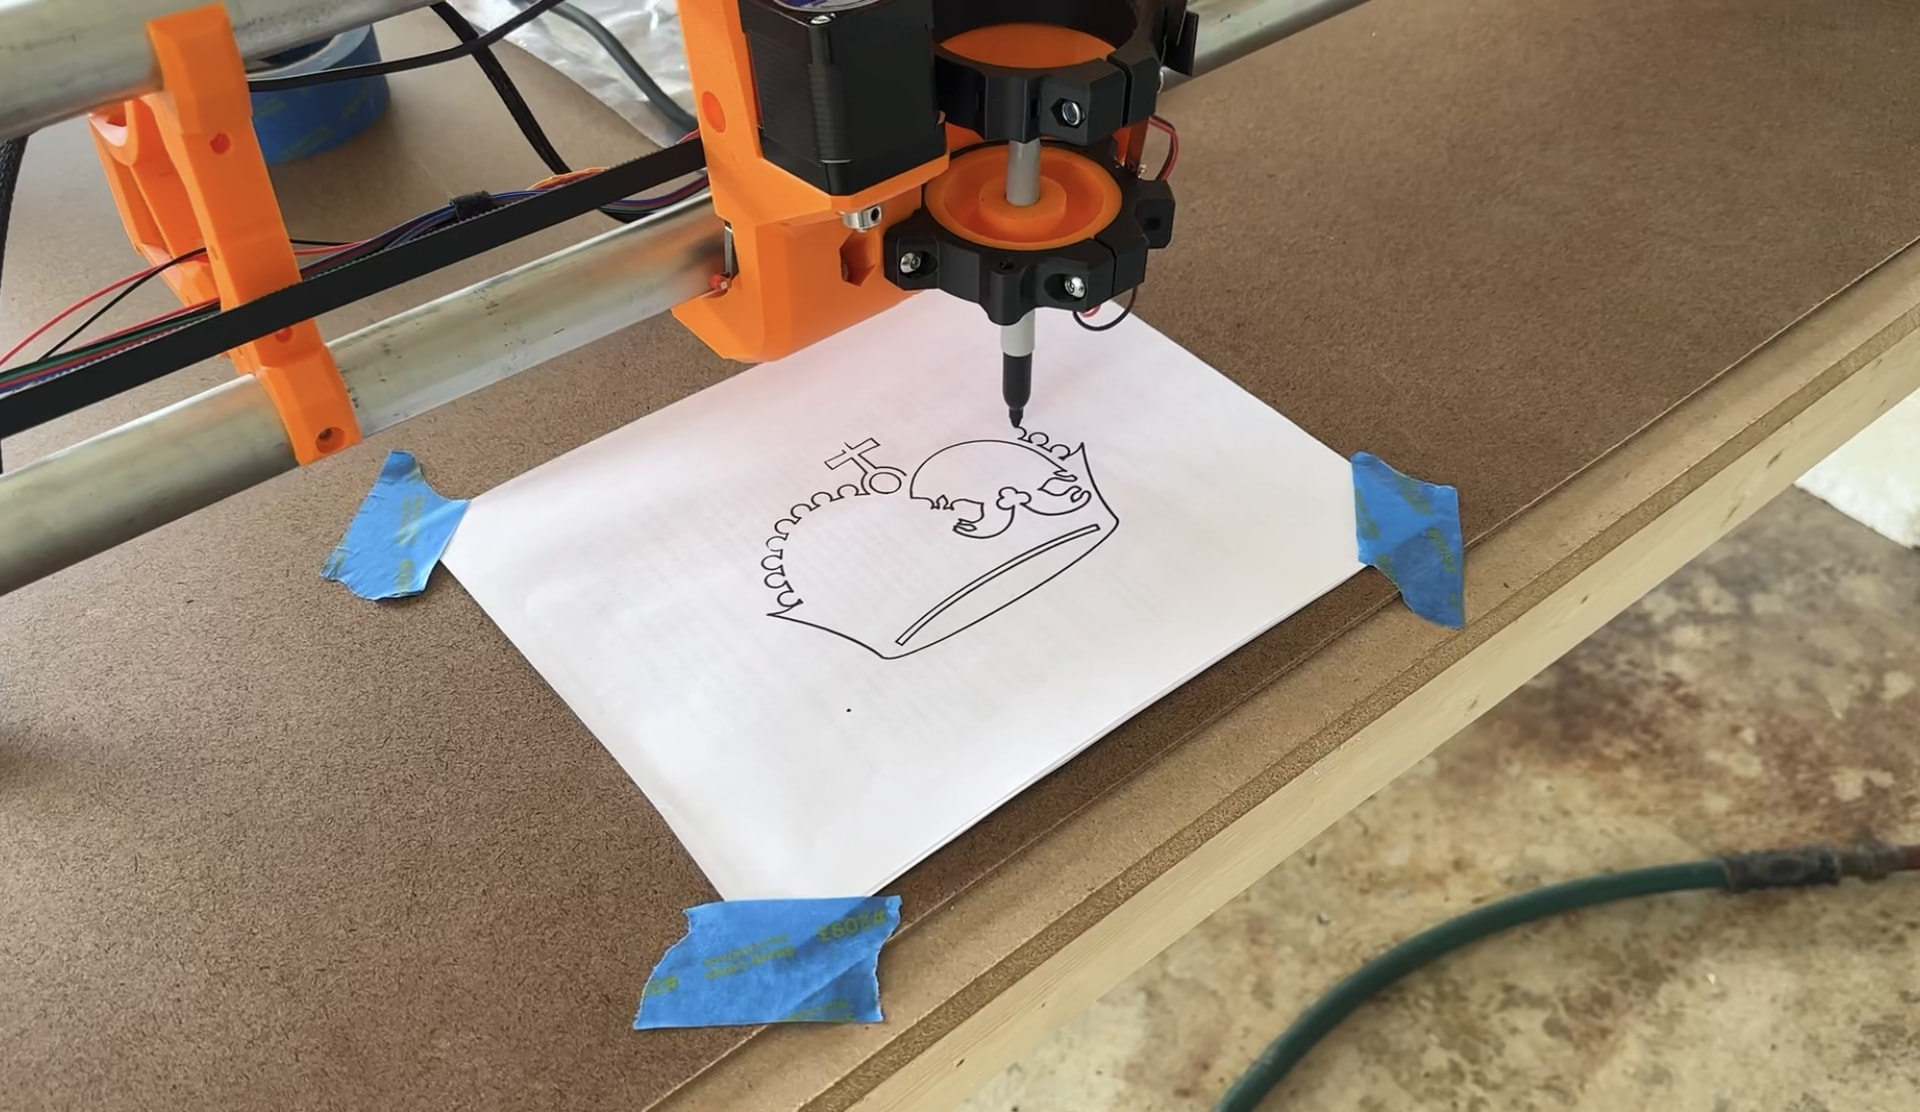
During all of the downtime between making the machine and getting it to this point I spent time learning
- Onshape CAD - highly recommend their learning courses, they were great in getting me comfortable with CAD and came in handy for manipulating @bitingmidge ’s tube end caps to match my 1” EMT conduit, designing vacuum hose adapters, and more.
- EstlCAM - all of the pages on the V1 site as well as forum posts were immensely helpful in getting my settings down and understanding how to use the program.
- OpenSCAD - this one is still being learned up but it’s coming along.
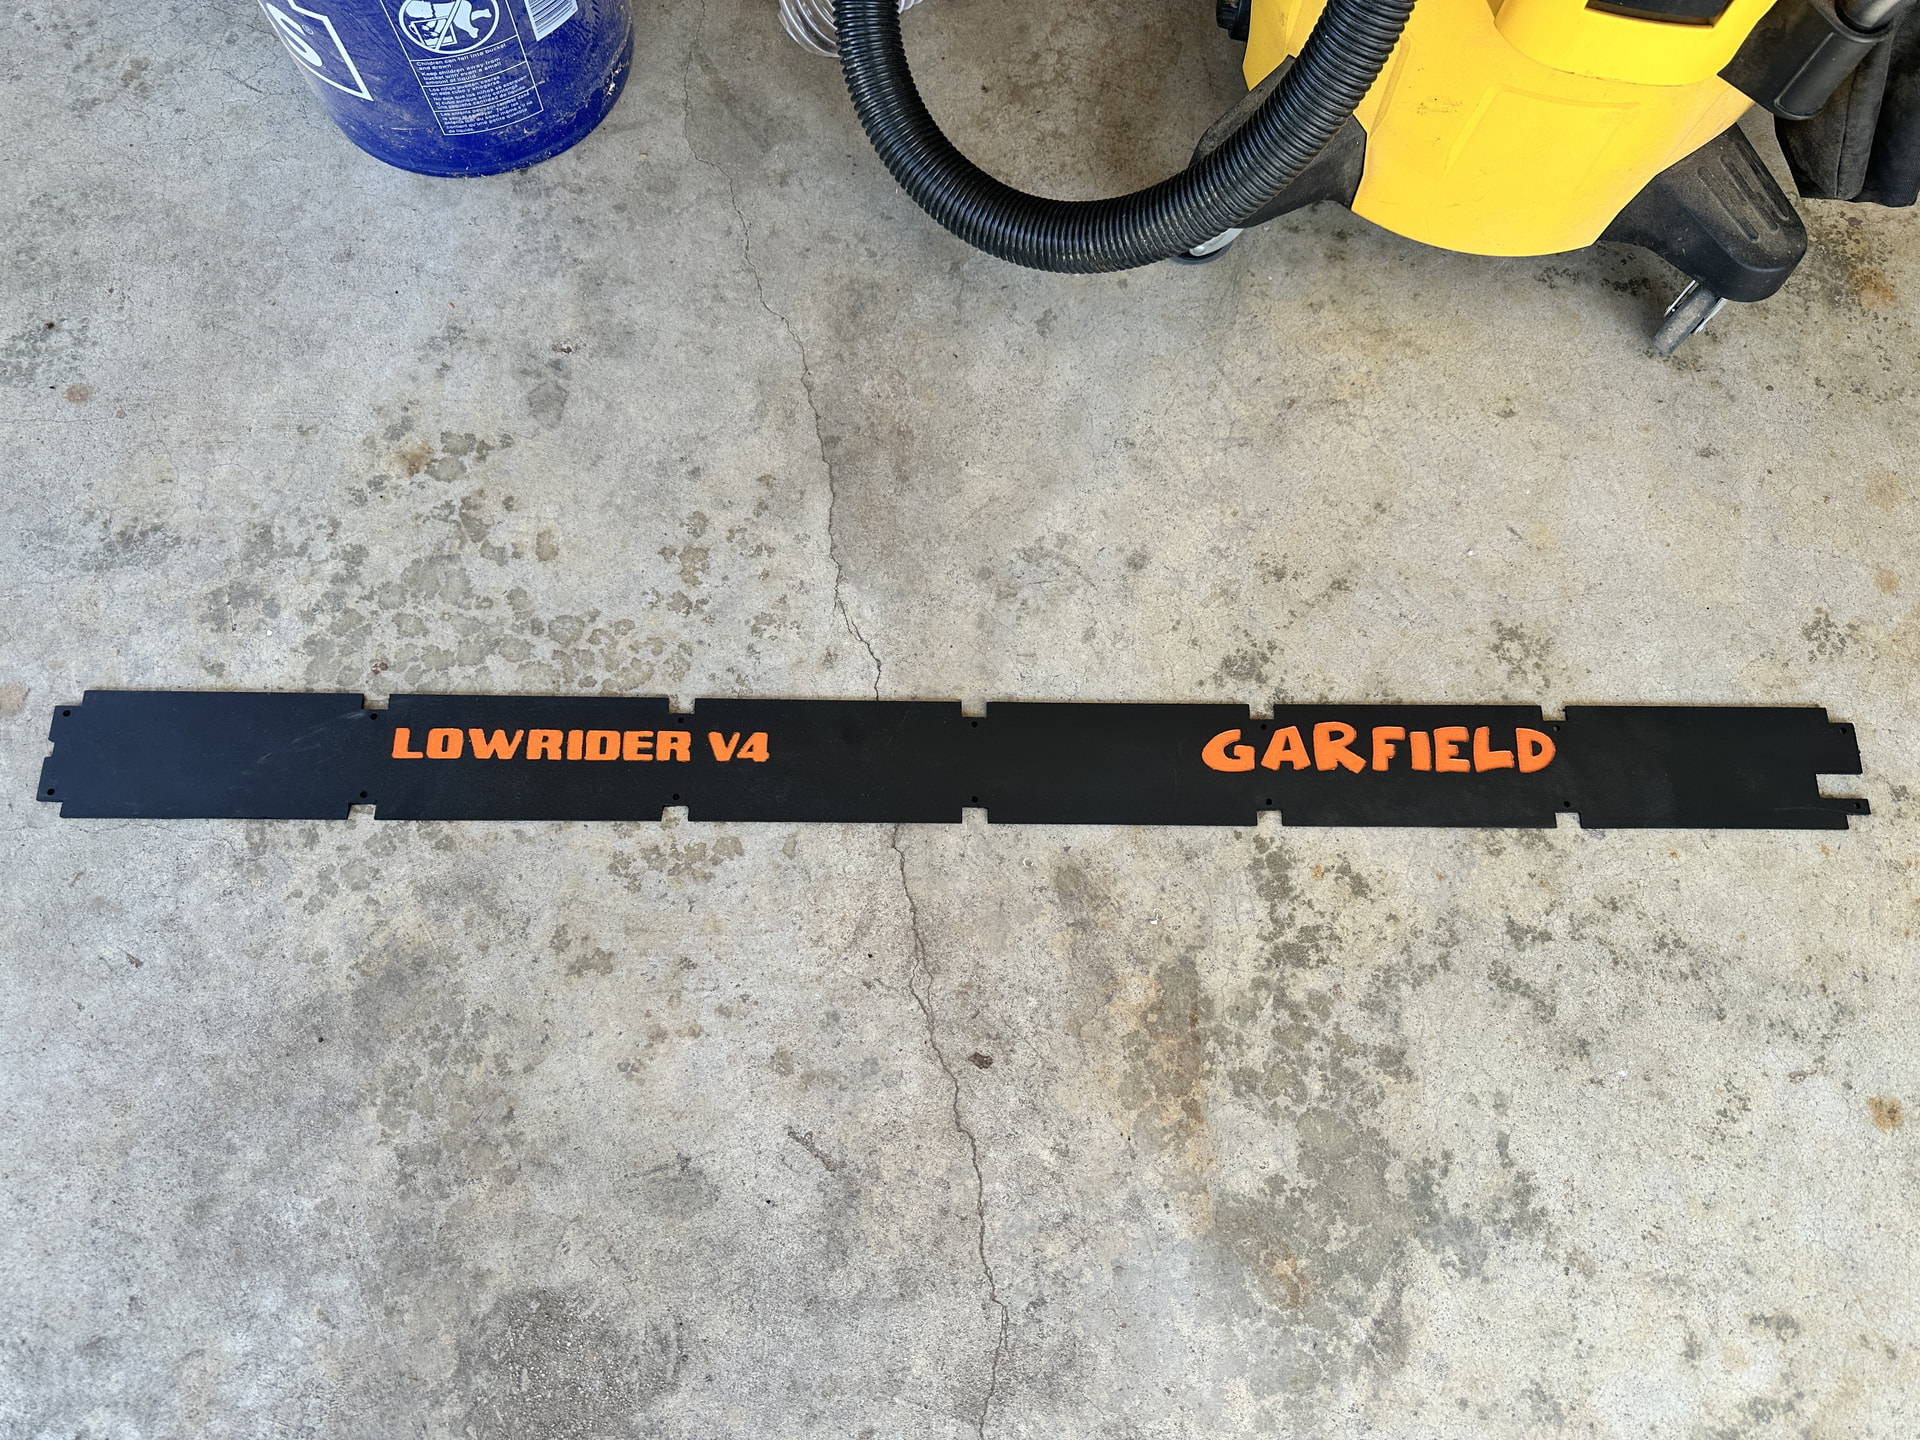
I even stumbled across a GitHub repo from @azab2c with some V4 mods and designed a cool custom strut plate since we decided to name this build Garfield due to the color scheme and because plywood is basically lasagna that Garfield will consume.
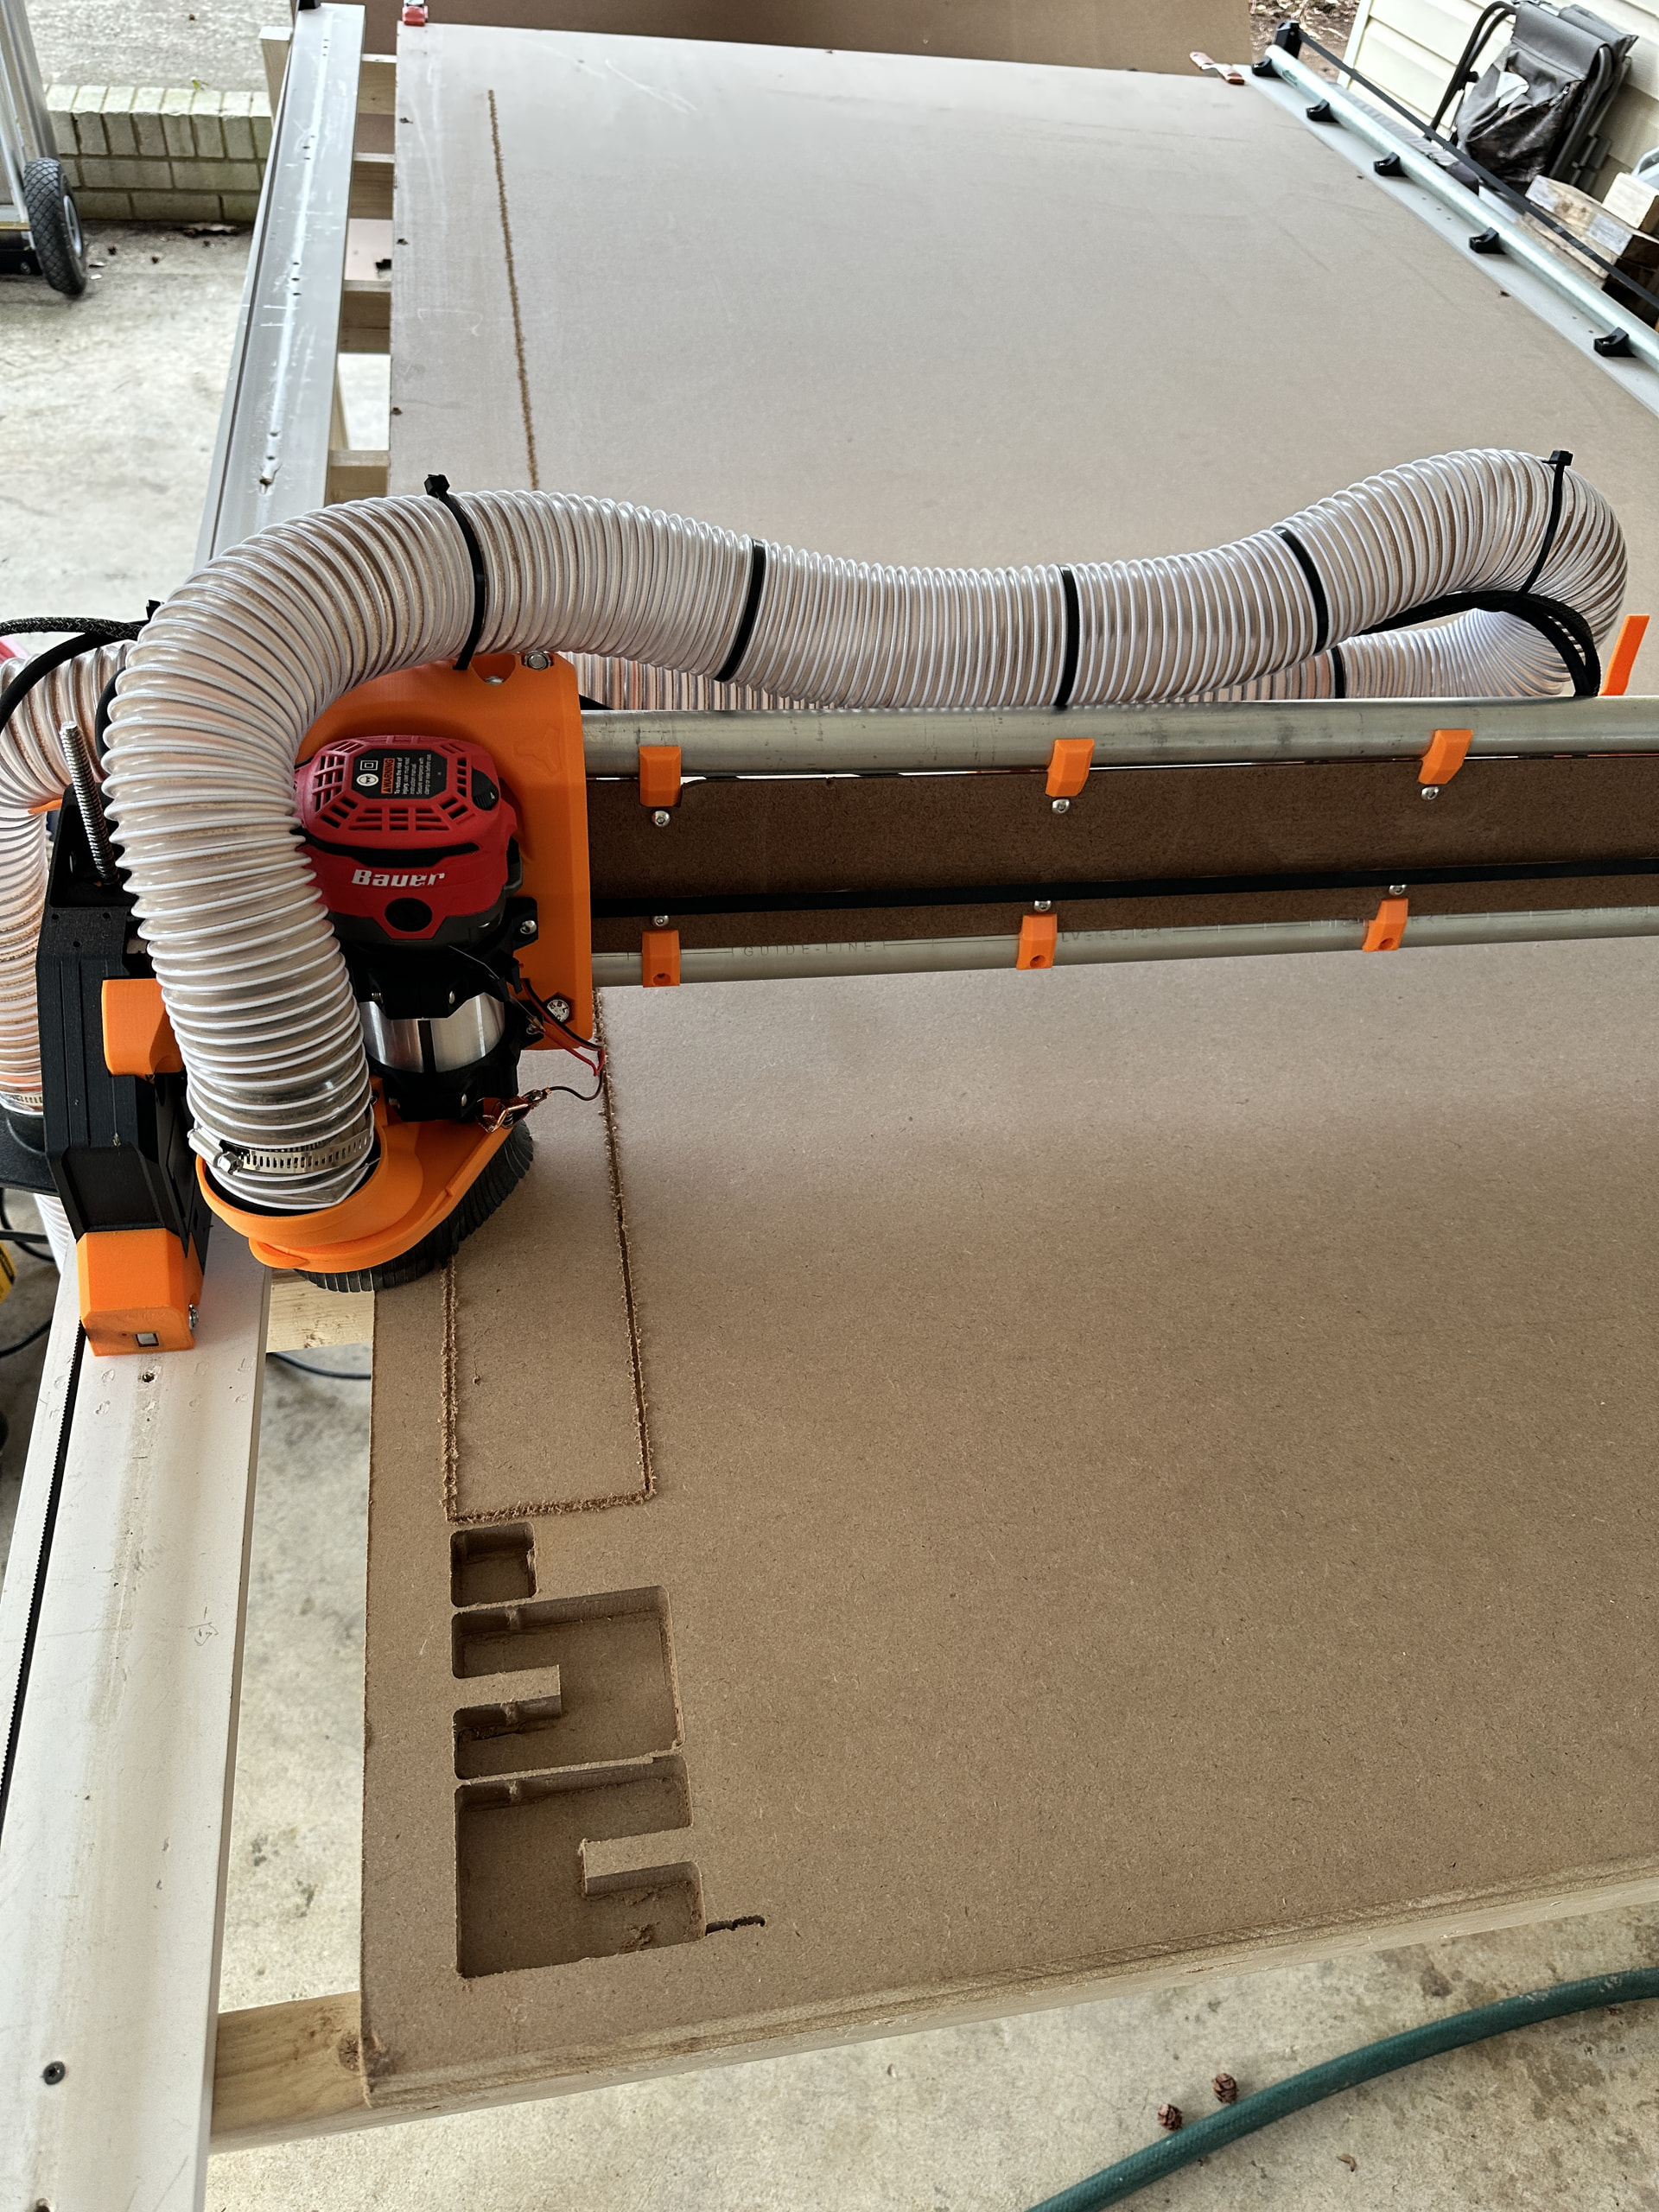
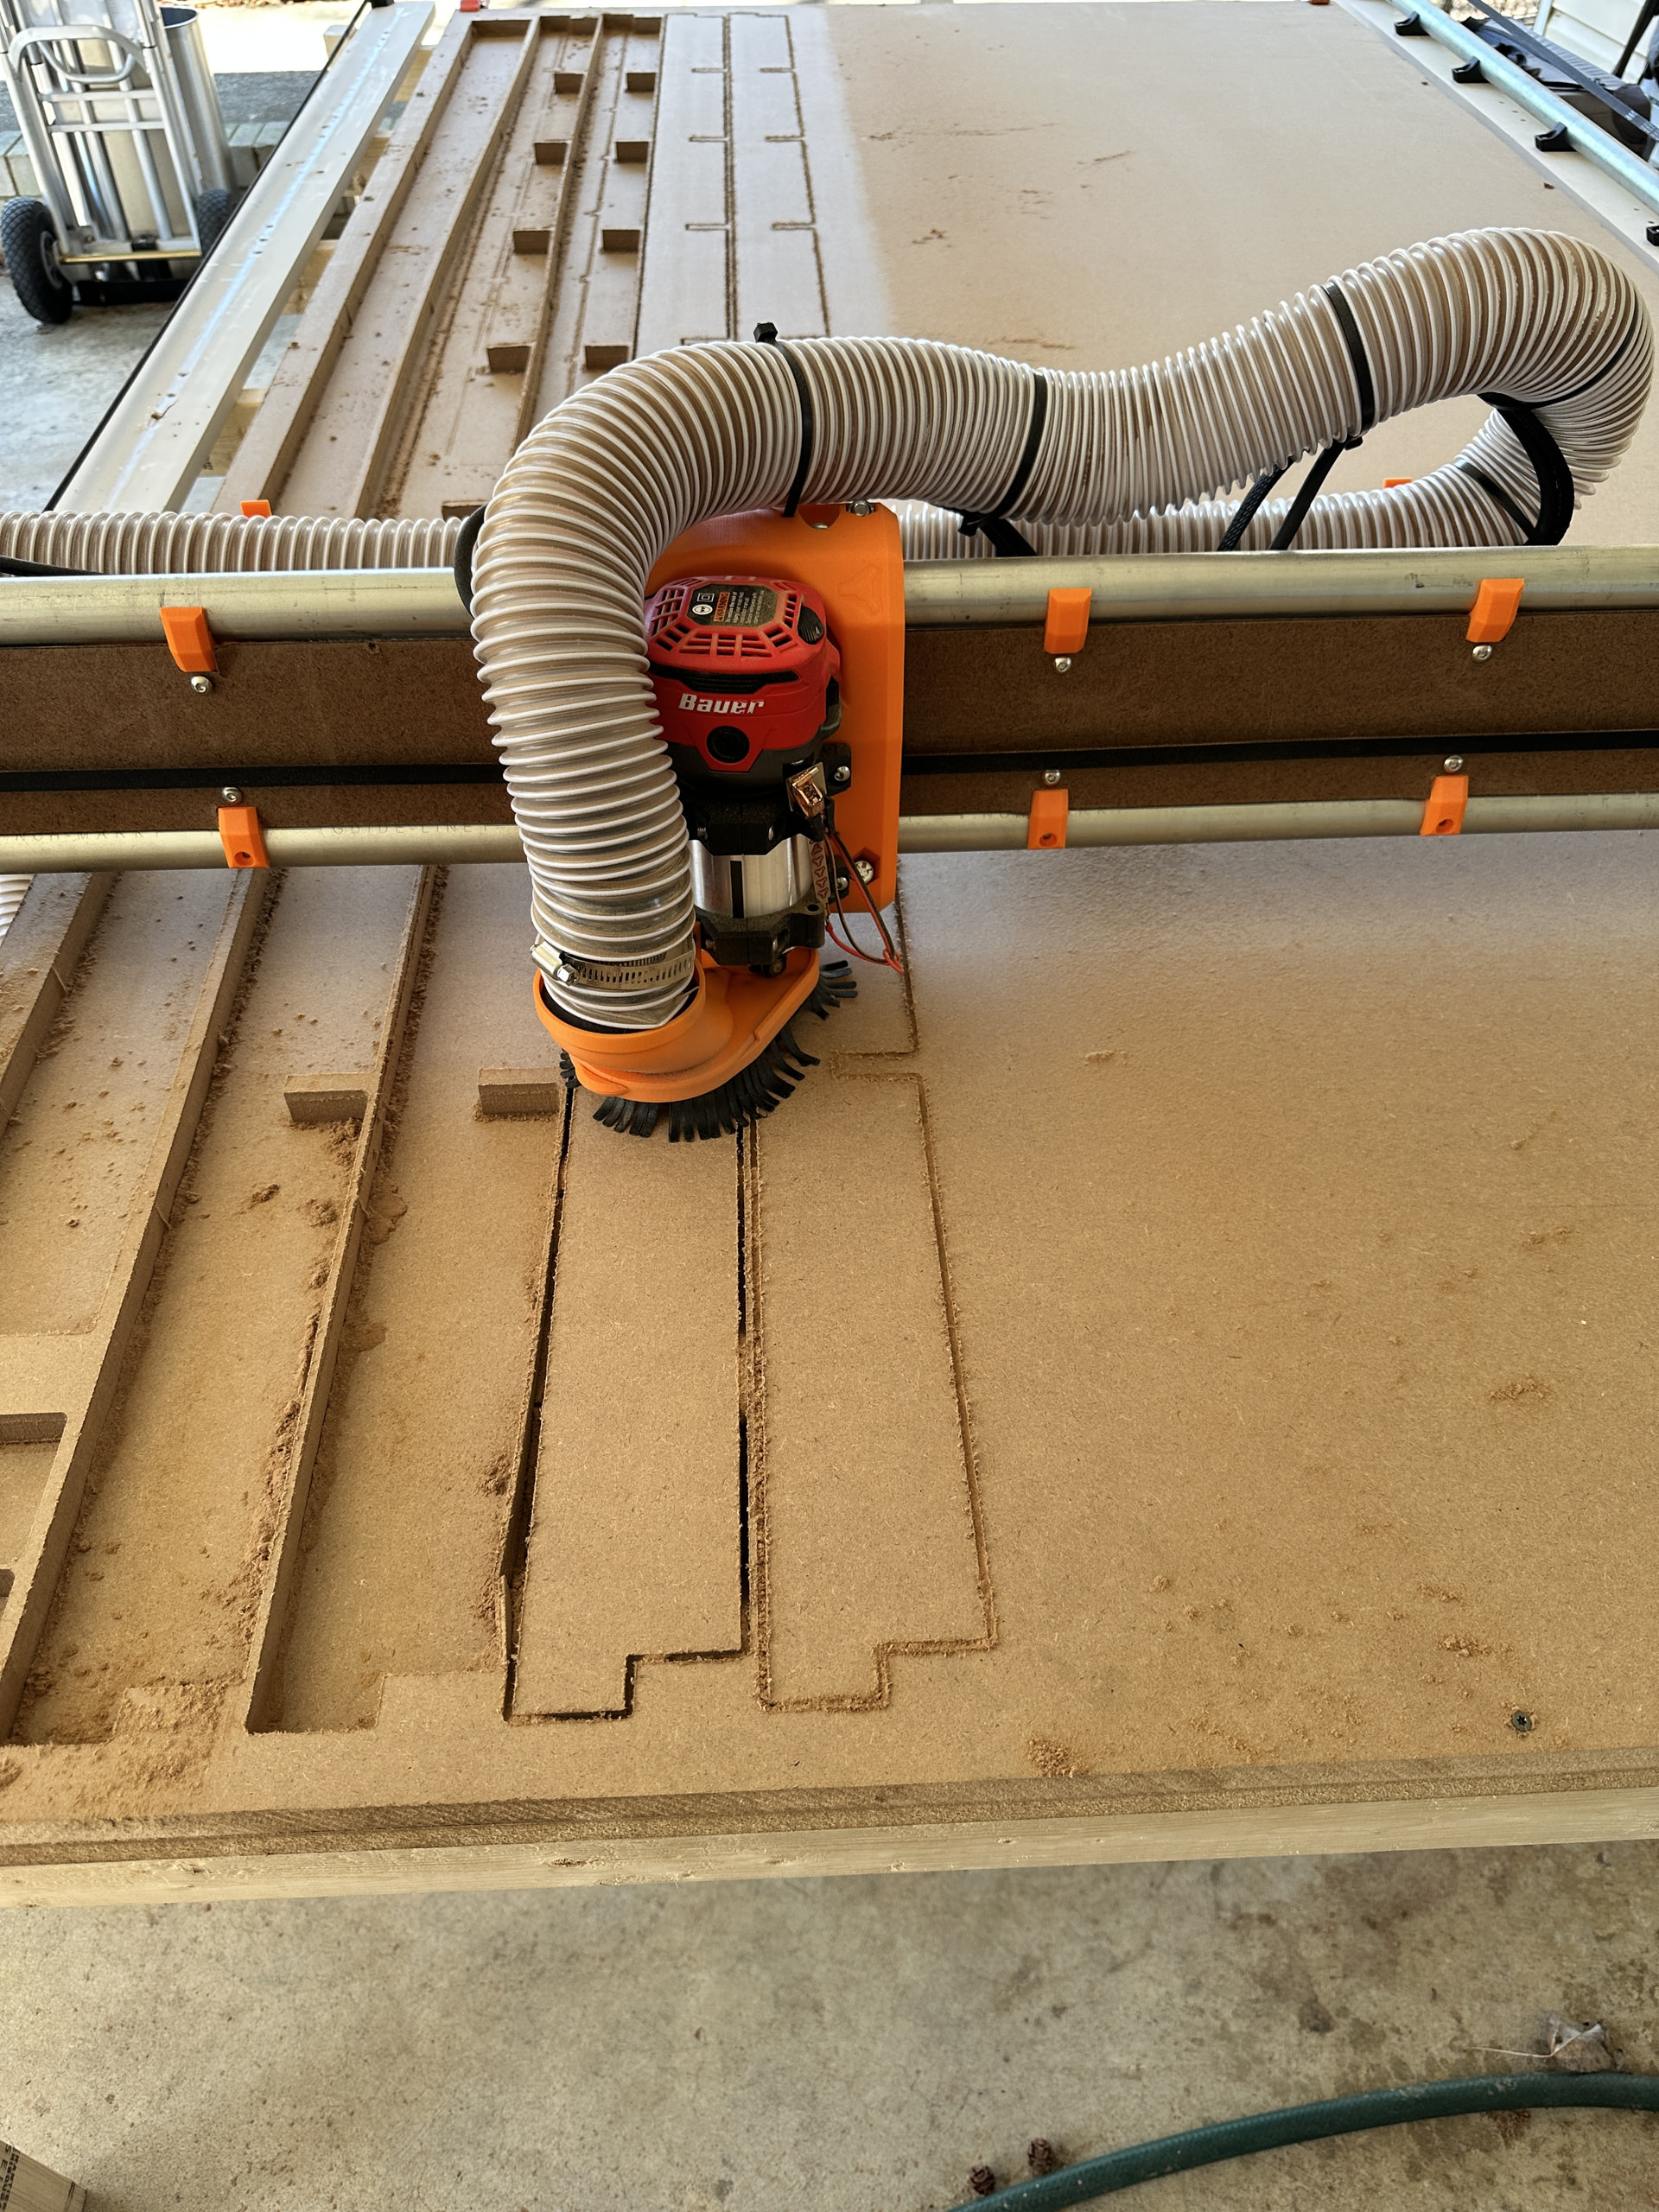
After the crown test success, I attached an endmill and started cutting my strut plate, multiple times! There were multiple design revisions and eventually I had them all cut out. During the very reliable hold up/eyeball test I thought it would fit, so I got to painting:
Turned out pretty good for a total n00b to this whole CNC thing. Time for assembly!
I got the core off and went to attach..we were so close yet so far..it was like 4” short. I was pretty frustrated and defeated, so I went inside, chilled out, went back to the strut generator and generated another very simple strut plate file and named it “frustrationstruts.gcode” on the EstlCAM output. I cut it with no frills, and some previous mistakes shown because I was not about to go and buy another piece of hardboard. That’s a problem for later me when I have the heart to go back and cut my fancy plates again.
As I sit here writing this, Garfield is cutting out all of the pieces for my torsion box table from @franklyrosalind ’s table generator. The test pieces fit perfectly on the first try!
Big, big thanks to Ryan (sorry, 3 user tag limit per post ![]() ) and the community for all of your work on this project. I love this thing. This has been a humbling and rewarding experience and it most definitely kept my winter blues at bay. Next winter’s project is already planned, too: ZenXY table!
) and the community for all of your work on this project. I love this thing. This has been a humbling and rewarding experience and it most definitely kept my winter blues at bay. Next winter’s project is already planned, too: ZenXY table!
Next steps for Garfield:
- Figure out how/where to put the emergency stop button
- Add a relay to control the shop vac and router
- Design some Garfield themed Peter plates
- Create a fold up table base so I can reclaim carport space when not in use
- Figure out what a lady has to do to get a laser on this beast
- And eventually re-cut them fancy strut plates!