This has truly been an enjoyable experience. Thank you, David (dkj4linux), for your guidance and assistance with the miniPC setup. I now have the option to control the machine from my laptop or simply use my miniPC. I love the flexibility to use either option.
WOW Joe. that turned out amazing! The fine detail is incredible. How many hours did it take?
That looks great!
I’m a bit envious. What a treat to have such a mentor/advisor to work with.
It is truly an honor and an amazing experience to have David guide me; he has been a blessing and a true friend. David has a wealth of information which is the greatest thing for me since I’m in the CNC world.
That turned out great! What router bit did you use?
Wow I absolutely love it! I never tried carving. Some questions:
- What bit (as asked)
- What material is that? MDF?
- How did you get the pattern? Not sure if this is polite but can you share the file only for my attempt to try?
- What CAM software?
Anyway great job!!
Regards
Craig
Okay folks, here are the answers, and I hope I’ve addressed everyone’s questions.
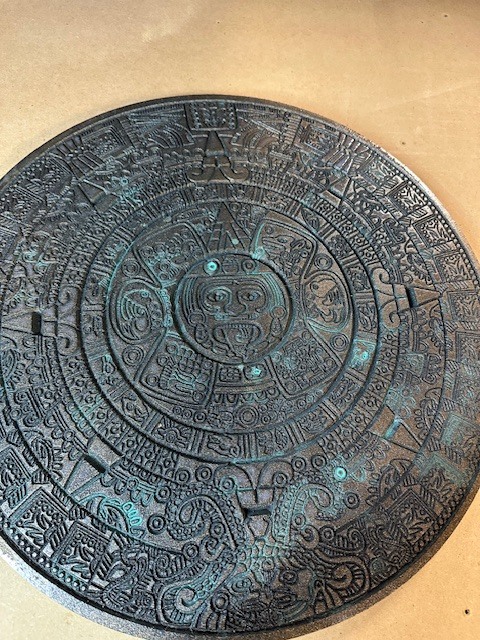
I used Aspire software, but you can also use VCarve. I got the image from the web and used LightBurn to trace it, then exported it in Illustrator (AI) format. You can also use DXF if preferred. After that, I sized it in Aspire to the dimensions I wanted; in my case, it’s a 15” diameter design.
I selected the entire design and used the VCarve option with a .25” 60-degree V-bit. I followed the recommended speed, which I believe was 15,000 RPM. In Aspire, you can choose the depth of the carve, but I left that setting alone and let the software calculate the depth based on the thickness of the material, which I used as .75” MDF.
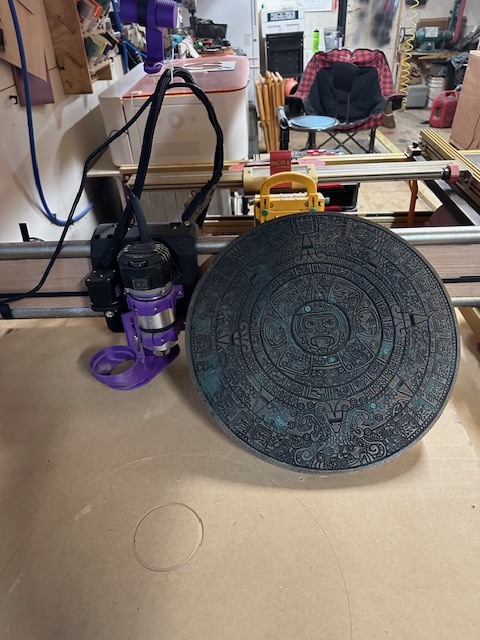
Once I generated the G-code, Aspire offers several post processors, such as “Generic Gcode ARC inches.” I then used the cut option and utilized a .125” end mill with the recommended speeds.
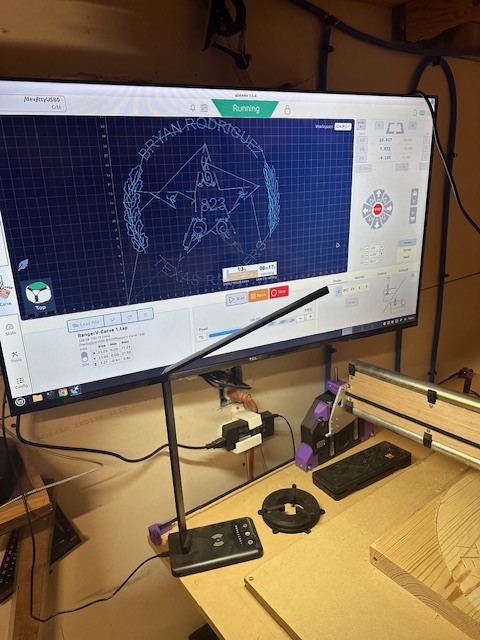
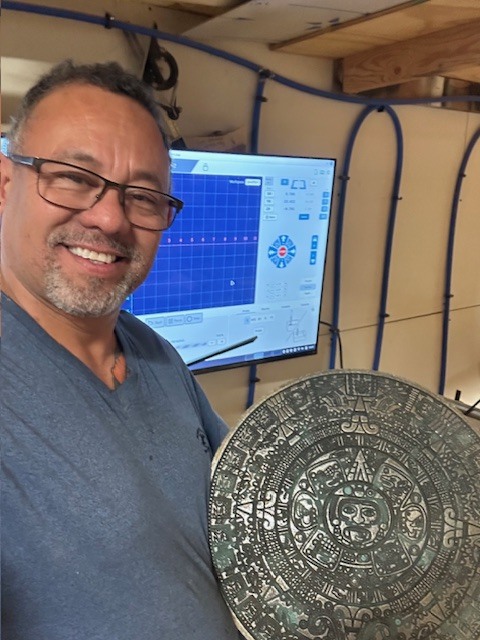
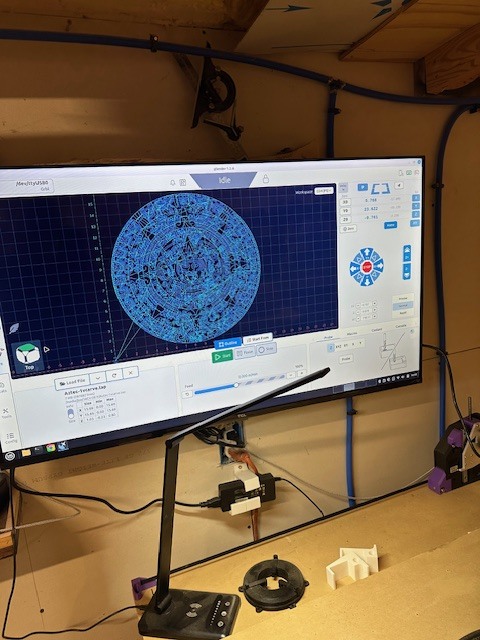
As David mentioned, different controllers may have variations. I prefer using G-code sender on a Linux mini PC. I will load the pictures shortly. After generating the G-code, always double-check it, especially if you’re working in metric versus imperial units.
For my files, I simply edited the G-code by adding “G20” at the beginning so it recognizes inches. I ran a test to ensure my home point was set correctly, and voila!
As promised, here are the pictures. First, seal the MDF with black primer from your local hardware store. Then, spray it with a patina color several times. I utilized the cap from the spray bottle, building up a puddle of this color and splatter it all over while continuing to apply the patina color. Let it tack, then spray the entire piece with metallic bronze. Finally, seal everything with clear gloss.

Craig, yes, sir, I will share the file. Give me a few moments and I will send it.
Oh yes, I completely forgot to mention this very important detail: it took 3 hours and 34 minutes. This project was definitely a test for this machine, which again impressively handled the job.
Okay, I hope this answers all your questions. I used a budget-friendly Genmitsu 710W compact router with a 65mm variable speed setting.Amazon.com
Just incredible! Very detailed an appreciated the share!
Okay folks, I need answers from anyone who has them. I want to add a laser to this machine, so what are your recommendations? It needs to be able to cut 0.125-inch wood material, etc.
This is what I have connected to my Jackpot3:
I would also recommend an air pump like this:
Joe, IIRC you already have a Neje A40640 laser that can do 1/8" pretty easily and should actually be pretty easy to hook up on LR4. It’s really a 3-wire laser (the 4th wire is a temperature sensor that you can ignore and leave unconnected). You’d just need a mount of some kind. Several folks here on the forum have Neje A40640 lasers… and they may also have them connected to a Jackpot controller.
Oh yes, thank you, David. I will definitely try this out and see how it works.
HeyBritt,
Thanks for help my friend, do you have the diagram or instructions how to connect it to jackpot3
You’re welcome Joe,
I have the power and ground connected to the 24V power supply going to the JP3.
The pwm wire is connected to gpio.27.
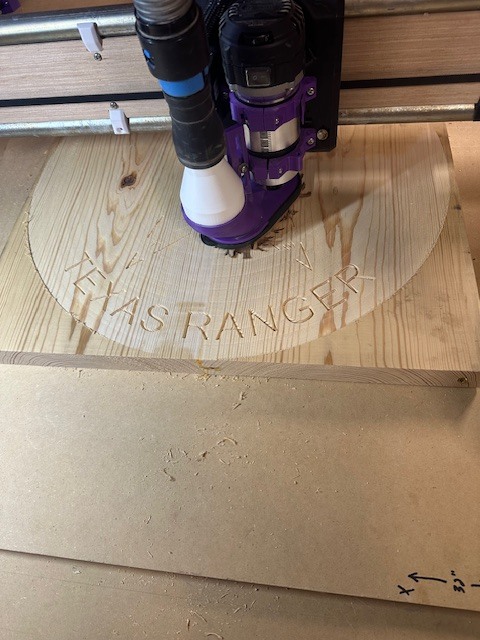
Well gents!!!
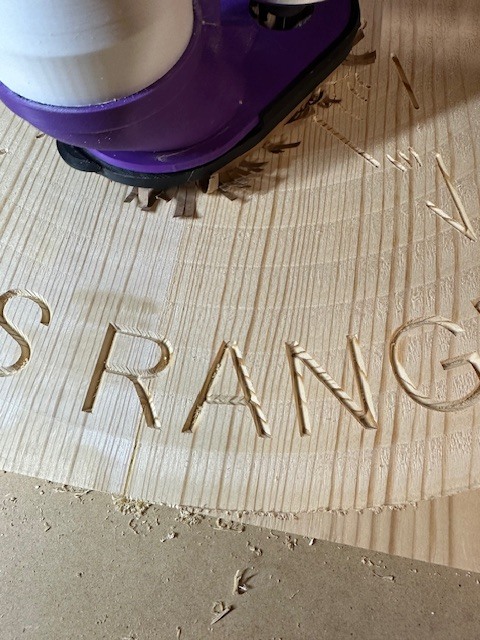
I’ve put the machine to another test: carving a Texas Ranger Badge as a gift. I usually make these on my “big” CNC without issue, but that machine is noisy and aggressive.
I wanted to see if the LR4 could match that quality, and honestly, the results are amazing. The carving detail is excellent—I actually prefer it over my big machine for this kind of work!
“The noise reduction is a huge plus, too. I’m blown away by the carving quality and detail—it looks fantastic!”