Ah. The board should have the connections by the drivers labeled X, Y, Z, E0, E1, E2 If not, I’d assume they are X, Y, Z, E0, E1, E2 from left to right with the drivers at the top of the board (as you’re holding it in the picture above). In fact, I can see the labels in the picture!  So for the LR2, it would be X, Y1, Z1, Y2, Z2, E2 (unused) from left to right.
1 Like
Thanks a lot !!!
Yeah. The preconfigured firmware files for the low rider have EXTRUDERS=0. That is a choice in the firnware, which you can set if you compile your own firmware, but I have chosen for you.
K got it right though. I’m back into hibernation until you call again.
1 Like
Unfortunately for me this SKR board was not ordered from V1’s shop…so I’ll probably have to load-flash or whatever you all mad techies call it…which I’m sure will be another challenge for me…I’ll now read and try to understand how this board is supposed to be flashed with YOUR firmware…that should probably be first step?
And thanks to everyone for the hand on this…
Àlex
@jeffeb3 Can I use the OEM firmware with the Bigtreetech 3.5 TFT V3.0? …it’s not the E3…but very
close…and Can I flash it before connecting anything but the screen?
My brain is boiling already trying to find the files in github…definitely need to catch up on all these tech things again…lost the path many moons ago and now need to get back into the game…
Cheers,
Àlex
That same page has some instructions to flash it and a link to the release pages.
You should definitely flash the skr pro, with the dualLR firmware. It is pretty easy and you don’t even have to install anything on your computer.
The tft firmware won’t work, because it was compiled for the E3. The stock firmware should work ok. But there is an annoying error related to it sending M221 constantly. But let’s get moving without that first. The solution there is to download the github tft firmware, change one line in a file, install vscode, and then platformio, and compile that firmware, then copy some files to the sd and put the sd in. The E3, you just have to copy the files to the SD and out in the card.
I just managed to download to my computer the following folder…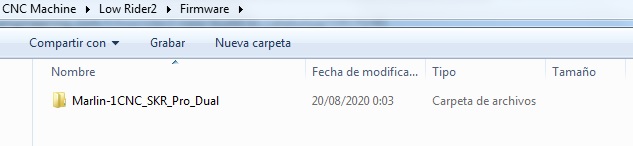
I guess this is the one I need…now need to understand how to flash the SKR…
It sounds nice and easy when you say it…but for me it’s a nightmare 
Nope, that’s not the one you want. That is for an mpcnc, and it doesn’t have the precompiled firmware.bin.
https://docs.v1engineering.com/electronics/skrpro/#skr-bin
There is a link in this section for preconfigured files. That should lead you to this file:
1 Like
Thanks that helped a lot…now need to try and follow instructions…if I can’t manage it I’ll ask for help again…unpayable help by the way !!!
Àlex 
1 Like
Sorry, but do I need to get rid of the Firmware file that is in the SD card? or do I just leave it there?
I got the file in the sd card, started the SKR and then pushed the reset button, tft works fine but I’m not too sure your firmware has been loaded…any way I can checked that through any menu?
Thanks,
Àlex
The skr board will move the firmware.bin to firmware.cur (for current). You don’t need to leave it there. It copies it to the board. While you’re flashing it, there is a green led that is only on when it’s flashing.
I’ll do it again tomorrow after work and check for that green led flashing…thanks Jeff…if nothing goes wrong I’d like to have this monster doing the crown by the weekend…
1 Like
I’m going through all the info, which is a lot and great, at V1’s page and come across this section on set up and first use…don’t understand the Arduino part…Am I supposed to install this on the board, on the computer, or ???
Bear with me guys…
Àlex
You don’t need arduino.
1 Like
Thanks Jeff, going through the whole amount of reading at the moment…I must say that you all involved in this project deserve some credit for putting so much information together and helping people go trhough the start project…it’s amazing how many things are involved on getting a CNC working…
Thanks,
Àlex
It really is a lot different than a 3D printer, right? But this project in particular doesn’t try to force users into a particular configuration, so there it is really hard to write documentation that isn’t always saying, "If you … then … else … ".
But also, without the documentation, these forums would just be swamped with questions, and so would Ryan’s email inbox. So the docs are a way that everyone can contribute and try to put the most often learned lessons in one place, even if it isn’t information that everyone needs (and that’s the real difficult thing to balance).
In my opinion the more reading the better…I find it very interesting going through all this reading…I’m an end user but knwing there’s so much involved at the backstage for running a machne like this just shows how much interested there is by the core people to make this run forward…My elder bro loves playing with Rasp Pi but I want to try and go through this setup process on my own so I trully understand the full process and get knowledge for future troubleshooting when milling etc.
I may have some more questions before geting this baby rolling but it’s a leraning curve everyone must go through !!!
I love 3D design, which is may challenging, love 3D printing, but a CNC has been on my list for many years now…once I get this rolling I might go for a Laser Cutter too…we’ll see…for now a step-by-step will do for me…
Cheers,
I’m seting ESTL at the moment and I seem to have different tool settings in my version refered to the one on the guide…could anybody tell me what those 2 symbols mean ? I can’t find them on the tool view display…
Thanks,

Ok, got the crown scaled up to 150mm wide, got the g-code generated and understand that this gcode is the one to put on an SD card ? Repetier Host I understand is the slicer to check travels and depths etc…not a G-Code Generator itself…Am I right ?
Thanks,
The arrow is step over. The V shape is the angle of the bit (for v bits).
Some of the words you’re using in your description are a little confusing to me. Check out the software workflow doc (since you like reading). You can run the gcode with repetier host or from the LCD/SD card. Repetier host doesn’t generate gcode for CNC machines, but it can invoke a 3D printer slicer to create gcode for 3D printers, but even that is actually just calling another program in the background.
1 Like