LowRider-inspired Foam Ripper

In general, a regulator is used to control how much of a higher pressure source is allowed through to a particular use. I don’t think that inflator pump will generate enough pressure that a regulator will be needed.

If that inflator is anything like the one we’ve got for blowing up air mattresses or “floaties” for use in the pool or lake, I don’t think you’ll enjoy the level of noise it makes. It’s one thing to compare the shop vac to the router spindle, another completely to compare that screamer to a virtually silent laser.

I got a long hose, so that I can keep it I’m another room. It’ll be less noisy than my compressor, I’m sure!

1 Like

Oh, goodness… I really don’t know. You’re the first to pursue it to my knowledge. I know cheap mattress pumps are plastic and loud and may not last long, mistreating it as we’re doing here… the one I have is all/mostly metal, seems far better quality, and runs more smoothly than the cheap ones I’ve had. I think I “inherited” this one from one of my kids somewhere along the way… :astonished:

Please don’t hammer me over the “technicalities” but I’m not sure you’d call the router speed control a [pressure] “regulator”. It’s just adjusting the volume of air-flow and letting the nozzle create some level of pressure… kinda like putting your thumb over the end of the water hose to create a high-speed stream of water. The pressure against my finger indeed varies with the speed of the mattress pump…

One disadvantage of the speed control, compared to the ball-valve is that it doesn’t go below some rpm value… and even the lowest setting is way too much “air-assist” when engraving… where you want virtually none beyond just enough to prevent soot/smoke from entering the nozzle and coating/damaging the lens. The dark smudged area was with it at lowest setting, everything else it was completely off. The ball-valve can be adjusted to almost complete cutoff… and just the barest amount to keep smoke and soot out of the nozzle.

I suspect my earlier version of air-assist works as well or better… the aquarium compressor, 4mm ID air line, ball-valve, and printed nozzle. I’ve not found an inexpensive ball-valve for the larger tubing… if I could, I’d replace the router speed control with it in a heartbeat for finer control.

– David

1 Like

Ah, I appreciate your thorough reply! I guess I’ll just have to wait and see how it works out. My ideal setup would be to run some pipes to get compressor air to the cnc room and have an air regulator. If I close the door, the compressor won’t bother me much…

1 Like

I want to discourage you/everybody from the mattress air-pump air-assist I presented. That’s what I/we get from thinking out loud… :roll_eyes:

After using it for a few burns, I’m disappointed with the results and the noise. I’ve since reverted back to my previous air-assist using the the aquarium compressor, 4mm ID air line, ball-valve, and printed nozzle. Much better…

Sorry 'bout that… :anguished:

– David

2 Likes

Though not that loud, I found the droning of the aquarium pump bothersome…especially since I had to be near the laser while it was running. I tried enclosing the pump in thin plywood, and that didn’t work.
Next I tried 2" foam insulation board, but that enclosures made almost no difference.

So I went with an alternate solution based on an idea I found on the net. I found two cardboard boxes that fit inside each other. The inner one was just an inch or two bigger than the pump, and there was 4 or 5 inches between the inner box and the outer box. I stuffed the cavity between the two boxes with old clothes that I was collecting for a trip to Goodwill. I did leave somewhat of an opening for cooling on the side facing away from the general shop space. This enclosure made a substantial difference.

The noise was obnoxious enough that I have to wonder what people do with aquariums where the pump runs 24/7. Surprising I did not find much on the net about the issue, so maybe I’m just extra sensitive to noise at that frequency.

1 Like

Relative to the air-mattress pump, I find the aquarium pump is very quiet… so I’m happy. It probably also helps that I’m hard-of-hearing. But even then the air-mattress pump drowns out the TV… not so the aquarium pump… :wink:

I buy a good quality aquarium pump.

The Tetra whisper pumps have rubber on their feet and run virtually silent. I then place it on top of an old foam mouse pad to further isolate it from the stand.

90% of the noise you hear from an aquarium pump is the pump vibrating against whatever it is resting on.

My aquarium is 3’ from my office chair where I work all day and I can’t hear the pump at all.

As far as air assist on my laser, I have an 80 gallon 5 hp compressor on the other end of the shop that I use on the laser. I have a small air brush regulator at the laser that’s choking down the pressure to about 5-10 psi. The 80 gallon tank can supply a lot of air to the laser before it has to kick on and since it’s a larger oiled compressor pump it’s quiet enough you can easily have a conversation while it’s running.

2 Likes

Don’t worry, I actually ordered the mattress pump on my own whim. Coming back to the forum, I was happy to see others thinking the same way. I’ll give it a try, and if it’s not working well, I’ll get
pipes from the compressor to my tiny room - which is something I’ve been wanting for a long time.

I still want to thank you for your helpfulness!! Your experimentation is inspiring and acting as a kick in the but for me to get the laser up and running :grinning:

2 Likes

David,

I got a chance to print the air nozzle today. My printer has a couple problems that resulted in needing to sand the part a little to get it to fit. Otherwise it looks great!


Thanks for the design. Now I just need to go through all the NEJE threads to figure out how to get the system going.

Mike

4 Likes

I ended up with using the compressor. Works well, doesn’t power up too frequently and easy to regulate air flow. I only need to get a pipe through the wall, so that I can fully close the door when using the laser. Thanks a lot to all of you for being so helpful, the whole bunch! The blacksmith wanted me to see if I could engrave metal, after all the mandatory experiments with wood and cardboard. Worked surprisingly well, on first try! (My wife was impressed, but I was honest with her and gave all you folks the credit :nerd_face:)

7 Likes

After spending the last few days playing with my stable of Neje lasers and air-assist, I’ve been getting frustrated trying to do the near photo-quality I was getting a year and a half ago, when I was doing the ceramic tiles I’ve shown before. Finally, decided to pull out the little 2.5W Eleksmaker laser module I was using back then… what a difference! Still not great, but definitely better… bottom 2 photos Neje, top two Eleksmaker. Same LB settings, same machine, different laser module…

A little dark yet but closer…

Now I want to give ceramic tiles another go…

But then I saw an incredible “3d illusion” effect someone over on the Lightburn forum had applied to a 2d image… provided a link and I wound up here. Decided to give it a try…

Amazing effect! Little 2.3W Eleksmaker laser on cereal box chipboard… imported into Lightburn!

Starting to have fun again!

– David

8 Likes

What settings did you use to etch metal?

2mm/s 100% power. This steel is soft though! And the surface is not very smooth, the blade is hand forged and flattened on a grinder. I’ve read that paint or other treatments can improve the engraving. The imprint is surprisingly strong, I did some rough sanding and nothing disappeared.

Impressive effect! It’s weird that the neje has such bad photo engraving quality. Can it be a dirty lens? Here is a simple try that I did, on cardboard. Didn’t tweak any other settings other than power.

1 Like

Here’s another try with 2mms 100%. I think I’ll decrease speed to 1mms or 1.5mms. This is after some serious sanding. I just wanted to see if how deep the engraving got.

1 Like

After an abortive attempt last evening, finally got a decent burn on flat-white painted ceramic tile…

Cleaned the lens, slowed down to 1000 mm/min, 100% power, 339 DPI… and a little less than 2 hours. Cleaned off paint with acetone and steel wool.

– David

7 Likes

was that with your older laser or the new neje one? I really like the 3D effect of that pic.

That is with a little 2.3W Banggood/Eleksmaker laser I was using 1-1/2 years ago… not the new Neje one. The Norton White Tile method actually seems to work best with a low-powered diode laser. While there are some who’ve done reasonably well with a higher-powered laser since, the most stunning always seem to be following closely the instruction given in this video…

https://www.youtube.com/watch?v=sk2A9F8Vunw

As far as the “3d-illusion” in a 2d photo… I’m not sure how that’s done. I purchased the elephant files from a vendor on Etsy… there are several vendors offering 2d files that look 3d and they are amazing.

– David

3 Likes

Kids got the new dog, so it seems expected that I do something about it…

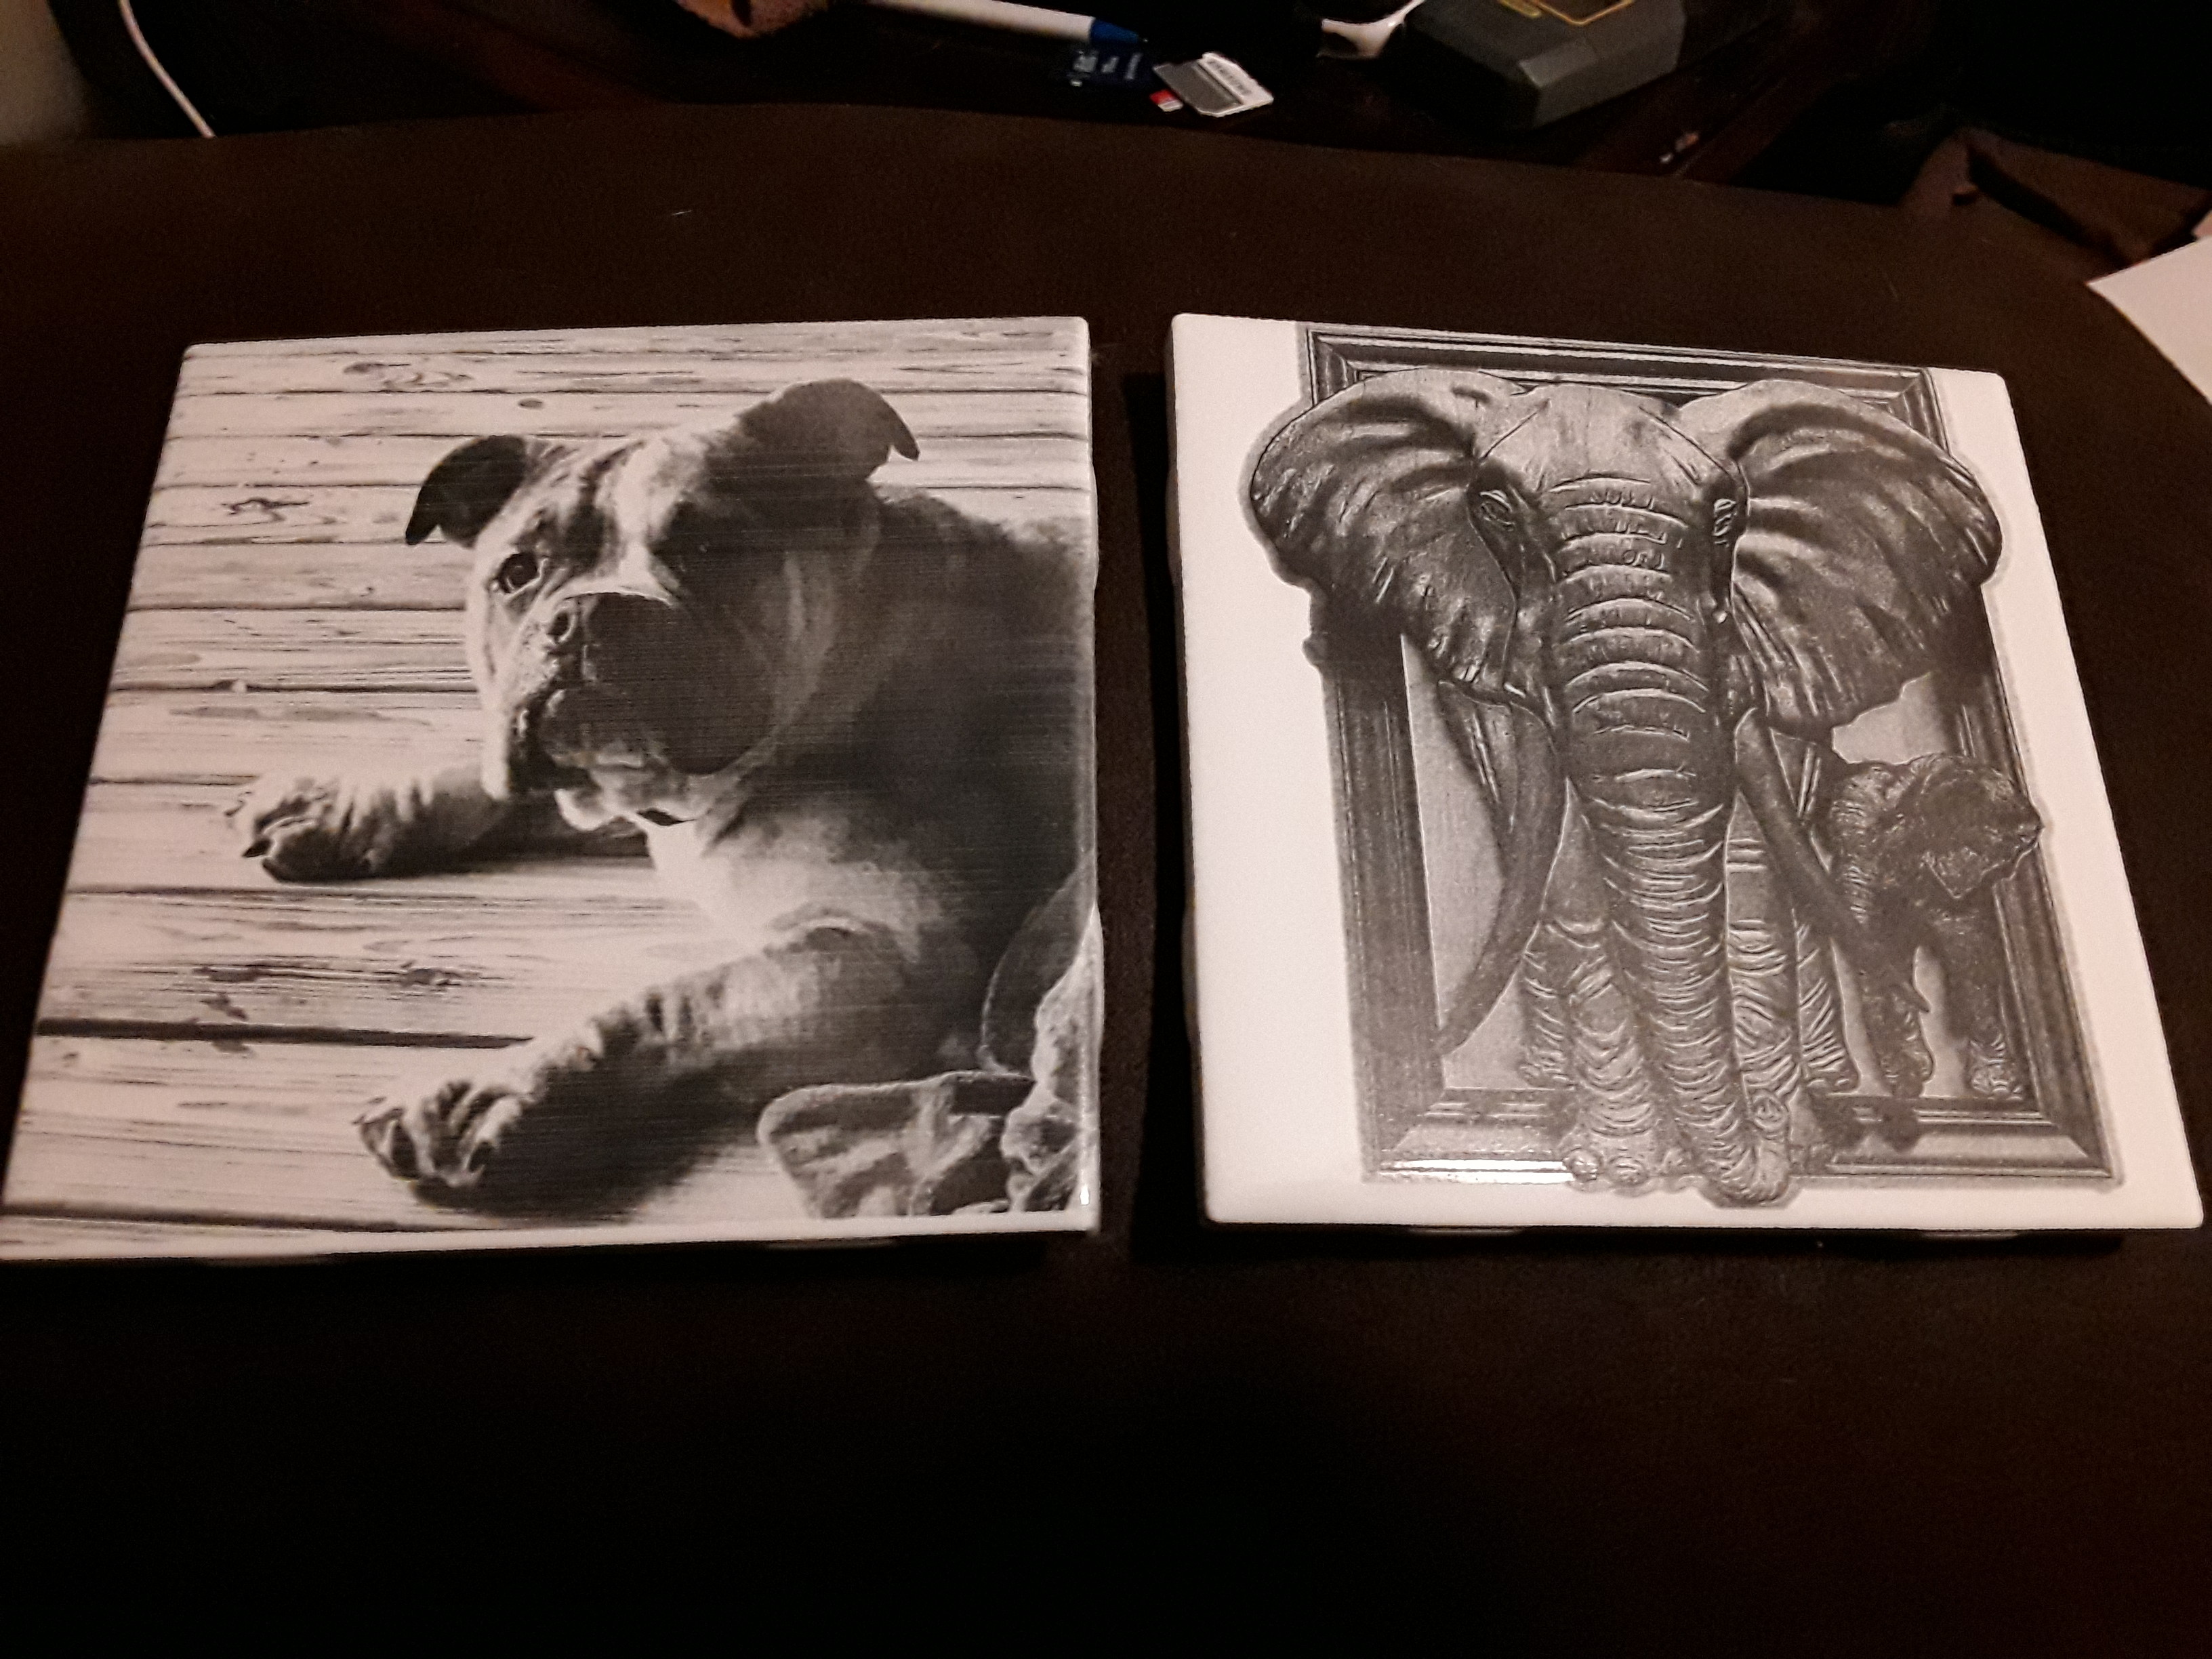
Mentioned cleaning the lens last post and I think it really had a positive effect. I was able to up the speed and power back up to previous levels (1200 mm/min and 85%) and started getting far better results…

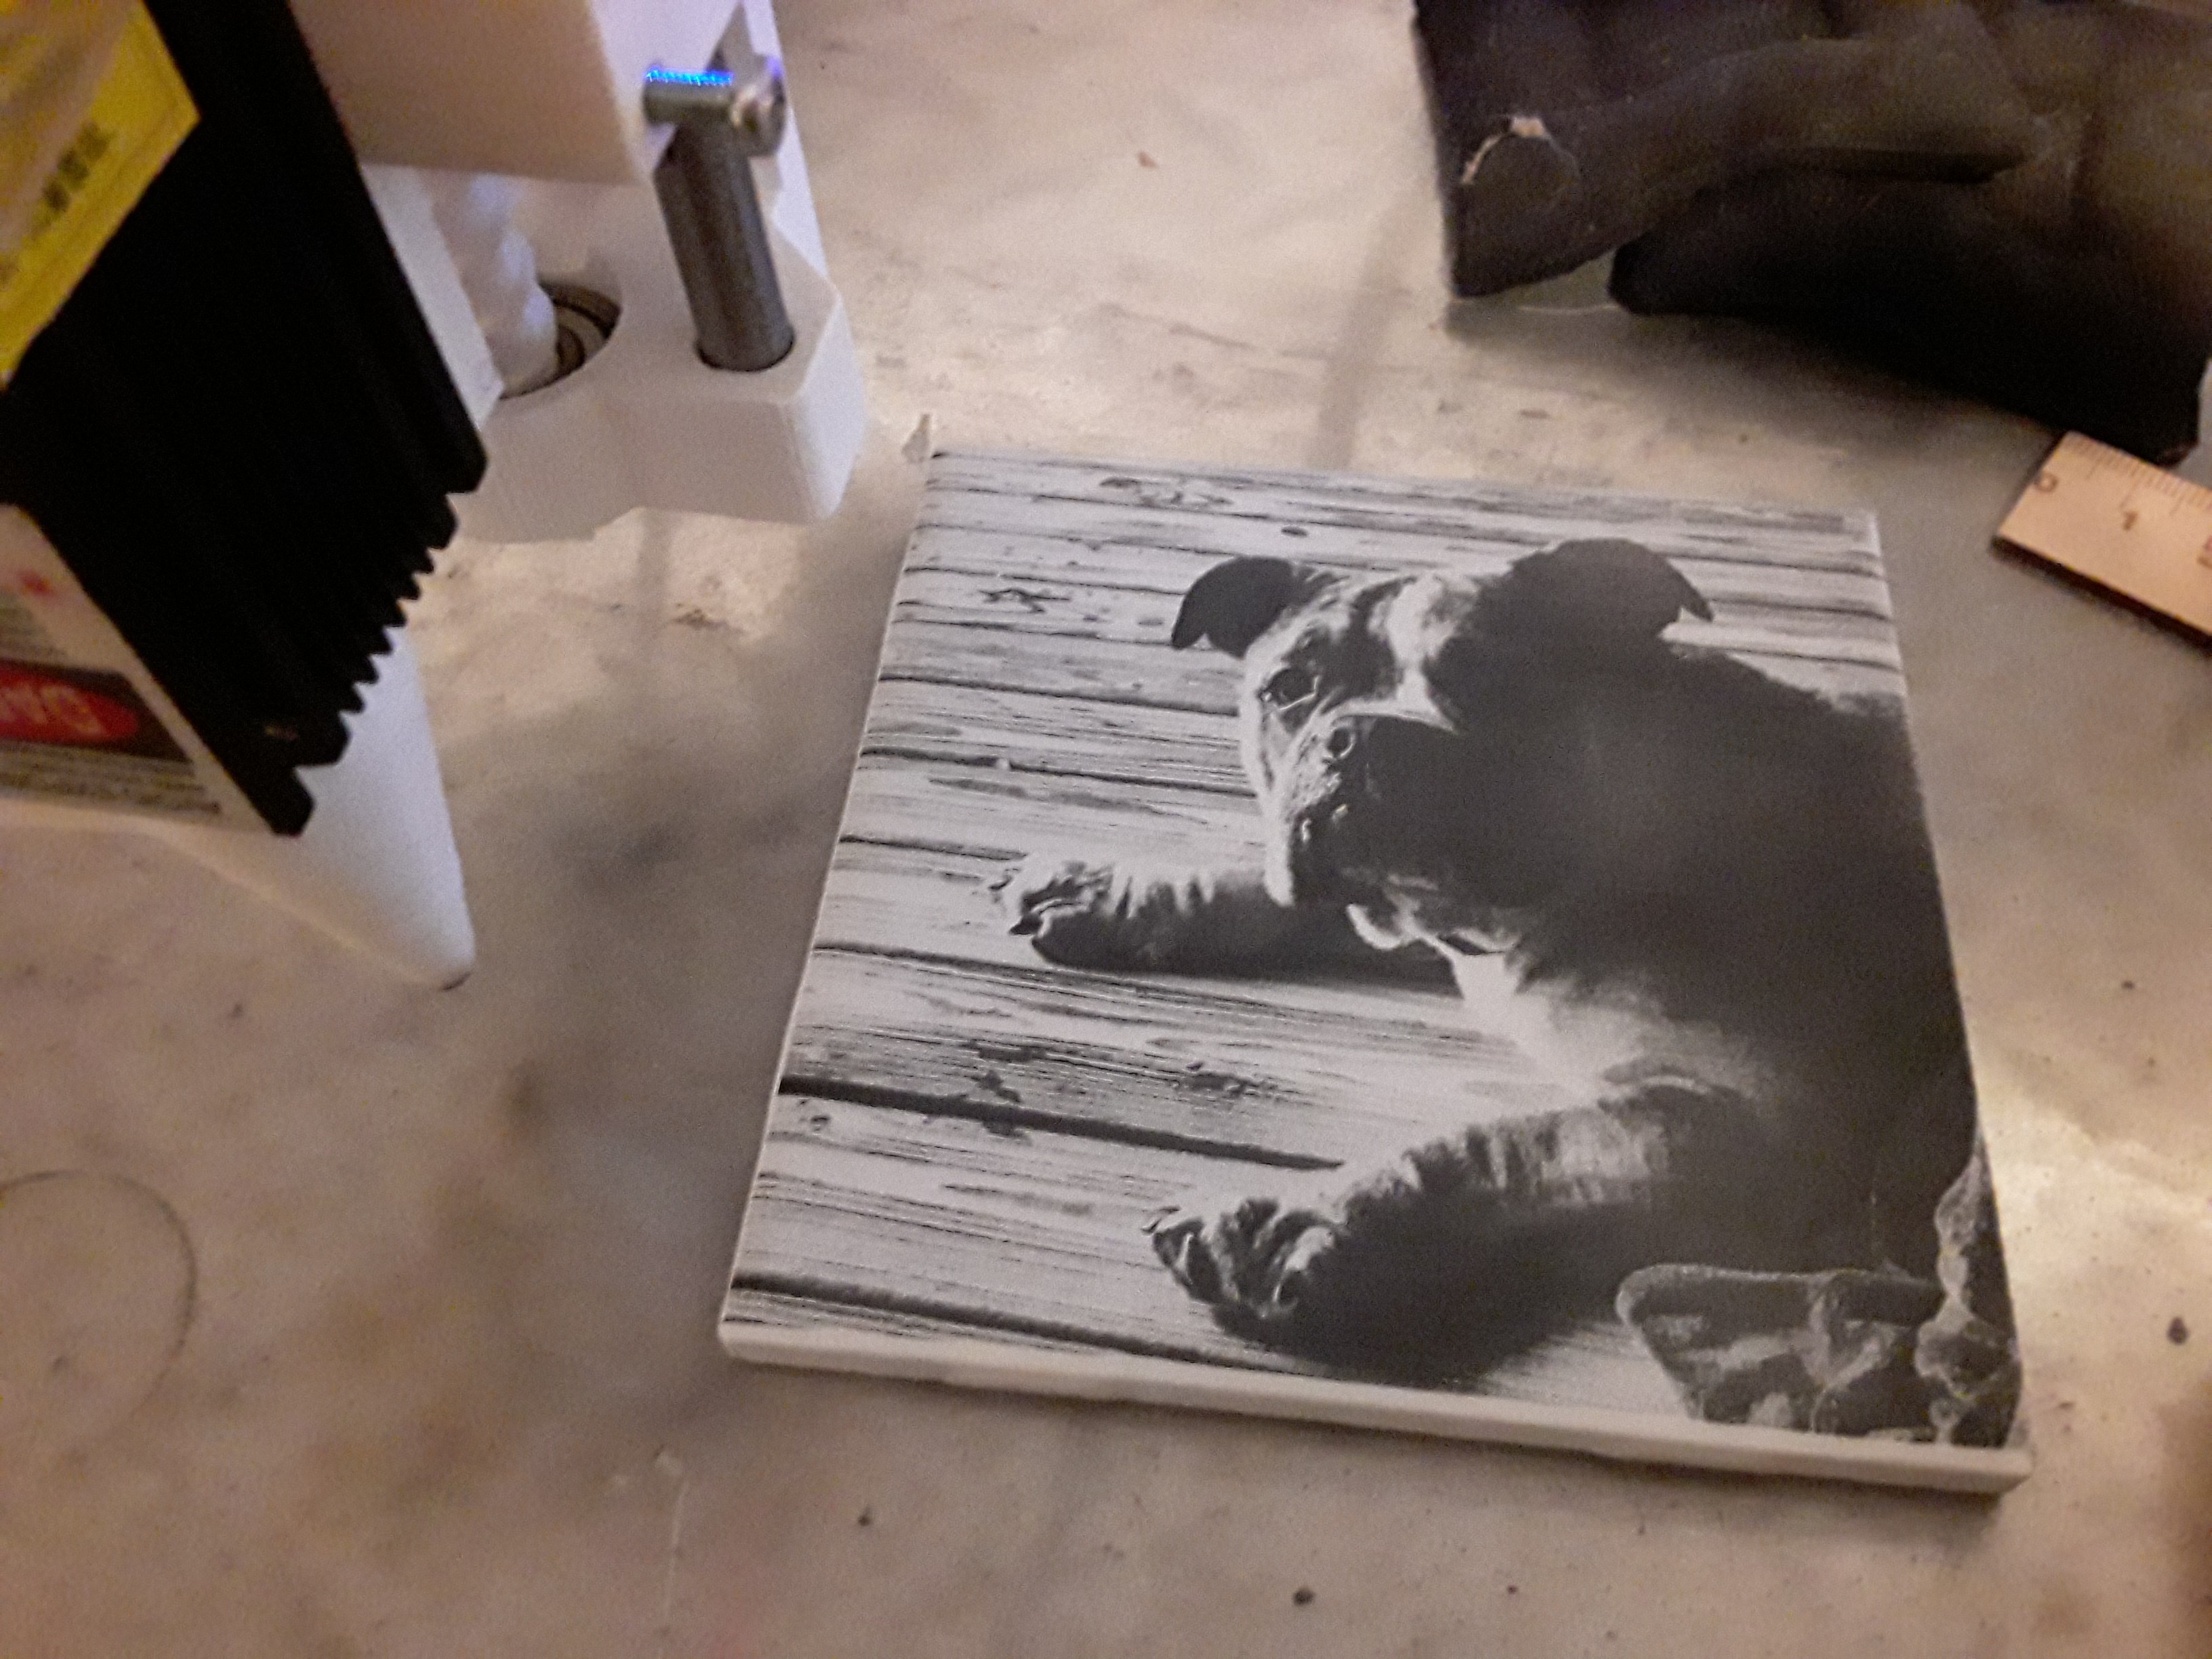
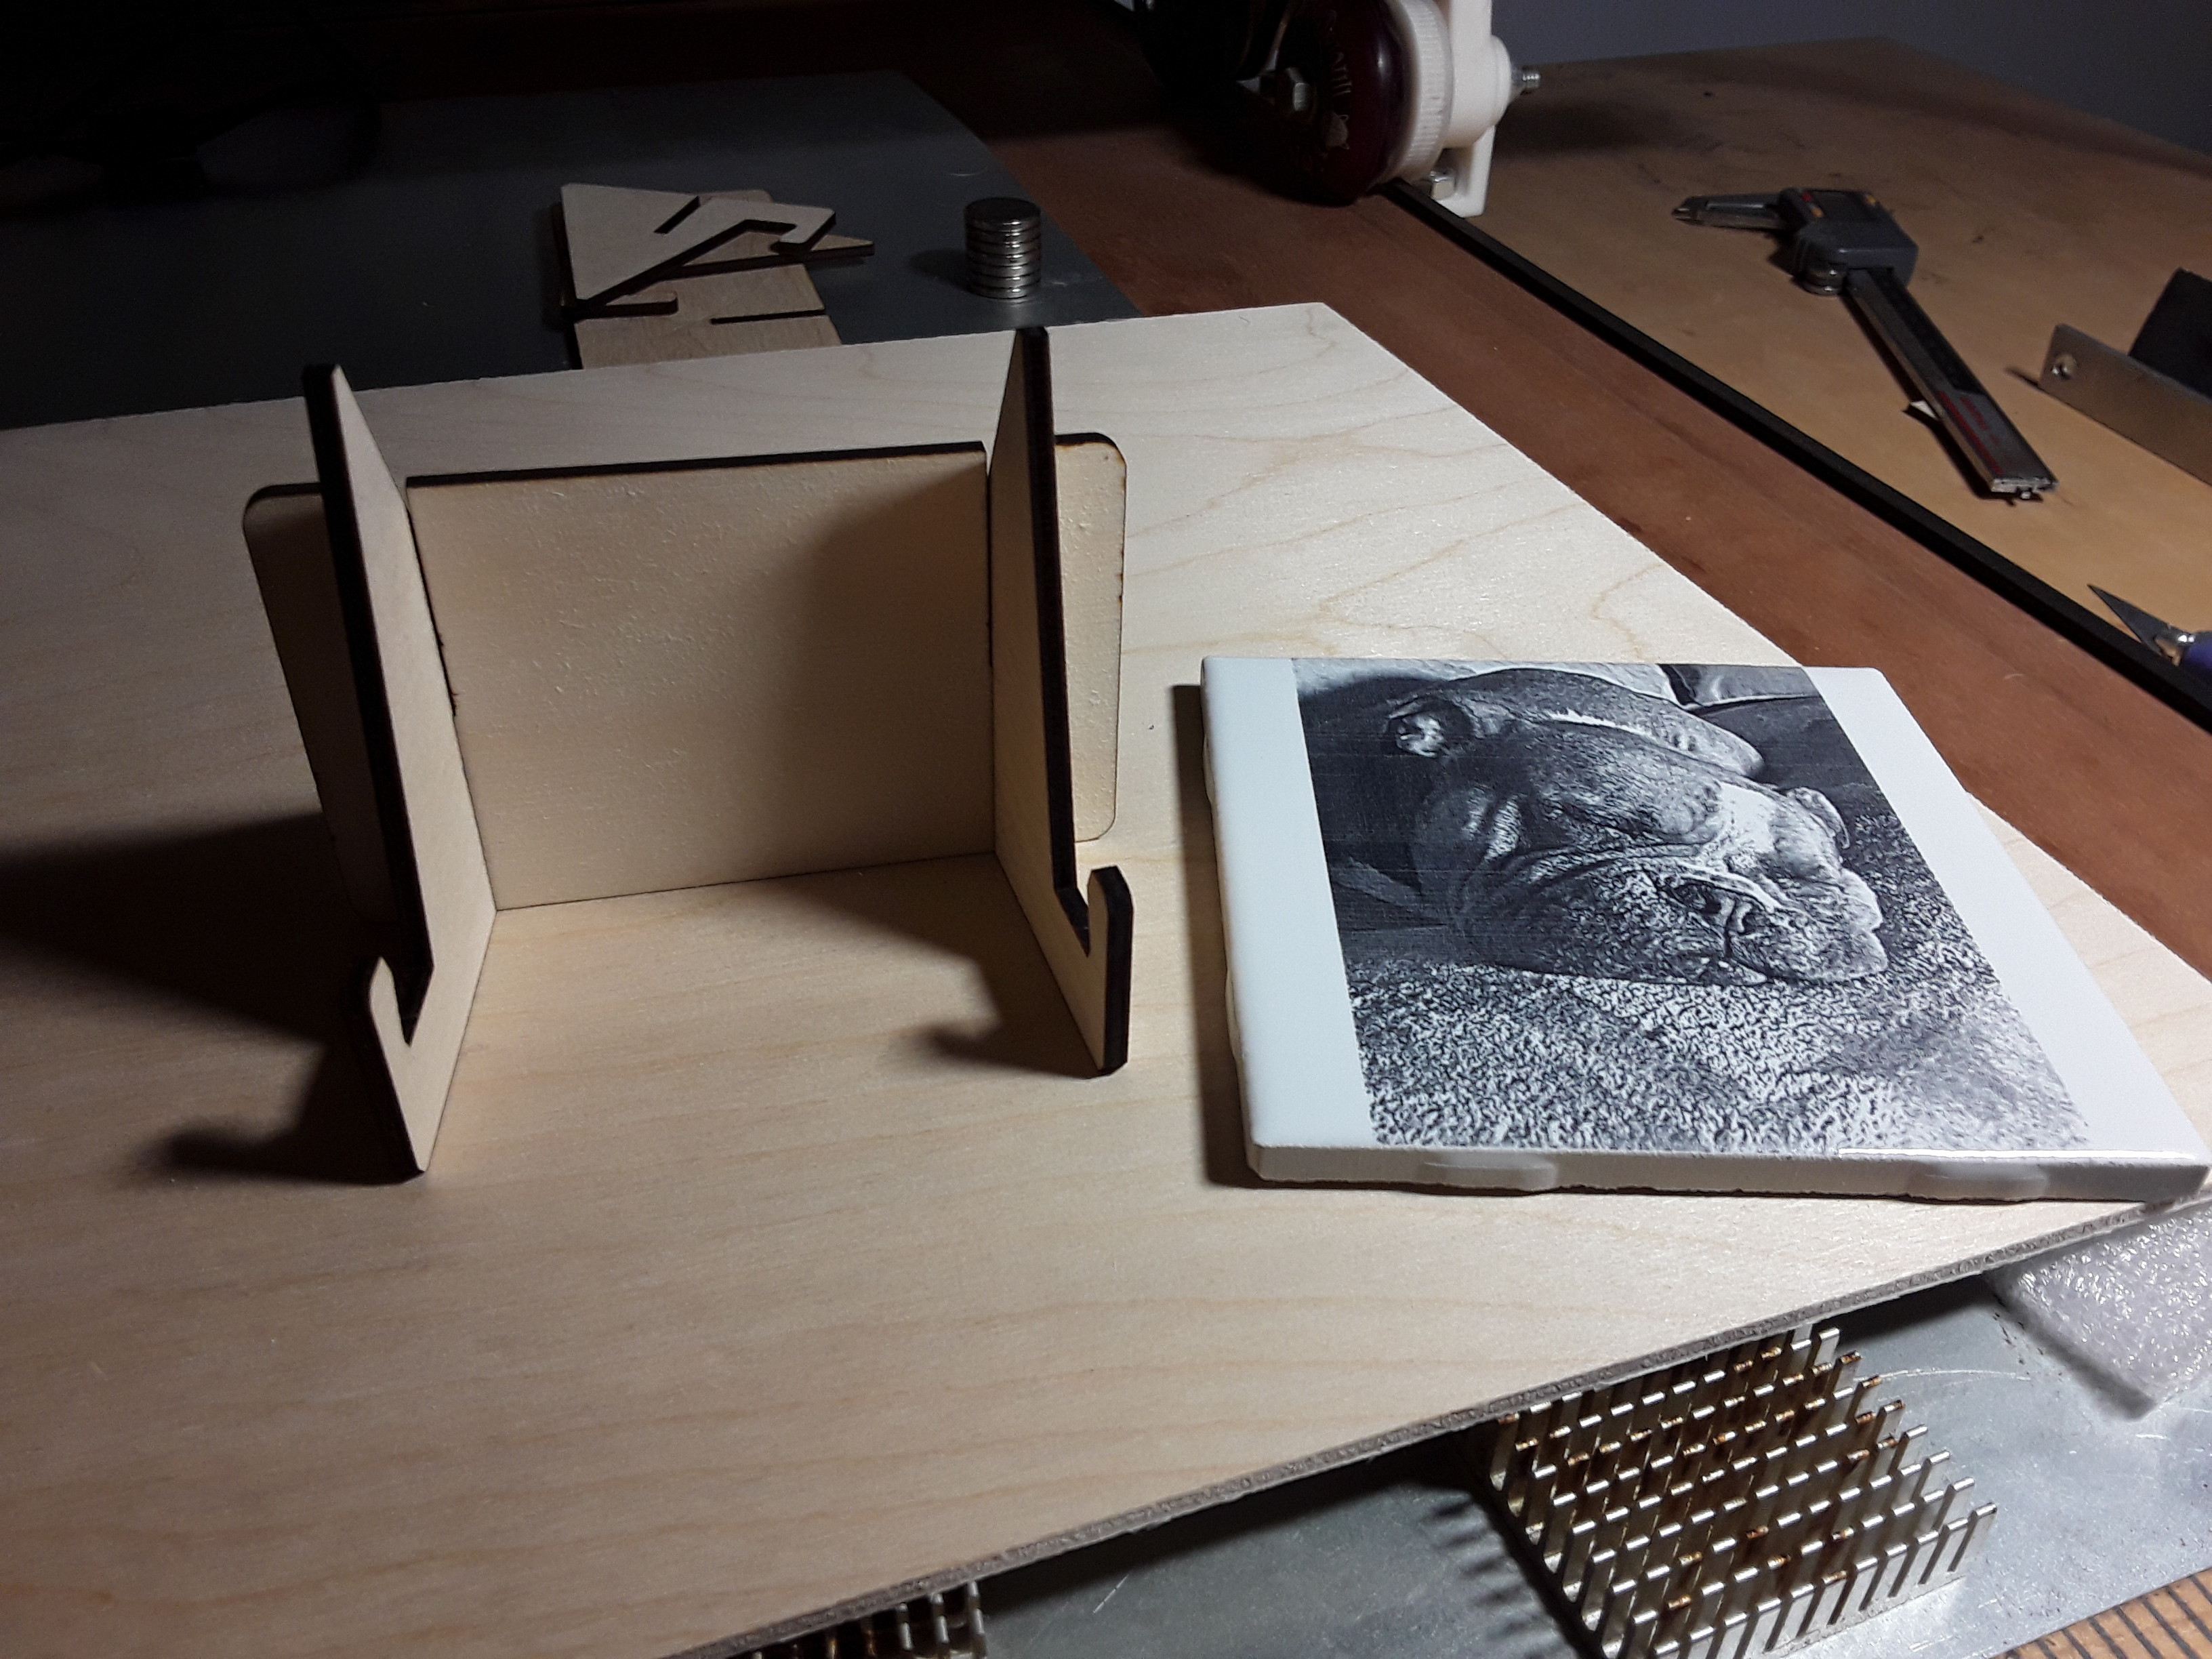
Daughter and I decided we need a small photo/tile stand… so cut one from 3mm plywood with the Neje A40640 laser module…

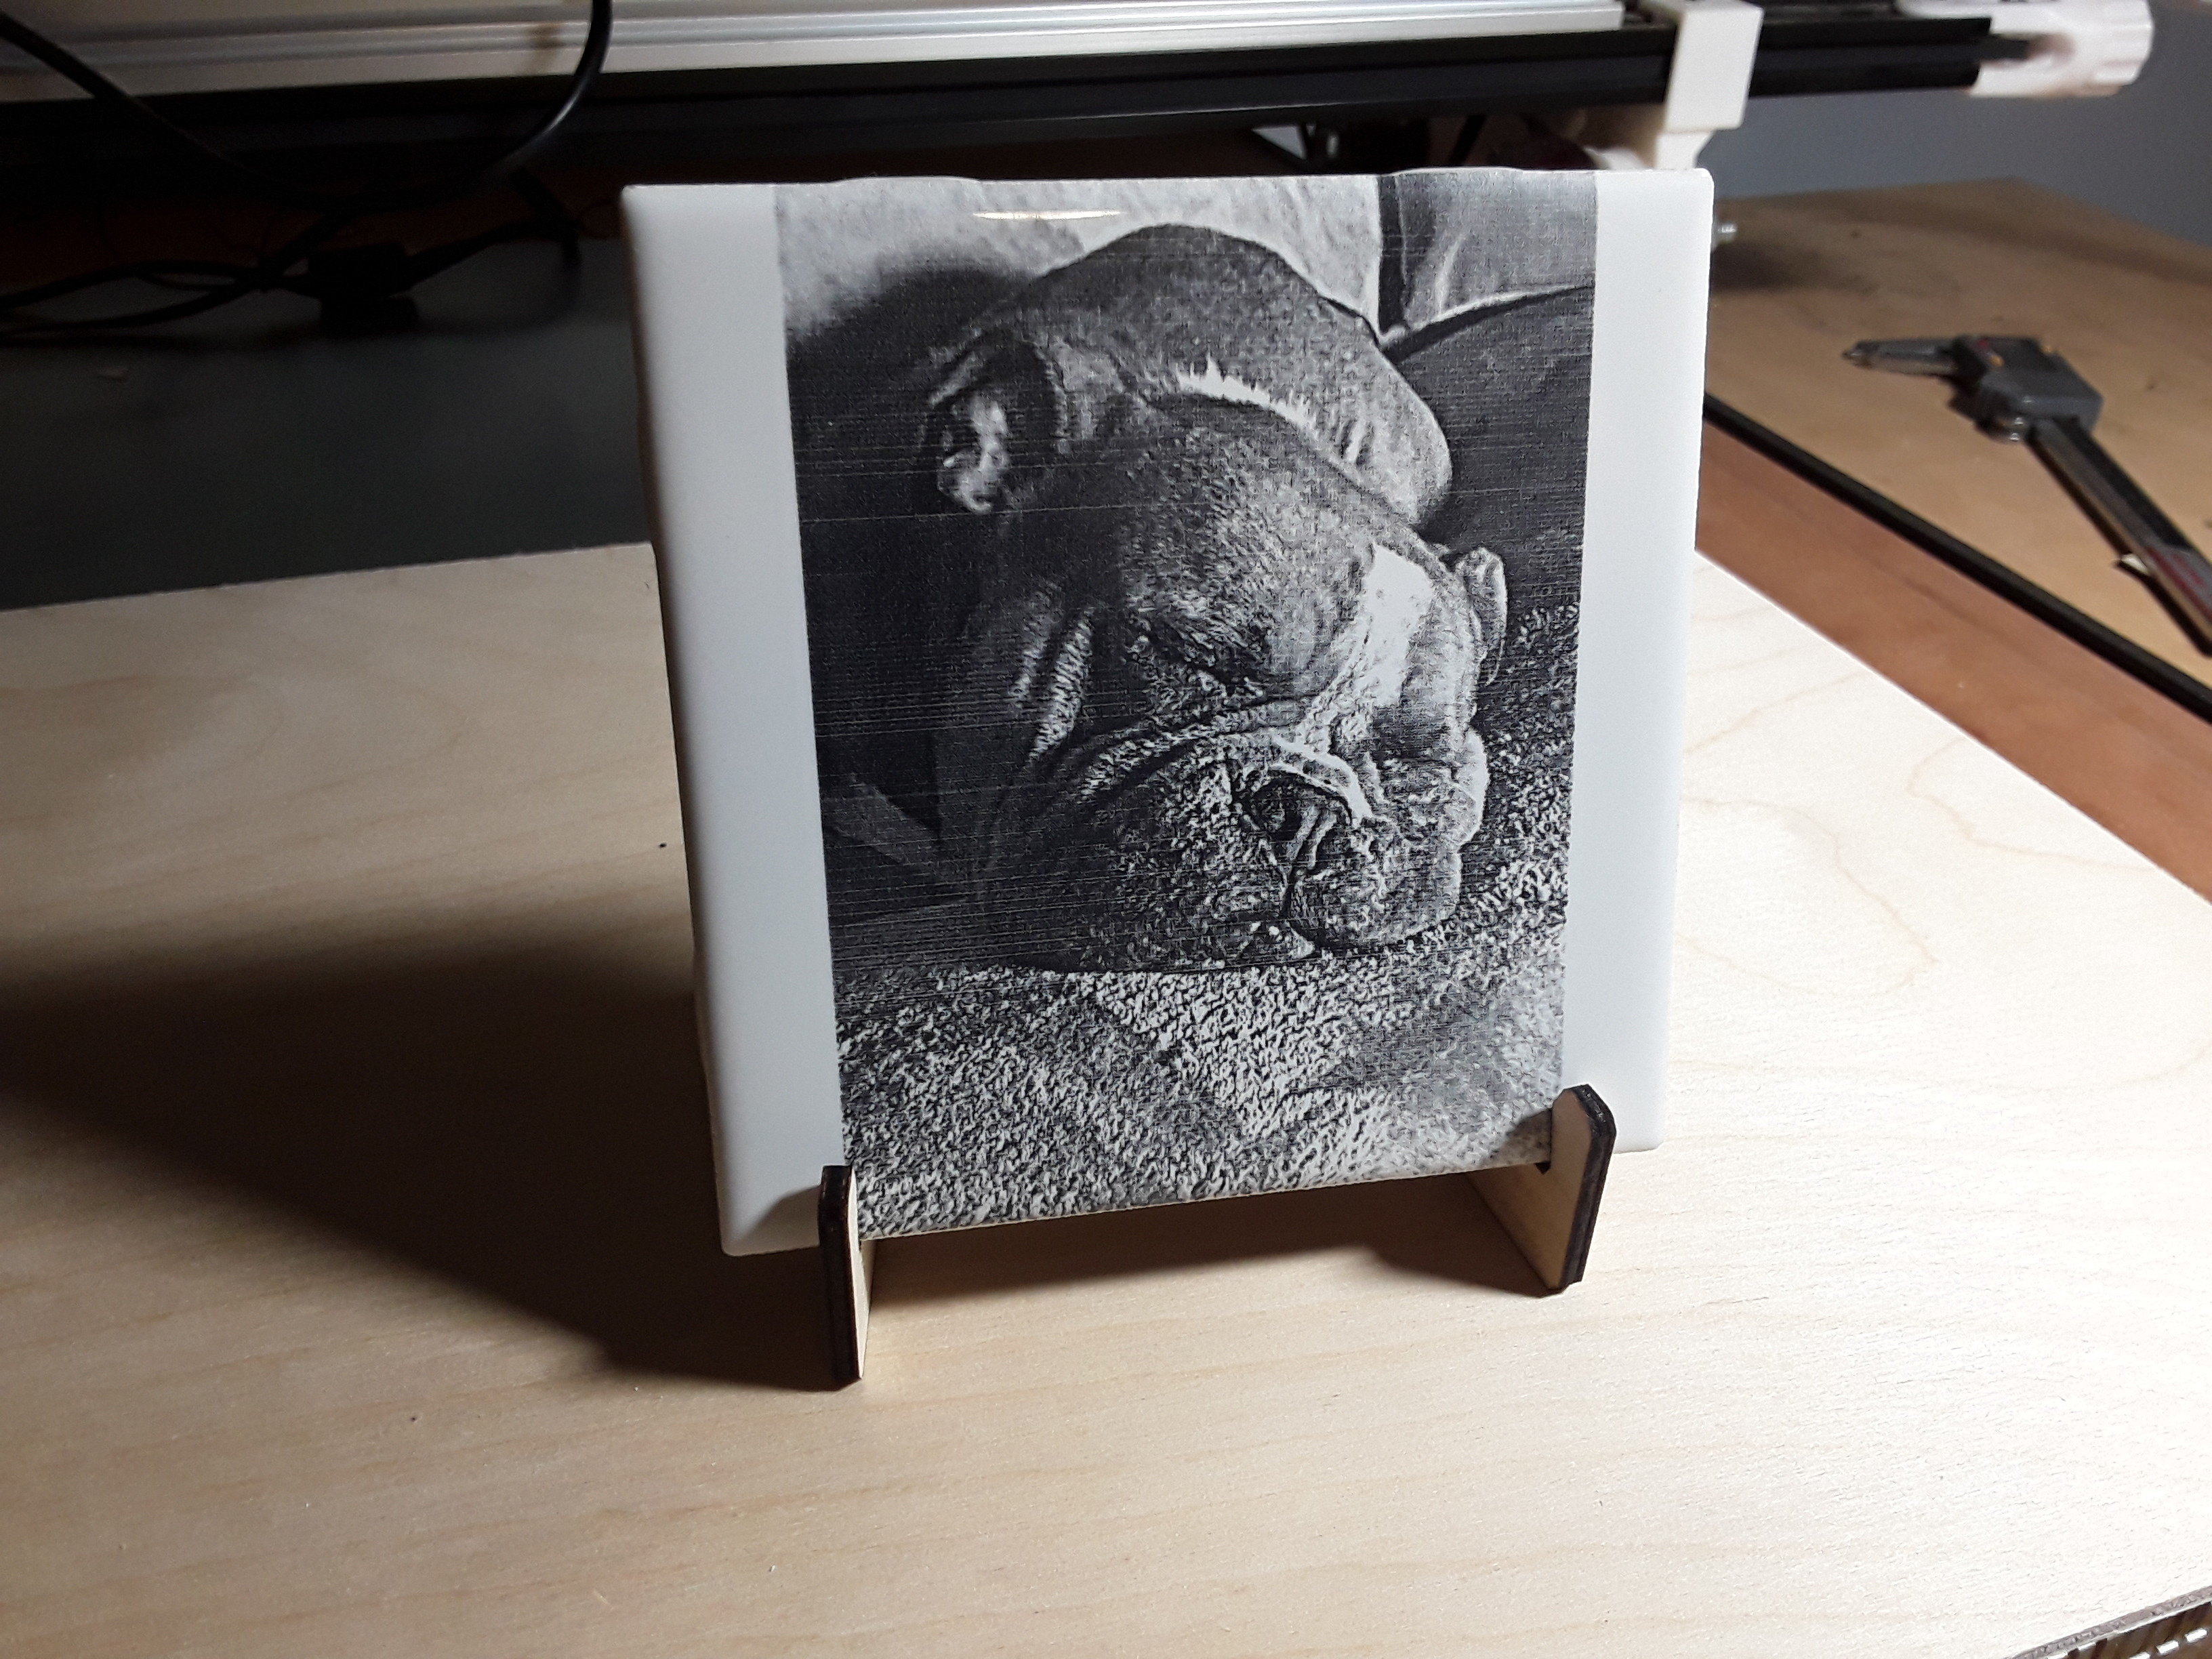
Finally, after a tough day (and following the dog’s example)… I took a nap.

– David

10 Likes