I’ll check it out. Thanks Jeff
Oh yes, sorry I haven’t thought about that, you’re right!
Unlesssssss… You purchase one BLtouch per bit, then tape it to the bit and add an arduino+bluetooth card+a small battery. This way the BLtouch communicates to your main board using bluetooth and since it’s directly attached to the drill it’ll work with any lenght.
I think we’re onto someting.
2 Likes
Very creative way of applying your solution to a solved problem, Dui. 
3 Likes


I have a friend who makes suggestions like that. For him, the phrase was coined: “Complex non-solutions for simple non-problems.”
3 Likes
As long as it works, anything goes. 

4 Likes
The G38.2 command is already working, great because it allows me to do the z-probe with the bltouch, but… it doesn’t set Z=0 as a G28 Z does, and although the display shows Z=0, the characters are not fixed, but are shown intermittently. So while this is a great improvement and makes things much easier for me, I can’t completely forget about the touch probe.
It seems (or am I missing something) that to actually set Z=0 I have to send a G28 Z, and for that I need the touch probe.
After tests and more tests, what I have come up with is, as you rightly said, to create a macro, which does the following:
1º - M280 P0 S10, push the pin down.
2º - M280 P0 S60, now the pin is sensitive to probing.
3rd - M0 opens the touch probe, the display waits for confirmation that the touch probe is open. It is necessary that this is the case, otherwise the 4th step will fail.
4th - G38.2 Z0, the z-axis will lower until the bltouch pin contacts the printing surface.
5º G92 Z3.1, there is (in my case) an offset of 3.1mm between the printing base and the nozzle, so we set it.
6º G1 Z0.000 F250, we go down to z=0;
7º M0 trigger the touch probe, the display waits for confirmation that the touch probe is triggered. It is necessary that this is the case, otherwise when executing the 8th step the z-axis would go down even more and the nozzle would crash against the printing base.
8º G28, will reference all axis to the home position.
9th G29, bed leveling.
Works fine for me, but I can’t completely forget about the touch probe, although it is a lesser evil.
I think the G92 Z should set the Z and you don’t have to G28 again. Maybe I am wrong. But I would have guessed that 6,7,8 could be replaced with G28 X, then G28 Y.
I will test again, but I think I remember that the character was flashing on the display, and when I send the G29 it automatically becomes a G28 Z, but I have to check it again.
1 Like
Speaking of printed instruments:
5 Likes
Widdly, widdly, waaaaaaahhhhhh!
1 Like
Brings to mind Buckminster Fuller shredding on lead. 
Nice work!
1 Like
What a nice thing 
1 Like
I’m not sure if I agree that it is nice in a pure aesthetic perspective, but as a concept it’s super neat!! I think it would be even better with a printer similar to your plan, or what @forcerouge already got.
1 Like
Ouch, I fell into yet another rabbit hole!!
2 Likes
An electric guitar is on my wish list. It would be great to be able to print the body in one piece. Then I’ll have to enroll in lessons because I have no idea how to play 
1 Like
You just pinch down the strings on the left side while strumming or picking at the strings on the right side.
1 Like
We are just so used to beautiful guitars. If it was something else, I think the aesthetics would be above par. But maybe I am just easy to please ![]()
1 Like
Beautiful. I wish I had time to build one.
I also wish I was able to play guitar.
1 Like
Do you have a list of the hardware/sw you used for your 3D printer build somewhere? Thanks
Greetings, and excuse my English
I don’t have my own thread on the process. It’s not finished yet, although I have a little bit left. I have to buy an aluminium panel to finish the heater base and I think it will be finished.
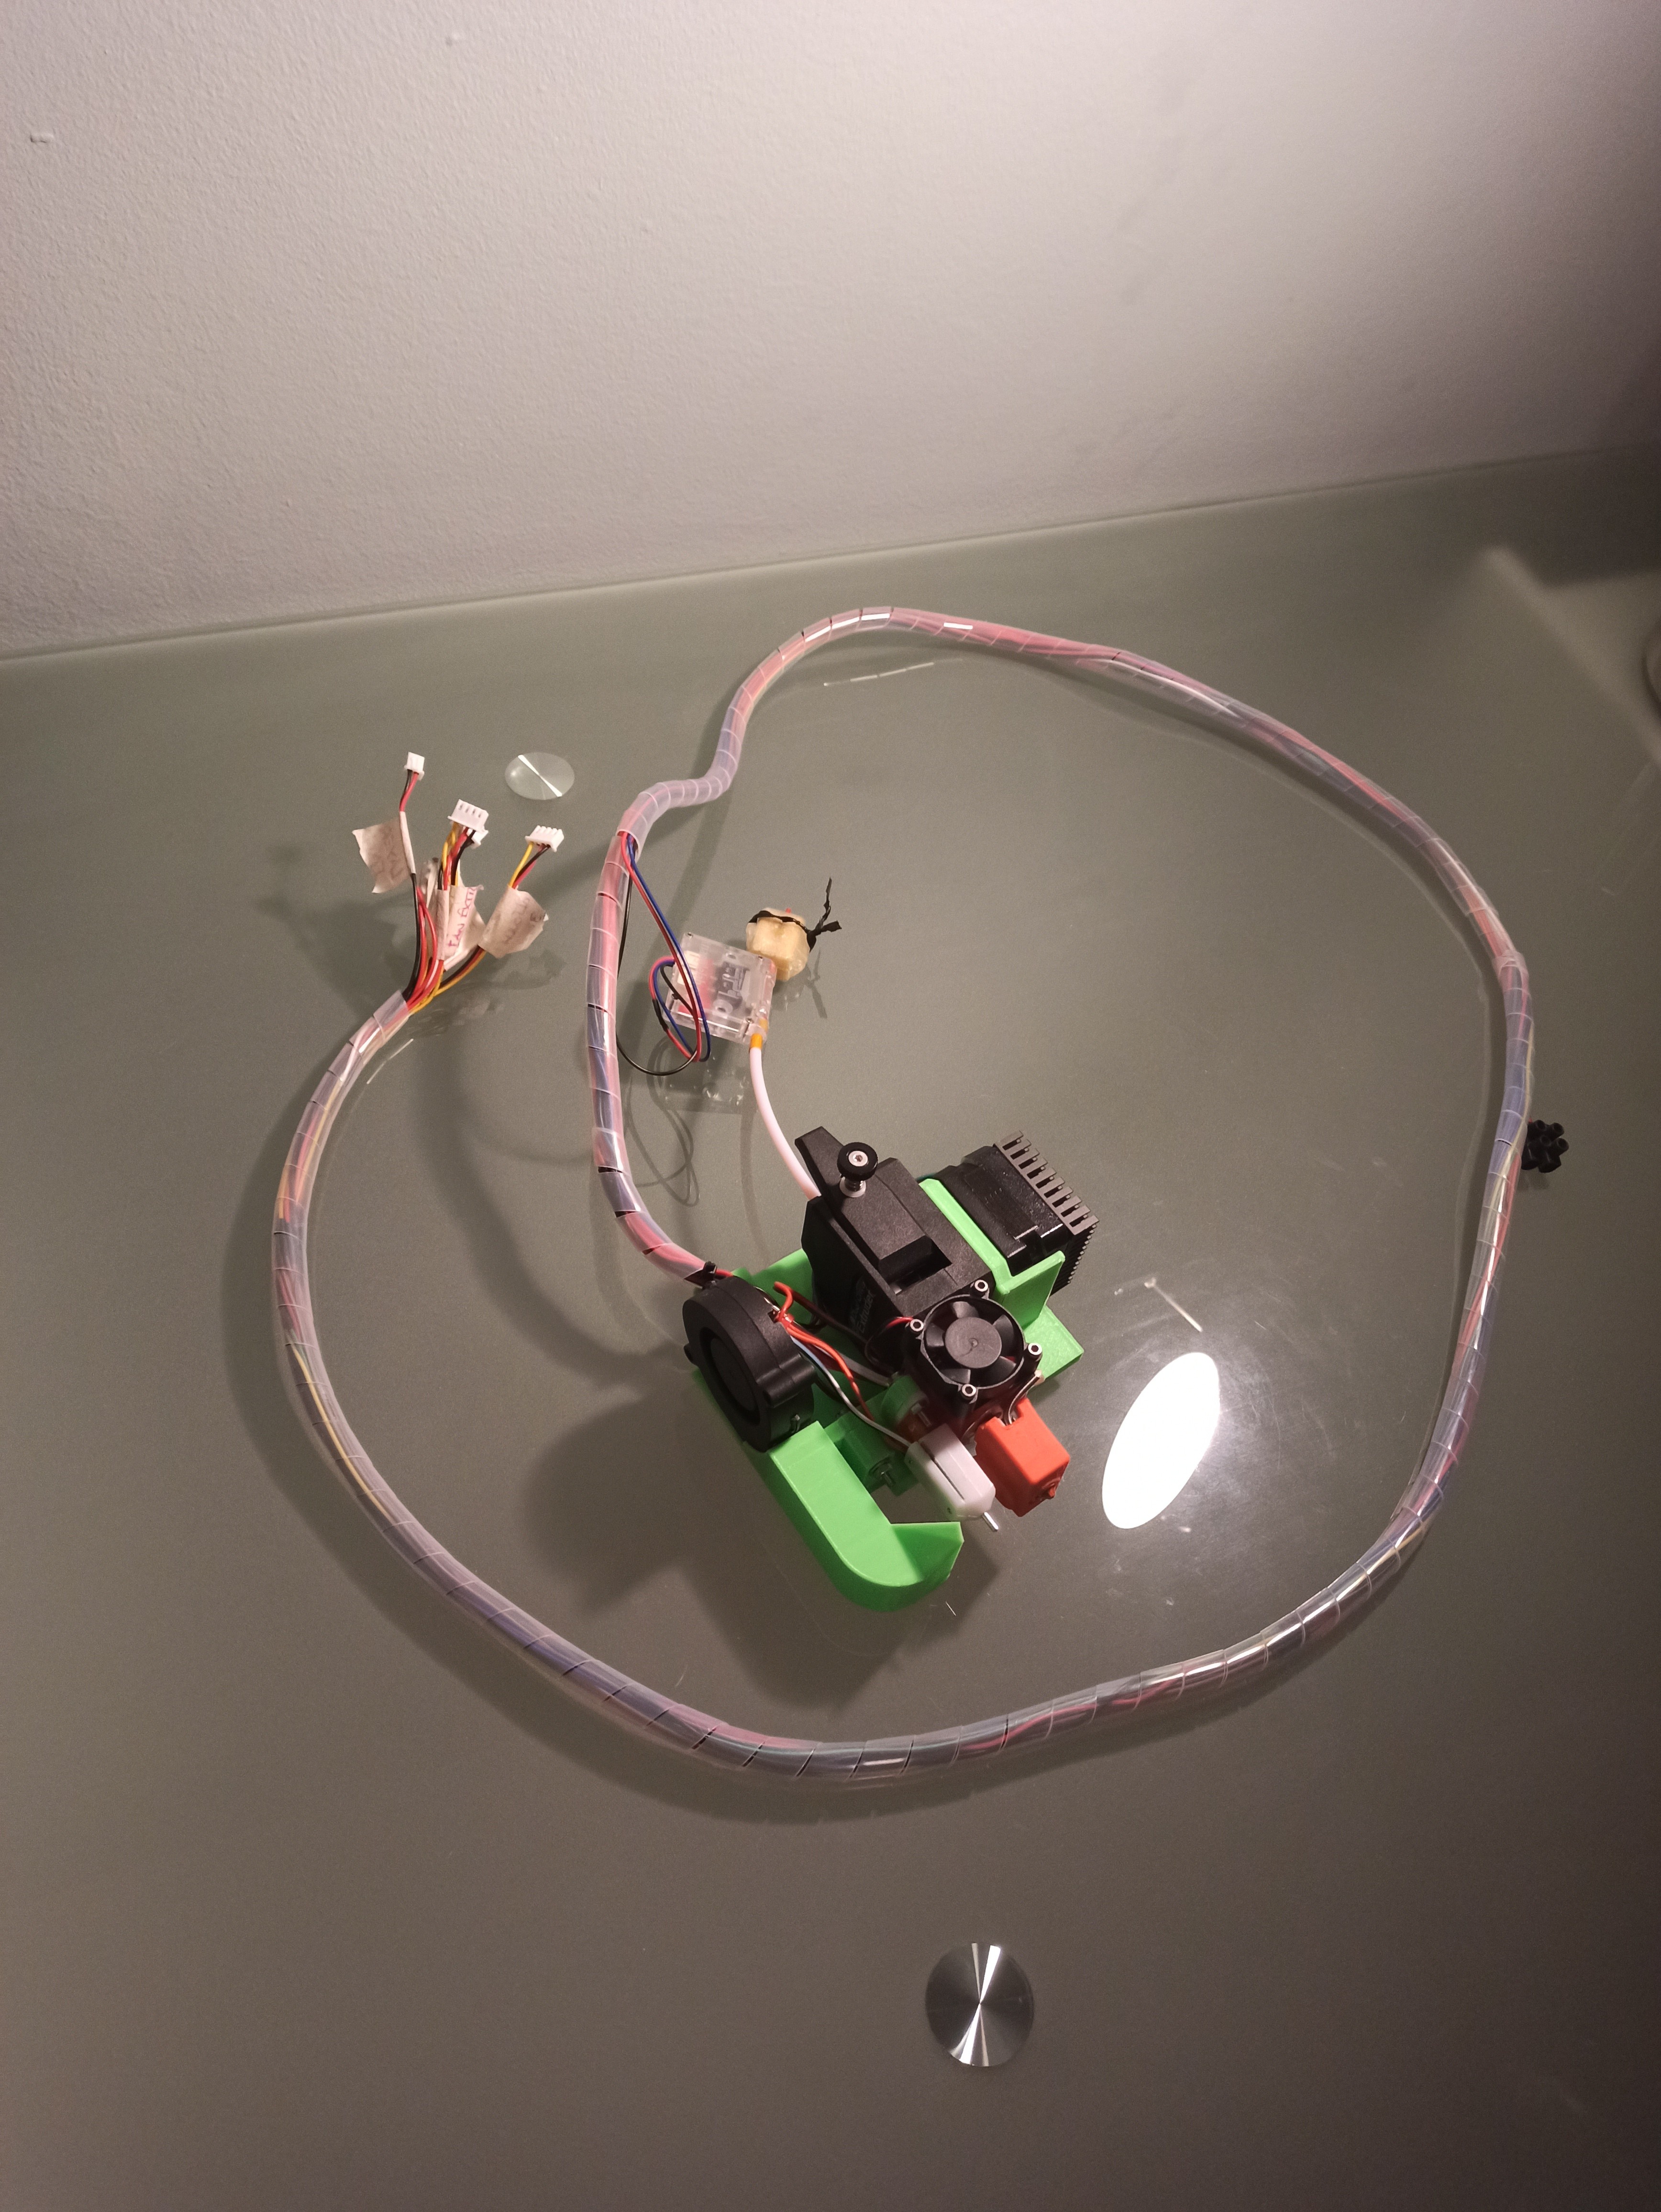
Regarding the hardware, I used this design to exchange tools, and I remodelled it a bit to fit my needs and to be able to mount the extruder, BLTouch and layer fan. I used a clone of the BMG Bondtech from Trianglelab (it works very well), the resulting part to install everything on the print head is this one:
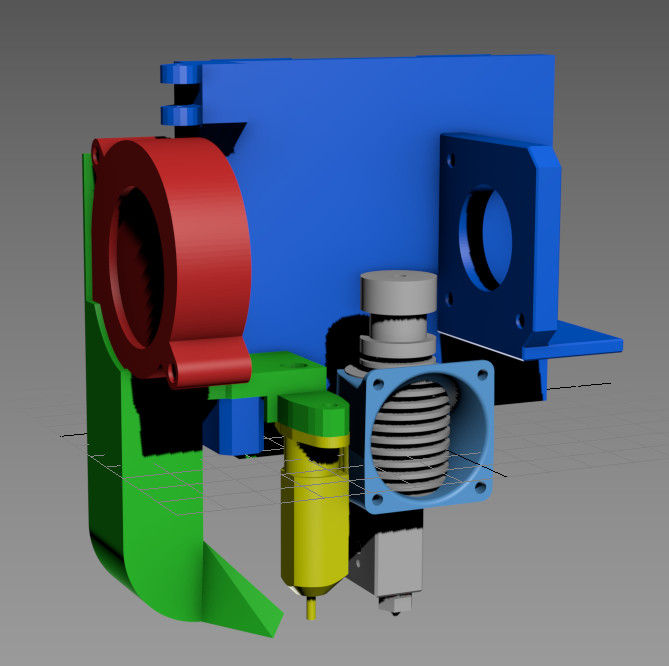
BMG_Bondtech_adapter_Lowrider.zip (57.4 KB)
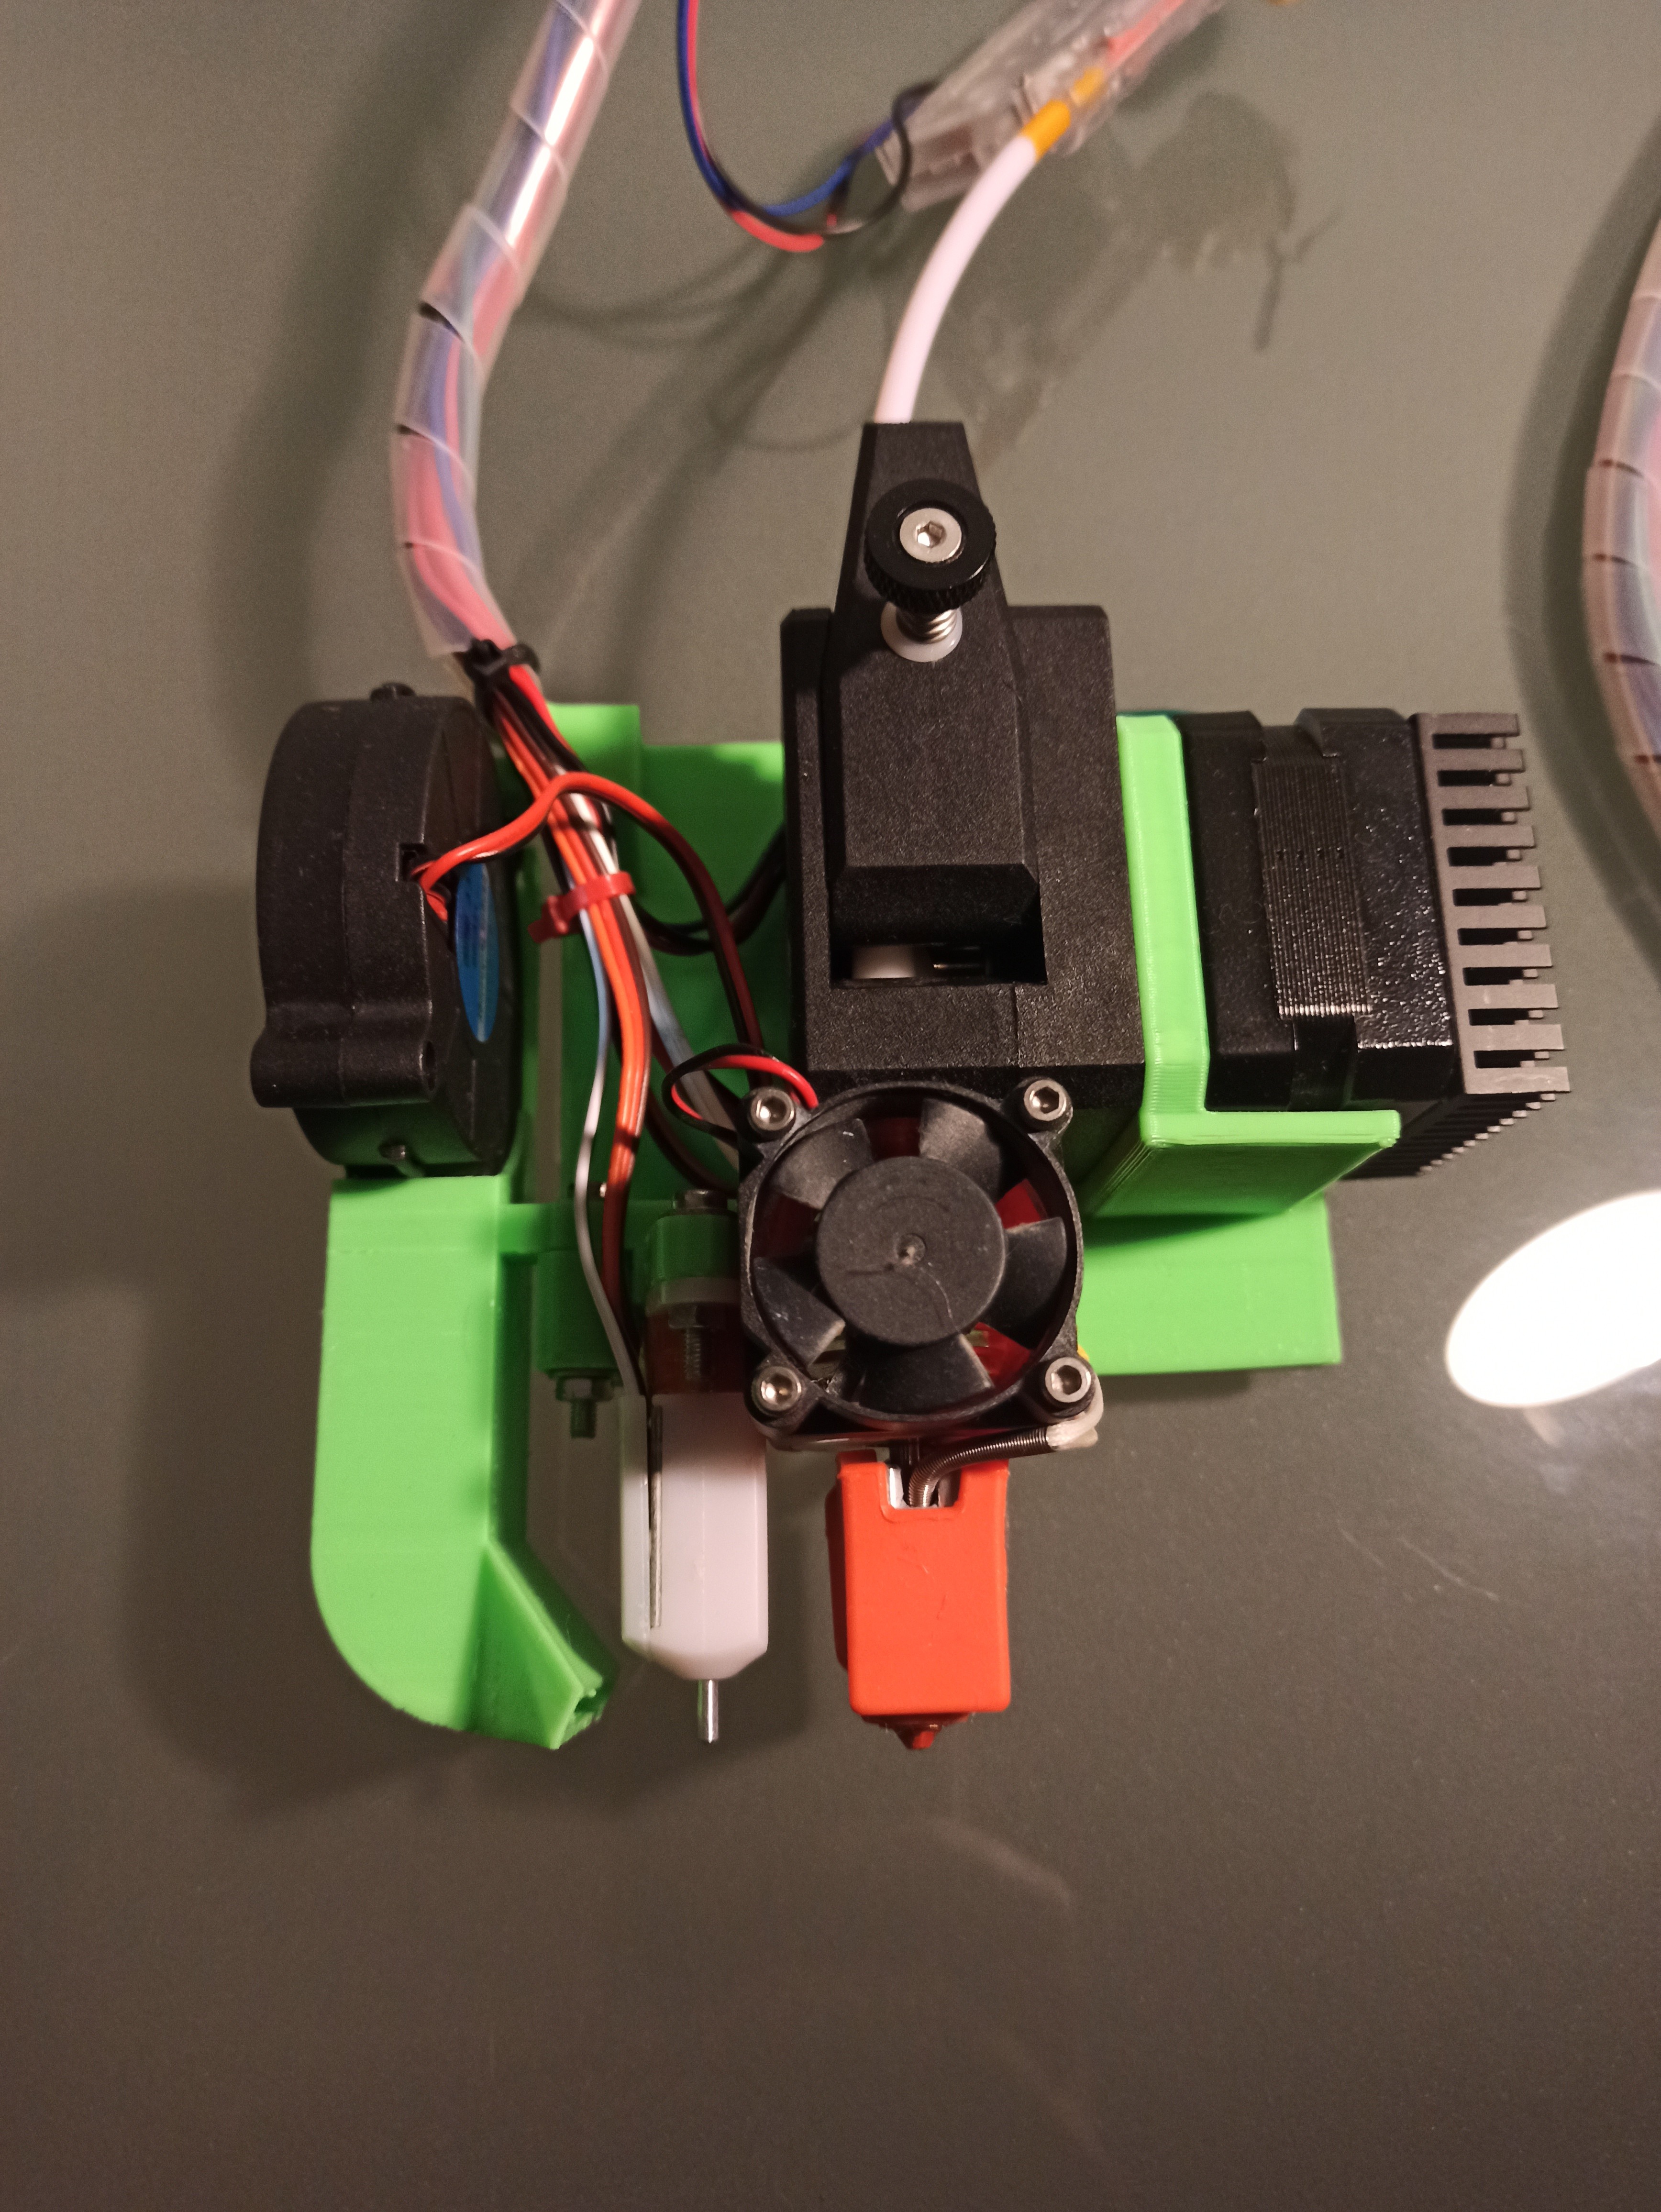
The layer fan is a 5015 12v.
The filament run out sensor you see in the picture is this one, I placed it as you see, after the extruder a piece of teflon tube and then the sensor.
My electronics is an Arduino Mega + Ramps 1.4, I needed an extra driver for the extruder motor as it was taking up all five drivers with the axes, so doing some research I found this, and following this video I managed to get it working without problems.
If you have any free drivers in your electronics you can save this.
I have added male/female connectors so I can easily remove the print head when using the lowrider as a CNC or Laser.
If you want to have a look at my Marlin I’ll share it with you, I made quite a few changes, I can’t list them now because I don’t remember.
https://1drv.ms/u/s!AjcmonhnxsUl9z5gfShDDBnb57Xc?e=R0dxOJ
As laminating software I use Cura 4.8.0, I have two printing profiles that are giving me good results, one for 0.4mm nozzle and another one for 0.8mm, although as you can imagine here the interesting thing is to use at least a 0.8mm nozzle so that the printing times are reasonable. Nevertheless, I share both of them with you in case you find them useful.
Cura_profiles.zip (1.6 KB)
I know I’m missing a lot of ink, but feel free to ask me anything you need, maybe when I’m done and everything is working properly I’ll make a more detailed thread of the whole process.
Best regards
Roger
2 Likes