As promised a long while back, I finally got around to posting this on Printables, since I had deactivated my Patreon account (I did not care for their business model).
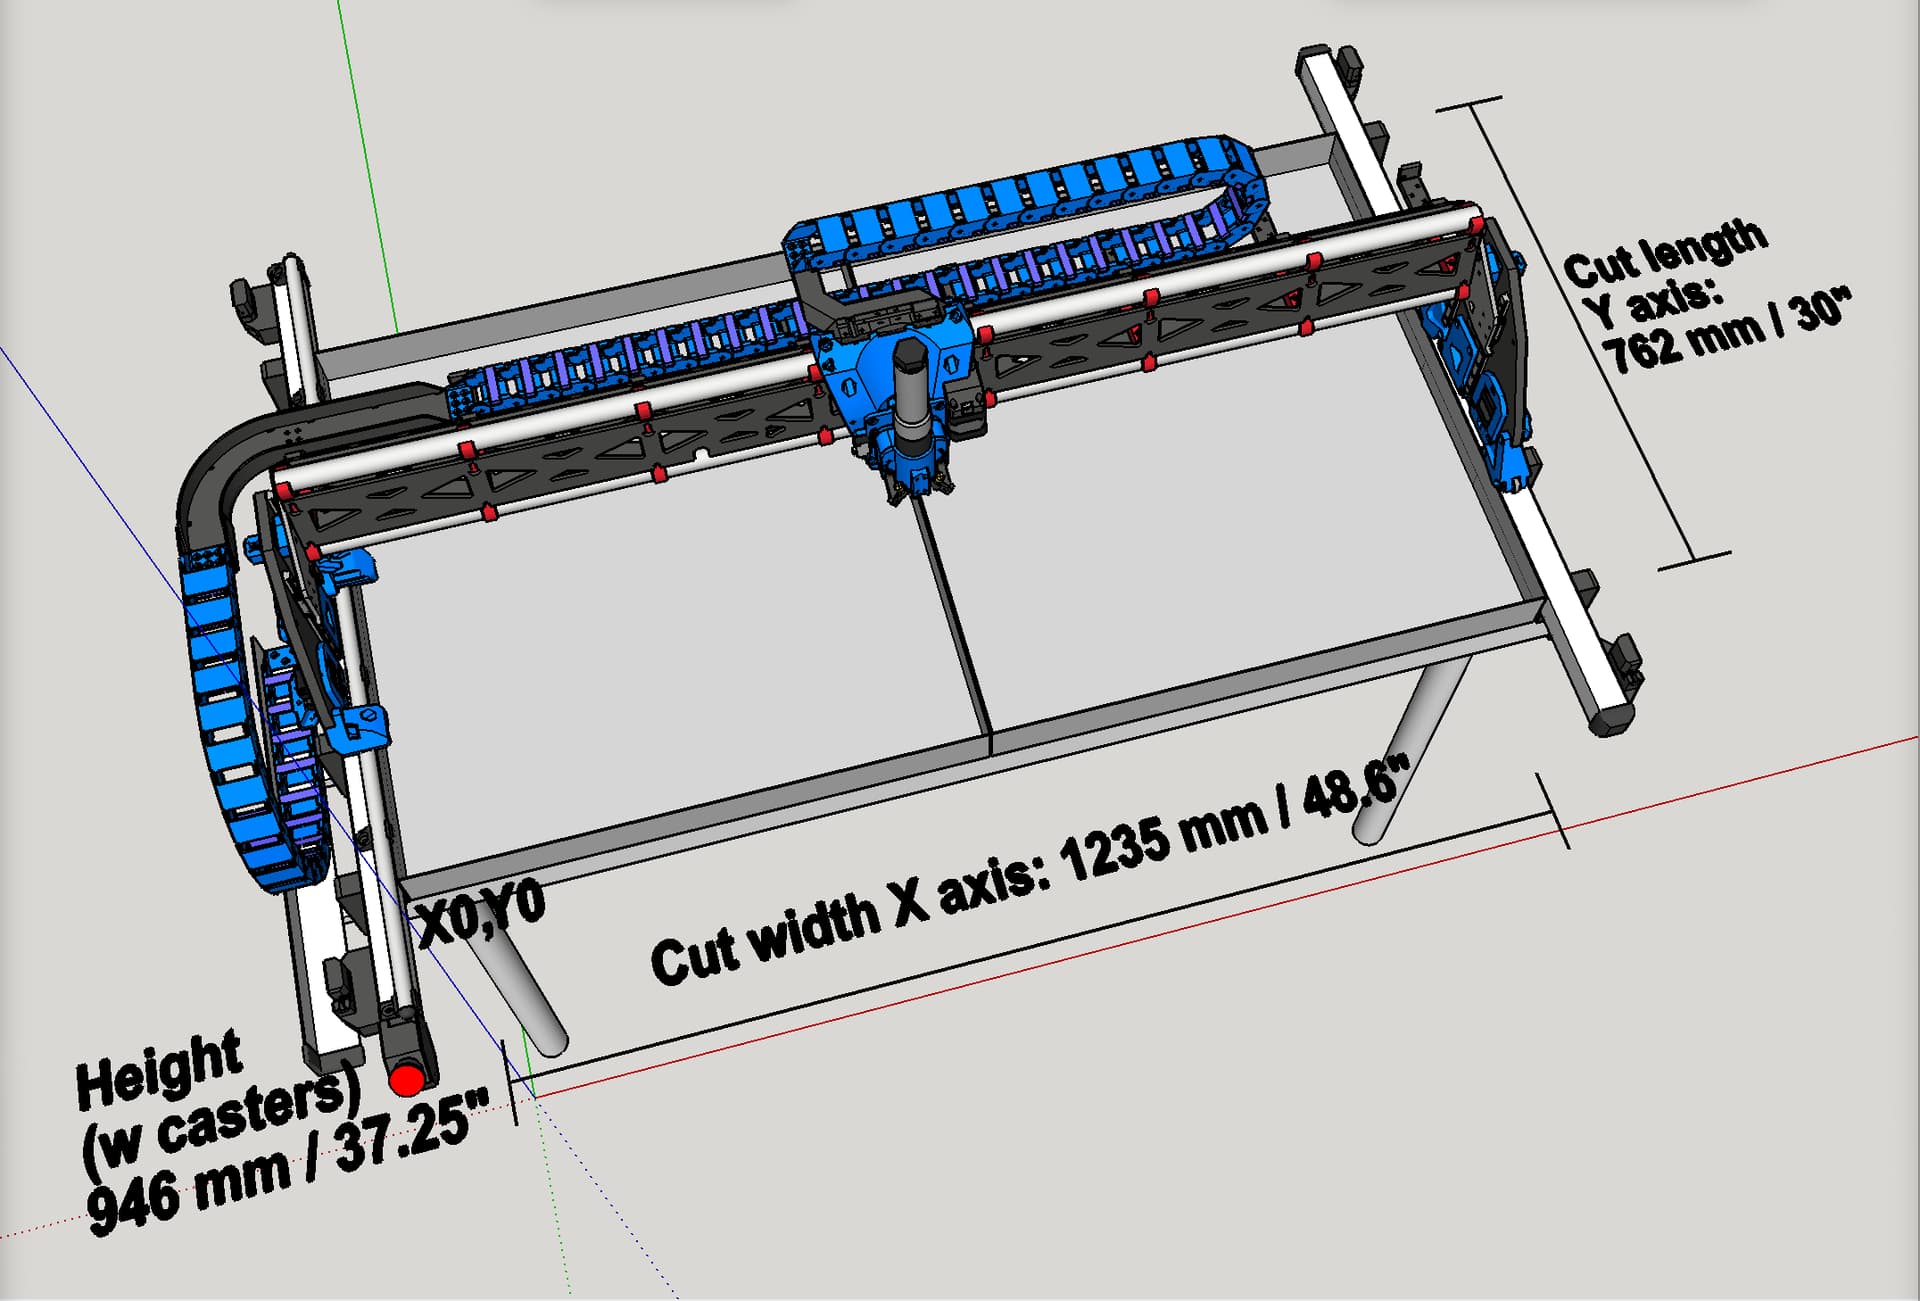
Download: LowRider 3 CNC - Large Drag Chain 90 curve raceway (SEE VIDEO: Large Drag Chain on both X and Y axes) by Doug Joseph (design8studio) | Download free STL model | Printables.com
Description from Printables listing:
As shown and discussed in this video:

As described in the video, attached are both printable files and editable SketchUp files. This content was previously exclusively for supporters on Patreon, but I did not care for the Patreon business model, and I shut down my account there, and have been working to openly share the content freely here and elsewhere.
Note: The original version of this is a big part, so I in case you don’t have a printer with a very large print volume, I’m including a 3-piece version so you can still print it and assemble it. I advise using both glue and screws and nuts. One clever glue approach is to use both epoxy and CA glue, for the best of both (CA for fast adhesion, and epoxy for greater adhesion and strength).
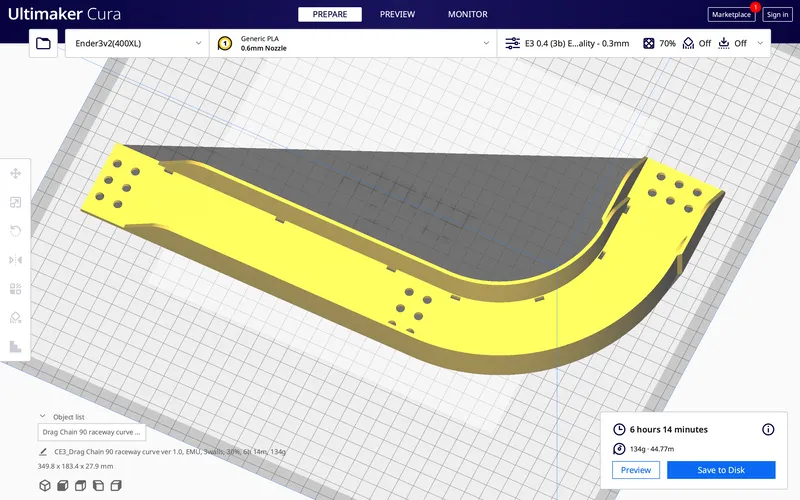
I used my Ender Extender 400XL to print the whole part as a single piece.
If you don’t want to print this out of plastic, and you have access to a LowRider or other CNC, you could mill something like this out of plywood.
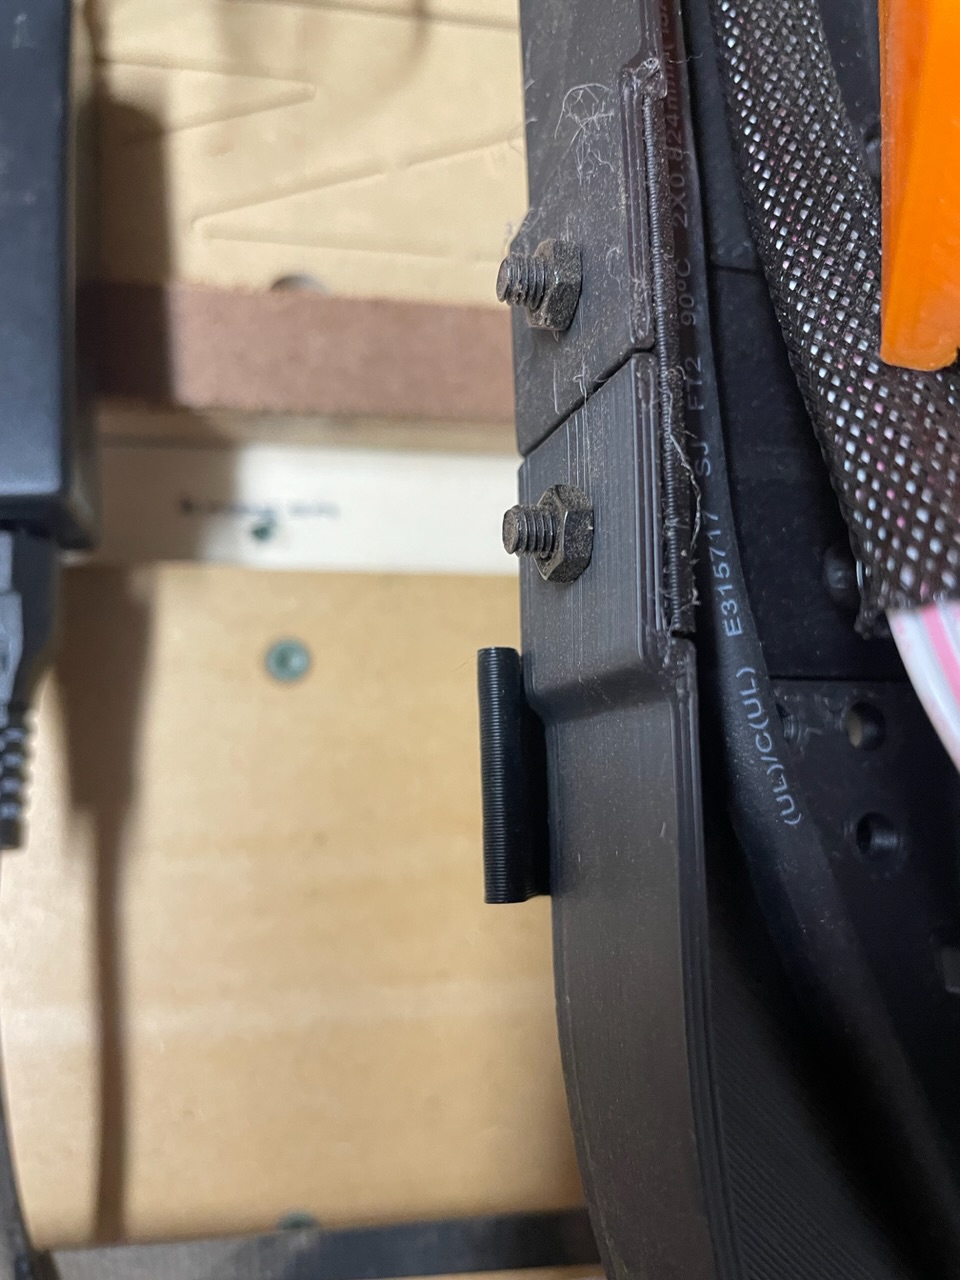
IMPORTANT: It is likely that my LowRider’s braces are spaced differently than others. The spacing I needed (from brace to brace) was 198.86 mm. If you decide to use this design, please measure carefully the distance between your last two braces, and then edit the length of the “Part C (Straight).stl” as needed. You can use the free version of SketchUp to edit the included file.
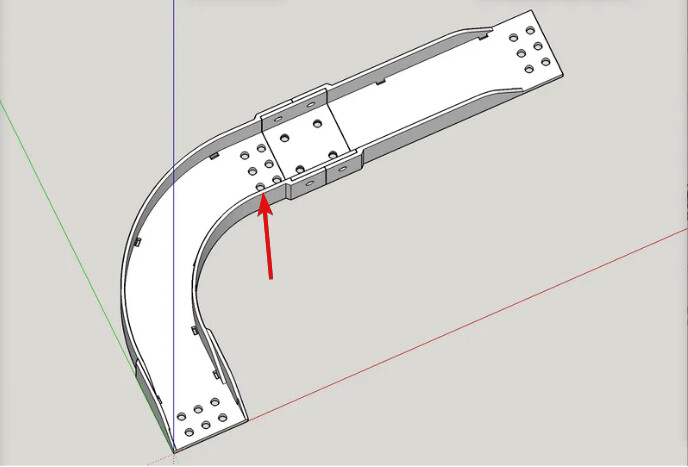
Re. the 3-piece print, this pic is color-coded simply for illustration of the separate parts:

The three pieces are:
- Part A (90 Curve).stl
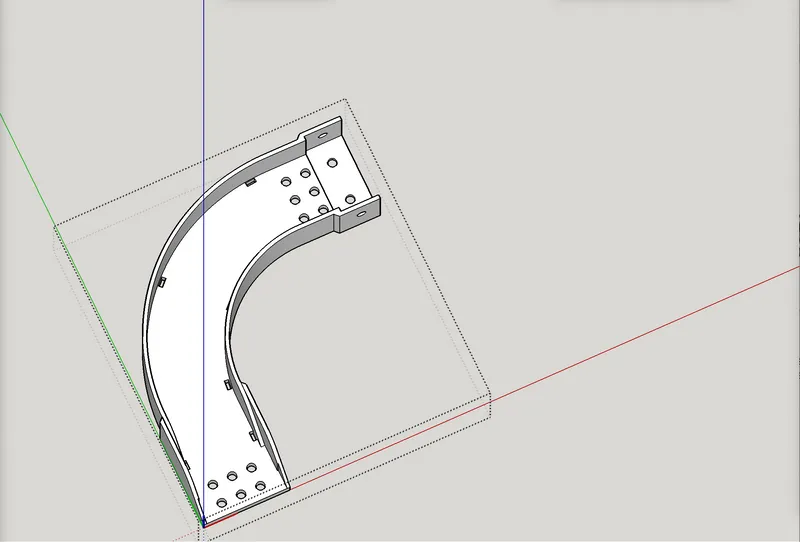
- Part B (Connector).stl

- Part C (Straight).stl
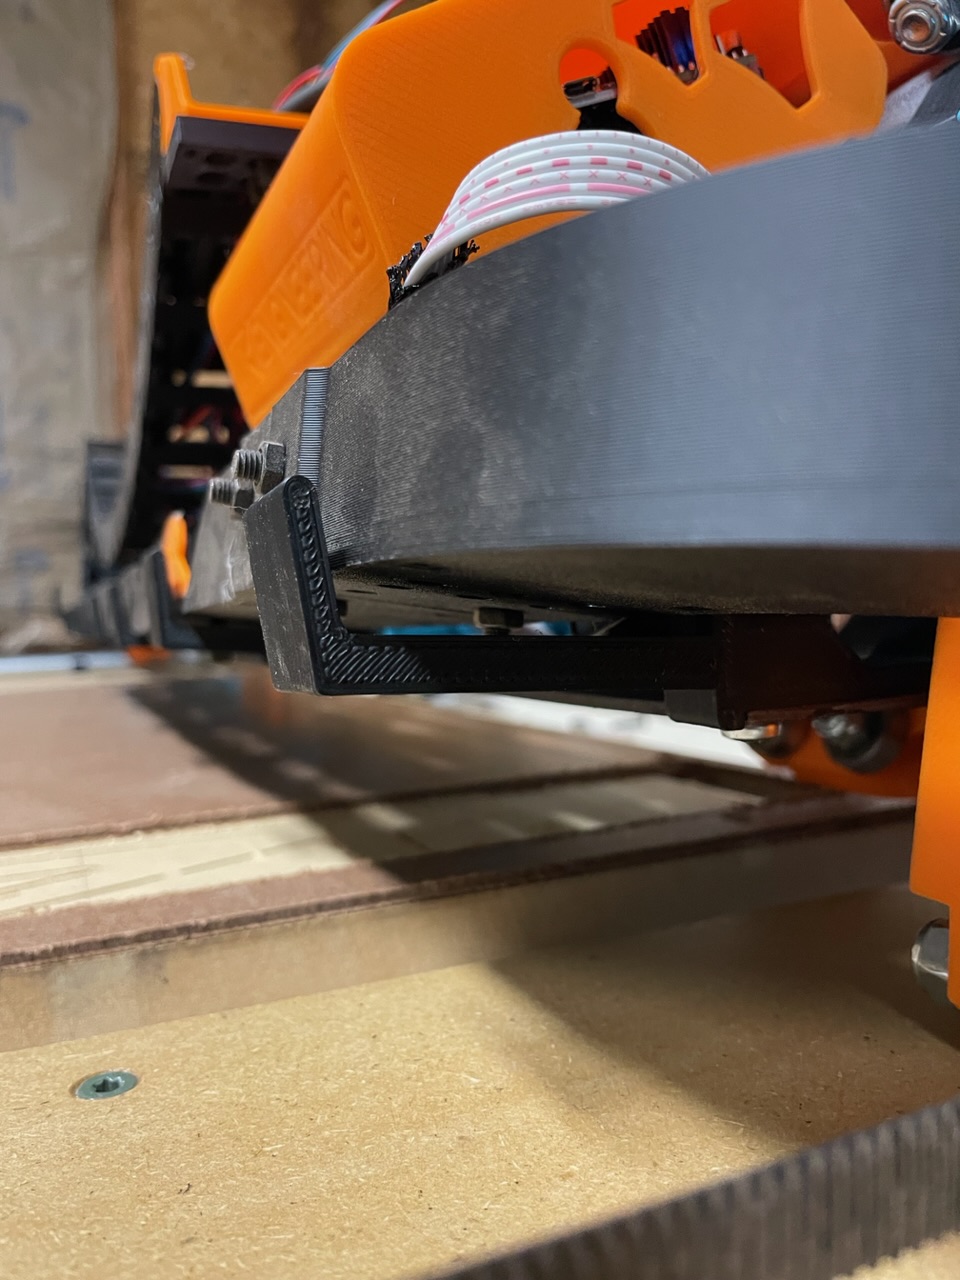
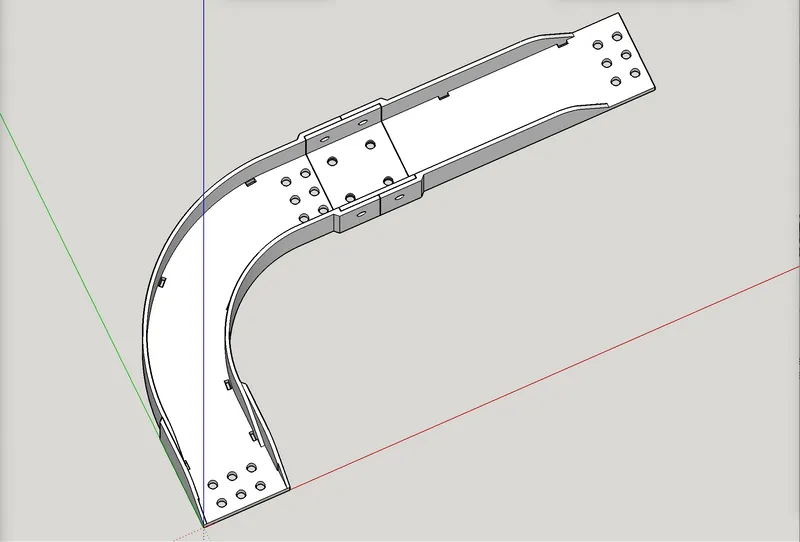
All assembled:
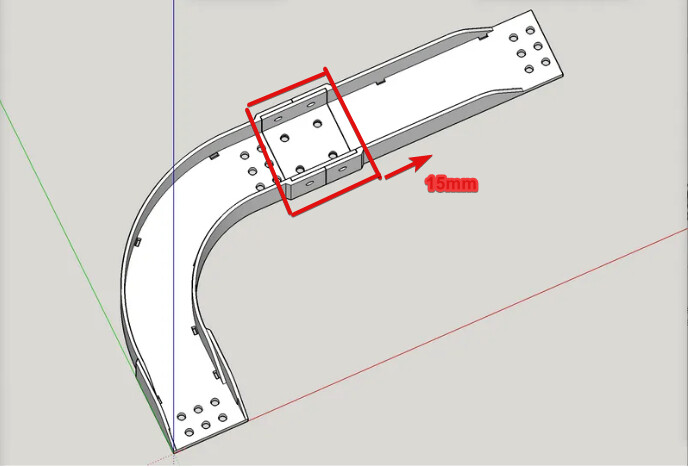
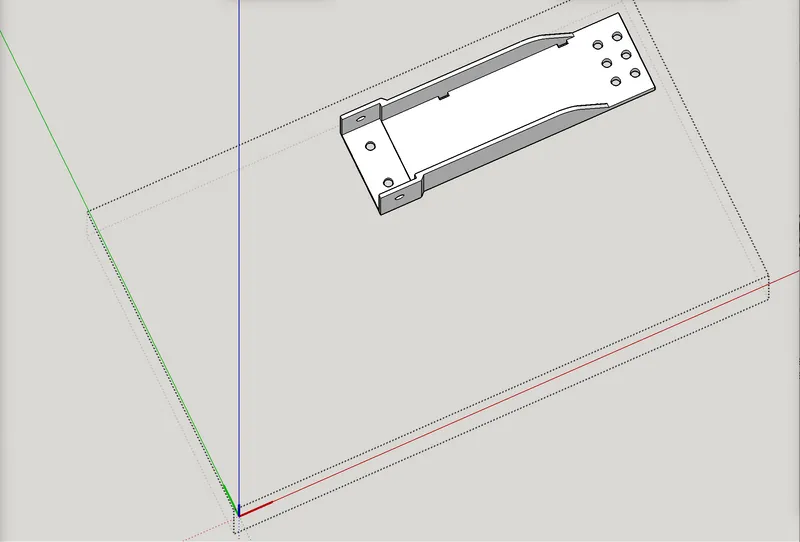
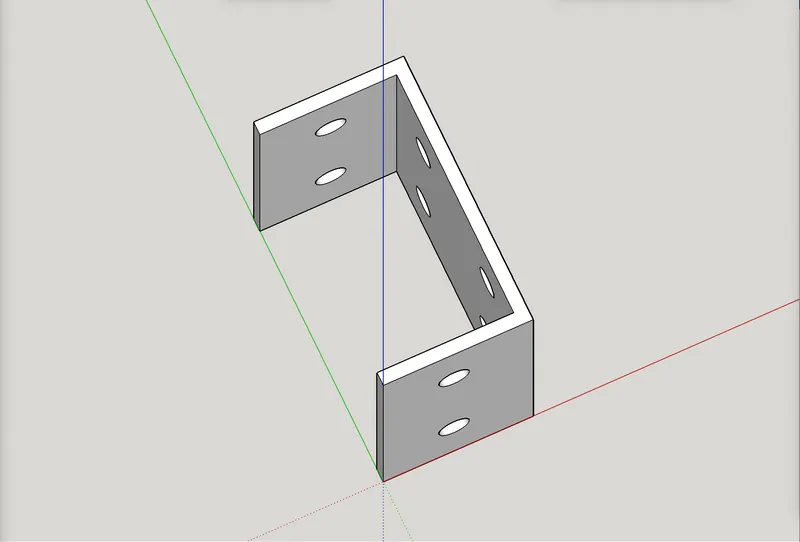
Please note: the connector part should be printed as oriented in the STL print file, not as shown when assembled. This achieves better strength regarding the layer lines. The image below illustrates its print orientation.
Connector part — print orientation:
For those with a very large print bed — Drag Chain 90 raceway curve ver 1.0.stl
Note: This design is made to work in conjunction with my other printable large drag chain designs, particularly those linked below:
- LowRider 3 plasma CNC - Drag Chain Mount revised for large 20x40 drag chain (v1.13)
- Drag Chain for CNC, two-piece, snap-open, 20mm x 40mm, 64mm radius (v1.13)
My PayPal tip jar: https://paypal.me/design8studio
Various LowRider 3 CNC remixes:
View all my models and remixes on Printables:
*Amazon product links are affiliate links.