LowRider 2 - Long time coming - (Australia)

I used blue panters tape because it was what I could reach when I needed it :kissing_closed_eyes:

1 Like

Is there a name for that disease where every horizontal surface get’s covered with stuff? This is one of many benches in my shed, and the only bit of space I have left to work! :open_mouth:

1 Like

But on to more serious things. Despite my best intentions, I couldn’t leave the “temporary” silver vac connector setup that I munted with the hot air gun go without replacing it, and I had time while sorting out a few other things.

… like the cam clamp delete on the Makita. Happy with that:-

And then the elephant in the room. The one which I’ve stated about a dozen times I’m going to ignore, then don’t. Bear with me here!

The Makita base is designed with the standard Vac attachment in mind - The vac fits to the open bit on the side of the base, and router cooling air combines with the vac presumably to suck “everything” up through that tiny “keyhole” in the base. The base is sculpted on the inside to assist with this airflow. I have no idea how effective this is, but an engineer at Makita has presumably thought it was a good thing.

I have printed and initially installed @frederik 's replacement for @vicious1 Ryan’s “vacduct” part which was designed for the DeWalt. I may be treading on thin ice here and certainly don’t want to cause any offence to anyone, but there are subtle differenced between the DeWalt and Makita airflow designs. I will eventually be running some actual comparison tests between that base and my version as best I can to determine if there’s a difference between fine dust particles captured, but for now, here’s my logic for reinventing the wheel before I’ve even fired up the router.

Firstly with the existing design - exhaust air is severely restricted. In operation as a router this would never be a problem as it would rarely be operated at it’s minimum height.

This obviously hasn’t cause anyone any problem as I haven’t seen any reports of dead Makitas! It’s the air intake that has me intrigued - that vent will no doubt assist in providing air intake to the Vac when the base is at its lowest, but will it make any difference to performance at other times, and will it actually let fine dust particles out into the negative pressure zone created by the conflict with the router exhaust?

Only time and probably more detailed measuring than I am capable of will tell!

What I’ve made today is a plug for the base that allows a much greater room for exhaust air, and cleans up the flow entirely on the base. Since as far as I can tell the DeWalt does not have any air inlet - performance should be no worse than the stock setup for the DeWalt.

Here’s a rendering of the model because the print is a bit less clear. Basically it’s a tap fit, but goes in on an angle so that the “big end” is held with the little flange, and the “small end” is held in position by the base. The small gap at the “small end” is intentional to allow the tilt of the piece as it’s being installed, hopefully with just enough friction on the ends to allow the “tap” without breaking the part, and it ends up being covered by the base plate at any rate.

Both Frederik and Ryan’s parts are stupidly well fitting, so it was a pretty high bar, but I think I made it - now to see if it works (eventually!) :smiley:

3 Likes

My experience so far with the LR is that it’s the fine particles that are more effectively collected by the setup with the vent. I think that if the router exhaust air was anything even remotely resembling laminar there might have been some Bernoulli suction, but I’m not seeing any evidence of that.

My only real metric is the accumilation of dust on my plastic safety glasses, which is far better using the LR than it is with the Primo.

I do still see some collection of chips on the work surface with the LR, which is reduced from what I see with the Primo on a similar cut, but still what I might term substantial. I think I can say that the LR has better dust collection than it has chip collection. (Which is fine by me. The chips don’t get into the air circulation.

Maybe what I’ll do is weigh my air filter before and after a cut, which will at least provide some metrics of the LR versus the Primo.

Incidentally, my solution for cutting depth was ultimately to buy a longer 1/8" mill. I do wish that I had found a single flute one, but this seems to work well for me.

2 Likes

It’s the fine dust particles I’m really interested in - and I figured I could afford the extra 8 cents worth of plastic to try this! Realistically I’m not going to be able to do any detailed tests until the new year - I probably won’t get this properly going till then either, and it’s nice to be doing something just for the sake of it!

Weighing the fine dust particles is problematic - unless you have a HEPA filter they’ll just get recirculated back into the air. If I can get my el-cheapo dust measuring gadget working again and can get my head around a suitable test things might get interesting.

I’m close enough now that I might even have to go out to the Sharpie shop tomorrow! :open_mouth:

That doesn’t mean I can’t continue to find solutions for problems that don’t exist though.

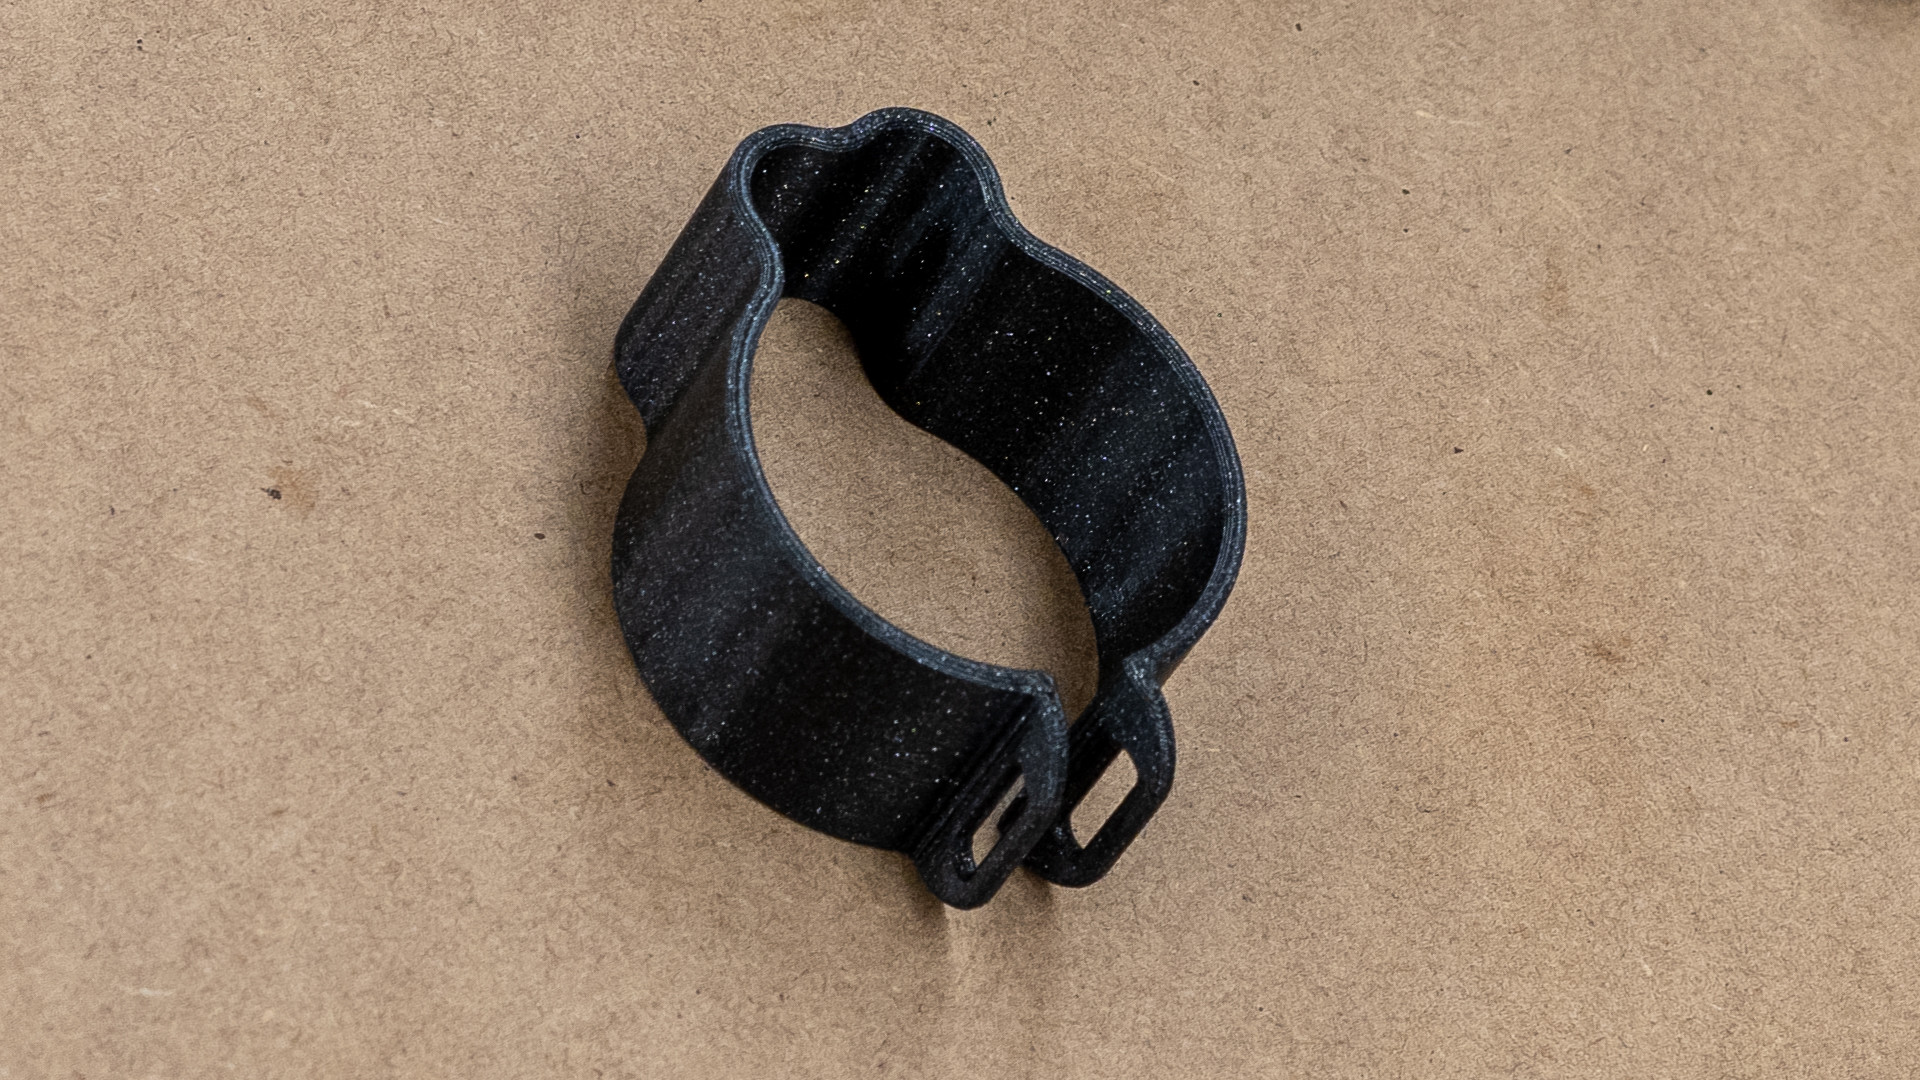
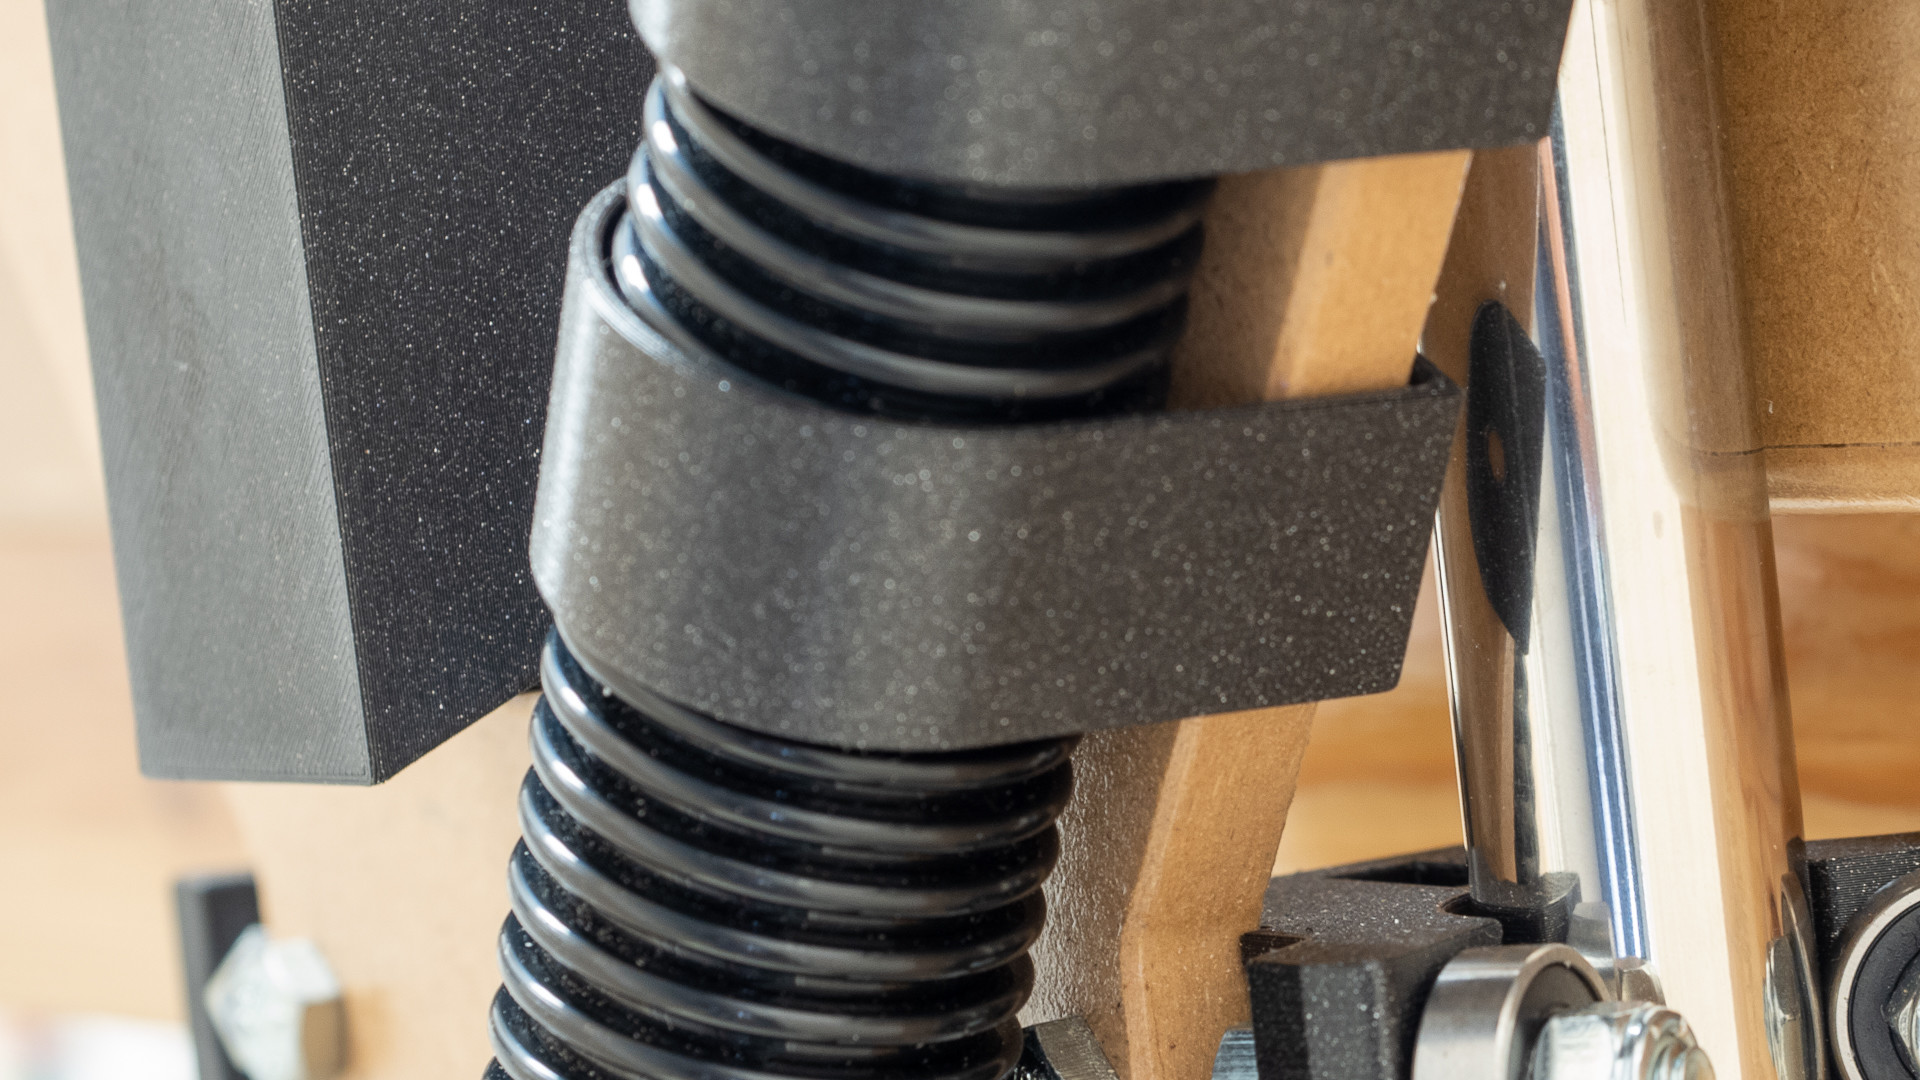
  1. A clip (4 actually) to keep the router cord, stepper wiring and vac hose nice and tidy - I’ve made this lot in PLA, but repeated use might take the spring out of it, so I’ll probably do them again one day in PETG. The little slots are so that I can use cable ties or velcro to tighten them more permanently, and you could rightly ask if I was going to do that, why not just use longer ones and skip the clip thing? :rofl: :rofl:

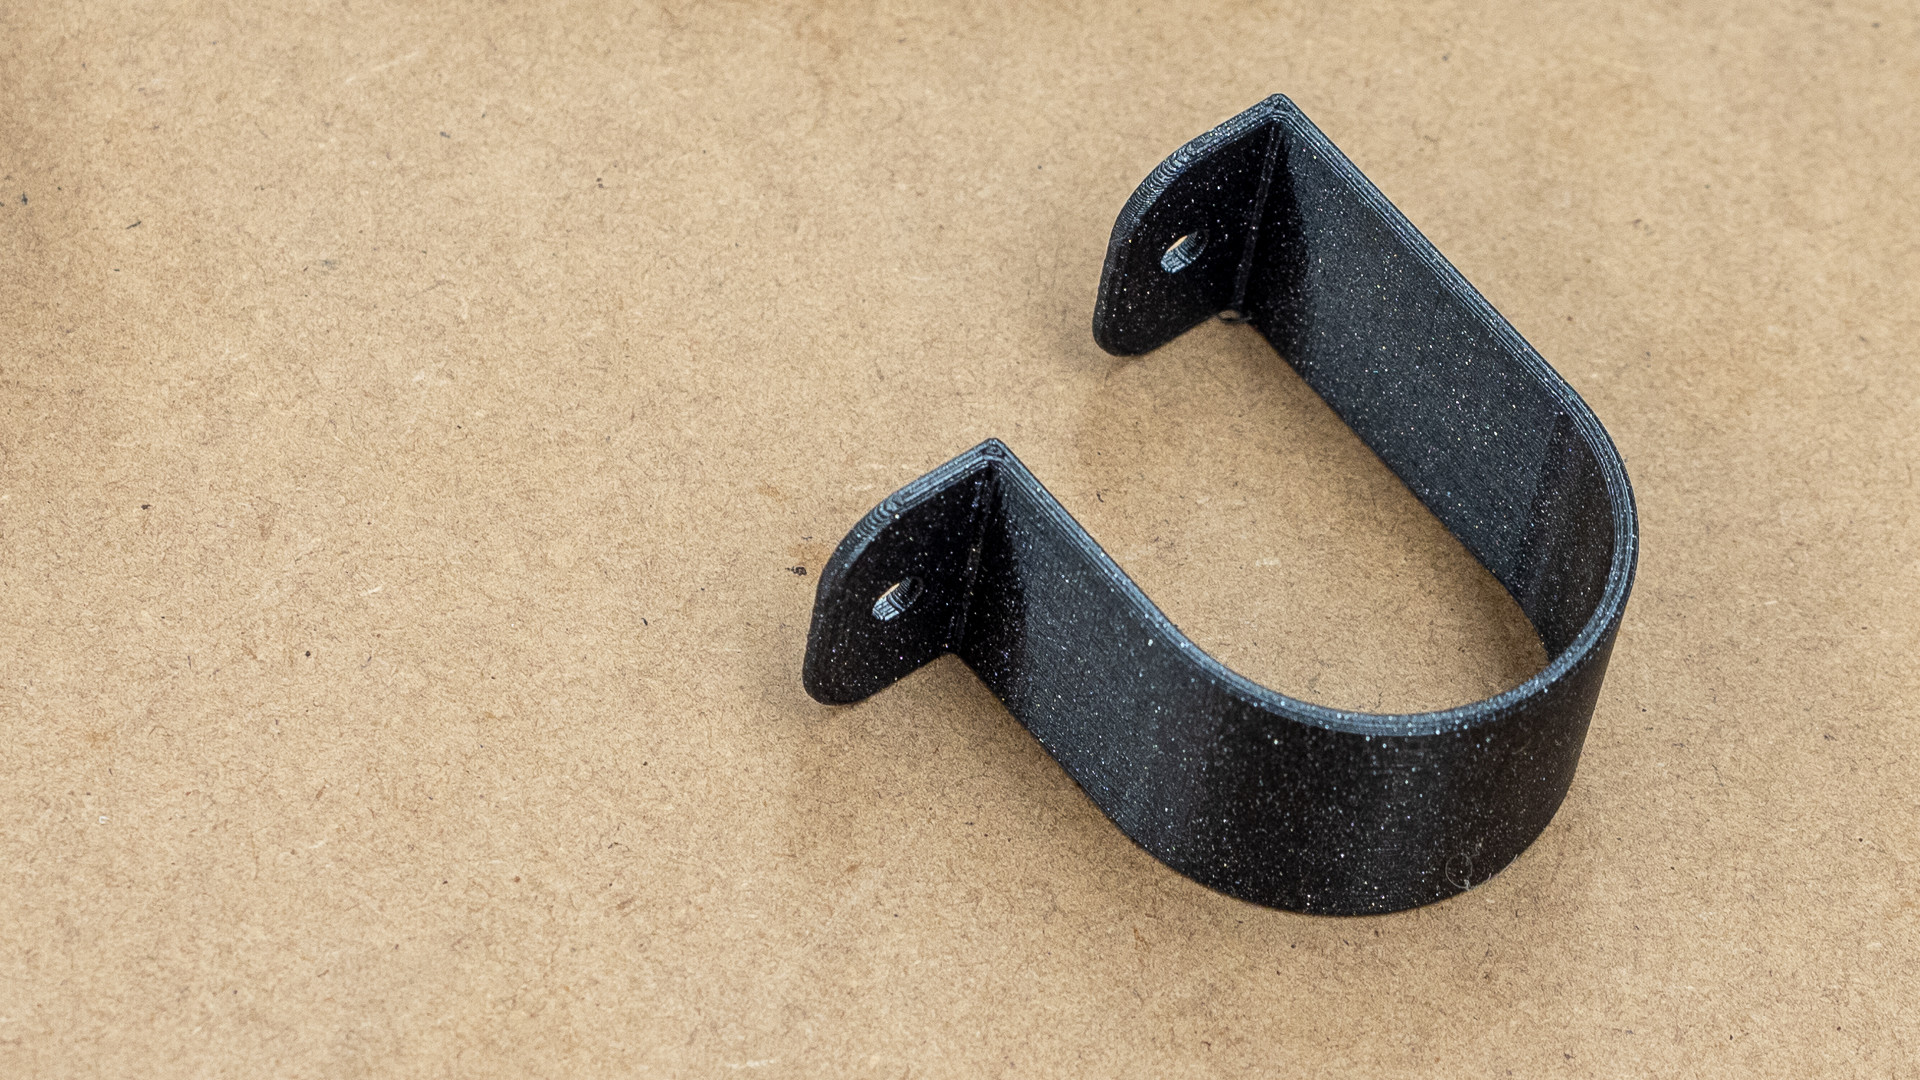
  1. A hose bracket to secure the vac hose - no need to screw it from behind but the holes are there just in case I find a 30mm right angled screw driver one day. :thinking: 
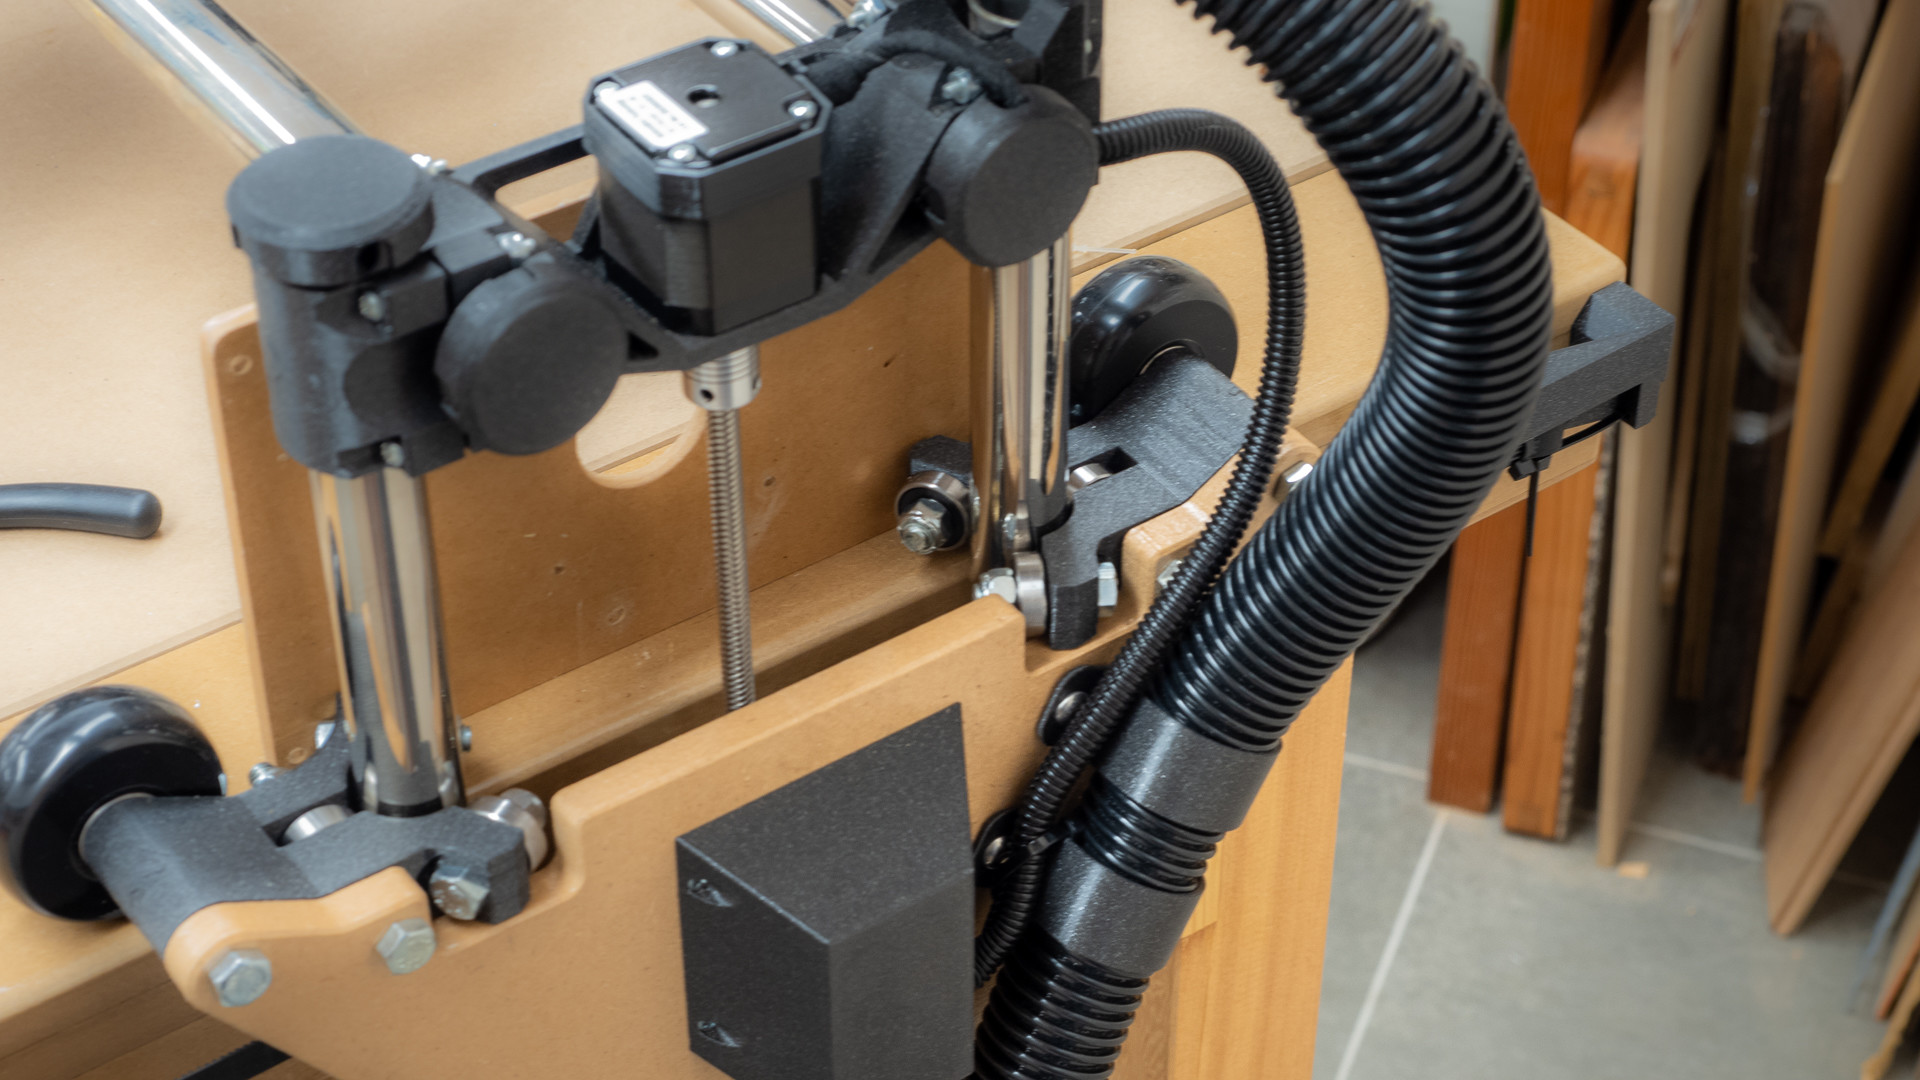
I’ve run the vac to the “off” side just to keep things tidier on the side I have to be working. The clips seem to secure it well enough that I might route it back the other way one day.

Or I m


ight not.

Yes, it does go up and down and backwards and forwards and even sideways if I ask it - thus far only in 1mm increments from the screen. If ever I stop finding inane little “improvements” to make, I might even plug it in to the computer for a bit.

3 Likes

And then the madness set in.

Even though I may very well never need to hold up the x axis gantry again, and even though there are always suitable sized bits of scrap hanging around should I have to, I got tired of the bits of scrap that have done such sterling service for such a long time, and built a pair of holder-uppers.

I know, it’s been done before and I could have just used someone else’s designs, but the only ones I could find on thingiverse were yellow, and I wanted red.

3 Likes

It looks a bit complete now, but I’ve still got the 240v stuff and emergency stop to do, and I’d like to make a couple of guards/dust shields for the inner side of the steppers, and perhaps one or two tiny details that will happen along the way.

Not sure if I’ll have time to go out tomorrow to buy those Sharpies, but I have the rest of the week! :smiley:

The only thing missing this morning was the pen/knife mount - I’ve looked at a few, printed a few more and comfortable in the knowledge that I have three models that work for other people, just invented my own because I could. Actually I think it was Ryan’s @vicious1 geometry that I copied from the business end of his original MPCNC version (?) - I liked the flex in that.

I discarded the one which neatly fitted inside the Makita base (sorry Dan @SupraGuy ), no hard feelings, but even though I can easily remove the router I’m just happier for it to remain in place, (that’s a where do I put it when I’m not using it thing), and just about to take that first step into making it move, I want easy visibility to the pen.

I know some have gone to a lot of trouble to centre theirs - I guess I’m about to find out why not doing that is a problem.

Enough of that. It clips over the vac duct and neatly braces against the base, bolts on using the standard vac duct bolt. It doesn’t move at all when I jiggle it, so I figure a pen or knife won’t give it any grief.

It’s been a busy couple of days, but it’s been a fun time too.

4 Likes

That filament makes those parts look like they are from a really fancy injection mold. WOW!

2 Likes

Thanks Ryan, that’s been one of my objectives for this build so I’ll call that a success! Like my benches and other home built stuff, it is intended be a tool that I have for a long time, so it’s worth putting in a little extra time/money/effort so that I don’t have to be bugged by things I could have done better when I use it.

On money and filament: I am a Prusament Fanboy and my machine is well dialled for it - this is Galaxy Black PLA (there’s a dash of Lipstick Red in those stands) - it’s an “expensive” filament for sure, but it’s cost me around an extra $20 (AUS) on this build or about 2% of the total build cost if I add everything up honestly. It’s seriously worth 2% IMHO.

Print times at 0.2mm with a 4mm nozzle were comparatively long, but I printed a couple of parts a day, and had them all sitting on my desk in a box for around six months, so slower printing didn’t hold me up. :smiley:

Cheers

2 Likes

Sounds like I need to get started on a new version… :sweat_smile:

2 Likes

Noooooo! :rofl:

2 Likes

Working on other stuff today, but now that the table top is clear it’s also clear that I should have screwed down the spoil board at the beginning. Or sealed it. Or both.

I live in a humid environment (it was over 90% for a couple of days last week) but will dry to 80% shortly :wink: and the 12mm MDF has warped a bit over 2mm in the 1200 length - just a result of having one side protected (the underside) and the other exposed to the humidity. I’ll flip it for a few days, then seal it, then screw it down.

Might not have to buy those Sharpies today after all.

2 Likes

I was going to be that guy. The one that didn’t care that he had a complete machine sitting in the shed that he hadn’t fired up - he’d get to it in good time after all.

But it’ s a year and 11 days since I printed that first part, and it won’t be all that long before the anniversary of receiving Ryan’s @vicious1 box of goodies, so I just couldn’t do it.

How hard can it be to download a bit of pre-done gcode, stick it on a card and press “go”?

Not very hard at all as it turns out. I feel like one of the cool kids. I do need to square the machine and tension the belts before I get too serious. Why do I get the feeling that this project has only just begun?

Sorry about the out of focus shot - let’s put it down to excitement.

11 Likes

:tada: :crown: :tada:

1 Like

Nothing better to end a long day with than to see a crown 1 year and 11 days in the making!

Sweet dreams are made of these…

5 Likes

Your whole setup looks great!

Regarding my benefit for having it centered with the router’s cutting bit along the X axis, I have really liked being able to drop the pen down, and then slide the router assembly until the pen nib is directly over the edge of the material I’m about to cut, and then “Home” the X axis, knowing I’m as spot on to actual zero as possible without a touch plate. My designs (below) are intended to “leave in place.” My latest one (last in the links) had to be created to accommodate my custom vac assembly for my 2.5" vac hose.

Version 1: worked but put the pen too far out front

Version 2: an improvement on ver 1, with the “push off” distance placed along the X axis instead of extending the pen so far away from the router base in Y axis.

Version 3: to accommodate my new vac shoe:

1 Like

Congrats on the crown print! You have “grad-iated”!

1 Like

I know it’s a few days early, and I know it’s “Holiday” time in other parts of the world, but in Australia you can tell it’s Christmas when a ceramic gingerbread star with frosting shaped like melting snow turns up on top of your sandcastle. So Merry Christmas to you all.

Thank you once again to all of you - specially those who haven’t seen this thread but have asked a question somewhere else and will never know how much help they provided!

Having just got back from a time away, I am about to go again - but I’d like to place an order from Ryan’s store for all the things I’m going to need to make some sawdust.

Can anyone suggest a sensible starter pack? I’m thinking a drag knife, 1/8" collet, variety pack of end mills - do I need more? The postage isn’t trivial but adding more just amortises that cost over more items and yes I know I could get them cheaper probably, but it’s Christmas!

I know I can expect to break stuff, but am I right in thinking that I’d be better off with better than el-cheapo quality in the first place?

Thanks again.

5 Likes

Merry Christmas!

Yes you are right, getting halfway decent endmills does help. Now you can get some decent ones from aliexpress, but you can also get drill bits that have been pawned off as endmills. Hopefully someone more locally can let you in on their supplier though. On the same token buying a $30 endmill right off the bat might not be the best idea. I just fired up my most expensive bit and 10 seconds into my cut found out my MDF had a small pebble in it and chipped my super fancy O-Flute. :confounded: I had been saving that thing for months.

3 Likes