Laser engraving tiles...results so far

…in the hands of a skilled person. These AI image engines, if not now eventually, are going to allow semi-skilled and even unskilled people to create fakery that now requires a skilled person. It is not creating a new problem, but it has the potential to make the existing problem much worse.

It will definitely hurt the struggling artist making ends meat by making art for gizmodo.

Eventually, but I don’t think we are there yet, at least with Midjourney. It is great at exploring concepts, but when something is needed with a specific layout, or using a specific content, it can be a real struggle. It is kind of like working with a hyperactive five-year-old. Sometimes Midjoureny listens, but more often it only half listens or just goes off and does its own thing. In thinking about it, it might be that stock image sales might be impacted most in the short term.

2 Likes

I agree more with the huge if true video I linked. I bet you there are already graphic designers using it as a starting point and able to do 10x the work. Which will put 9x of their peers out of a job. Maybe not in the next month, but over the next few years.

Maybe some of you saw the person who won a digital art competition with a generated picture at the Colorado State Fair:

They did some post processing on it. And there were plenty of people mad about it.

True. I think of the way email is now saturated with spam and all the growing pains that took. But there isn’t really any good way to stop it.

2 Likes

I know I promised not to clutter Robert’s thread with another lengthy post but I feel I should at least show the results of my adventures with the MJ image generator that Robert kindly introduced us to.

First, I put one of my Banggood 2.3W laser modules on my $79 Cenoz machine and did a test tile with my normal flat-white Krylon ColorMaxx paint… actually two, since the first one was done with a bad lens on the module. After swapping lenses from another module I got this pattern…

and did the following tiles at 1750mm/min, 100% power, and IIRC 339 dpi and Stucki dither…

There’s also been considerable discussion on the Lightburn and LAHobbyGuy forums about using pure TiO2 powder instead of white paint. This powder is readily available on Amazon and not terribly expensive, so I order a 1lb bag. I tried simply mixing a spoonful with isopropyl alcohol and sprayed it on a few tiles… but I was unable to get as smooth a coating as with spray paint… more like orange peel texture. It does, however, result in a rougher, thicker, blacker image, is less “smelly” than spray paint when lasering, and easily cleans up with water.

Obviously, the TiO2 powder works to put an image on a tile but concocting a suitable “recipe” to get a smooth coating will require more effort/research and is the reason for all the discussion. I’ll start another thread if anyone wants to go down this particular rabbit hole.

– David

7 Likes

Don’t worry about cluttering this topic, and you are producing some very nice results. I had TiO2 powder on my radar, so I’m very glad to get the info from your first test.

1 Like

I’ve been thinking about this as well. Felt kind of bad about all the spray paint cans and propane/propellant I’d be using. Plus it smelled bad. Go down the rabbit hole! I’ll follow.

4 Likes

Since everyone who’s spoken up so far has the TiO2 powder on their “radar”, so…

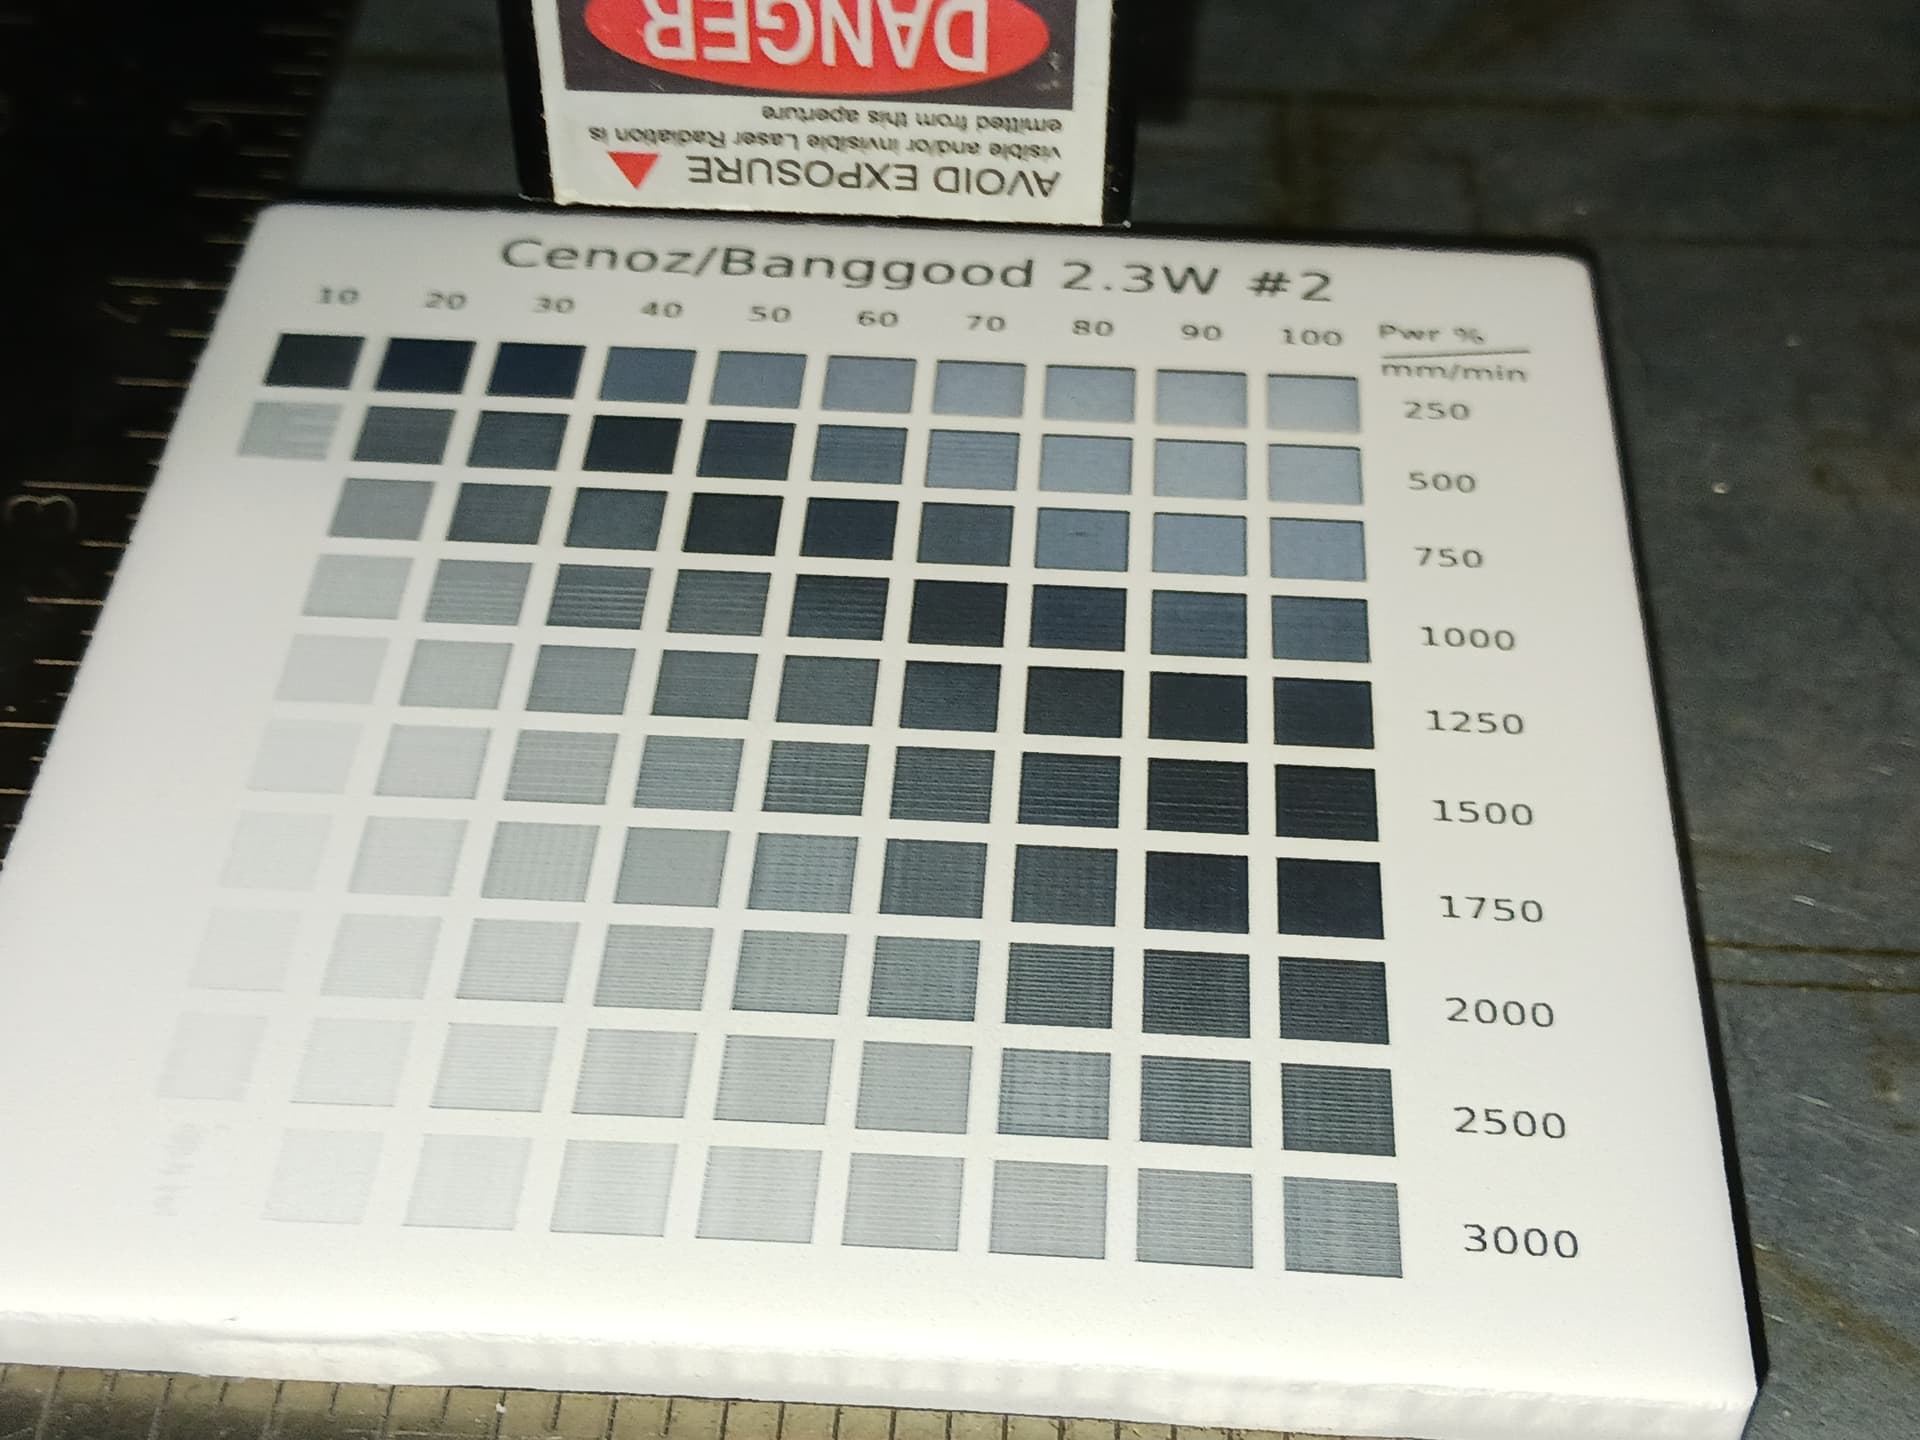
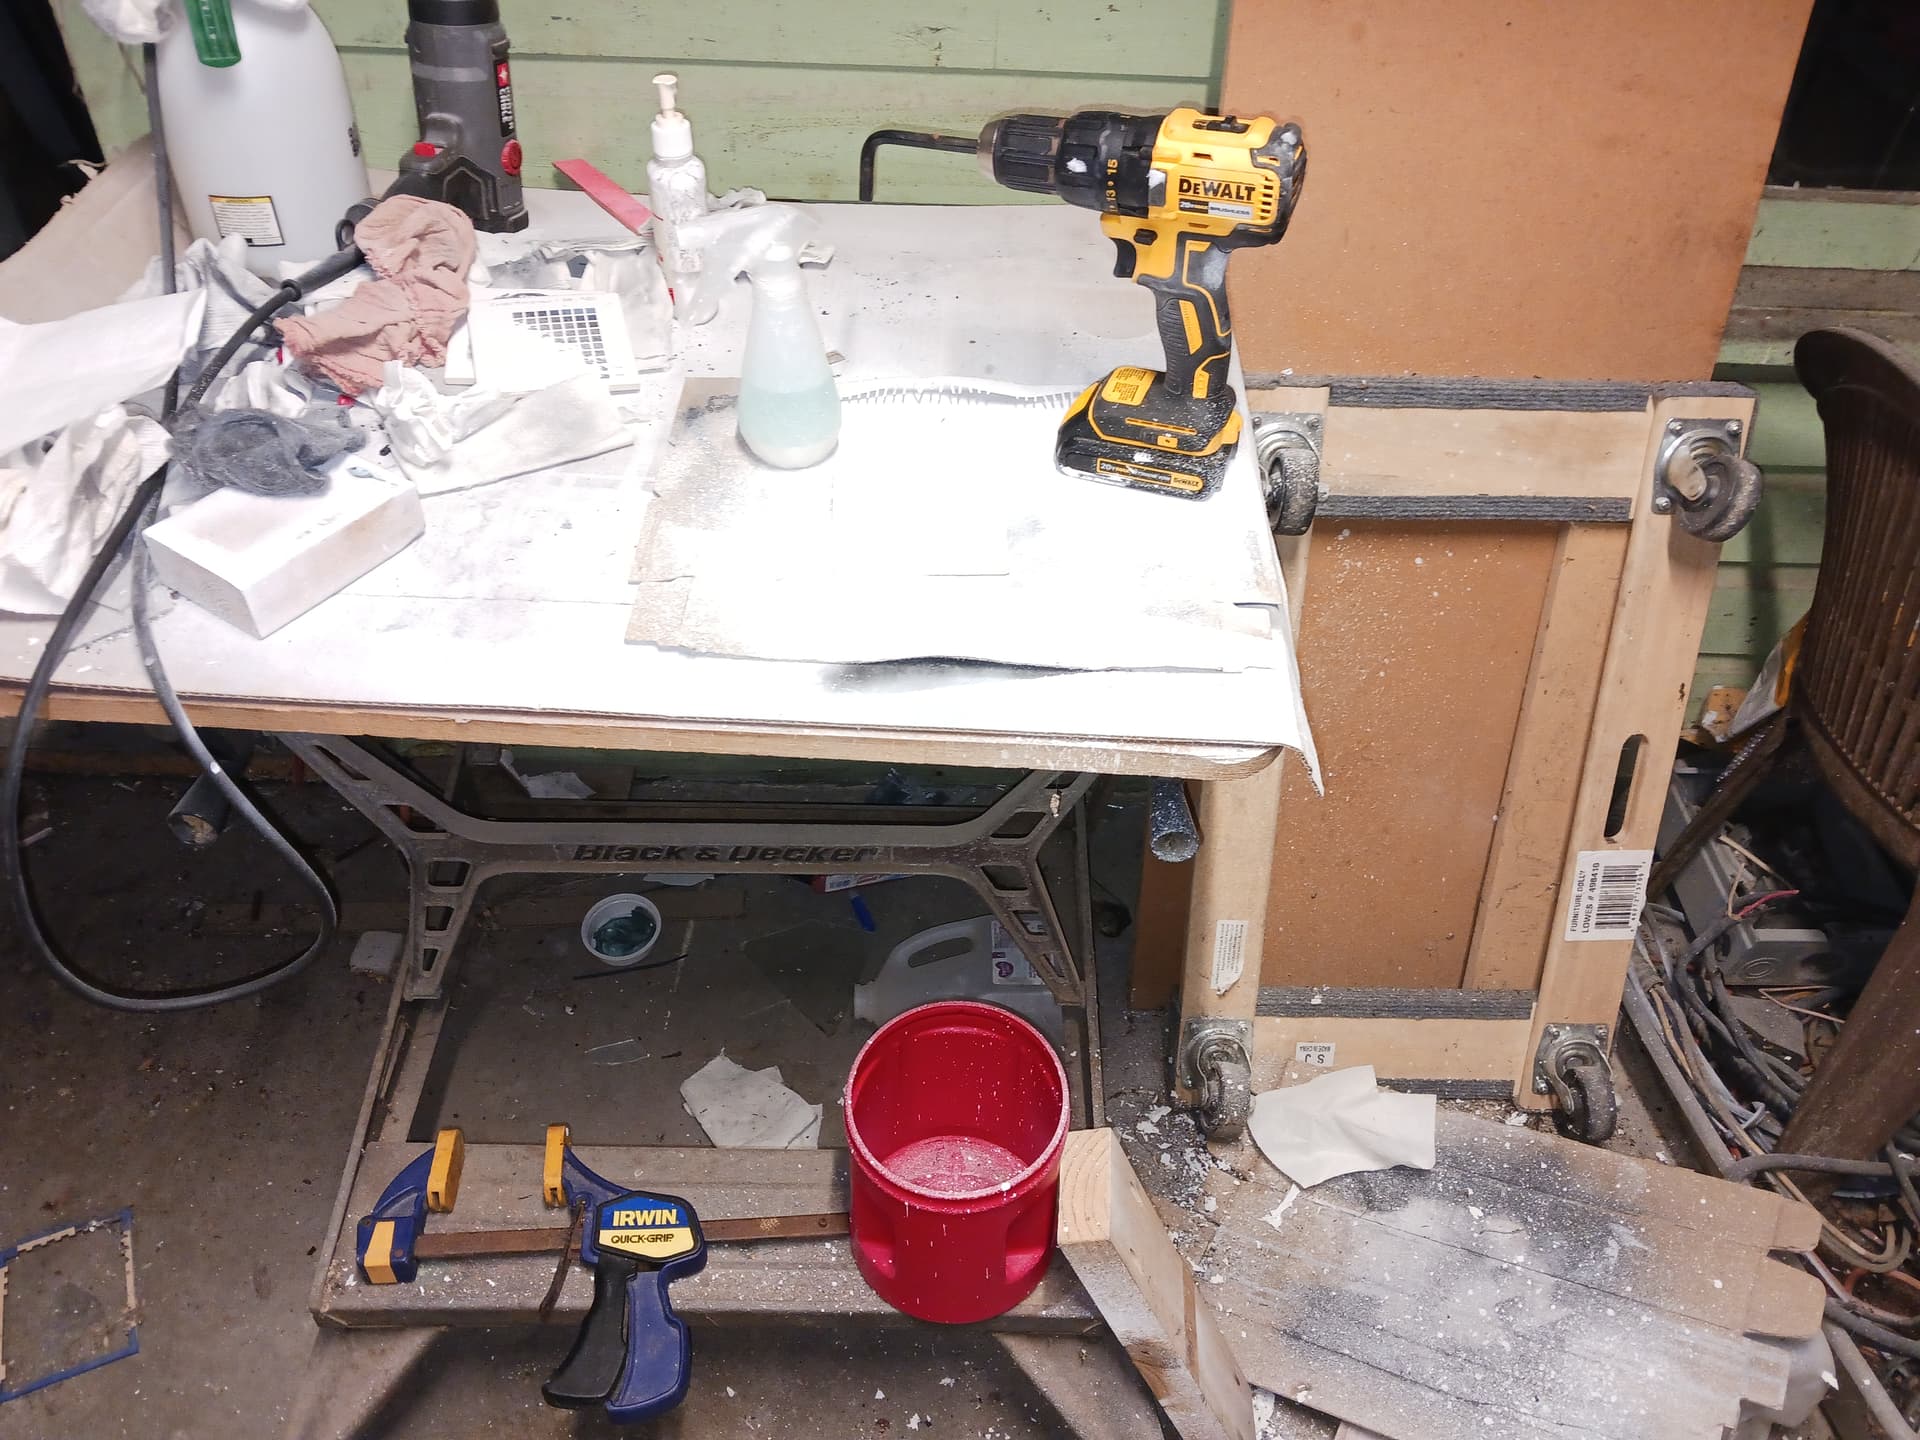
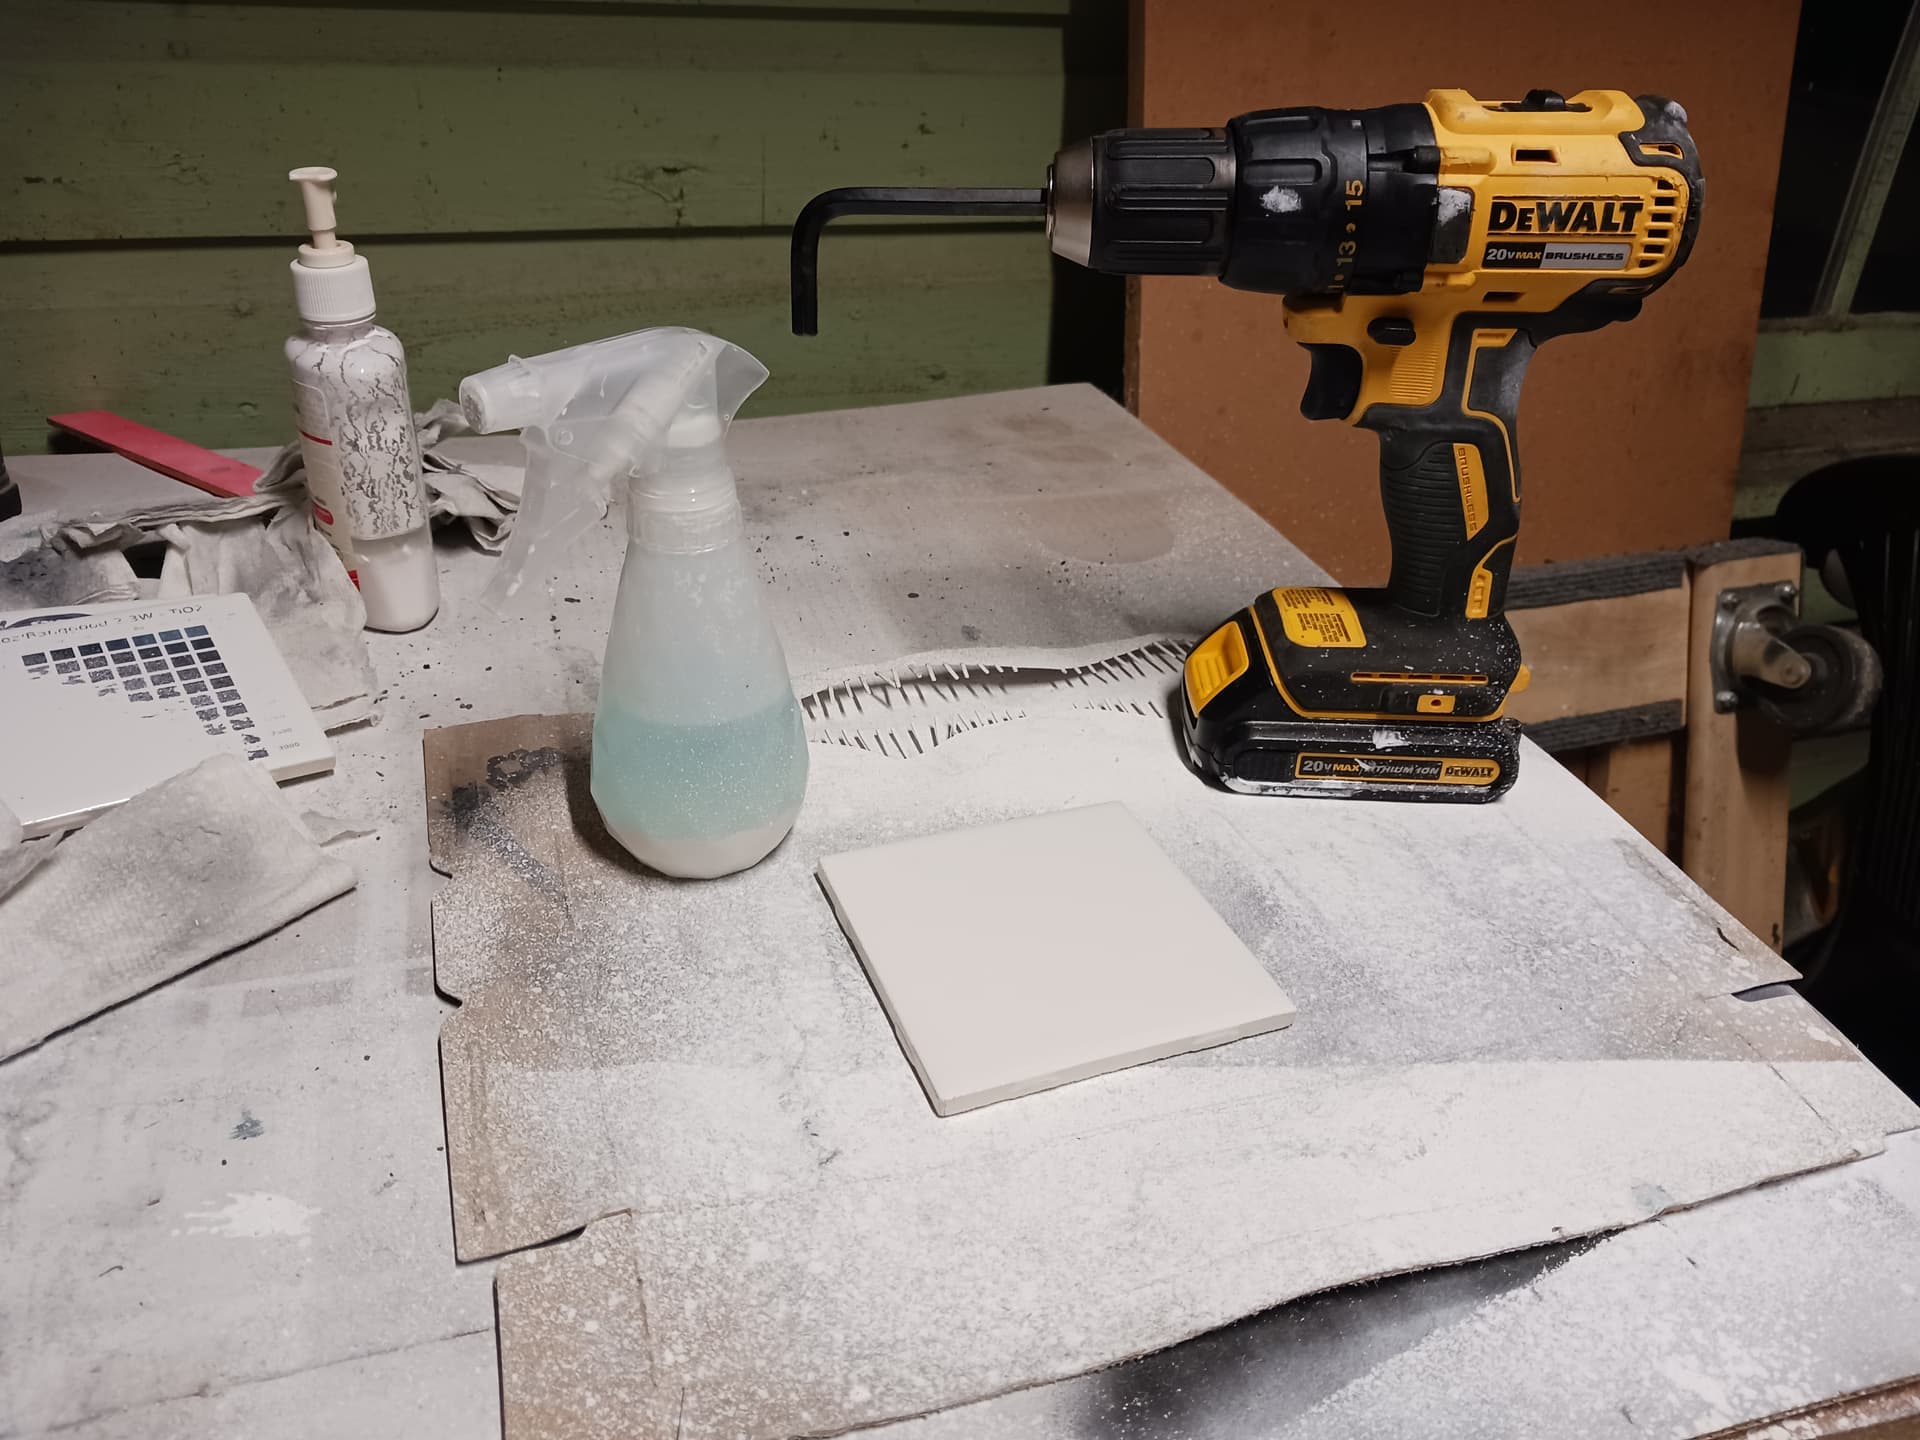
I’m not a “chemist” or a “chef” so I’m trying, of necessity, to keep this as simple as I can. The simplest “recipe” I’ve found is a simple 3.5:1 ratio of ethanol to TiO2… and I’m believing denatured alcohol should be an okay substitute for the ethanol. And I’m using a simple spray bottle to do the application of this mix to the surface of clean white ceramic tiles. I really want to avoid trying to learn how to “paint” with an air-brush.

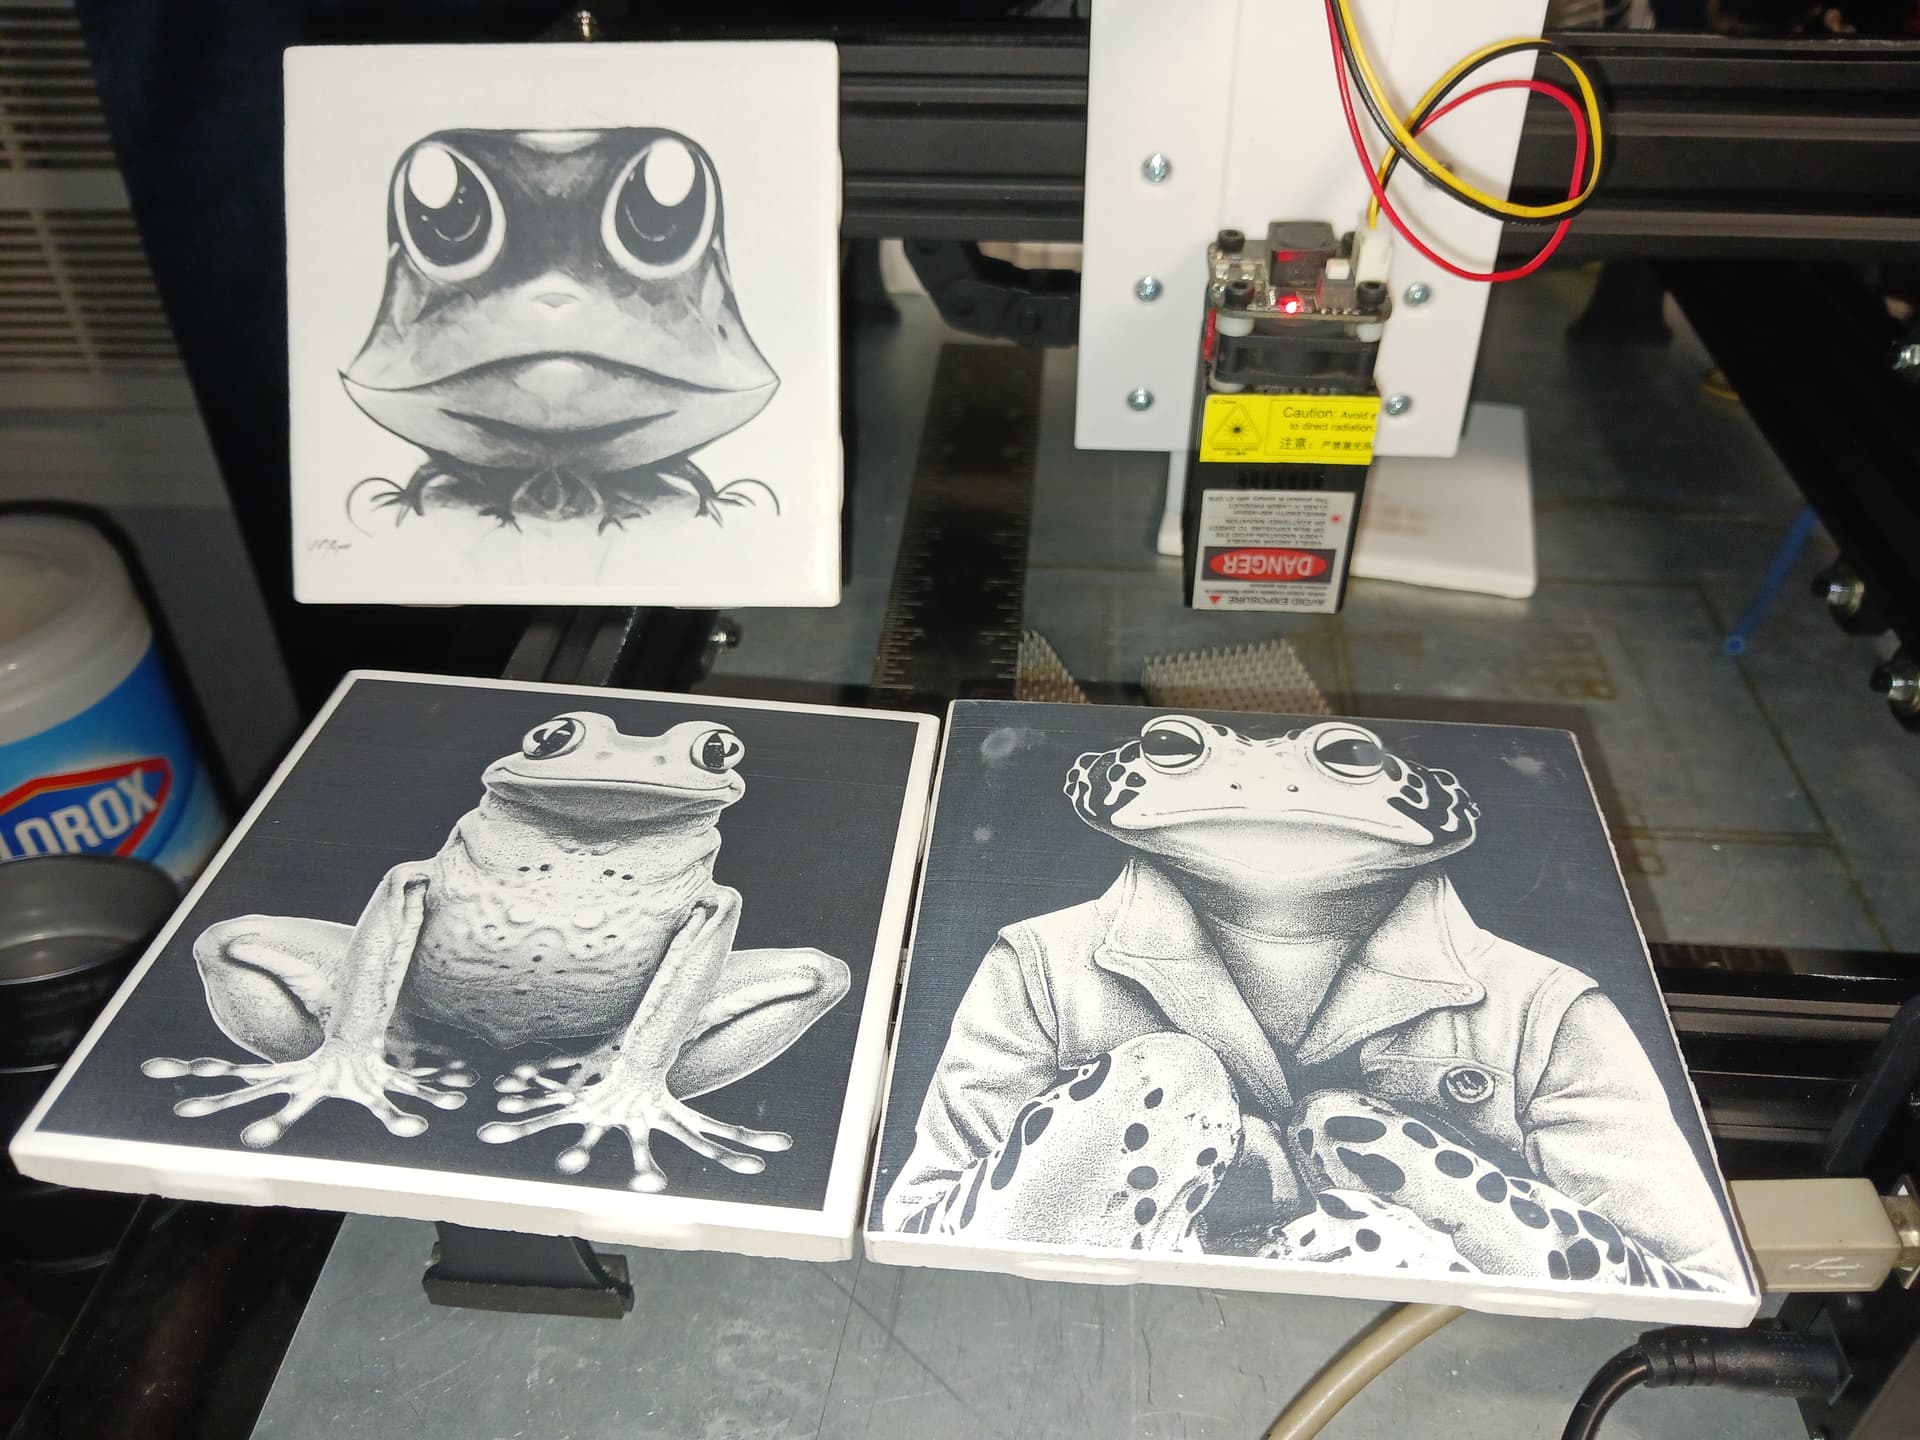
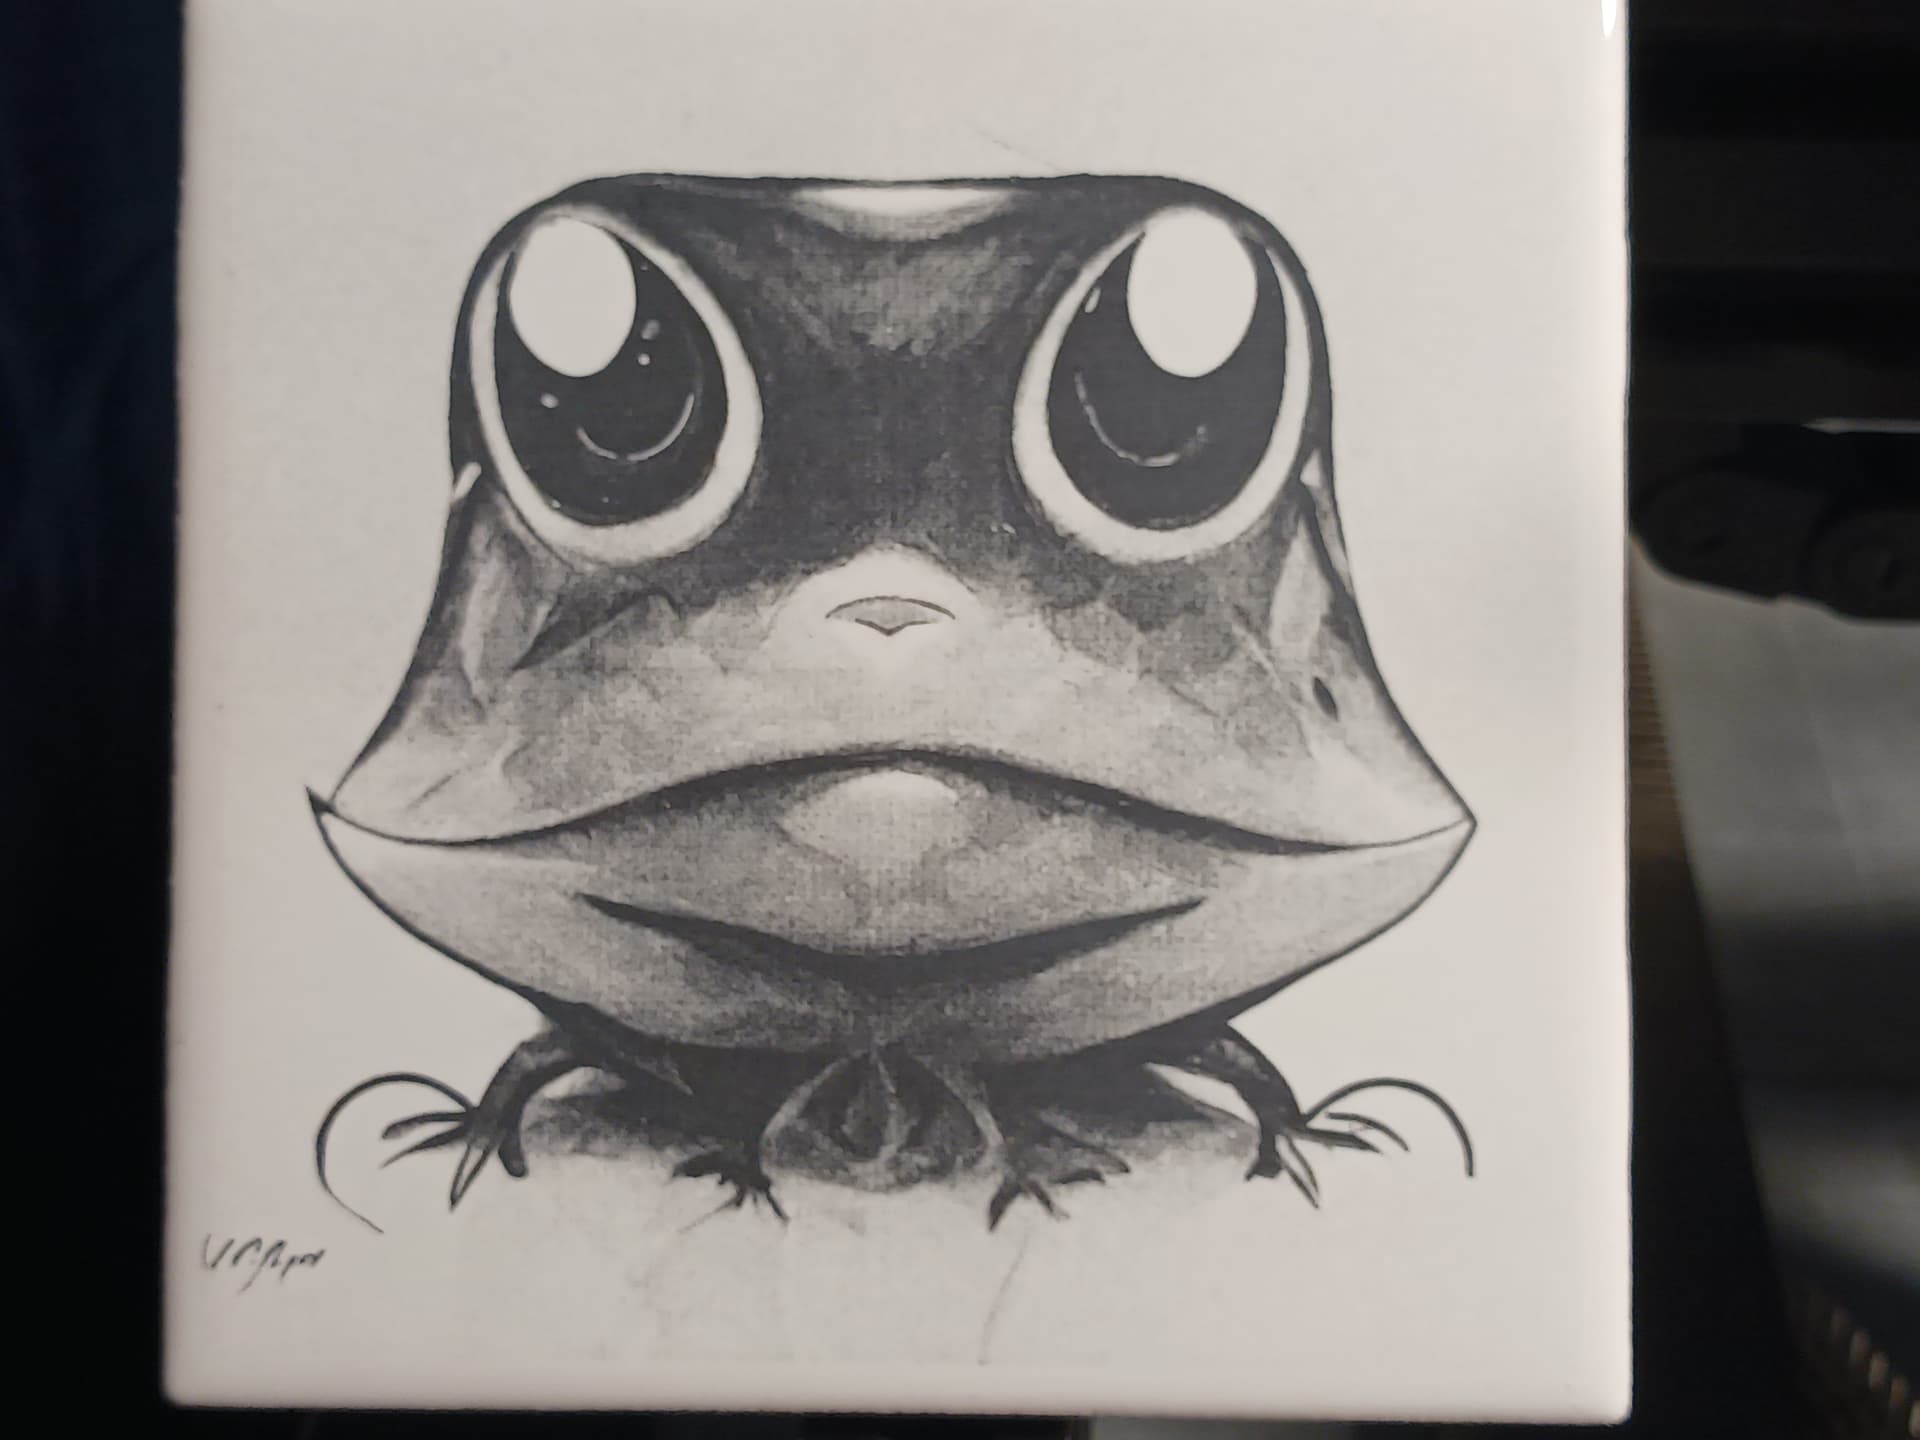
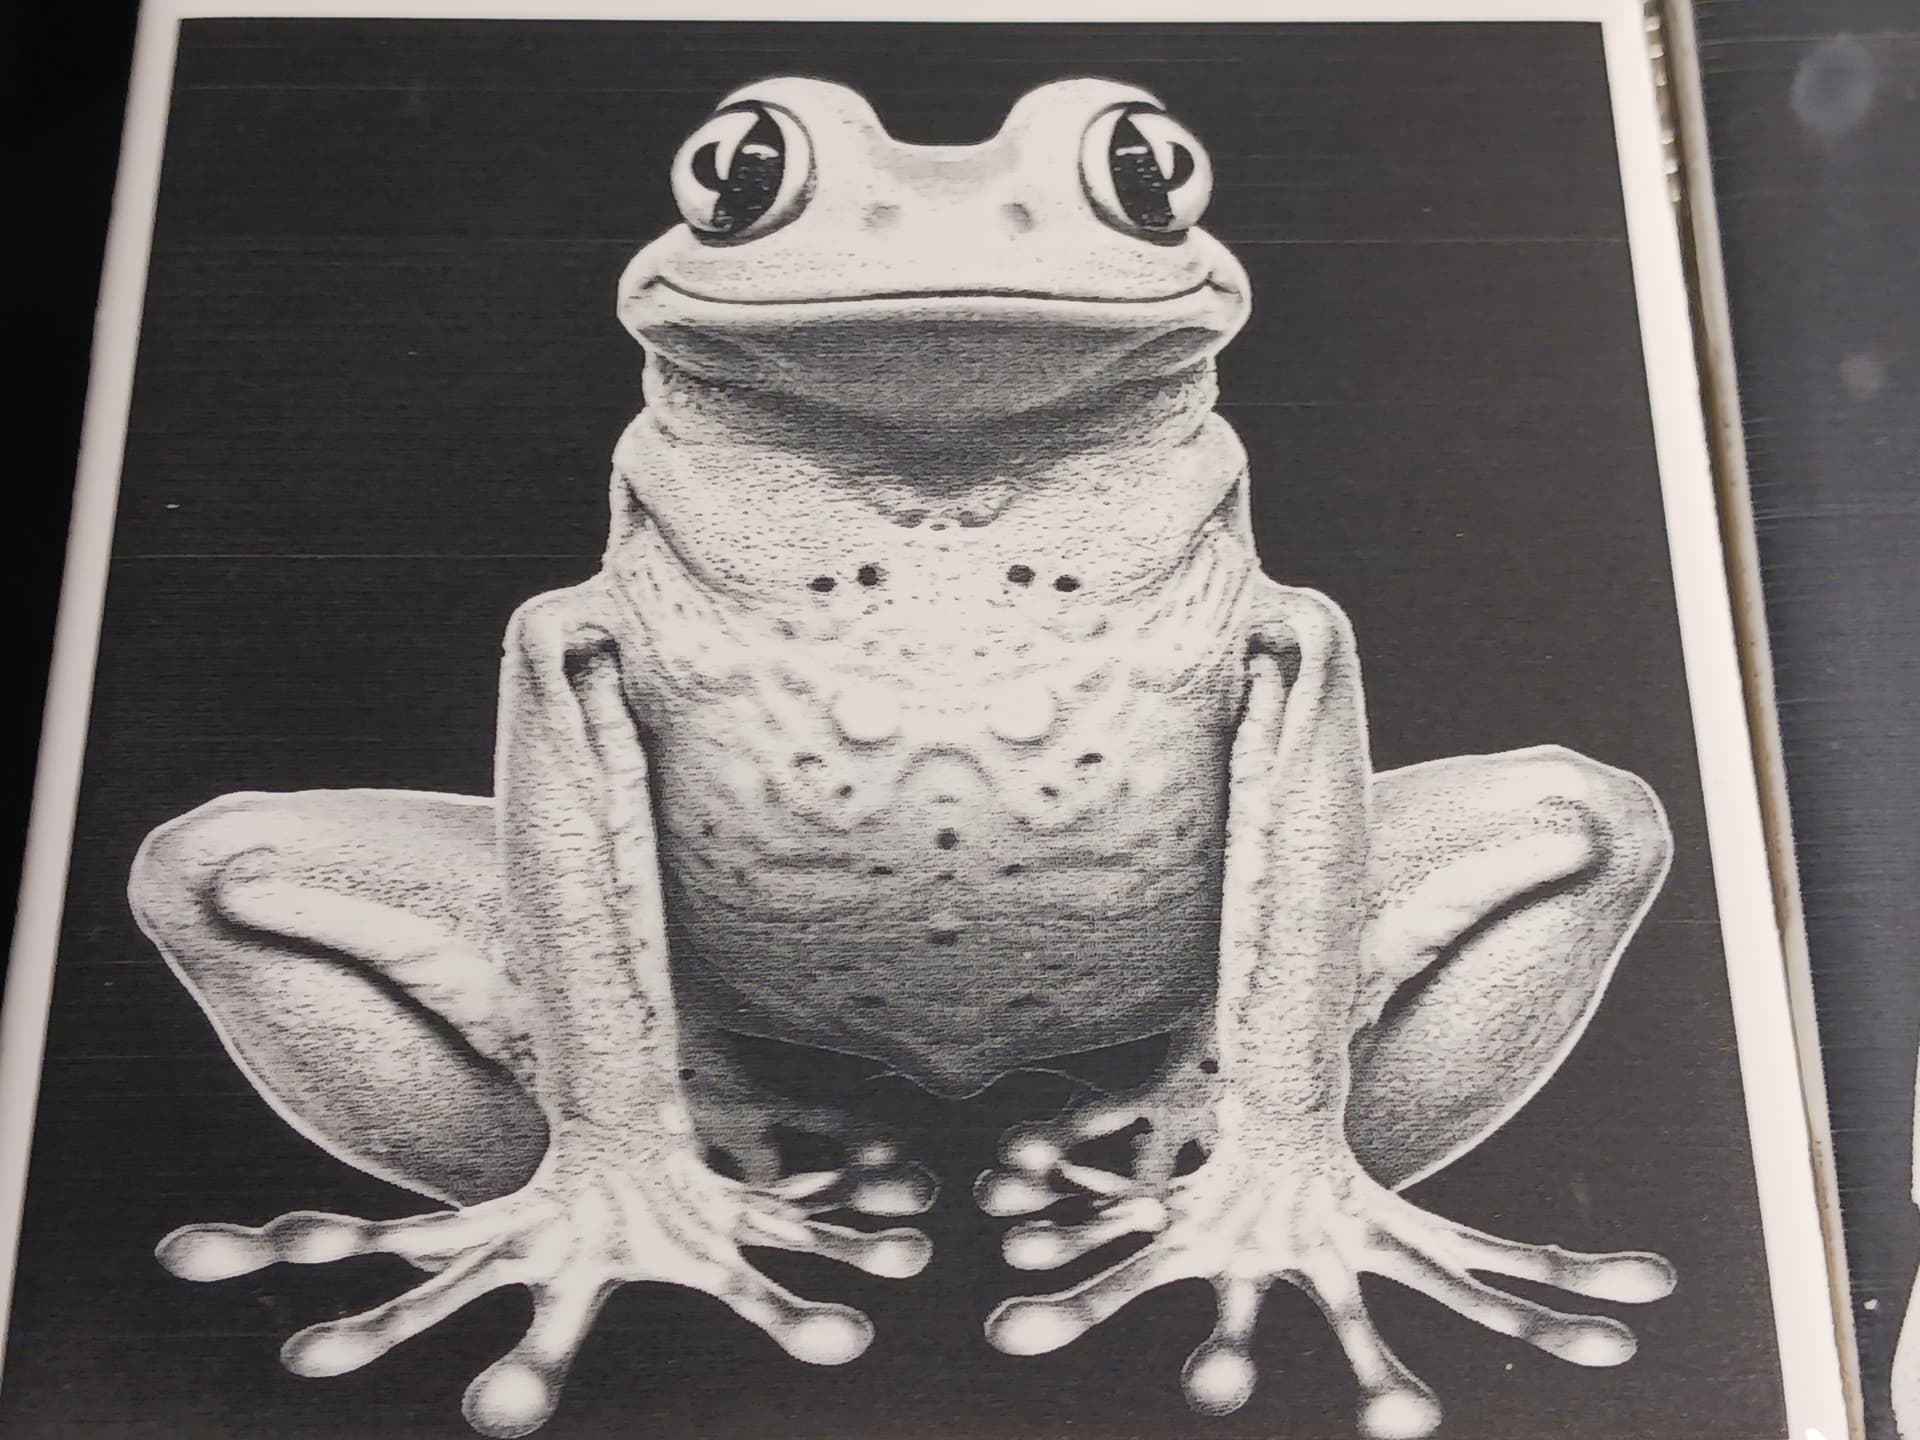
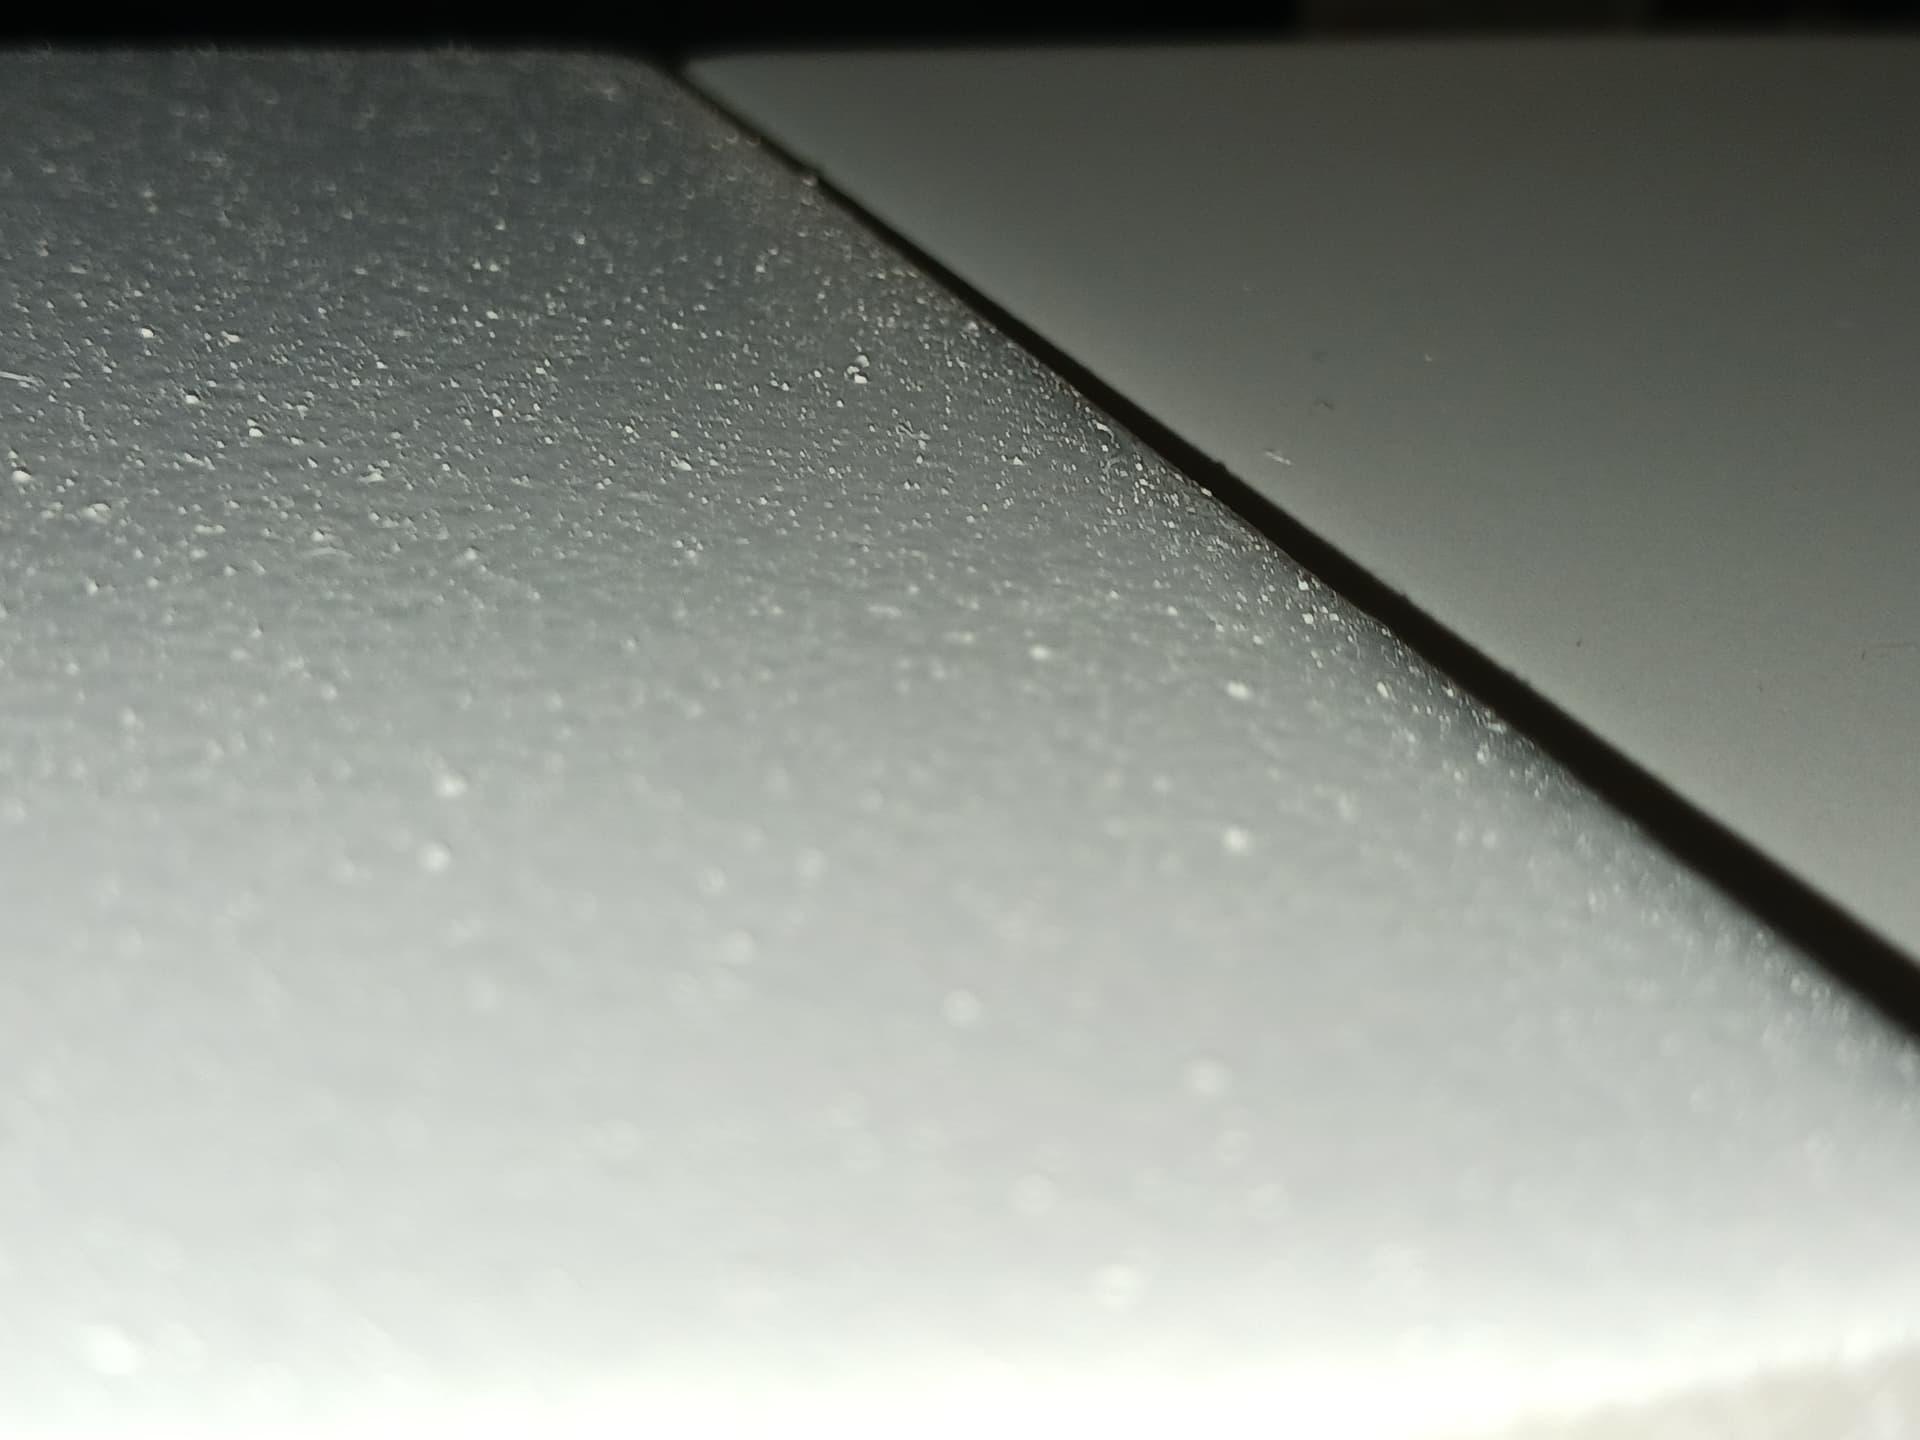
First, I simply sprayed as fine a mist as I could… one or several coats, same result. Left undisturbed to itself it left a uncontrollable rough surface (left) compare to spray painted tile (right)…

and, as we’ve seen, resulted in a equally rough texture to the tile and image…

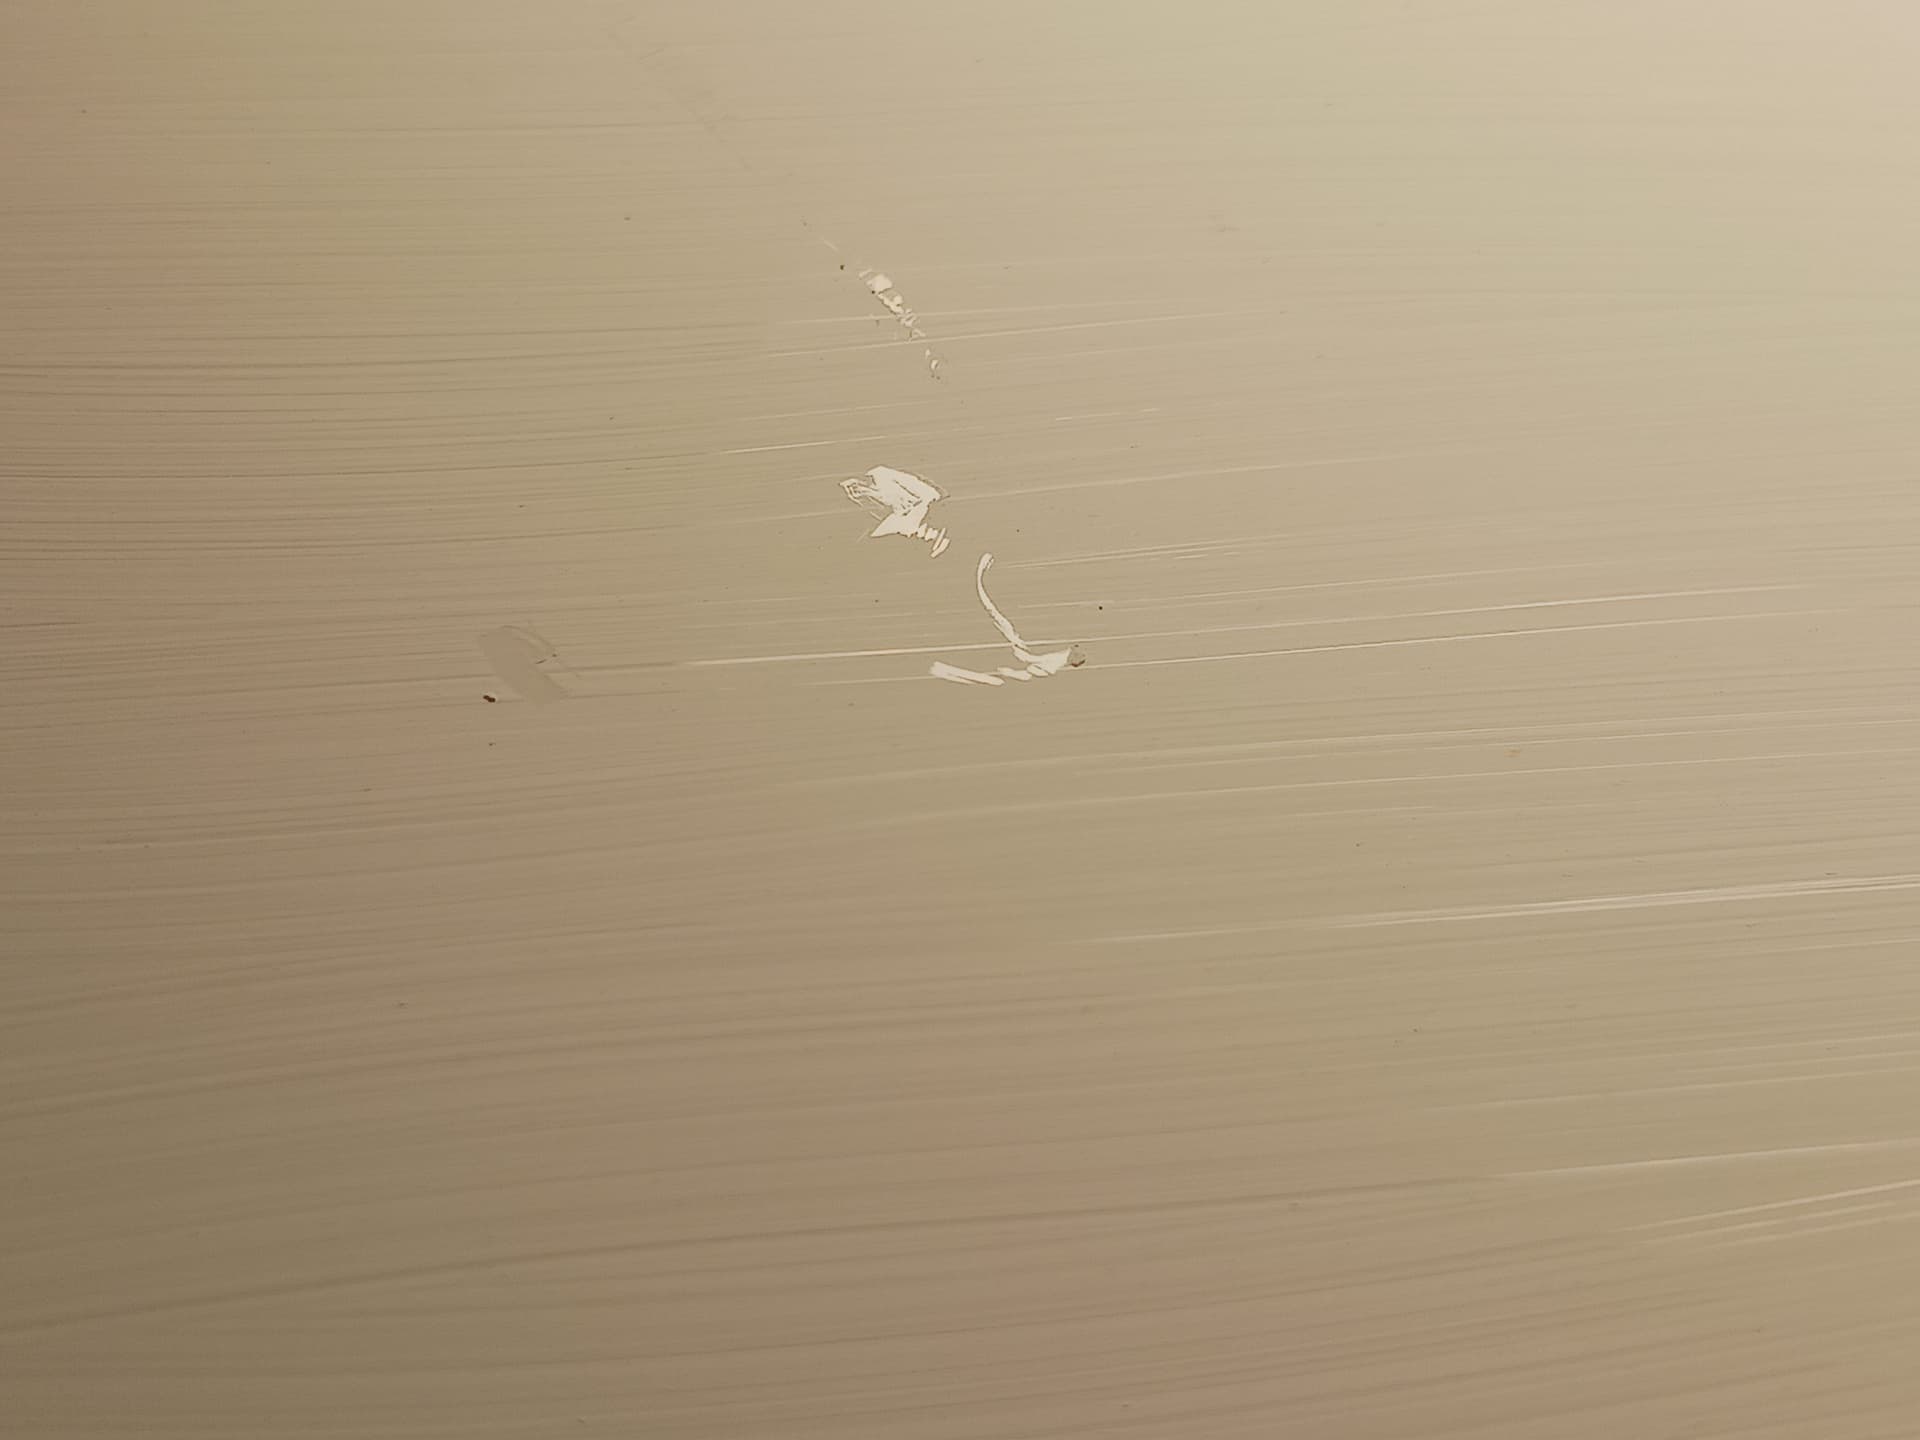
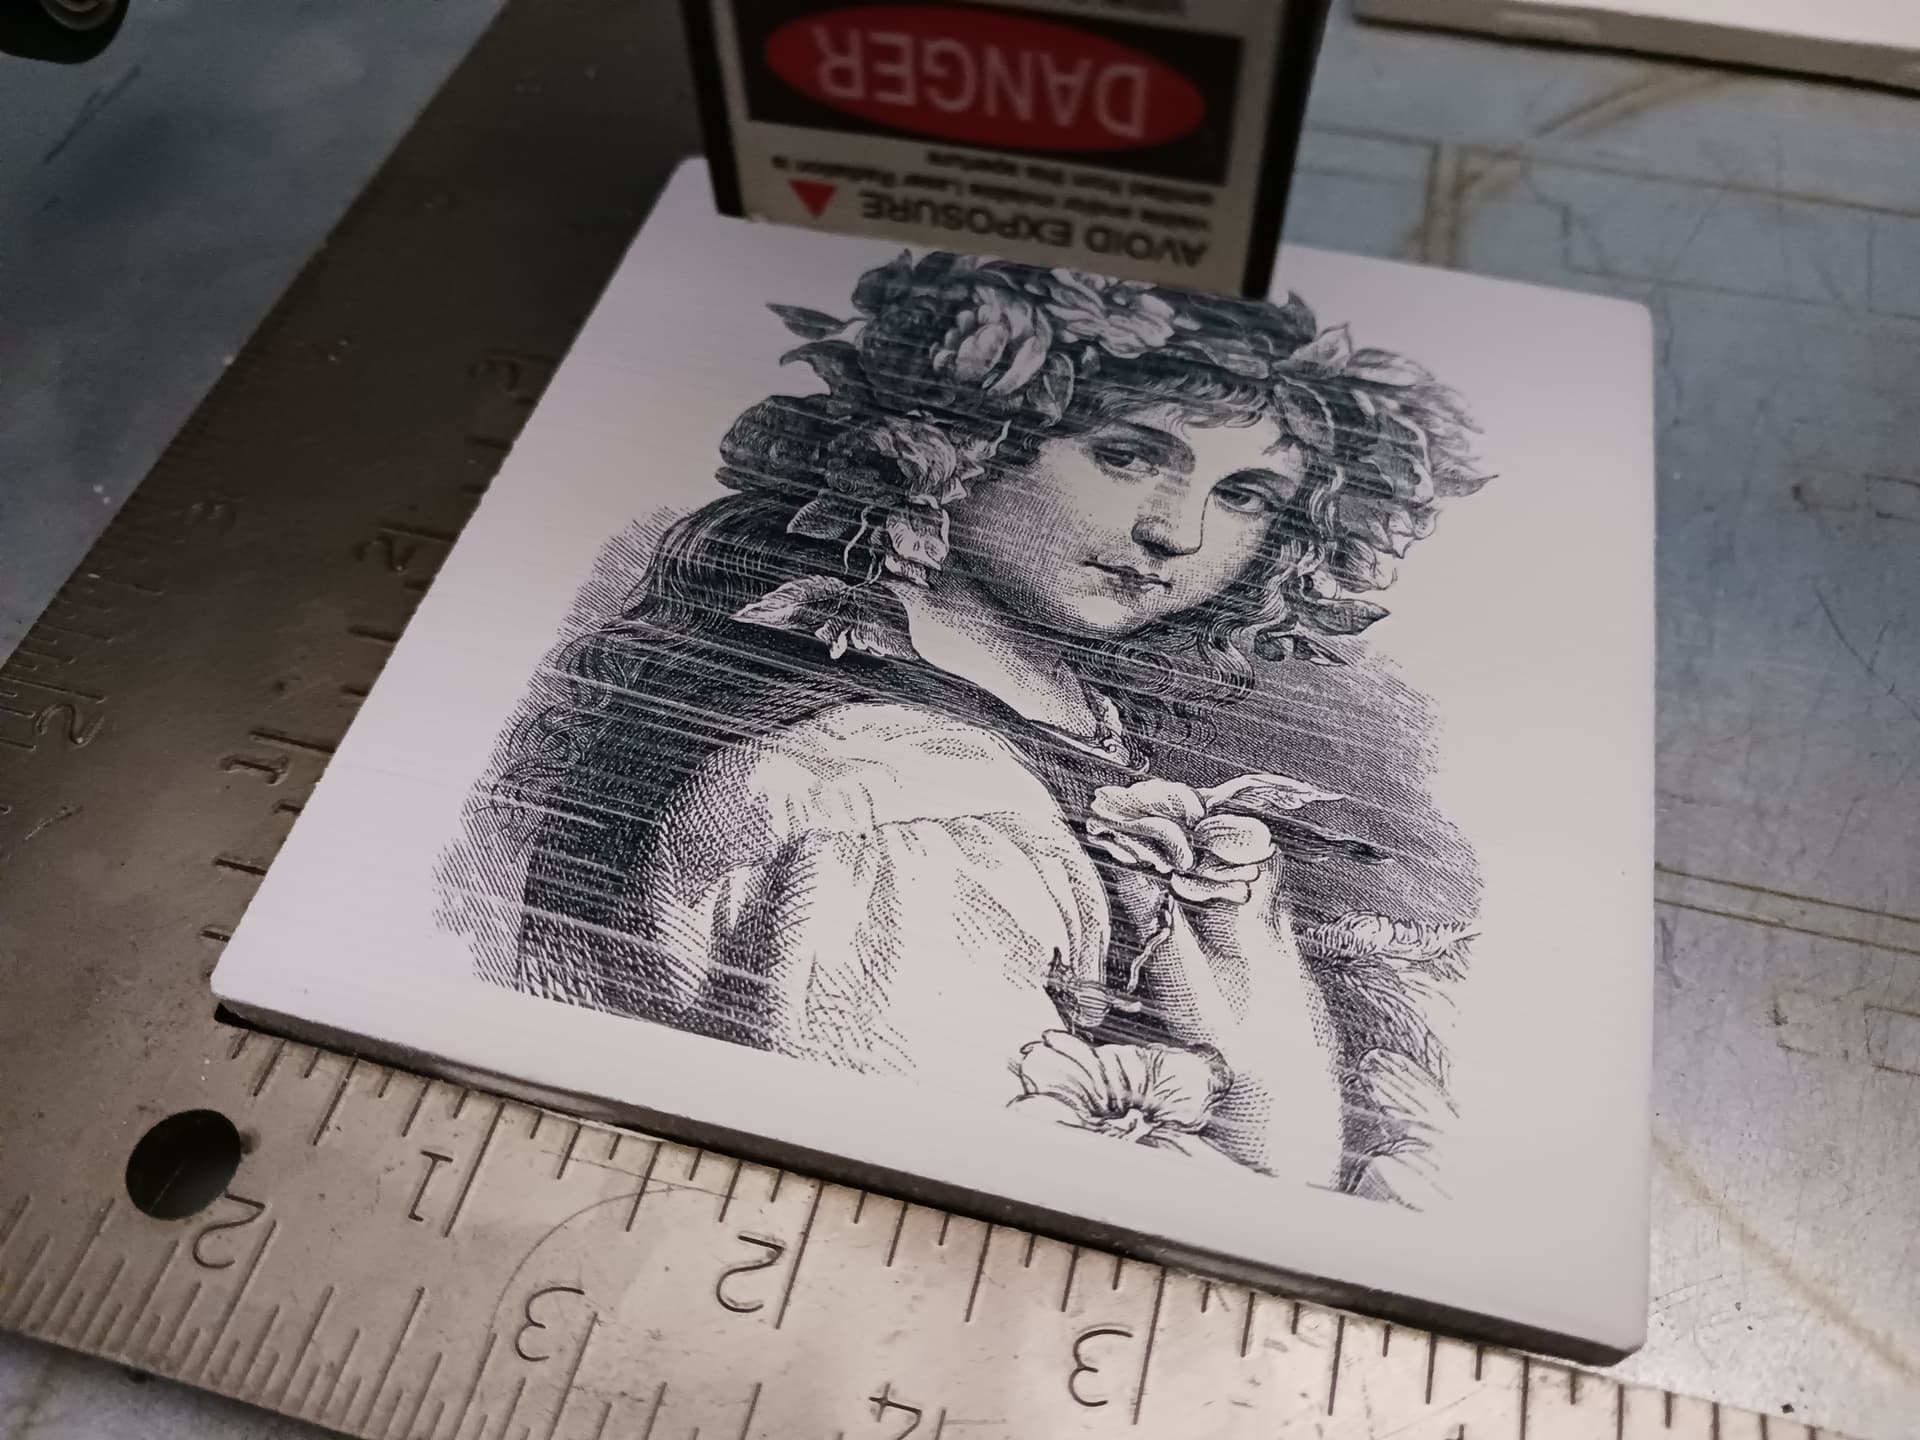
Next, I tried spraying on a rather heavy coat and then light brushing it to try and level out the coating…

Note that once dry the powder can easily be scraped/scratched off… and quite likely the “furrows” left from brushing the surface might have cleared the powder from the surface of the tile. Predictably, I got these images…

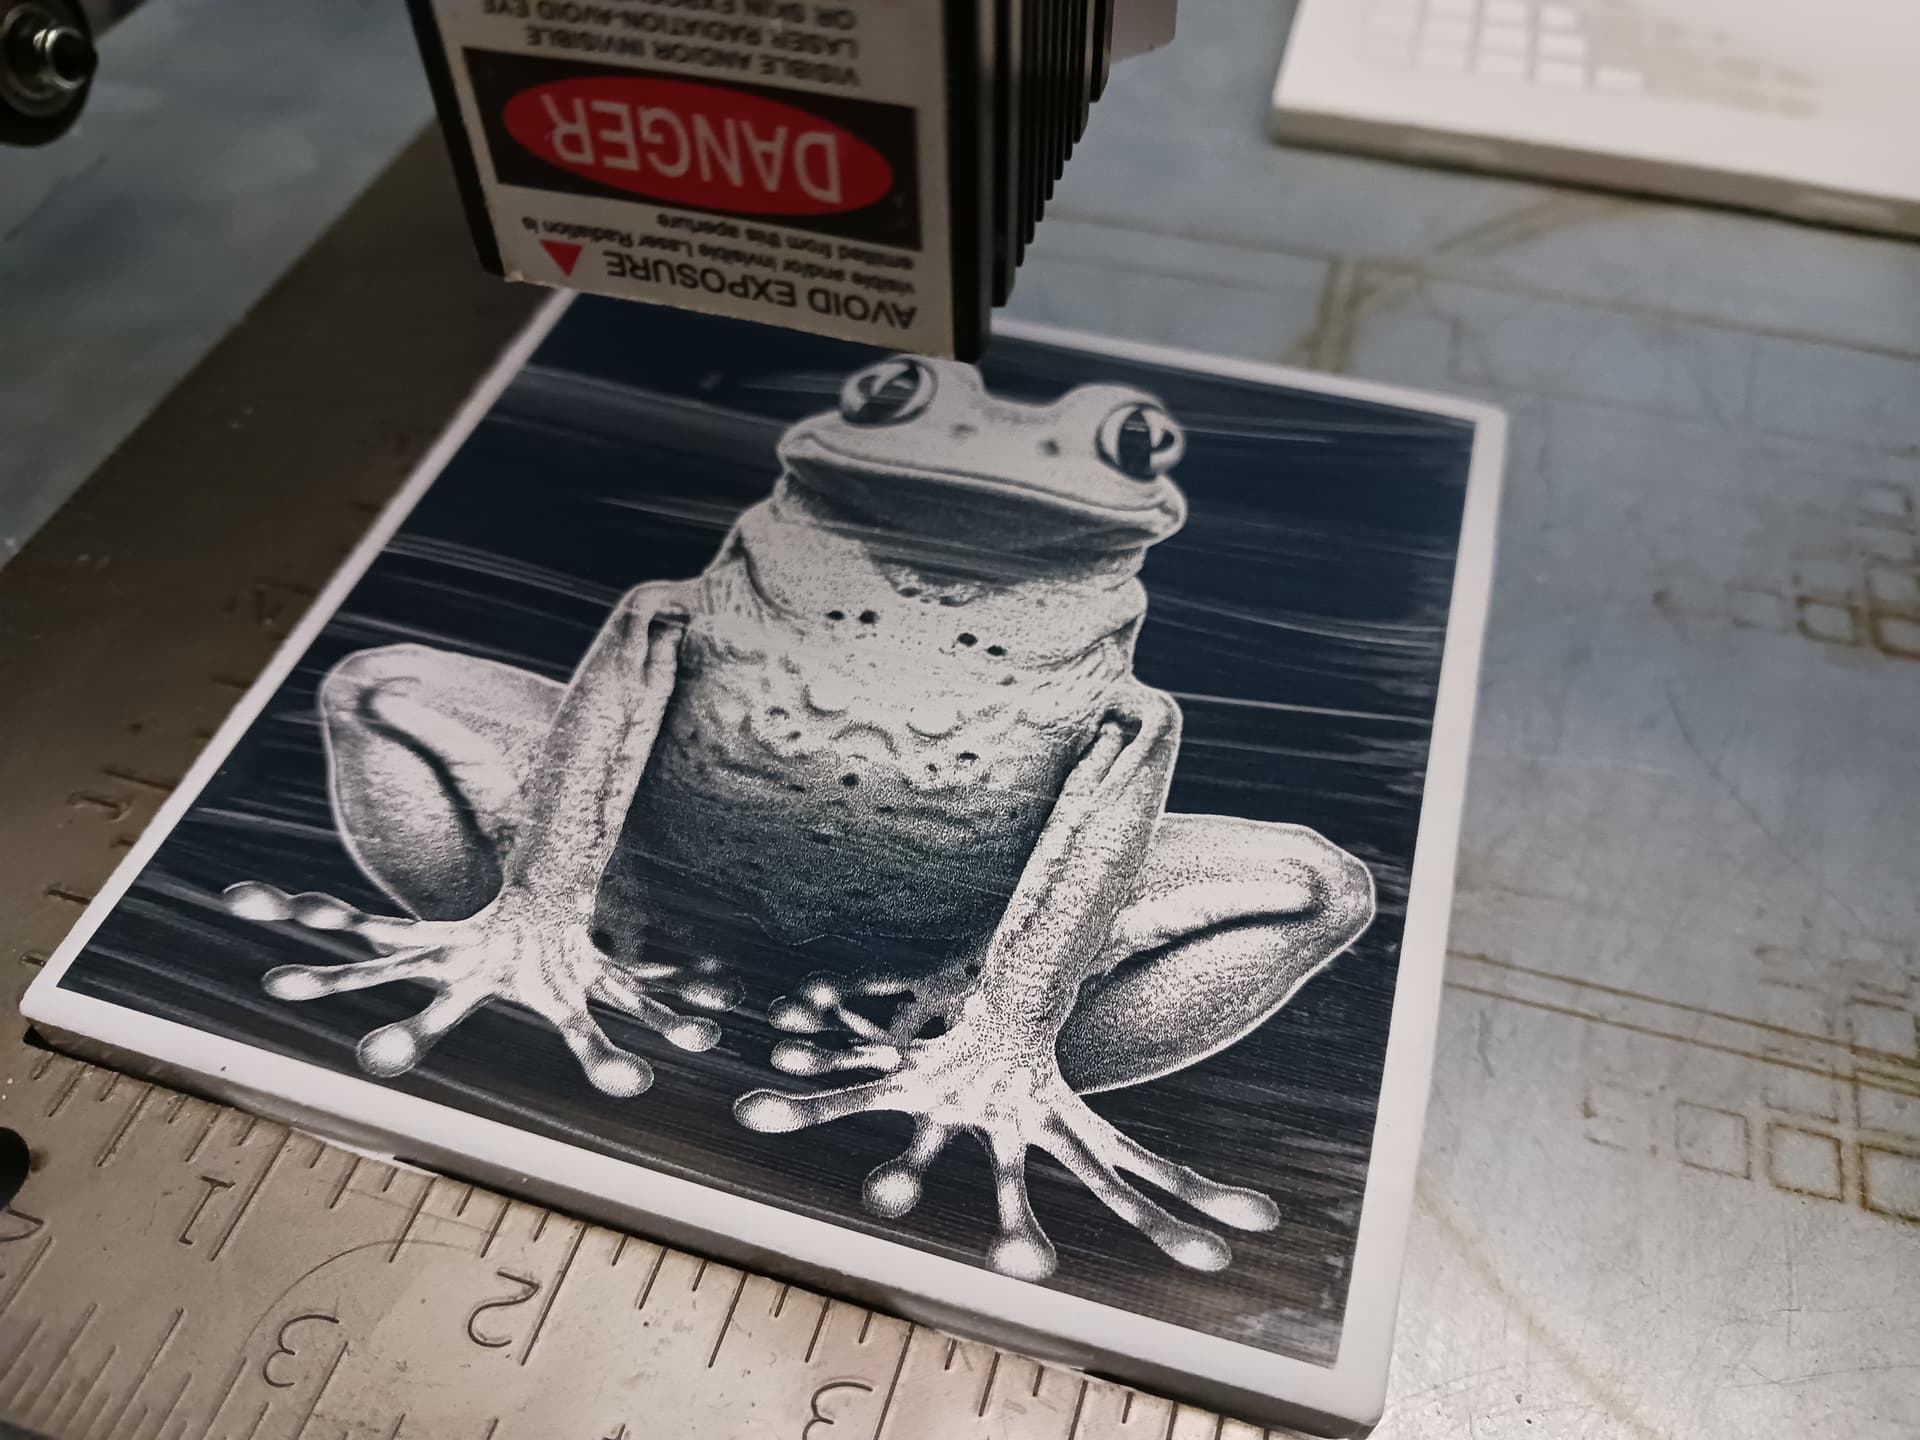
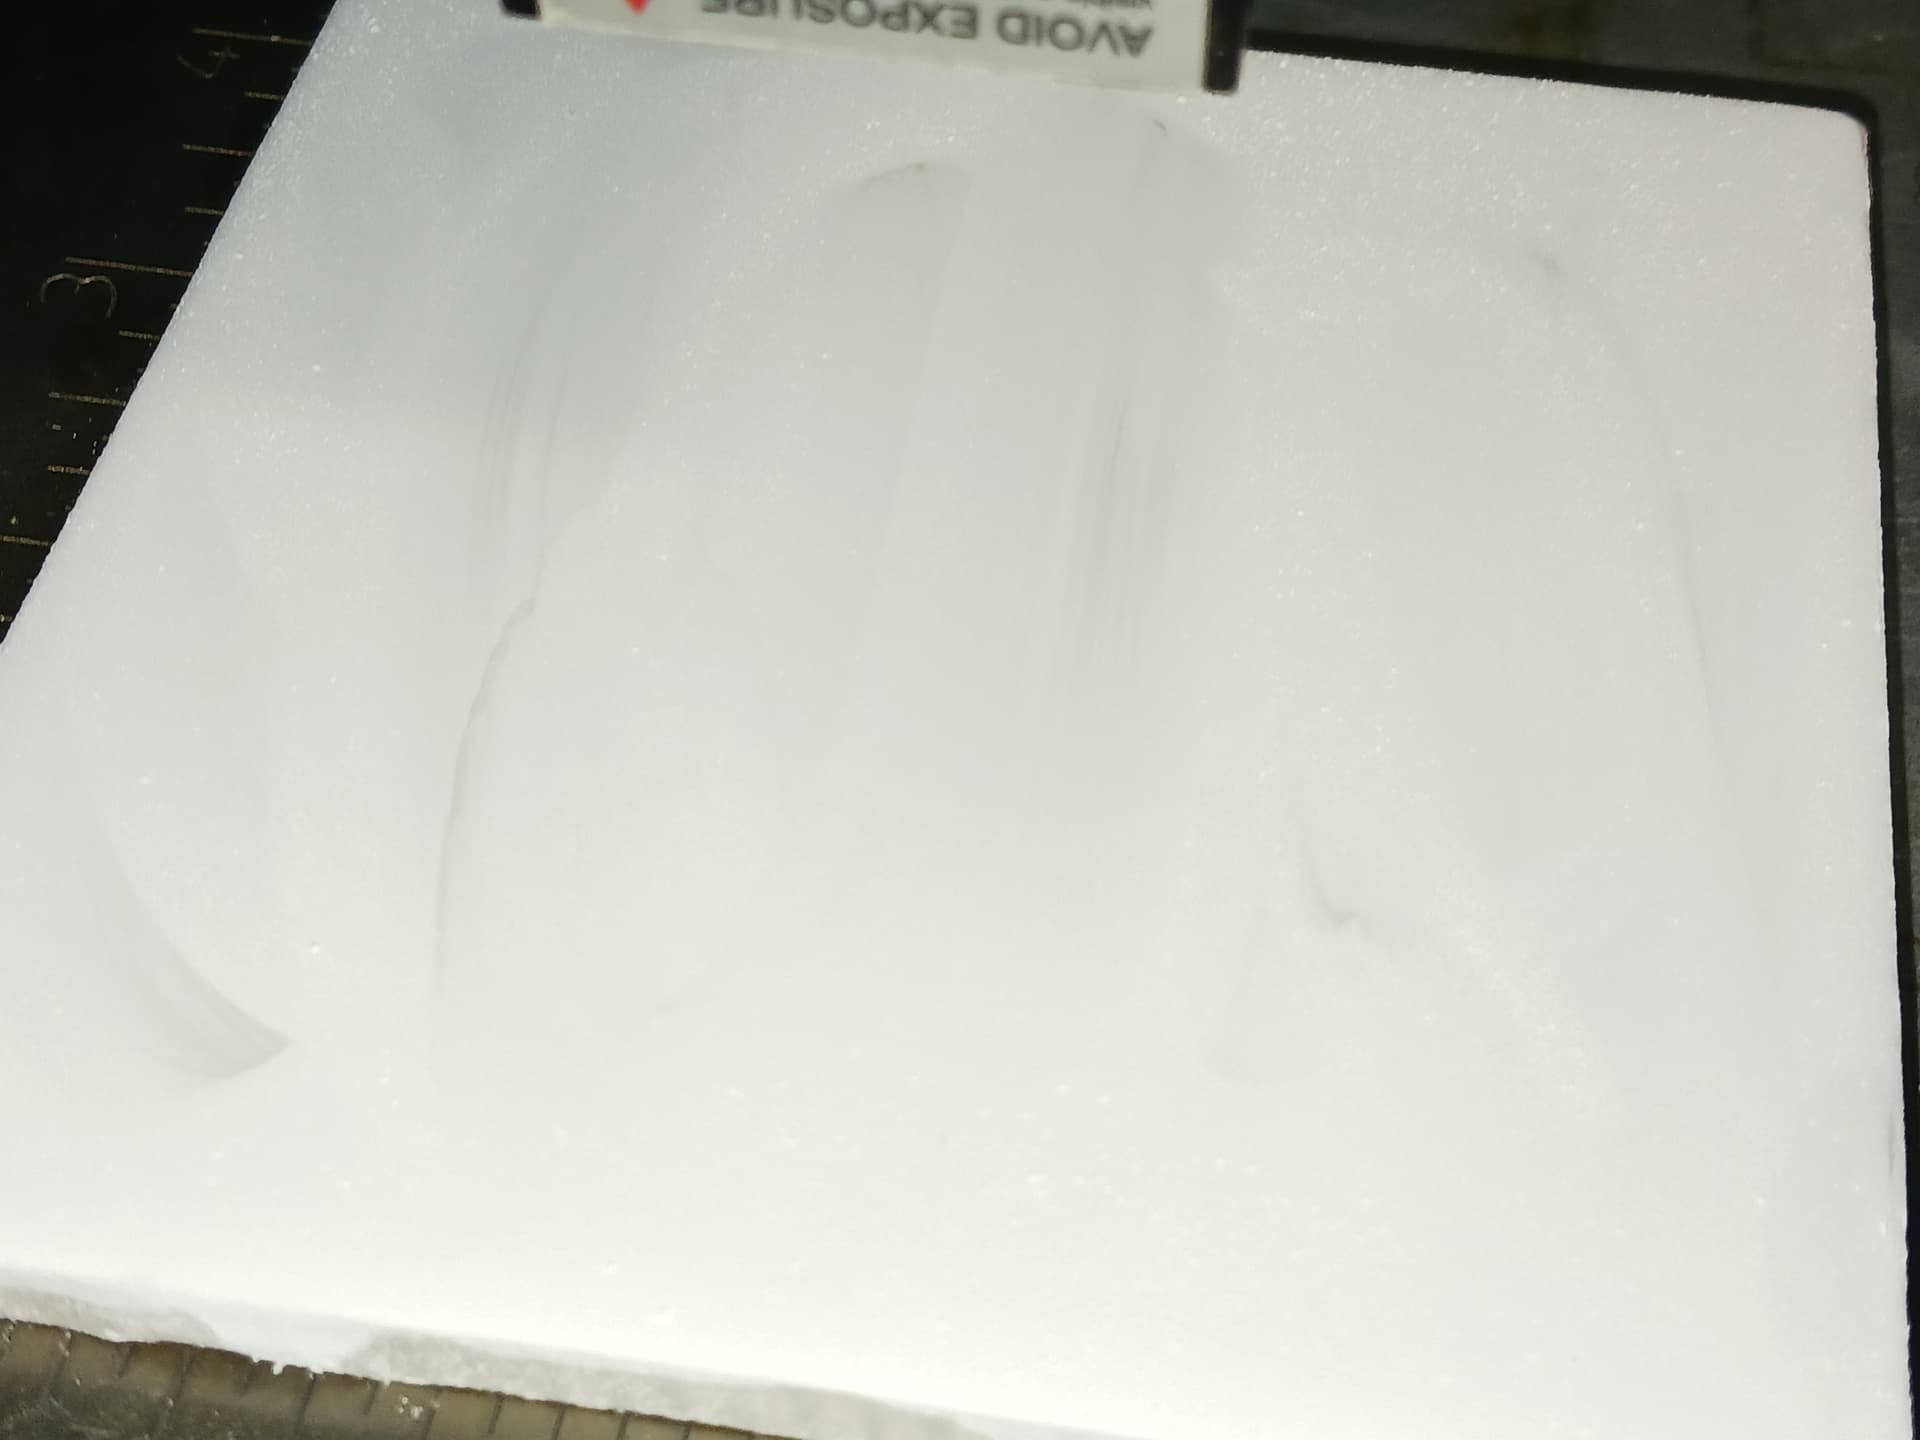
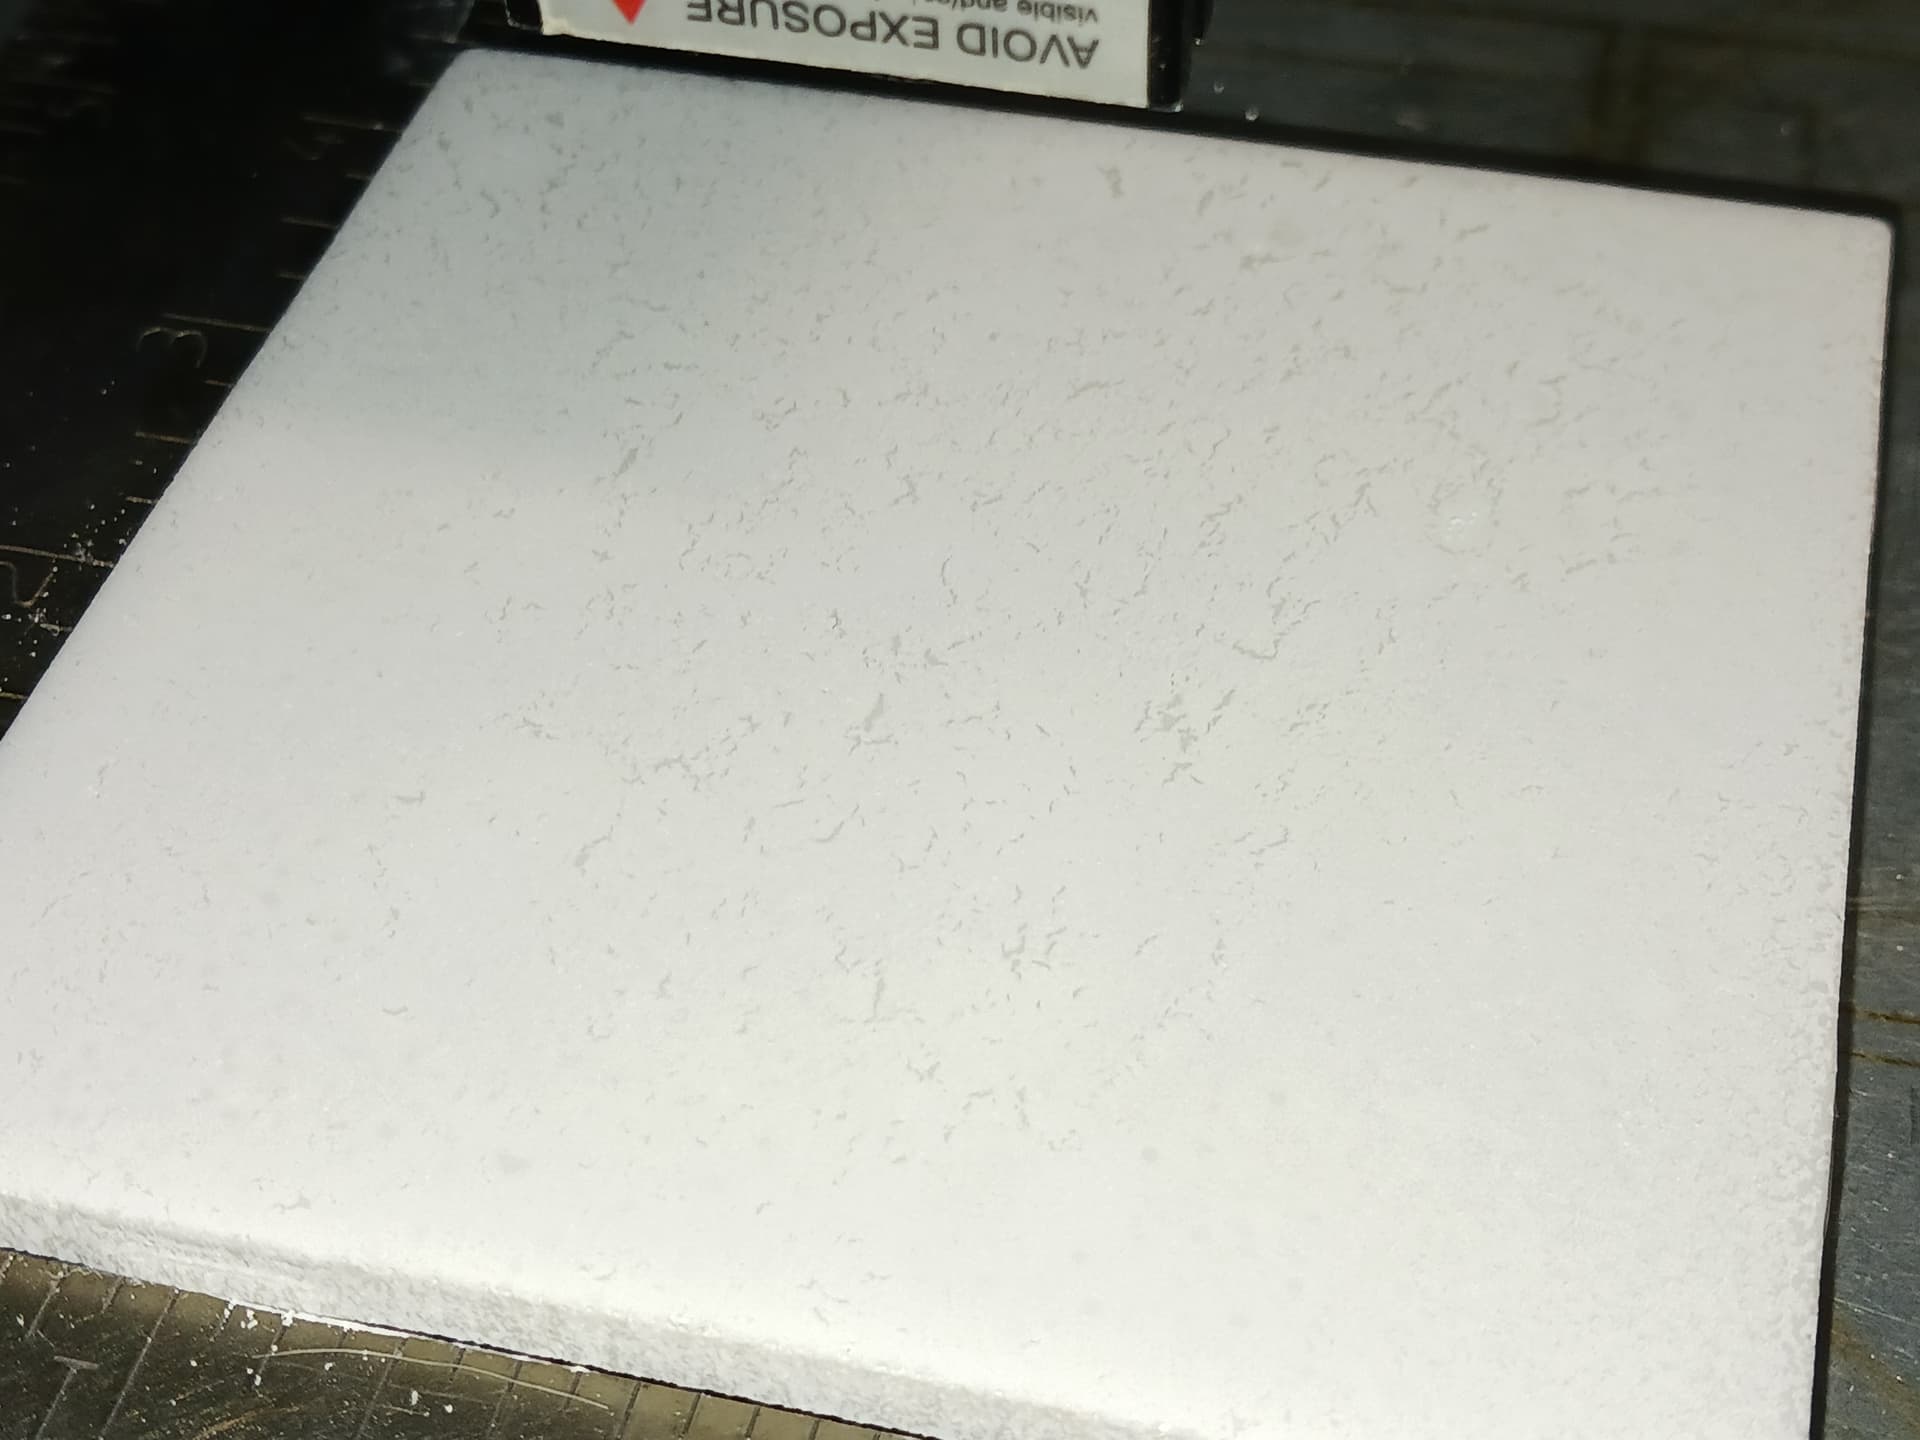
Finally, as I write this , I’m lasering a tile that I simply poured some TiO2 mix in the center of the tile and then spread it around lightly with the tip of my finger… ungloved, of course :wink:

Obviously, the thickness of the coating is heavier in some spots than others… but I think there is a coating of powder, of some thickness, over the entire surface.

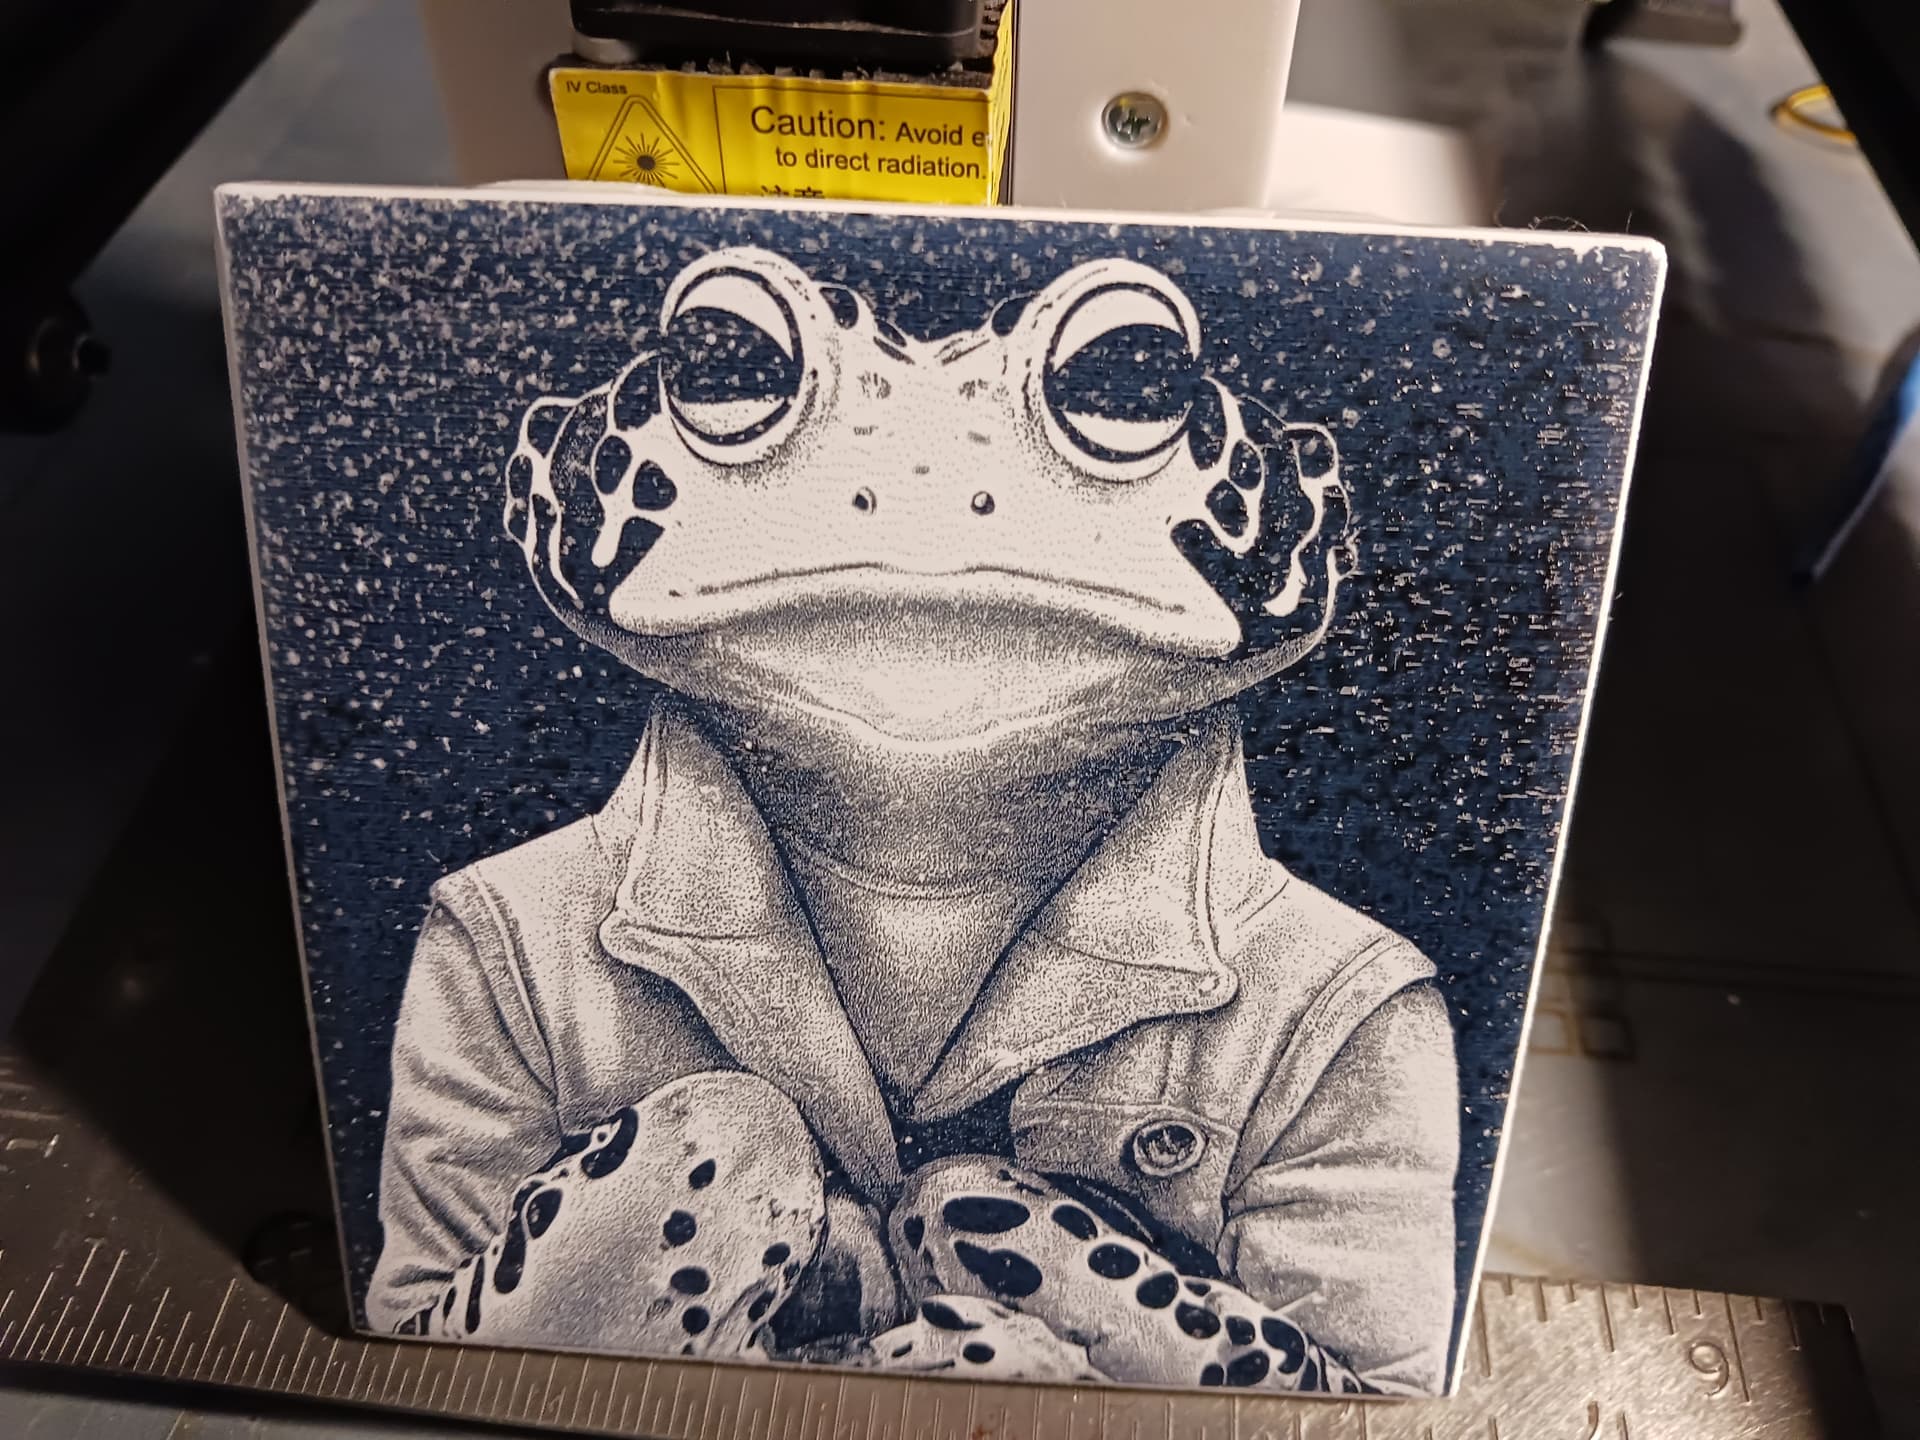
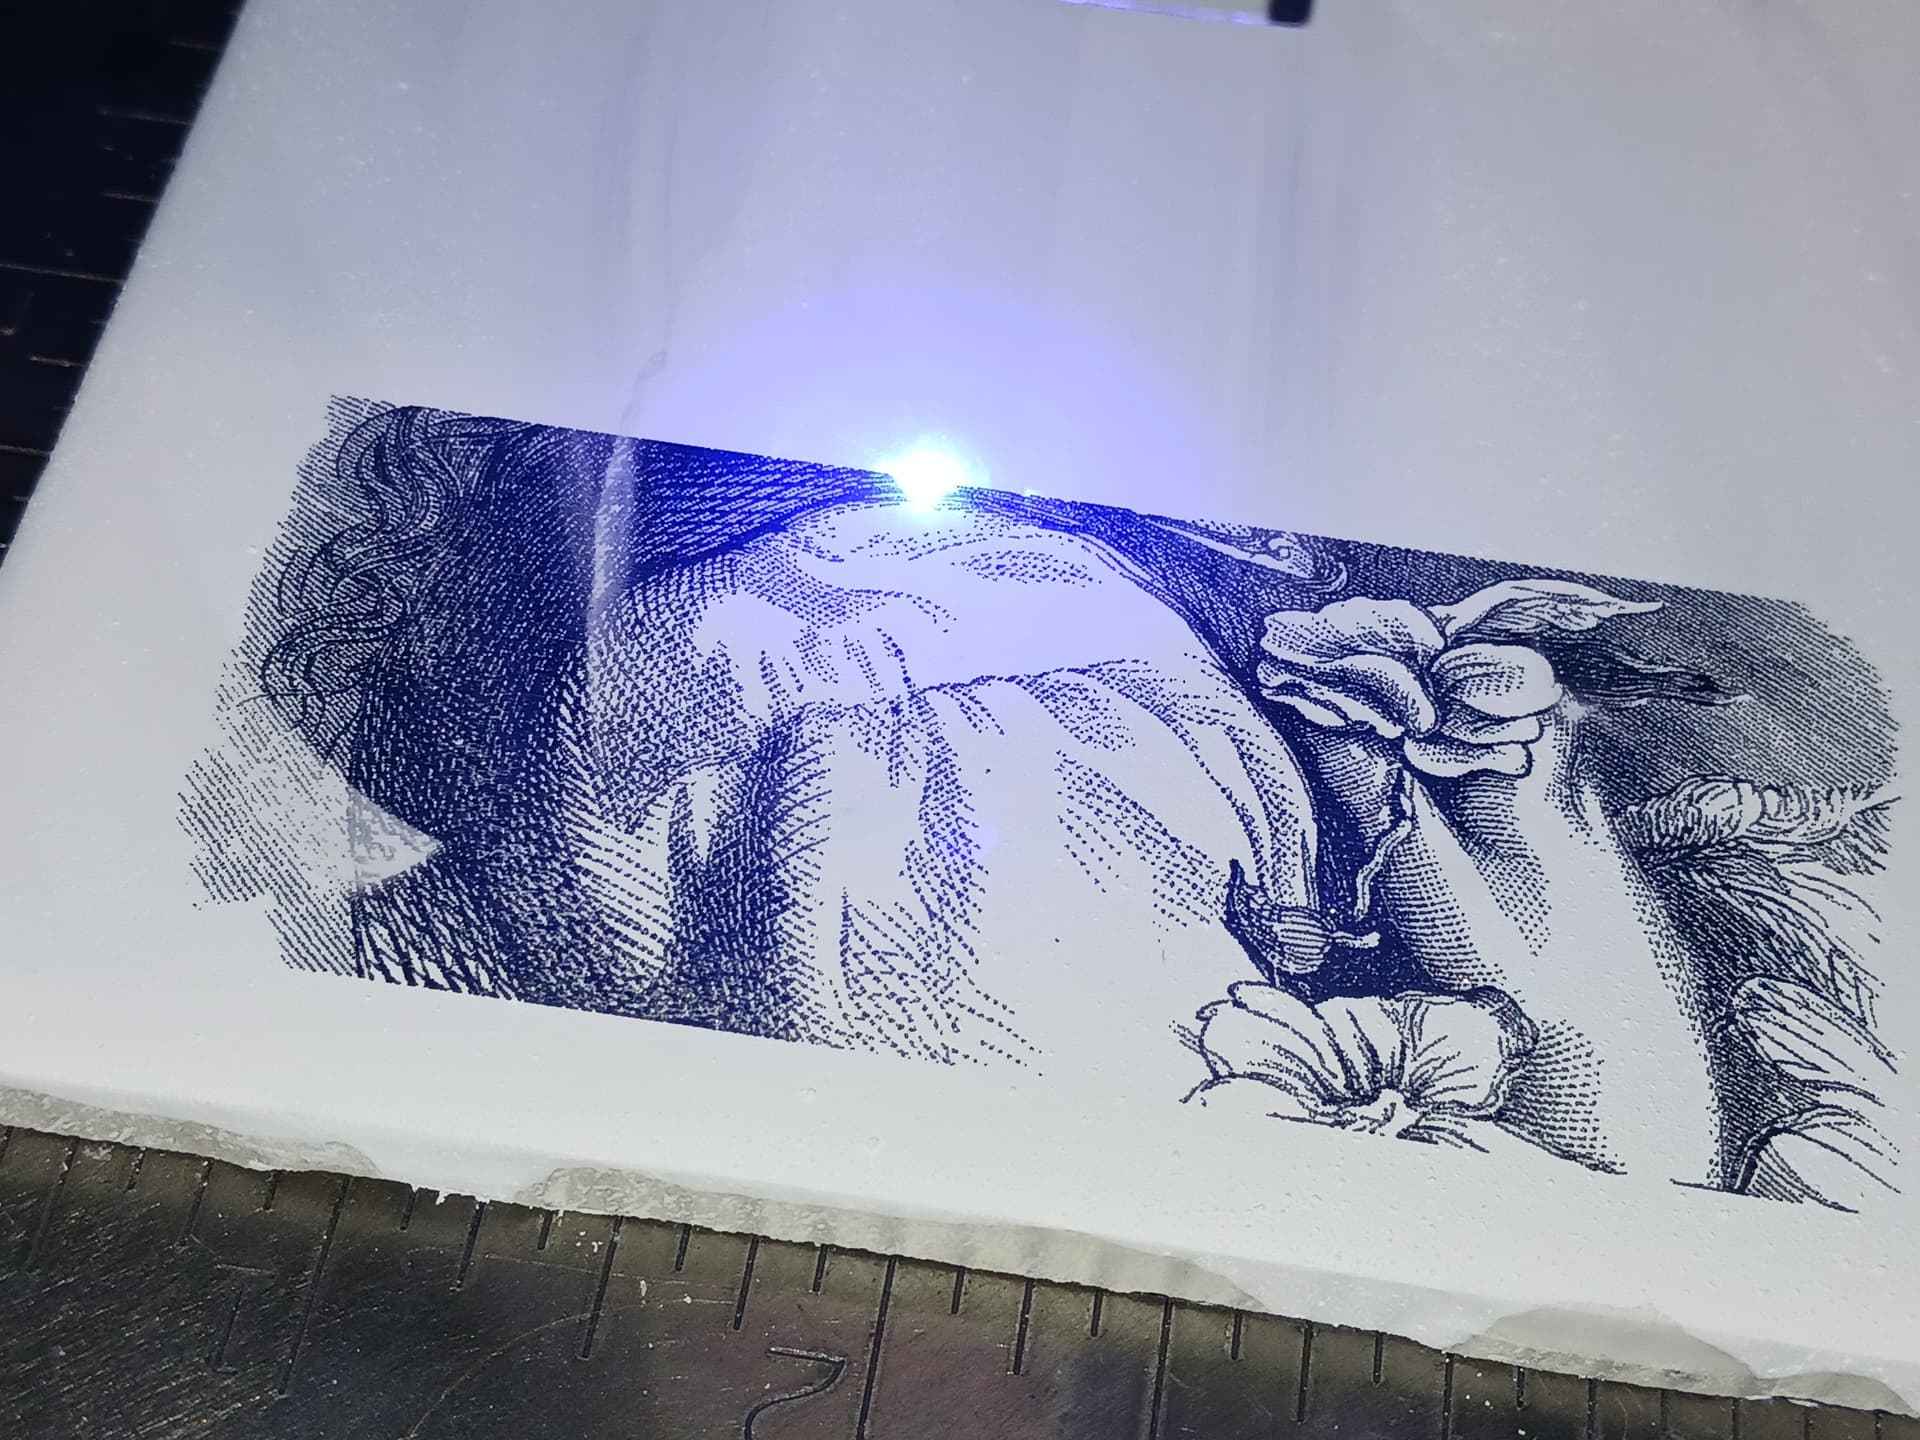
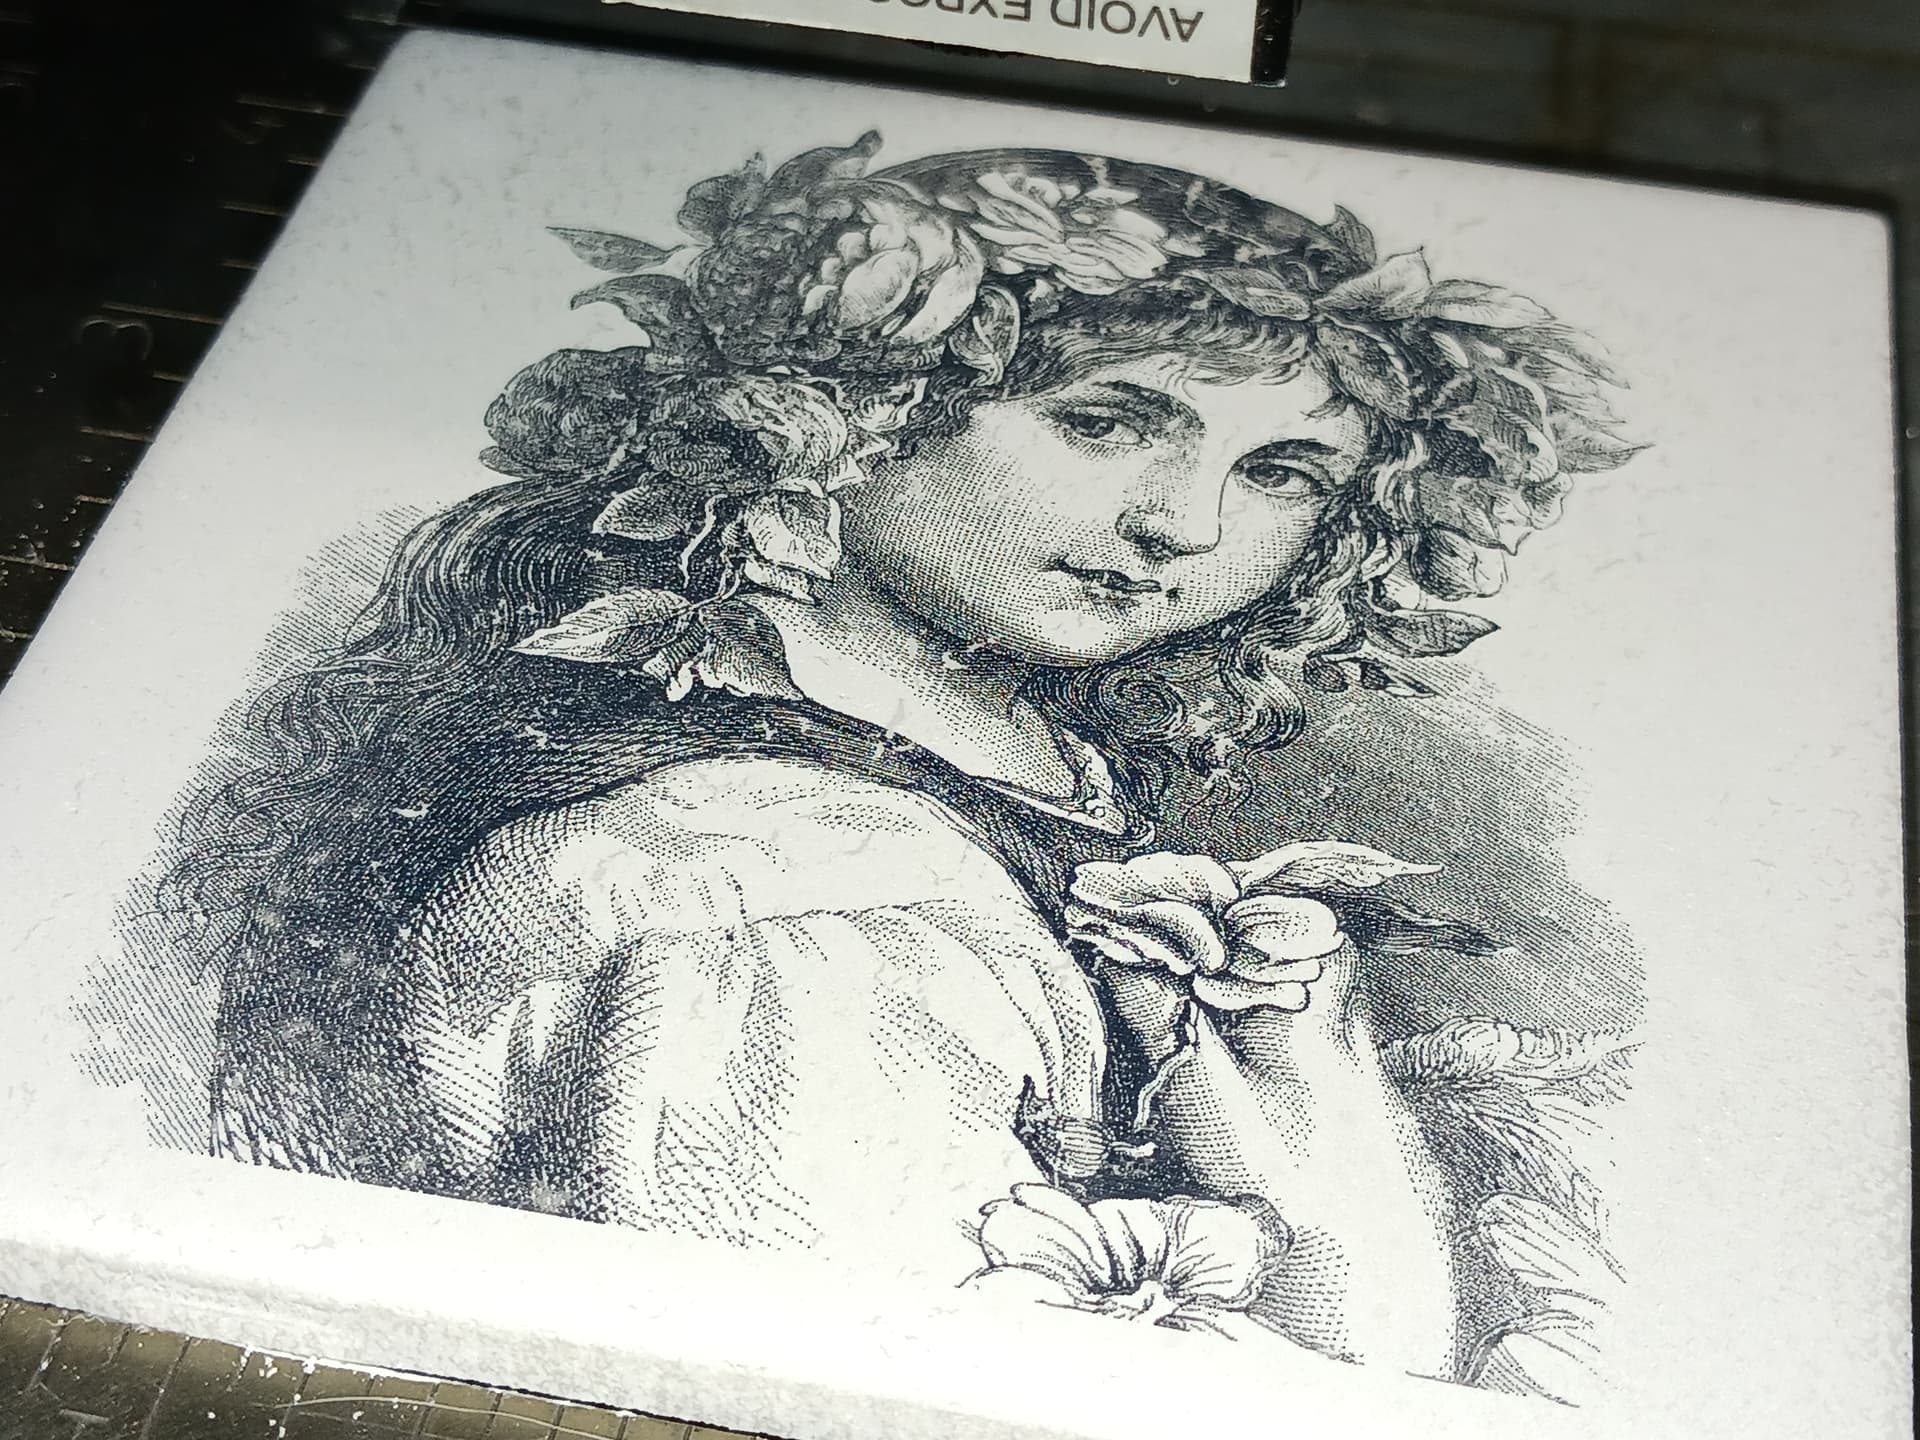
Sneaking a peek at the lasering process… it’s looking better though it appears that maybe the heavier “banana-shaped” coating just off the top-back of her shoulder may not be lasering completely through…

I’m sure that it’s the ungloved finger that’s made the difference… and maybe licking my finger clean will take it to the next level ??? :thinking: :crazy_face: :thinking:

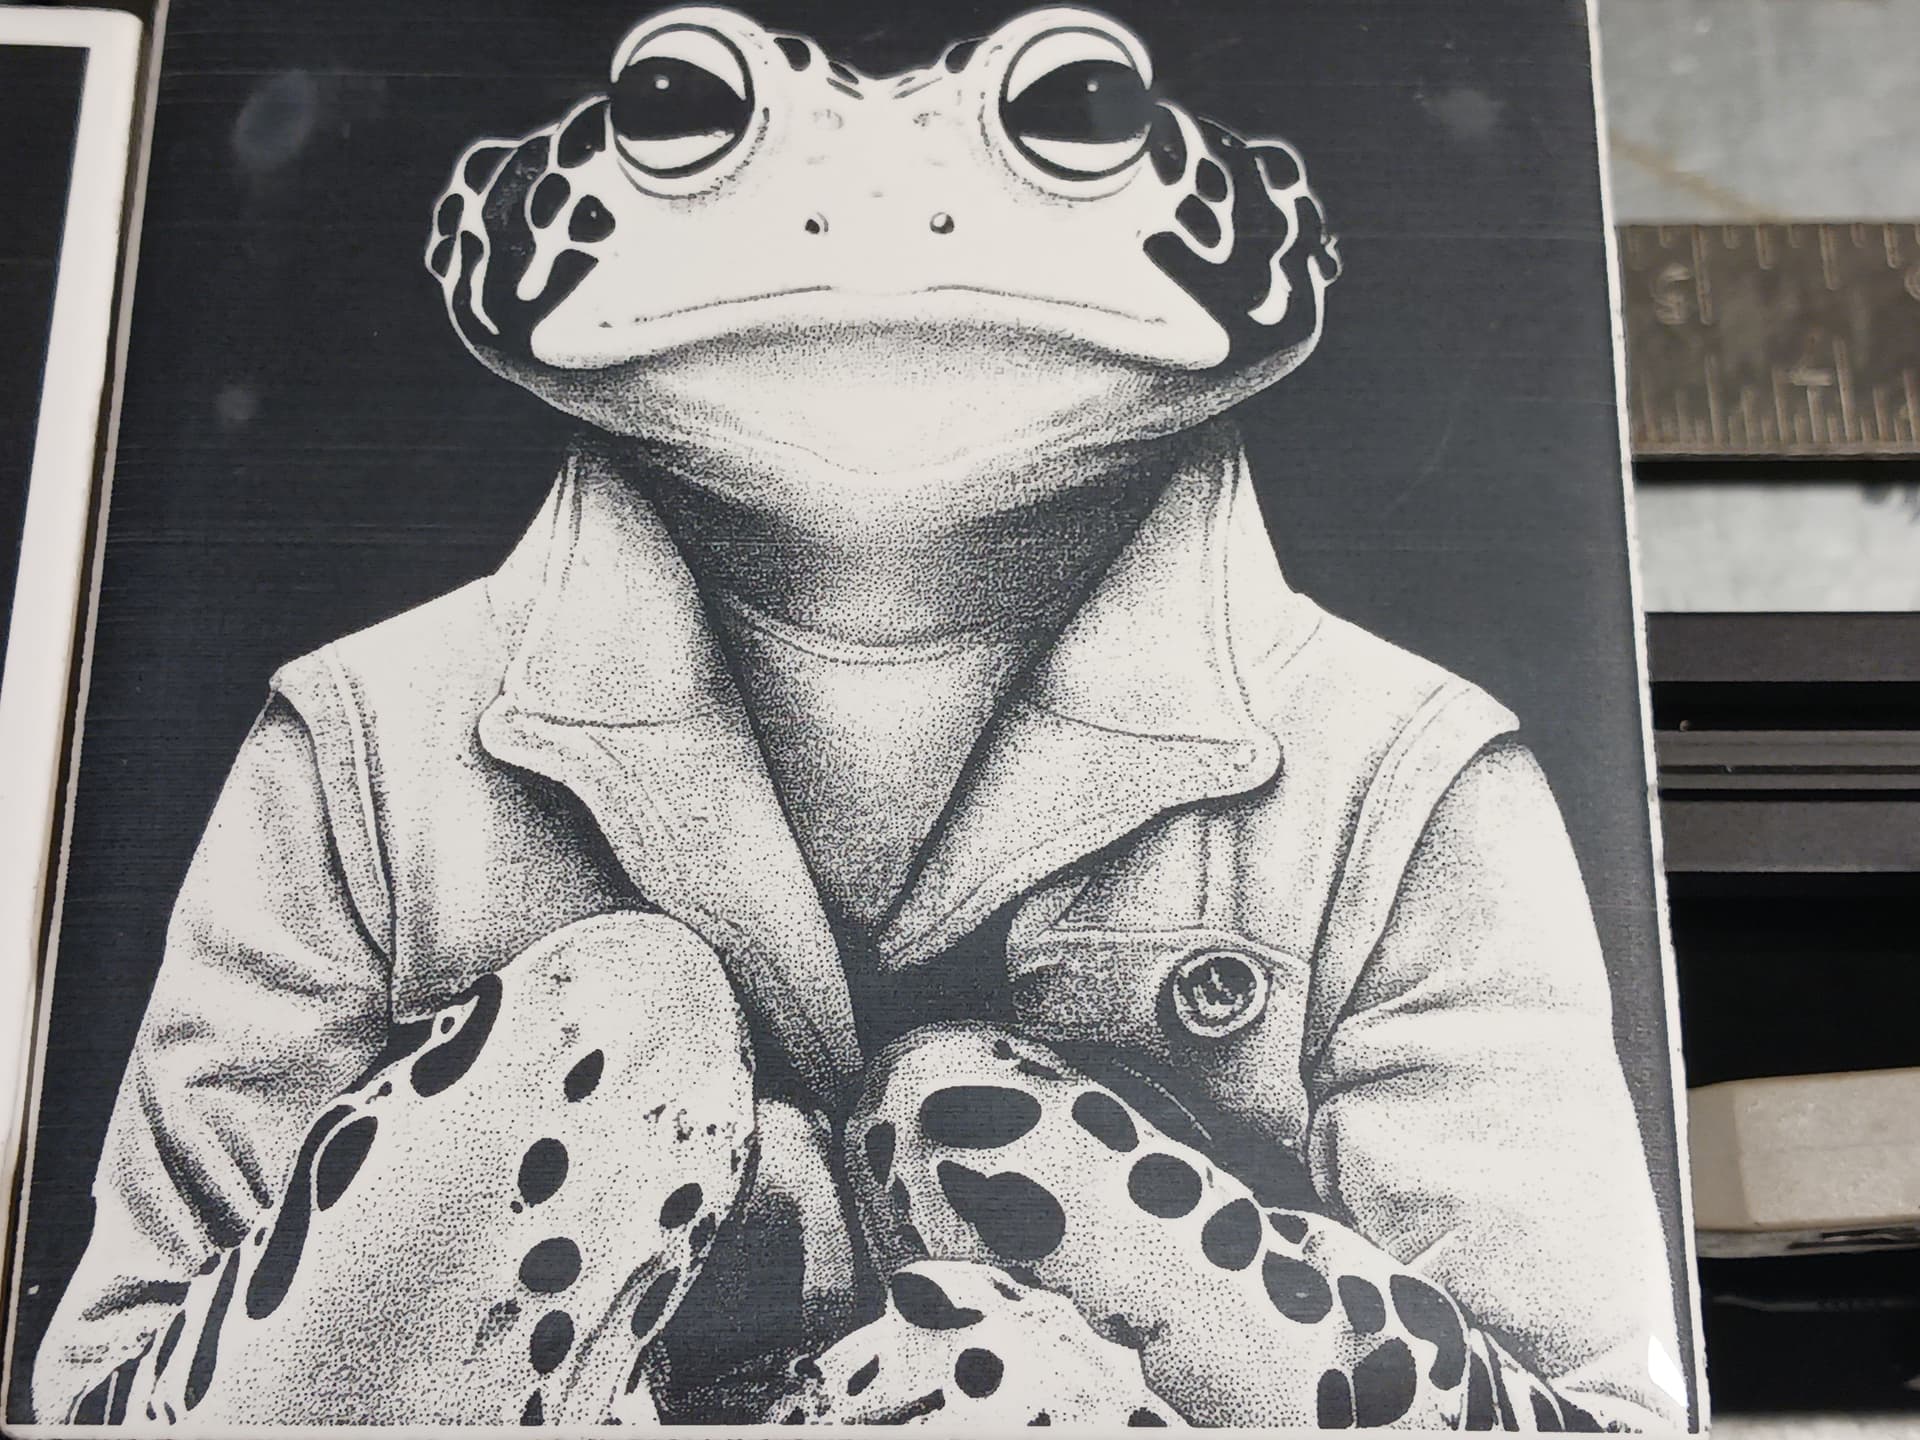
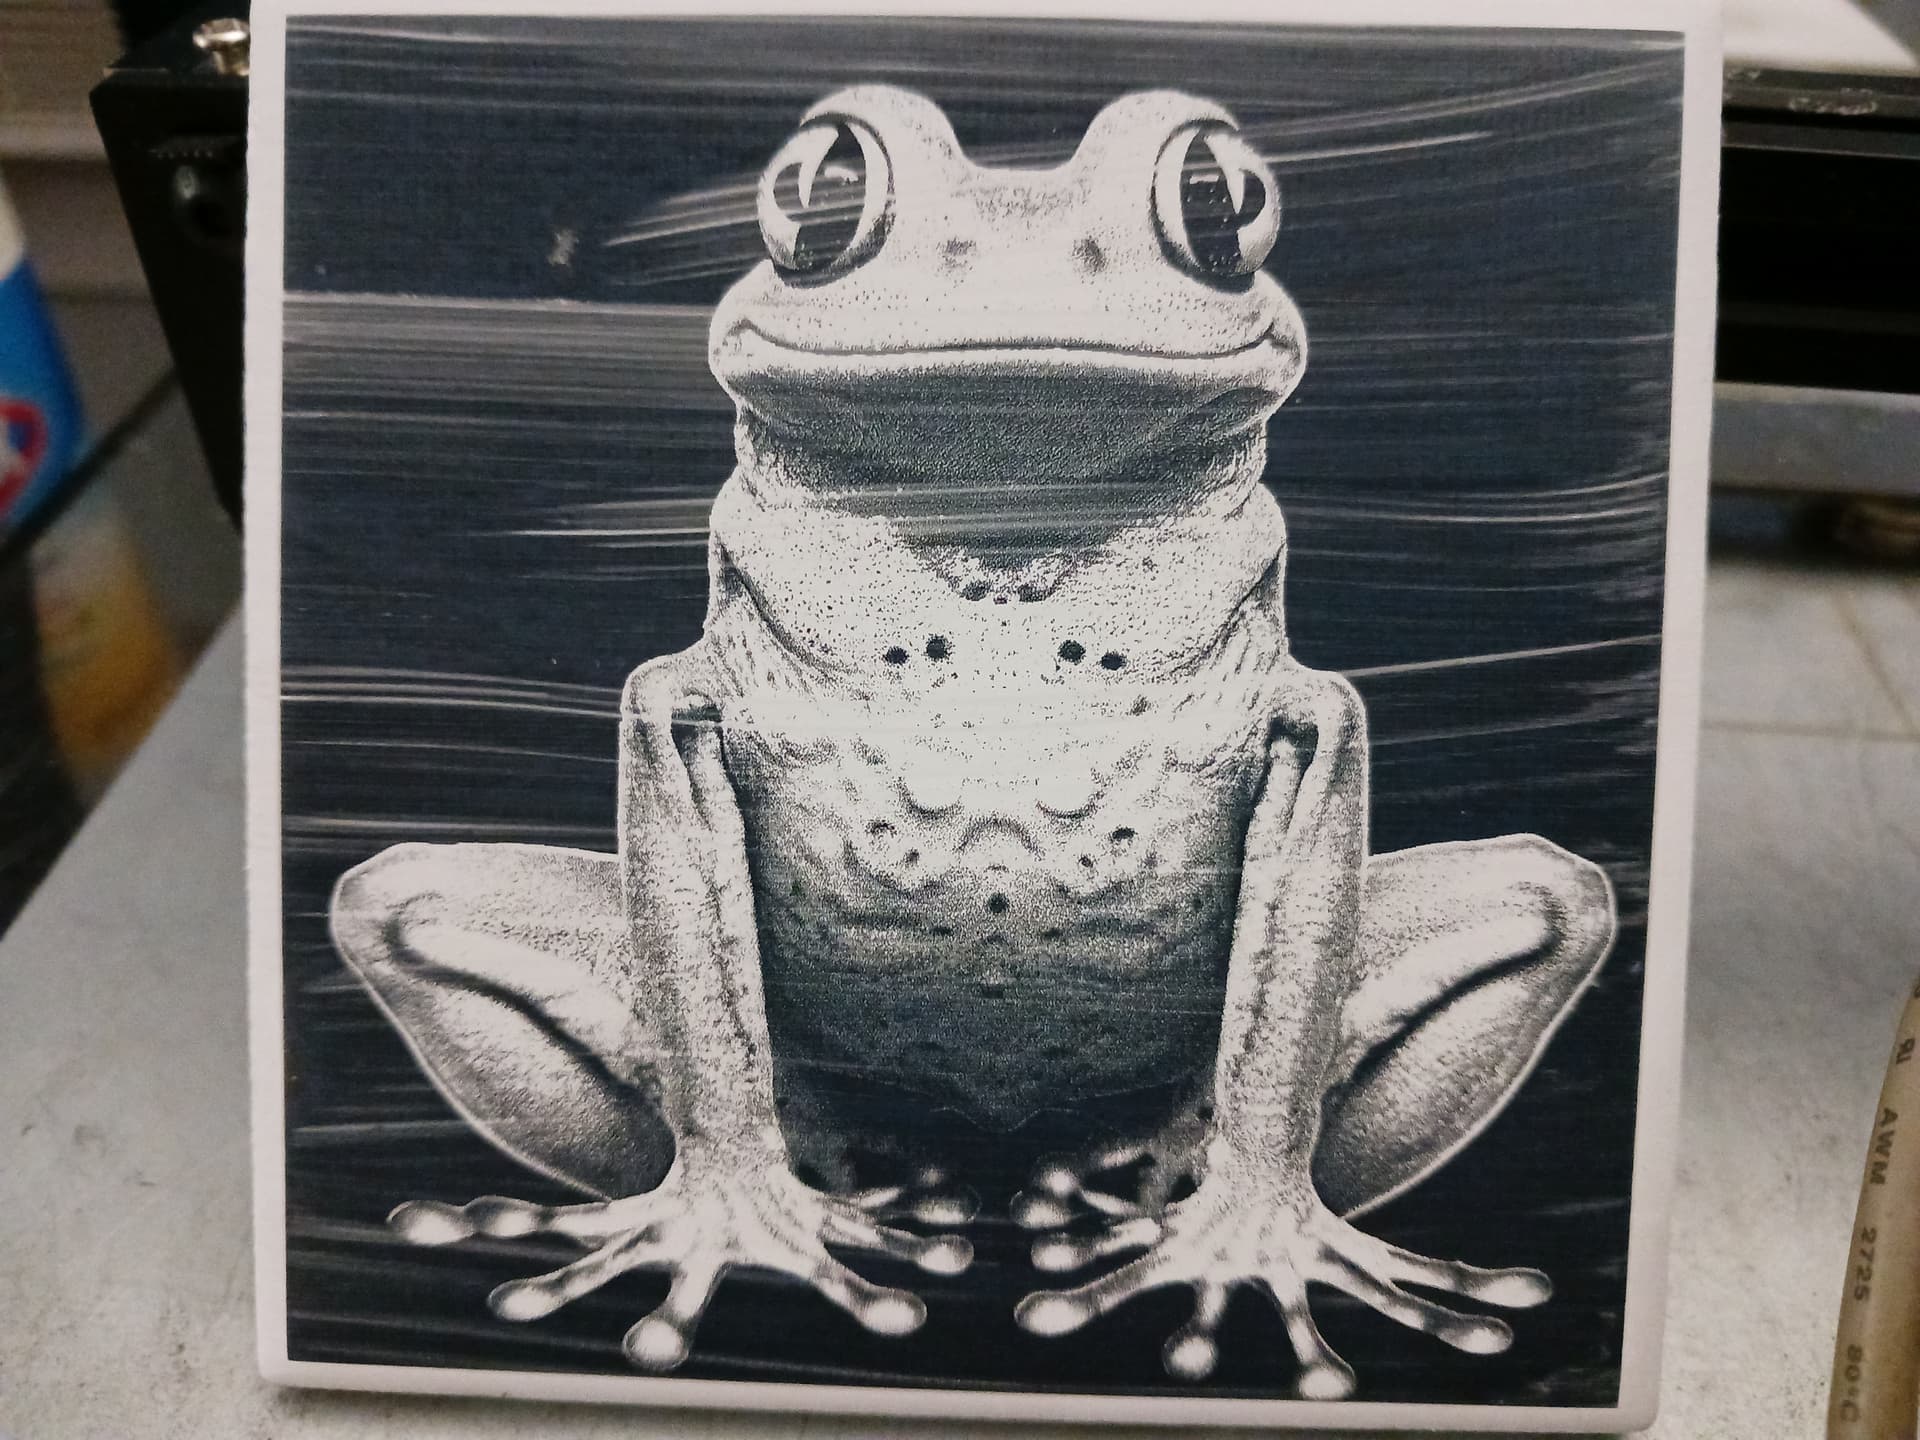
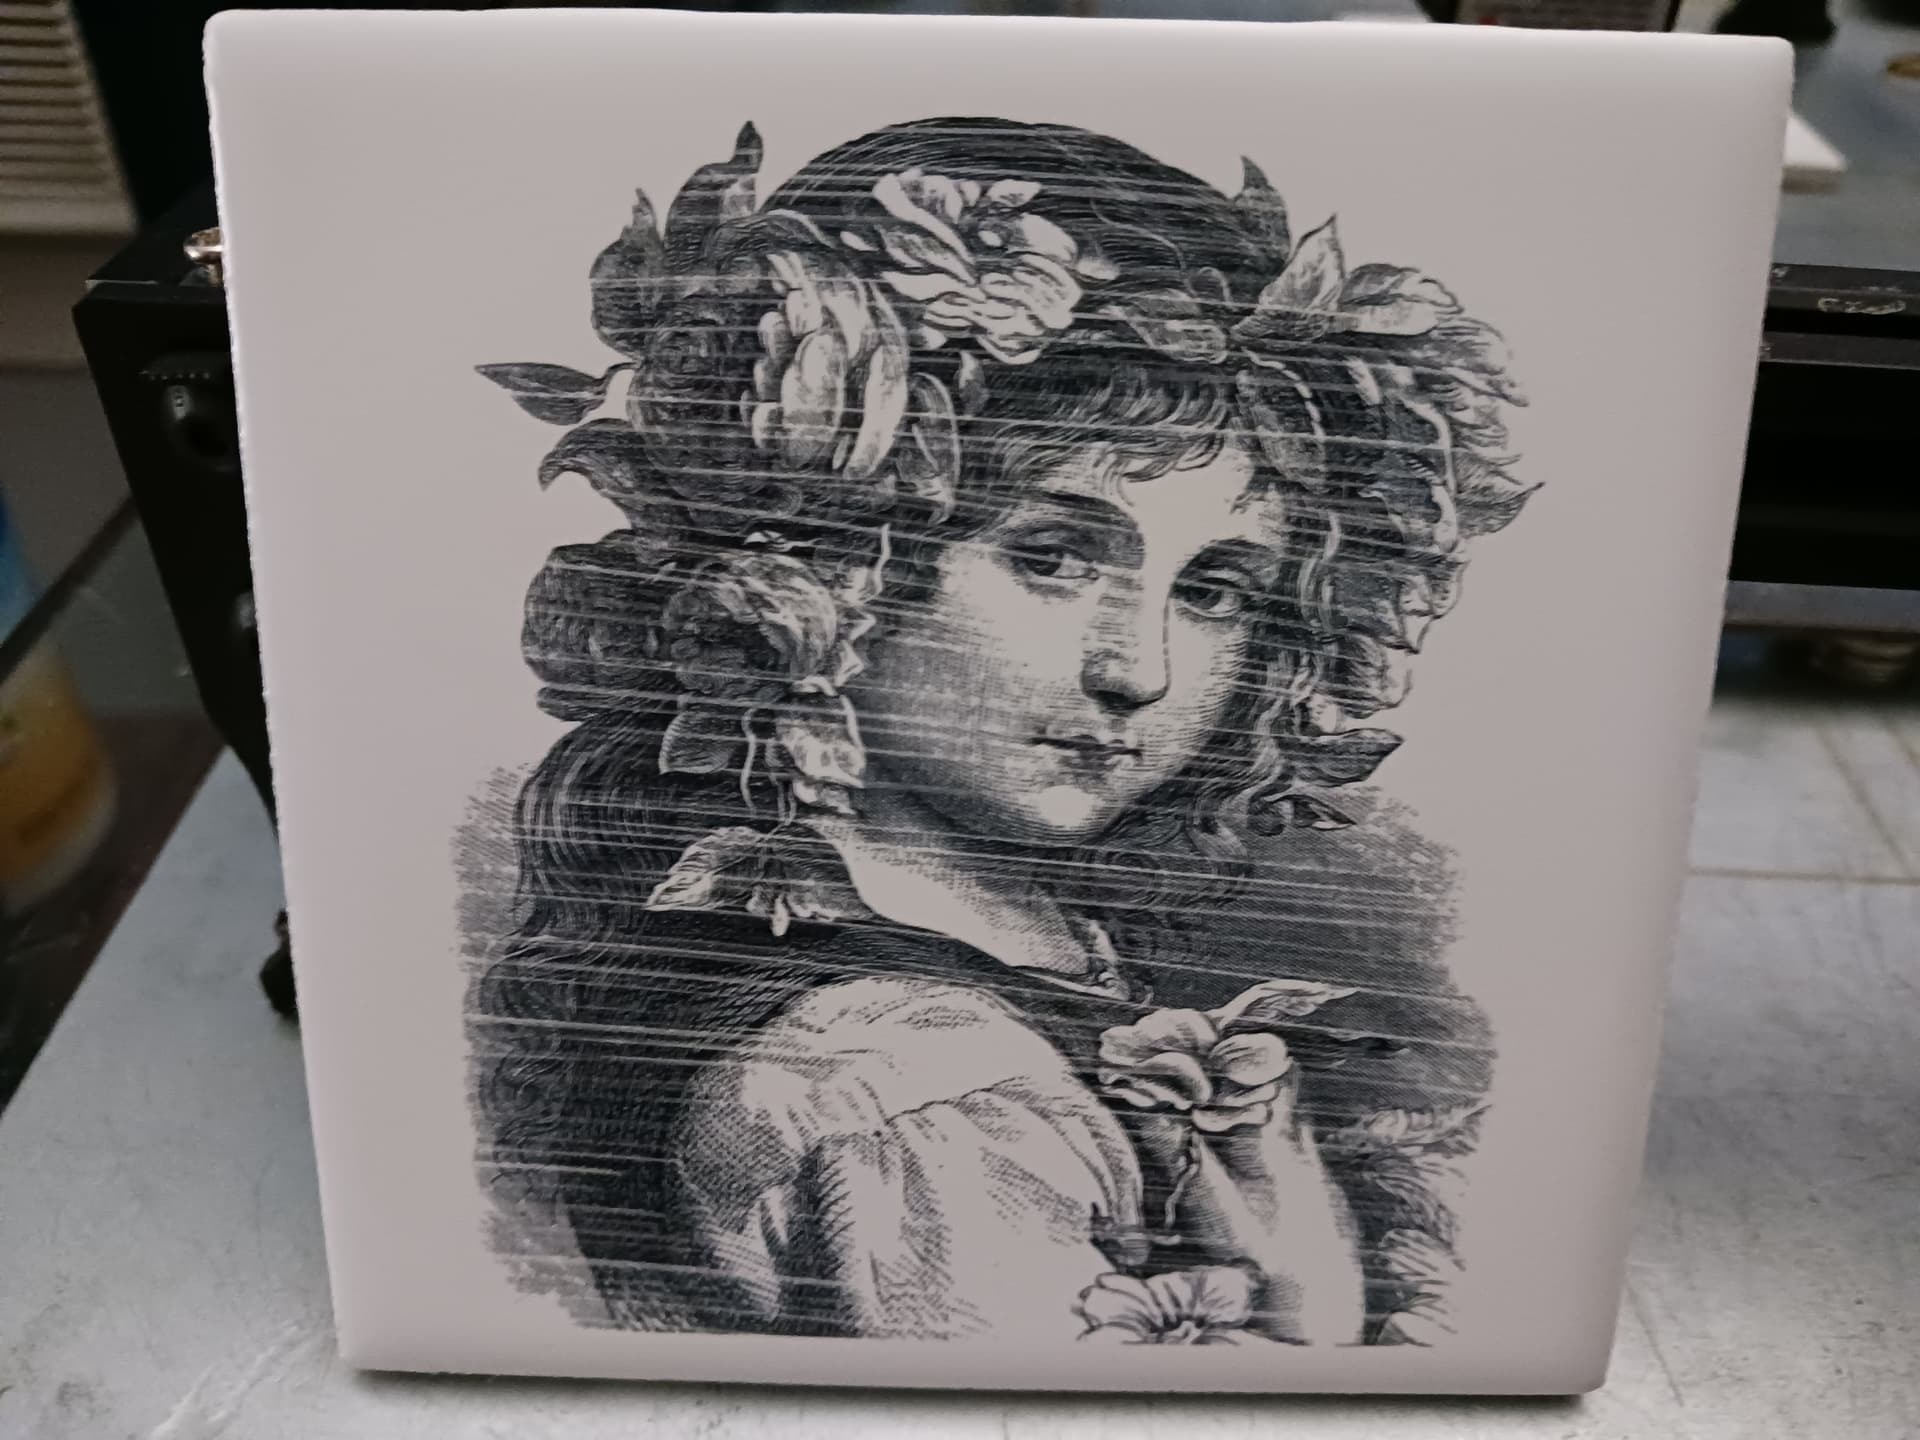
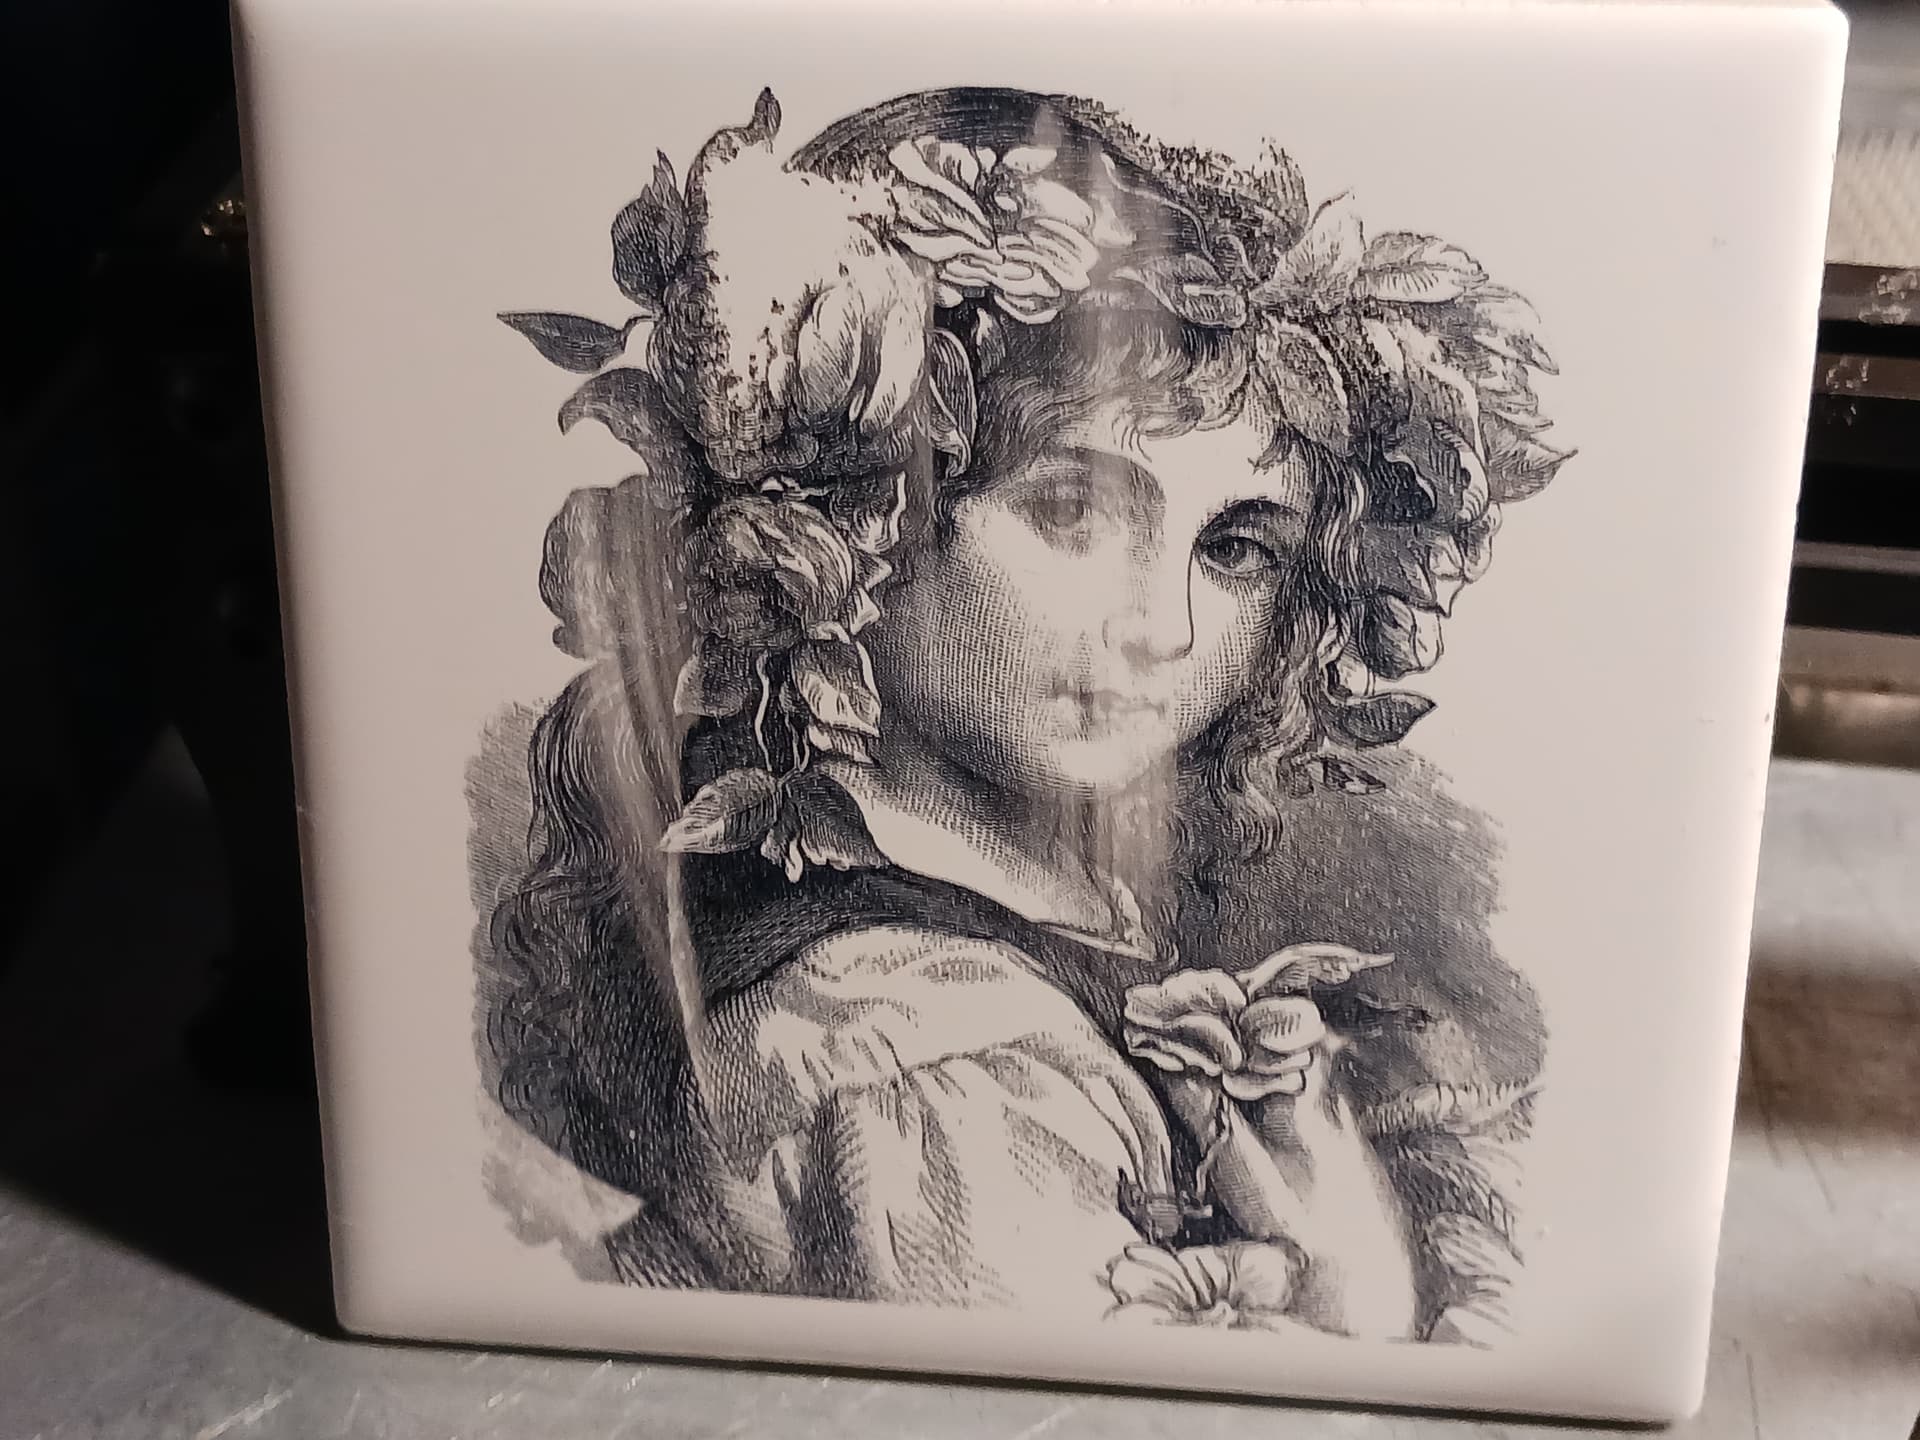
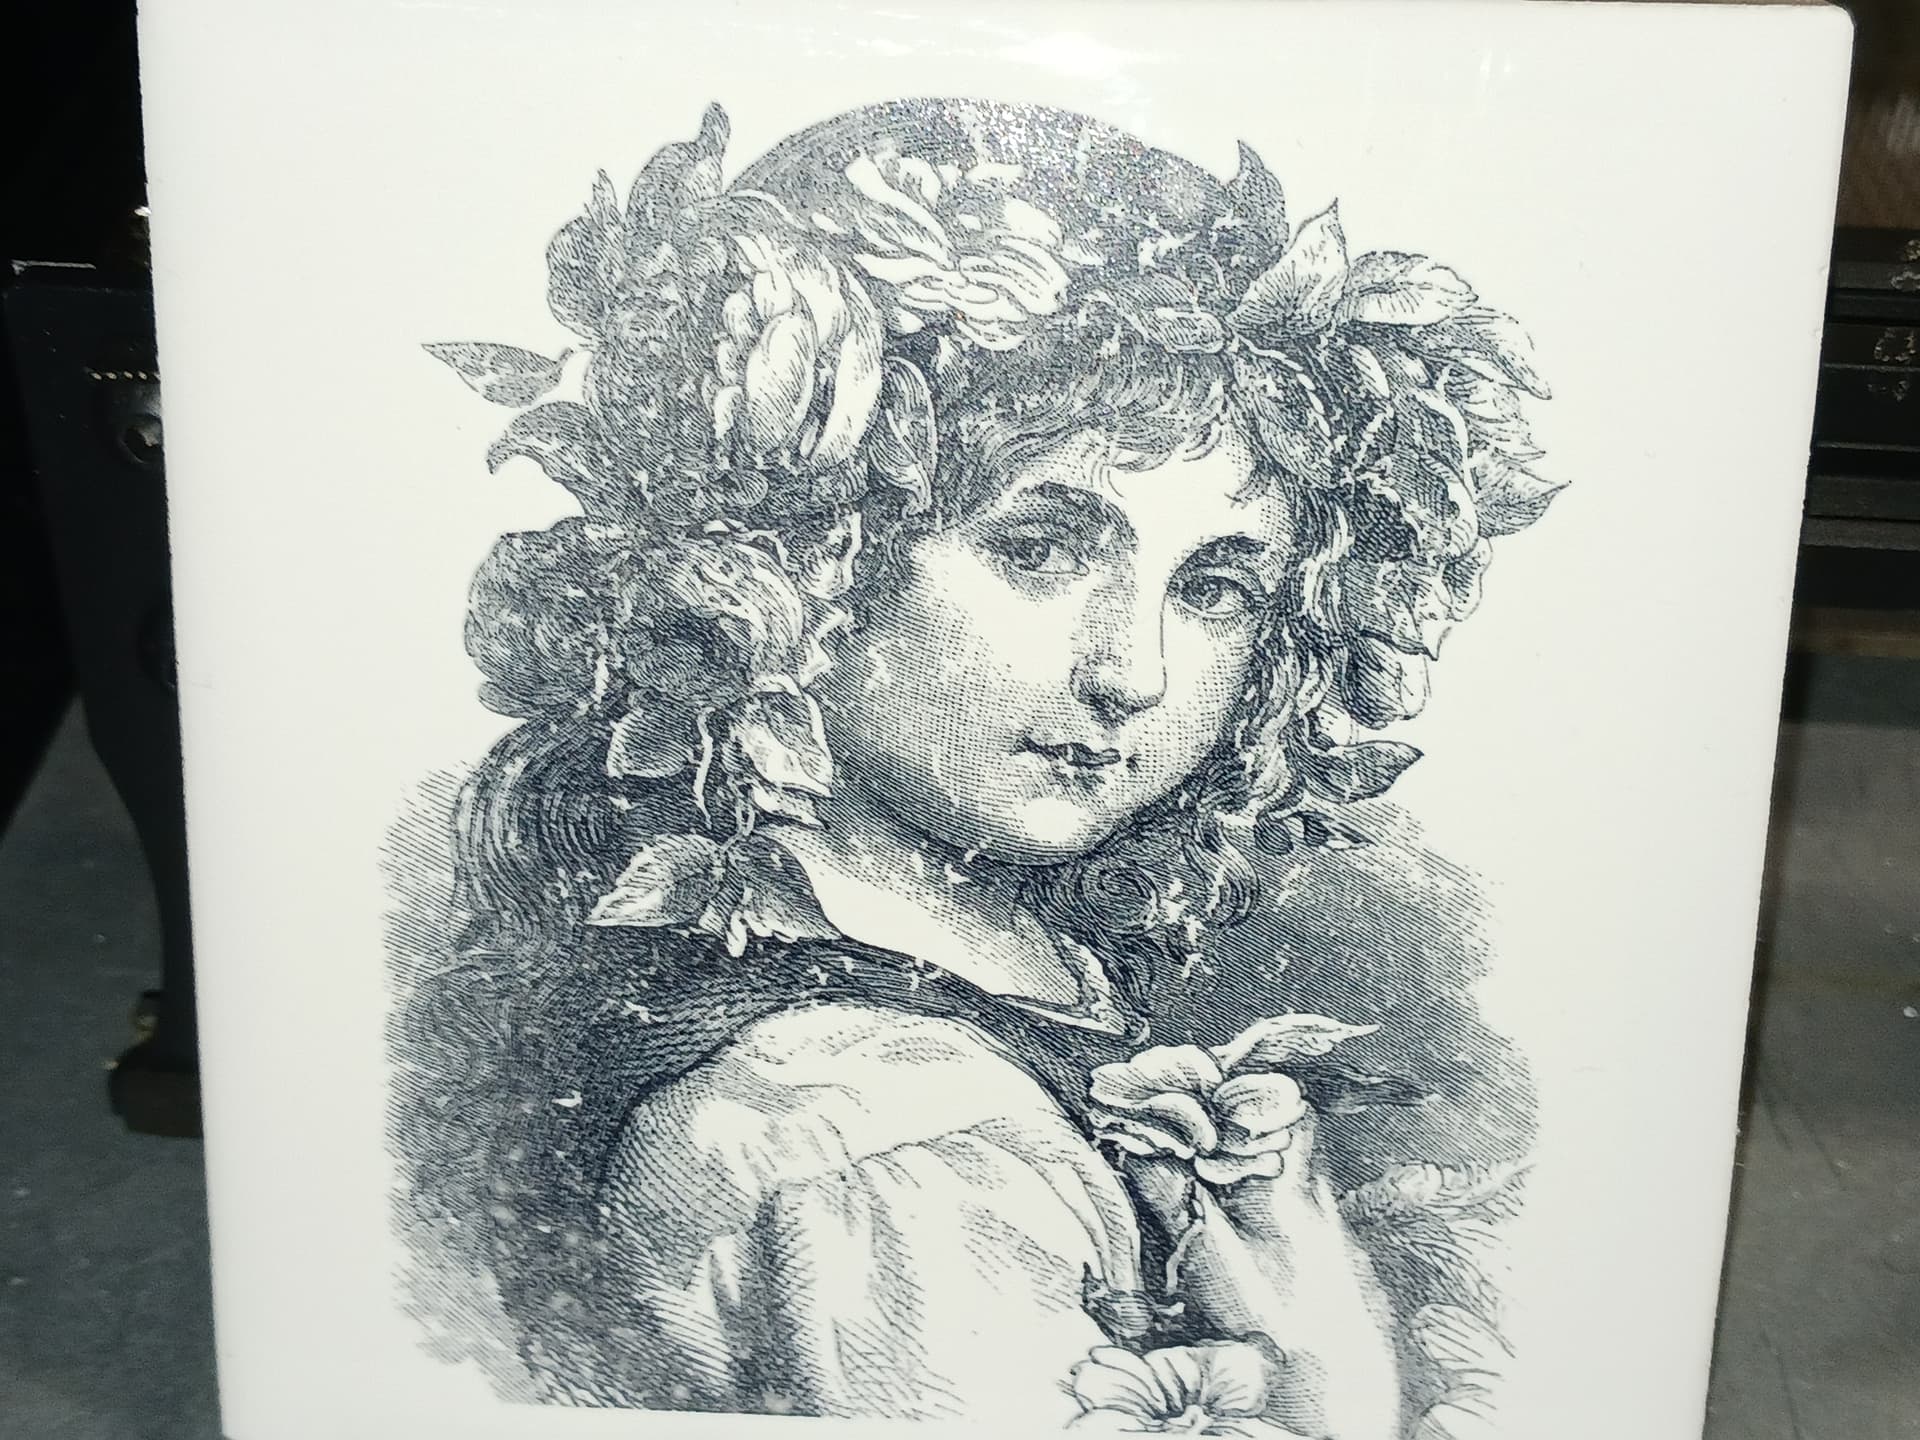
BTW the completed tile looks like this…

Obviously, the heaviest areas didn’t laser through, and left light/blank areas, so we really need to figure out a way to level out the coating. Anybody got a simple spin fixture design, ready to go?

– David

3 Likes

Maybe a râteau-rozell that you use for crepes?

1 Like

Set your phone to vibrate ,lay it on the tile then call yourself. The vibration should level the powder.

1 Like

I have a love/hate relationship with my phone… love the camera, hate everything else :crazy_face:

But… I did come up with a pretty simple shake table that works quite well… shaky old Workmate and drill motor with a large-ish Allen wrench chucked up.

First I tried pouring a thick coating and shaking it to level it out but the coating was so thick that it wouldn’t laser through the coating with my usual settings.

Then I used the spray bottle to just mist/wet the tile… and simply held the drill motor down on the worksurface and ran it on highest speed until the entire surface was smoothly and evenly covered. I was using a isopropyl alcohol and TiO2 mix with a couple of drop of Dawn dish soap in it this time IIRC. Gave a nice glossy coating… until it dried and developed small cracks in the powdered surface

Lasered it anyway and, aside from the cracks, got my most unform/consistent image yet…

I’m thinking I may try a Windex and TiO2 mix next… to see what I can do about the cracking when it dries. Maybe plain water with Dawn dish soap and TiO2? Is this a surface tension thing going on?

Any other ideas how to stop the cracking as the surface dries?

– David

3 Likes

I wish I knew some practical chemistry and could help you out.

1 Like
  1. I wonder if you could spray a thin layer of contact cement or some water soluble glue then add your TiO2. Shake off the excess and you should have an even coat of powder that is stuck to the tile. Kind of like what kids do with glitter.

  2. Maybe mix the TiO2 into a carrier like Modge Podge or elmers glue. Its thicker and might dry slow enough to prevent cracking.

1 Like

No clue if it’s applicable here, but some airbrush forums suggest using acrylic floor wax (e.g. Future) to thin water-based paint. I have no clue as to whether such a concoction would be considered safe to laser.

1 Like

Mark, I think you’re on to something. Most of the discussion surrounding the use of raw TiO2 powder is how it’s mixed and applied… there’s no question it fuses to a ceramic/glass surface when hit with a laser.

Overnight, I also got to thinking about a couple of budget golf courses I’ve played on. The ground in that area is what’s not-so-fondly called "black gumbo" and it “eats” up golf balls like crazy in the summer, with all the cracks that open up. This area used to be great for growing cotton (both my parents lived that experience) but it’s horrible for house foundations and golf courses. The ground “moves” a lot… swelling, shrinking, and cracking with the amount of rain it receives, or doesn’t. In summer, folks have to water their house foundations and better golf courses IIRC water heavily and mix in sand to keep ball-eating cracks from forming. So, keeping it moist and adding filler is starting to make sense to me.

I know some folks are adding PVA glue to the recipe… so “locking it in place” as it dries. Now that it’s starting to make more sense to me, I need to go look more closely at some of those recipes… it shouldn’t be too difficult or expensive to add a few drops of water-soluble PVA glue to the mix.

I’ve also thought about "dry application"… dusting the tile with a light sprinkling of powder, maybe with a make-up brush or nylon powder-bag (… stay with me, guys! :wink:). Coating the tile with a glue stick, maybe a heat-gun to soften/spread it, and then sprinkle with powder? Maybe a lint roller would leave a light sticky coating on a clean tile… enough to hold the powder in place? I can really see me making a big mess and/or wasting a lot of TiO2 powder with this though… :stuck_out_tongue_winking_eye:

Maybe easier, I could keep doing what I’m doing… doing the “bulk application” with alcohol and spray bottle and let it crack… then lightly dust with a makeup brush and shake with my “shake table” to fill the cracks. I’m thinking the less dry dust in the air, the better.

I’ve already picked up a make-up brush and lint roller from DG… getting the usual strange looks for loitering in the “ladies section” while trying to find emory boards, make-up brushes, and/or finger-nail polish (paint for fishing lures). C’mon guys! :wink:

– David

2 Likes

Of course, you could always upsell the cracks as “character” and “unique to the process”… Each piece is a “one of a kind”. Think OG NFT… :wink:

1 Like

I think you need to use the french toast method. Egg, then Ti powder, then laser.

Add bread crumbs if you want it extra crunchy.

WDYT of this preval thing?

I wonder if this would be best if both worlds, or the worst of both worlds.

I saw one of those in a store at one point and never saw it again. I would give it a try for sure.

P.S. I could not work with that much paint on my fingers…What the heck, did he dip them for effect?

Still has all of the waste of a spray can. You get 16 ounces of paint (according to the website) before you have to switch out the propellant. You could get rid of all of the chemical fumes during lasering which would be cool if it doesn’t crack.

I personally like the table shaker drill lol. Cool ideas!

Too bad ceramic is an insulator. Electrostatic/powder coating seems like it would be the perfect application for something like this.

2 Likes

Do you think if you made a thin mixture and dipped the whole tile, let it dry, and repeat a few times like building up a candle that it would be even? Maybe change up the direction of the dipping each time to make it more even.

1 Like

Hairspray comes to mind. Cheaper and aerosol best. Use it on all kinds of stuff from handlebar grips to chalk paintings!

1 Like