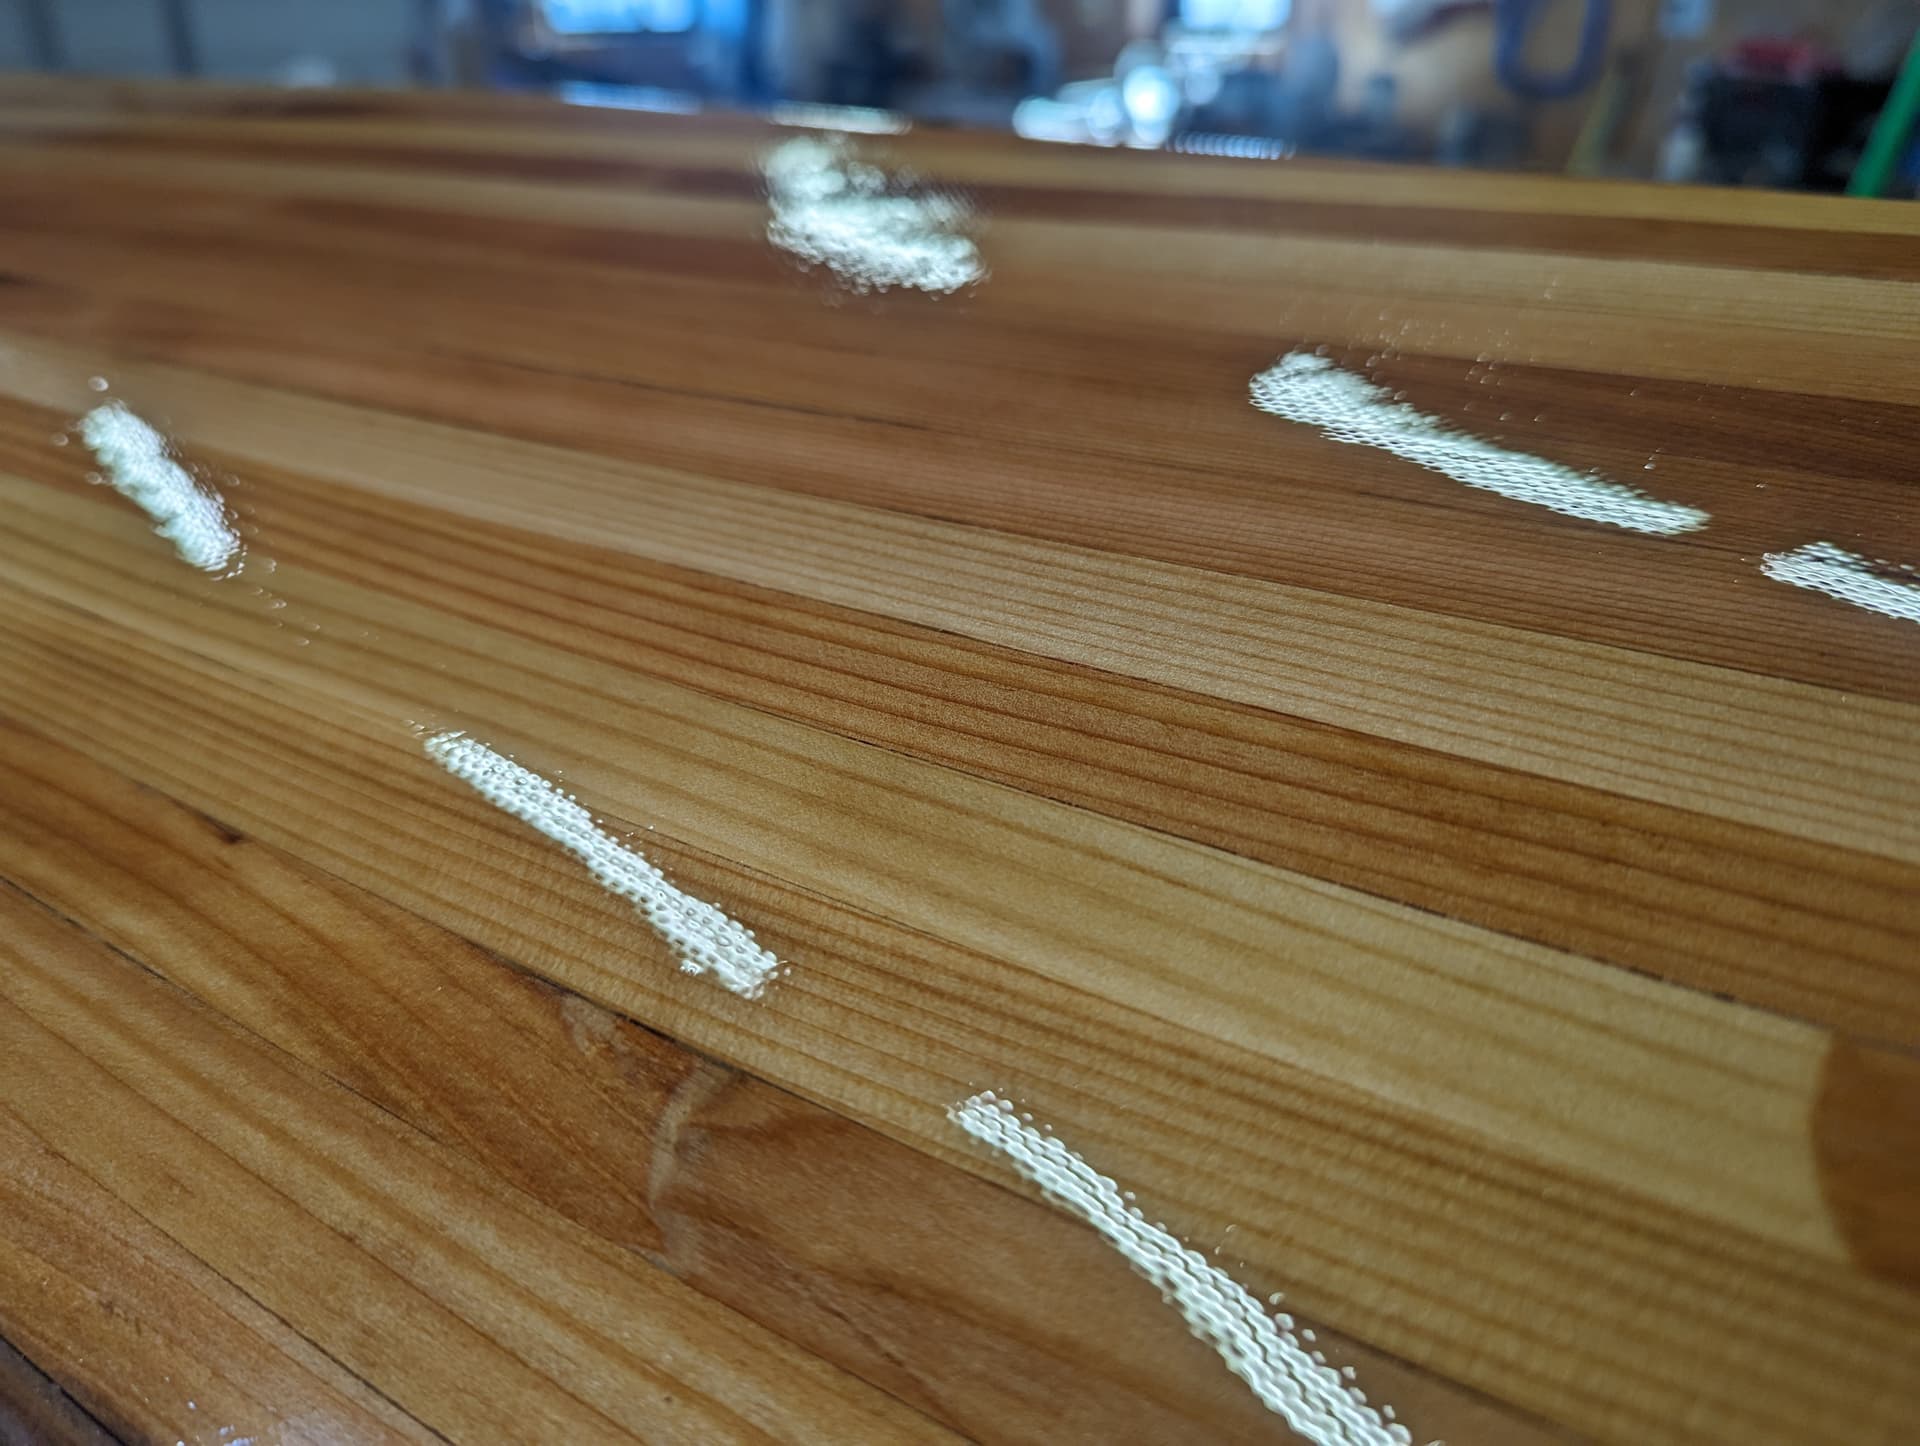
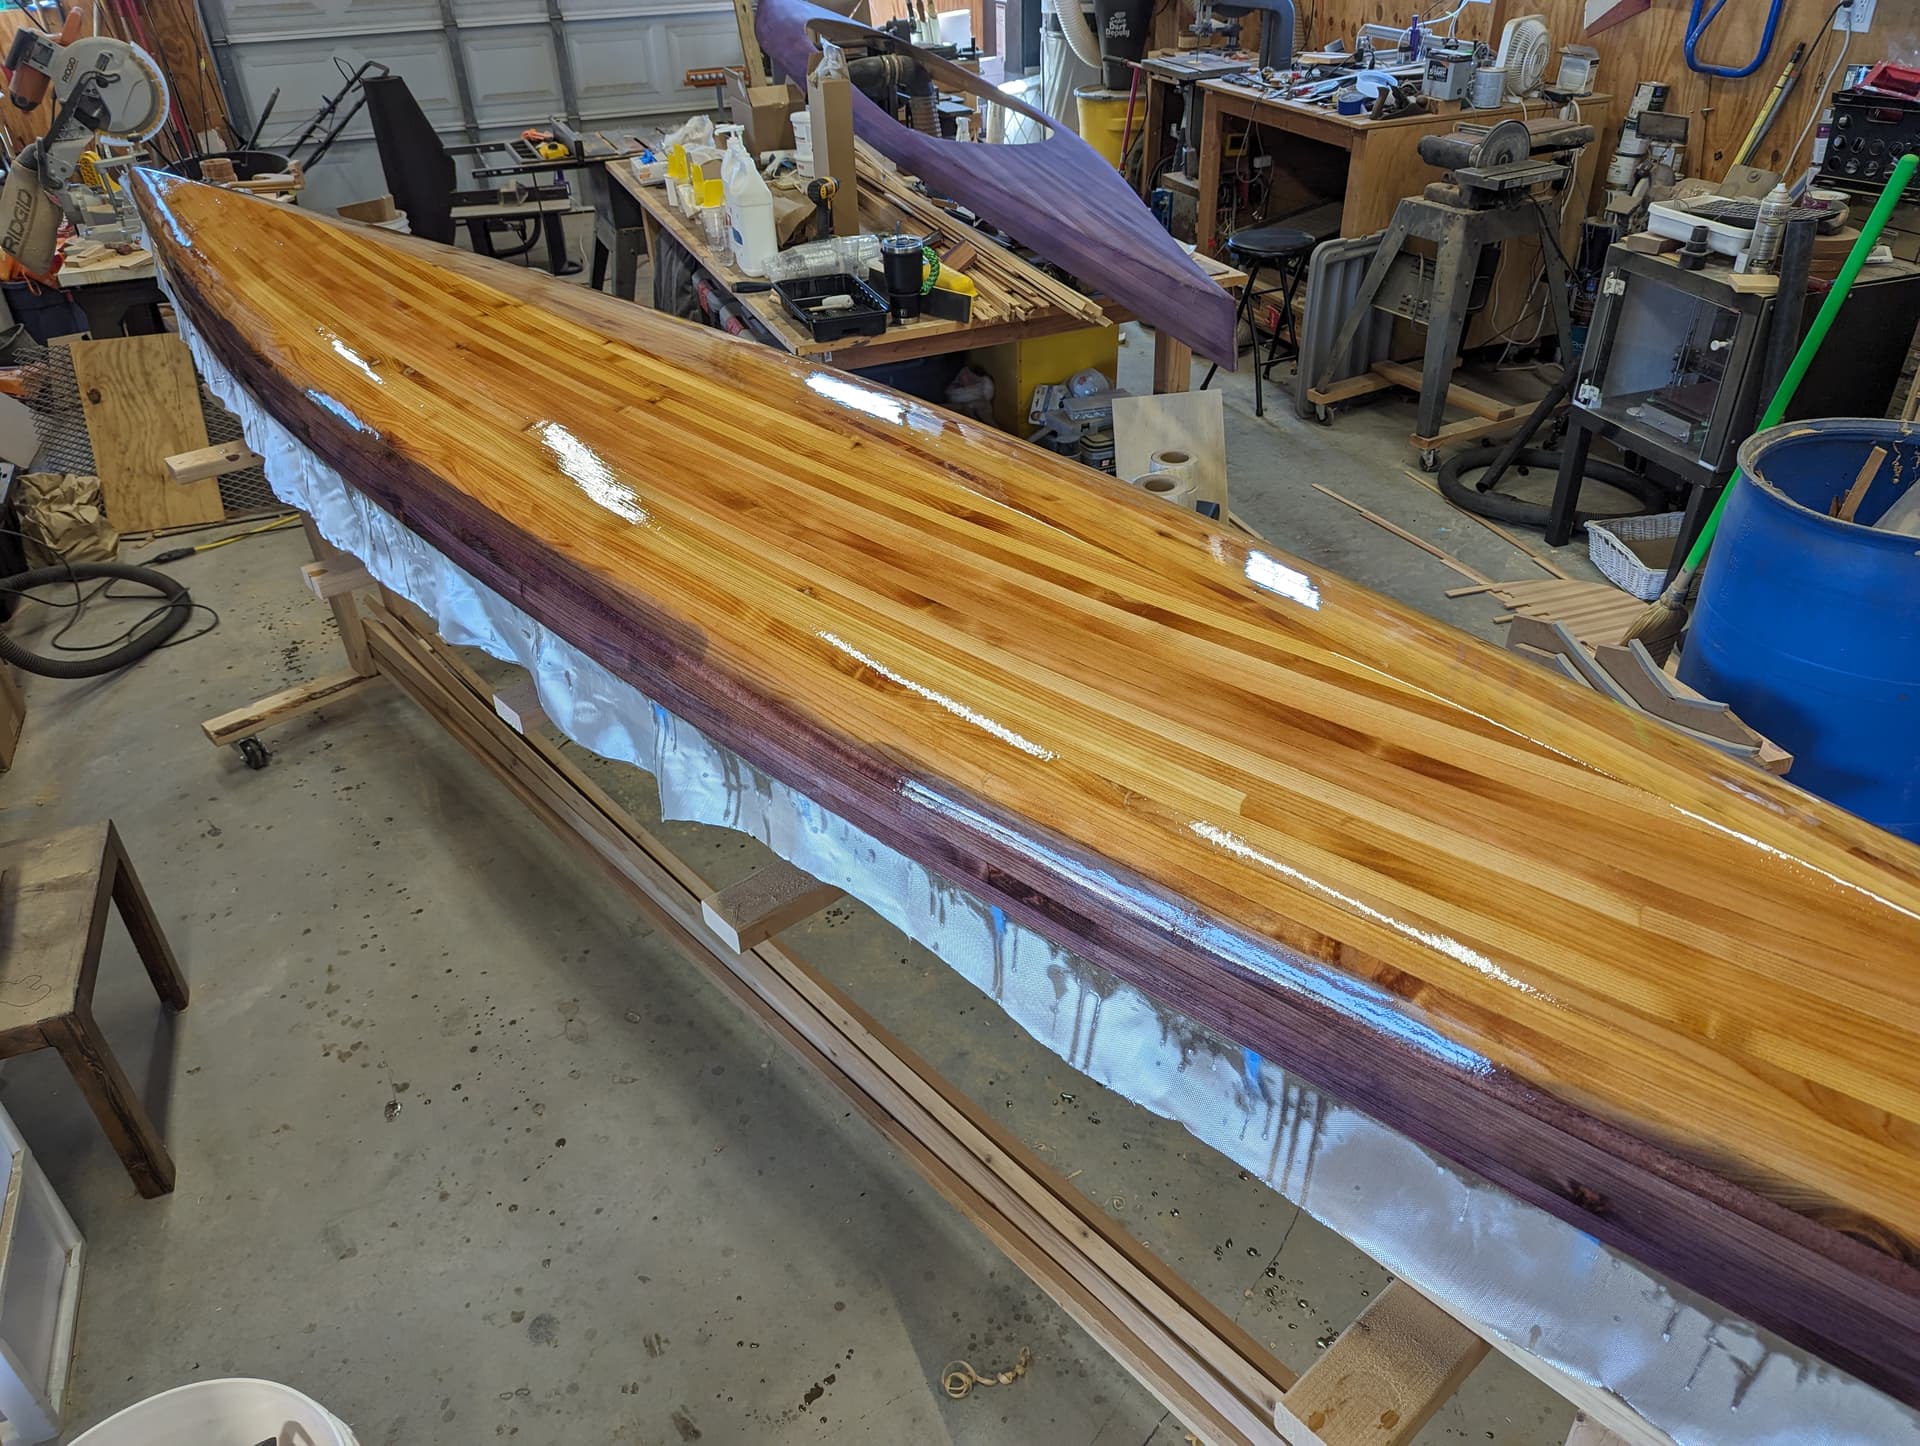
Glassed
 fiberglassing the outer hull")
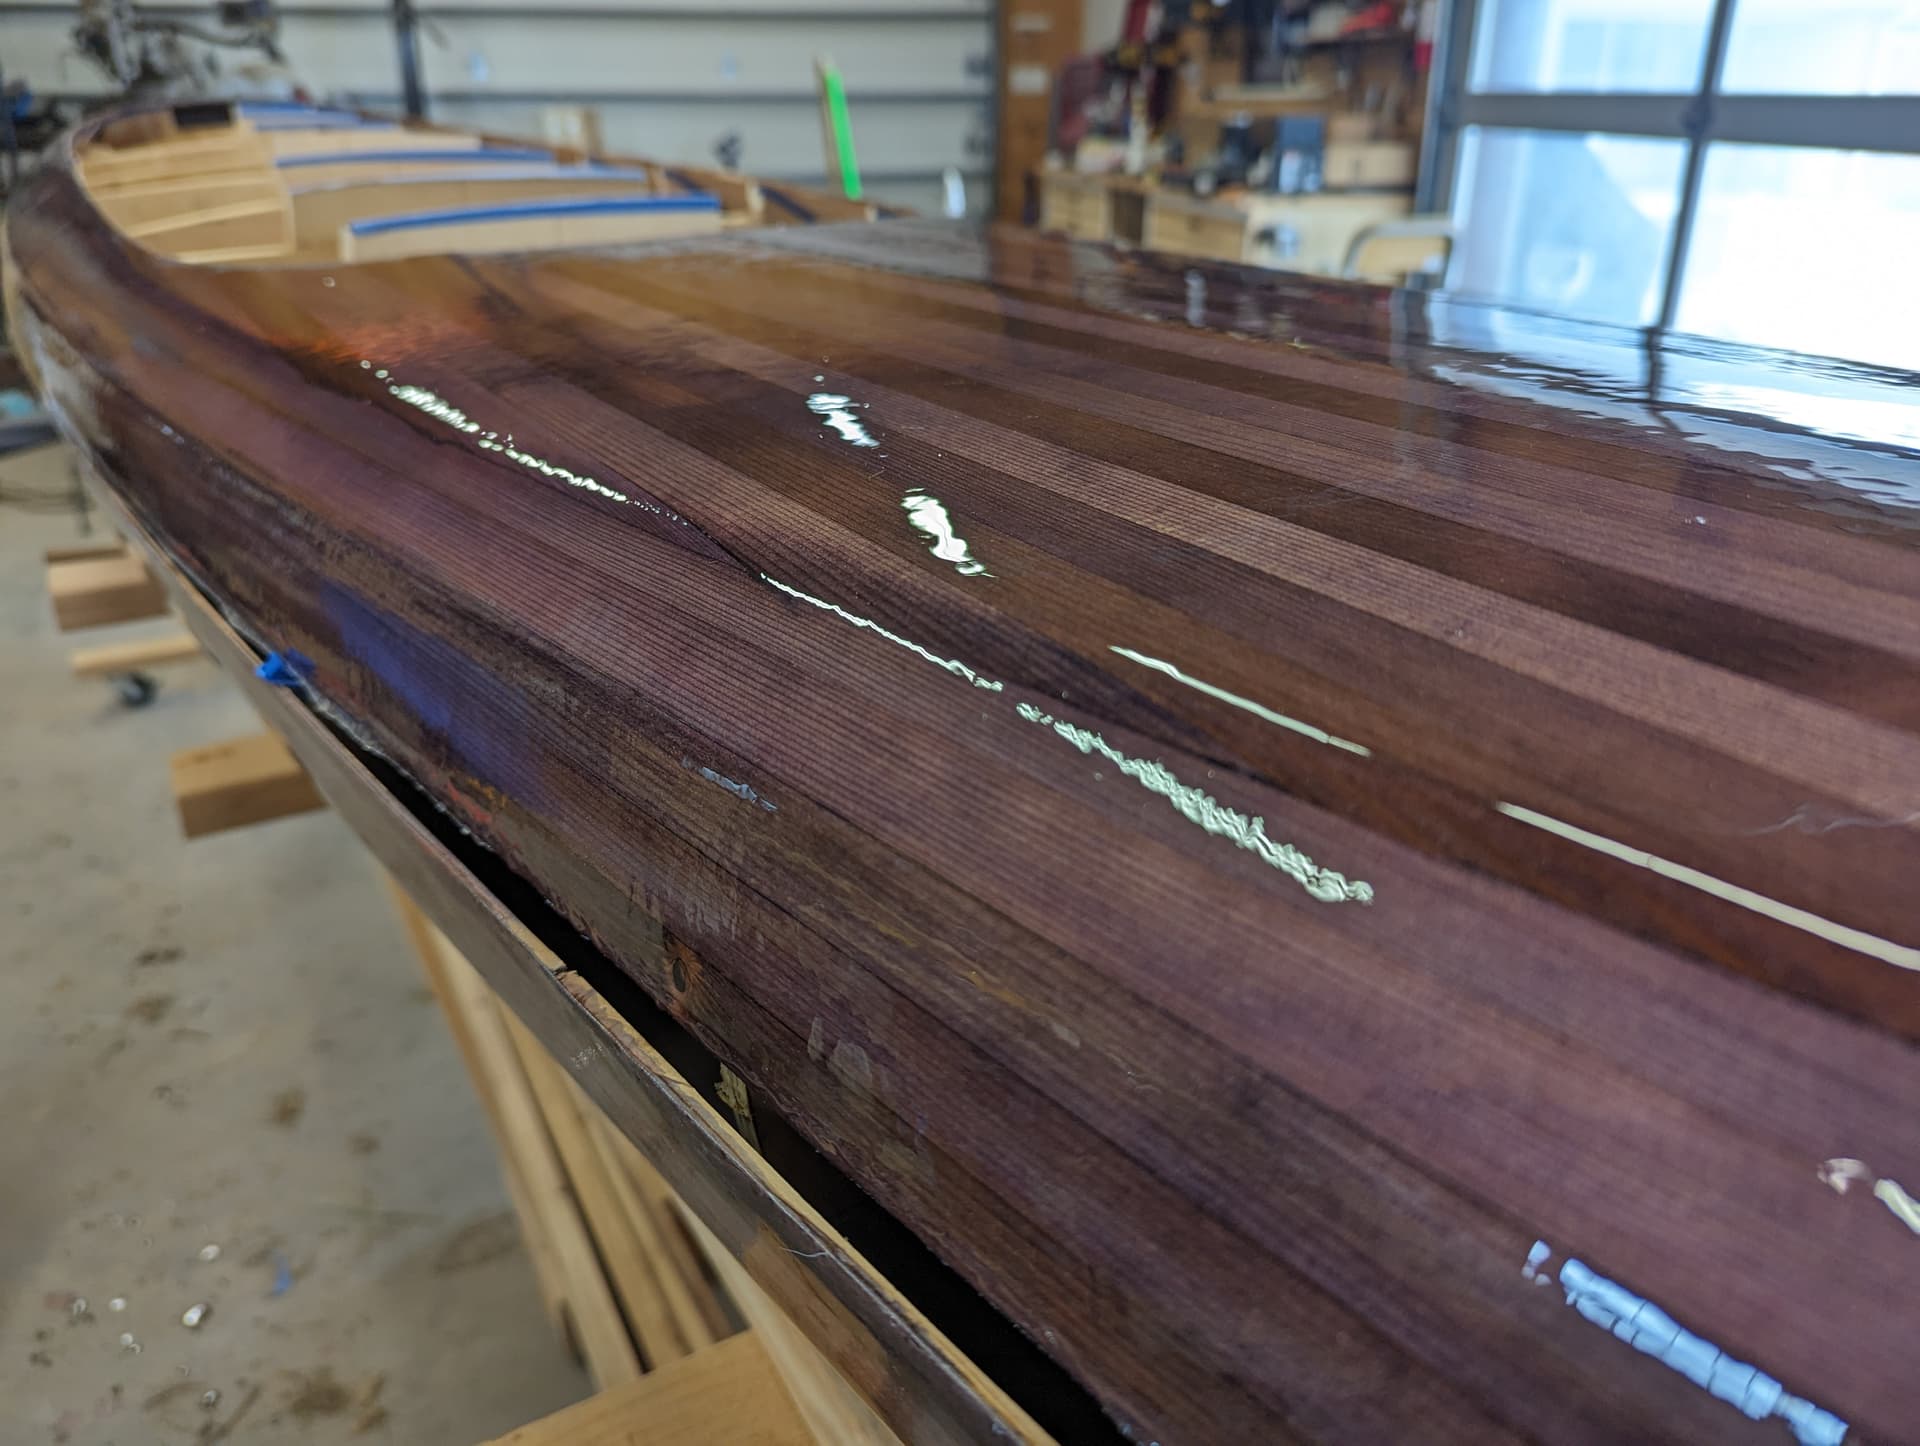
The closeup of the grain there makes me wonder. How wide are the strips? Could you take a sheet of inch thick really nice Baltic birch plywood, cut strips from it and use them?
Your build looks beautiful.
3/4" wide. 1/4" thick.
Plywood doesn’t bend nearly as well as solid wood and edge gluing plywood isn’t as strong.
There are other kayak designs that use plywood. Look up “stitch and glue”. I almost built a plywood boat for my first one, but I really wanted to do the cedar striped.
I’d still like to do a small plywood fishing boat like a Jon boat or skiff. Something around 15’ or so.
Well darn.
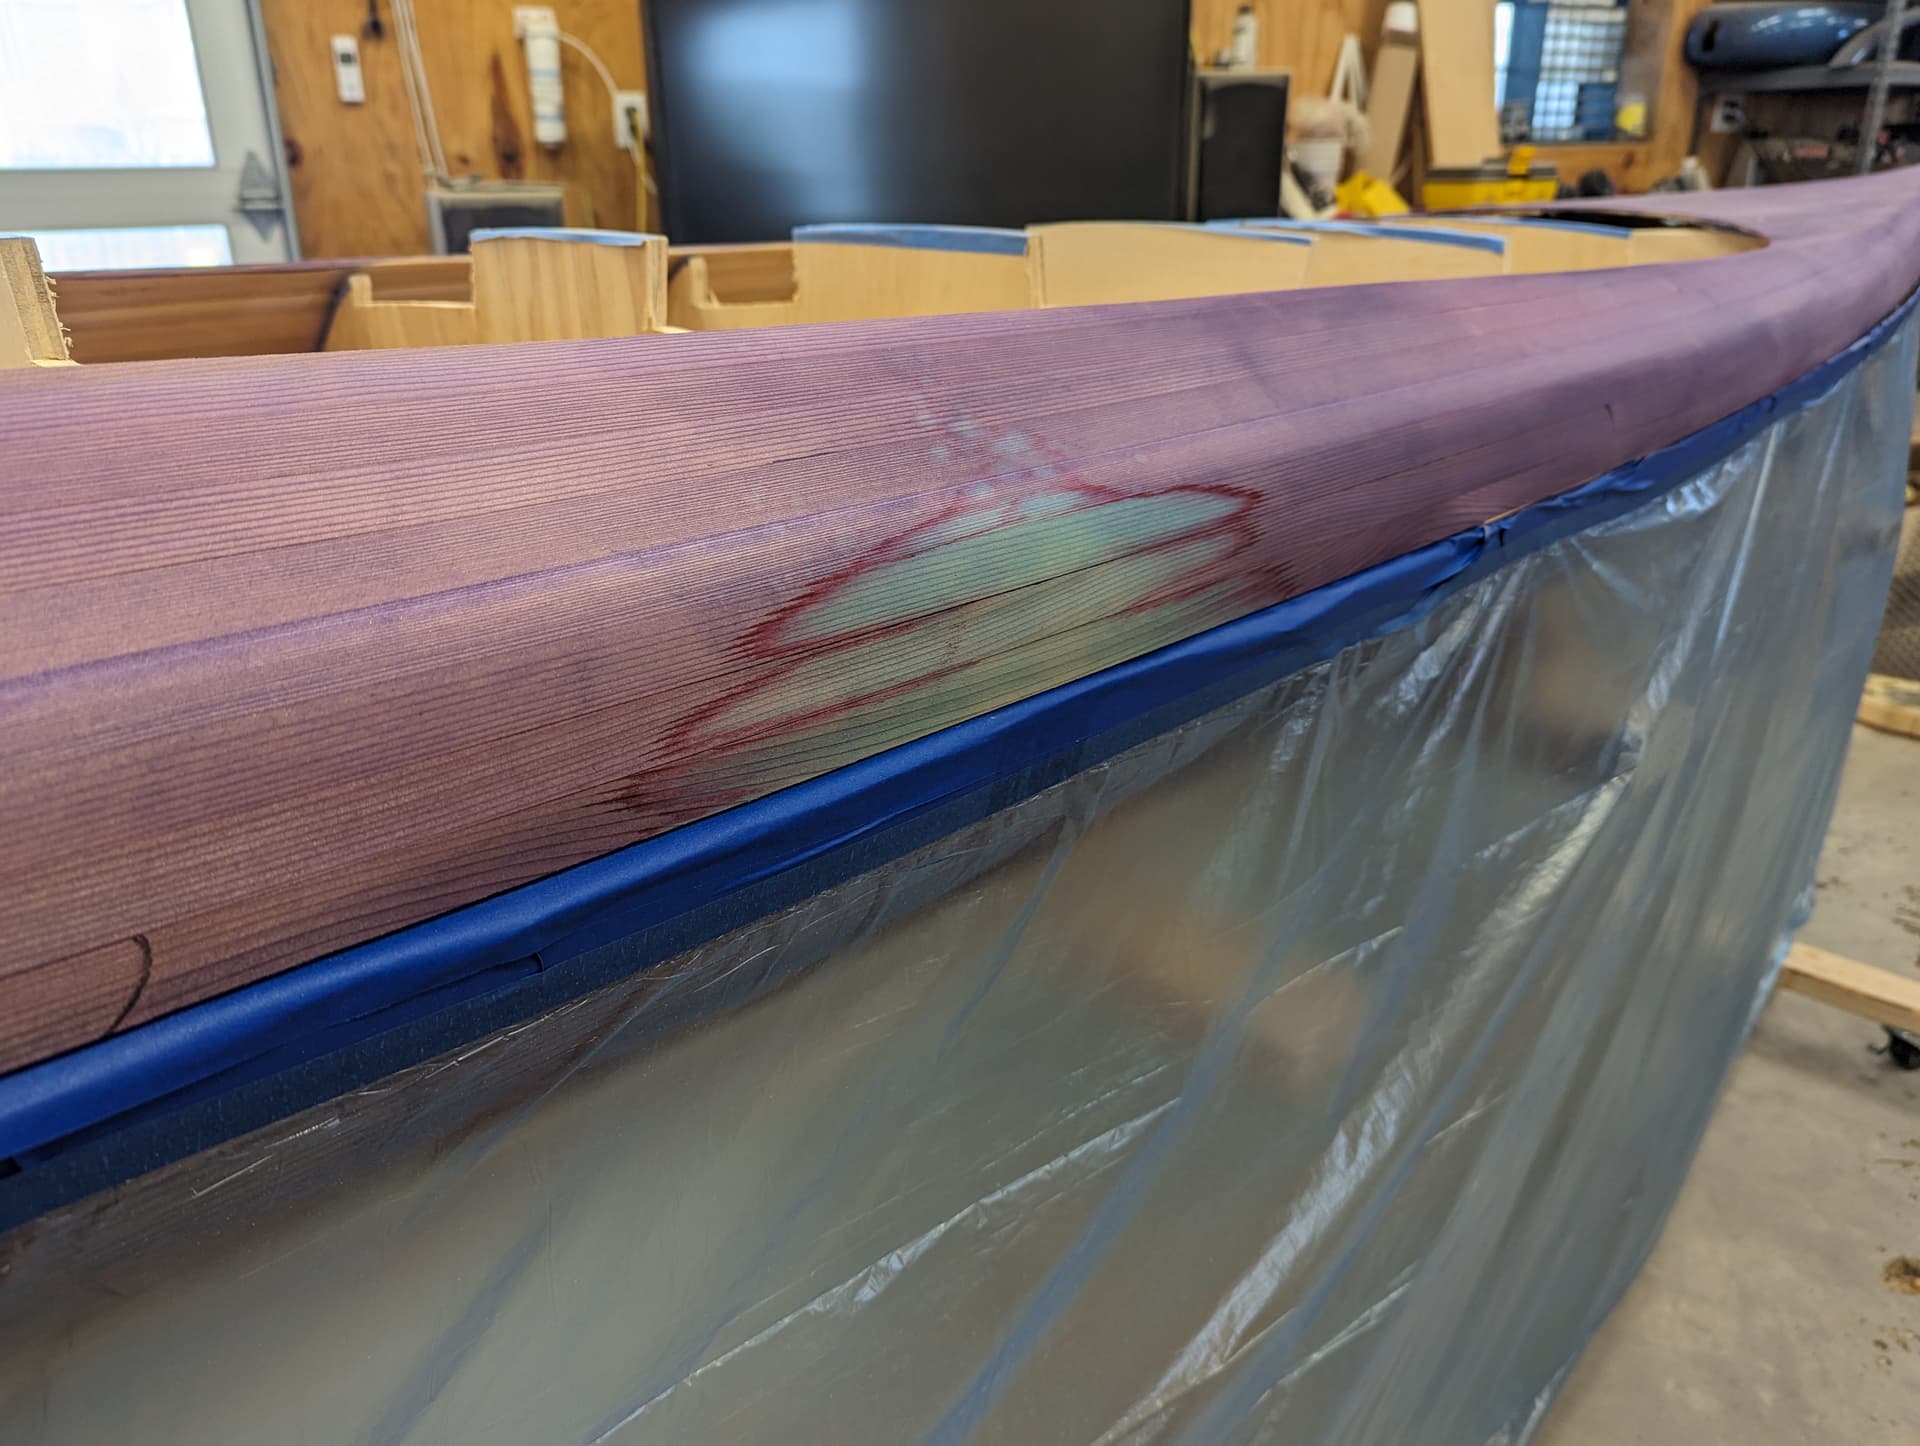
I went out this morning and discovered my shop roof has a leak. 2" to the left and it wouldn’t have been an issue. As it sits, I now have to fix the dye on the deck before I can fiberglass it.
So sorry! Best of luck working through this setback.
Oh damn that sucks!!! Hopefully it’s not too hard of a fix
It shouldn’t be. I had to fix some other blemishes in the dye when I first did it. I should be able to sand it back down, put some fresh dye on this part of the boat, and blend it in with the rest of the dye. It will also give me a chance to fix another blemish on the boat that I was originally going to ignore.
Hand made has character, right? I mean, the leak is too much character. But a fix and a blend is character.
Did it also make it blue? Or is that a consequence of the dye?
I’ve noticed that this color tends to ‘go blue’ as you dilute it. I think the red gets washed out easier.
Update: got it fixed this evening.
 fixing the wet spot")
I think I’ve decided I’m going to sneak out during work tomorrow and glass the deck. I can go out before I log in to work to get the initial wet out done. Then I can sneak an early lunch for the first fill coat. A mid-afternoon break to get the second fill coat.
I have no meetings Wednesday, so should be able to work around helping others.
Tonight I’ll lay out the fiberglass and cut the excess off so all I have to do in the morning is start spreading resin.
Gorgeous build. I also try to squeeze in shop time around work when I can. Nibbling away at projects is often the best way to keep the process going forward.
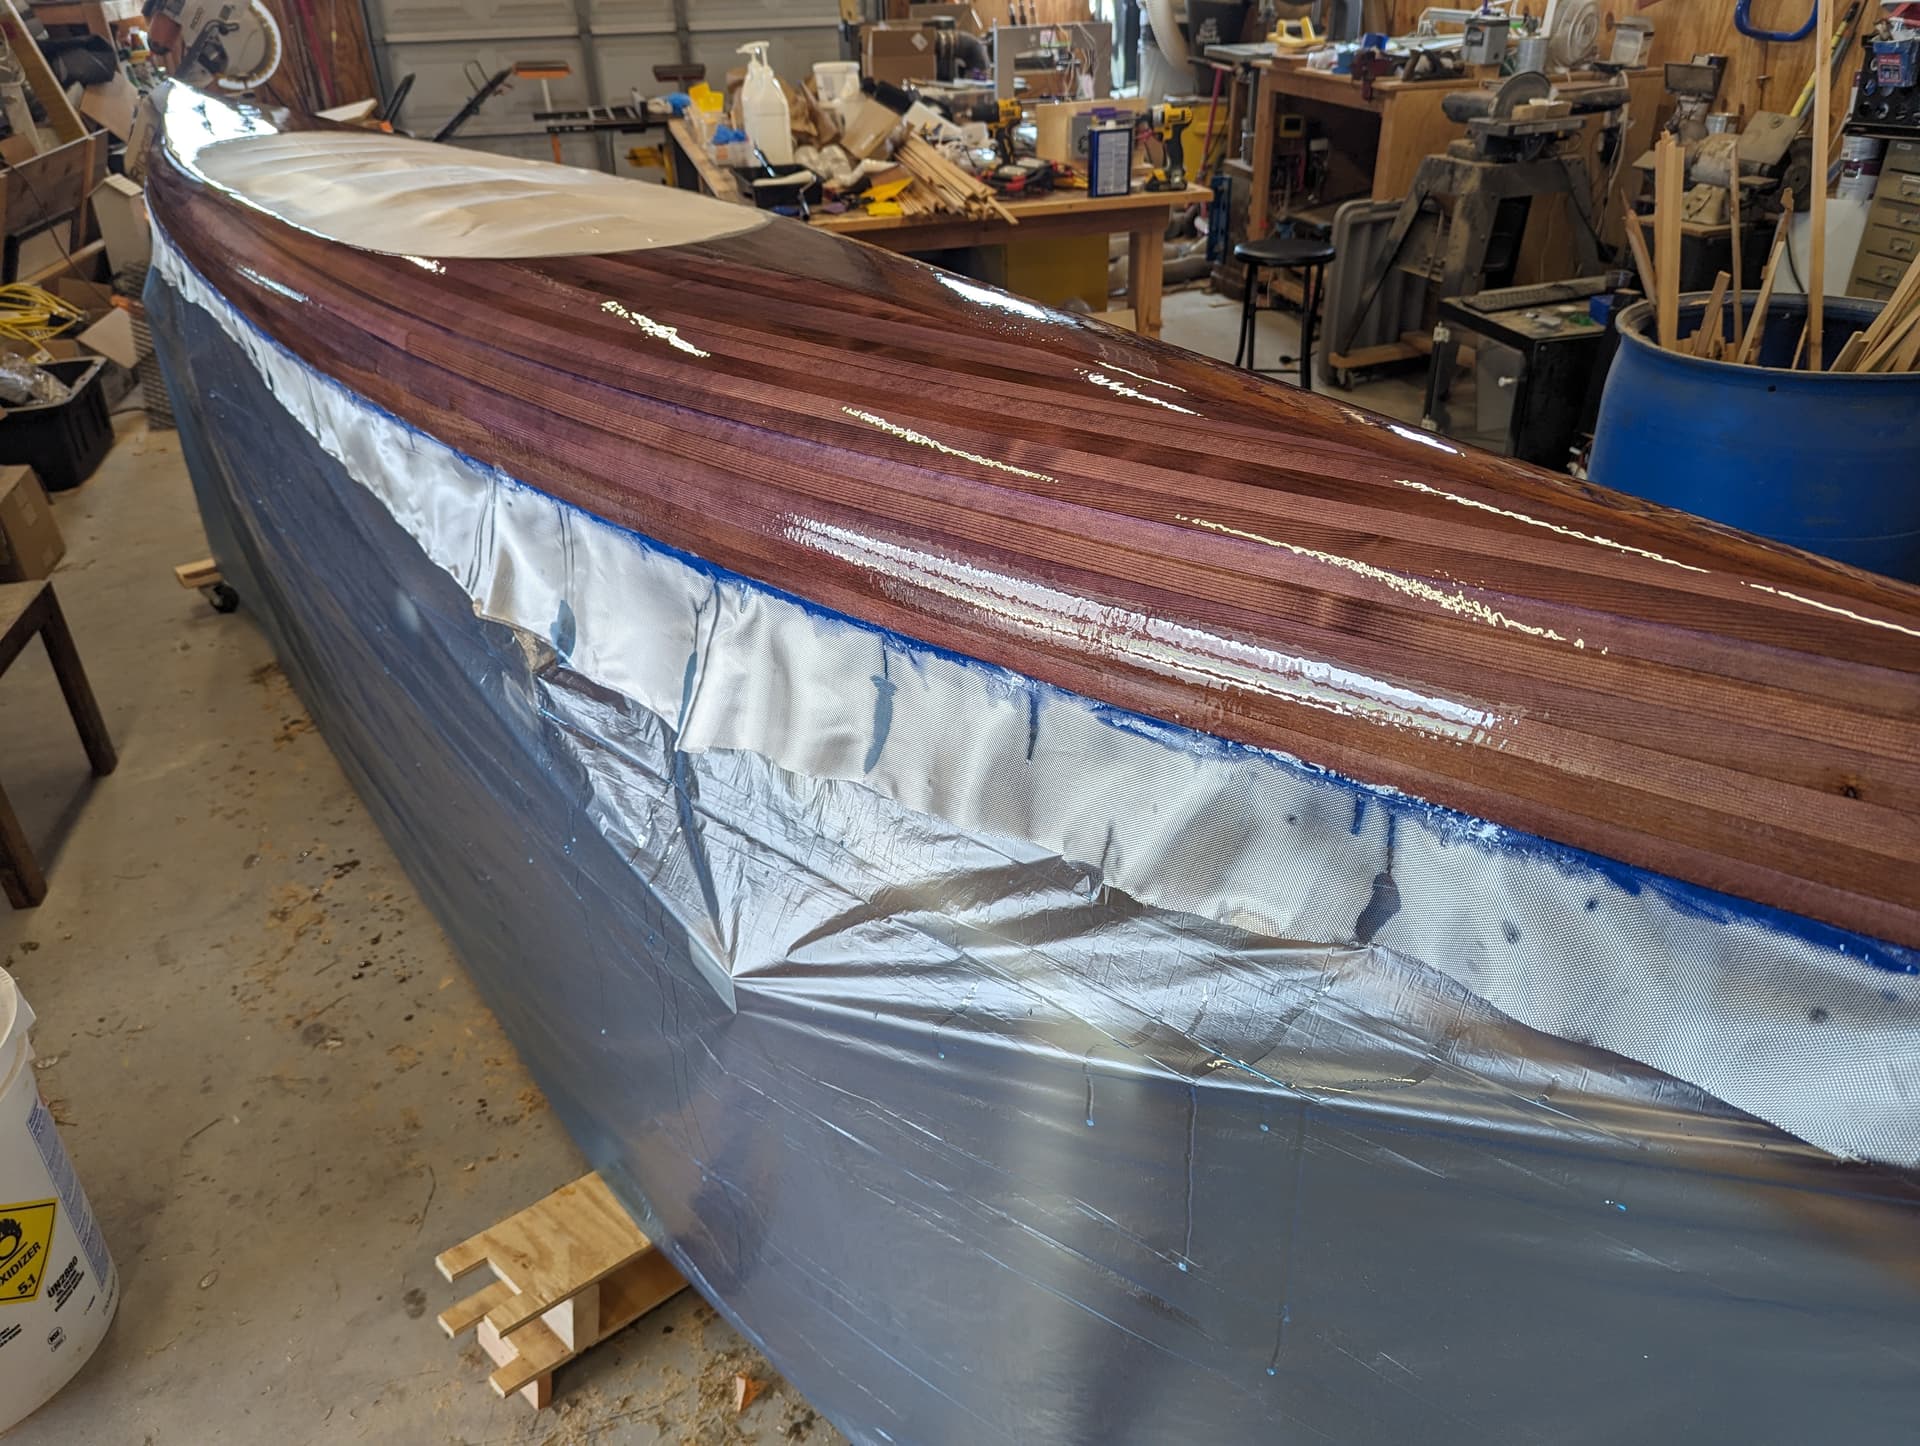
So far, the day is on track. First resin coat has been applied to the kayak. Now to do ‘work’ for a few hours, then go out and put on the first fill coat.
Fill coat 1 done…
WOW! not even purplish, just a beaut!
It has WAY more purple in person. Something to do with the lighting and glare causes the color to wash out. It almost acts like a candy color on a paint job where there’s more color where you “aren’t” looking than where you “are”.
I’ll throw a video up later. The walkaround you can still see the color.
That looks awesome!!!
Just finished watching (I think) all 22 videos. Cool stuff - wish I had the space to build one…
Been following your Kayak build and appreciate the updates here, and on youtube. Cheers!
Why is there a gap/slit around the waterline? You planning to do some edge-lit acrylic band or something ![]()