oh and that fan shroud for the part cooling is not great if PLA. It is close to the surface and it sags and then it drags and then it plows stuff up… had to “farmer” it so it doesn’t do that anymore until I can get one printed out of ABS or ASA. Need to find the right color now for the fan and the core reprint. Let the bootstrapping begin.
My fault… Normally the case. First layer much too close.
@vicious1 Do you sell replacement silicone socks for the H2v2s? I couldn’t bring myself to buy one for however little it was and pay 3x in shipping for it. If you carried them, I’d snag a couple with my next part order.
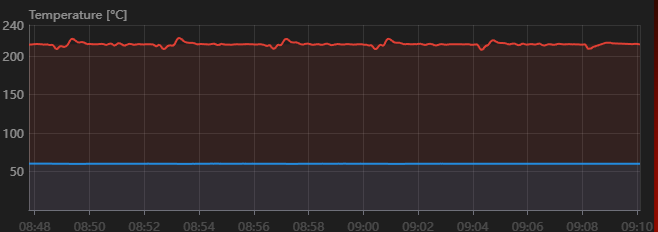
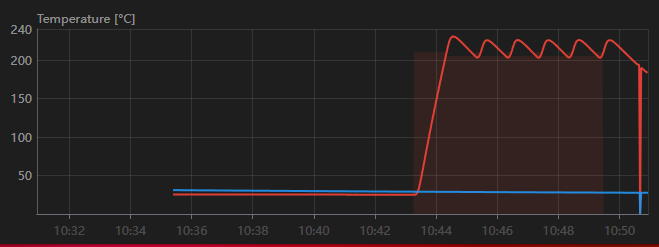
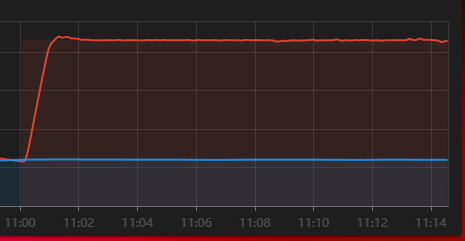
Klipper question or PID question perhaps: this hot end trend is troubling to me. what do you do to make the red trace look like the blue trace?
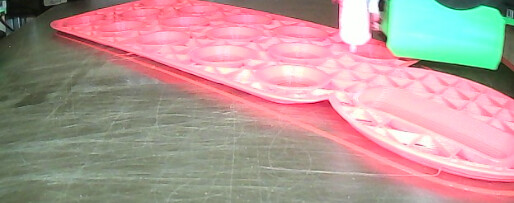
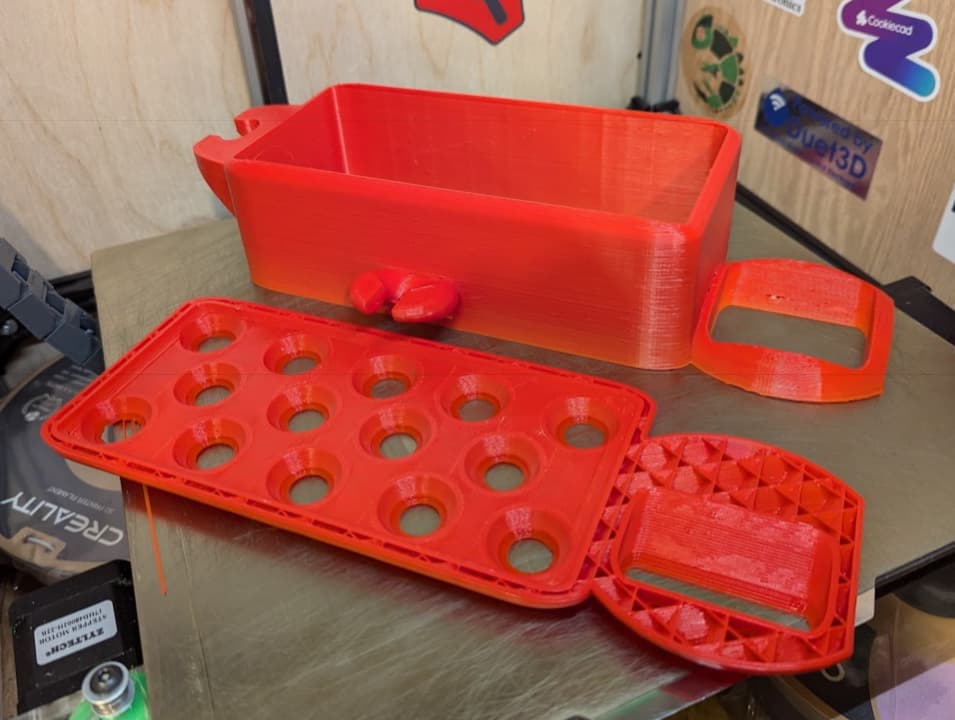
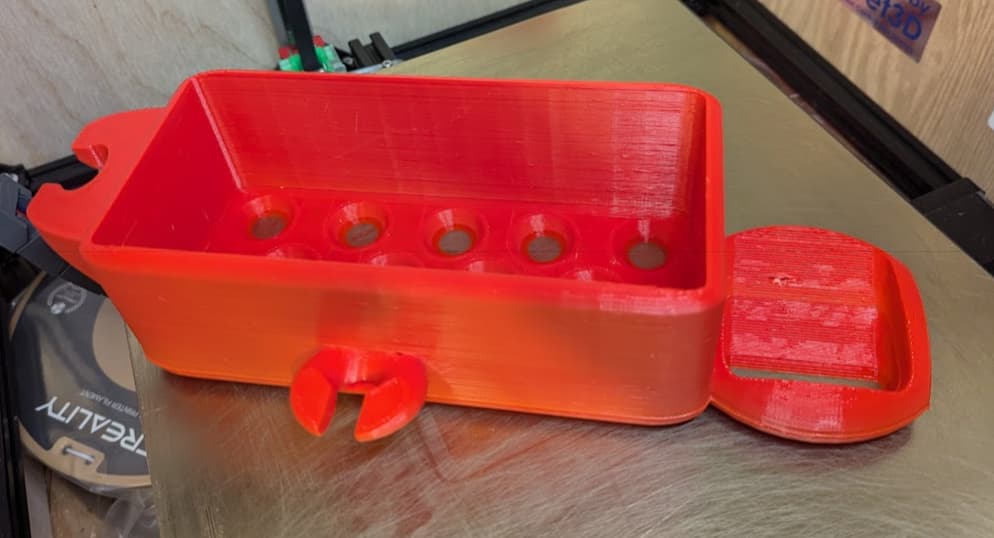
It is printing this:
it is a shower soap, shampoo, razor, and brush holder… that I made in tinkercad to share goodwill with the printing capabilities with the family (read that however you want).
Since I have a near endless supply of adhesive we will stick the back side to the shower wall and it will hold 4 bottles of stuff. hopefully it is strong enough to take the weight and the use. Time will tell.
I’ll google it and do it when this print finishes… if it does. I thought I had done it when it was a v4 and I’m using the same electronics and printer.cfg file.
the print failed. I think the core umbilical wire bundle got mangled somehow… will try again in a couple minutes.
This was the command I used:
PID_CALIBRATE HEATER=extruder TARGET=210
looks like this:
and I do remember doing that before. And the “save calibration” button appears at the top of the screen when on the web page next to “upload and print” button so you just click and it is done.
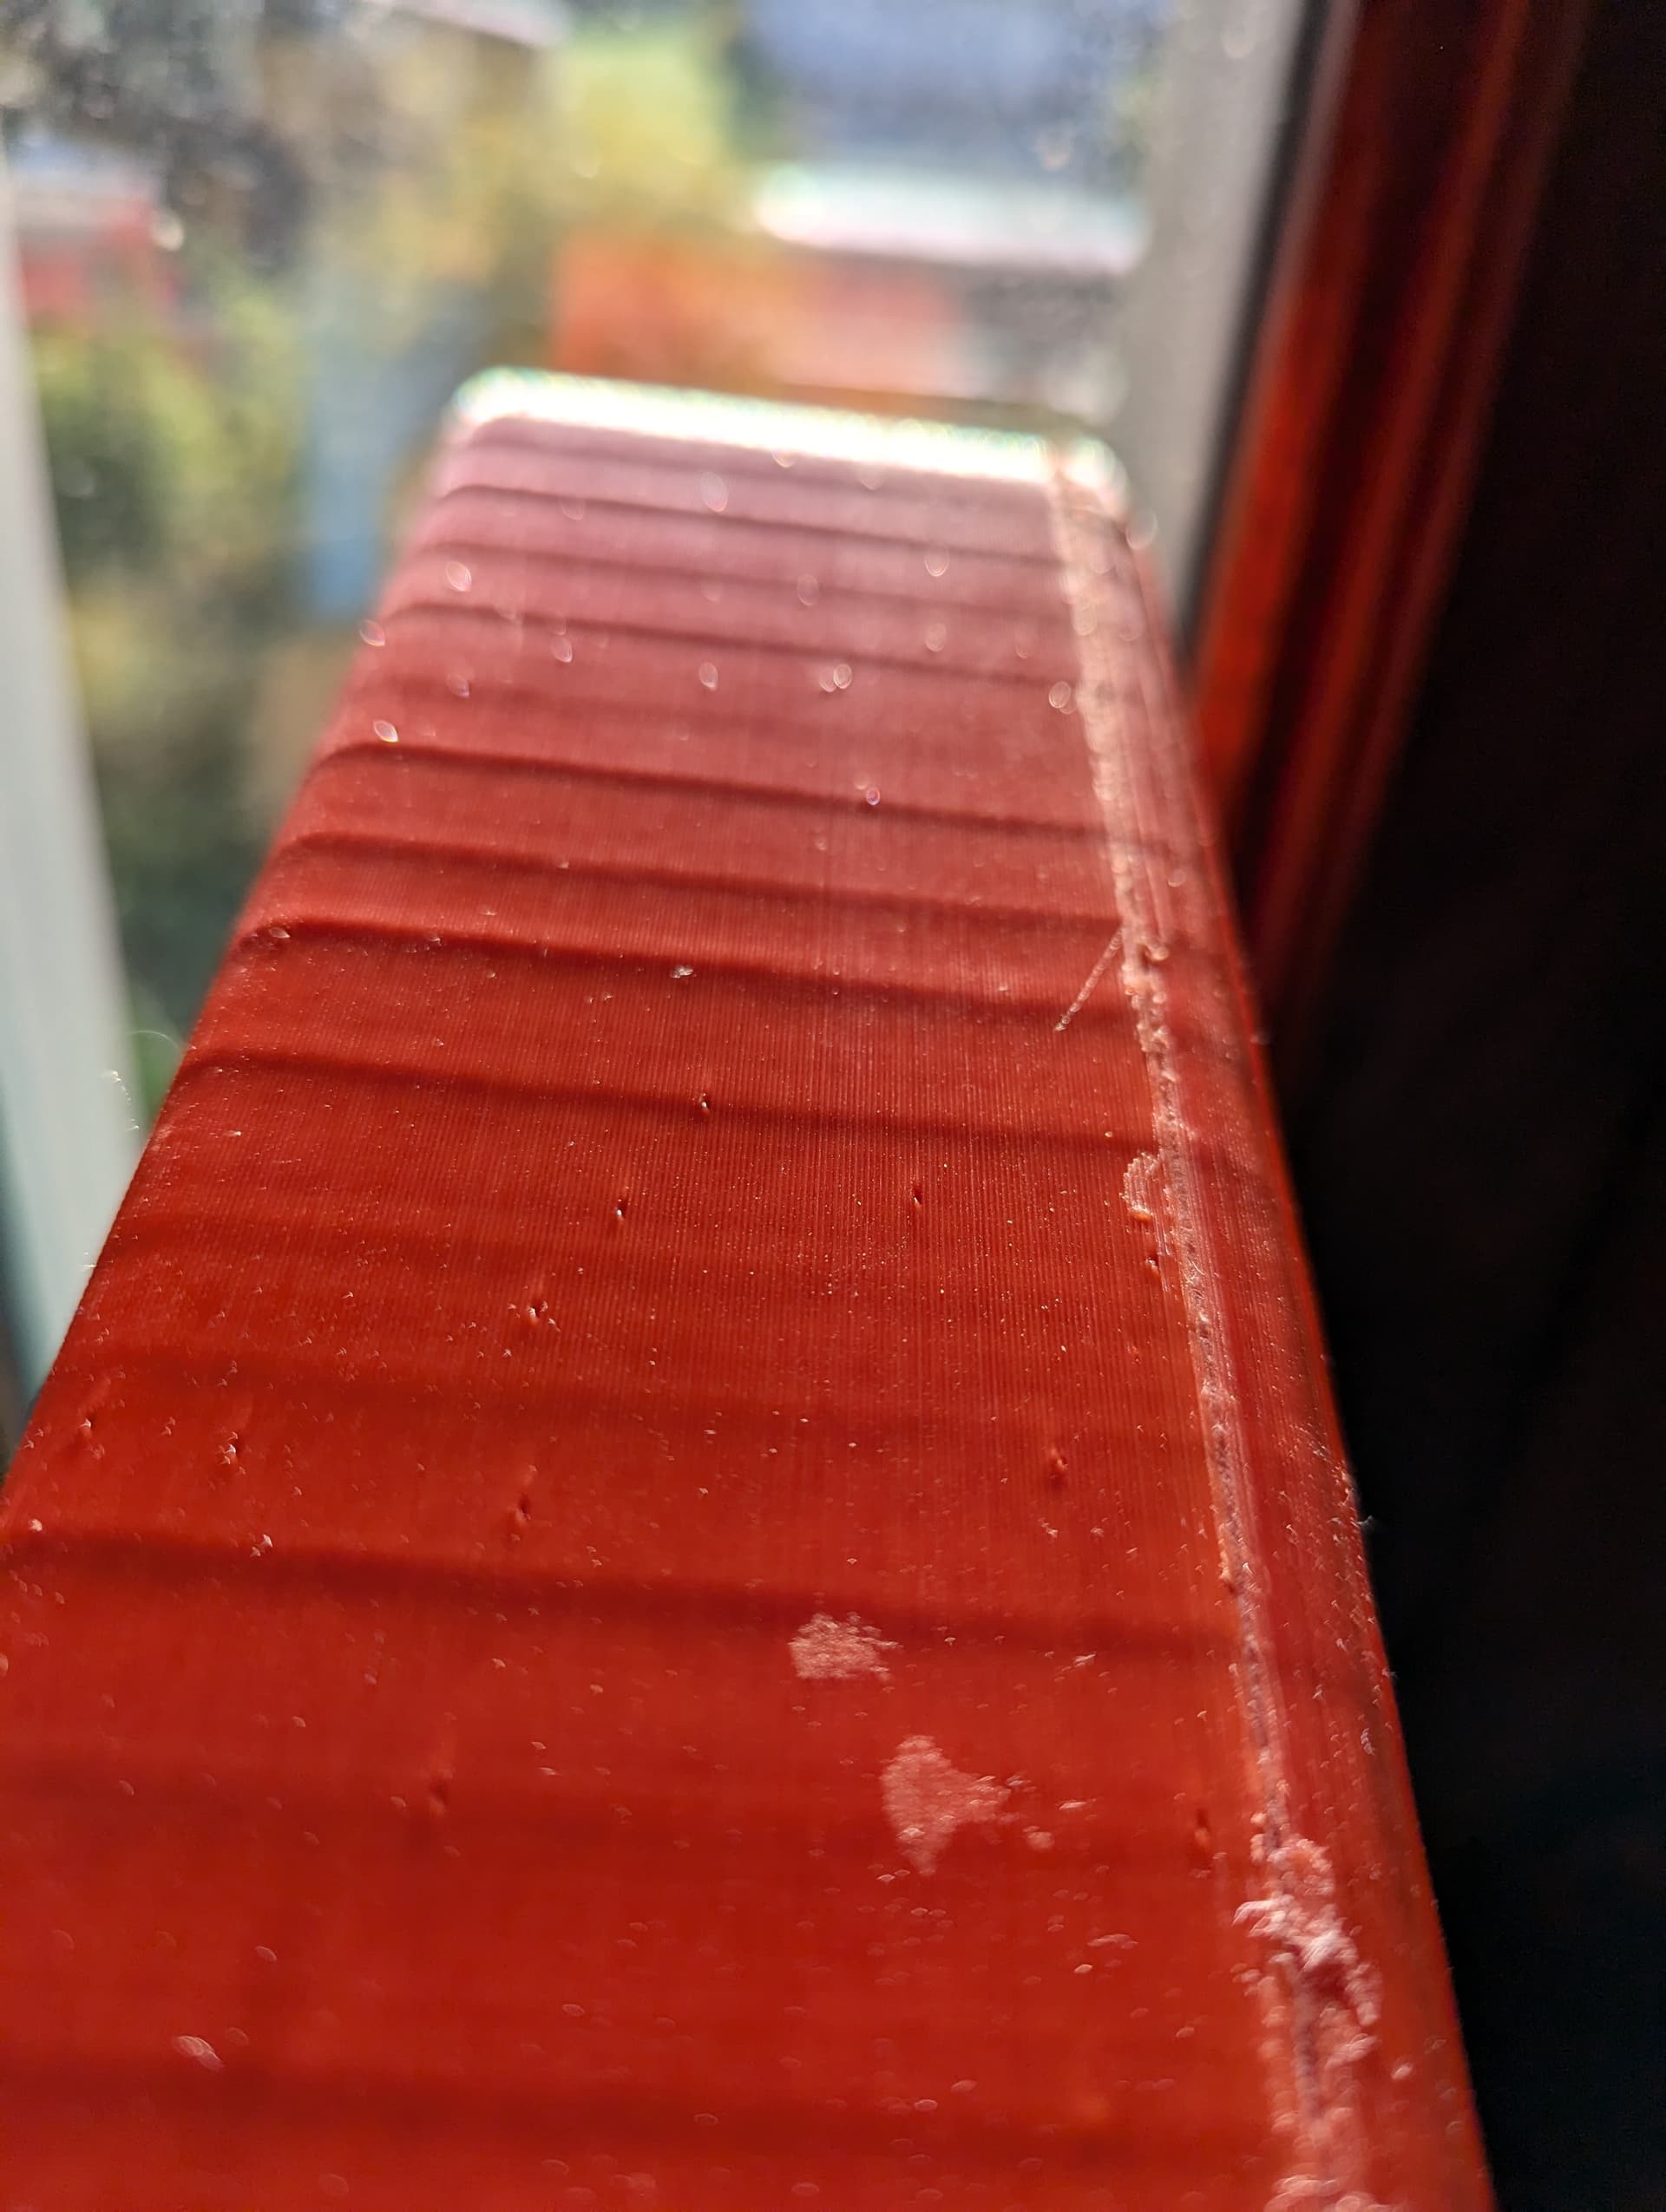
in looking at the side of this thing, there are a couple large artifacts on the wall and a few gaps or zits. I’m wondering if its speed is overrunning the extruder? Not sure I can get a good pic of it. Also this cheap red filament I’m using is more like candyapple red/orange, so not great, but it should work.
so ignore the superglue seam on the right and the dirty window and road grader in the background. the “horizontal” bumps (in the picture) could be infill artifacts with 2 skin layers. The random holes are what I’m talking about.
How much volumetric flow is right there in the slicer preview?
The best thing I learned when I was having problems with my Ender 3 extruder skipping steps was to limit the volumetric flow rate in the slicer to make sure it never moves too fast for what the extruder can handle.
A 0.6 nozzle with a 0.3+ layer height can run the volumetric flow rates up pretty quickly
My extruder test showed 6 mm/s with the nozzle and flow setup, which equates to about 16 mm3/s. It is an H2V2S and I ran the test with a heated extruder and a piece of tape, so I set the max flow to 15.
The test:
heat extruder
Set extrusion length to 100 mm
Mark 100 mm from input of reverse Bowden with a piece of tape.
Start extrusion
Measure distance from tape to reverse Bowden.
The tape should get there if not, bump up heat and try again.
I ran 210, 215 and 220 C at 8, 7, 6, 5 mm/s feed. I have a table of the remaining filament somewhere, but the worst was like 8 mm/s at 210 with like 10mm remaining at the end.
For the record, I’ve learned more about 3d printing for the sake of making CNC parts than I ever learned about 3d printing trying just to learn 3d printing. Large parts that need high quality in a reasonable amount of time requires some subject mastery, for which I am indebted to you all for helping me towards getting there. Thank you!
I’ve never seen that method for measuring max flow…
If I’m not mistaken, when @vicious1 was running his V2S, I don’t think he was getting that much flow without using the CHT nozzle, but I could be mistaken. I think BTT only rates the H2 V2S at ~10mm3/s max flow
Highly recommend using the “racetrack” style max flow test that is integrated in Orca slicer for calculating max flow
I left off the math… X mm/s *2.4 = flow rate for 1.75 mm diameter filament input.
I have a cht nozzle.
My question is more about characterizing those defects. Assuming the measurements are right, does that defect look like an overrun situation where it is under extruding because it can’t flow enough, or is it something else?
It is possible all the settings may not be right to fully constrain the system. If this is a flow defect, the first check is the extrusion temperature, then the slicer flow limit, the klipper config settings, and then run the racetrack test to verify.
best bet to see if it’s a max flow issue, would be to check the sliced model and see if there is, for some reason, an increase in flow at those points.
Which slicer do you use?
If you have random seams turned on and retraction at layer change, those could be underextrusion/seam artifacts.
")