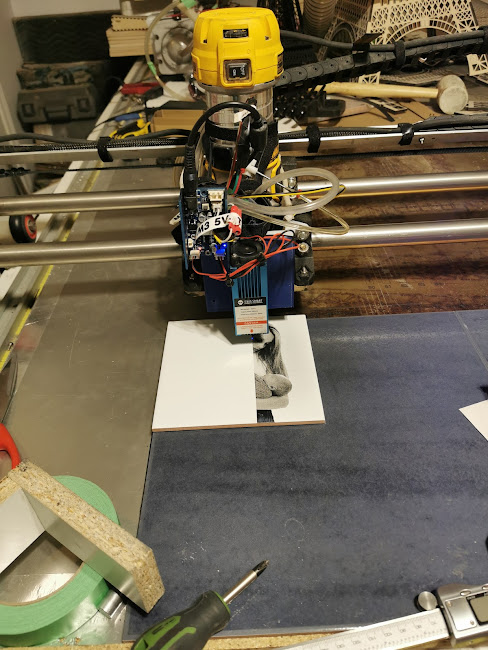
I used the pin PC( and the ground next to it for the M3 and inline command and an external power supply for the laser
so i used a 2 wires connect for the M3
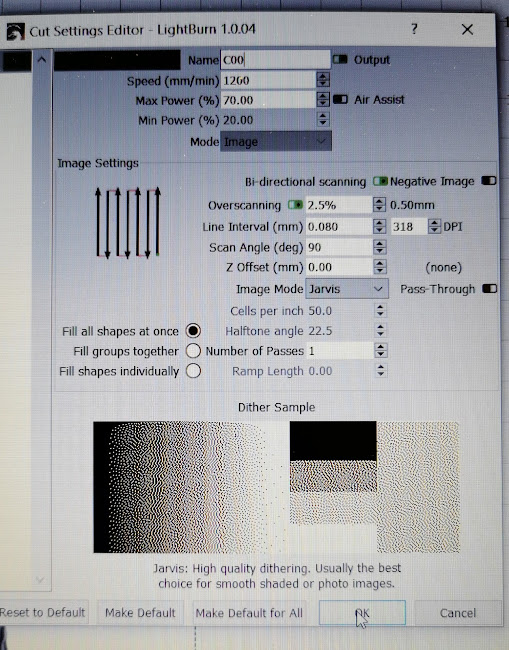
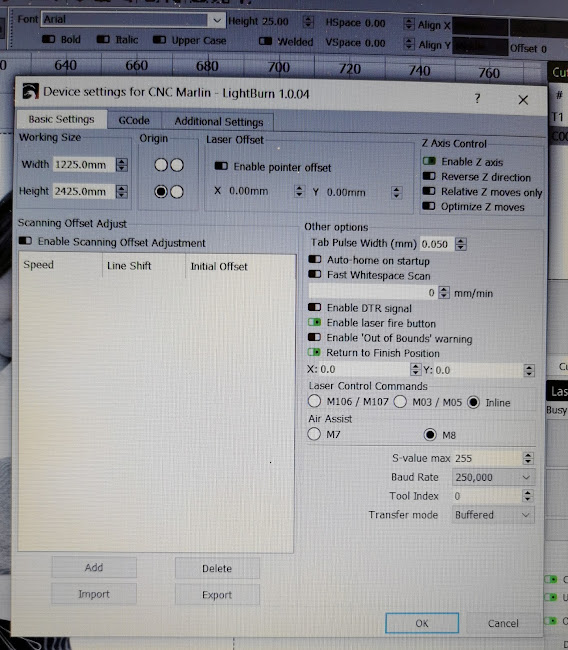
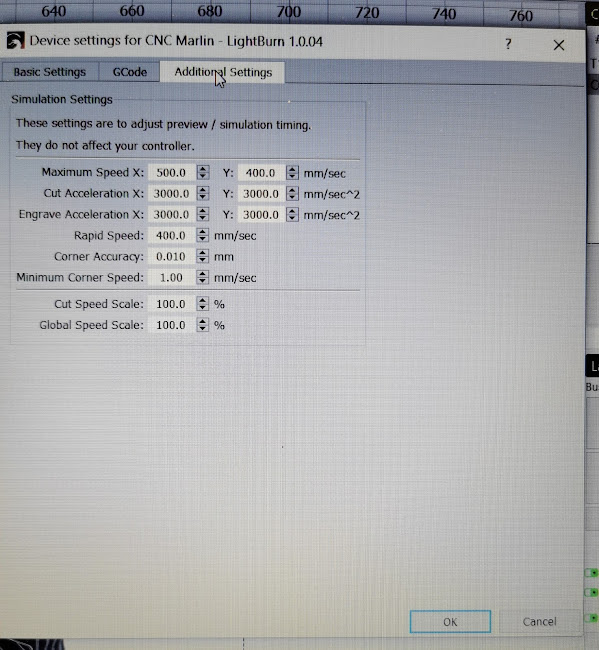
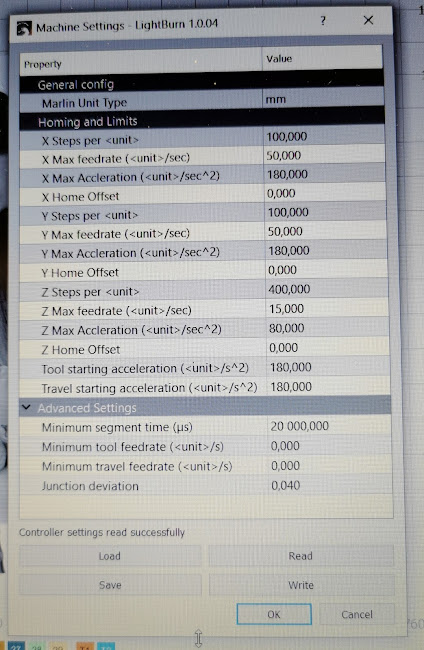
i look again and i dont see any difference of the firmware fron the articlethe only difference could be the setup of the machine from lightburn is there anything i can change do you see the line in the picture

2 Likes
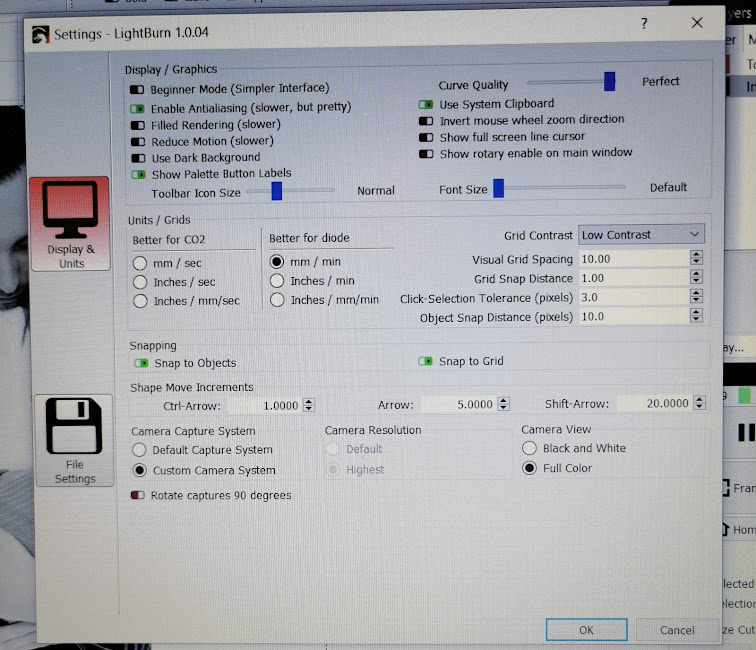
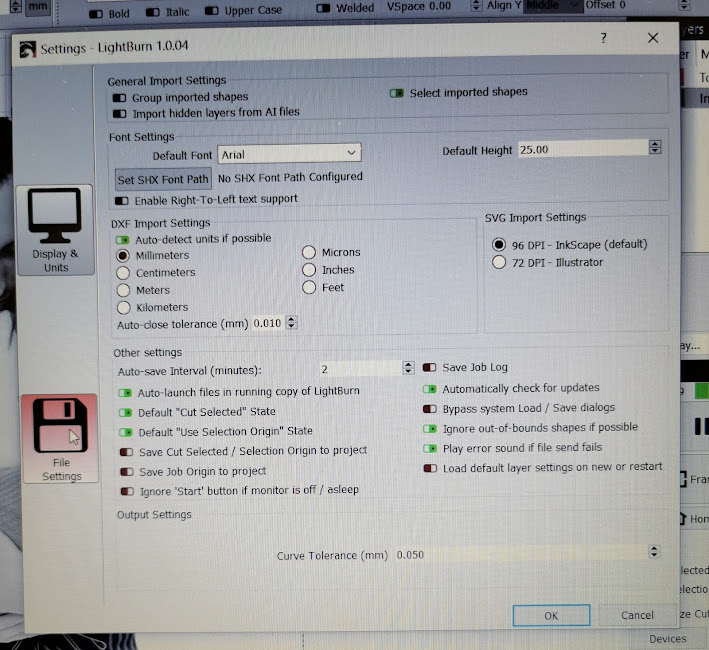
It sounds like your MPCNC and Marlin connections are working as expected, now its time to tune the Lightburn application’s settings. You may have better luck finding detailed Lightburn tuning advise on a Lightburn forum.
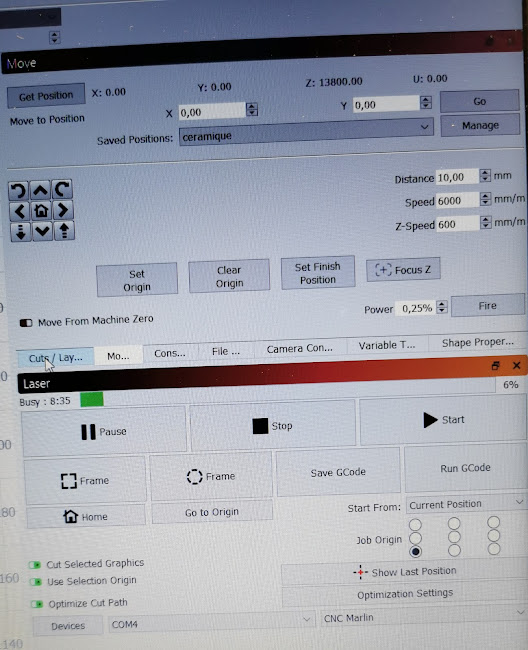
How closely does the finished image match what’s shown in the Lightburn editor window? Can you be specific about the defect in the output that you’re hoping to fix? I know some folks who would be overjoyed at that image.
If it is the vertical white lines, then I think you need to lower the “Line Interval” setting in your top image.
If elements of adjacent scan lines aren’t aligning properly, try turning off bidirectional scanning. This will ensure all lines draw in the same direction which tends to tune out artifacts due to physical backlash in the machine, but it does make the burn take longer as it has to return to the starting side after each line is burned.
1 Like
thank you
DId you found better LightBurn setting to avoid those vertical lines, and would you mind to share some screenshot if you resolve that issue ?
I added a laser to my mpcnc in January and have enjoyed playing around with it. I have made a handful of plaques and miscellaneous projects. I just threw together a rotary axis with spare parts but have not got that up and running yet. I have the SKR Pro 1.2 board running Marlin. I do not have dual endstops. Two questions:
- Can I attach the rotary axis to the E0, E1, or E2 axis? If so, do I need to make any changes in the firmware?
- Marlin shows that it has settings for controlling air assist. Is there a pin on the SKR Pro 1.2 where I can attach a relay that can be controlled with M7 or M8 commands using Lightburn?
The code in Configuration_adv.h has the following beginning on line 3342.
//#define AIR_ASSIST // Air Assist control with G-codes M8-M9
#if ENABLED(AIR_ASSIST)
#define AIR_ASSIST_ACTIVE LOW // Active state on air assist pin
//#define AIR_ASSIST_PIN 44 // Override the default Air Assist pin
#endif
Any thoughts are greatly appreciated.
Hello there. I am trying to attach an attomstack m100 laser to my LR3 SKR PRO. This laser came with a 12v to 24v converter. I was thinking i should use fan O connected to the convertor? But i am not sure what input to connect it to. I have tried a few of the inputs from and cant control anything from the screen, i havent even attempted the test gcode yet. I want to fire it from the screen first nefore i move on to anything else.i am using the latest firmware.
Any help is appreciated.
That’s their new 20W, quad beam module. I’d love to hear how it works when you have it set up.
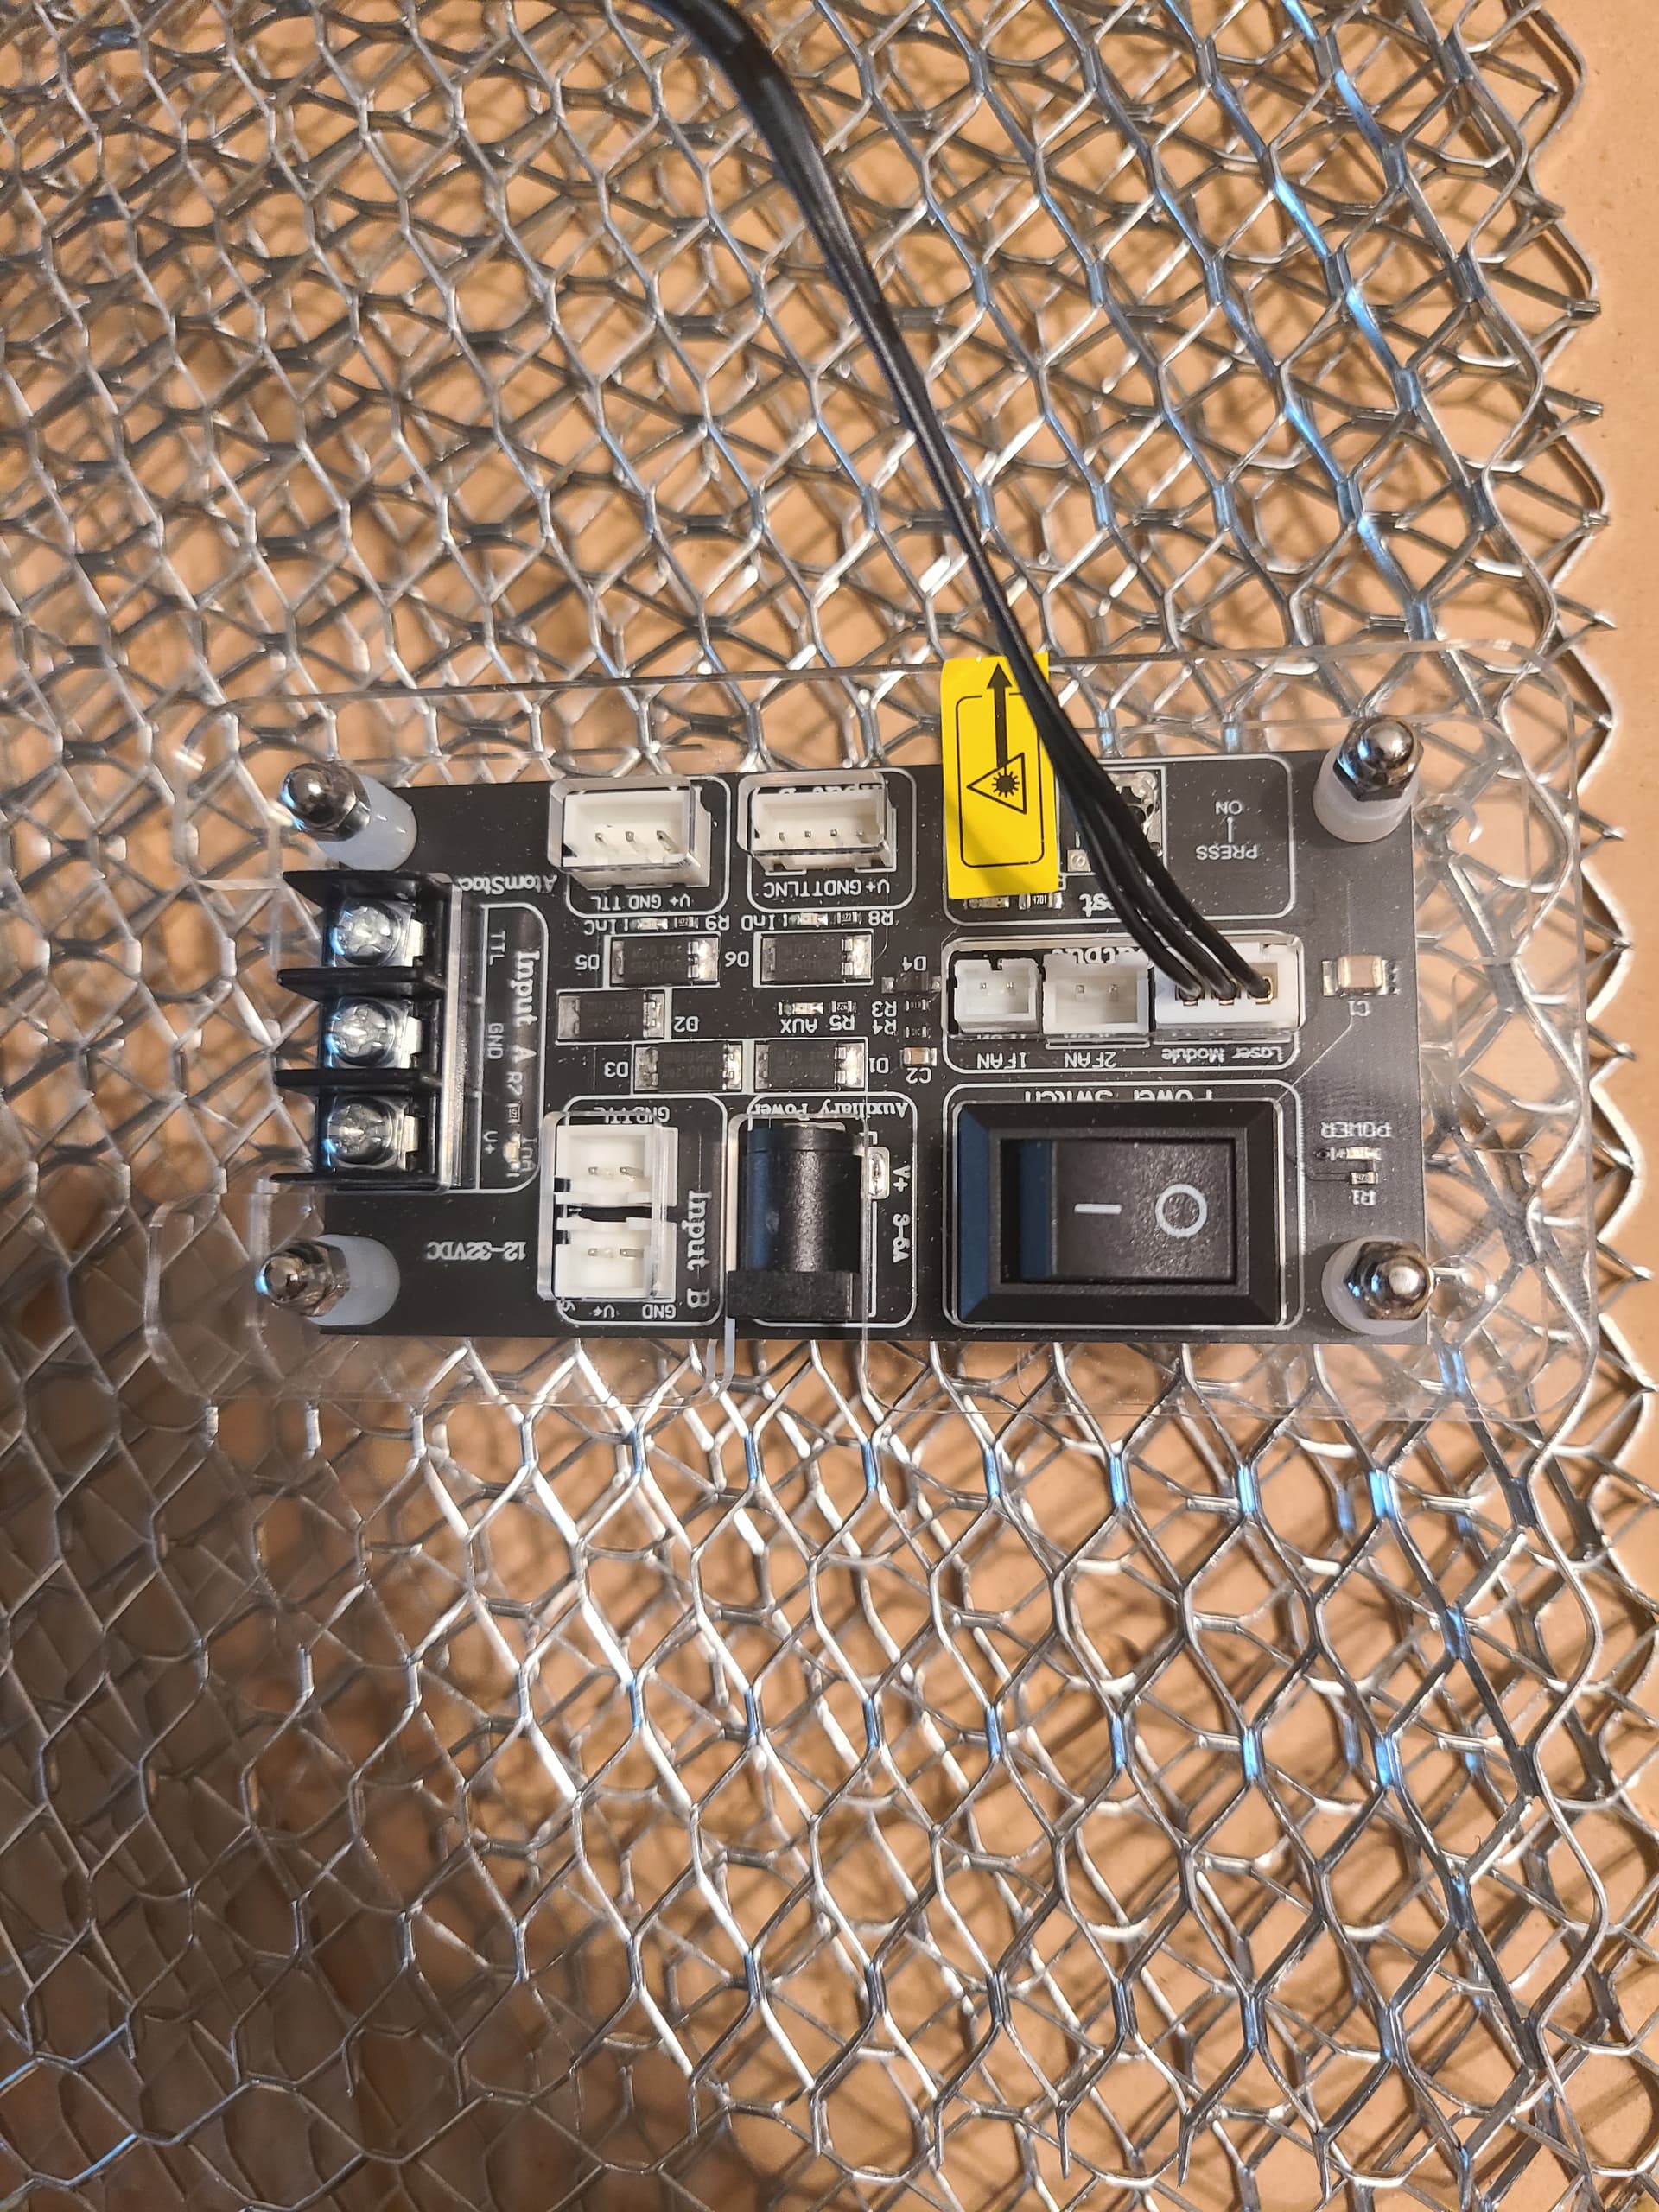
According to the link I found, it came with a power supply, so I assume you will be using their power supply. If so, the power supply plugs into the female barrel connector on this board. To connect to the SKR Pro, you can use Input B from this board. The TTL line goes PC9 on the SKR Pro, which is in the Extension 1 block. You can find a pinout diagram for the SKR Pro here. You will also need to connect the ground pin on the laser board to any ground on your SKR Pro, including the one adjacent to PC9.
If you want to power your laser from the same power supply as your MPCNC, the MPCNC power supply needs to be big enough to support both the MPCNC and the laser. As for connection, it is best to connect that power directly from where it enters your SKR Pro board to the screw terminals on the laser board.
2 Likes
I tried connecting through “input B”, and PC9, but i cant make it fire. Am i missing something in the firmware maybe? I thought the laser was enabled, based on the previous posts, but i dont know enough on this stuff to be able to identify if something is missing. Intried using the g1 codes and the m codes and nothing
Laser is enabled in the SKR Pro firmware. The laser stuff was overhauled in the latest version of Marlin. In order for inline codes in G0 and G1 to work, you must first send:
M3 I
But straight M3/M5 g-codes work without needing this initial g-code string. As a start, I recommend carefully hooking up a multi-meter to PC9 and ground. Then you can send an M3 or an inline G0/G1 command and see if the voltage of the pin goes up. Note there is also a new feature in the latest version of the firmware where the laser pin will turn off if Marlin has not received a move command in 1s. These new features are in version 515. Things are simpler in 514 and below, but you don’t get the new laser code.
Anyway, if the pin voltage goes up, the issue will be in your laser hookup.
Edit: I also noticed that Input has two 2-pin connectors. To be on the safe side, use the pin closest to the TTL label for your PWM wire.
3 Likes
That thing is a beast!
Lots of inputs there, do you have a link to the manual or anything?
1 Like
Ok- quick Q for people already using a laser
Assuming everything is hooked up correctly to the skr pro1.2 (pin9 and ground, independent laser Power supply) and I’m using the latest updated software
And I have M03 l at the start
Is it really as simple as assigning an inline S## value to control the laser pwm?
Assume pwm range is 0-255, then 50% power would be S127
G01 x50 y150 f240 s127
G01 x100 y150 f240 s127
Will etch a 50mm line in X direction at 240mm/min at 50% power.
Is that really all there is?
That should do it. Make sure to drop an M5 as the last line just to be safe. I don’t think that is needed unless you have an enable pin, but I am not really sure, that is a guess.
cheers ryan
you and the other ‘forum leaders’ and users have done a stellar job on making everything work together so seamlessly. i cant believe i can run 4 wires and add a couple parts of gcode and have a 5x3 laser cutter.
2 Likes
Junkies??
2 Likes
Pushers/Dealers…
2 Likes
I would also love to see that particular laser in action as I’m looking at it as well. Did you get it working?
ok, i was able to get it up and running. I think there was a wiring issue as the PC9 pin did end up working out. I was able to get it connected to Lighburn and do a test fire at different power settings, but other than that, I have no clue what I am doing…lol. I am just continuing to research calibration techniques and I don’t know much about focal length, focus, speed, power, etc.
Thank you very much for your help.
2 Likes
nope, I can’t find anything online. Just the manual it came with, which only gives information on the initial setup. Very basic and not useful.
But you all got me there. Now I just need to learn how to use it. any resources you all have for calibrating, determining speed, power, etc. would be beneficial.
Thanks again.
1 Like
crazy that for the price of that thing, there’s essentially zero info or support.
Good luck figuring it out.
2 Likes
right, i sent them a message for more info. Hopefully, they have something. However, I will say it is kinda my fault for jumping into the deep end, and I don’t even know how to swim. lol
1 Like