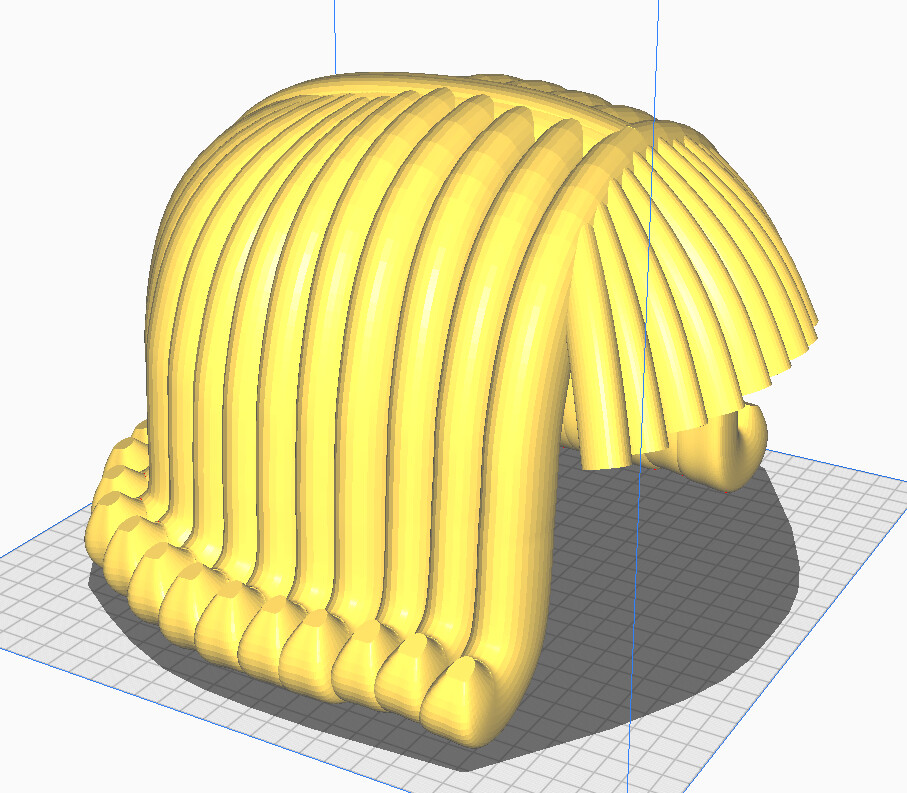
Because budget is running low we want to make the wigs from paper mache and paint them. To make all the wigs the same I need a mold. I tried to make a mold from gypsum, but it was a fail, I could not get the printed wig out of the mold.
My idea now is to 3-d print the mold of the outside of the wig, so we can put the paper mache inside, let it dry and make the next one. The inside is not important and doesn’t need a mold The problem is I don’t know how to make the mold. Is anybody willing to help me with this or can someone point me in the right direction, so I can print a couple of molds?
They have to be ready in July, so the group can practise with them and make adjustments so they fit snugly on to their hats. No real hurry, but a working prototype would be nice
I’d prefer a printed mold, I think its easier to keep its shape when putting the paper mache in.
I have thought about printing the wig , but it takes a lot (too much) of pla and time… Paper mache almost costs only time and everyone can do it. I need my time for the rest of the scenery for this musical…
So when a couple of player are busy with the paper mache, I can build the castle of Duloc, the house of shrek etcetera…
Are you having trouble using CAD to make the negative? Or are you asking how to make the mold in other materials?
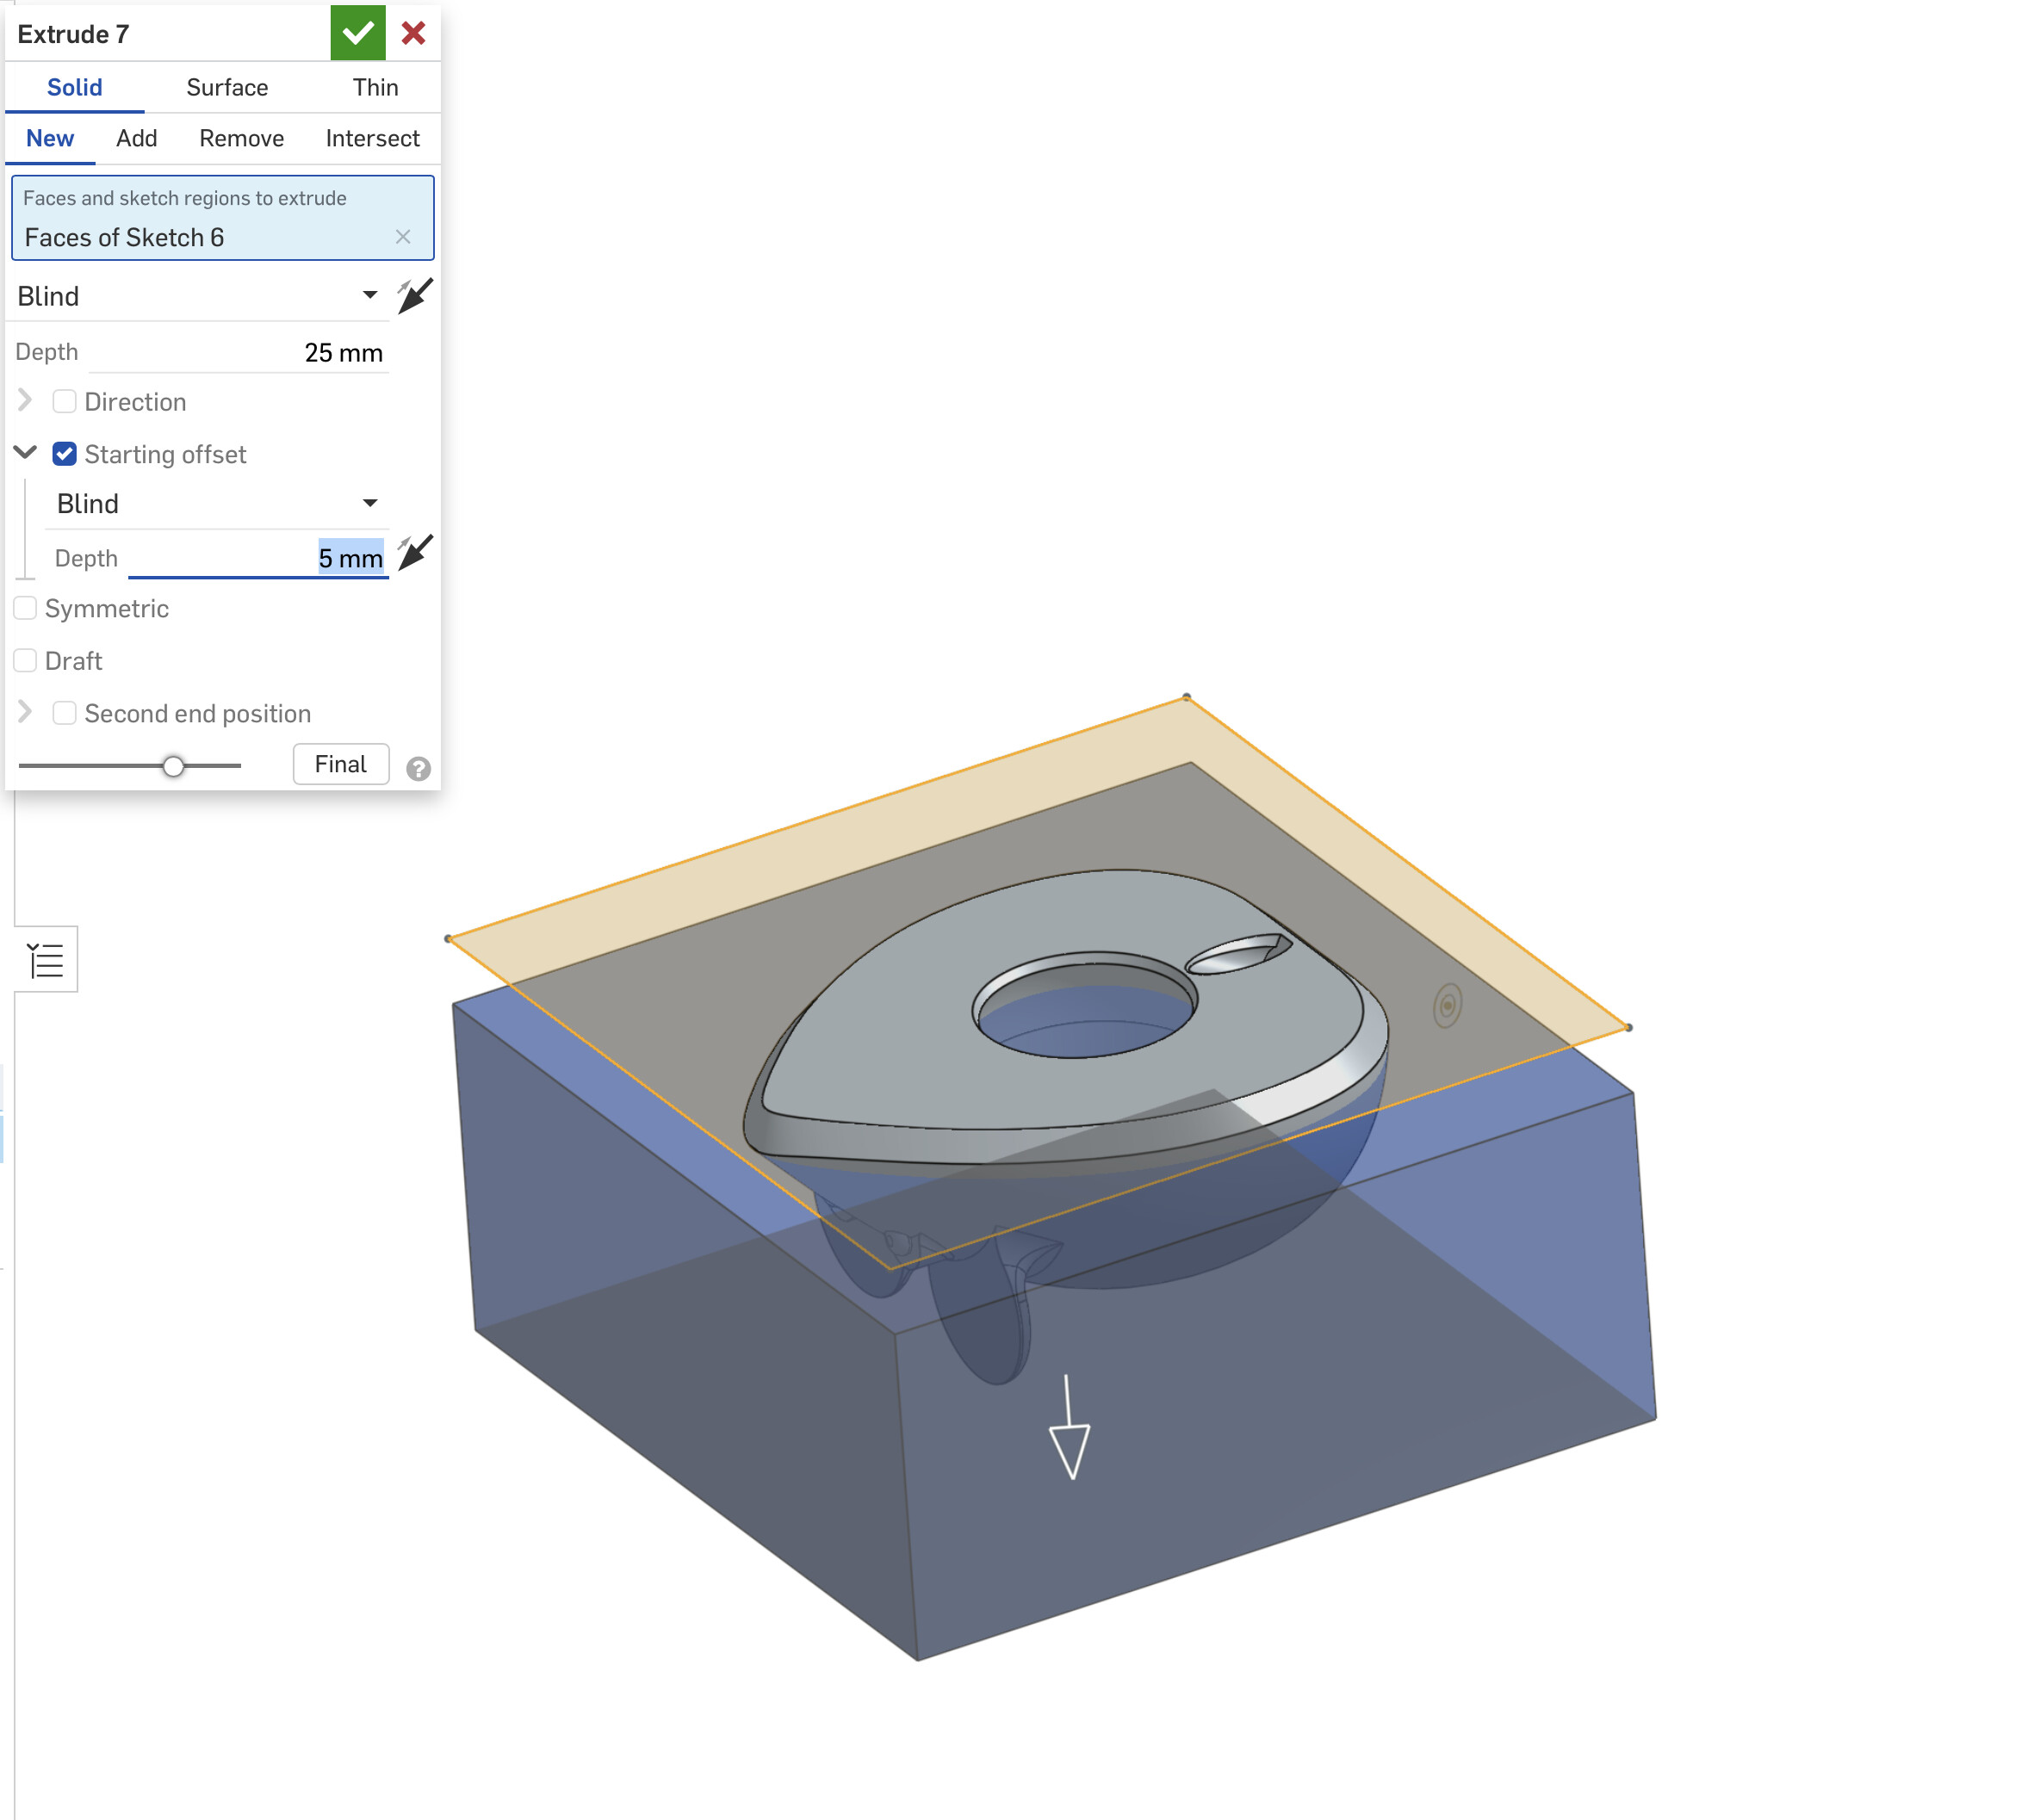
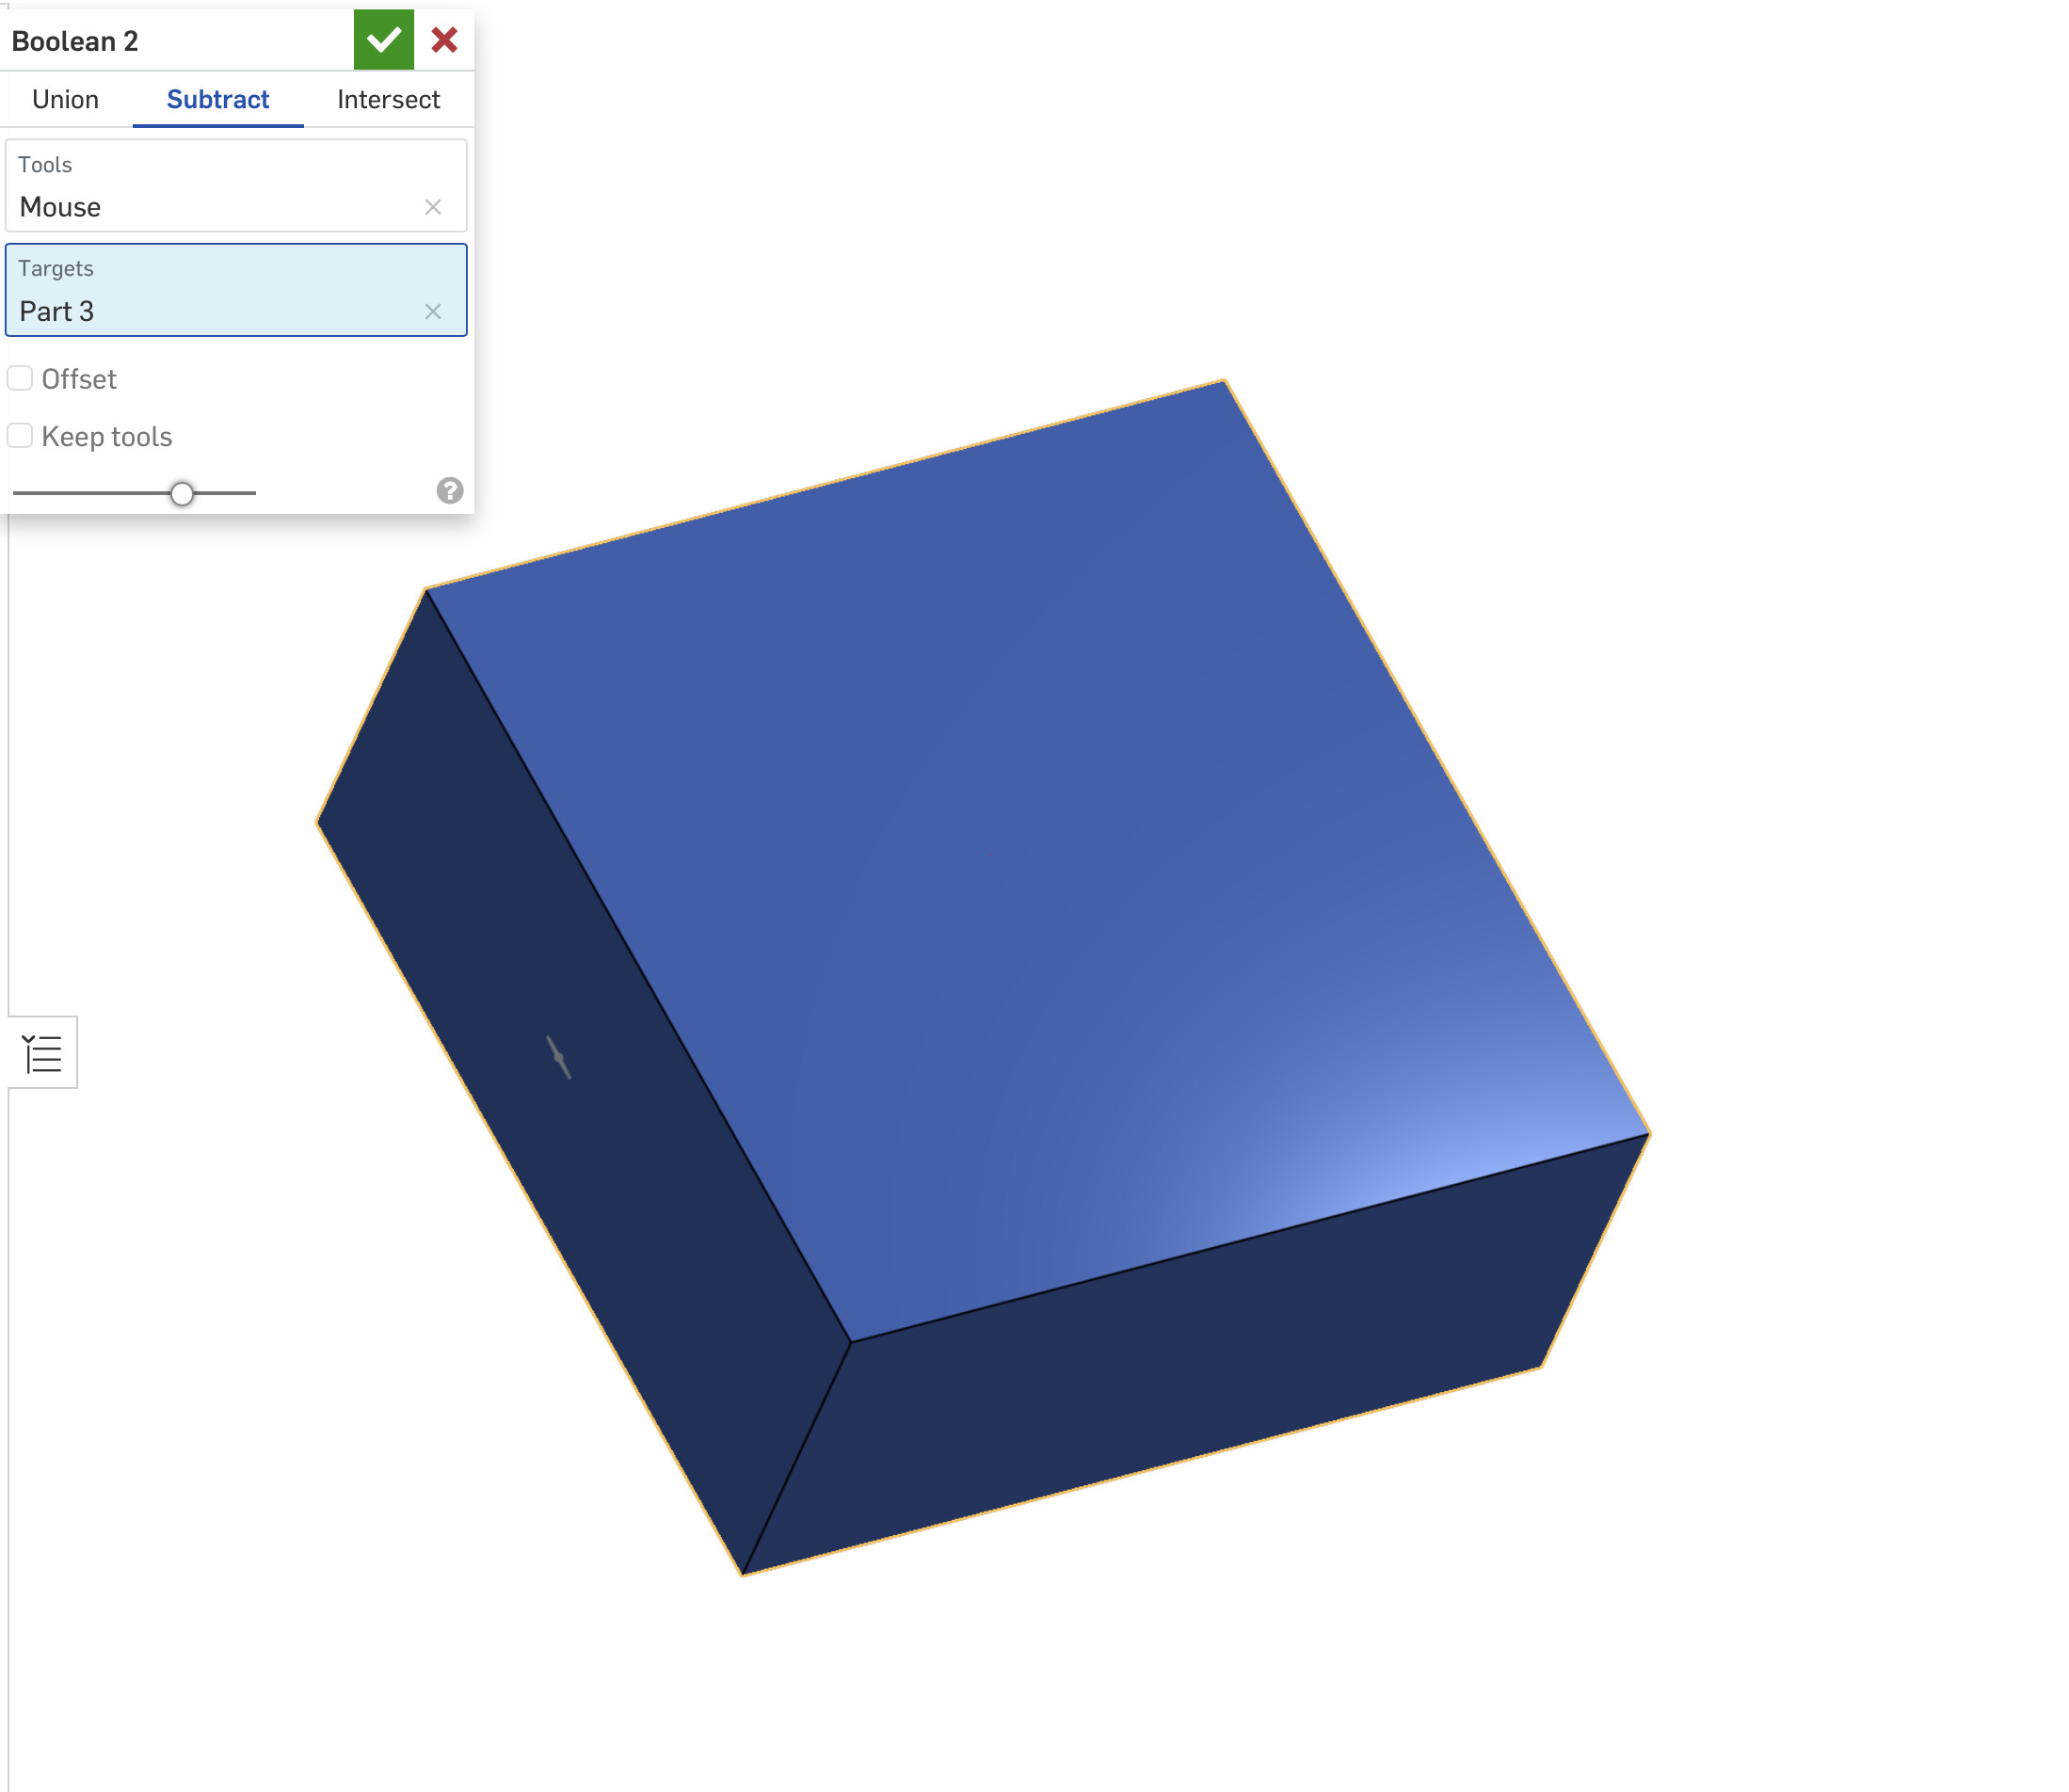
If your cad object is a solid, you should be able to draw a block (or a few) and do a subtract (sometimes in the union menu) to remove the wig from the block. You might have some extra chunks inside the wig, which you can cut away in CAD.
In real life, I’m not an expert, but Tom is. I was guessing silicone. But I also thought of plaster or paper mache. There is silicone you can buy that holds its shape. Maybe that is easier to make a mold like this. IDK.
I would suggest printing a positive shape (multiple parts and assembling if necessary), then using silicone to make a negative copy of the exterior, and then using the interior of the silicone negative to make your paper mache props.
After you’ve done the silicone but before removing from the master, maybe some spray foam on the outside of the silicone you can make a support so that it doesn’t wobble/deform when you’re making your paper mache copies.
Rigid molds tend to be very hard to separate. They can very easily get trapped, especially if they are not designed specifically with casting features like draft angle. Using silicone as an intermediary allows removal of the mold from the master and also removal of the final part from the mold.
I used this process once before to cast metal with an extra step:
3D printed negative
Silicone positive
Plaster negative (single-use disposable)
Metal positive
The shape of the part (no draft, mild overhangs) would not allow separating the printed part from the plaster, but with silicone it was possible.
The first, I’d like to make a mold in CAD from the positive I have now.
The problem is that the stl is not completely solid. When I try to make it solid, some pieces dissappear. My skills in this region are not good enough (yet).
Me neither, I’m afraid. Making a solid from a mesh is hard. It might be easier to import it into cad and use it as scaffolding to draw a new solid shape. But that design seems hard to do in cad. Any way your son knows how to make it solid or fix the gaps? I have no idea how to blender.
Armchair crafter incoming, so foam the deck and break out your extra-coarse kosher sea-salt!
Whatever your mold base is, it needs to be water-proof(ish). So no gypsum/plaster molds. A printed mold might work, but you’ll have to be very careful of undercuts. Sounds like you’re pretty short on time, so that may still be your best bet. But for overall skill-building, I’d be tempted to use a silicon mold with a plaster mother. basically, take your printed wig, coat it in a thin layer of silicon (to get all the detail, and ensure you don’t have any really nasty bubbles on the surface), let it set, then coat that in a thicker layer of thicker silicon (silicon permanently bonds to silicon, and you’re building the “meat” of your mold here and getting rid of any undercuts). Once that has set, build a plaster mother mold around it to provide solid support (keep it from deforming when you’re working with it, probably easiest to do with plaster tape). Once the plaster sets, pull off the mother mold. Then you can extract your printed master from the silicon mold. The mold pops back into the mother mold for support while you build up your papier-mâché models. After they dry, you can take the silicon out of the mother mold to give you the flexibility to demold the wigs without undue stress on the final product.
Maybe tpu could work when I was doing some forged carbon molds it was tricky as the layer lines act like Velcro.
Even with mold release it was tricky. And draft angles are key.
There are a zillion ways to achieve what you need. I’ll have a crack at making a negative STL , but papier mache will work for the mold as well, reinforced with corrugated cardboard, Theatre stuff is viewed from a distance so the “3metre rule “ applies- if it looks ok from 3 metres away it is ok!
We need a Blender expert for that I’m afraid to repair the model - I’ve tried to repair it Meshmixer and also in PrusaSlicer, but there are some super interesting problems with the model!
It’s probably easier to identify the issues and export the solid from Blender.
As @jeffeb3 said, once you have an stl you can work with a “boolean subtract” from the mesh should be an relatively simple thing for your cad programme.
Here are the steps in CAD - (Onshape, but the principals are the same.) Think Archaeology - enclose it in a solid then chip away everything you don’t need till you find the fossil!
I think given your issues with the model and the time take to print it - you could even use the existing model as a positive mould - lay your papier mache over the top a few layers thick to speed up drying - then go back from the inside at your leisure to reinforce as you will.
You won’t have a perfect reproduction of course, but it will be more than good enough!
Thank you for all your answers. I will try to motivate my son to try your recommendations in Blender this evening (its 7.40 now, he has to go to school, I have to go to work. I will report back tonight!