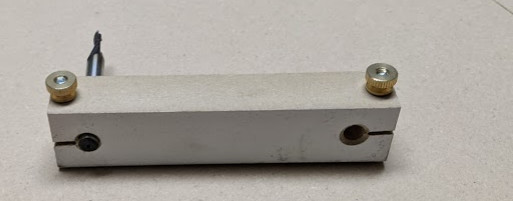
So after setting up the rails to the level, I checked perpendicularity of the router using a method that has been posted here before, I just used some “learner” bits and a block of wood with a clamp screw and chucked it in the router.
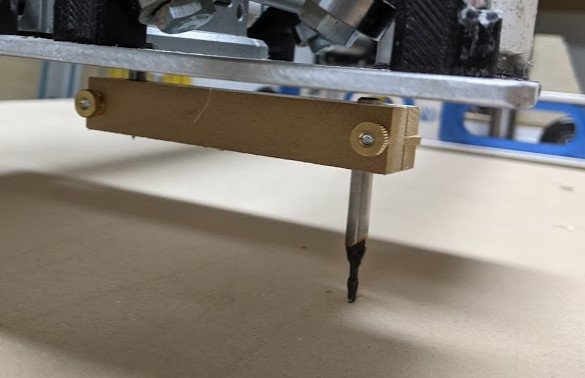
I lowered it to the table and checked the gap under the bit, there is lots of flex in this setup so its pretty heard to measure. From what I could tell I had a difference of about 0.05mm in the Y direction. Since this is actually 0.05mm over something like 4" (diameter of circle created by the bit) I was more than happy. I had more issues in the X direction. I tried adjusting the tension on the X roller brackets, that did not really do anything. Then I realized I could just shim my parallel blocks that I use to set the Z initially. These are just two pieces of mdf trim that I put on the spoil board and then lower the X rails to that. I don’t zero it on the 3d printed parts because those parts are not critical and will have deviation.
Long story short after adding tape to the parallel rails I was able to level out the X.Having the bit lightly touch the surface makes a faint scratching sound on contact. Spinning the arm 360 degrees needs to make a consistent scratch sound. I took points throughout my table and it all sounded the same… good enough for me.
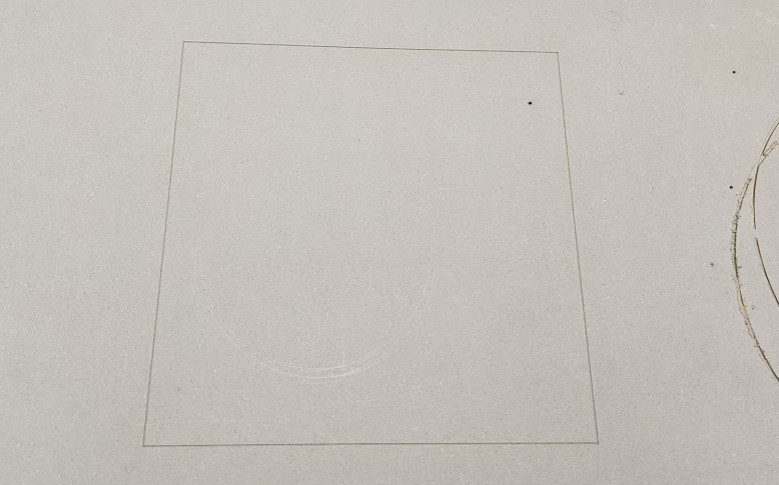
Ran some test cuts, 60 degree V bit, 1mm into the surface and a 300 x 300 square results in measuring tape perfection corner to corner and consistent groove width indicating everything is running true.
I have never surfaced my table top or my spoil board, they are 1" mdf and 3/4" mdf on top with the 1" board just floating on the legs to keep it flat.
I will try surfacing some signs soon, I had some issues with signs on Friday and I think my issue was that my rails were significantly out of true. Hope this helps you get yours dialed in as well.