Hi,
I’ve been doing a few test cuts this morning. Simple circles. I drew a 64mm diameter circle. That’s all. i used Estlcam to create the outside cut path, and then to Repetier Host to do the cutting.
Three things I’m not wild about:
(1) First, the “circle” is only approximately round. It is oval - with about 4mm difference in diameter measuring the smaller and larger diameters.
(2) The sides are not round, but a series of straight lines. From what I’ve read, this second issue is to be expected I guess, but it’s disappointing nevertheless.
(3) Finally (and most importantly) the drawing was 64mm diameter. The “circle” ended up 73mm and 76mm respectively.
Are any of these things acceptable in your experience?
Duncan
Sketchup/Estlcam/Repetier Host
3mm single flute bit
20000rpm
Feedrate: 20mm/sec
Material: 3mm plywood
None of these are acceptable.
Something is not setup properly in your build, you should have tolerances better than 0.5mm and it should be equally accurate on all axis.
Please describe your machine, what board are you using? what firmware? how did you calibrate it?
Pictures and exhaustive information will go a long way to help troubleshooting
Hi,
Thanks for the speedy reply.
Rambo 1.4
Firmware from V1 Engineering
Calibration: I didn’t. I’m un clear about what I need to do. Maybe this is what is wrong… Bugger.
Sketch up isn’t great at circles, but I think you can increase the number of sides with a setting. The circles I’ve cut have been round enough I have never noticed any flats.
You shouldn’t have to “tune” any distances. At least nothing that would make that large of a problem. You should be able to jog 100mm in a direction and the bit should move 100mm, or at least within a mm.
I would start with some pics of the machine, check your grub screws on the pulleys. You can also buy some hd purple /pink foam and cut that remove any question that the problem is feeds or speeds or load.
We can help, and we’ve seen a lot before, but ultimately, it will be your fingers that find what is loose or tight.
Hi Jeff,
Cutting foam.
Sketchup number of sides increased to 80 (too small to see straight lines)
Diameter = 64mm
Checked grub screws - all OK
Jogging along Y-axis 100mm = 100mm of physical movement
Jogging Z = 100mm, physical movt = 100mm
Jogging X = 100mm, physical movt = 97mm…
Hi again,
OK, I’ve searched for a solution, and it seems I have to calibrate my X-axis steps/rev.
Copied from another post:
For example, if you commanded 100mm and actually only moved 98mm and your current steps/mm setting is 80… that setting needs to be increased to add enough steps to make up the 2mm it fell short. Use the following to determine the new steps/mm setting…
(Commanded movement / actual movement) * current steps/mm setting
so, plugging in the values… (100/98) * 80 = 1.02040816327 * 80 = 81.63
Adjust the steps/mm setting to 81.63 and rerun the test…
But what the post omits to mention is WHERE do I make these changes? In the firmware?
Hi. Found it! It’s in the LCD screen attached to the Rambo card.
Now for the other issue:
My circle is supposed to be 64mm in diameter. But my cut is 74mm in diameter. Any suggestions of where I might look for this anomaly?
Your steps/mm shouldn’t be that far off. So something else is wrong. The components are all very precise and they shouldn’t be off by 3%.
The stepper has exactly 200 steps / rev. There’s no way for it to be 199, 201, or 200.5.
The driver has exactly 16 microsteps/step. The chips are very good at counting.
The pulley has exactly 16 teeth (you can count them).
The belt has 2mm/tooth. This can be 2.01mm or 1.99mm, but it’s not a rubber band, it is reinforced with fiberglass and is very resistant to tension. You’re moving less than the desired, so stretch is not the issue.
So you should have exactly 100 steps/mm, except for belt stretch. I haven’t ever seen a belt have a pitch of 1.94mm/tooth, but you can count out 20 teeth and measure them yourself if you think that is the issue.
So changing the steps/mm is a bit like “teaching to the test”. You have made it harder to see the problem, but you haven’t fixed it.
Post some pics and pay close attention to how it moves.
Hi Jeff,
I’ll get back into the workshop as soon as I’ve finished my morning coffee and make some very careful measurements - with photos if they might be useful. I’ll double check Ryan’s original configuration.h file to verify I haven’t introduced anything weird.
Hi,
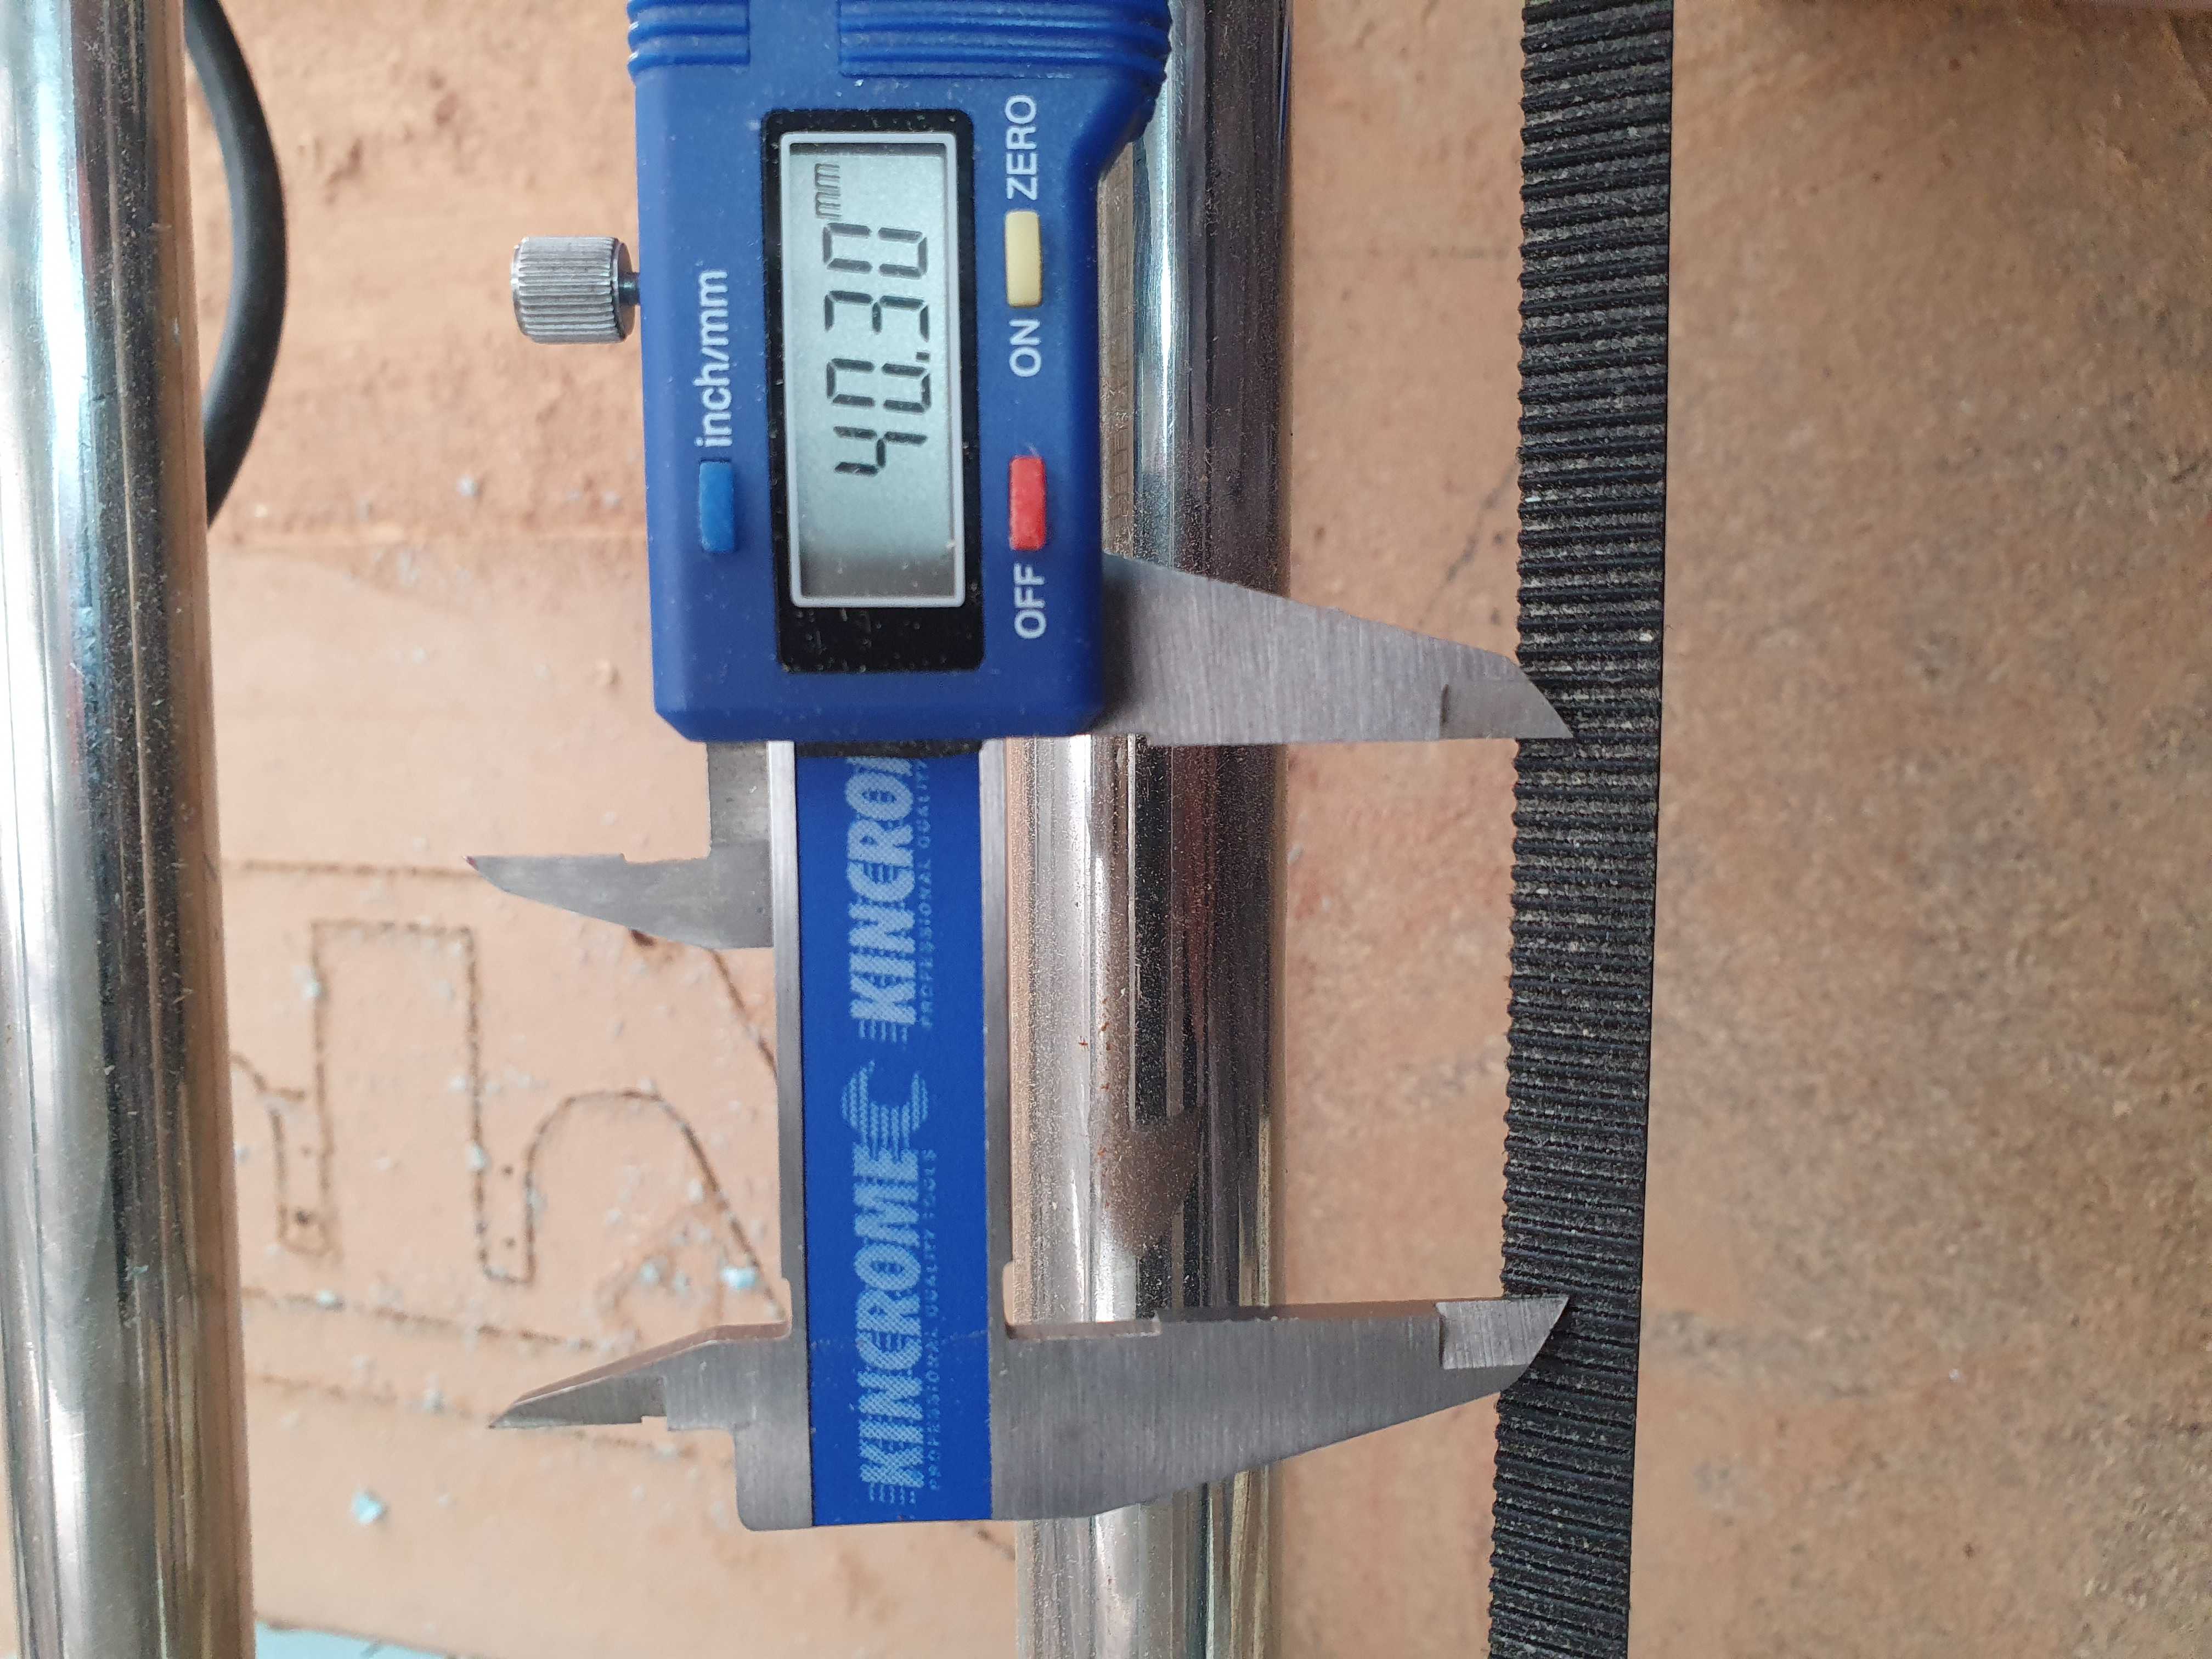
I understand your comment regarding teaching for the test, but I double-checked everything - grub screws, belt: 20 teeth = 40.3mm, steps/mm (100,100,400). But my 250mm x 250mm square came out as 276 x 279 So I changed the steps/mm to 91.2 x 90.6. The square now cuts precisely 250 x 250.
So I have no idea whyb this is happening, but for the moment I have a fix, and I can begin cutting some more test parts before putting nan expensive piece of aircraft ply on the table.
Test with all the mills you will use under over size will make a difference but not that much also in your drawing and cam make sure it is cutting on the right side of the line thise are small errors I had. I have never even seen a sheet of aircraft ply would not to make many mistakes
Grub screws are crafty be real certain to push pull till it skips in all access on all 4 motors by hand with power to the motors and no movement happens in any directions 3mm is about the amount of movement I had when mine were lose but still caught at the edge of the flats
Is that a 3mm doc with a 20mm/sec feedrate? If so you may want to start with something much more conservative for a test like this. I’ve run into issues with ovalization of circles and other deformations from what I assume was some deflection in the bit. Dial it way back and see how the measurements go, like 5 to 8mm/sec at that 3mm doc. It’s a simple change to test.
I realize you are out a significant amount on the diameters expected so this may be only part of a solution.
Hi,
I was cutting Blue foam, so I thought the feed rate was OK. But problem solved. Beautiful round (and square) cuts in the foam with almost no deviation at all. 64mm diam circle is now 64.08mm and 64.09mm VERY happy with that. This was in the foam. Now I’ll try it with some 4mm plywood and see how she goes. For this I’ll reduce the feed rate to 5mm/sec and do two 2mm passes.
Cheers.
And a lesson for new players using Sketchup… Measurements in SU are just plain wrong. Off by just over 10%. If you are using Sketchup to do CAD, that’s fine (I really like the application, and intend to continue using it because it is so easy), you MUST run the DFX files through some other CAD software, and scale it properly. After that, all plain sailing.
Okay, I’ve been waiting all day to hear Duncan’s results… so, I’m chiming in! And I’m thrilled that worked for you, Duncan. I’m the source of that quote you shared a few posts ago… but every time I’ve shared that calibration process, I’ve gotten a surprising amount of “push-back”, primarily from Jeff and, occasionally, Ryan. Don’t get me wrong. I love these guys to death… but, in this case, I can’t agree with them
As good and precise as Jeff insists those components are, they aren’t “perfect”… there are manufacturing tolerances and when incorporated into an assembly, with other imperfect parts (especially relatively soft/flexible parts, such as belts and tires), there is sometimes need of “adjustment” for utmost accuracy. Testing and adjusting works in industry (you don’t just throw “assumed good” parts together and expect it to automatically work)… and it works here as well.
This is IMO too general a statement to make, Jeff. Like Duncan, I know that when I carefully check, and double-check, everything and I am certain everything is assembled as solidly and accurately as I can make it – and I can get the same REPEATABLE “almost correct” result every time I test it – then I don’t see the machine having a “problem”, as “flawed”, and in need of “fixing”… it simply needs adjustment – and that’s not a bad thing. “Close” may be good enough for some folks and for many end uses… but when, for example, I’m engraving a ruler, I don’t want just “close”… I really want it as accurate as I can make it. And it gives me a far greater sense of pride when I know this machine that I’ve built can repeatably give me that kind of accuracy.