Looking at picking up a (preferably cheap but still good) hot air soldering station. Looking for suggestions on what’s worth getting and what to stay away from. Noticed several on amazon in the $45-60 range. Sure would love to be at the $45 end but not if its just not worth it. I have plenty of “normal” soldering experience and find I’m not too bad at it. Many who are way better but I can get the job done 99% if the time. But hot air I’ve never messed with only seen YouTube for it lol. My reason is linked here. I smoked 2 SKR Pro 1.2 boards this week. Both the exact same way and same chip. When the second one went tonight I thought why not try to fix them. Not like I can break them anymore than they are now.
Linking an example from the other thread:
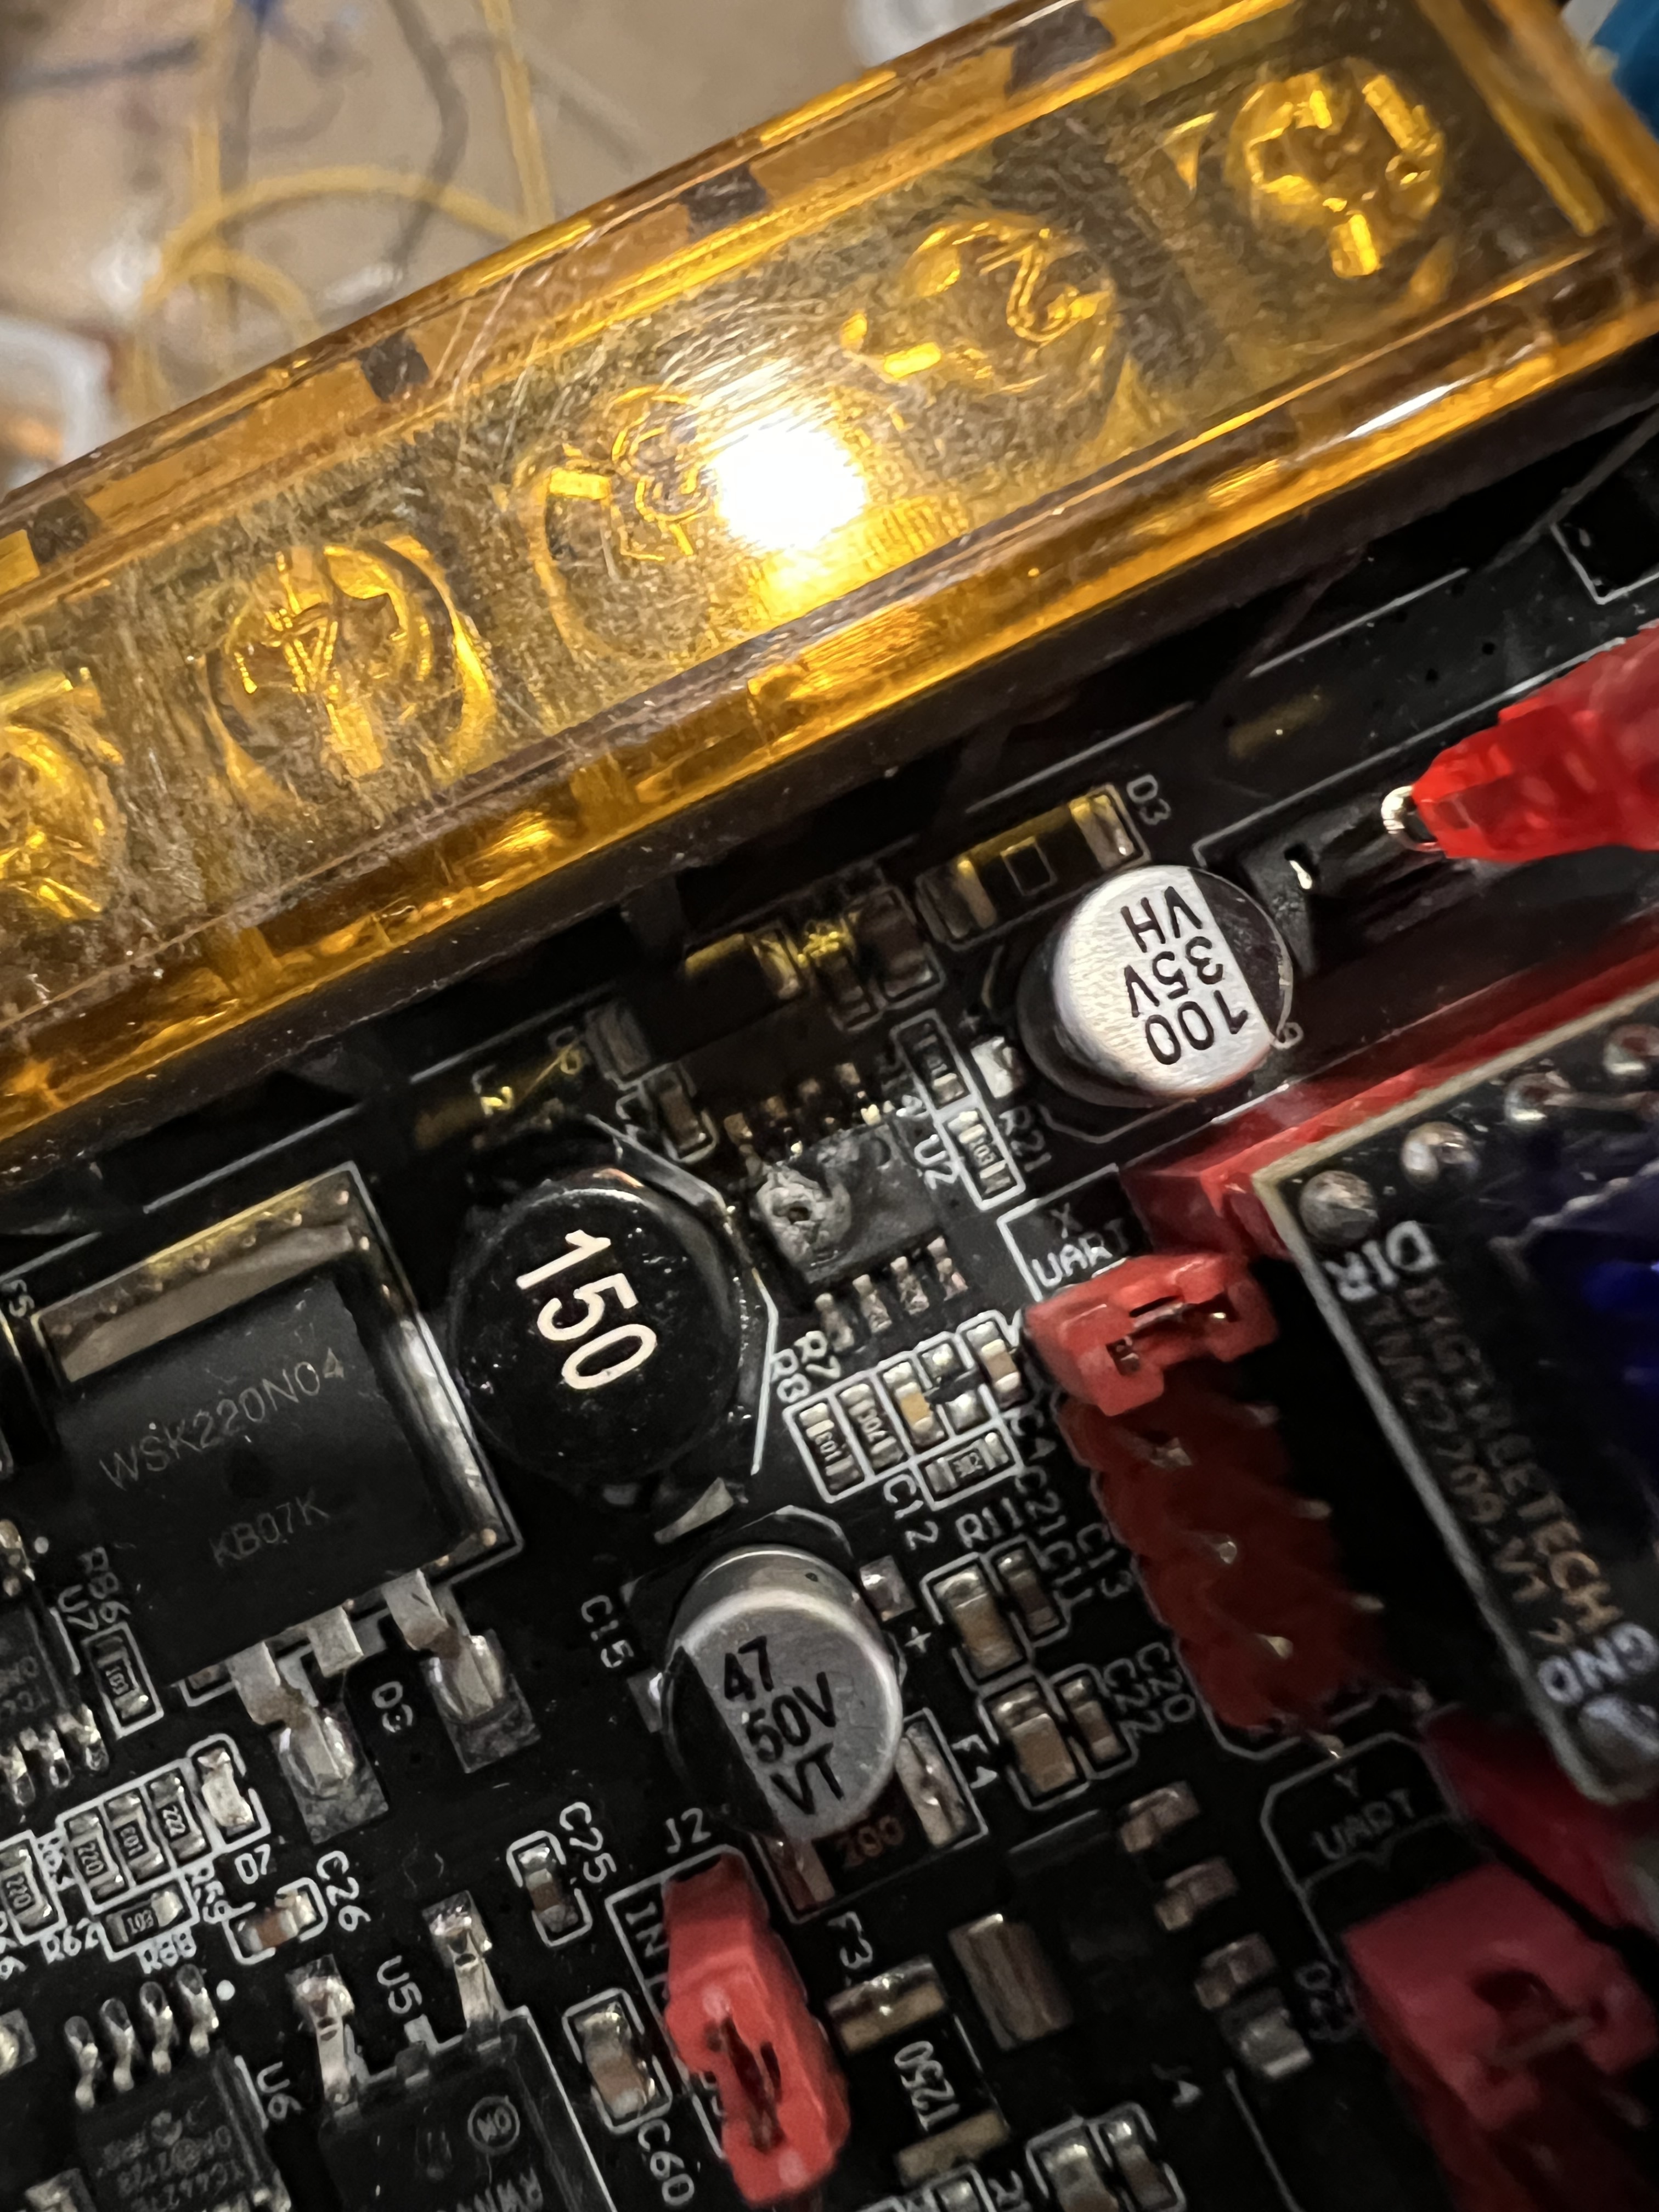
One observation about this particular situation is that is a REALLY dense space to be attempting a rework.
You’re at risk of melting headers, terminal guards, or blowing small SMT parts all over when doing the rework.
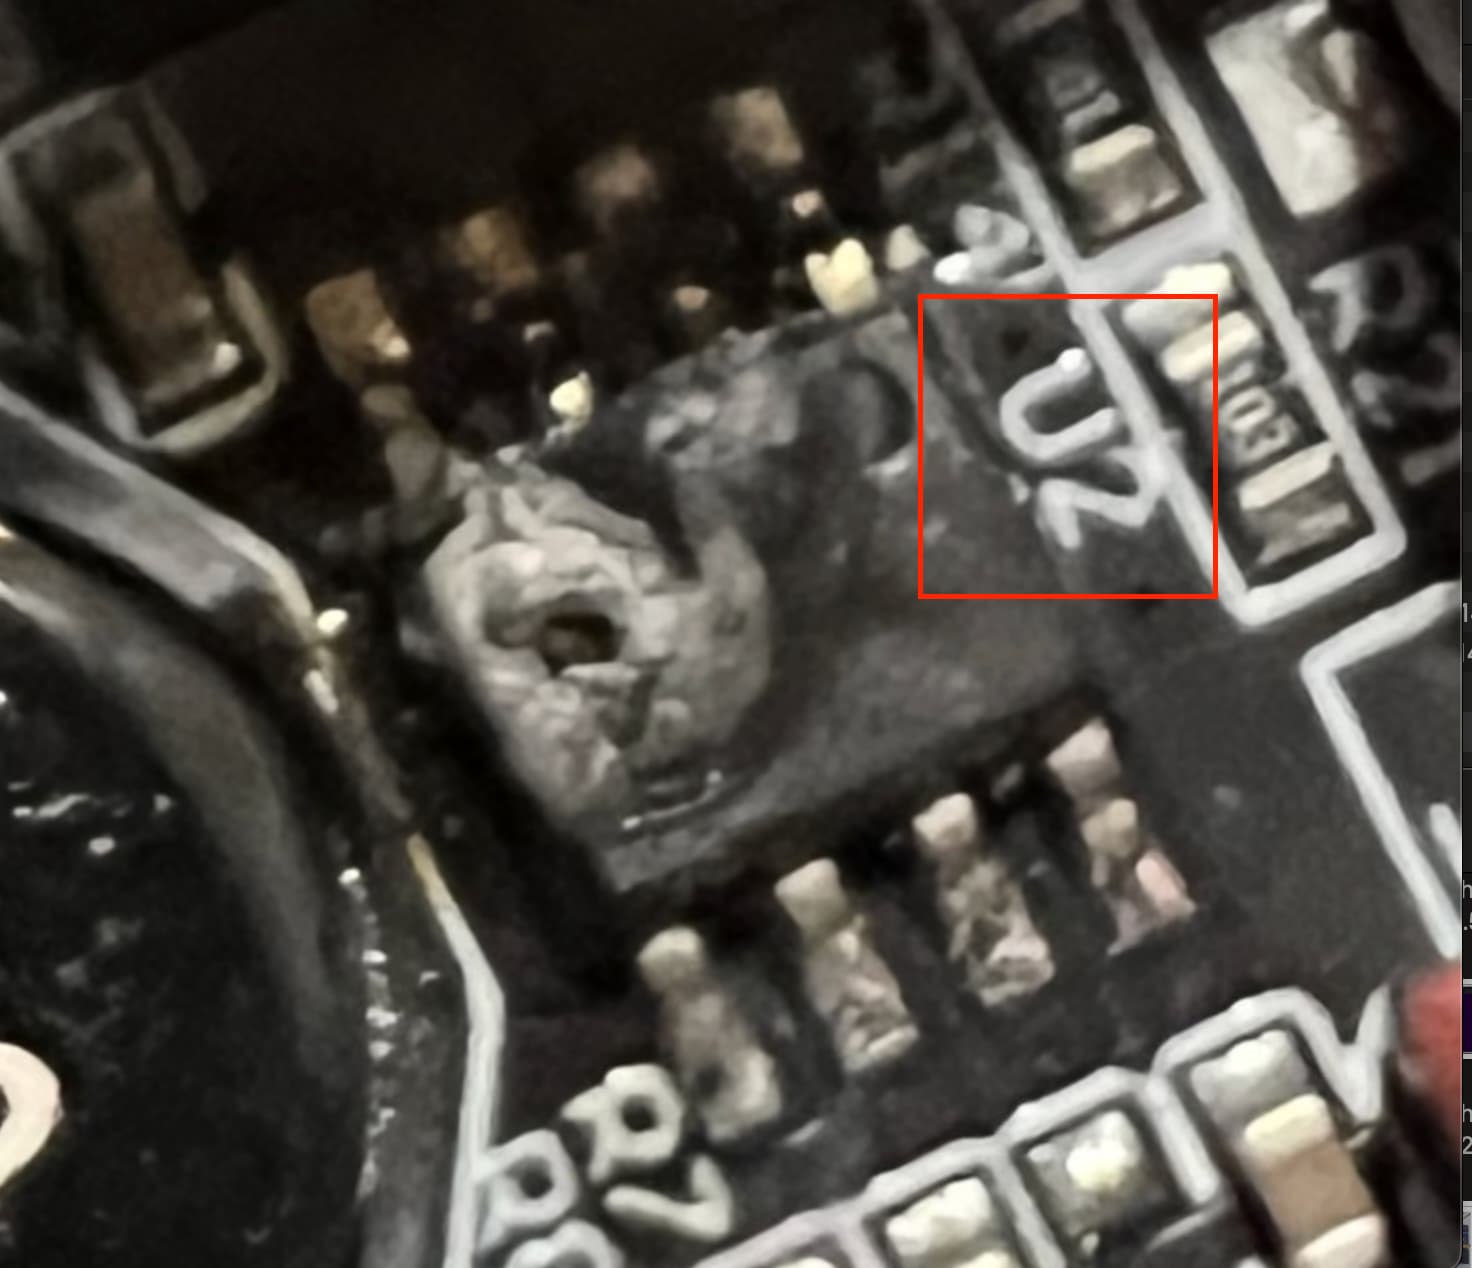
If it were me, I’d consider a different way to replace U2.
- Get some really sharp, really fine side cutters.
- Cut off the failed U2 at the body, cut the leads at the top of the plastic, leaving the leads on the pads
- Use a soldering iron to melt and remove the clipped off leads. Can use chipquick if necessary.
- Re-tin the pads and put down some no-clean flux
- Position the replacement part, and solder it. I’d consider dragging a tip across the part- it’s a learned thing but I’ve found it easier than pinpoint soldering the leads.
- You can consider some mounting putty to hold the IC in place at the ends while you solder in the replacement. There are more expensive purpose putty used by industry but these style seem to work for me.
3 Likes
Is you current soldering iron adjustable? I’ve personally had better luck with those than hot air stations. But I never really got adjusted to them so one could say I didn’t give it enough of a chance.
Edit.
People seem to really like the Yihua brand
If you’re willing to spend $80 they have one
1 Like
Yes, I have 2 and both are temp adjustable. One goes lower than the other. I think my big station only goes down to 392°C while the Pine64 can go much lower.
I guess I never considered the possibility of just using a soldering iron on that. I would be much better suited for that. I’ve never attempted anything that small but sure wiling to give it a try, and with more confidence than a hot air station. Now to just figure out what part I need to order lol, although it seems like @MakerJim already knows lol
@MakerJim always knows ![]()
And yeah I used to tear down old boards for components I swore I was gonna reuse for other projects… all those components may still be sitting in a box… but I did get them out cleanly and have done some minor repair projects that way.
With small pins I like using the 45° tip so I can use that fine point to heat up small legs
1 Like
I got one of the cheap all in one models, the “Gordak 863”
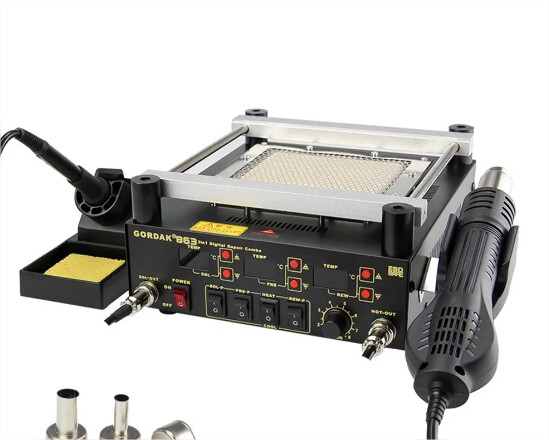
It’s pretty good, it does regular soldering, heat plate and hot air soldering. So it’s pretty much everything in a single package.
Works very well, the only thing that sucks is the aluminum bars that clamp/hold the PCB. They aren’t well designed so they don’t stay in place very well, plus it is aluminum so it gets super hot super quick when the heating plate is on.
So, on my model I made a few mods to better secure these bars and also I insulated them with layers of heat protecting tape, so they don’t burn my hands if I touch them, which happens a lot when you don’t pay attention.
So now they hold the PCBs fairly well and I can rest my hands on the bars while soldering.
Overall I think it’s pretty good. I don’t know how much it costs outside of China, I paid 53 USD for it and I think it was really a good deal.
I never used actual professional/high quality stations and I’m not an electronics engineer either, so consider this as a noob’s advice, but I also bought one for work and the guys at the factory seemed to like it.
2 Likes
I would cut the legs of the blown component, remove it, then desolder the remaining part of the legs from the PCB.
Then maybe pre tin the legs of a new component, pre tin the pads and then solder back the legs one by one.
It’s probably the easiest way to do it without risking too much damage around.
I know the point is mostly to experiment here, but in my opinion in this case you have better chances of success with a regular soldering iron, hot air soldering is trickier than you think, it tends to damage stuff around quite easily.
(Edit: I just realized now that the post I quoted the picture from said exactly the same thing, haha)
4 Likes
Well if anyone has a link to the Chip I need to order post it up please. Thanks to everyone for all the suggestions. I think doing it with a soldering iron will be a lot easier and more likelihood of success
1 Like
If it is socket u7 they list it as
AOZ1284
Not sure where to get it
Did you check Digikey?
https://www.digikey.com/en/products/detail/alpha-omega-semiconductor-inc/AOZ1284PI/3973647
Good luck
1 Like
I think attempting to de-solder that chip from there will cause other problems, it is just too confined. You will need to take special care not to overheat the electrolytic caps or melt all the plastics that are very close by. Cutting the chips pins might work but the chip will be soldered down to the pcb via it’s heatsink in the centre of the chip, you won’t be able to cut that, you must also be very careful not to damage the pcb. Another approach might be to buy some low melt solder and flood the faulty chips pins with it, this will, in most cases, enable a standard soldering iron to de-solder the chip. Then use some flux and desoldering braid to clean up the pcb.
2 Likes
I’ll see if I can find a BOM to identify it.
That doesn’t look like U7 to me, more like U2.
That made me smile!
EDIT: I was wrong! This will be a bit of a challenge to replace because it does have a center pad.
That’s definitely doesn’t but the BTT octopus schematic says u7
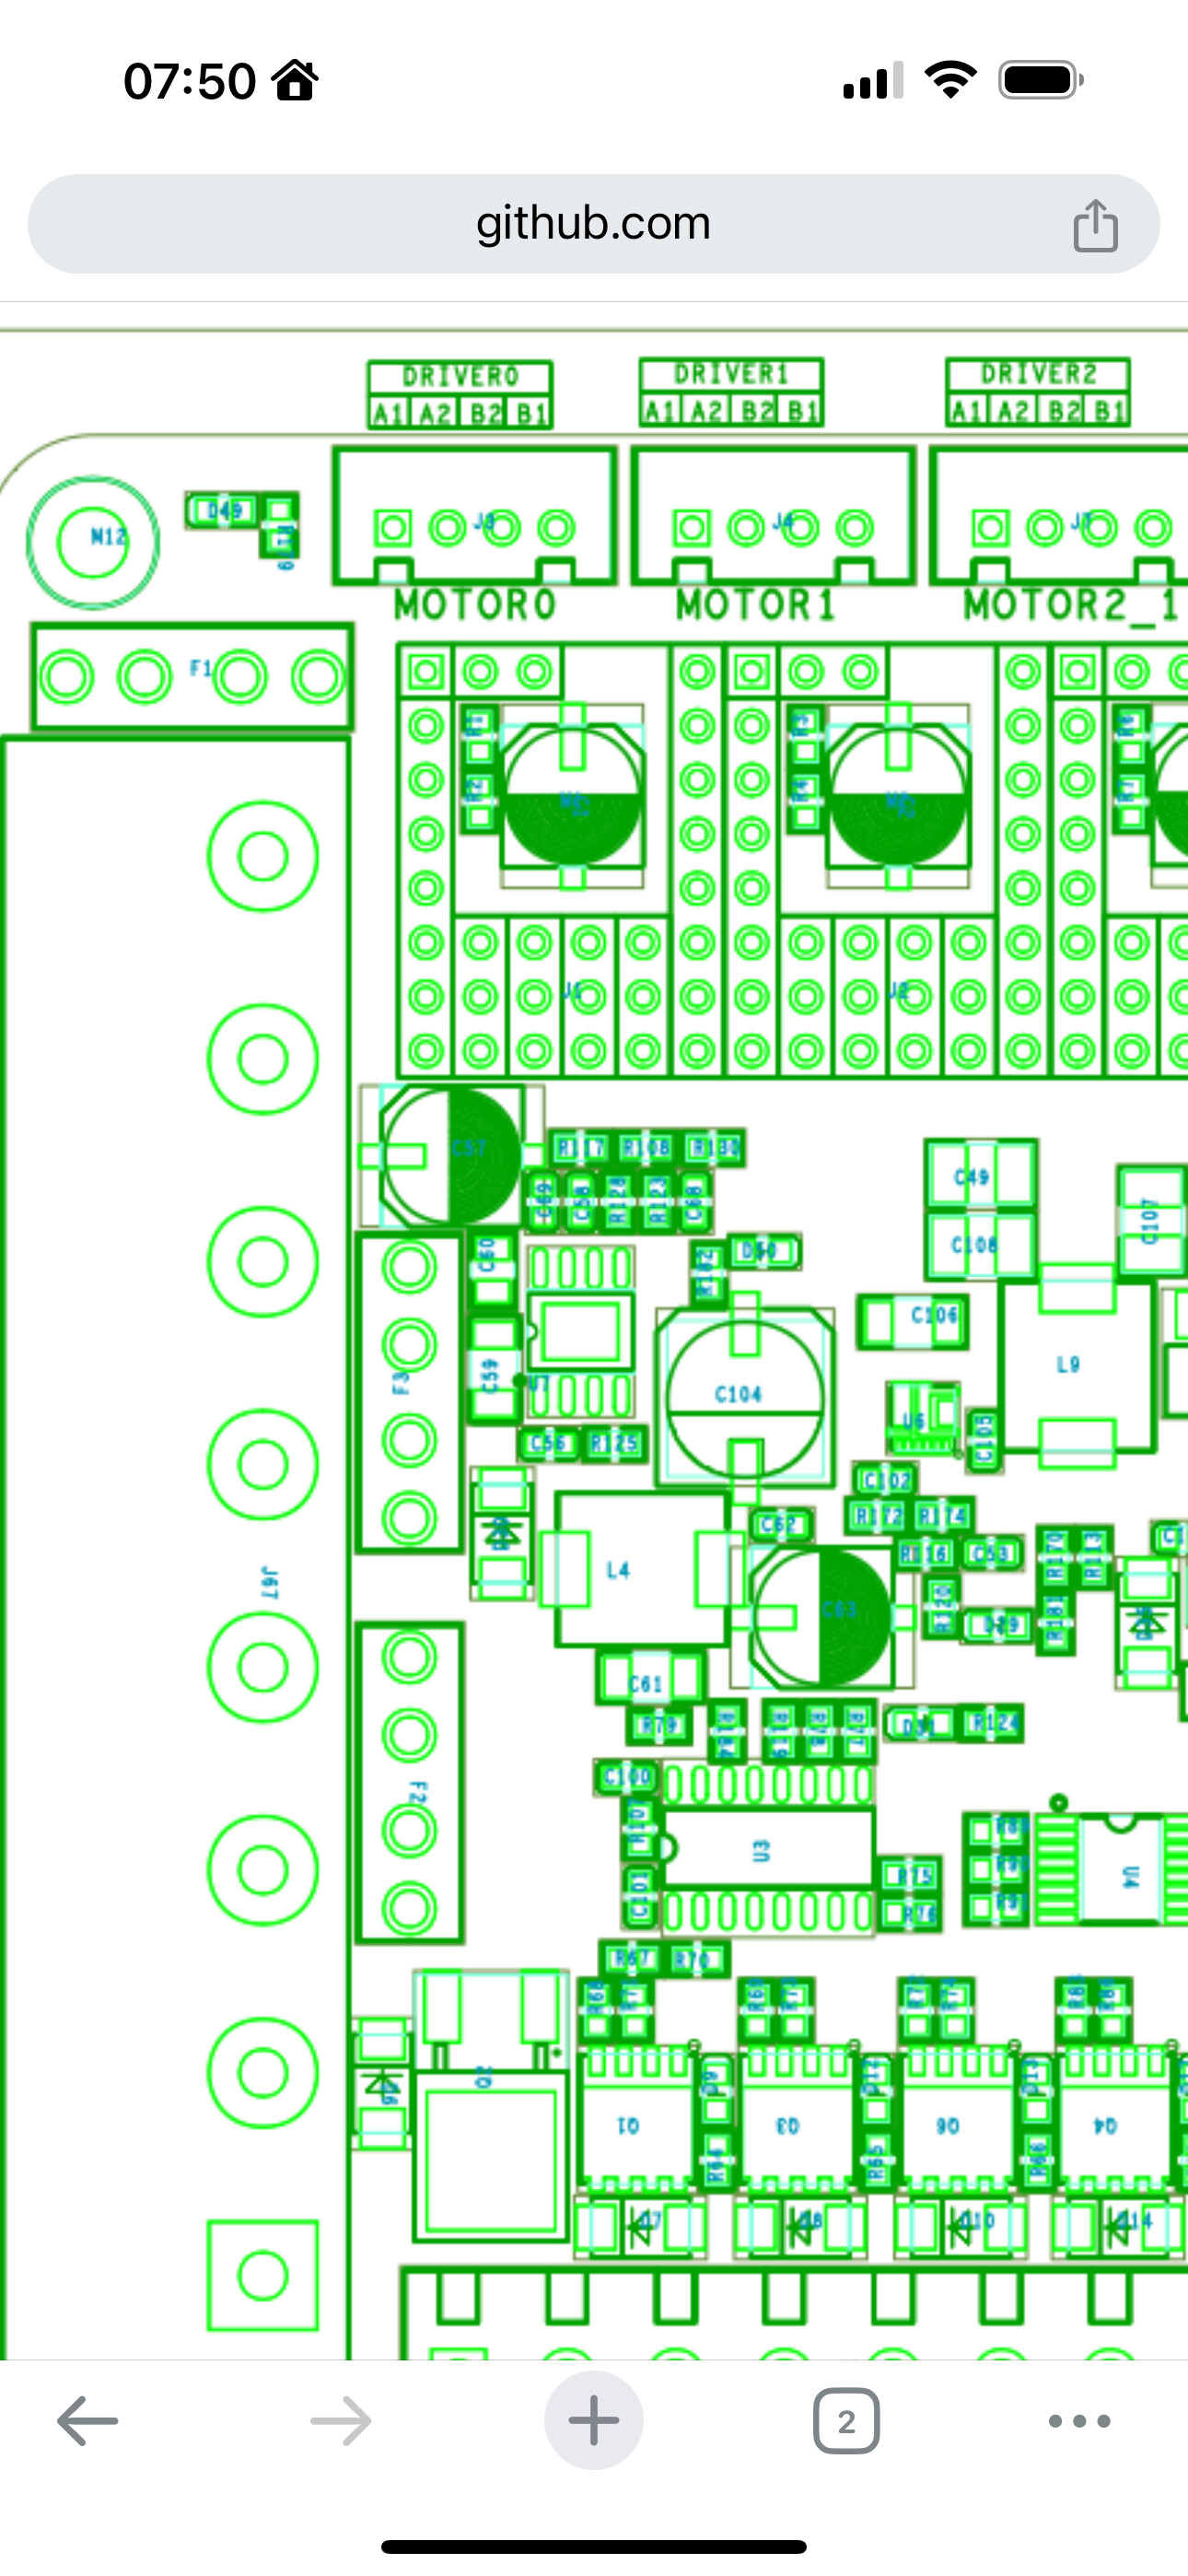
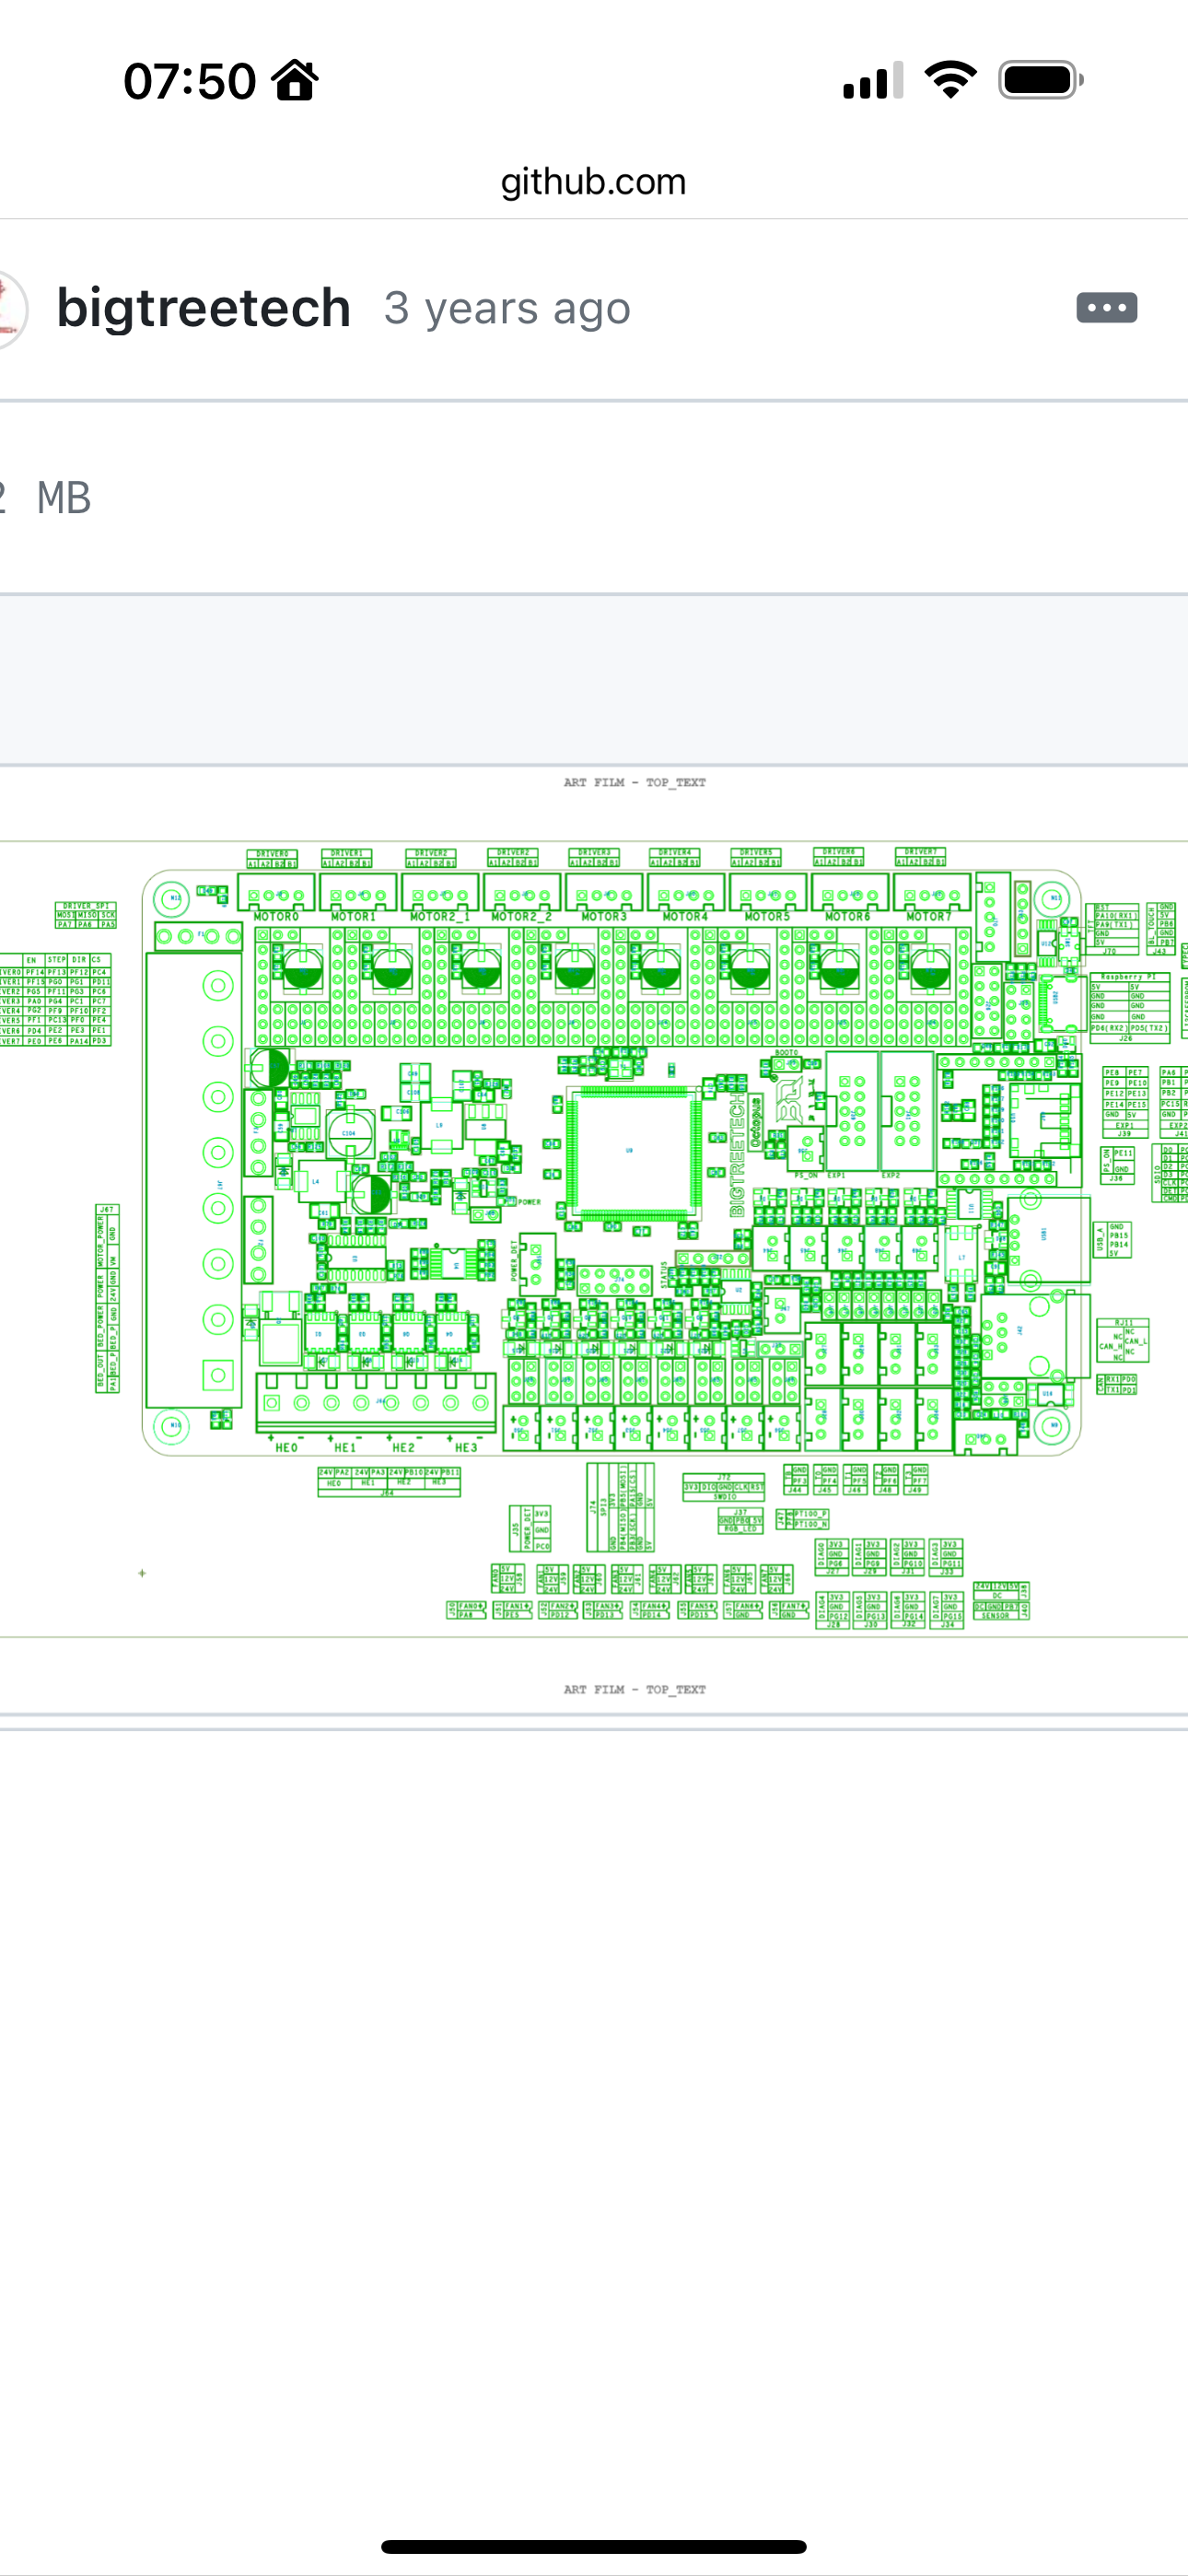
But some of this doesn’t look right now that I’m looking at it more. Is this not a BTT octopus board?
Edit I am now seeing the skr pro 1.2 in the description ![]()
Let me pull up that schematic
I think for the SKR Pro 1.2 that U2 is an SGM6130
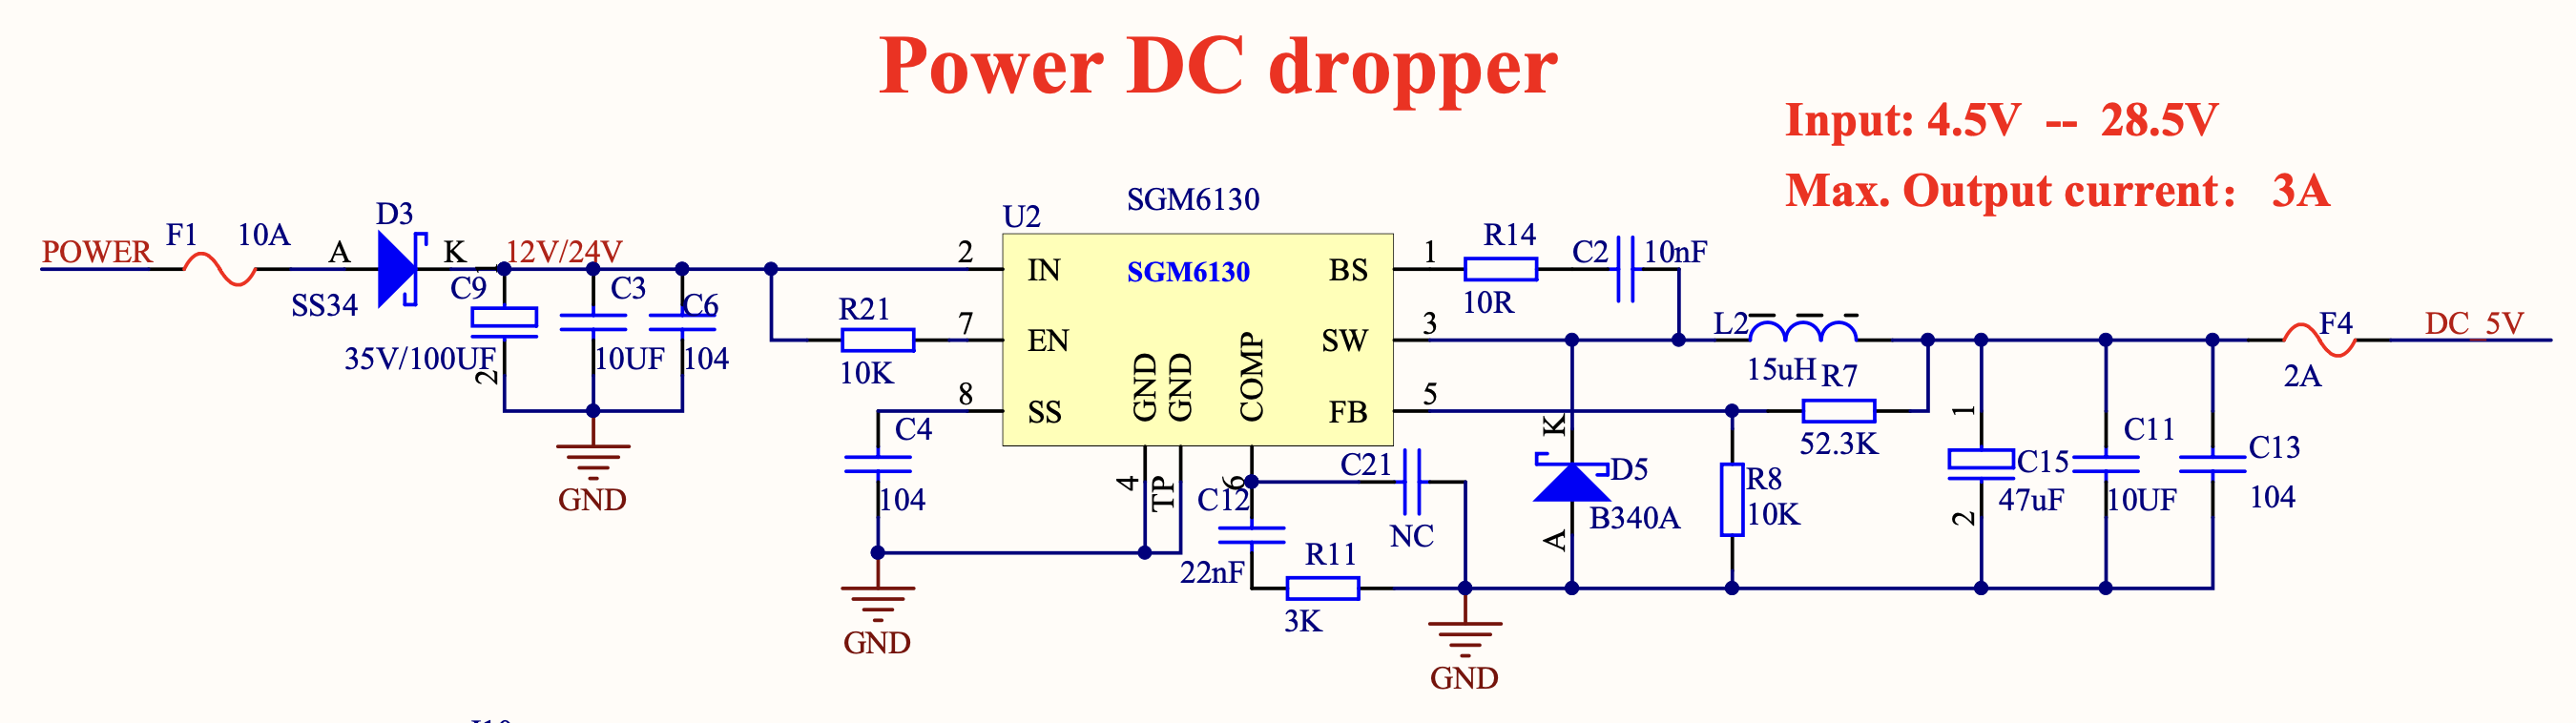
I’m having trouble finding a US distributor.
Edit-- looking at that, I’m curious about the failure mode and what else would have fried.
Is F4 blown?
If the 5V rail went negative or really high, it wouldnt be a great day for the rest of the board.
3 Likes
Now that I found the right board I concur on the SGM6130 now to find somewhere
Edit: this might work, thoughts Jim?
https://www.aliexpress.us/item/3256803963365808.html?gatewayAdapt=glo2usa4itemAdapt&_randl_shipto=US
1 Like
The more I think about this, the more I think getting a good dual reflow/solder station like the one mentioned up thread is a good idea.
Specifically to replacing the blown regulator, that thermal/ground pad makes this almost require hot air.
The density of the board means it probably needs to use a more advanced rework setup.
I’ve seen pro solder techs do rework by making a foil shield to mask off just a specific part on boards like this that are really dense. It’s not completely ideal because you put thermal stresses on the board from isolating to a small working area, but as dense as the SKR is I think that would have to be the approach.
Will also need to get some good tweezers, and some good no-clean flux to use for the rework.
I’d love to hear from other folks if they have other ideas.
Yeah, that looks like the right part.
1 Like
I’m not much help. I bought this a while ago and I’ve been happy:

If they don’t sell it anymore, maybe it has a fatal flaw, IDK.
I have definitely ruined more parts with the hot air than fixed. It is a tricky art. I also frequently cut chips (more often headers) to make them easier to desolder. Just be careful you don’t do any pulling. The tiny pads can get ripped right off. I would also probably start with clean pads so you can solder one pin and orient it properly. If you tin them all, it will never sit flush.
1 Like