I just built a new laser machine,
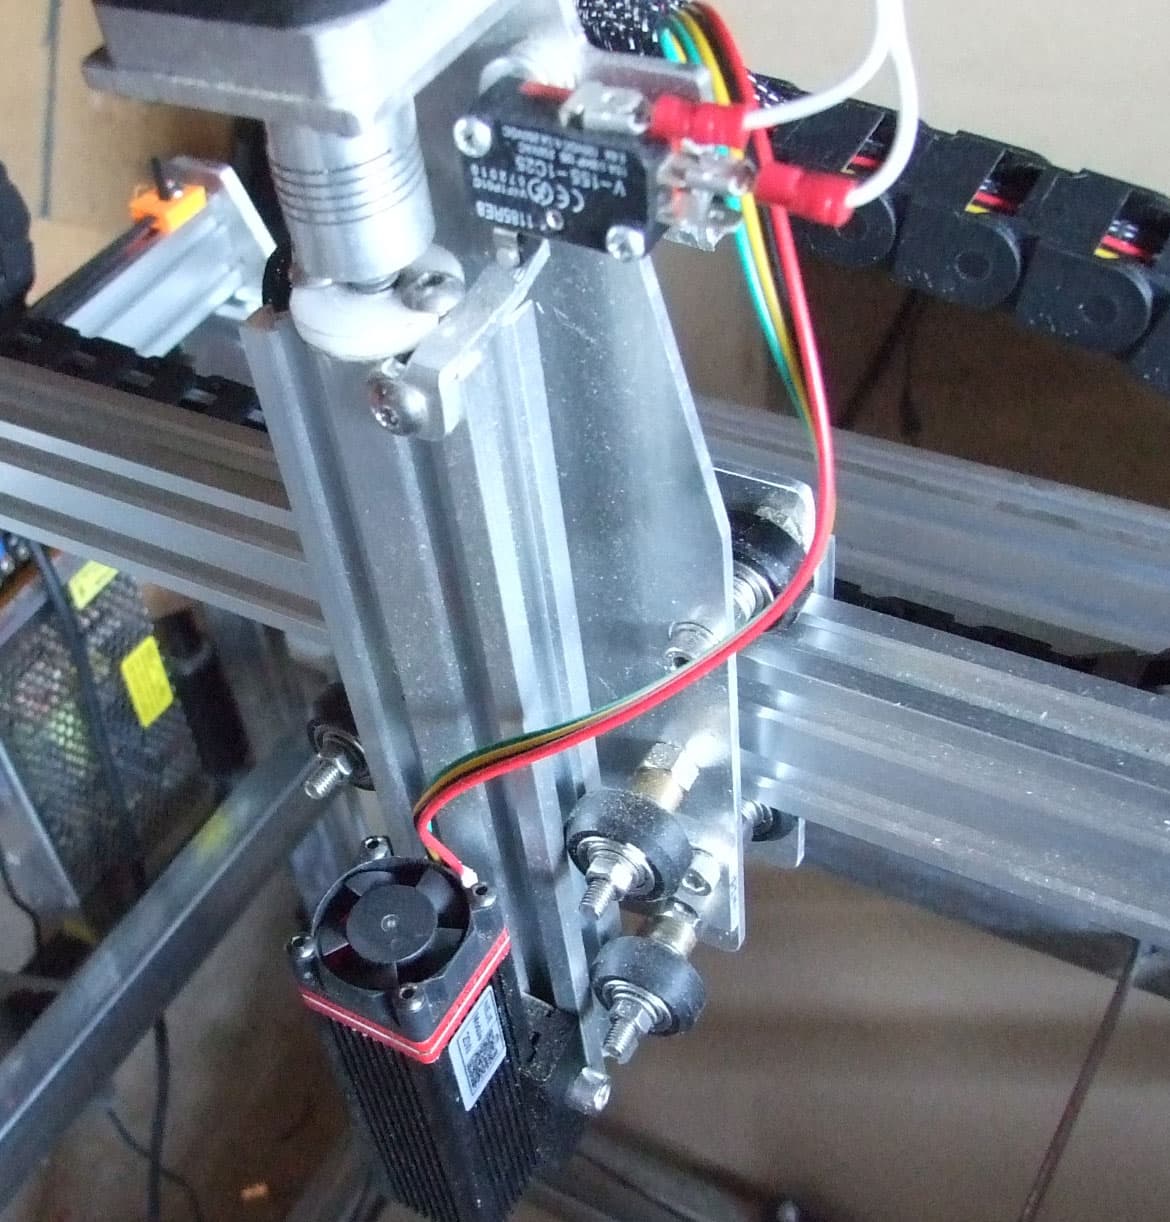
This one has limits at both ends on the X and Y and a single limit on the +Z
When I press a limit switch by hand it works, but is very slow to display on LaserGRBL.
When trying to home the Z lifts up and triggers the limit but no reaction and the motor keeps running until it has locked up.
I have to disconnect power to release the motor and wind it down by hand,
I have checked my wiring and tested manually by hand triggering the limits, all work but VERY slow to register that they have been triggered.
Have I done something wrong? I am at a loss with this one.
Windows 11, GRBL 1.1h, LaserGRBL (latest version), CNC Shield v3.00, Z limit on SpnEn, Spindle PWM on Z+ (works laser module OK)
Are all the limit switches slow to register, or just the Z? Do you have capacitors to cut down on endstop noise? Maybe they are too big and causing the delay.
On the CNC Shield v3.00, even though the shield provides a max (+) and min(-) connection for each axis, each axis only has 1 Arduino pin for its limit switch, so I’d make sure nothing was attached to that other Z endstop pin.
Thanks Tom, I will check by removing the capacitor altogether and also the resistor (just for testing) I am only using the positive pin in each case as I know that they are actually connected.
I changed from parallel (NO) wiring to series (NC) and it made no difference, so what you are saying is a big possibility
I recall reading (somewhere I don’t recall, and some time ago now) that using too large a capacitor for noise suppression can cause lag on the signal wire. I’ll try and check what capacitance I’ve got on mine. I’ve just got ceramic caps, no resistors.
I am using 104 caps and 4.7K resistors
I just did a test Tom, I unplugged the limit wiring and connected three micro switches directly to the shield pins to simulate the limit switches.
I made sure that homing was activated in the GRBL configuration,
I tried activating each limit in turn and there was no response at all from any of the pins. I also tried inverting the limit pins as that should activate immediately, but still no response.
It appears that possibly there is a fault in the board (wouldn’t be the first time)
I tried the setup on another board and the switches work fine on the test board, so it looks like I may have to change over the boards (what a big job now that it is all wired up and hard to reach)
Sorry you’ve got more work to do, but I’m glad you’re closing in on a solution.
I think I will leave it for a while and get on with the rest of the build.
I did a short test and the machine is working fine without the homing and although I need it for better setups, I will attend to that later.
This machine is only small compared to my other lasers. It has some special features that I was not able to incorporate in the other machines.
It has a power lift table (uses a windscreen wiper motor for lifting up and down, driving some M8 threaded rods) so I can put large boxes on edge to be engraved (I have several of these that I use for storing various electronic bits and pieces and other things)
I also have designed and built a rotary attachment to go with the laser.
Still have the cabinet to finish off and the smoke extractor to finish and attach.
I know you said you were going to focus on other things for a bit, but just wanted to mention - Are you sure you’re using the COM (common) terminal and one or the other of the NO (normally open) or NC (normally closed) terminal on the switch in your latest test? (no other wiring/components)?
I’m assuming these are “naked” microswitches, and not the little circuit boards with LEDs sold for 3D printer end stops. I was not able to use those boards effectively with the CNC Shield, but did have good luck with plain switches. I did have to add capacitors for noise rejection, but that’s at least partially due to me running the limit switch and motor wiring together inside of shielded 6-conductor cable.
That is a good point Tom, I will check as these are different switches than I have used before.
I can start to relook at it now as I have finished doing the build and am now testing. First engravings can out pretty good so far.
I will test the switches and make sure I have used them correctly, easy fix if wrong as they just plug in.
If the switches are not the problem, then it will be a bit of a headache getting at the boards and changing over.
closing old topic to help fight spambots