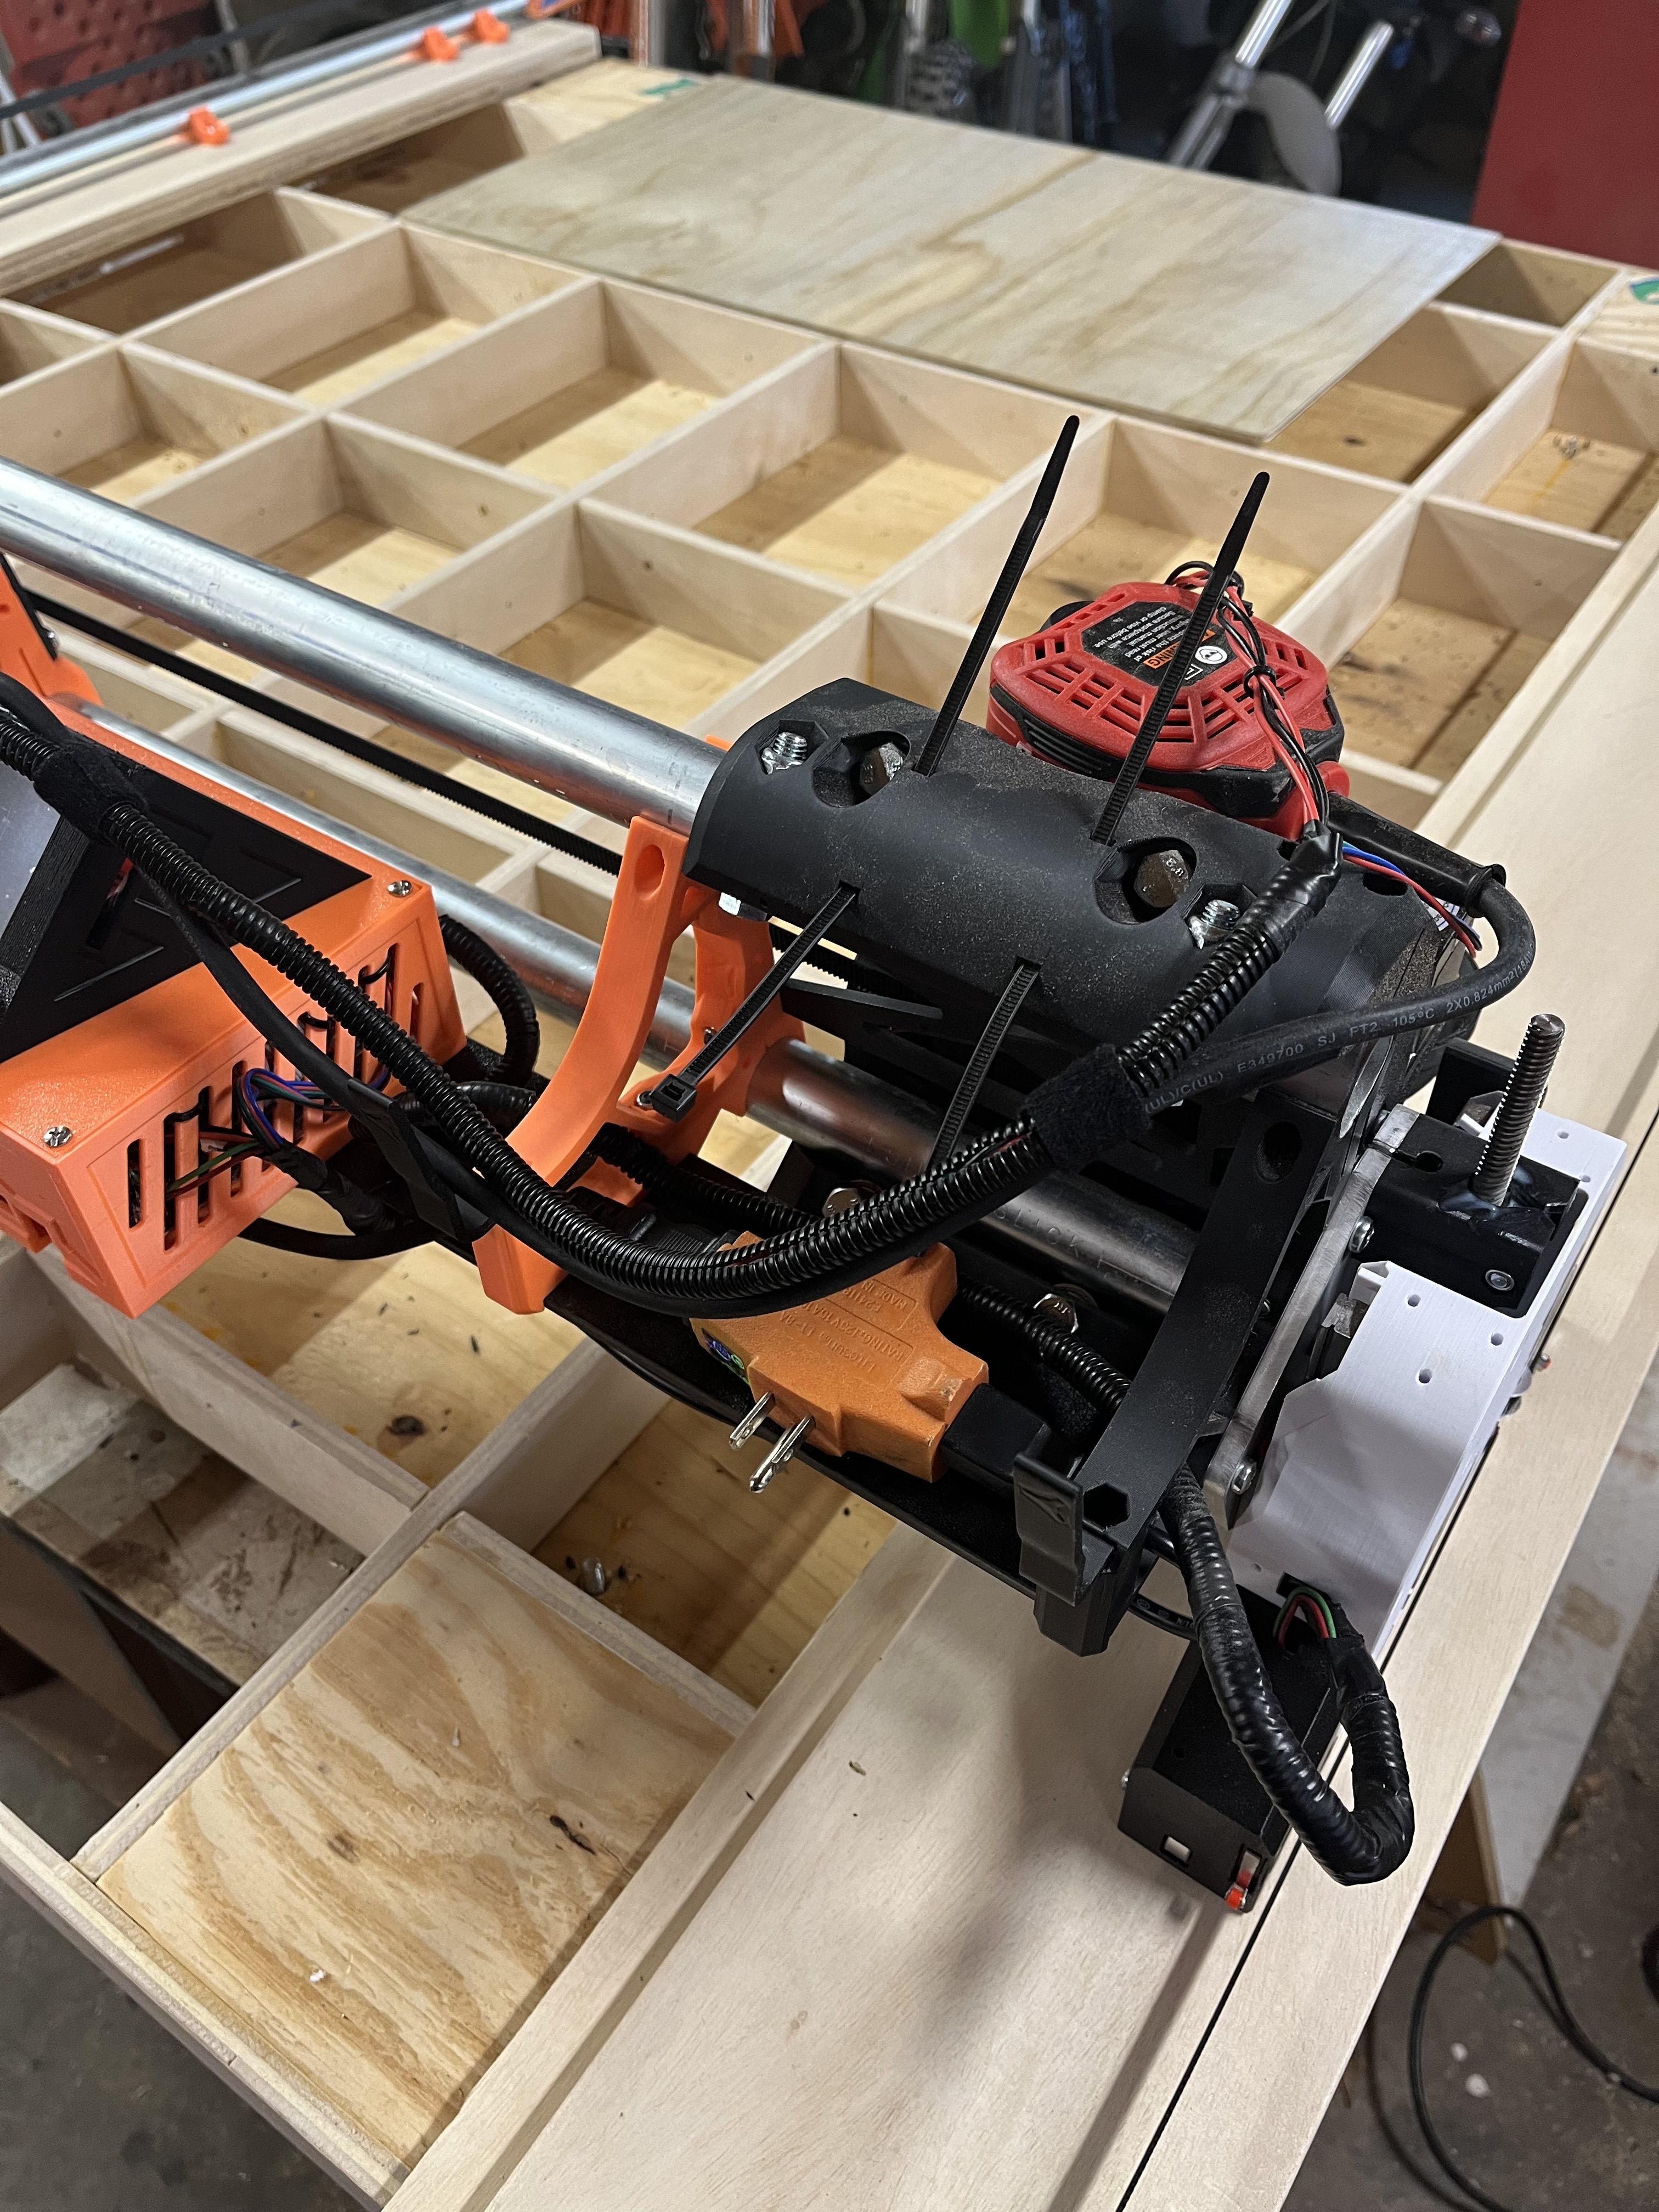
Hi everyone, first I want to saythanks for being here and all the knowledge everyone has generously shared. I am new to cnc and I’m trying to get started. I have finished my LR4 build and I’m trying to home it so I can then square it and so forth. My build is a 4’x4’ LR4 with a SKR pro/TFT screen.
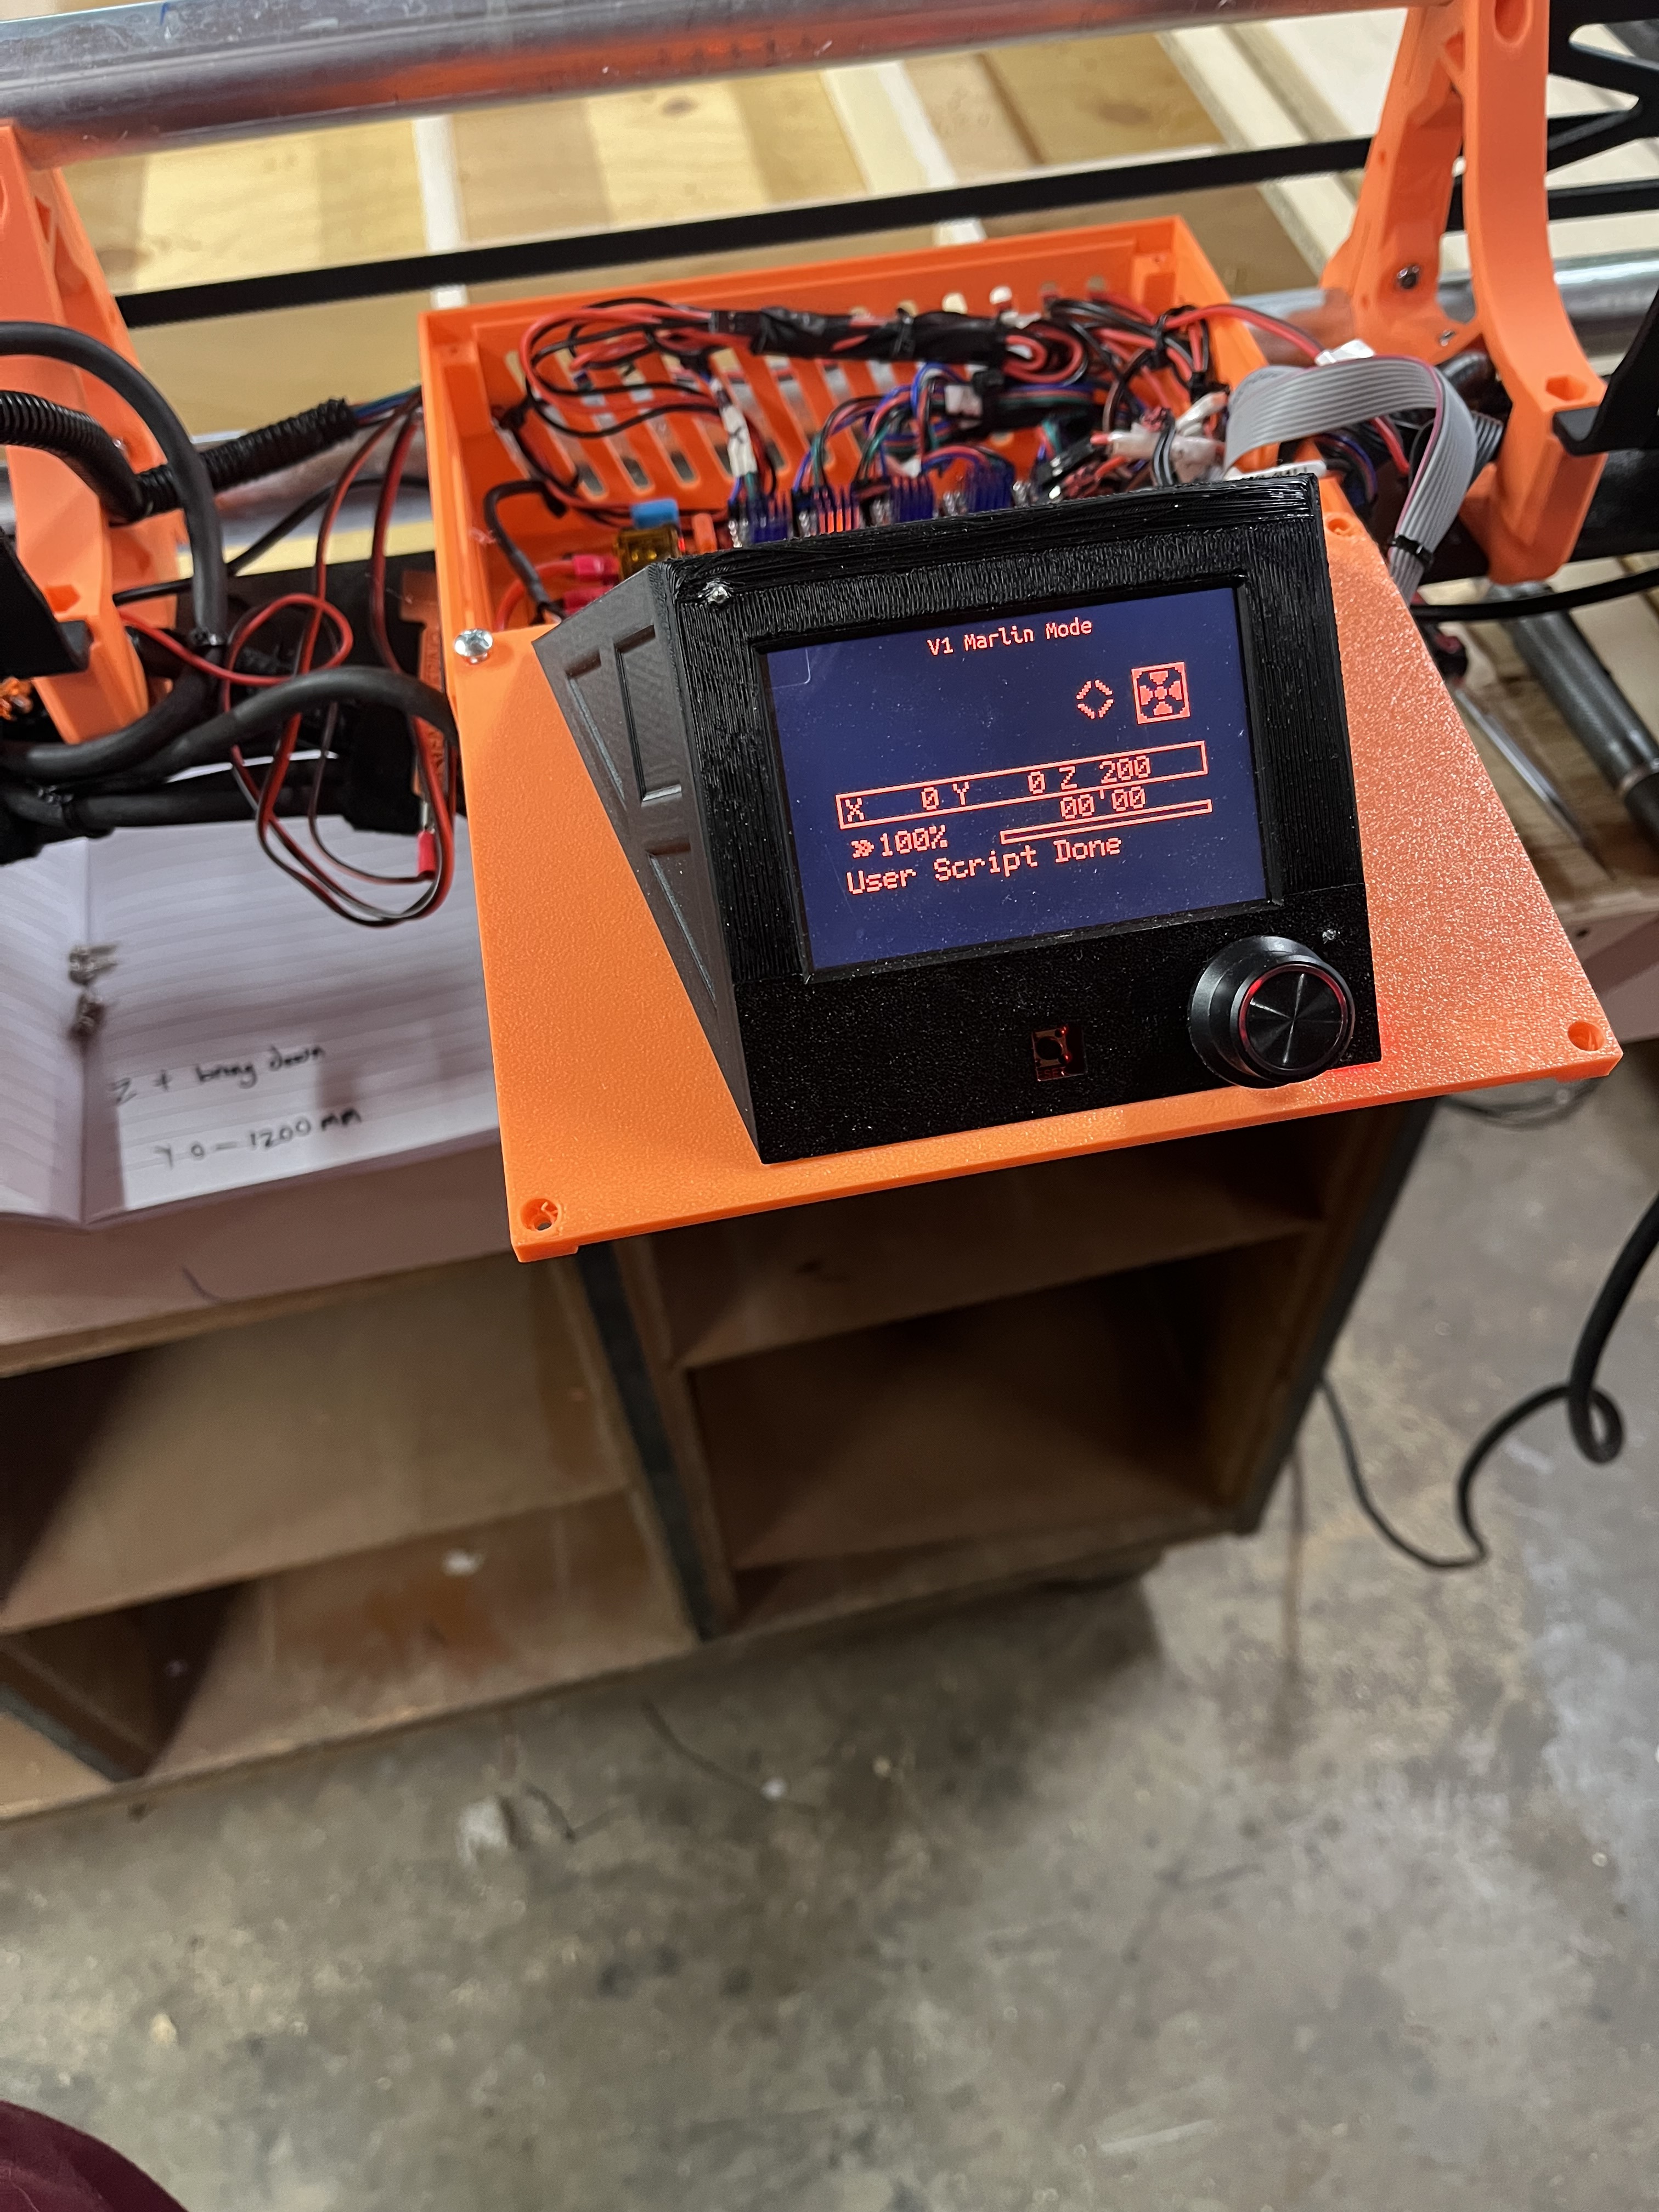
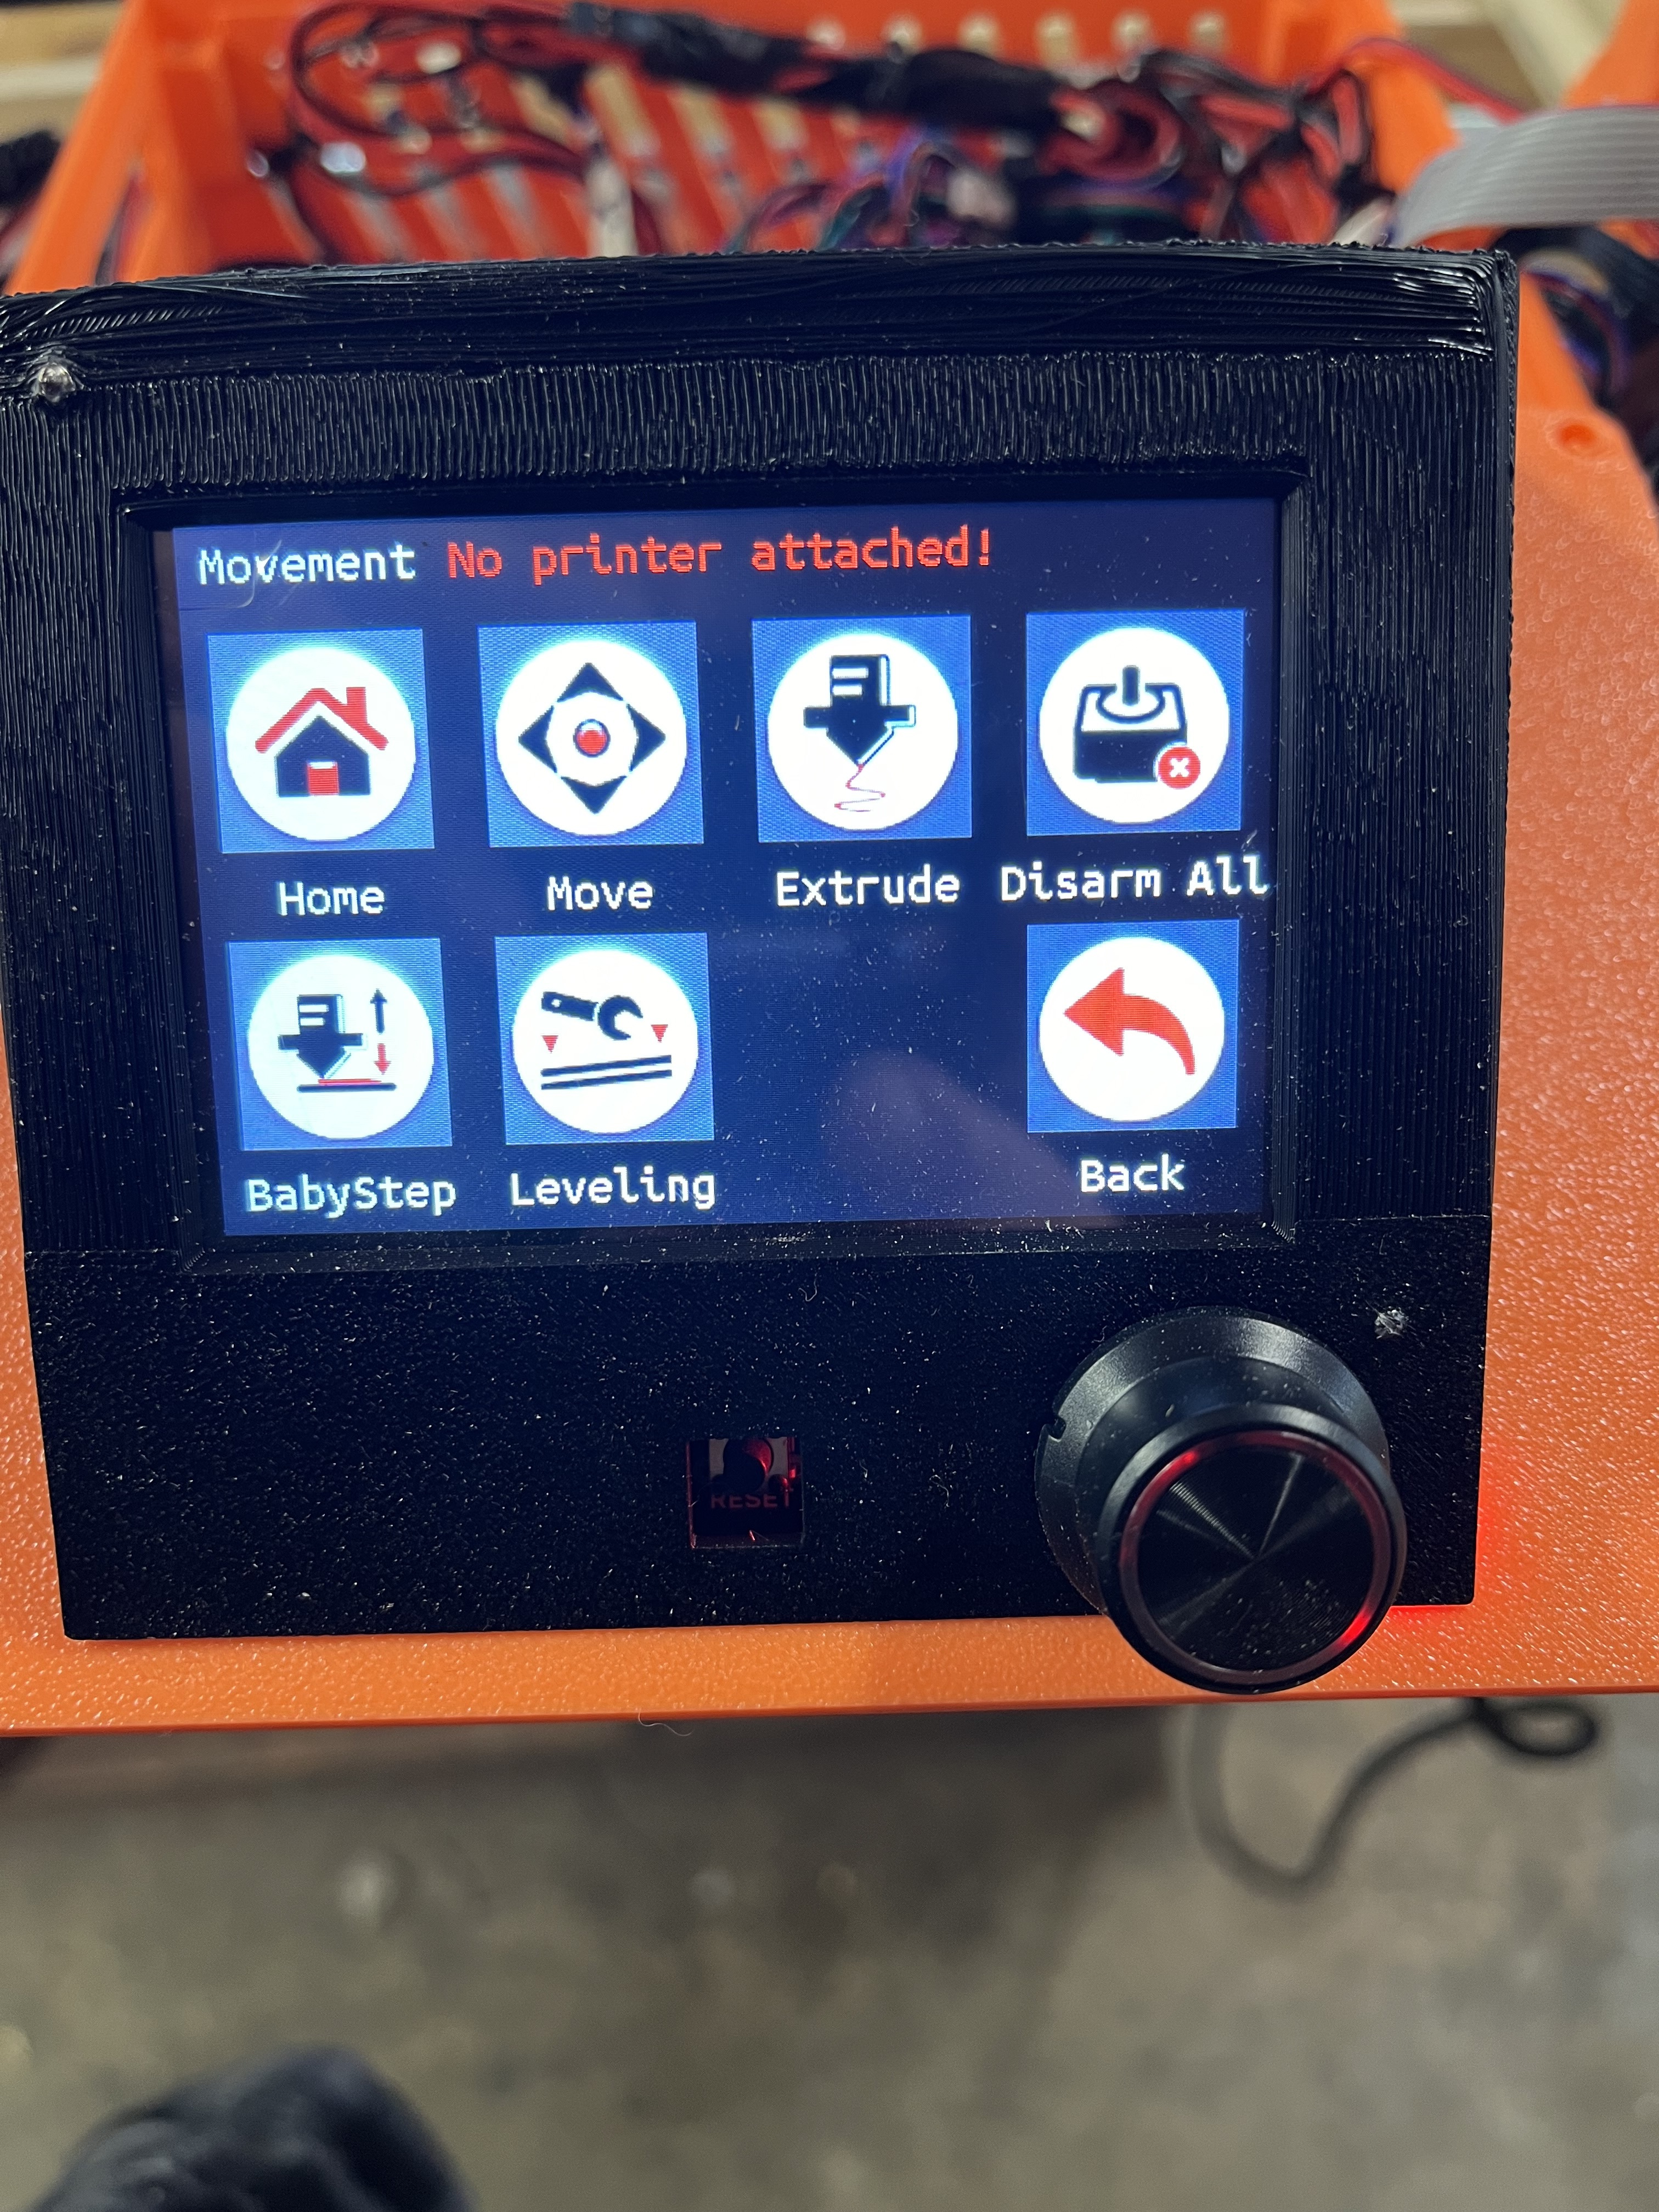
First, somehow after my first couple attempts to move it individual axis at a time I lost the original screen layout and it seems to be just the marlin( I really don’t know what to call it) was a nice colorful screen with icons now just a black and red with text only.
Next issue, I’m trying to home it but my base starts at 0 and will only let me travel in the positive. For example if the machine is at the halfway point on the Y axis then I can only move it the forward 50% and back to that same halfway point it started. I guess when I plug the machine in it thinks home is wherever it is at first power up.
In the docs I couldn’t find anything that directly says how home is determined or set.Im wondering how the software knows where home is on a table it’s never seen before. I assumed you would drive it to 0 on the table then assign that as home by pressing a button.
Thanks for any advice.And yes I know I have endstops unplugged in the pics was taken while troubleshooting.
First, somehow after my first couple attempts to move it individual axis at a time I lost the original screen layout and it seems to be just the marlin
We call it “Marlin mode.” You can switch between the two screen modes by holding down on the control knob for a few seconds.
I guess when I plug the machine in it thinks home is wherever it is at first power up.
Something is strange here. The behavior you describe happens when Marlin is in a homed state, but that does not happen when the machine is first powered up. To troubleshoot, send your machine a G92 X0 Y0 and then try your movements again. The G92 X0 Y0 sets the current position as the origin for your machine, but it will also clear any homed state.
Note if you homed the machine while the endstops were unplugged, then it would become “homed” at the current location rather than at the machine origin. This is because the endstops are wired normally closed, so having the open would signal to Marlin it was at home.
Ok got it to go into touch screen mode but when its there nothing works neither touch or knob. Says no printer attached. Also took a bit to get it into touch. In the screen with the two options (marlin or touch) I would select touch it would open touch then immediately go back to the two option screen. After doing that a few times I decided to be quick and touch an icon on the touch screen before it went back this kept the screen up but no touch or knob will respond.
In pictures 1 and 2 I can see you have endstops on the ‘back’ of your trucks. You don’t need these and they shouldn’t be wired to the board - just confirm you haven’t.
Can you take your screen out of the case and try again - sometimes if the 3D print is a bit ticght it puts pressure on the screen and it thinks something is permanently being pressed.
Yes I got overzealous during the build and put an end stop in every spot before rereading they were not necessary. I just left them in place but they’re not connected to the board and never have been. I’ll try releasing the screen and see if that does it. I still have the protective film on it too.
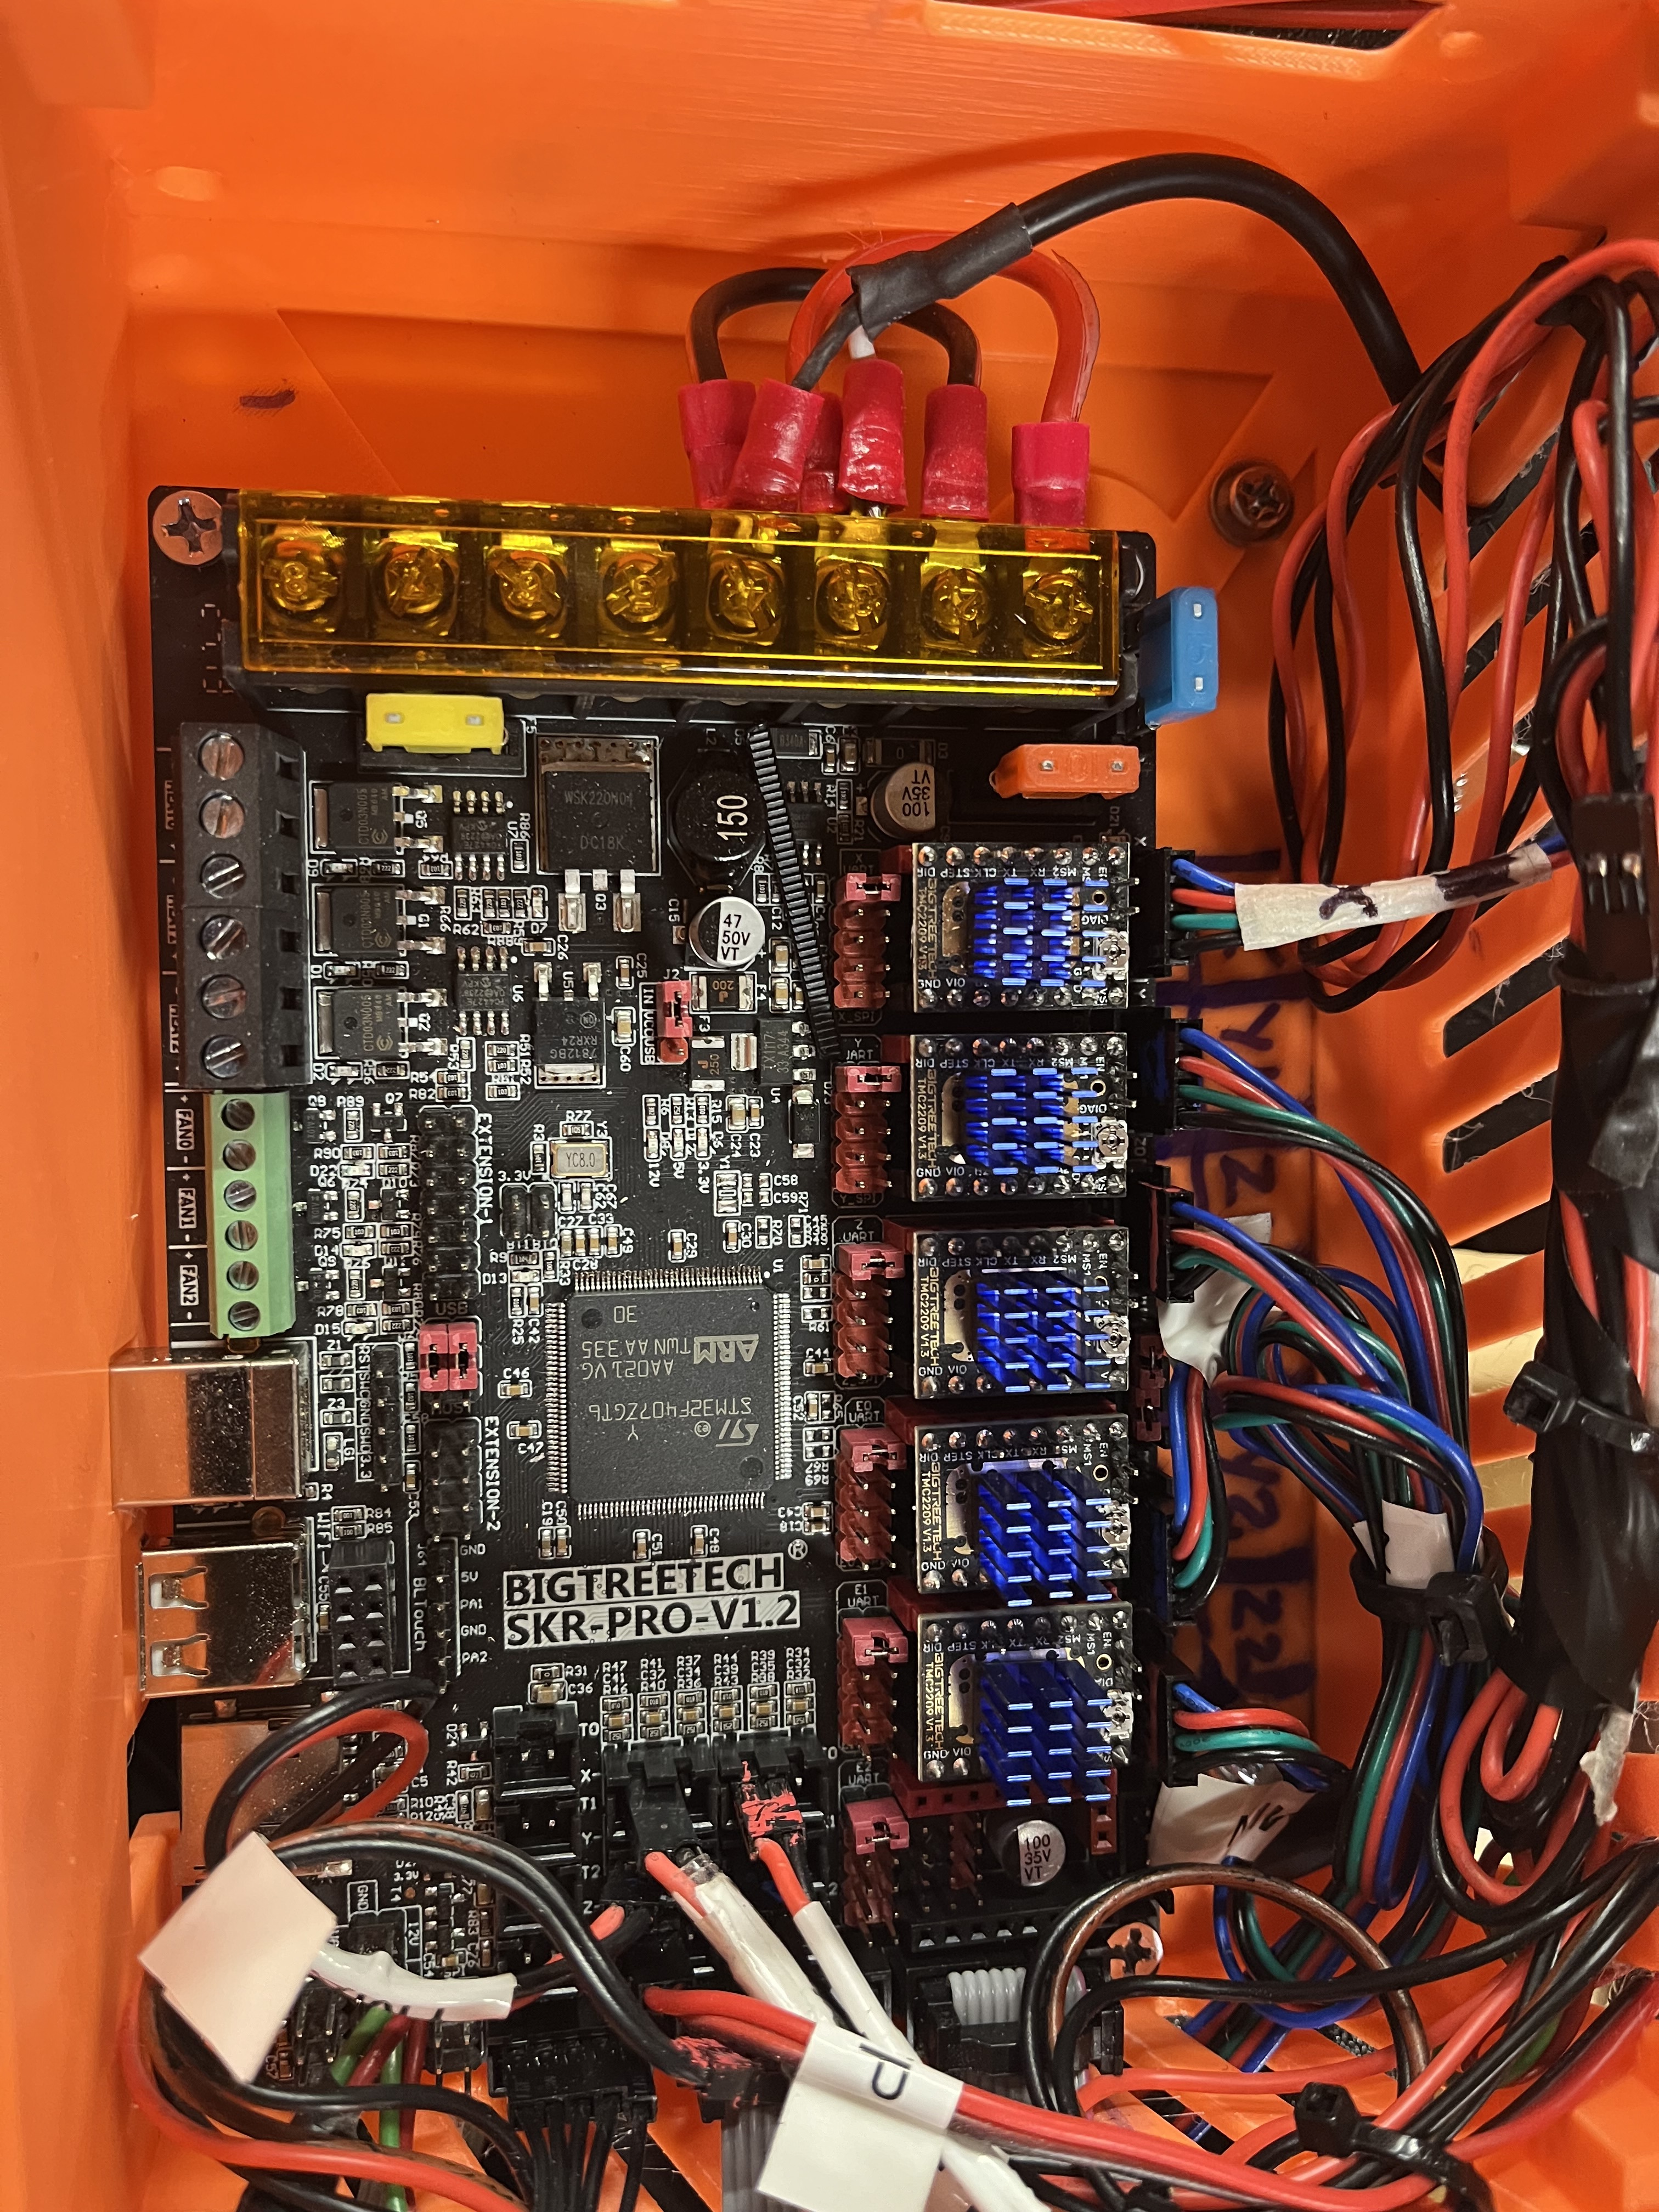
This brings up another question I need clarification on.On the motor and end stop terminals on the board it’s labeled y1 y2. I assume y1 is max y2 is min or am I wrong.
Actually, this is completely normal behaviour in an SKR/Marlin board.
When the machine is powered up, it starts on the 0,0,0 state at whatever position it starts in. And I’m pretty sure that you can’t manually move into negative territory (although I may be wrong about that).
At that stage, the first thing you need to do is to set your axis positions by homing all three axis (from the Home menu). Then you will be at lower left of the build area at x=0, y=0 and the gantry at the top of its travel at Z=200.
After that, do a Z probe to set your Z=0 at the top of your material.
Just a question to clarify, when you say you try to home it, are you using the Home menu commands, or the Move menu commands? The Move commands will behave as you described, but the Home commands should work as I described.
On my Rambo board running Marlin (and SKR Pro should be the same) you are only prevented from moving to a negative coordinate if Marlin is in a homed state. That requires a homing operation. After just powering the control board on, the machine is not in a homed state, and you can move to negative coordinates. A G92 setting X and Y clears the homed state. In marlin mode, the coordinates displayed will switch between values and “???” when Marlin is not in a homed state.
Says no printer attached.
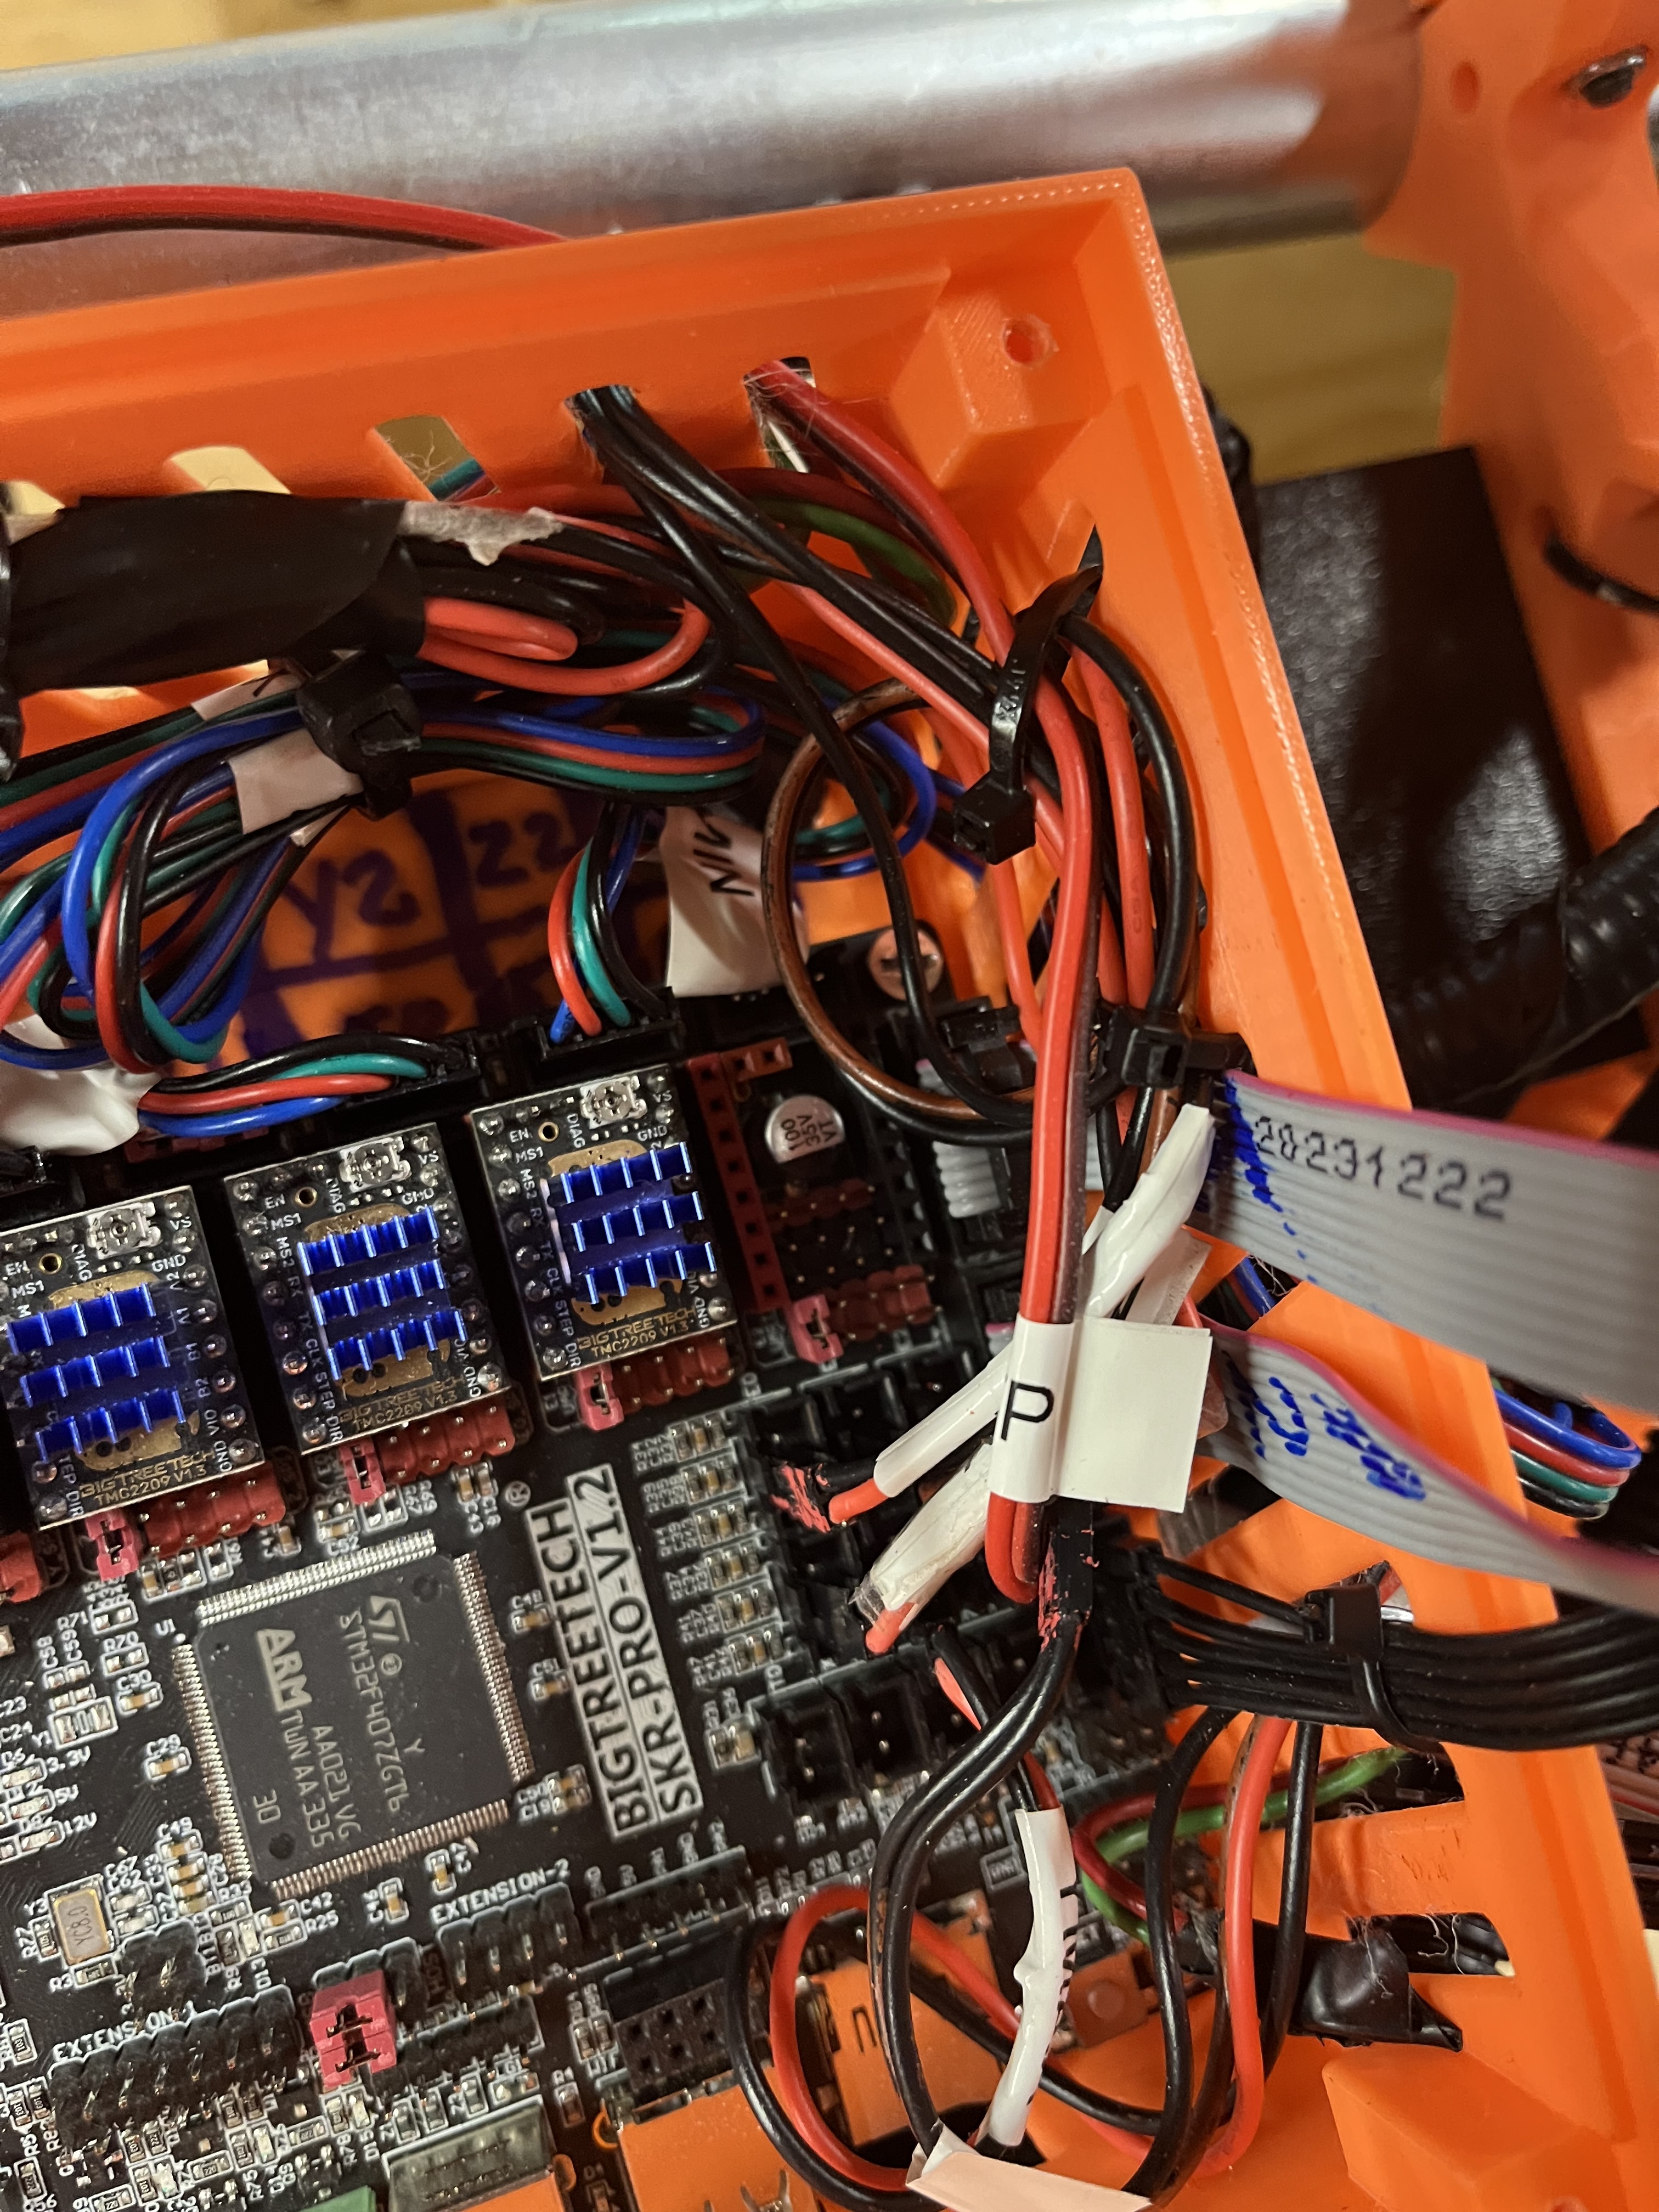
There are three cables connecting the display to the SKR Pro board. The smaller, usually black cable is used in touch mode. The two larger, usually gray cables are used for Marlin mode. Try unplugging and reseating both ends of the black cable. If the touch display has never worked, check the baud rate on the display settings. It shoudl be set to 250000.
Sorry I did not reply sooner, had to step away for a day. I was just rereading this and realized you asked me a question. Yes I was operating with the move function not the home functions. I think early on I hit the home button and it went past the stops and started stalling and binding motors this could have been when I had motors min/max confused and ES mis assigned.Which also brings to mind would this also cause the end stops to not trigger? If I push an ES in with my hand I can see the led on the board light up. However if I move the machine (10mm increments ) with the move control (any axis) I can go beyond the ES without it stopping sometimes it goes to the end and just starts stalling the motor in which case I panic and yank the power cord. Leeds to another question, is it ok to just pull the plug? Is there a proper shutdown procedure?
Don’t panic. It is OK to kill power, just not necessary for a simple situation like miswired / misinstalled endstops.
The stalled motors are skipping steps which sounds really horrible but won’t damage the machine.
You should be able to kill power at any time as that’s a needed function for a real emergency (machine is on fire, a motor wire broke and the machine walked off the rail, router fell off the machine, work piece jamed and getting spun by spndle, etc.)
Have you confirmed your endstop phasing with the M119 command?
To do this you run an M119 while none of the endstops are triggered, verify they all show the correct state.
Then, one by one manually trigger the endstops one by one. While each one is triggered, run another M119 and verify that the correct endstop is showing triggered in the results.
I wouldn’t proceed with trying an auto home until you are certain that all the endstops are working correctly and installed in the right location (phased correctly).
The end stops only work during a Home command, so it is possible (in an unhomed state) to use the Move command and go past the end stops. The result is that the motor will hit something solid and start skipping steps. This is ok, nothing will be damaged, although it sounds horrible.In a homed state (after it is homed), you shouldn’t be able to Move past the X or Y end stops into negative territory (I think). After Homing, you can still move past the Z end stops, and you can move into negative numbers in the Z axis, but that’s another story.
If it moves past the end stops and starts skipping steps during the Home command, then you may be experiencing an issue not uncommon on SKR boards that will require a minor tweak to your board (adding some resistors to the end stop connectors at the board), but let’s not go down that road unless/until we have to…
I’m new here, and still learning, and I use a jackpot CNC, so maybe this doesn’t apply to you. But I learned last week (by asking a similar question) that home is determined by the endstops. It is all the way at the front of the table (Y) where the endstops hit the Y-min brackets, with the router all the way to the left (X) where the X-endstop hits the X-min side, and with the Z at it’s highest point (where the Z endstops hit). None of this is probably “CNC” language, but I wanted to pass along what I learned in case it’s helpful.
I was confused because I thought “home” was where the machine is supposed to start it’s cut each time. But home is just the place where the machine lives after hitting the endstops.
Thanks for the advice. I will have some time tomorrow to get back at it.
So I need to be clear on where home is exactly. ( been getting confused with my touch screen mounted on the back of machine)
As I understand it if I am looking at the front of the router or the side of the gantry the router is on then home would be where Y min and X min meet at the beginning of their lines. Other words Birds Eye view of the table it’s the lower left corner. And any movement from here X or Y would be positive numbers. Am I correct?
This response is very clear to me. You just put it exactly the way I needed to hear it. I just sent my previous reply before seeing your response. And I did read through your post on before making mine, it was helpful but I still had more questions.
Ok. Some good news. I did some test ran m119 and determined the z min ES was not making good connection. I had to make a new terminal but now it’s good. I homed it and all axis worked great.It hit the ES backed up then hit them again. Now to square and crown test. A little confused on setting z level though but I’ll try to make it through the steps. One thing that’s odd and it was happening before and after my latest adjustments. When ever I unplug the machine the z min stepper releases tension