I finally built the machine and ran the crown test file (although I didn’t pay close attention to the cutting depth since I was excited to just see the machine do something, lol).
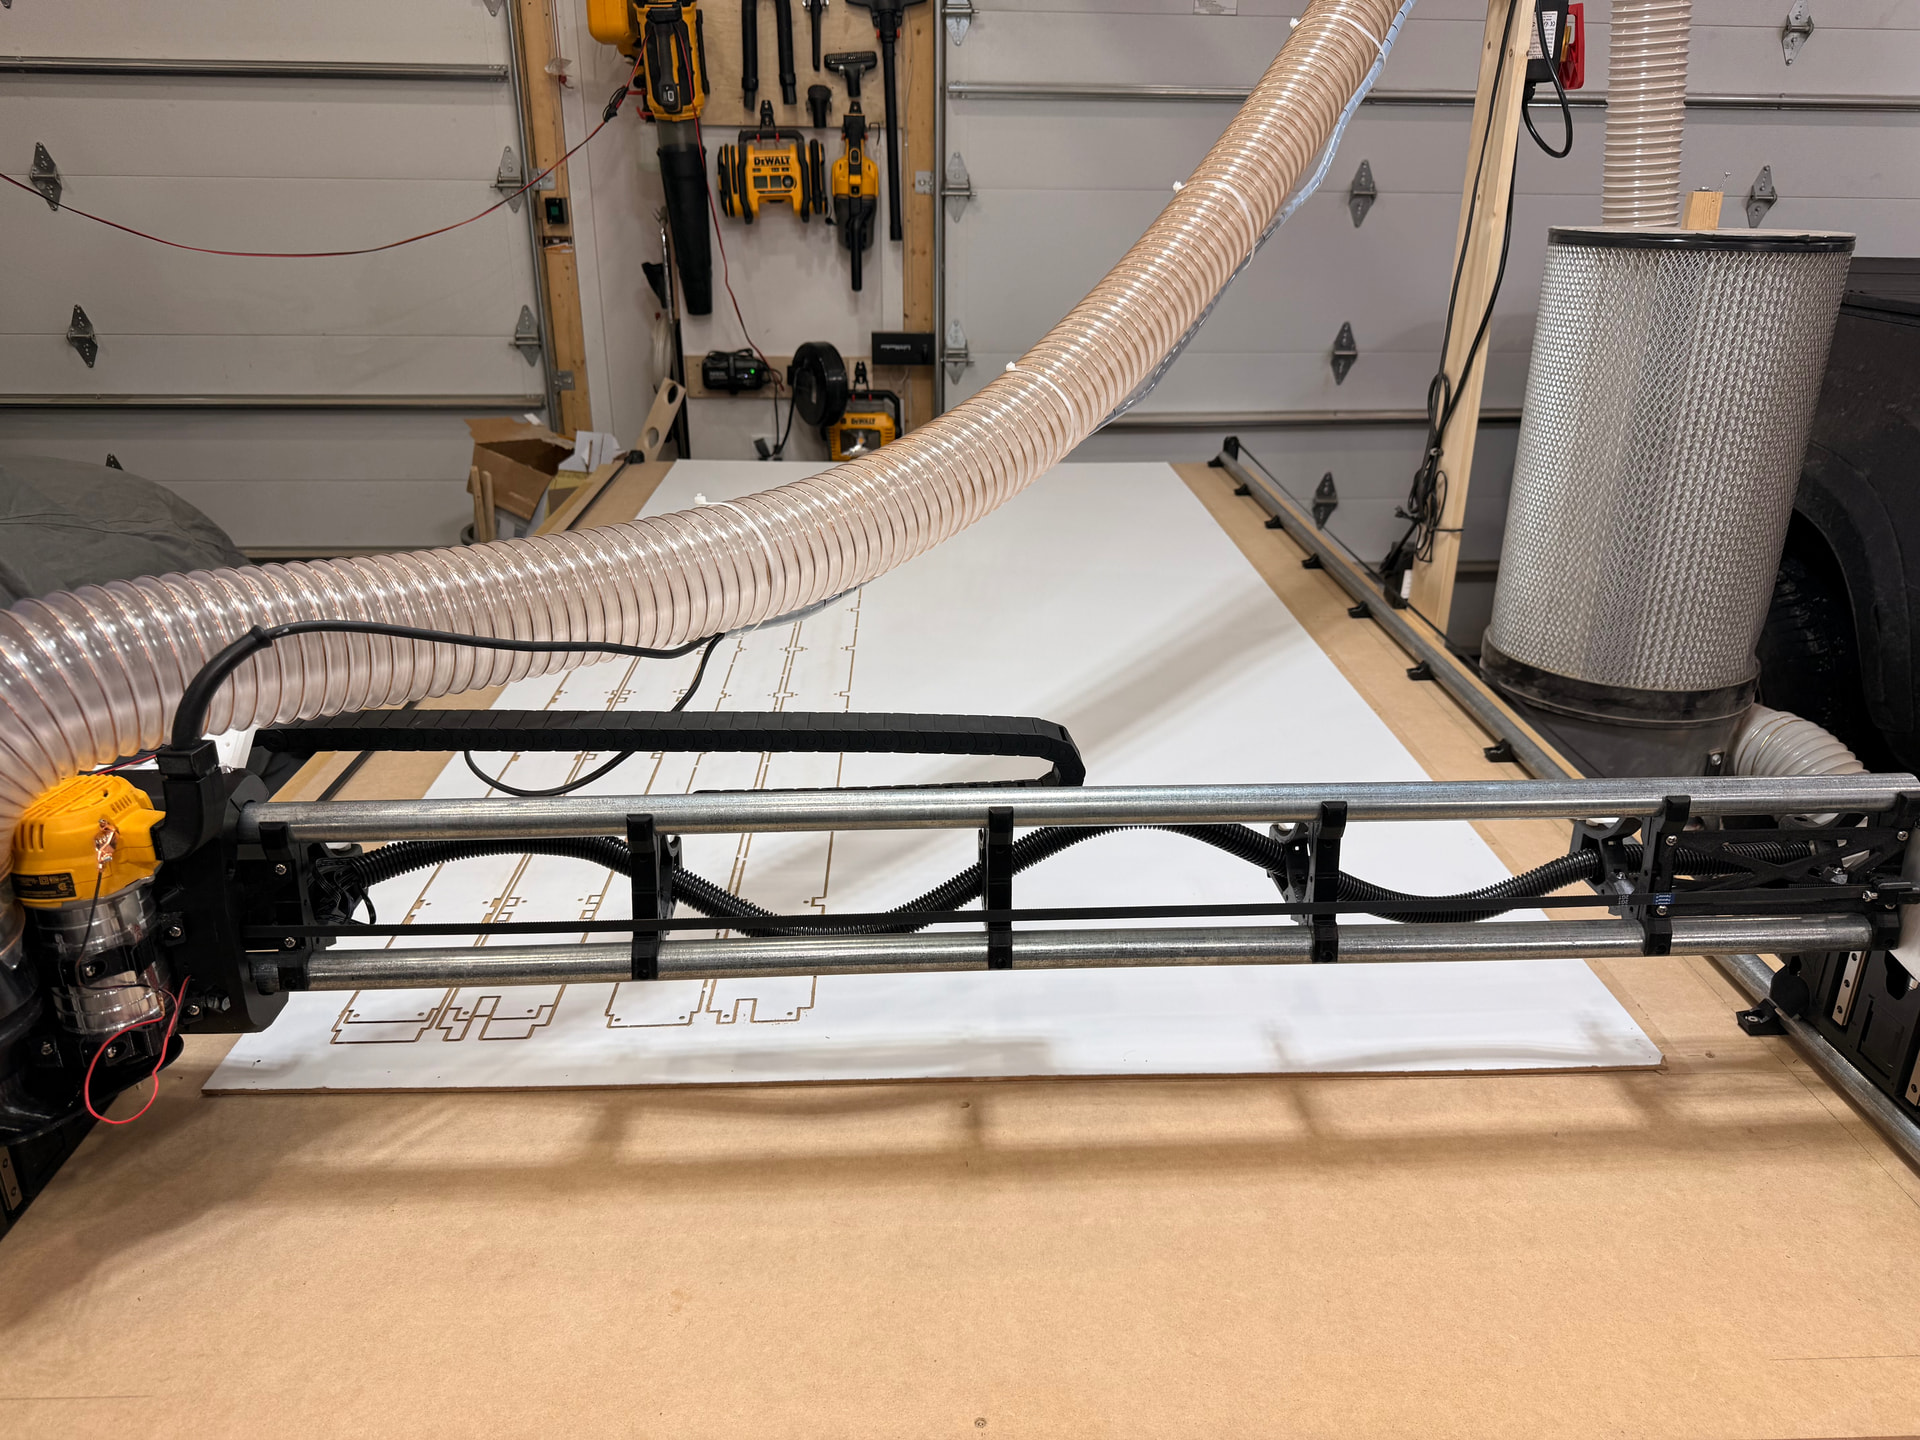
I’m now having difficulty cutting all the way through my hardboard I want to use for the strut plates, as you can see in the photos, I’ve tried three times using guidance I have found in the forum but still have no luck cutting through the piece. The hardboard is 3/16” or 4.76mm thick.
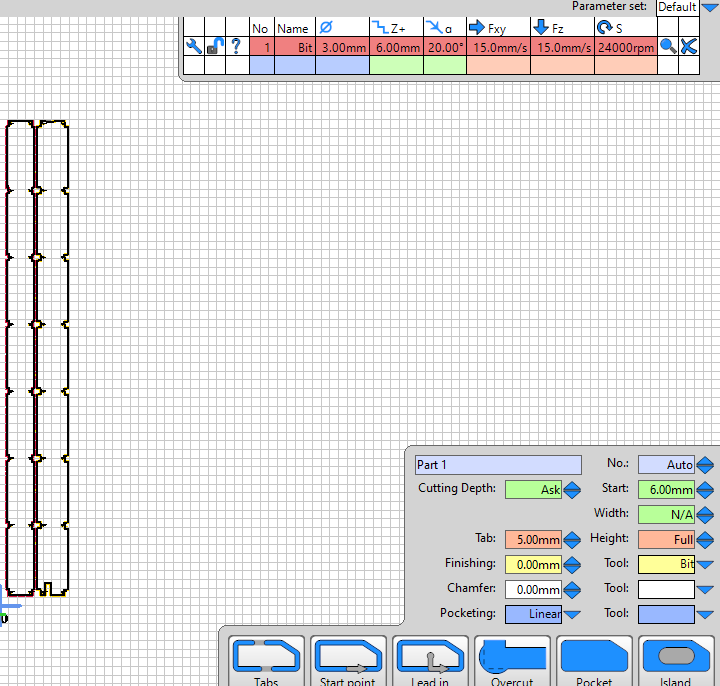
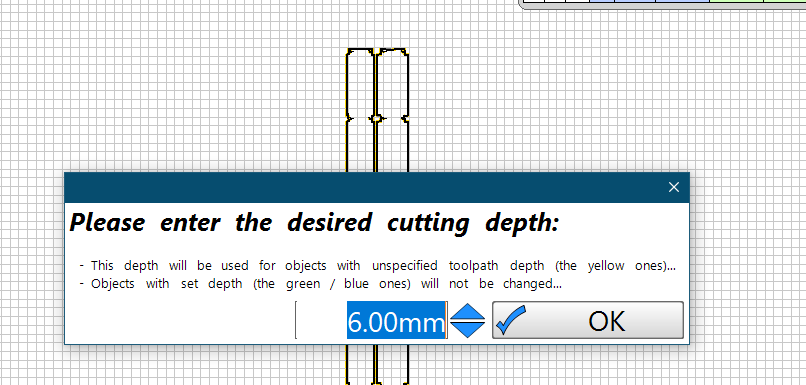
My first two attempts used the “machine bed” for the z-axis origin, then I found guidance on setting the z-axis origin to “workpiece top side”. So, I set the bit depth to 6mm, the start at 6mm, and the desired cutting depth to 6mm, hoping to cut a bit into my spoil board, but it’s still not going through. I’m frustrated with myself since I don’t remember if I placed the touch plate on the workpiece or the spoil board on the third attempt. The first two attempts I definitely put the touch plate on the workpiece.
Please refer to the screenshots attached of my settings. I have a feeling this is a simple fix as I have some wrong parameters, but I thought I’d check with the community before I waste a whole sheet of hardboard.
First of all: you don’t set the “Start”. It starts 6mm below 0 then normally.
Second: Are you sure you set 0 correctly with the touchplate? It rather seems that it does not set 0 correctly.
When you probe with the touch plate, you need to specify the thickness of the plate so the controller can factor that in to it’s understanding of where the end of the tool is. I’m betting all your errors are the thickness of the plate.
Share the gcode you’re using for the probing operation and folks here will help you get it sorted out.
Are you referring to the “Start” field in the part window where I set it to 6mm?
I’m thinking not. What I did was:
place the touchplate under the bit,
then pressed start in FluidNC
then the bit lowered, touched the plate, and raised
then I pressed start again and the machine ran the gcode
What am I missing in terms of setting the touch plate?
Thank you, I’ll search the V1E site for touch plate settings.
Is the touch plate probing operation separate from how I outlined what I did in my response to Philip above? Is there anything to set in Estlcam with regards to the touch plate? Or is this done in FluidNC?
I’ll be back in the shop this evening after work and will copy the gcode and share it here.
1 and 4, set touch plate on the work piece being cut. Set Z Axis 0 origin to top of the workpiece being cut. See Ryan’s CNC workflow video…
Use shallow DOC of 1mm (or 2mm if you’re feeling brave…) until your Ply/MDF/hardboard Struts are cut and installed. Only use deeper DOC (Depth of Cut per pass) like 6mm after installing permanent Struts.
Yep.
Set “Desired Cut Depth” to the ACTUAL caliper measured thickness of your workpiece stock material plus extra 1mm to help account for uneven table and/or gantry leveling.
Ensure gantry has been Z leveled before cutting Strut.
Ensure you’re happy with how square your machine is. Ensure you’ve done the squaring and pulloff configuration step.
Ensure motion distance is calibrated (i.e. Moving the machine 1000mm along the Y axis actually moves 1000mm, if not, then do step calibration). Am mentioning, because my first LR4 Struts were a few mm off because I didn’t calibrate steps/mm
I appreciate your questions. https://docs.v1e.com/lowrider/#making-the-strut-plates points to a mix of docs and info. Maybe a clean step by step how-to walkthrough to create permanent Struts would help folks at this stage of their LowRider journey (started something like this, but that ended up being another unfinished project…).
Thank you all for your assistance and input here. I finally figured out the issue and feel like such a noob… the problem was the router wasn’t fully seated in the holder! I’m running the strut plates now!