That is honestly the best size IMO. Who wants to build starship models anyway? Roman Colosseum all the way.
2 Likes
This one will probably not be enclosed, on the farm all the spools are out front…but I might enclose it who knows. Depends on what it gets used for.
But…I have kits to prep. I think I am going to order a few sets, and get mys stuff done. If they do not show up I will start cutting my own.
So far so good. It would be easier to have all the parts on hand while assembling but I could not help myself.
good idea.
HA! I wanted at least one tall one…those collapsible swords are too cool. Would have been super fun to make a few giant ones.
3 Likes
You need a prep area out with your LR3 lol. But if you are anything like me you still wouldn’t get anything done. I get mesmerized just watching it cut and don’t end up getting anything else done lol
1 Like
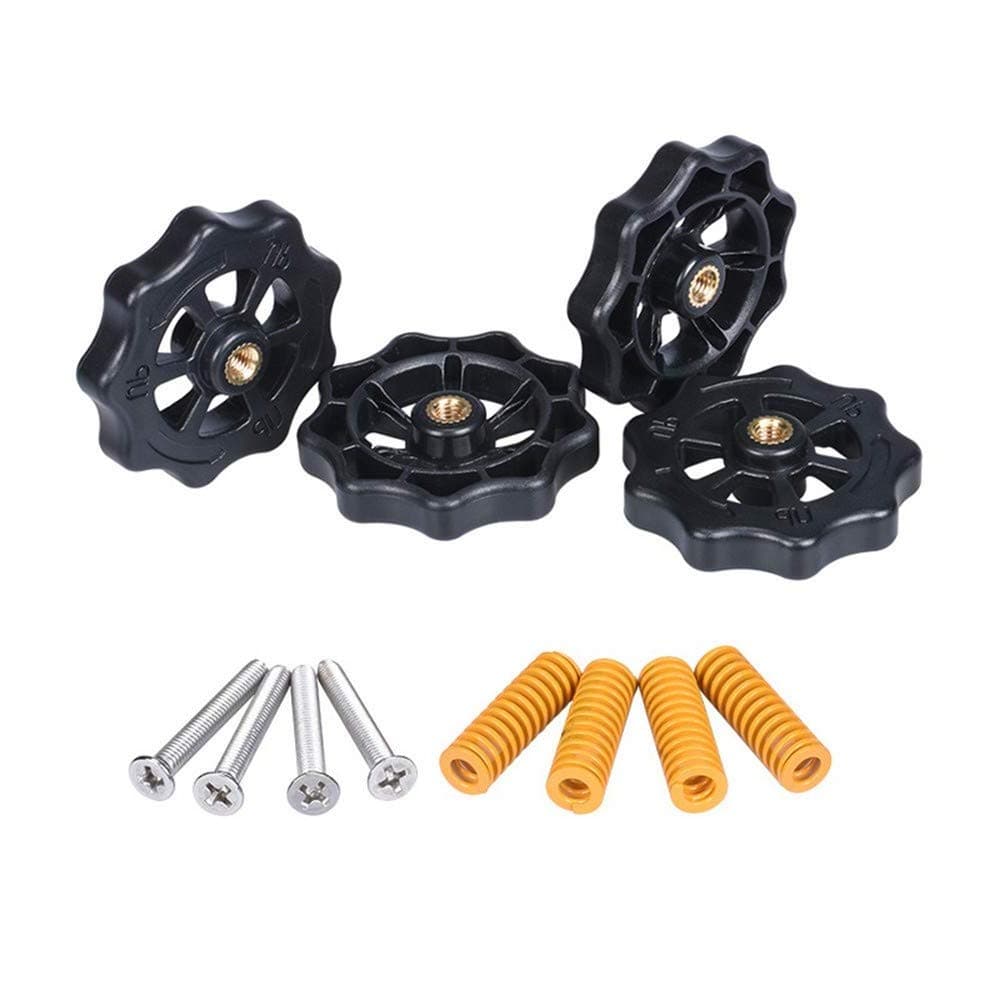
Using the leveling springs you sent me last year for my v4 bed. Reasons… Manually fine tuning bed after first ever XYZ home helps reduce how many attempts and overall time Z-Tilt takes for EACH print. Just manually leveled using by sliding paper between nozzle and bed. Also, am hoping ever so slightly springy bed might help reduce bed/nozzle damaged if/when unwanted contact/grinding happens.
Sure would be nice to see your v5 printing some stiff high temp stuff ![]()
1 Like
Any updates on the build @vicious1???
I want to play with the CAD a little bit for the Z parts.
1 Like
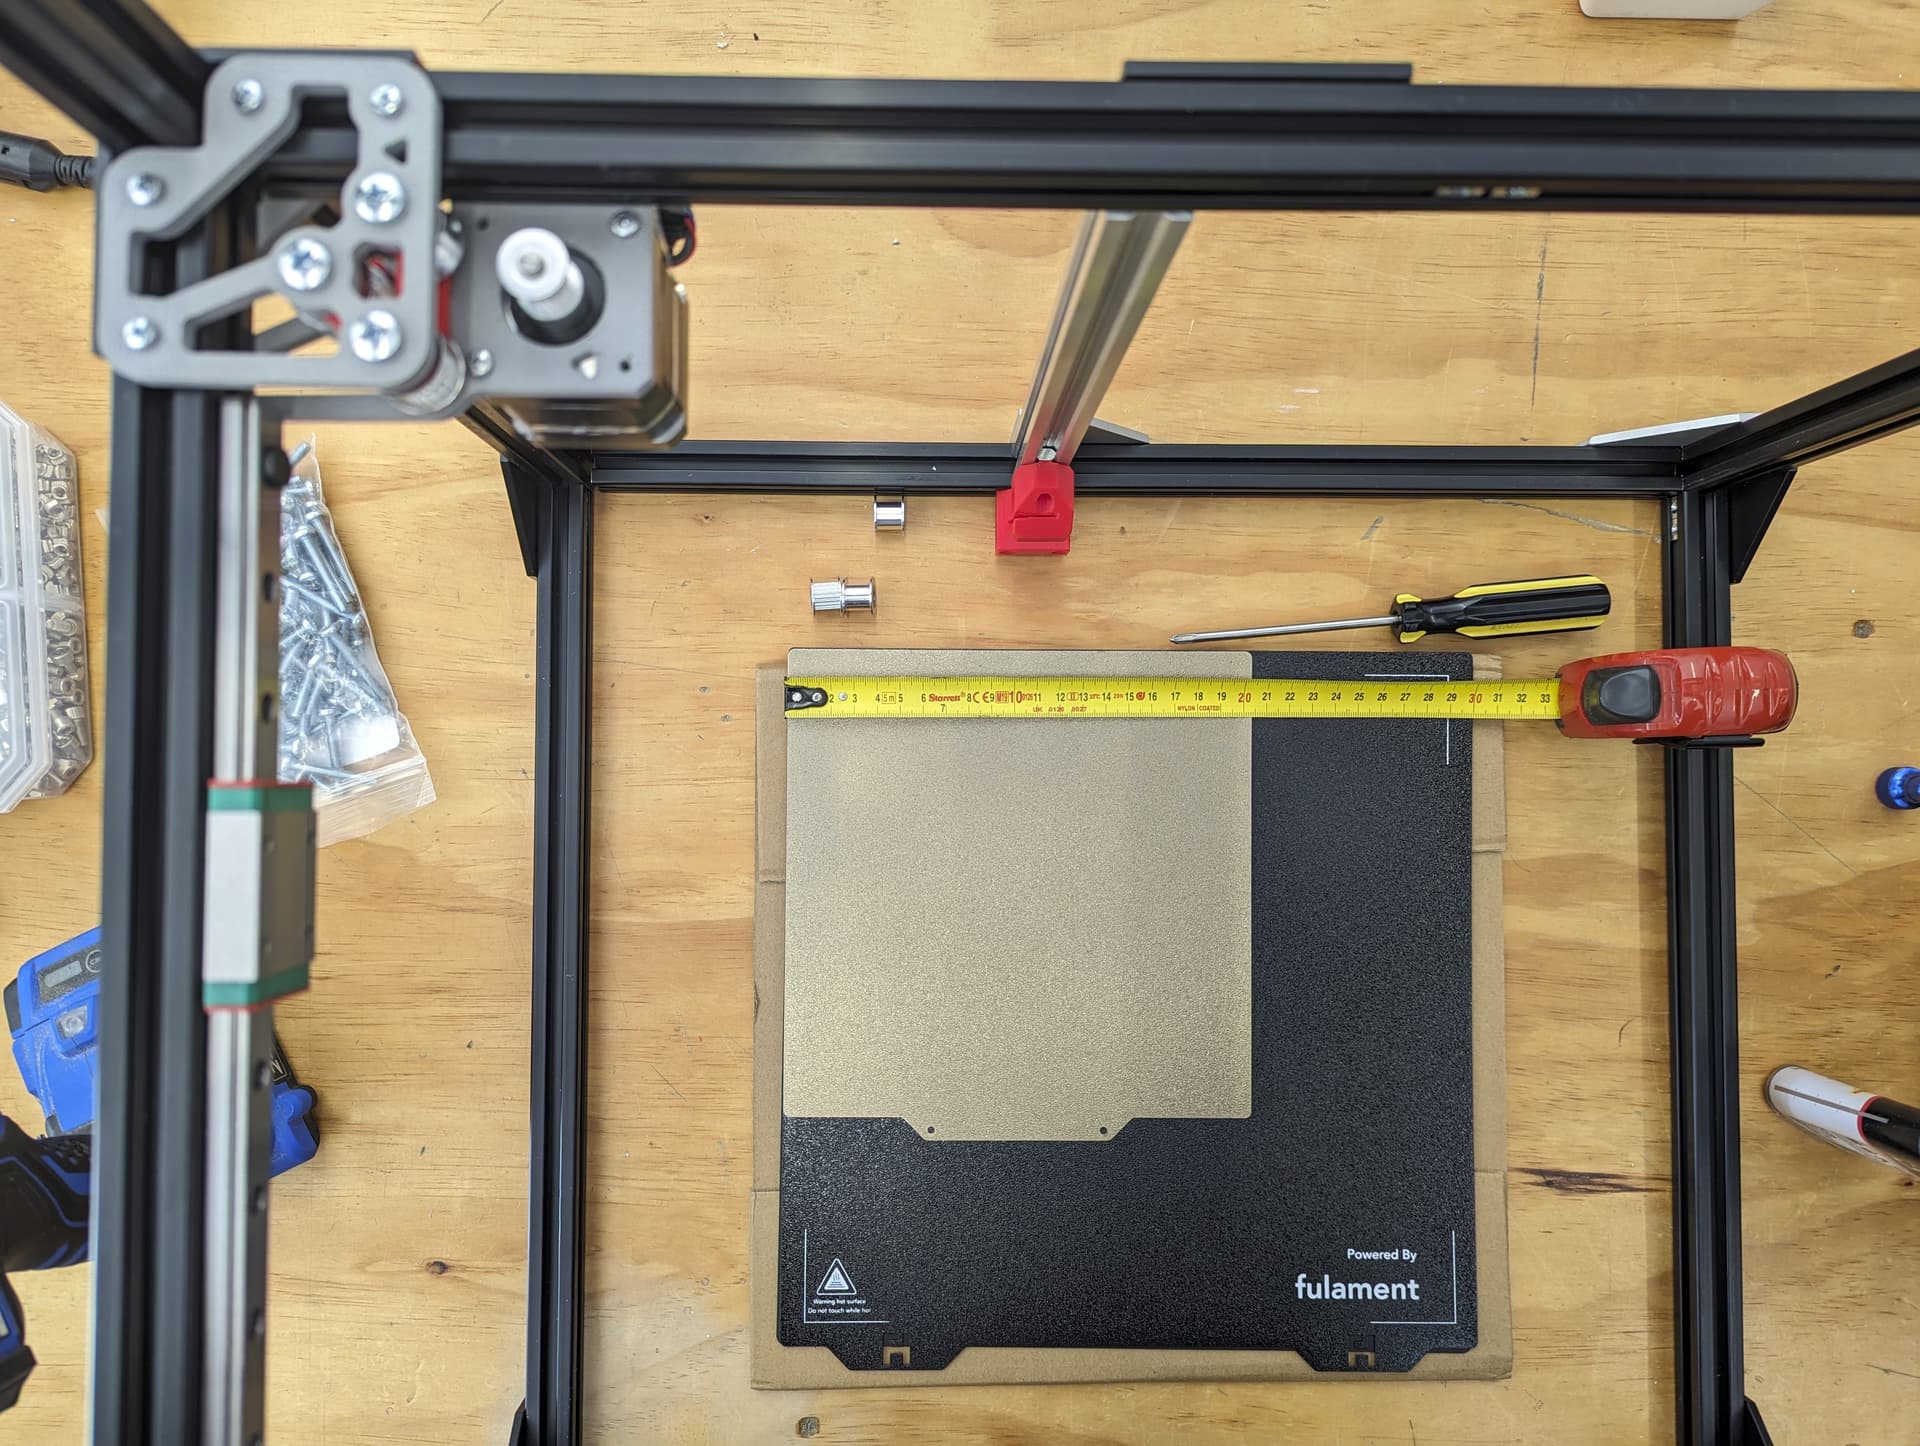
could you elaborate on that? The tape measure says a lot.
Since my v4 is a 300x300x400, would it be considered bad form to make a v5 that is 200x200x200?
oh and is the aluminum spec’d in this for the plates 1/4" or some other thickness? Any idea of the surface area of a piece needed to cut them all out? 6x6" or 12x12? Just thinking of gathering some and interested in ballpark amounts. I’m also curious about acrylic instead of aluminum unless that is a bad idea.
To me 300x300x300 is the perfect size. My V4 is 300x300x400. And I will still build the V5 at 300x300 for sure. I only have one printer under 300 and it gets the least use because you can’t fit shit on it lol. Yes I know I can and still use it but it’s just not as easy. It’s all in what you are used to I guess. I am also curious as to what you find ridiculous about it.
I think I am going to start making plates 1kg in prints, instead of fill the plate. That should make the print farm easy.
currently ~5mm. If you go more than 0.5mm up or down you will probably need to resize the M3’s So next step down would be 3mm and 8mm screws, or 7mm and 12mm screws.
Let em see what I can do about that. I have some parts paying around to get an idea.
It seems sooooooo big, like not even close to the 200x200.
Acrylic is fine I’m sure, careful though one of those does not like IPA spray.
looks like 12x12 would leave you a lot of wiggle room. Might get away with 10x10 if you use deepnest.
I could see 300x300 seeming big when all the others you have are 200x200. I guess it just seems normal to me lol
I found a mistake. Or a bad assumption.
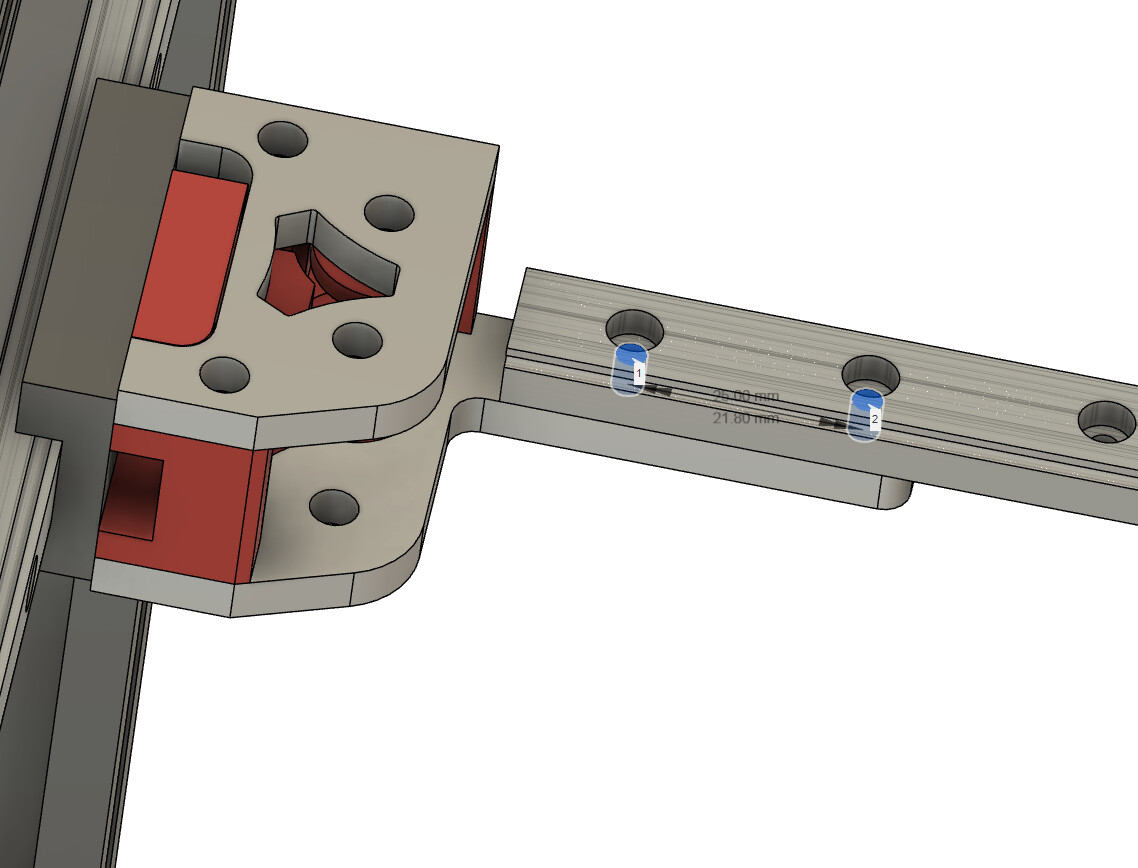
These 4 screws are not M3x10…I am not sure why I thought they were. They need to be M3x12-14mm Grrrr. It was so perfect before that.
Making the nut holder now.
You’re talking about the bolts that attach the linear rail to the aluminum plate? If we threaded the plate then 10mm would be more than enough correct? I know you don’t want to make that a have to but I’m thinking anywhere I can I would like to do that on mine. Just seems like it would make a lot cleaner look
Yes but it kinda needs to be a slot.
1 Like
A slot means the build does not have to be as perfect as the V4 had to be.
Although I have learned, cutting all the extrusions 2-3mm short means building it perfect is pretty easy.
2 Likes
Well, it’s double the print size.
Oh, and FWIW, on my v3, I use a 7×7 probe grid for mesh level, and it’s the same size squares as 5×5 on a 200mm bed. (50mm squares) and almost double the probe points (49 v. 25.)
I found that the 50mm spacing is still about right for a good first layer, something to consider for firmware config on a 300×300 build. I got some issues in places with a 5×5 grid mesh level. The G29 operation takes longer of course, but it seems worth it.
Huge difference in rigidity. Acrylic is wibbly wobbly for flat pieces, unless you put a bend in them, or have some 90° joints solvent welded together. Thr acrylic bends easily along the flat plane but can be rigid as a cross brace. Still wiggly relative to aluminum, regardless.
My self-designed printer was all cut from 5mm acrylic, and the Z towers are hugely over-engineered to be rigid enough. The bottom wasn’t, and I ended up needing to reinforce it with aluminum square tube.
In this case, some of these parts are under loads where I don’t think acrylic would offer adequate rigidity.
1 Like
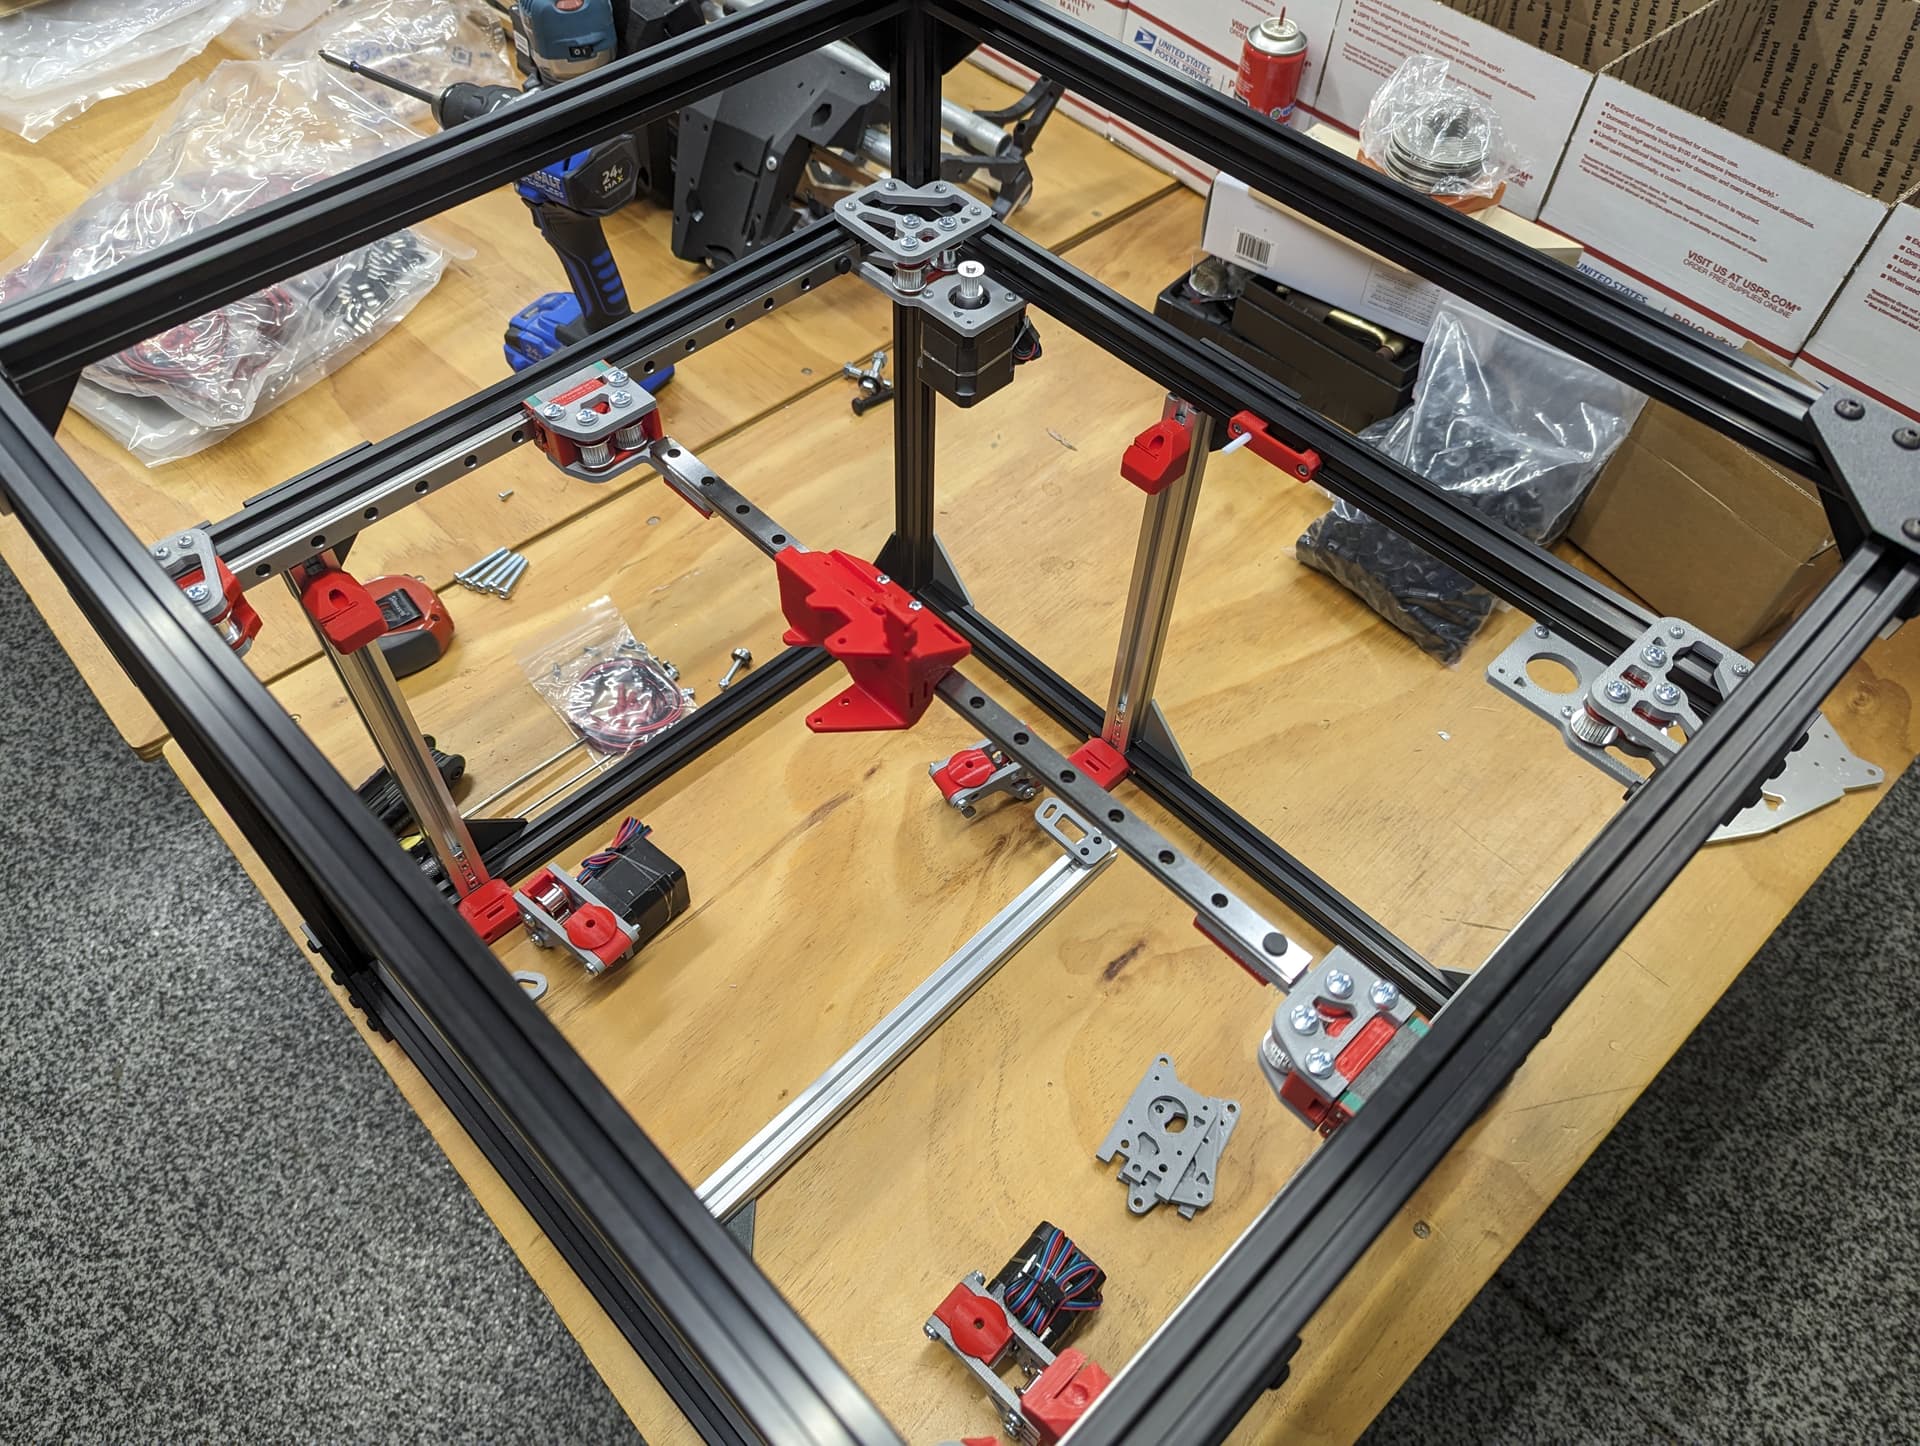
So, to follow up.
These work well, but…if your belts are short, or your XY steppers are a little bigger, they interfere, I was able to move the the heatsink on my stepper to the front side, which solved this problem.
I am going to order some 15.3mm diameter wheels, the standard diameter wheels are 24mm.
As I order these parts I will also put together a Pricelist / BoM. I am thinking based on preliminary pricing, that there are minimal savings vs MGN Rails.
BTW, the bed drops are very dramatic now…here is hoping the SKR Octopus has good circuit protection.
1 Like
Hope to have more info on that next week… waiting on parts.
4 Likes
Waiting on Z linear guides, so I started working on a H2 fan and probe mount.
Might start wiring up a board to get klipper started. It also might be good to figure out where it might be good to add wire holders. For this one I think I am adding the board on the right back panel that is where the hotend wires and bed/steppers will end up so close and easy.
5 Likes