Wow, that is really shaping up to be really powerful!
As soon as the new community docs (close… docs.v1engineering.com) are done being transferred I/we can start working on a controls page and add this to the list of awesome ways to drive a machine.
Wow, that is really shaping up to be really powerful!
As soon as the new community docs (close… docs.v1engineering.com) are done being transferred I/we can start working on a controls page and add this to the list of awesome ways to drive a machine.
I managed to get my laser working under GRBL Mega 5X which was written for an Arduino Mega 2560 and RAMPS 1.4. The way Gauthier Briere has written the control pin for Spindle PWM places it on D8 which is ordinarily for the heated bed and runs at 12V. My little 3.5W laser runs on 12V but has a third wire for TTL which wants 5V. I have read a variety of solutions, some simple and some complicated. I finally found this solution:
In short, it uses the D6 Pin located in the Servo area on the RAMPS board. This pin doesn’t seem to be used for anything else. It is associated with an 8 bit timer which gives 255 power levels (instead of a 10 bit timer and 1000+ levels with D8) but this seems to work just fine for me so far. To implement it I downloaded the Mega 5X Edge file with all of the various GRBL related folders, Cut and Pasted the solution into the cpu_map.h file over the one specifying D8 (right at the end of the file), recompiled everything in Arduino IDE, created a Hex file which quickly uploaded with Xloader. In the end this was a very easy solution so a big thanks to the guy who figured it out and posted it!
The big bonus is that I can use the laser with Grblgru and a 4th axis. The program makes the laser follow the curves I map in and so stays in focus!
I tried out the combination above - Mega 2560 + RAMPS + GRBL Mega5X - with the laser for a few minutes. I found GRBL is still looking for 1000 for full power. I haven’t figured out where to change that in GRBL Mega back to 255 but it works with Lightburn just fine. I burnt these images on plain old hardboard. You definitely have to decide on power levels with each different material. Darker surfaces are better. White is tough. These are on a flat surface. I’ll try to upload some examples of burning on a curved surface tomorrow.
The Celtic cross is at 3000mm/min and 100% power. 1 pass
The Bouquet is at 2000mm/min and 80% Power. 2 passes
I didn’t bother getting rid of the double lines from BMP tracing.
Grblgru has now uploaded a English Manual to his website - grblgru.com.
It is worth reading through to understand his program.
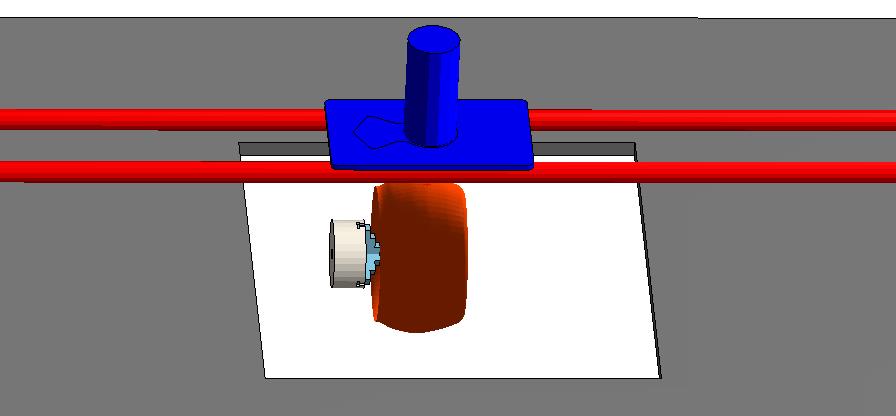
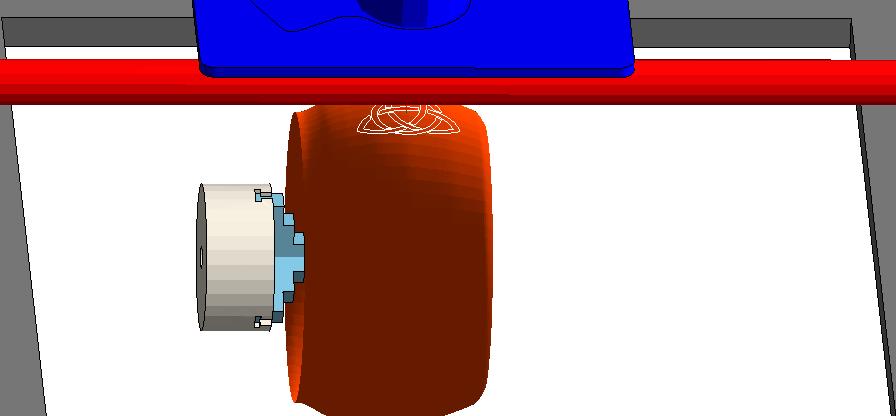
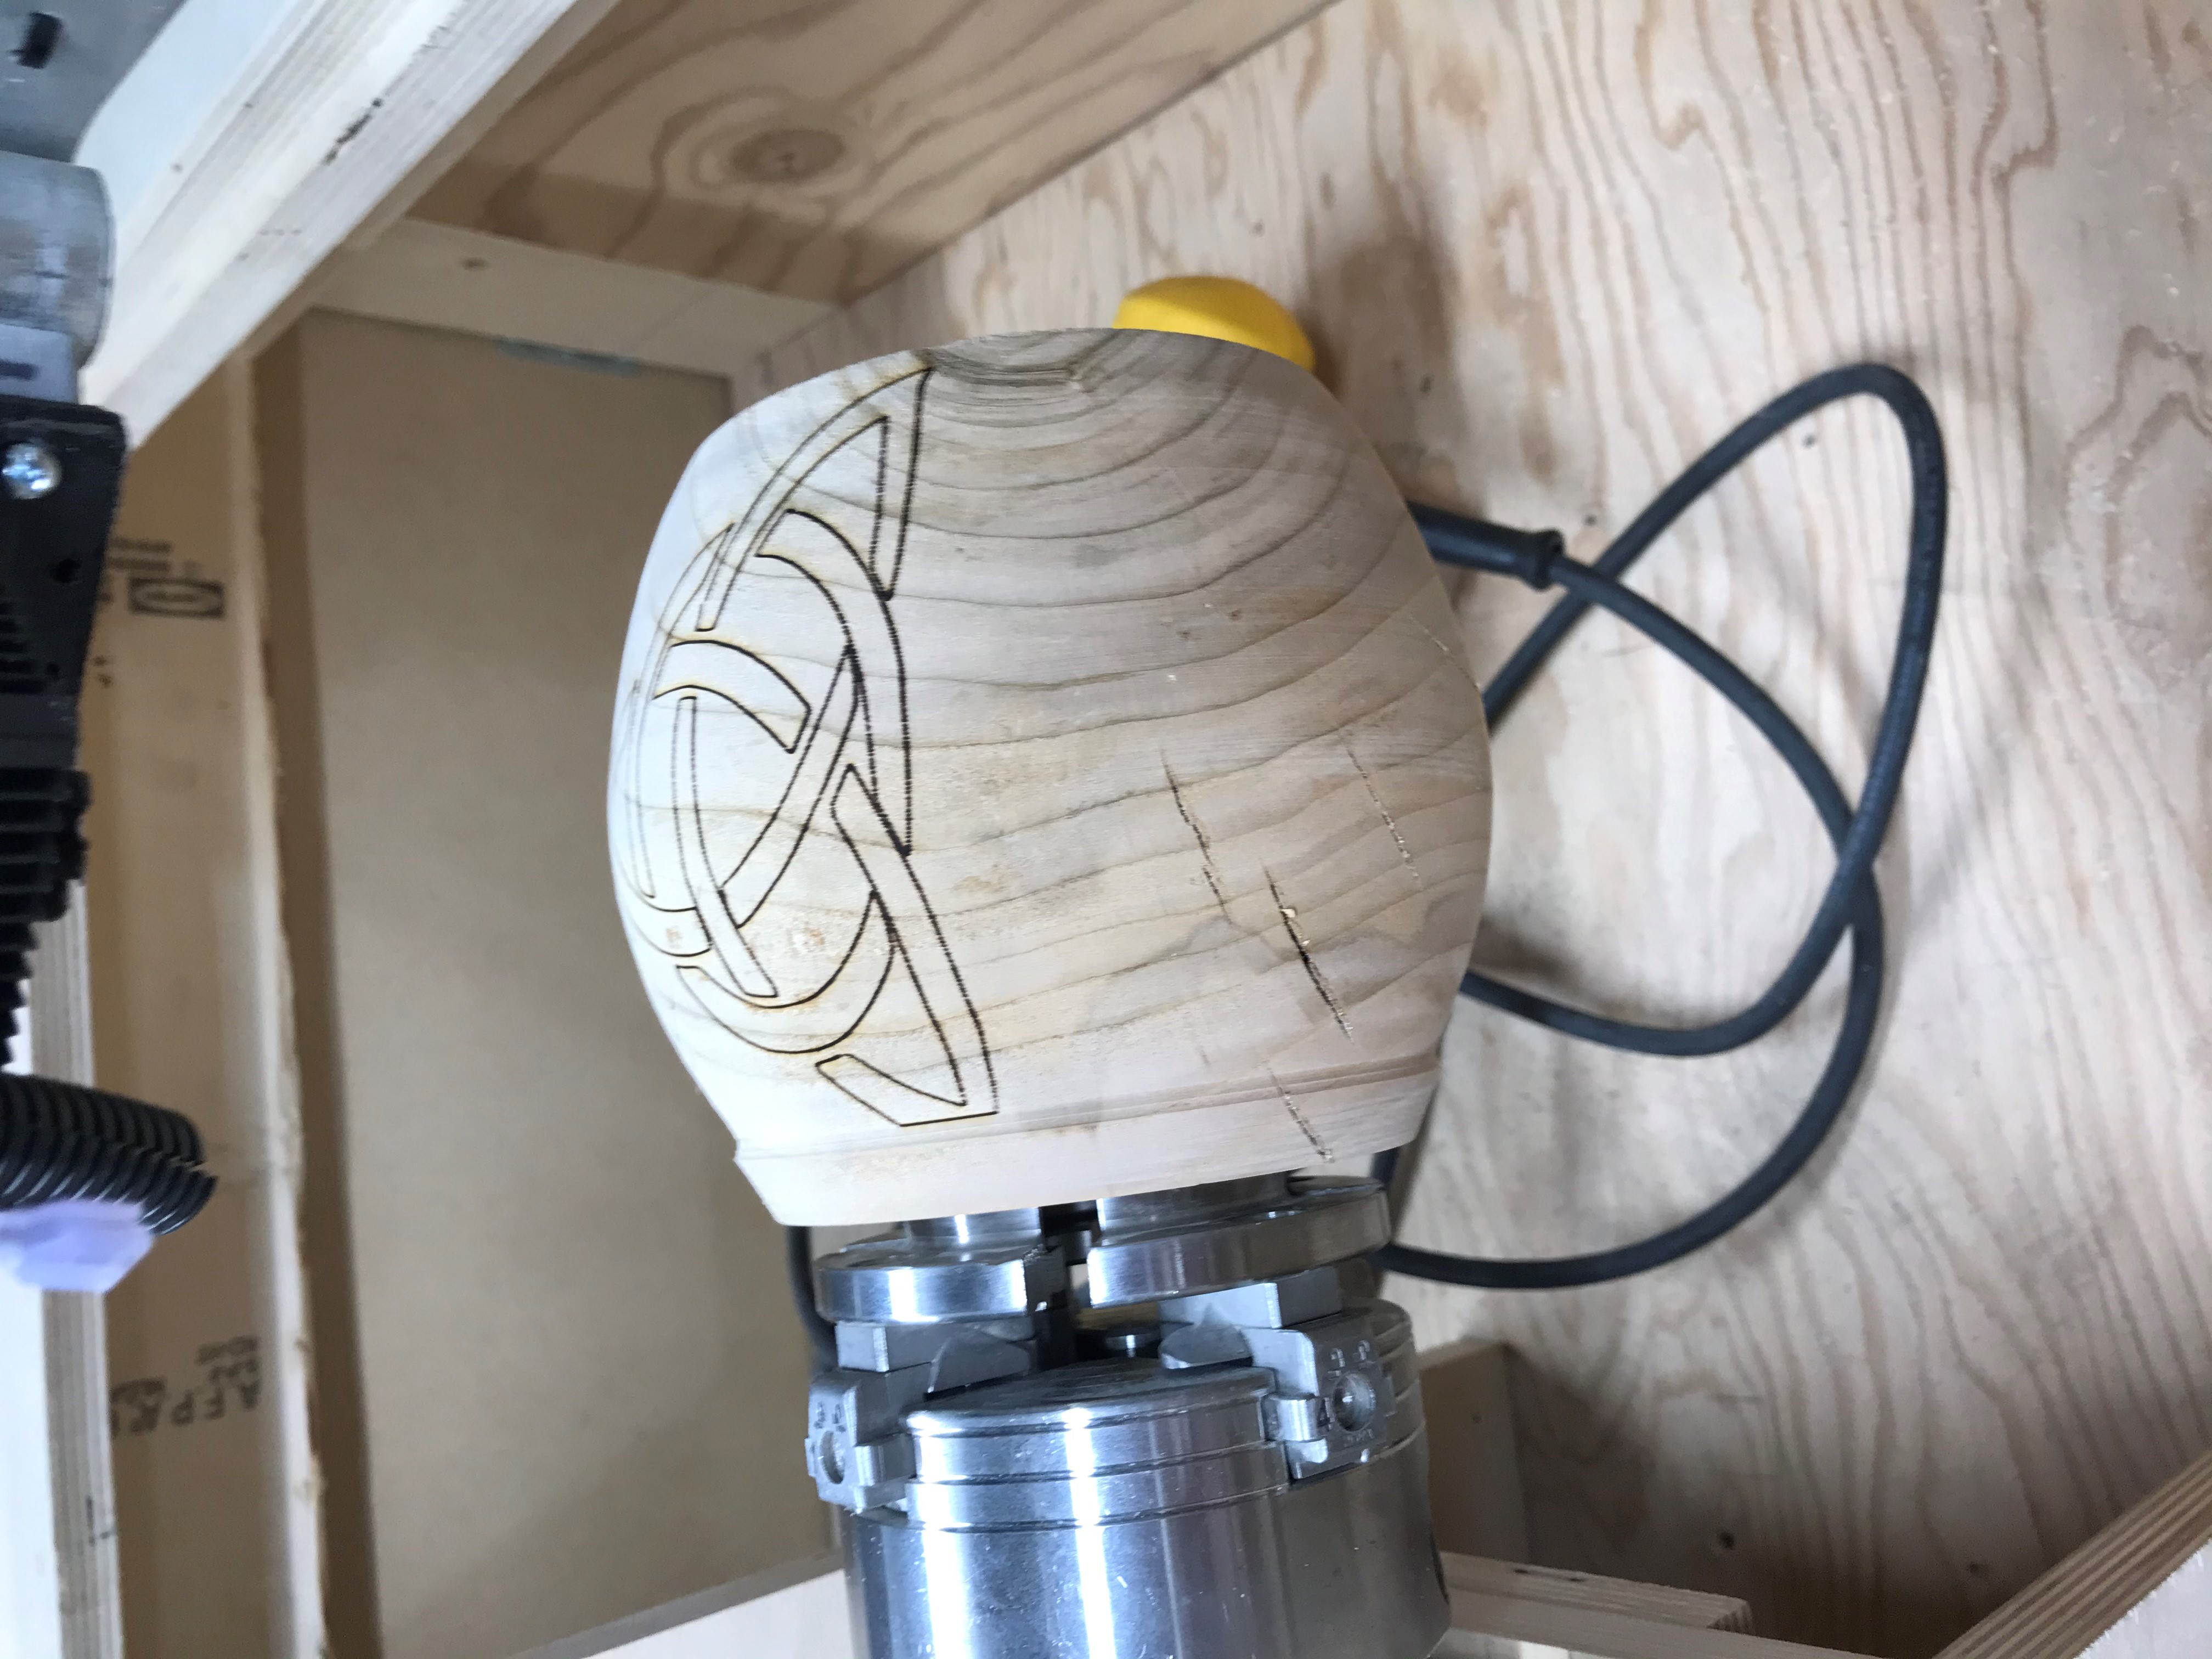
I finally got around to applying my laser to a curved surface under Grblgru. I scan the form and create a virtual STL model in about 2 minutes.
Then I can apply a SVG or DXF design and size it:
Create a Job specifying Projection on to 4th axis. Fill out the variables in the Job menu wrt laser intensity, passes, speed, etc
Voila: one image burned to a curved surface. I did this one quickly keeping the focus wide for a more visible line.
I am doing this with a Canaduino ESP32 board and a Arduino style CNC shield now too. This one is attached to my MPCNC. Very easy upgrade all things considered.
It works just the same with a Mega 2560 and Grbl Mega 5X too.
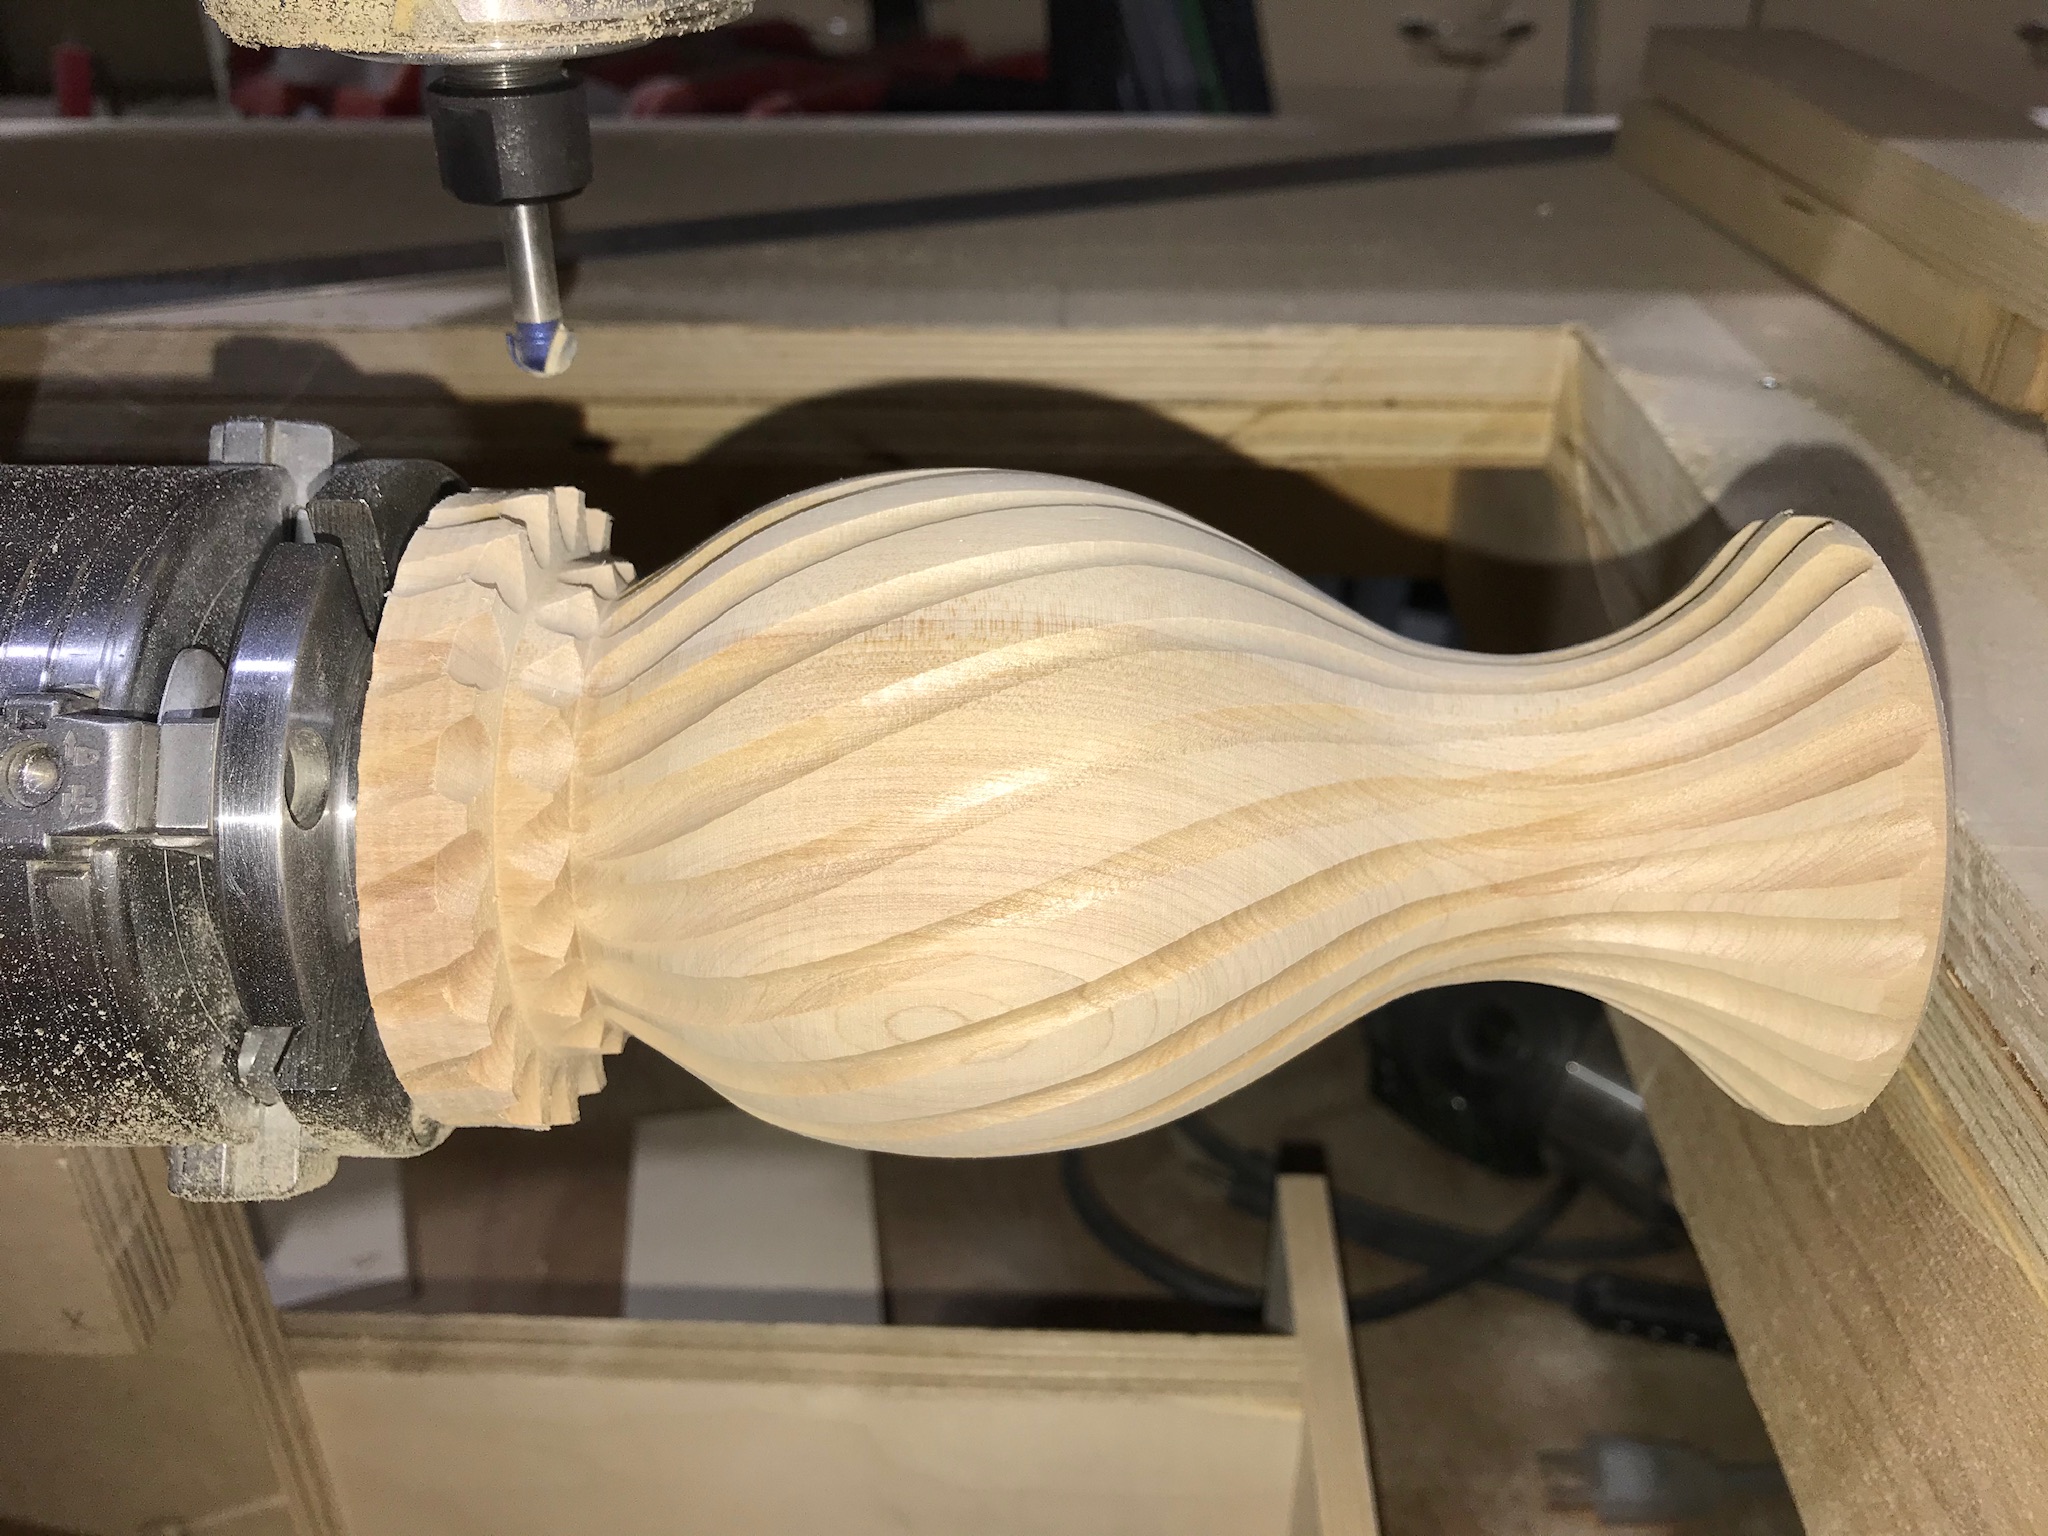
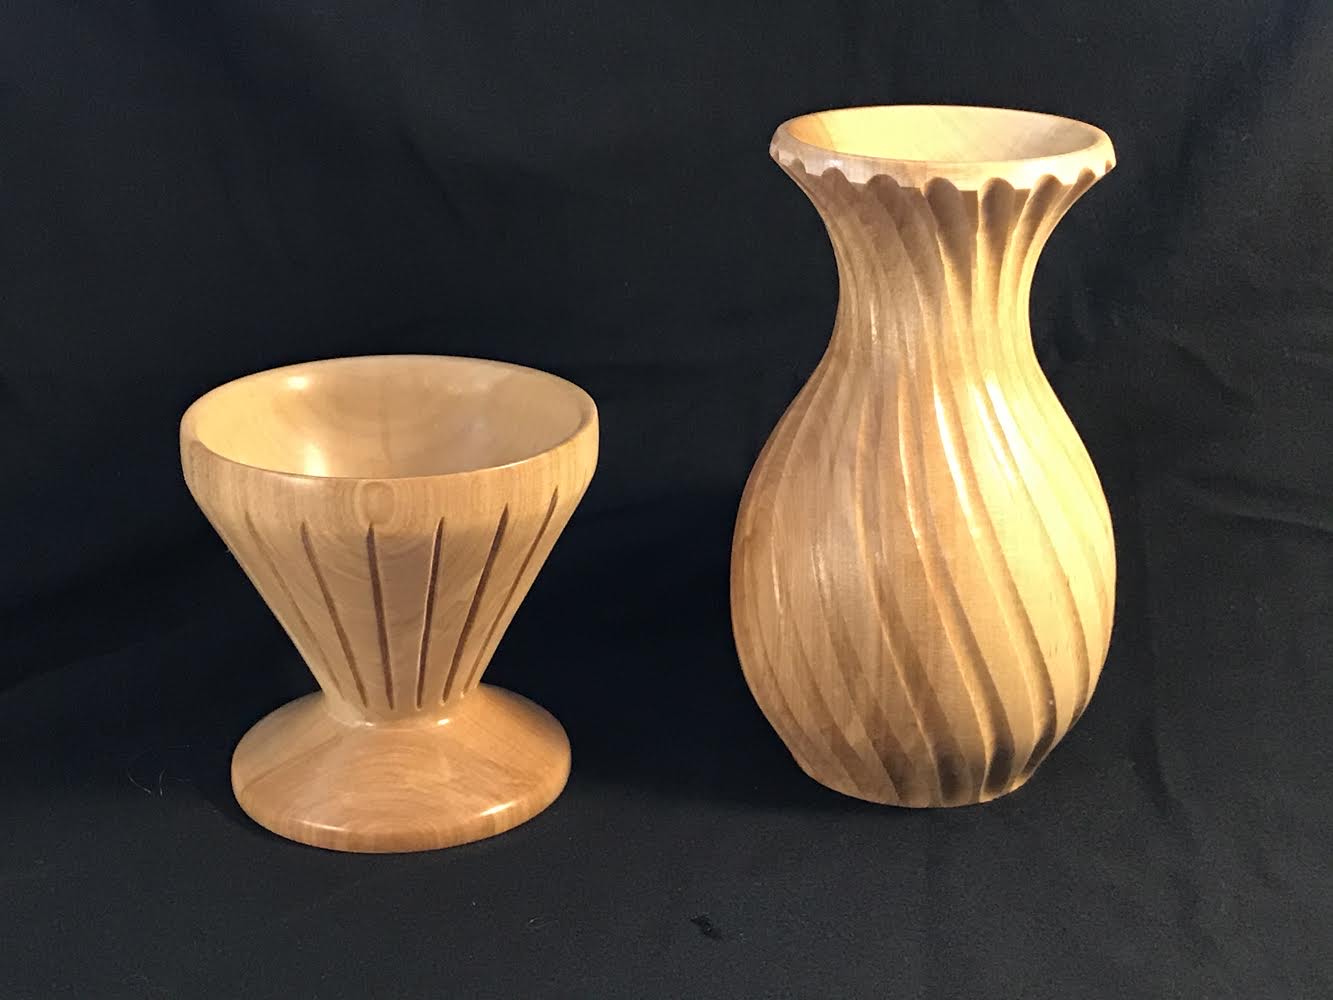
A more complicated shape to follow with the router. I turned this on the wood lathe. The fluting took about 10 min on the CNC. I still have to finish the foot of this little vase but you get the idea where I’m going with this.
Any videos of that in action?
I am not sure of the format I can use for that . The upload link prefers what I think of as picture formats 
.mov and .mp4 are not allowed…
A youtube or vimeo link is best, saves from hammering my bandwidth and storage.
I finally setup a YouTube channel with a few examples. I’m still learning that stuff too ha ha.

Whoa, so someone already had Grblgru running!!!
I just found this: GrblGru: 5-axis CNC machine controlled with Mega-5X - YouTube
But what you have here is stunning. I need to take time to soak it all in.
The items above are made with just 4 axis control. I’ve since moved on to 5 axes since I came up with a way to write GCode for the 5th axis that is quite simple. However, this use of the 5th axis is quite specific to what I want to do, ie embellishing my woodturnings. GrblGru’s author has been quite helpful applying real mathematics to the process instead of my more ‘intuitive’ approach.
Hey, no worries. I am just beginning to grasp all of this, but man, in my world, you are a god, sir!
Ha ha not. I’m just a curious human with a problem to solve
Grblgru has also implemented G93 in Grbl GCode. This is a much better way to integrate linear and rotary axis movements. The vase cut above did not have that so it cut a lot slower than what the original software specified.
I am just reviving this, because he has been working on the program and it looks really, really good. The video‘s subtitles are German, but you can still see what kind of features he has:

It also runs with FluidNC, so it might be an alternative to Estlcam? I really like the 3D animation of the CNC before the cuts and I really dig the idea of doing lathe stuff like JeffH has done above. I have a spare motor lying around that I haven‘t got around to making into a lathe Addon for the LR… it‘s been lying there for years… Argh.