So my father in law wanted some special tools for one of his Ducatis (don’t ask which one, he has like 2-4 depending on drive readiness percentage ). Those doohickeys were pretty impossible to wrap in a proper manner so i made a little “spacer”.
First “production” part i made.
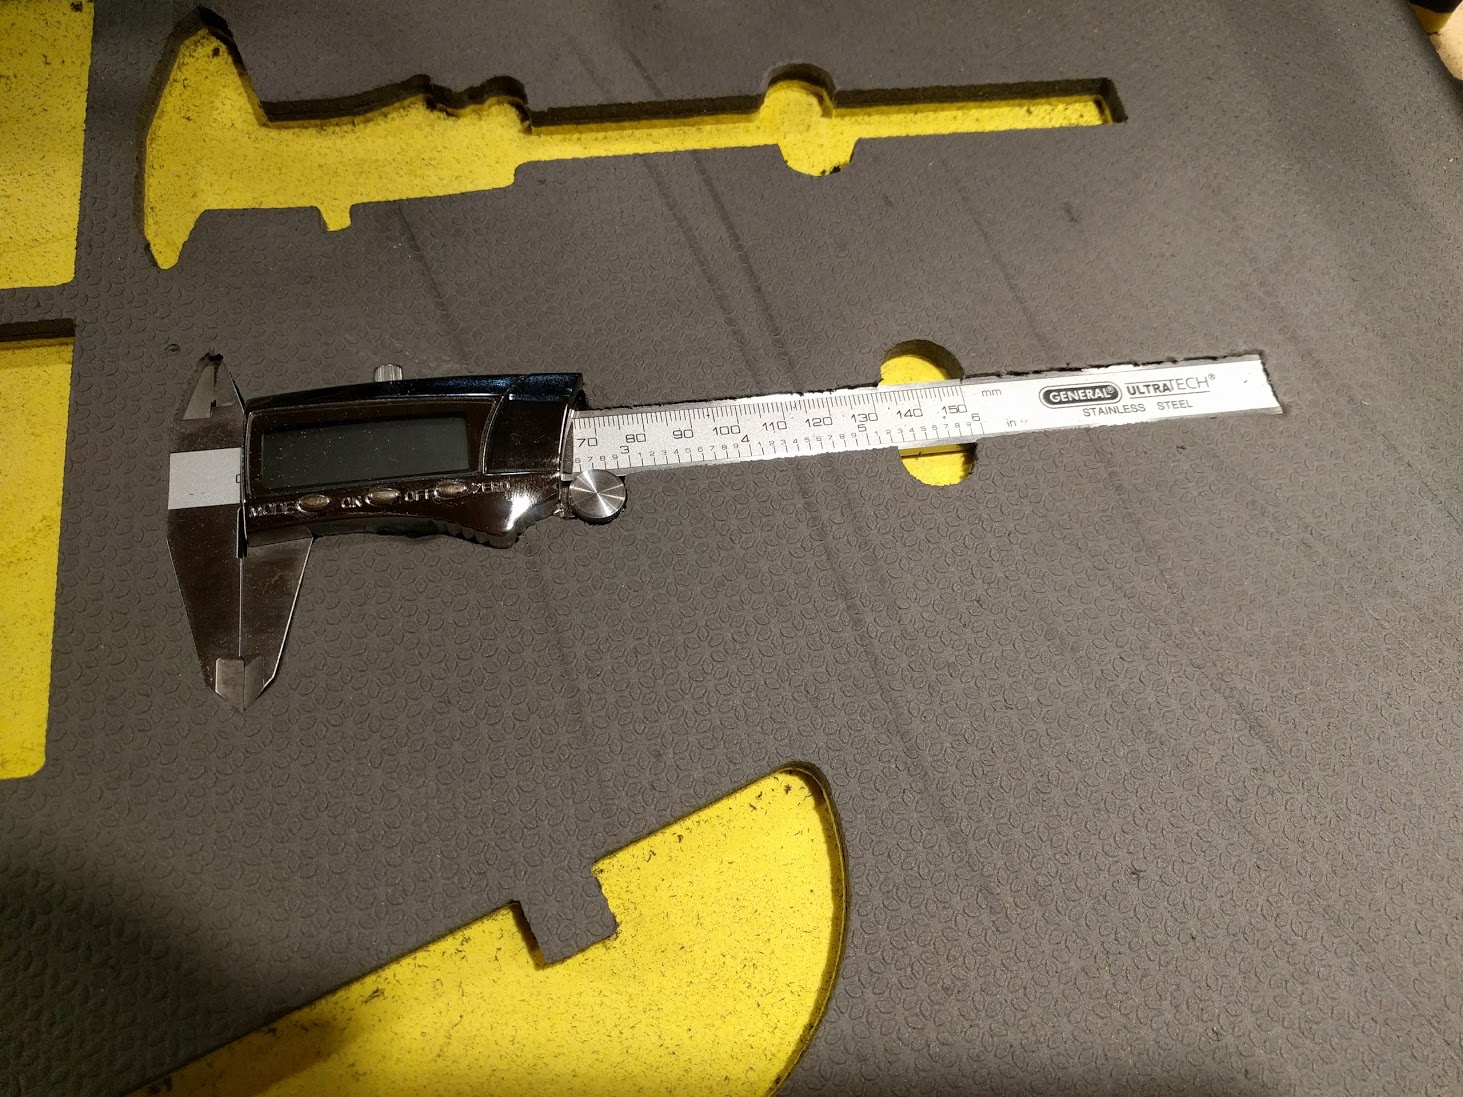
Measurements take of the actual tools.
CAD/CAM in Fusion360
6mm single flute upcut Endmill, 6mm DOC, 540-600mm/min (increased mid-process, and could still do way more)
Edges cleaned up with a heat gut (just like you would remove those spiderweb-ish strings on a printed part).
I like that he could even drop the whole thing into a drawer and keep it all organized if he wanted to. Look out, you may be getting requests for all sorts of tool-related spacers and keepers…
This is cut out of foam of some sort? Is it rigid or something with a little “squish”?
I “shadow” my tools at work like this. It’s not actually mandatory per company policy, but is highly recommended, and it is a good idea really. I’ve been wanting to re-arrange my tools, but have been procrastinating, due to the very tedious nature of the process when done by hand.
I started thinking just last night about the possibility of laying out the tools the way I want them, taking a picture and using the CNC to cut the foam.
@kvcummins: as long as the customer provides the .svg or at least a technical drawing with all relevant measurements, i’m cool with that.
@Paradox_Pete: google “shadowfoam”, “kaizen foam” and you will dig something up. I could provide links to the german sites if that helps.
Its just some hard-ish but flexible PU (i guess) foam. There is cheap stuff on ebay and more expensive stuff (also on ebay ). As far as looks go, they are just the same.
The process itself is pretty simple but not necessarily quick. The hardest part is to get the outlines of your tools into a machine-readable format. I measured them by hand and drew them up as models in fusion (this is okay for 3 tools - especially if 2 are equal and the other one is basically a simple cylinder…the more tools there are the more tedious this will get).
I shrunk the models by 2% (to get a tight fit in the foam), created a box the size of my material, arranged and subtracted the tools and the pockets for the fingers (just a box with rounded edges all across the tools, no need to over-complicate things).
And there’s your virtual part. Setup the tool paths (i won’t go into detail on that in this thread) and you’re good.
Taking a picture might work, but you might need a lens with very little distortion or your tool outlines might get f***ed. If i had such pictures for all my tools in front of an easily distinguishable and uniform background (plain white or greenscreen maybe), i would use Photoshop to automatically mask the tool-outlines and just send them over to Illustrator to create the svgs. Import those to fusion and you just saved a lot of time. Never tried that because as i said…just 3 tools
Office scanner/copier? (Certainly not your personal one, wouldn’t want to scratch it up…)
Or a small-ish drawing tablet that you could trace each tool on, then you could (re)arrange them all in your CAD without the hassle of having to measure and input all the fiddly numbers.
I have done this. There is a tool to fix skew in gimp (the free alternative to photoshop). I then traced the thing with the lasso tool, filled a layer with black and a white background. It was then super easy to convert to an svg in inkscape. This was before I had a CNC, and I extruded it to print it. It was a bottle opener and it still worked.
That said. If you used a scanner, there shouldn’t be any skew. Just out of focus at a distance.
Had a girlfriends mom tell me about the time she was chased by a polar bear at Prudhoe bay. Said it took a few laps around her truck to get into it. First lap just went around thinking it would quit, it didn’t, so the next one she pulled the door open on the way around, then the next one she jumped in.
Dang, I’m stoked. The shadow foam machines well, there’s a tool in GIMP to fix skewed images, and I can verify proper scaling with the graph paper as well.
I’m astounded that less than 12 hours after I start thinking about cutting the shadow foam on the CNC @Jansetsfire posts an example.
@kvcummins I like the Idea with the tablet. @jeffeb3 The out of focus issue might just make make it a littel too hard for the edgefinder in your postprocess. Was thinking about doing it this way, but decited against it, just because of this issue. @Paradox_Pete You’re welcome
And while we’re at it, check this out:
Haven’t tried any of his tips, but it doesn’t sound very far fetched. Buying a special endmil for foam might not be worth though. Esp. if you look at the prictag for datrons (they are fantastic though).
If you don’t have to have 2 colors, it’s much cheaper if you search for EVA foam. Ethylene-vinyl acetate. Maybe make your own custom 2 color and thicknesses by gluing them together first with spray adhesive.
Just in case it helps anyone, these are EVA foam and are used by cosplayers to make costumes all the time. I can’t imagine that they wouldn’t work for this application also. They are 1/2 inch thick and if you use a 20% off coupon (this past weekend they had a 30% off up to 5 items under $10) they only come out to $7.20 ($6.30 with the 30% off coupon). Just a thought.
And if you ever need Harbor Freight coupons, check out the HFQPDB. You can even pull it up at the store on your phone and they’ll try to scan the images at the register. If that doesn’t work, they’ll type in the number. Again, just sharing in case it helps anyone.
 ). Those doohickeys were pretty impossible to wrap in a proper manner so i made a little “spacer”.
 ). As far as looks go, they are just the same.