The pen holder looked like the same compliant mechanism as years past and I’m pretty sure those holder were printed at RMRRF or earlier. I think Ryan was hoping he had a few more in the box than he did. But they held up ok to the curious fingers.
He also wired an endstop switch to the macro button. That was nice. It did weird things if you pressed it before the last pattern finished. But we could be in the middle of a sentence and pop a new coaster in and press the button from either side of the table.
I have spent more time than I would like to admit thinking about pen holders and I still haven’t built or seen what I consider the perfect one.
The features I want are:
Should have a kinematic mount that allows swapping pens with excellent repeatability
Each removable pen holder should allow adjustment or shimming such that changing pens results in perfect alignment with no software offsets. A separate alignment fixture could be used to align the pen tip relative to the kinematic mount.
Pen force is independent of deflection, at least over a few mm of travel, which basically implies a flexure with:
3.1 Low stiffness in Z travel
3.2 High stiffness in 5 other axes
3.3 Preload spring (or something, like weight) to provide near-constant force
3.4 (implied by preload spring) Hard stop lifts the pen when Z lifts
Ideally the preload can be different for each pen, because a felt-tip pen or ball-point pen or engraving tool will want different amounts of force.
If a pen requires a cap (like a sharpie) then it must allow capping / uncapping the pen without messing up the fine-tuned alignment.
I would consider 0.1 mm relative alignment accuracy between colors to be success. 0.5 mm is marginal, and 1 mm is poor.
And for me, these are aspects that are not requirements:
It need not be fully printed. Wire, rubber, magnets, weights, or other materials are on the table.
It need not be small. Maybe long flexures can have better characteristics than short ones. Maybe wider spacing can have better torsional stiffness than narrow spacing.
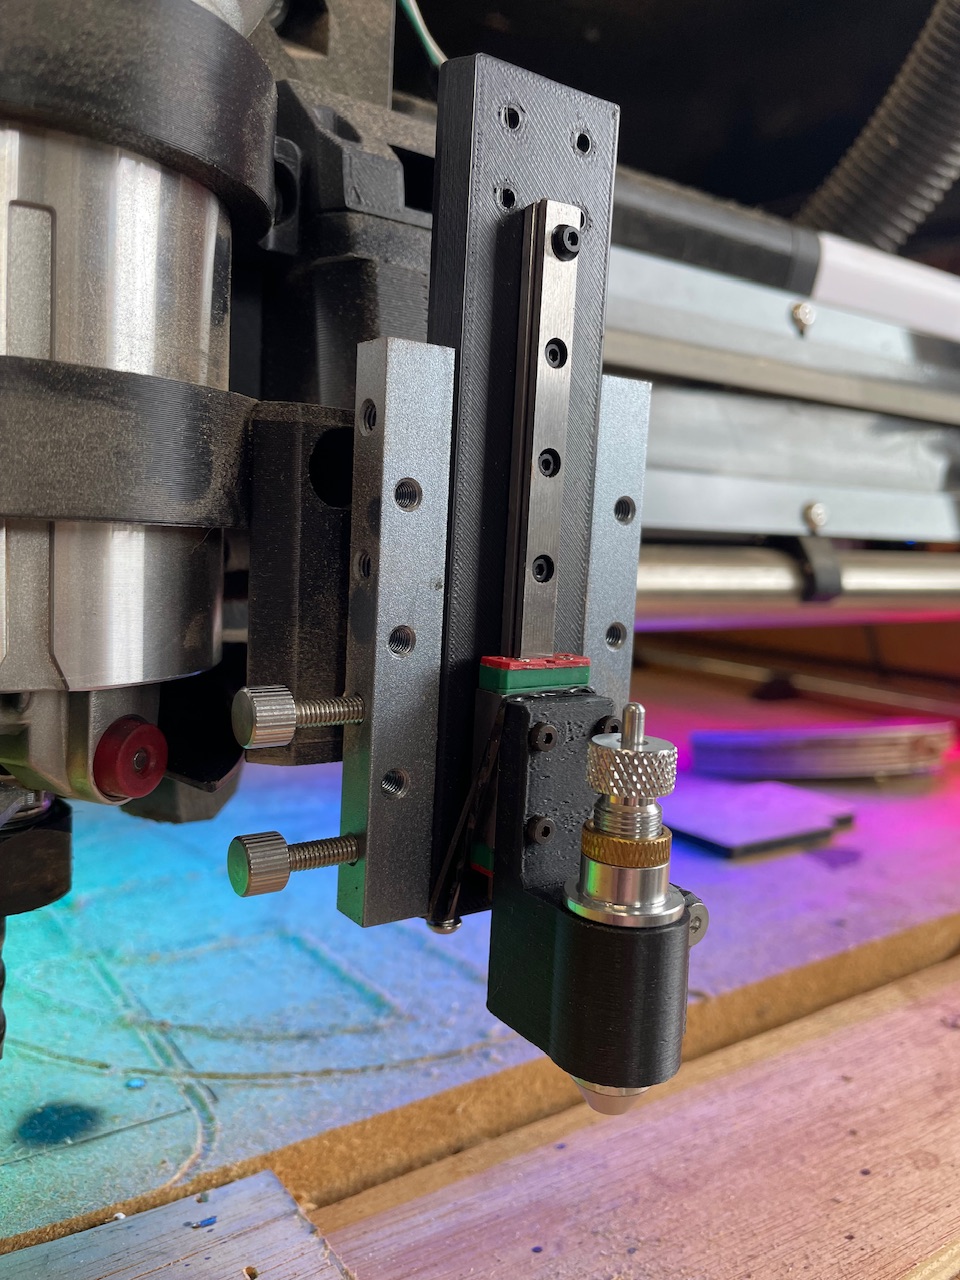
I made this one which uses a small linear rail to keep it rigid but allow vertical movement. Loom bands act as a preload spring. It’ll hold a drag knife or pen. It mates with the dovetail mounting of my diode laser so not really much use to anyone else.
The holder is the published one, I just zip tied it to the router instead of screw mounting to prevent the “seems like overkill for a pen plotter” comments.
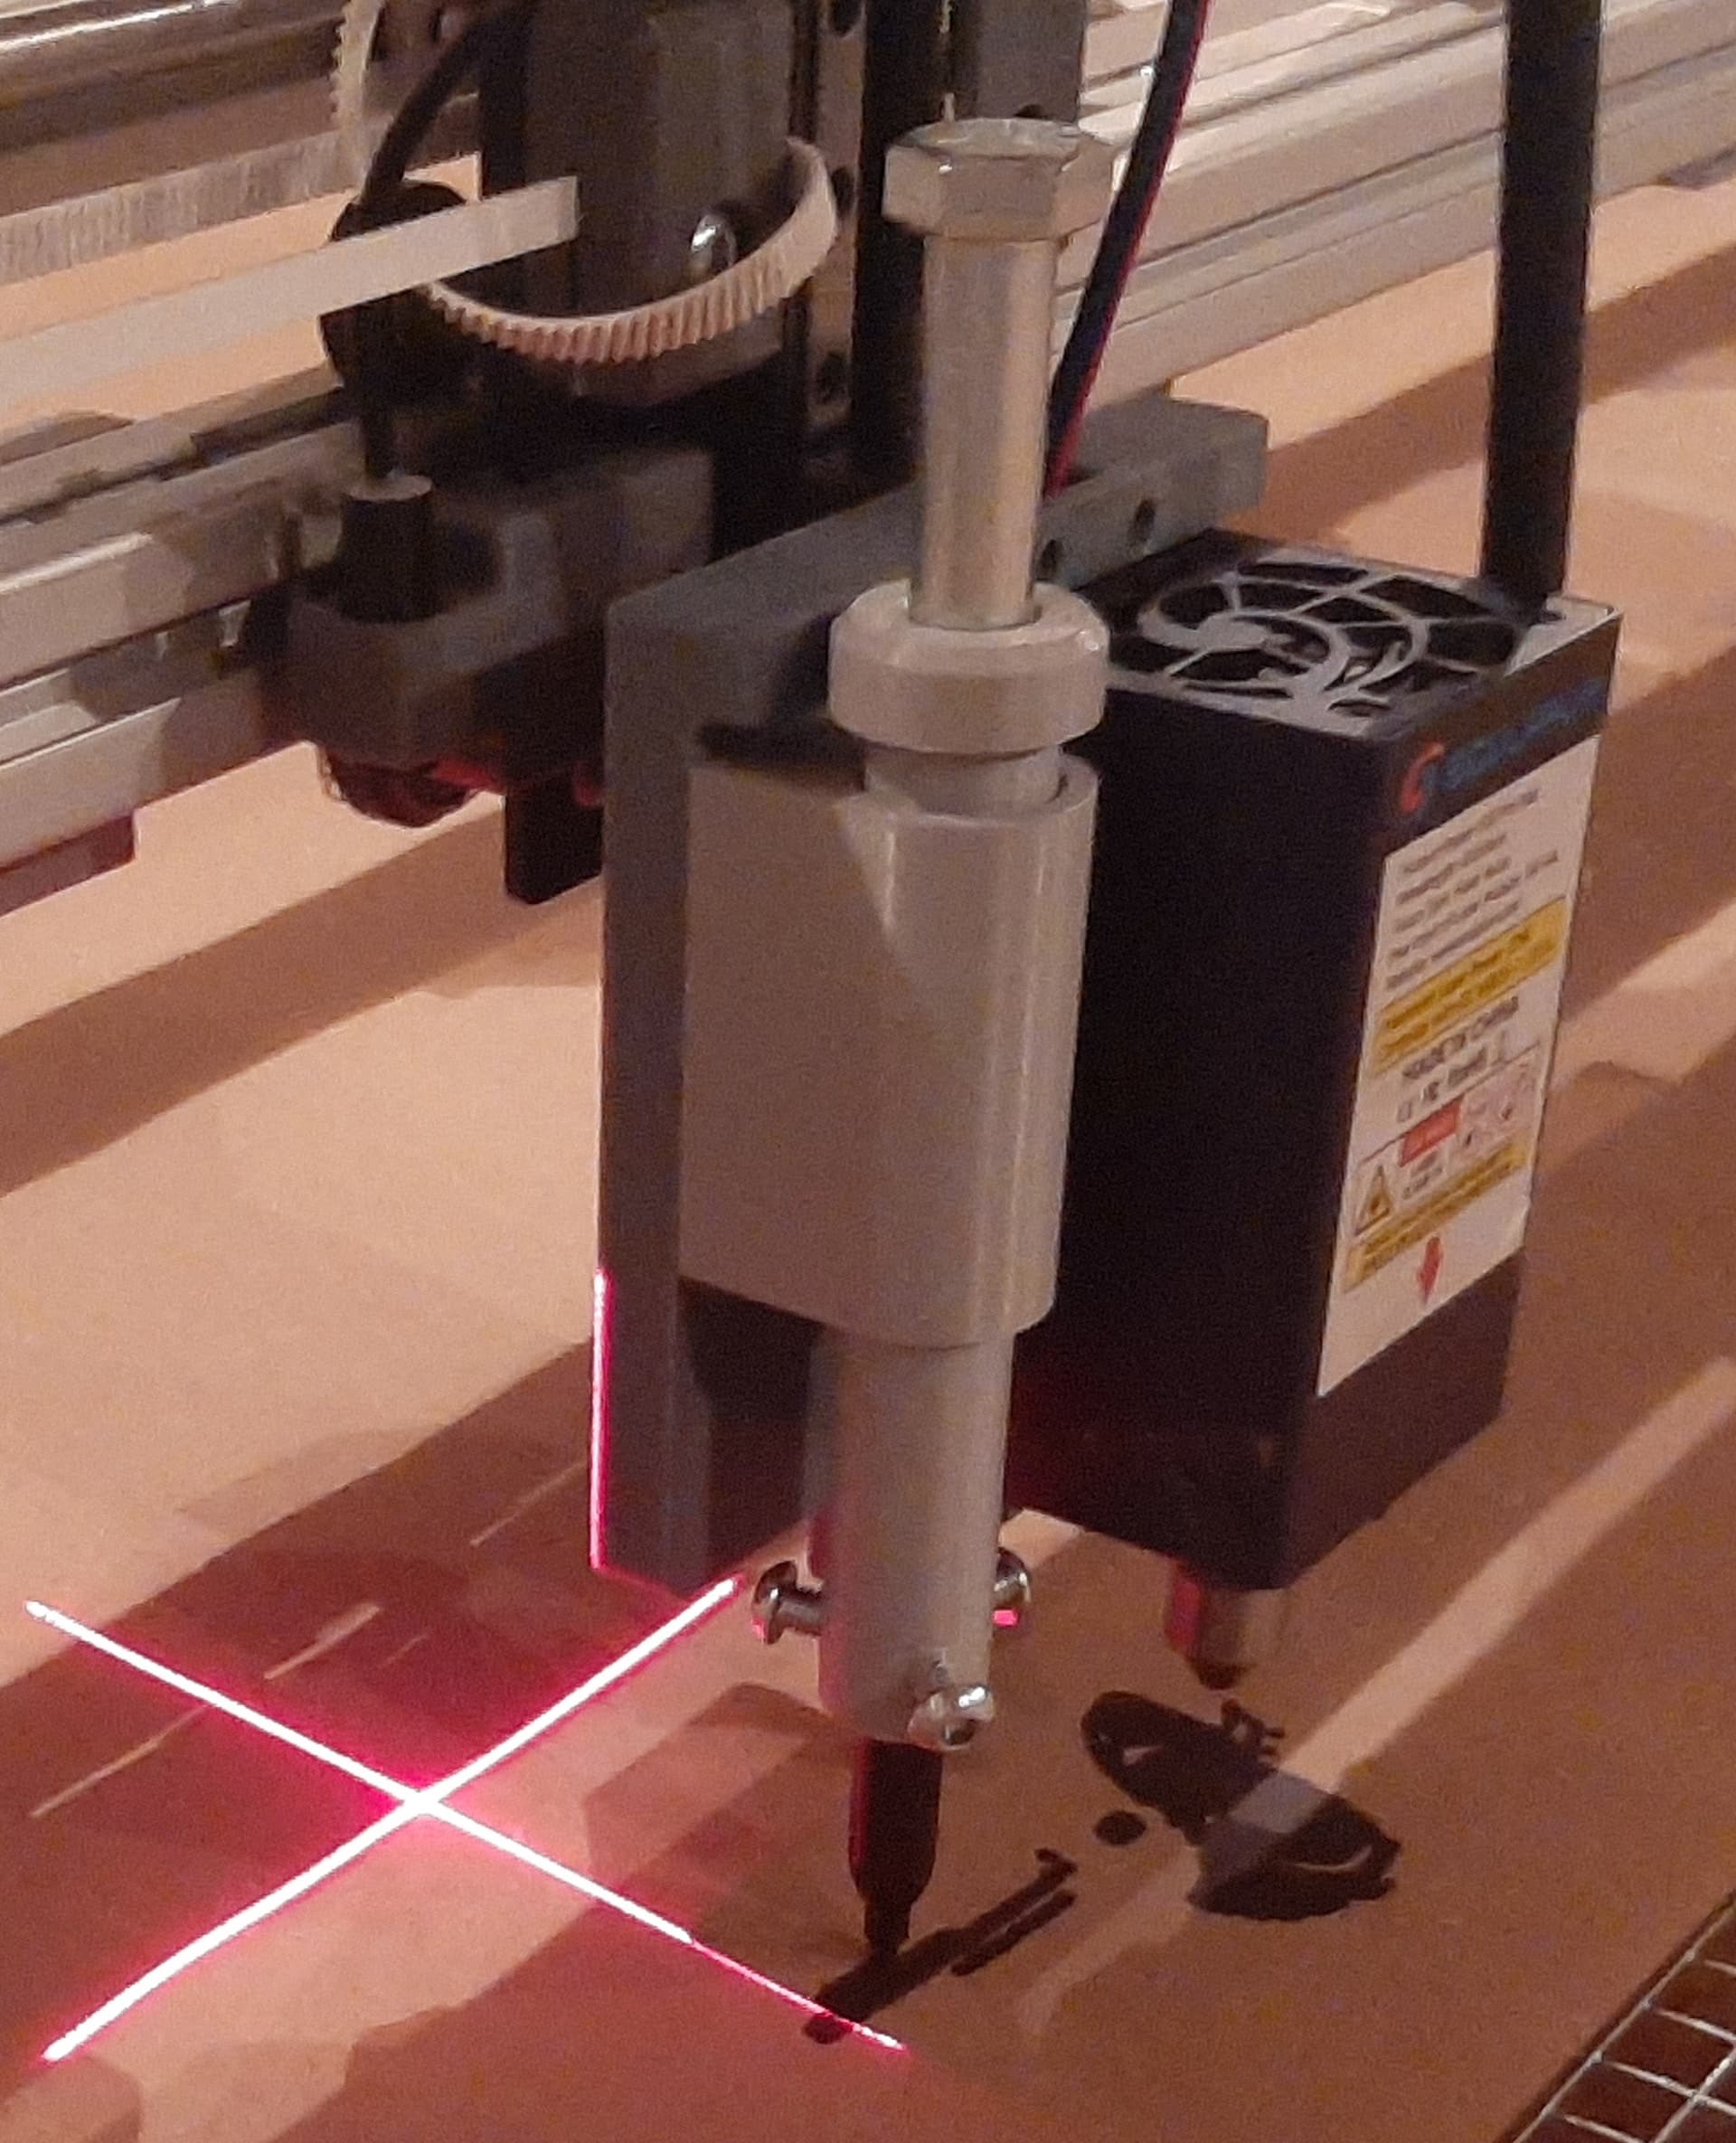
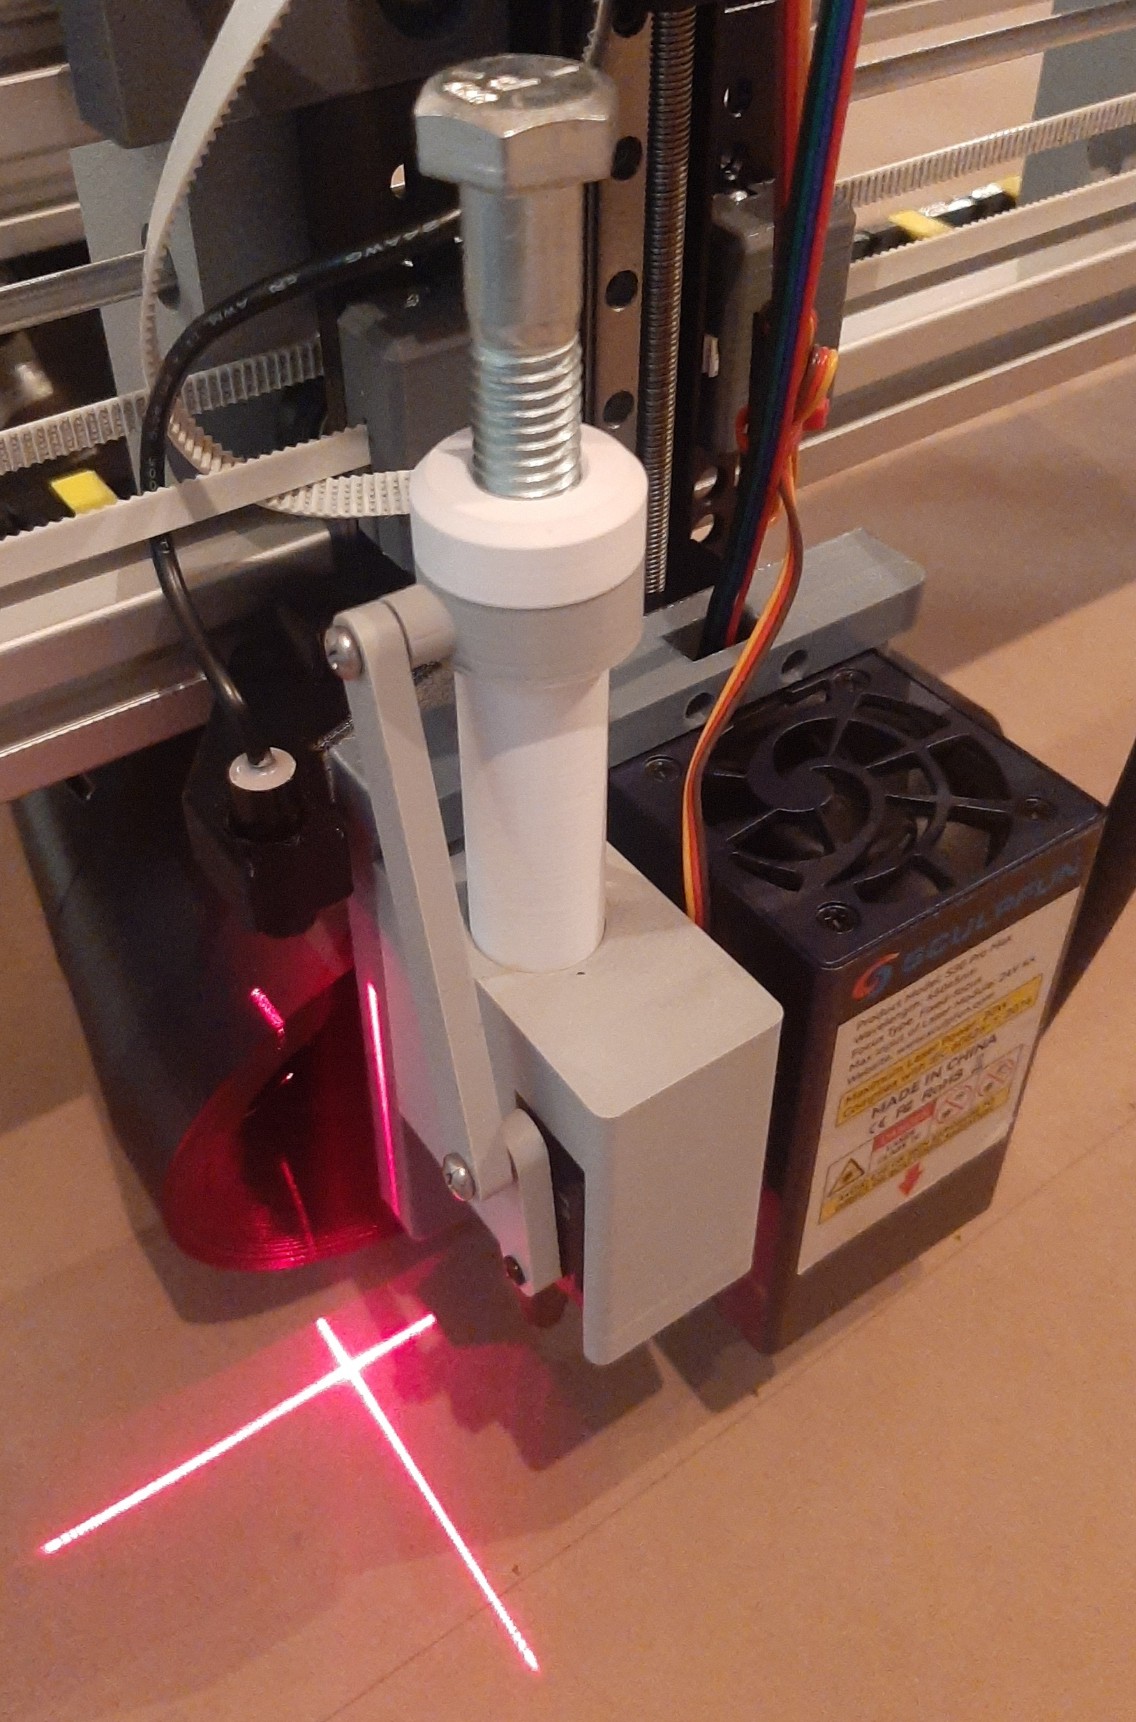
I’ve found that an assorted length of 1/2" hex bolts work great to ‘pick your pressure’. It eliminates the issue of varied pen tip to work surface offsets altering spring pressure.
So you have a floating pen mount with a max drop position you can raise to lift off the page? The bolt holds pressure on it instead of it being rigidly mounted?
Yes, that’s correct. I use different length bolts for different markers (fine tip vs. not, etc.) to get different amounts of down pressure. It’s the result of researching recommended tip pressures for various pens and markers and thinking “these random bolts here on my desk probably weigh that much”.
I would be very interested in trying this out. Could you please share your CAD file for editing and 3d printing? I might have to change it to fit metric bolts and different pens.
I have tried various pen mounts but even the slightest variation in the height of the paper/surface make the drawings fail. Applying pressure through springs or rubber bands appears impractical because they are really hard to adjust.
true, my problem might be that i have not found the right pen mount/pen configuration that provides enough stability in the x/y but is loose enough for the z axis. any recommendations?
1x 1/2"-13 bolt (ranging from 1" to 2" in length, depending on Sharpie marker / felt marker / paint pen)
2x M6-1.0 x 20 screws to mount the assembly.
3x M6-1.0 x 8 screws for securing the pen – you might want the pen holder to be longer if you use the screws and the servo version of the pen holder-holder… I just use tape around the pen as the screws are a pain to remove and re-insert each time you want to take the holder out… which you may or may not need to do depending on your useable Z height.
@CABix’s clamping pen-holder is way better. If I ever redo my quick and dirty permanently temporary solution that I needed for the next morning I’ll go the same route.