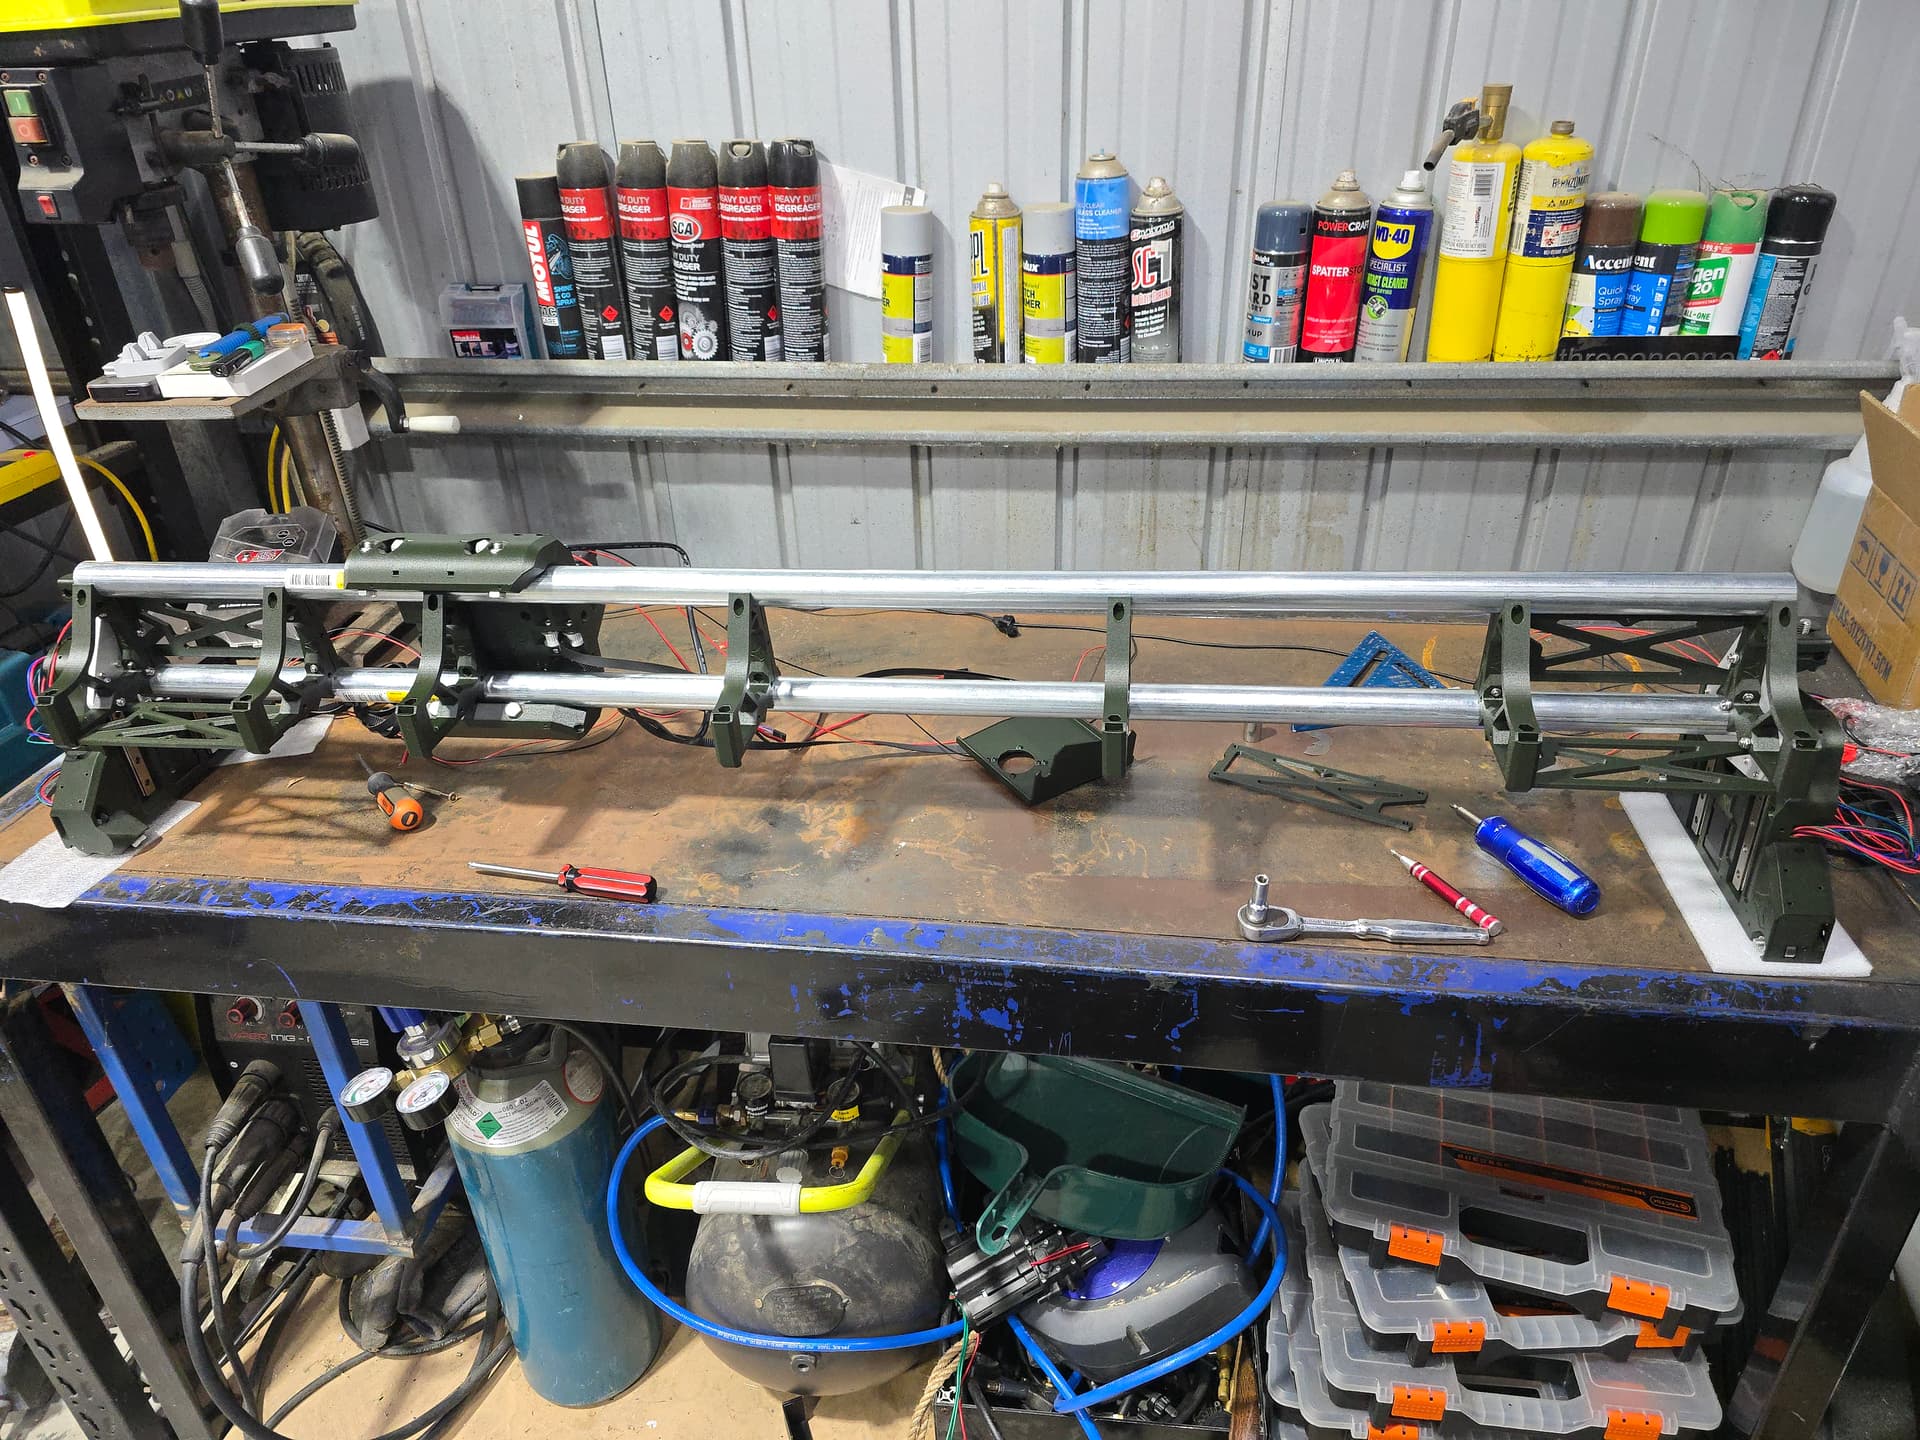
What an awesome community and amazing product. Currently about 80% through my Y rails.
I have previously owned a Bluecarve Turbo CNC which I sold last year so very interested to see how the LR4 goes, considering the cost the LR4 is already many points ahead. My plans for the LR4 are to build cabinets for a house reno coming up and then go from there.
I have recently started my building in Melbourne Australia. I did a fair amount of research before hand so really this is a summary of things I’ve encountered that may help others
BUY THE KIT! I looked into sourcing the items locally to save on postage, there are savings to be made BUT getting the kit with all the fasteners pre packaged, wiring all done and the plates has been so easy.
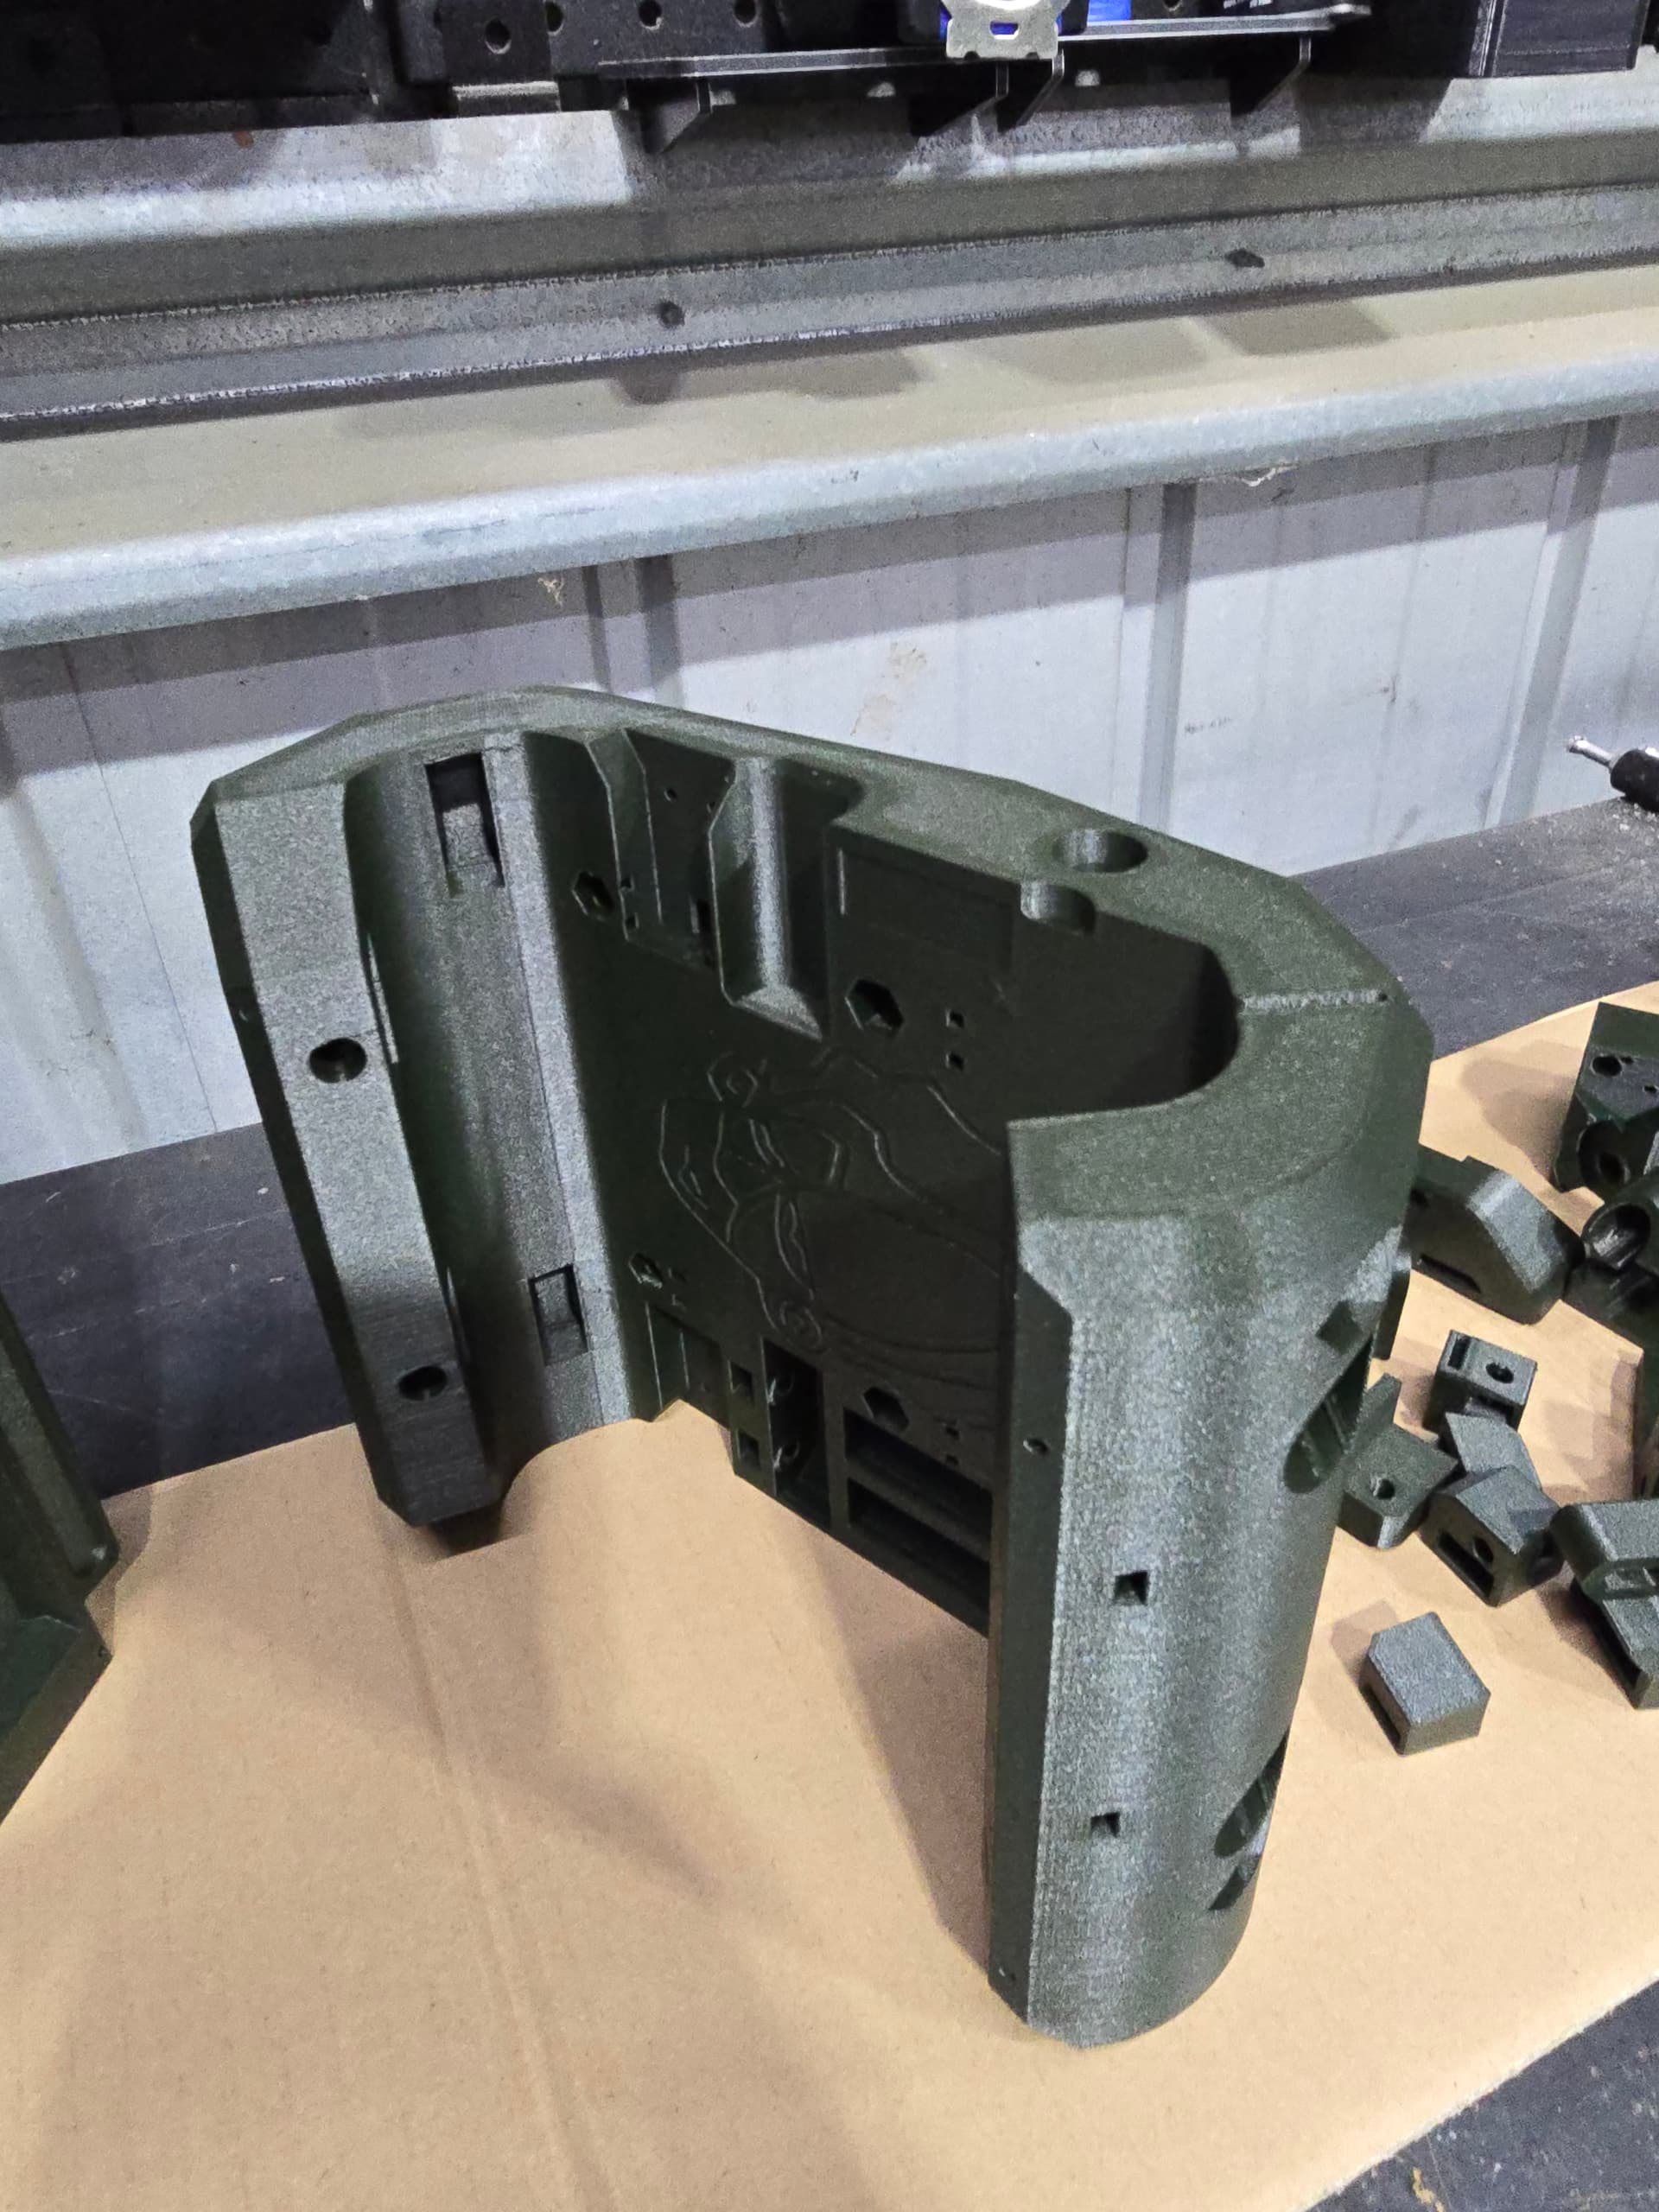
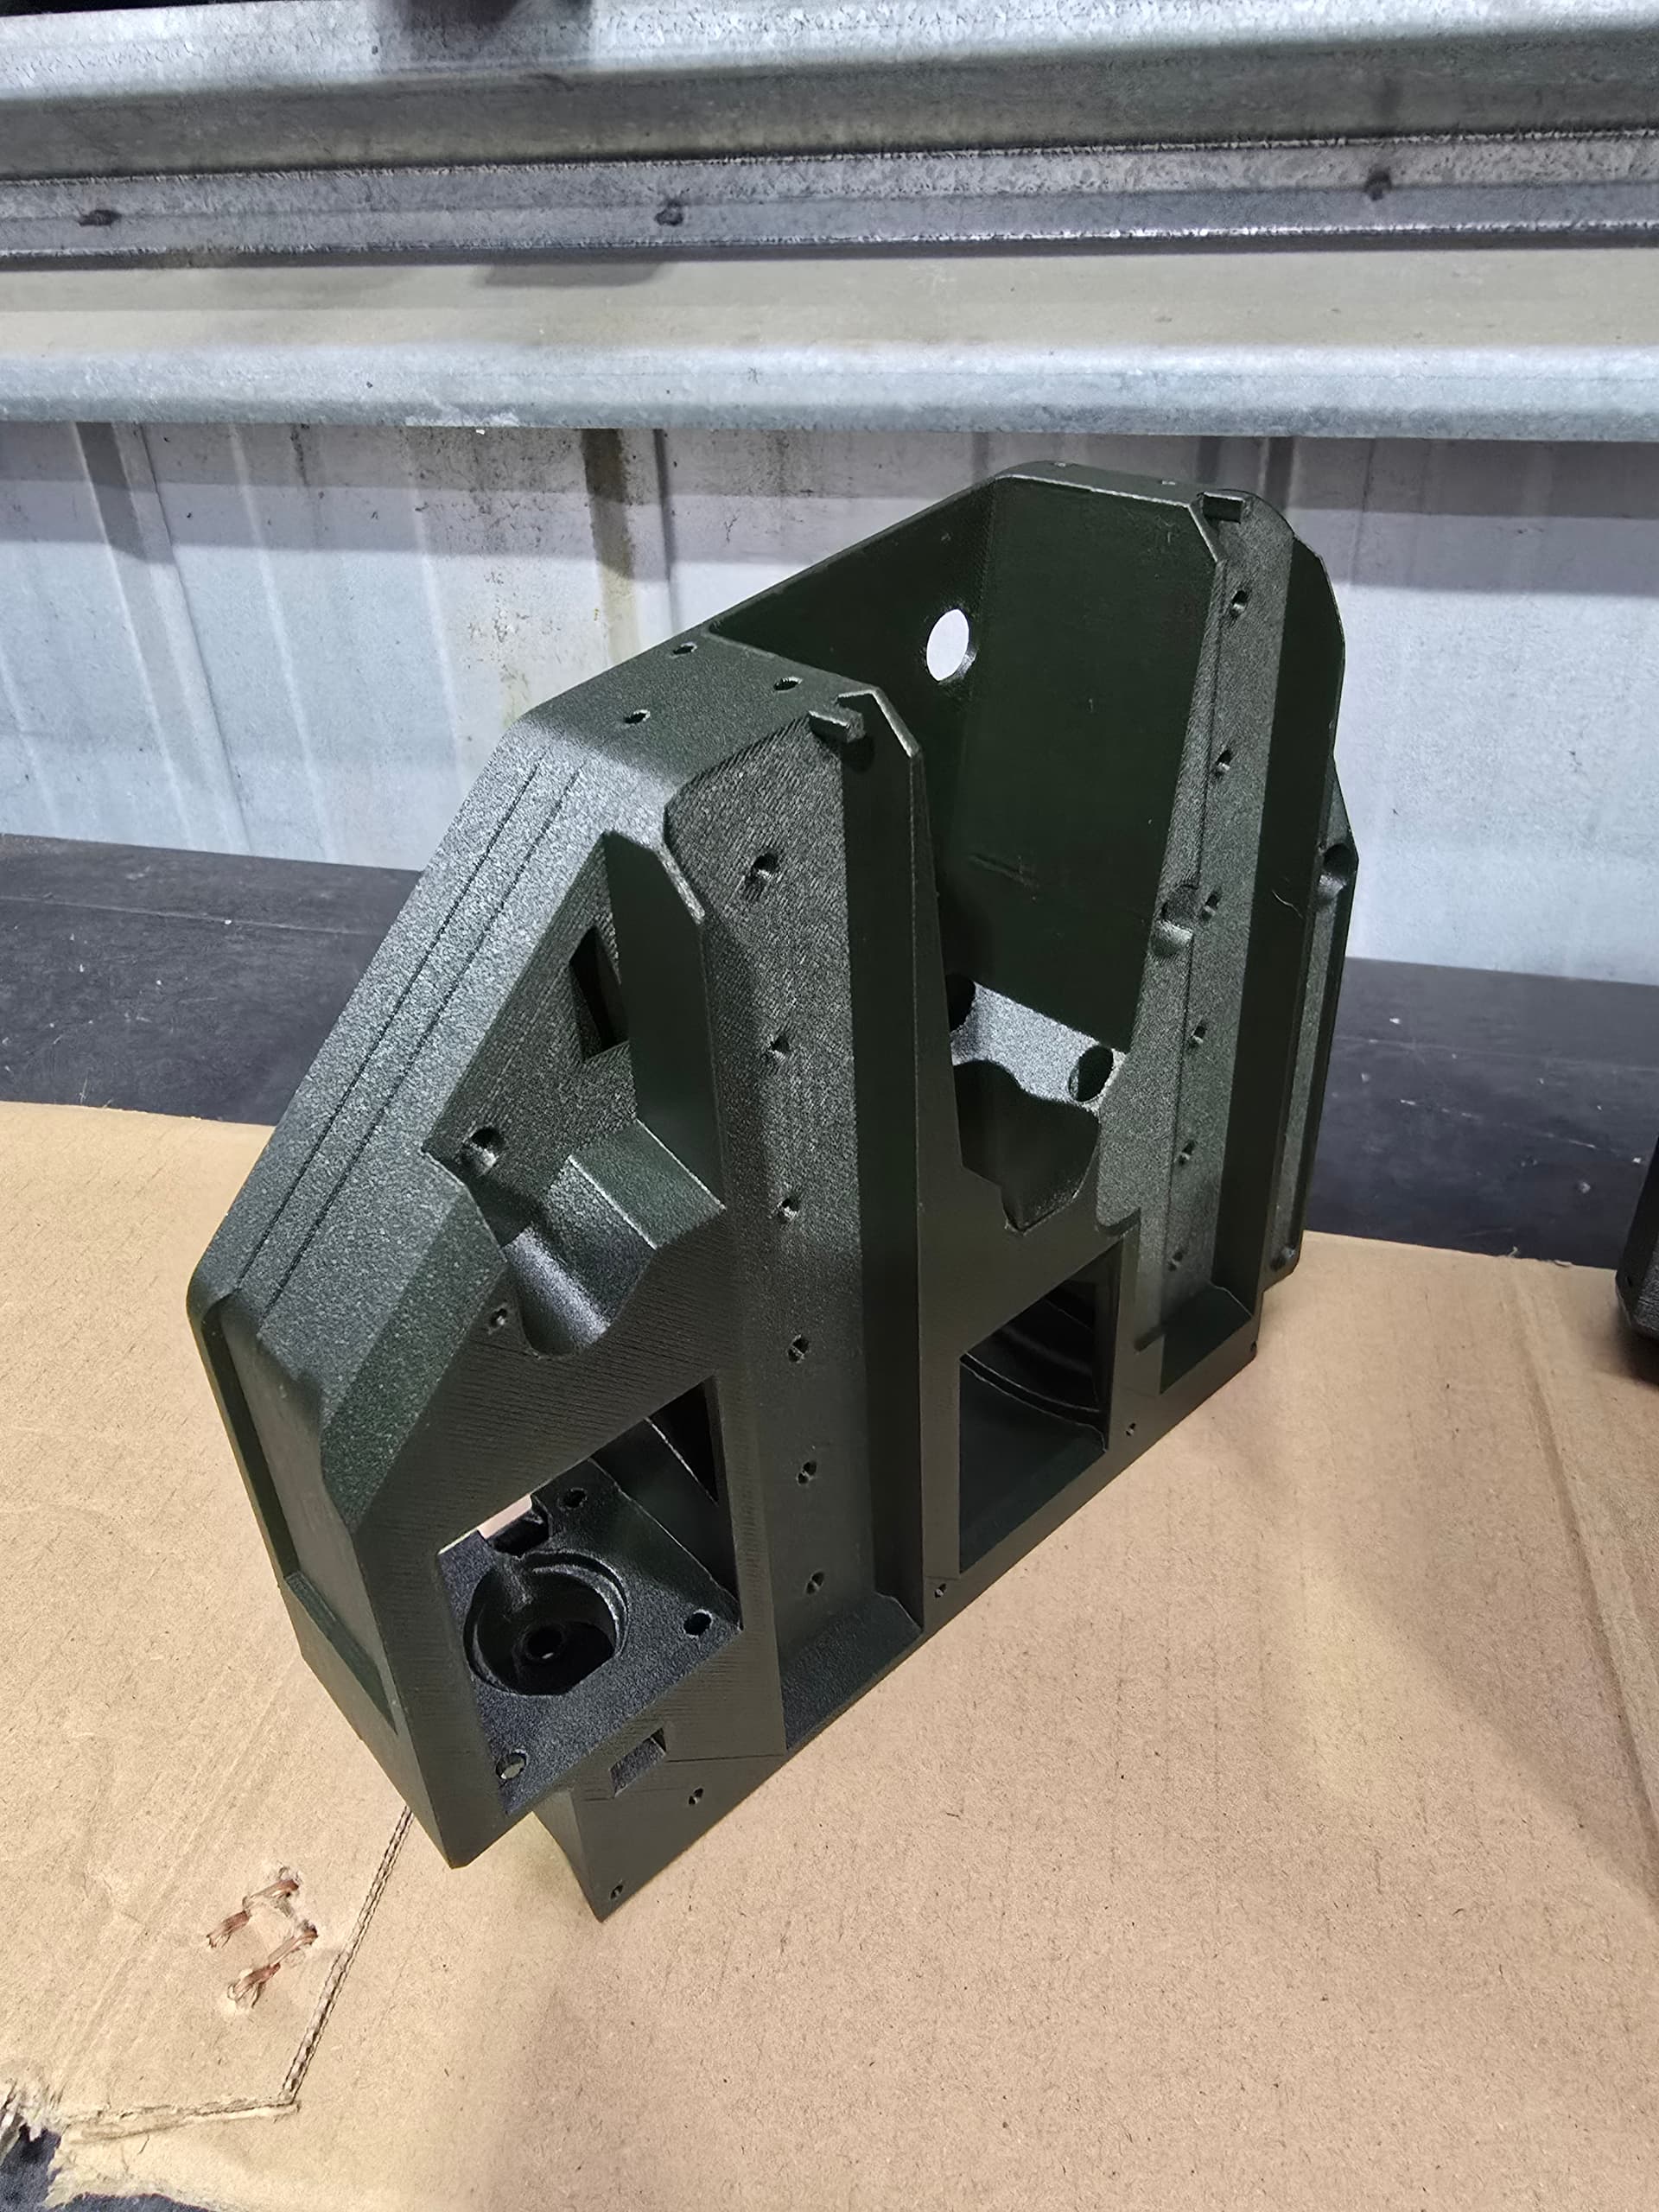
I printed all the parts on my Bambu Labs X1C, using Siddament PETG CF. PETG isn’t recommended although with the CF it should be up to the task, CF also makes the prints look amazing. Side note, if you’re in the market for a 3D Printer, my opinion is you really can’t go past a Bambu Labs printer, they just work.
The instructions are amazing, my only advise is ready ahead, each stage can be split over multiple lines with pictures between
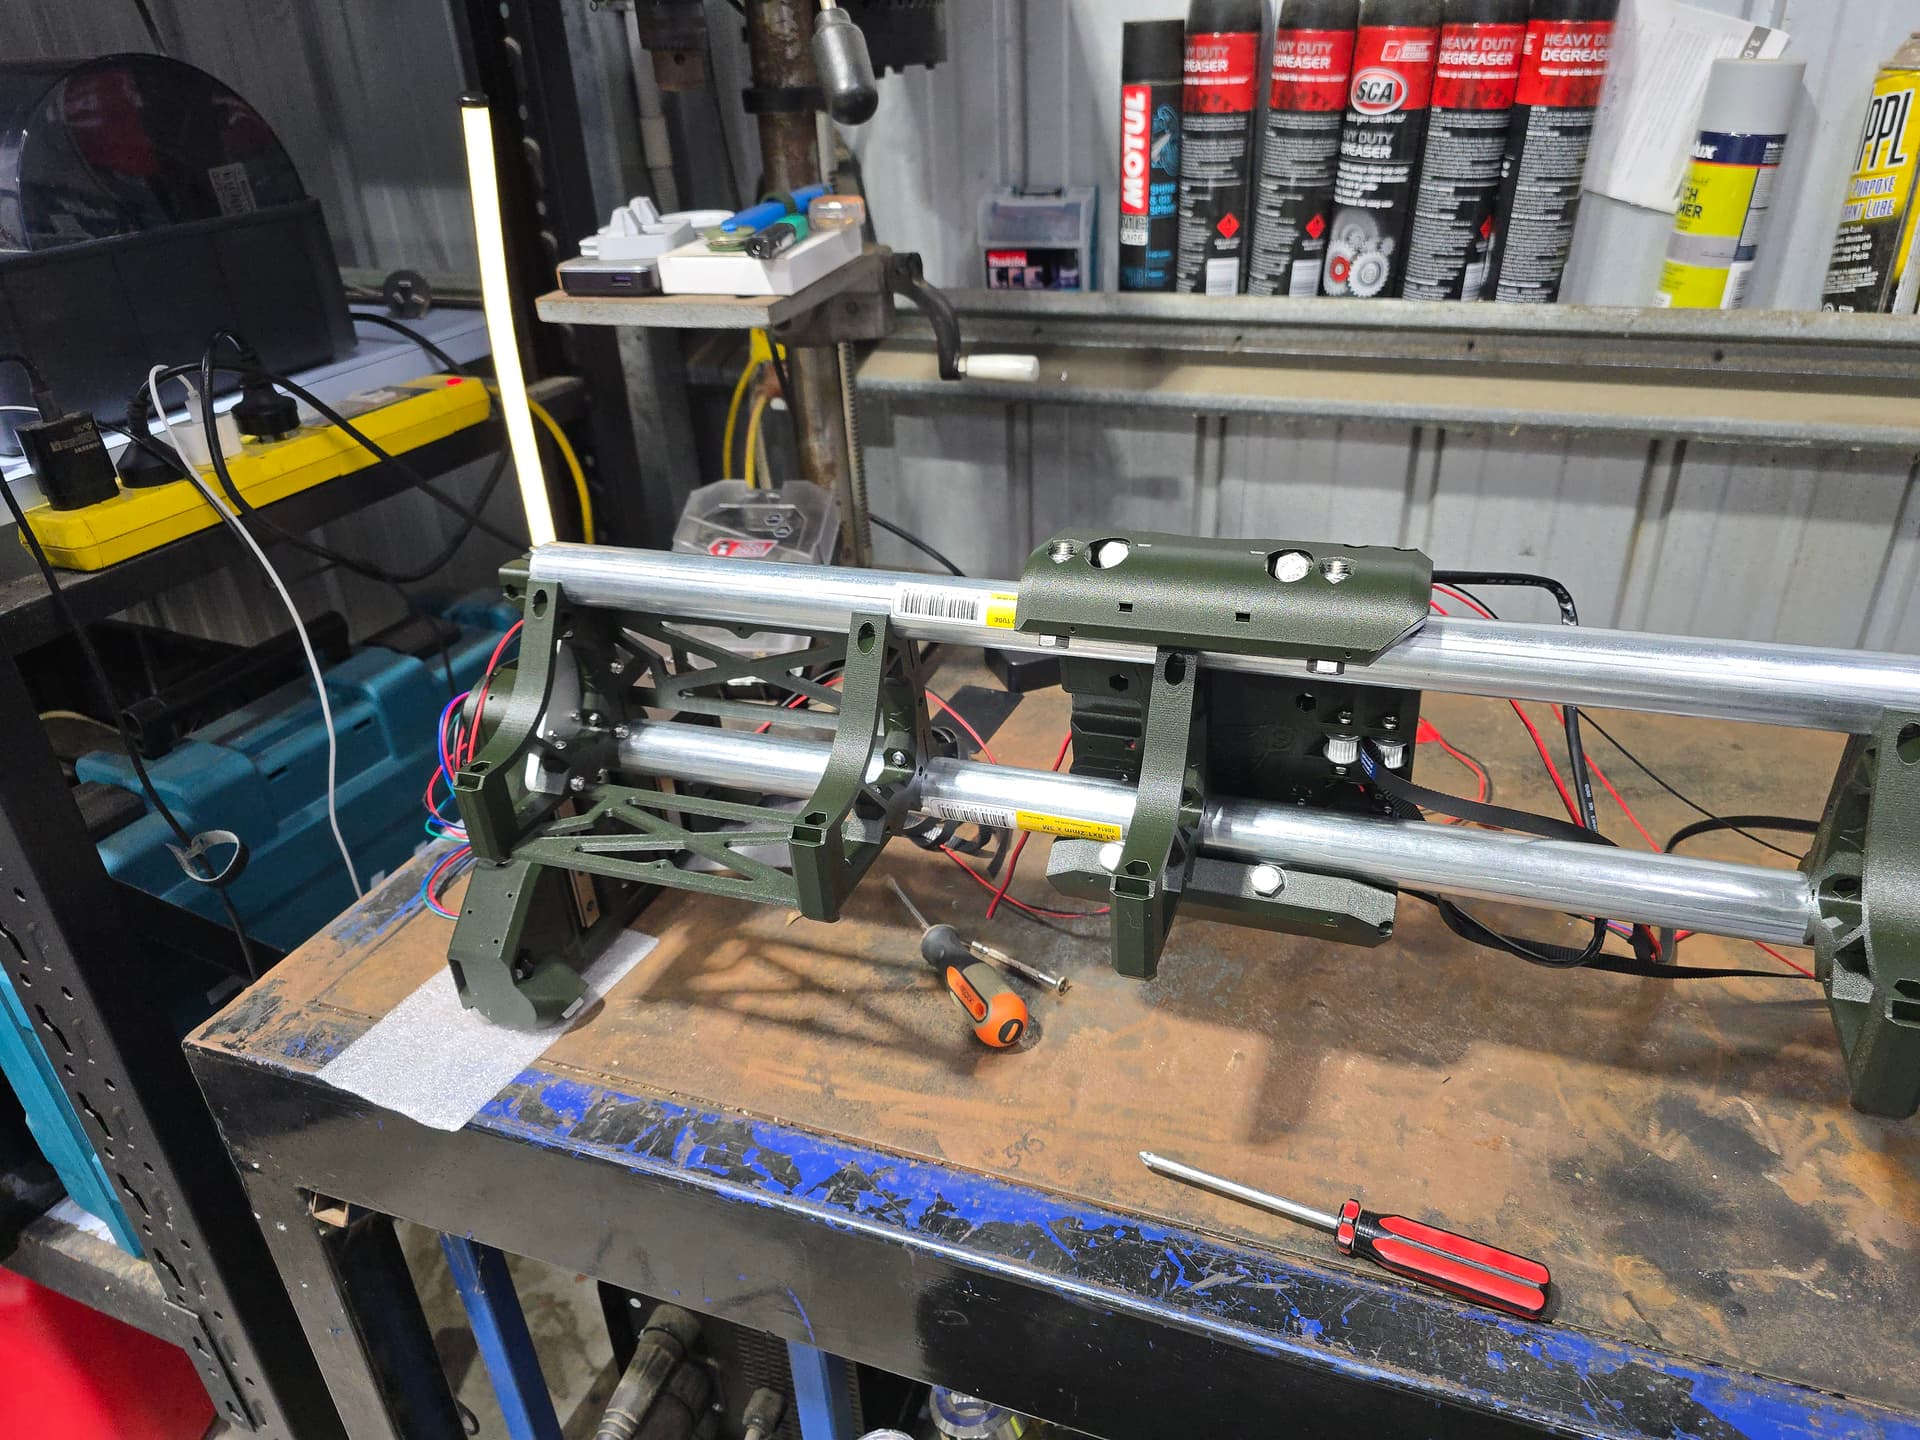
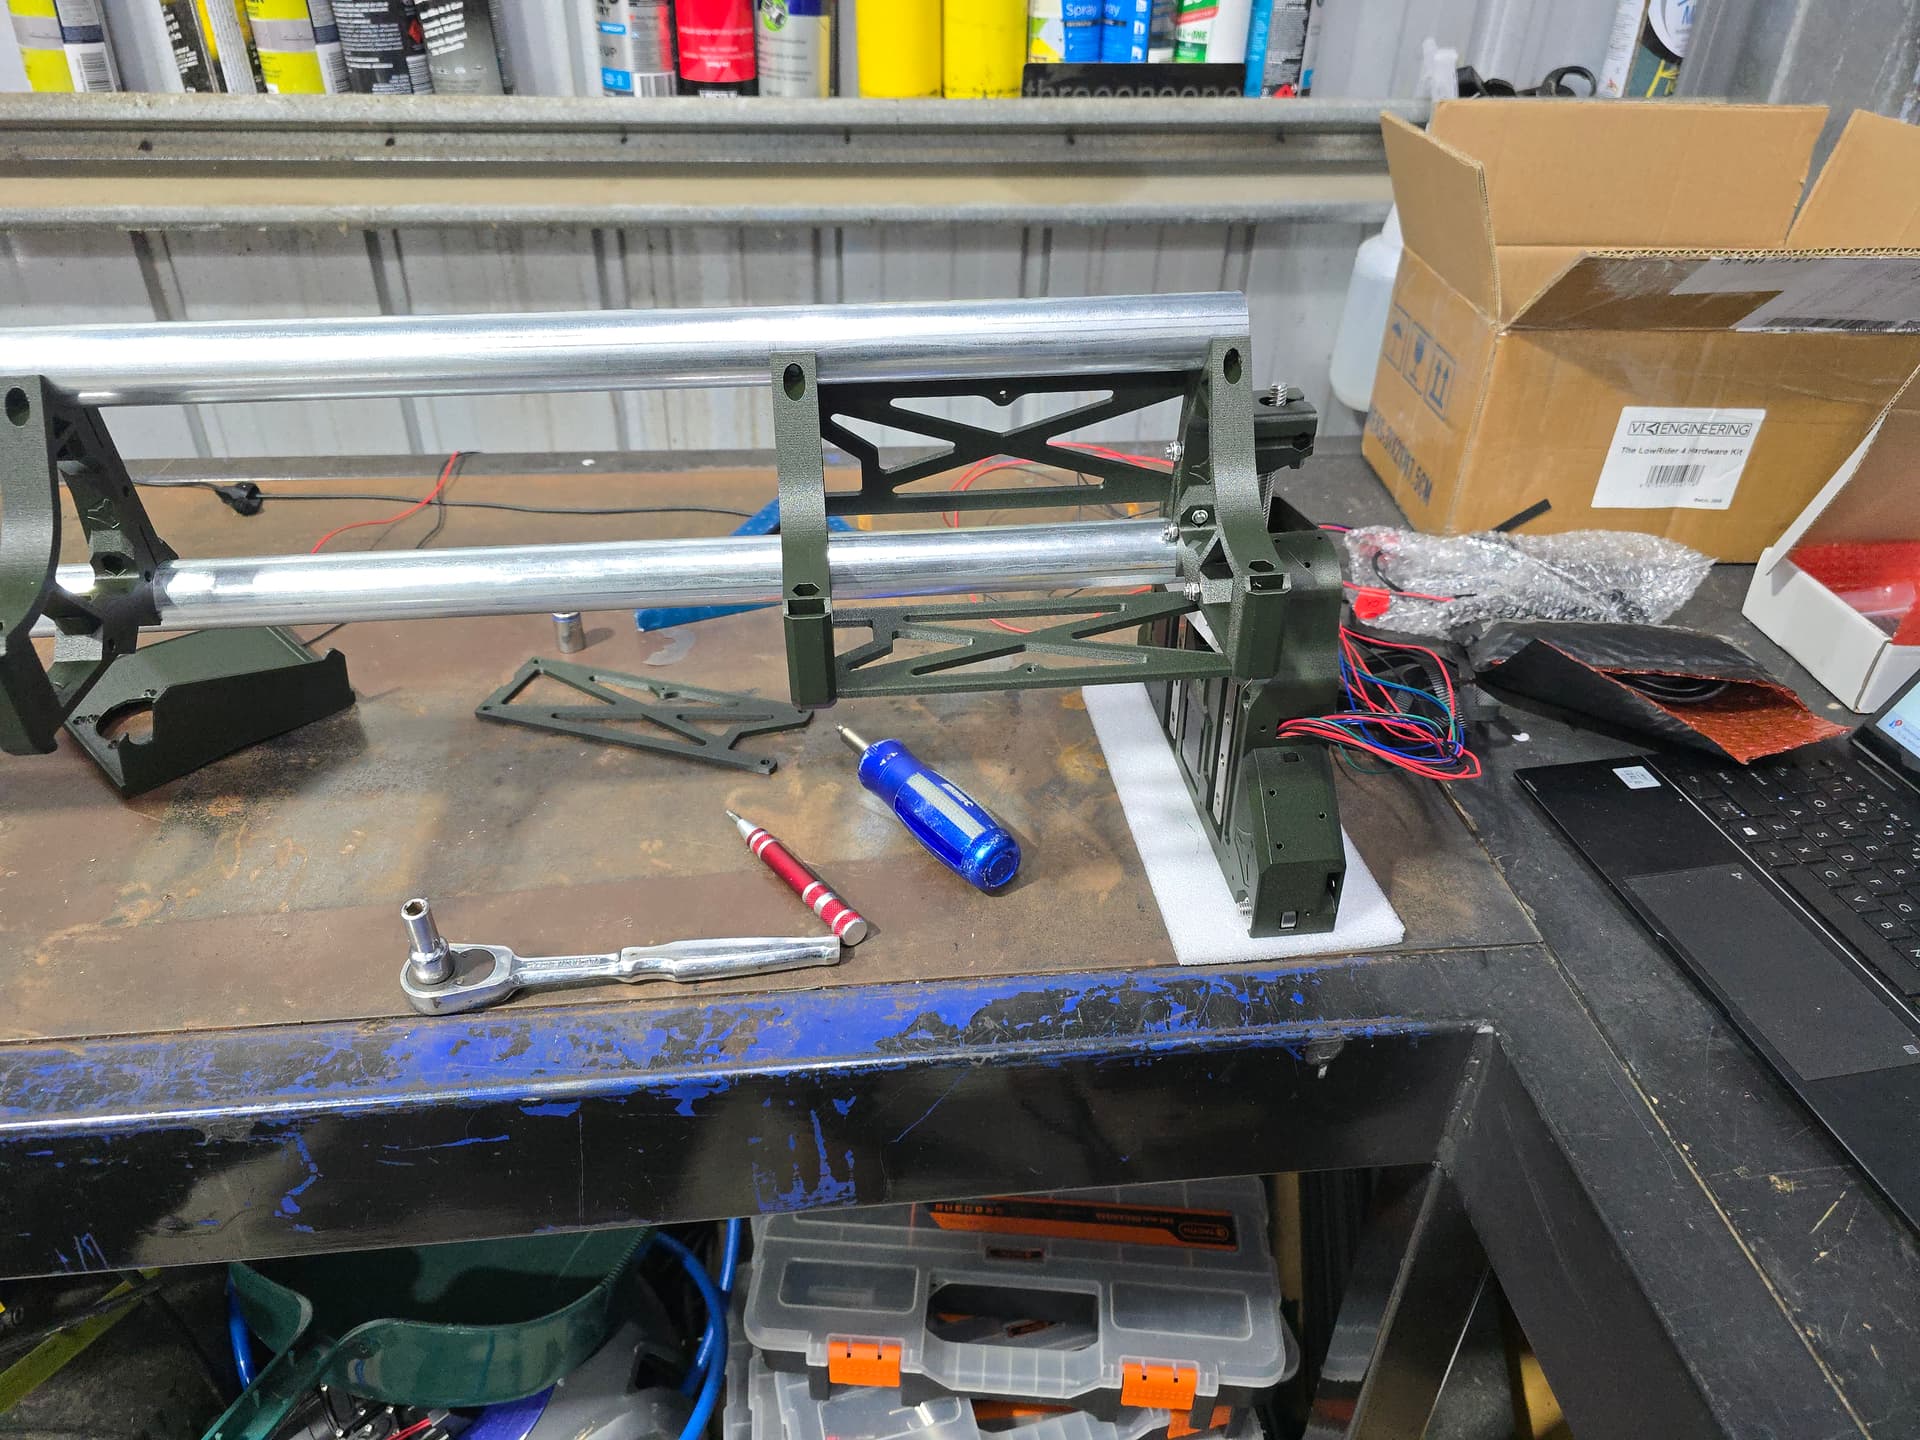
If your cable are pre assembled (like in the kit) or have heat shrink on them, remove the protection. The cable routing is awesome although gets tight
Take your time and enjoy it. I have little to no patience so I find this difficult although I am focusing on enjoying the build, not getting it finished. This has helped me a lot.
Up next is the table, this is new to me so please share your designs/photos. While I want the table to be flat and solid, I don’t want it being a over engineered, over priced and over weight.
Onto another night in the shed to continue building!
You weren’t kidding, the PETG CF looks awesome! I’d describe it as sleek and futuristic looking Good luck with the build, looking forward to seeing it progress.
Re: table - what woodworking tools do you have at your disposal?
There are some excellent designs and discussions around here to bootstrap with your machine, but if you have access to a table saw you can make a seriously light, strong, cheap torsion table with some strips of MDF and some 6mm skins.
No table saw but I’m thinking some 12mm square skirting profile pairred with a 12mm top skin (currently waiting to dry) and a 6mm bottom skin in a torsion setup
12mm square is a bit light - if you haven’t bought it, 70 x12 would be fine - you don’t have to do anything fancy, just block the cross pieces in.
I have used 60mm strips of 12mm mdf very successfully a number of times. Have to go out for a bit, I’ll find a link. If you have the means to rip the MDF reasonably accurately it’ll be cheaper, but beggars can’t be choosers!
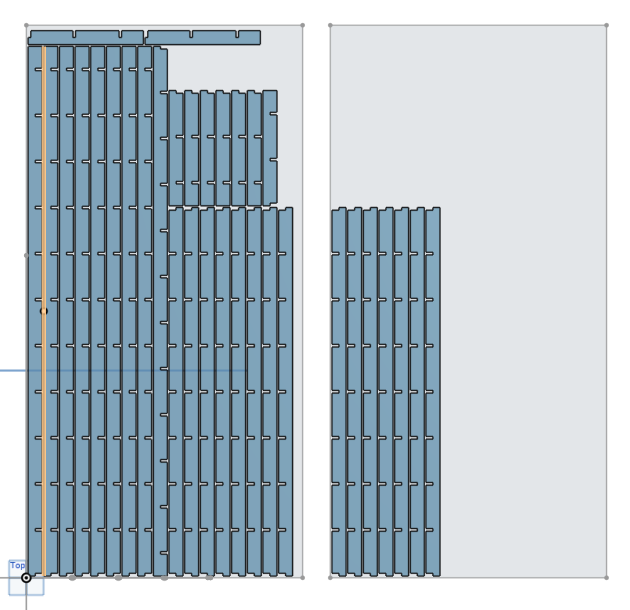
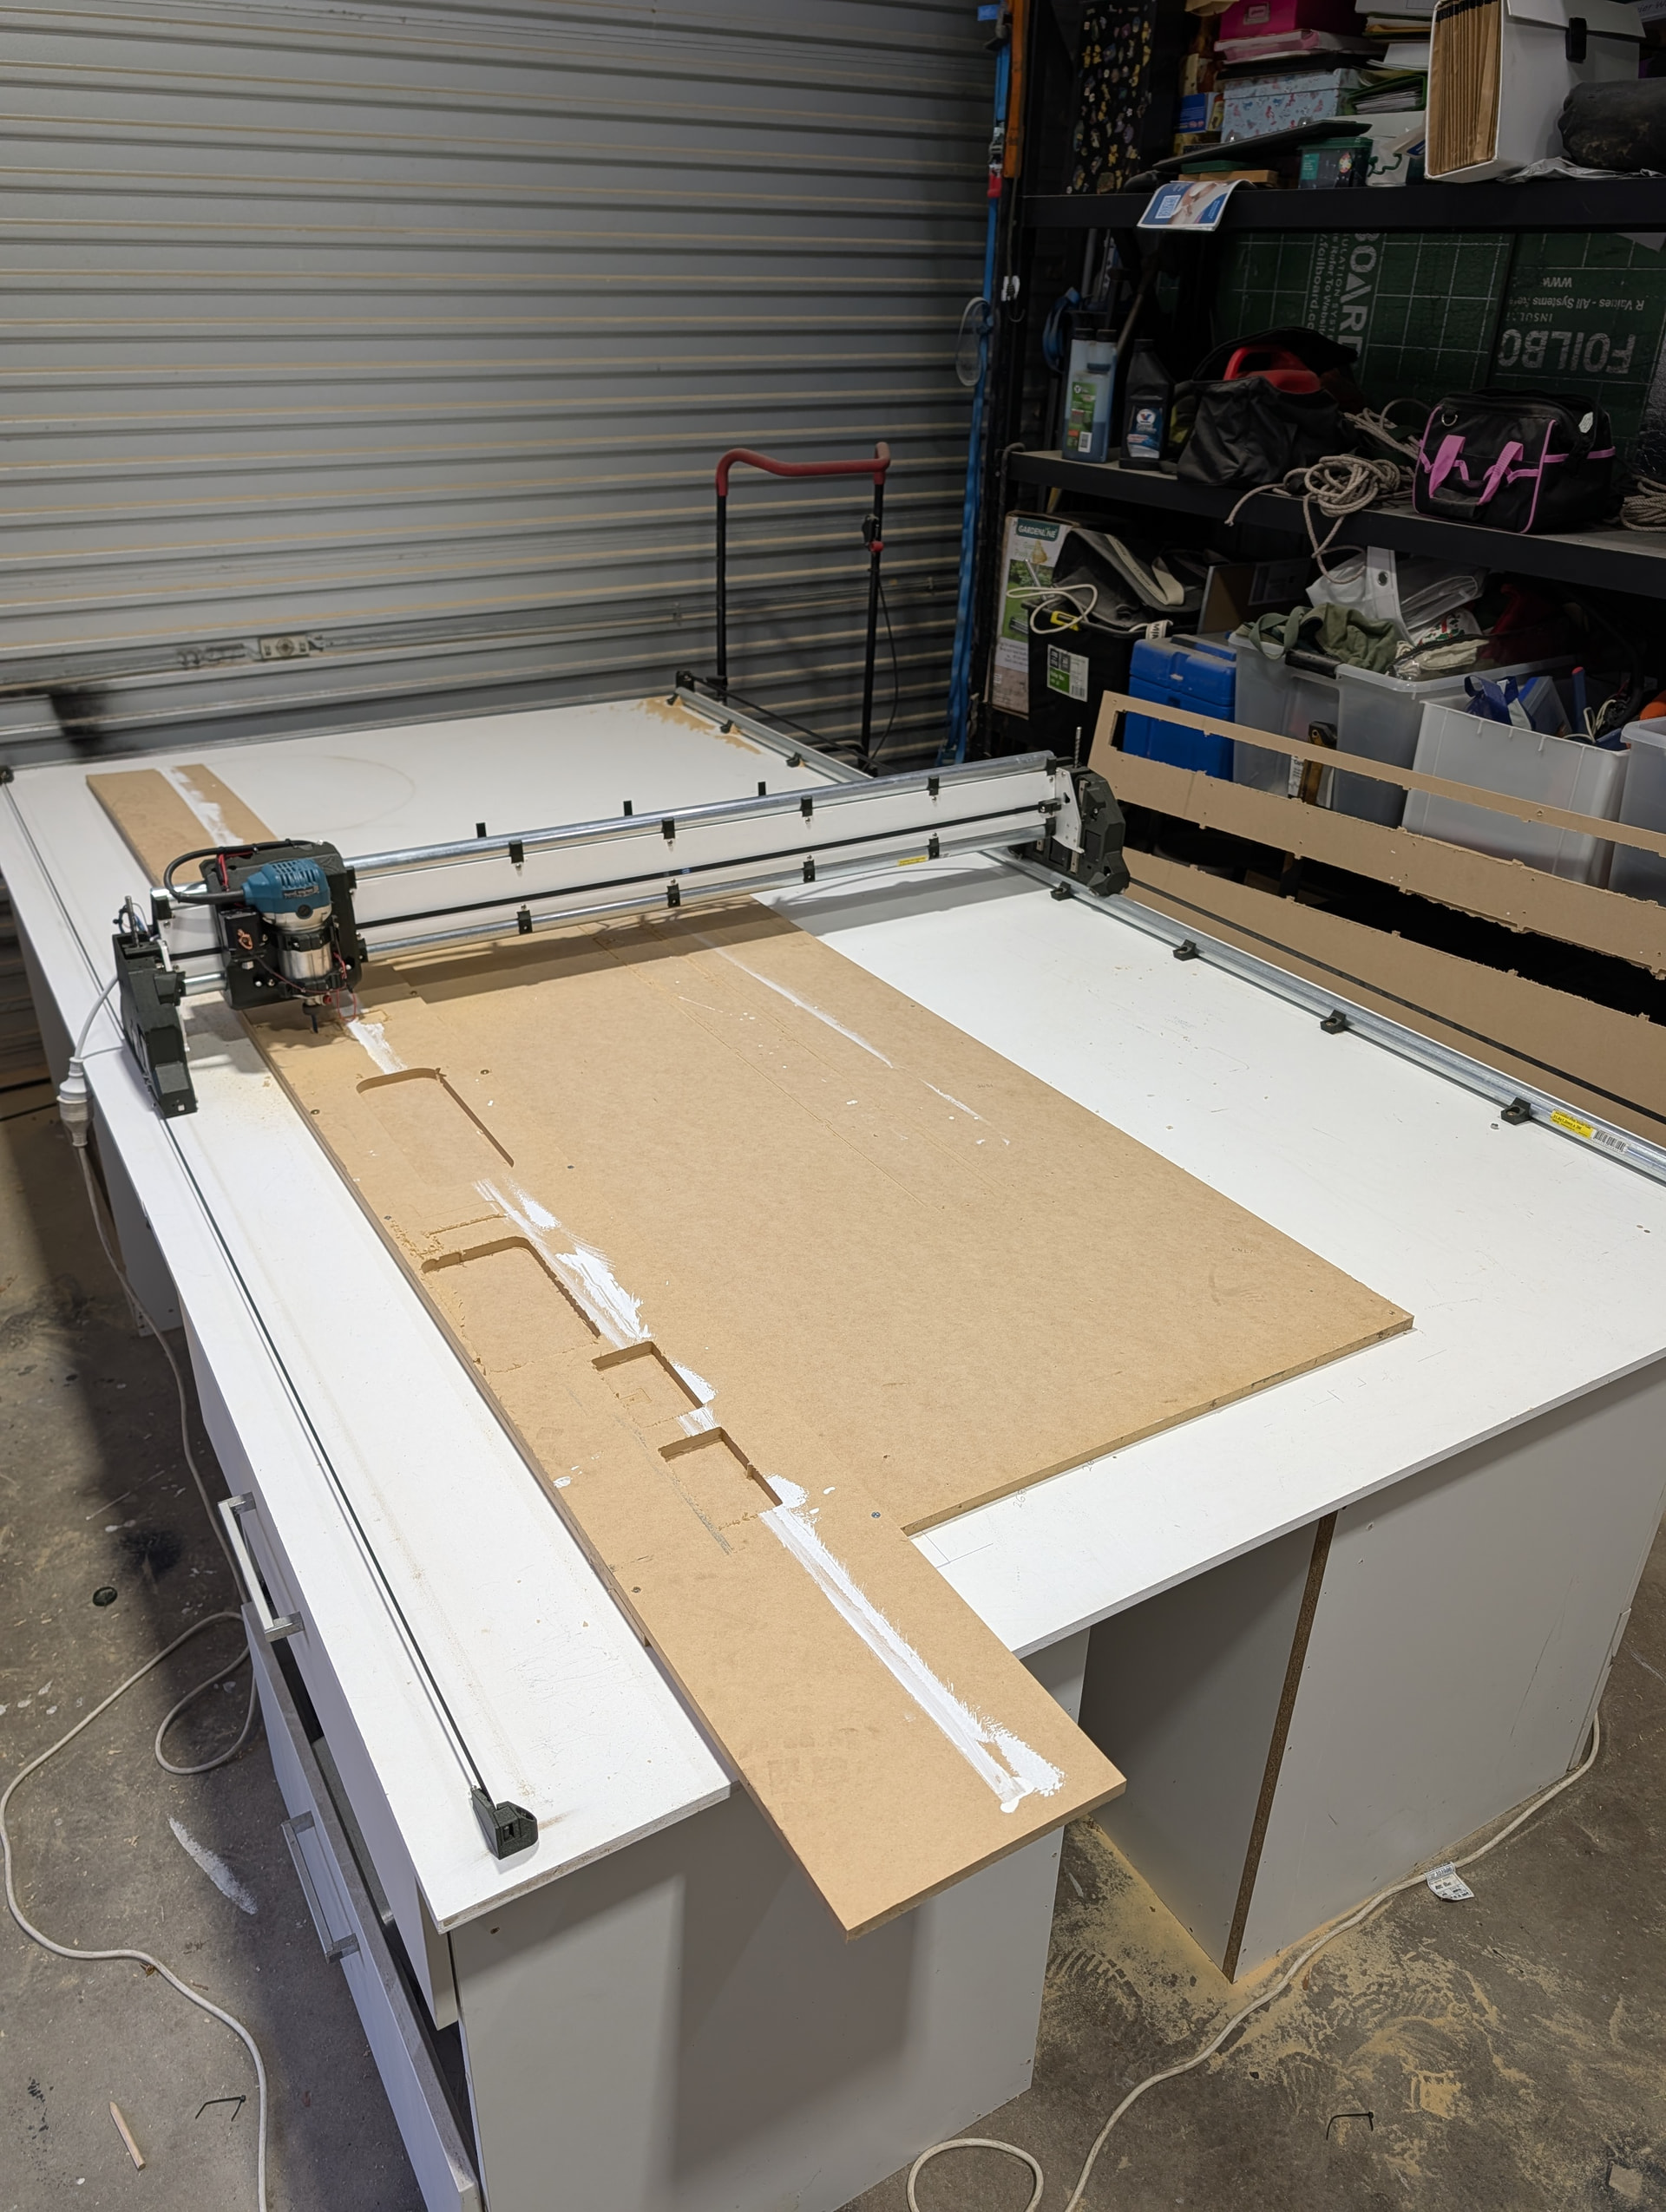
I may also just see how flat I can get the floor setup and get the LR4 to build itself a table, this will mean I can dato everything and work with full sheets.
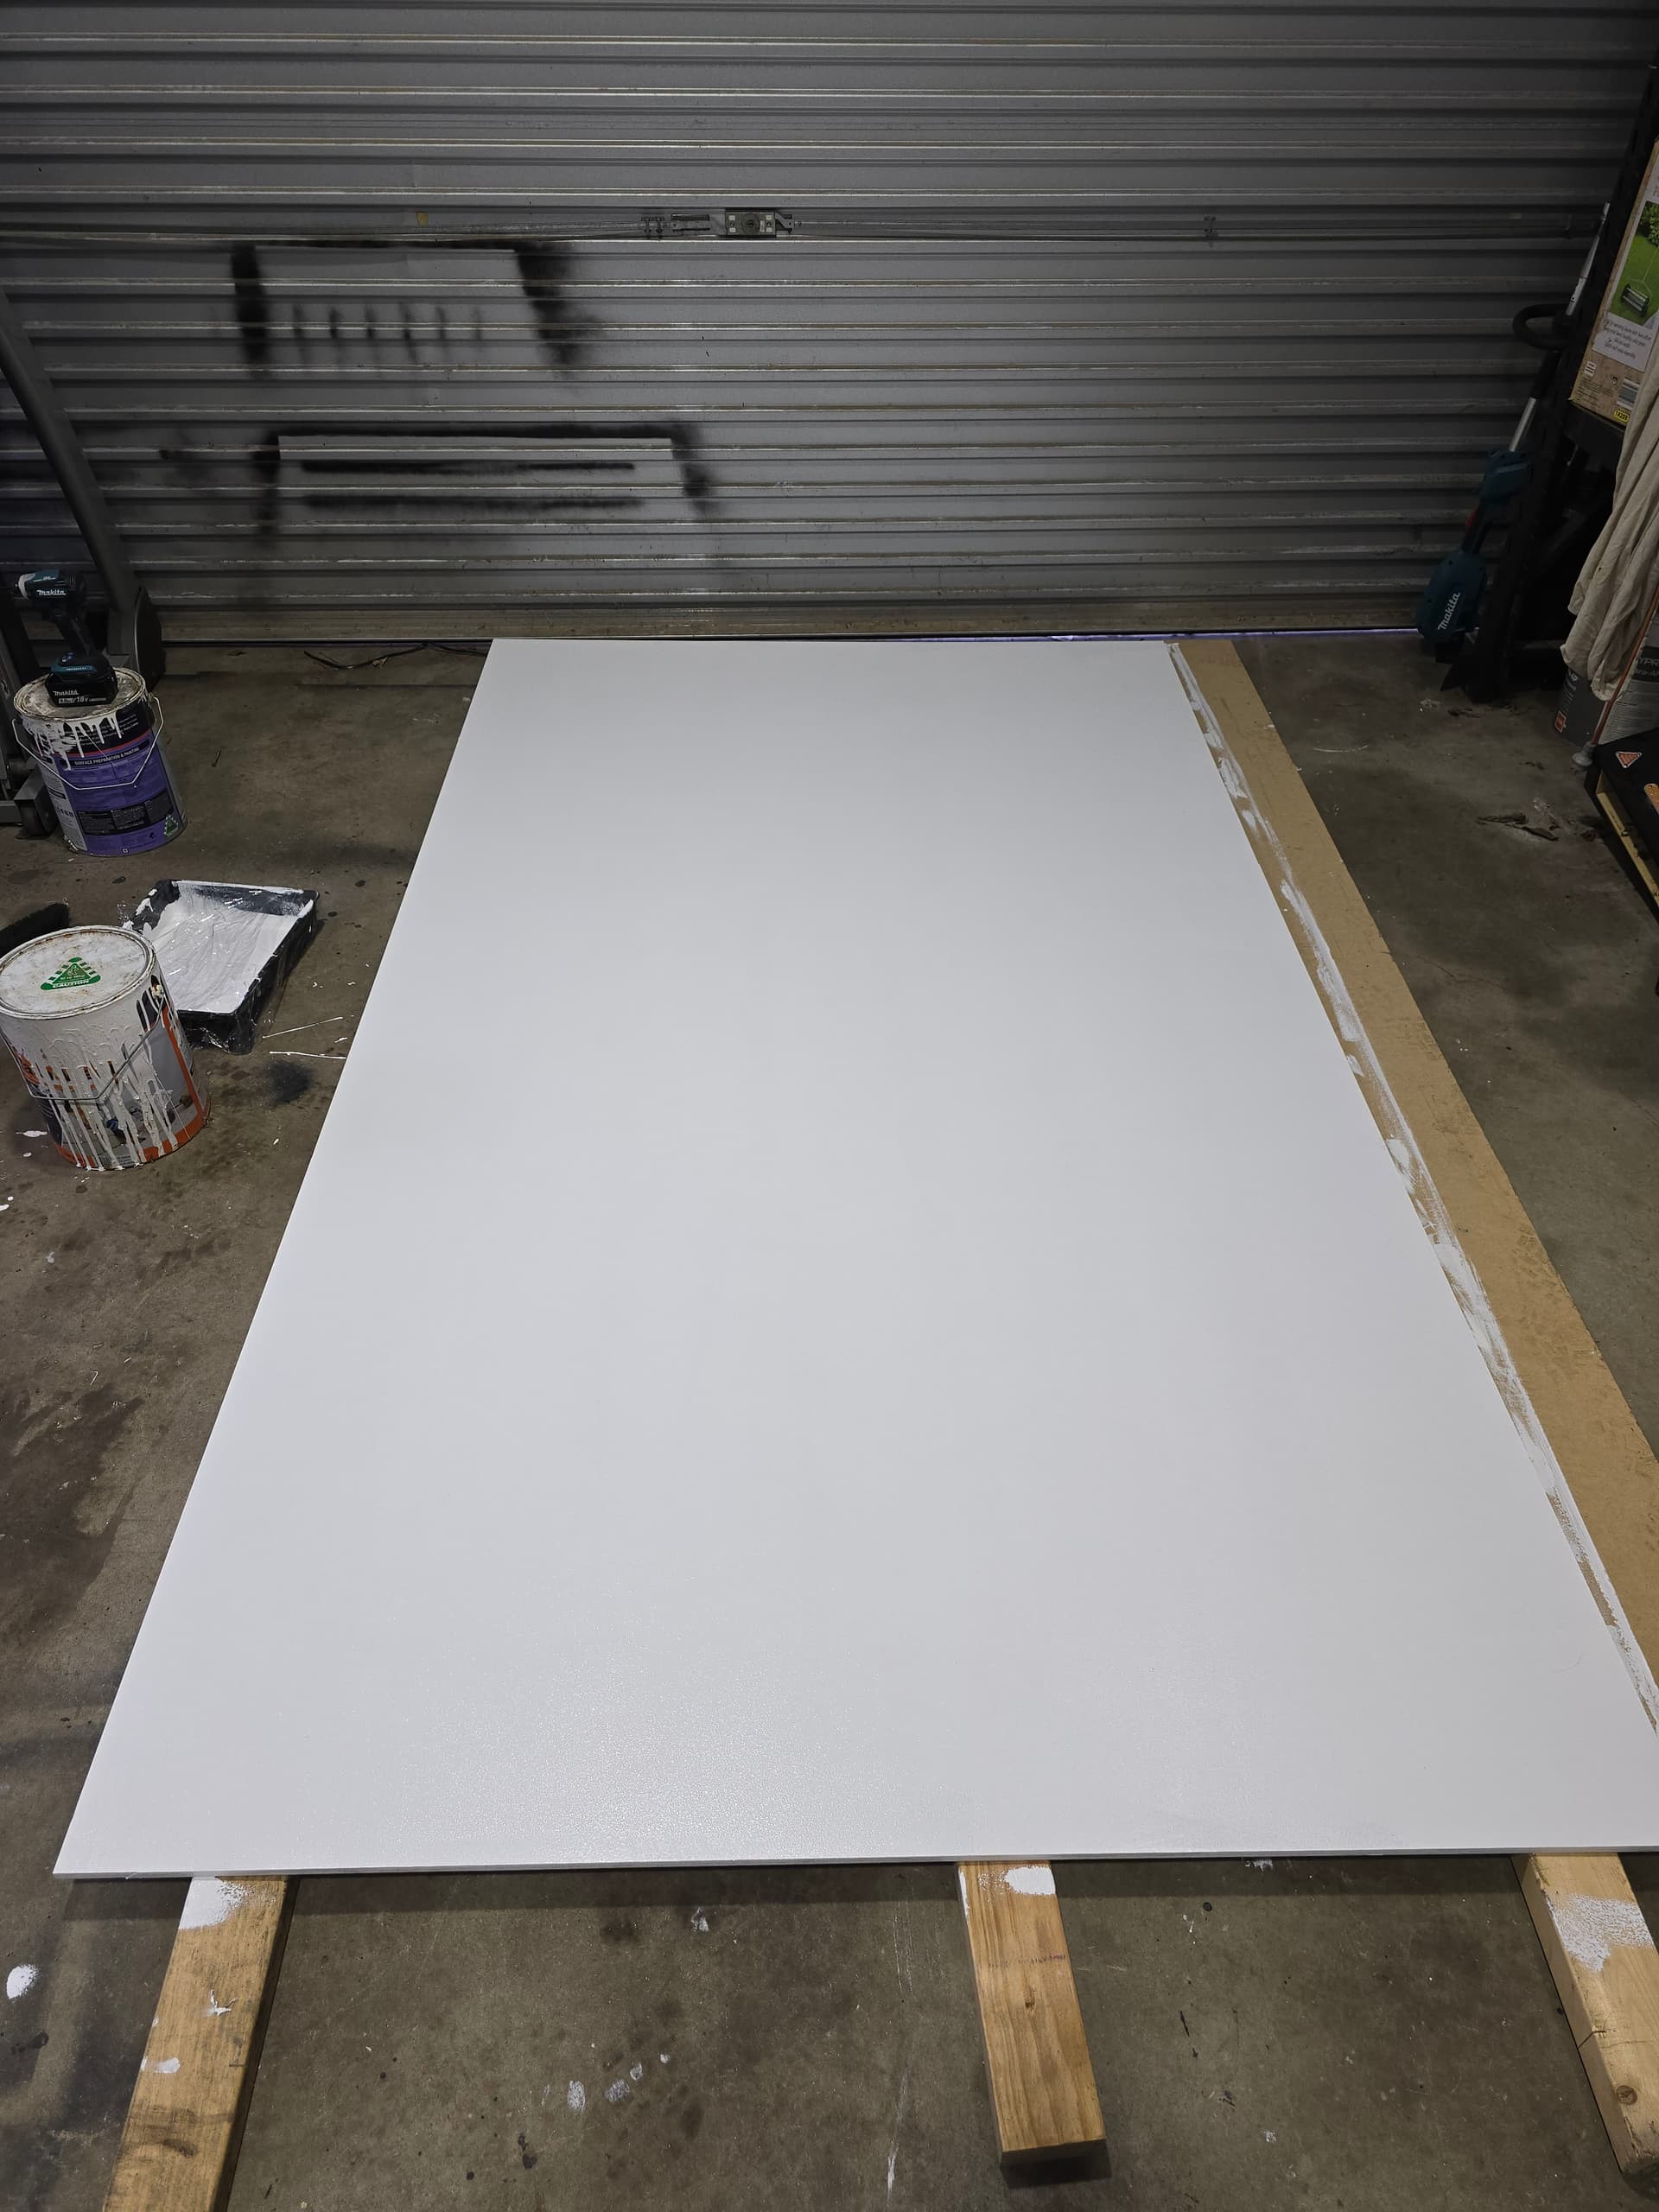
Purchased a large sheet of 12mm MDF, 3600 x 1800mm and cut down to suit. Plan is to have the CNC cut a torsion style table. I’ve painted all 4 sides to mitigate moisture.
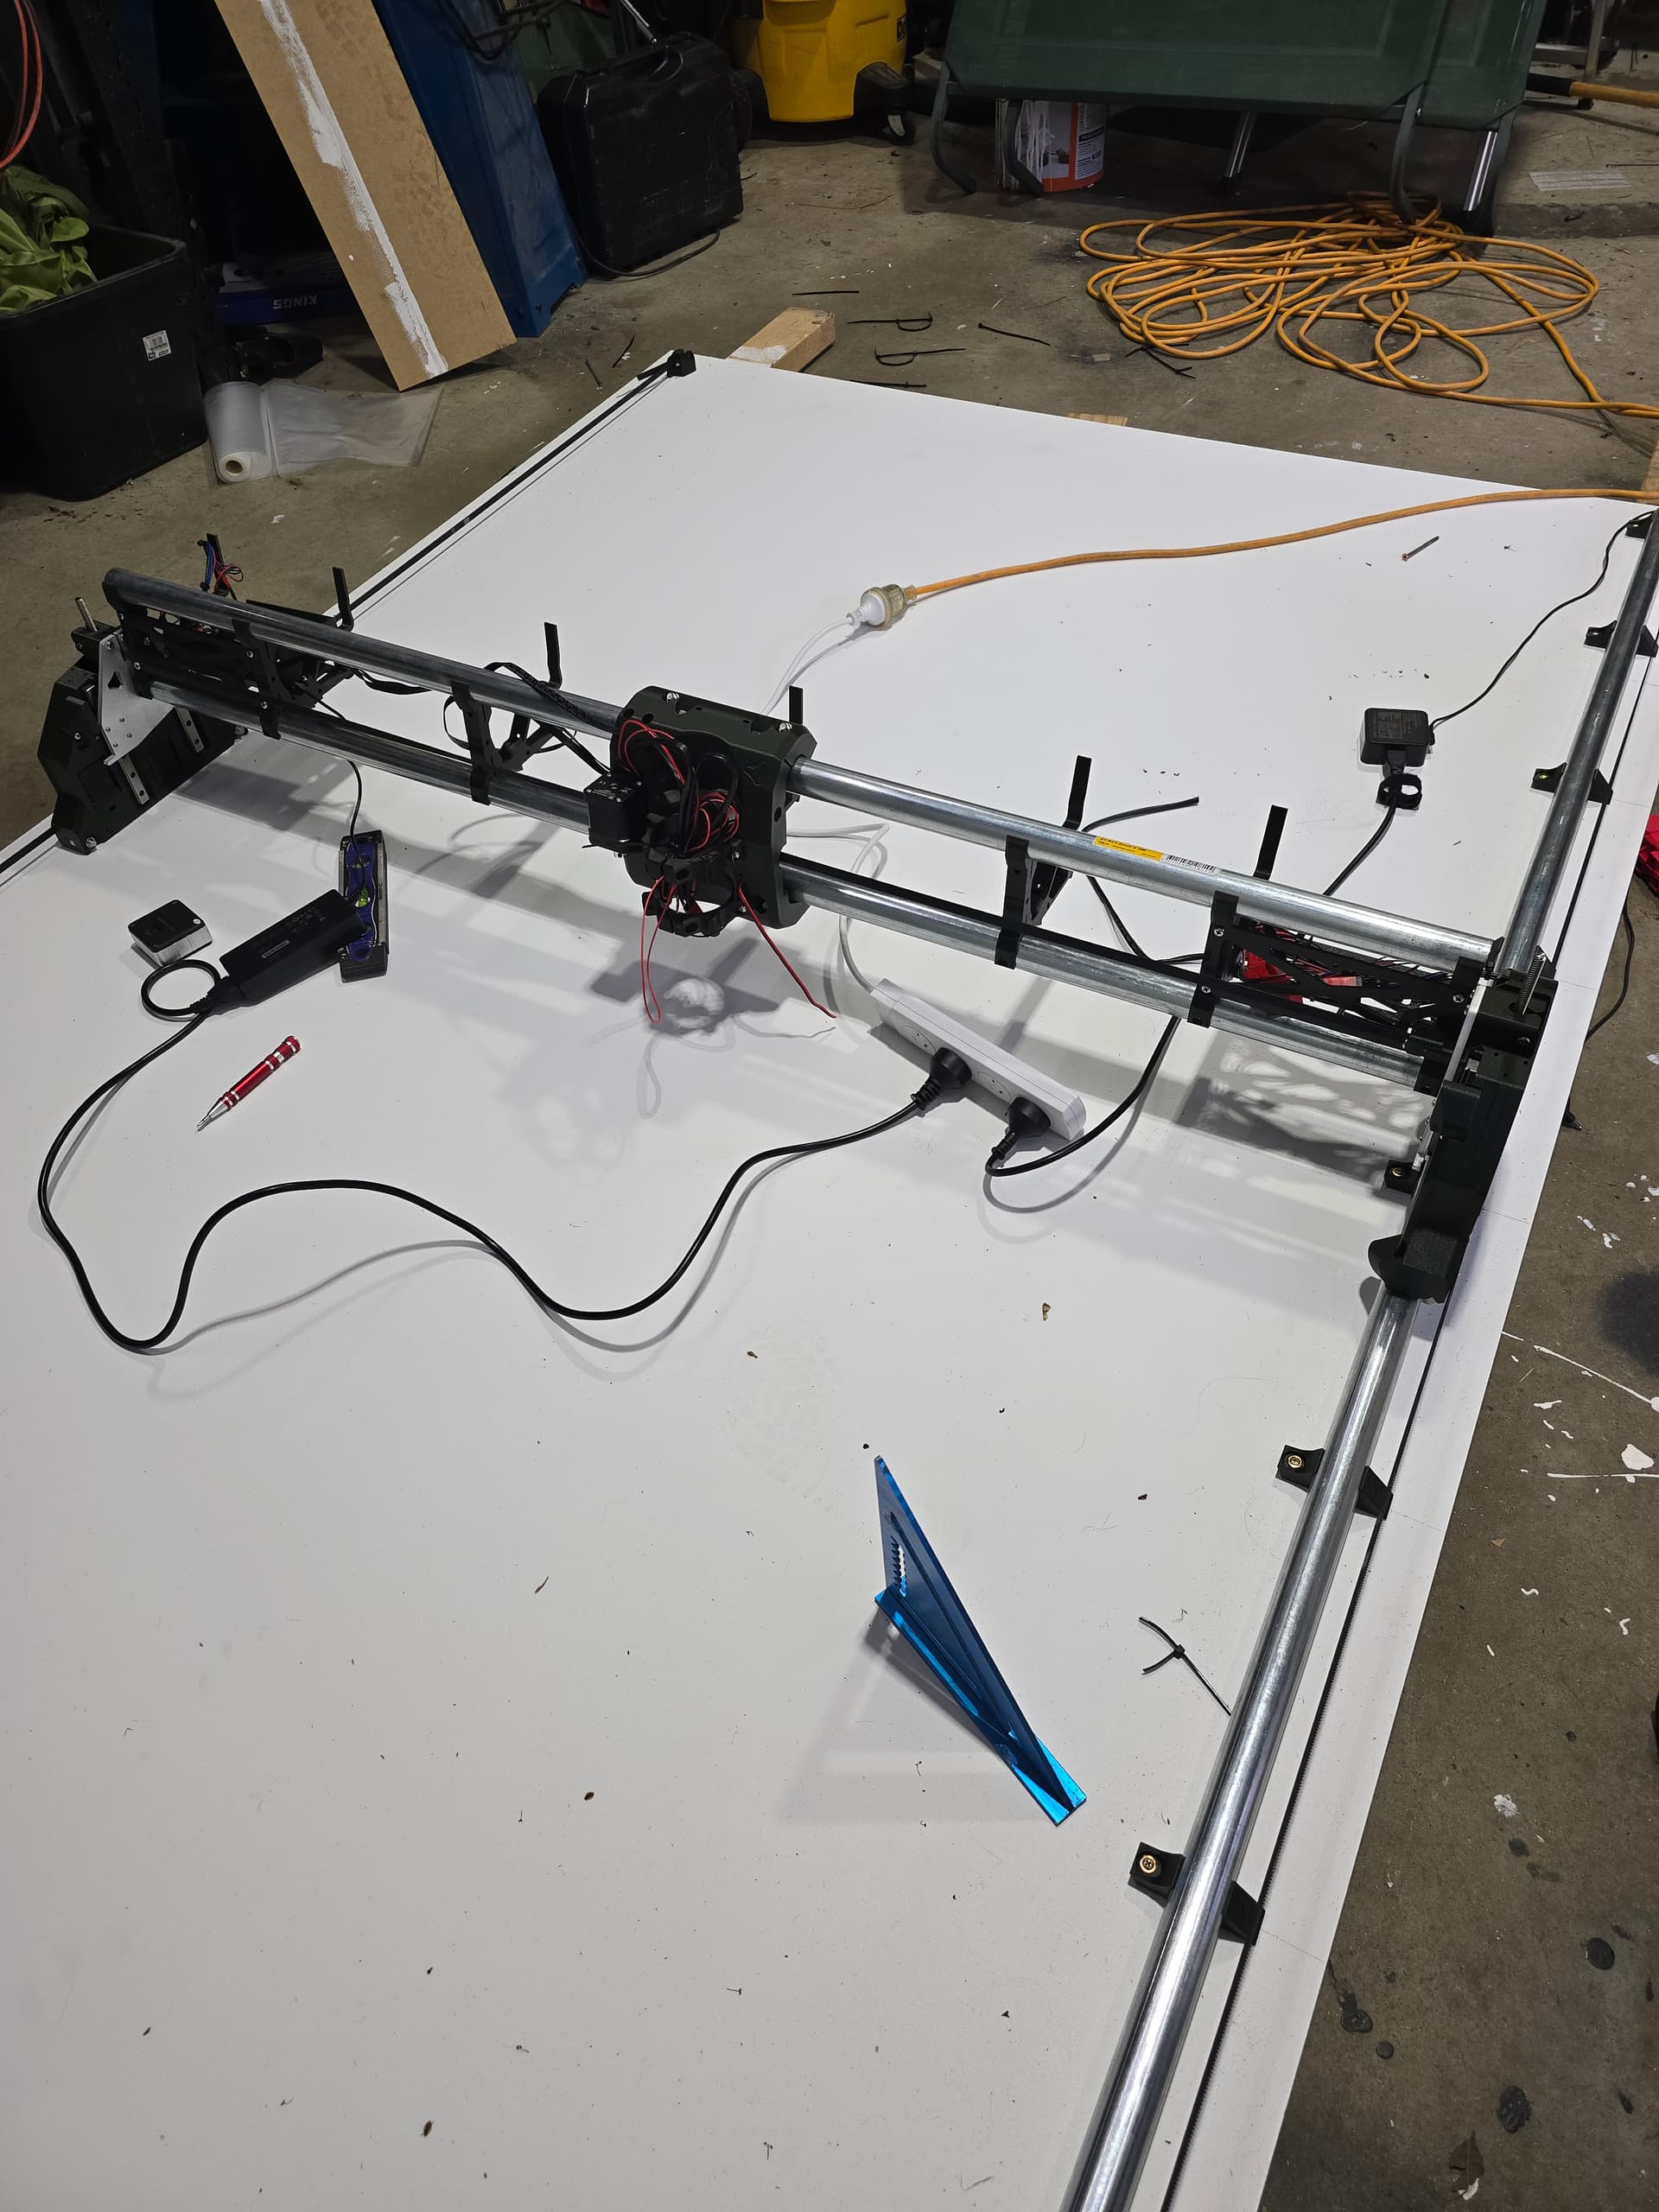
Stops are all doing there thing and moving well on X and Y.
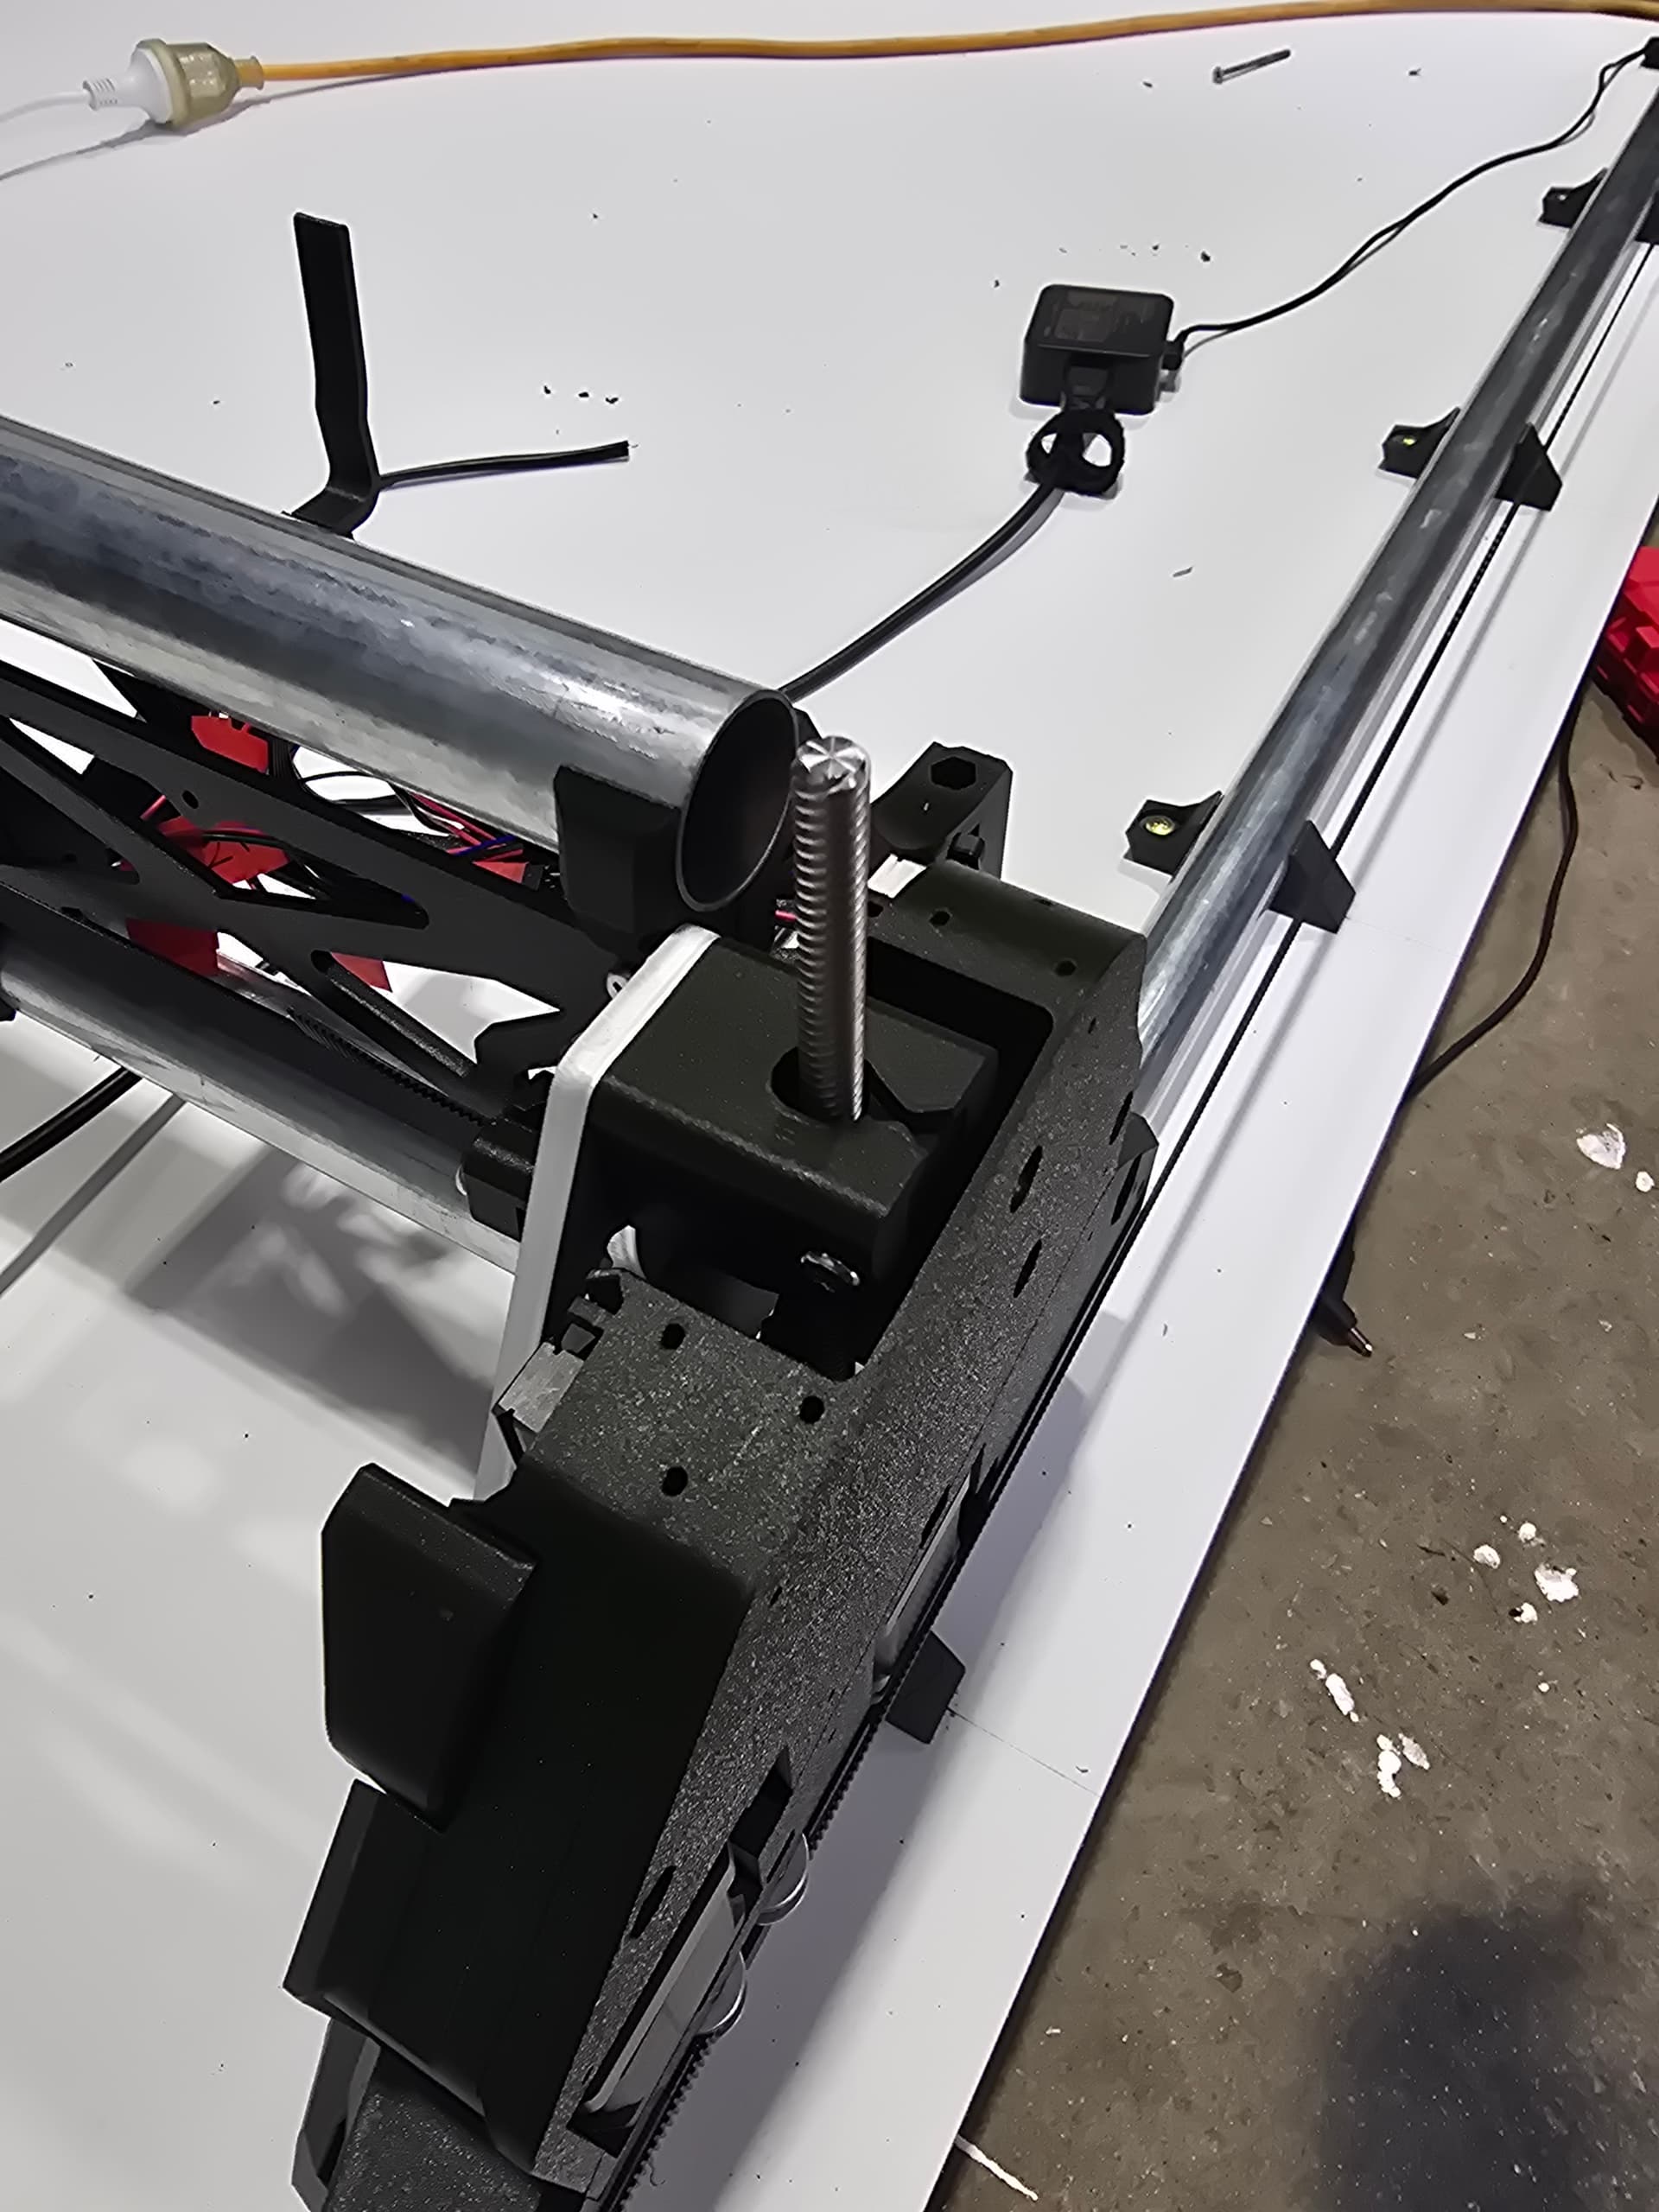
Getting bad binding on my right hand Z, everything is square and level. Thinking maybe the linear rails although when power off and weight taken off they slide well. Any suggestions? Removing this screw helps but doesn’t elevate the issue?
How writing something down helps, not long after posting I lube the lead screws and removed the tensioning bolts. Now going up and down without binding.
Next question is how important are the tensioning bolts? Instructions say to leave them out and installed later but never reference again.
Your Bunnings steel pipe should work fine. For reference for any other Aussies, electrical wholesalers sell 32mmOD electrical steel conduit in 4metre lengths. Ask for the threaded type as it has slightly thicker walls than the press fit type
I’m just starting working on my setup again, table wise I went 30mm square steel tube at approx 500mm centres with 12mm structural ply on top currently sitting on saw horses.
I found the steel was pretty close to the same pricing as timber these days
Hi Mitch, The PETG CF looks great! The progress and info you have detailed is great. I’m currently getting everything ready to upgrade from a LR3 and researching/following all builds for info. Its always good to hear what builders encounter along the way. Keep up the great work!
So a big break between drinks and I’ve been back into the build. I’ve got the machine built and running with plans to use the machine to build its own table.
Been super happy with the machine, some reflections on my build so far that might assist others
Keep an eye on cables while you are moving your machine around, without cable management they can get snagged, I now don’t have a USB input
Check your strut plates before breaking the machine down to fit to check they will fit, mine were to big and needed to be hand cut to size
Once I was rebuilt I started chasing perfection for squaring, this is difficult on a full size machine and realistically you will get close but almost impossible for perfect. This is not a problem and it also ruined the build for me as I was spending time working on the CNC and not enjoying it. I’ve got mine close, started using it and really enjoying it now
Plans are to get an actual spoil board installed and built a table to hold everything. Ultimately I’d like to move to a spindle and some vacuum holders but for now I am going to enjoy the CNC.
I’ll also move across to CNCjs or GSender, I used these previously and they’re great, I find the fluid interface lacking.