This project was crazy fun, and I also had a lot of fun putting this timelapse video together for Youtube:
I obviously feel good about cutting wood on it, and now I’ve been working on cutting aluminum – had a couple successes and failures, and learning a lot! Any questions about the build, ask away!
In this last picture, I was cutting two 2020 extrusion corner brackets. The bottom one I did a 0.8mm DOC contour around the part, which barely succeeded. The top one I made it a 4.5mm “moat” and used adaptive clearing on it. It technically worked and was way less stressful on the machine, but was a total mess and took literally 12min instead of 1min. Looking forward to playing with it more!
To avoid spam, after you join the forum, there is a short period of time where there are limits on what you can do. After that time, links and other abilities are available.
I loved your video. In particular I really like that it went through to a first, successful project and did not stop when the machine was assembled.
Lots of cool features in your build. Really liked the print in place flat pack minimal filament consuming electronics case, with flexible vent/cable routing. Very neat!
@azab2c Yes! I made this foldable electronics box that I use for nearly all my projects, and I tweaked it specifically for the Jackpot CNC controller. I just uploaded the Jackpot-specific one to printables:
I also made some really awkward adapter mounts for using regular size limit switches instead of the microswitches. I had so many spare limit switches, I decided not to buy new ones, but it totally wasn’t worth saving the ~$5. It was surprisingly annoying to design, haha.
GREAT video! I know you put many hours into making the video. If you built a LowRider, your build video would answer many of the questions that new builders have. Your pen drawing would have turned out much better if you added a laser to your MPCNC.
Congratulations on your new MPCNC and I look forward to watching more of your videos.
Sadly, I don’t have space for a LowRider. In fact, I built the MPCNC because I wasn’t sure I had the space or noise tolerance for ANY CNC router, so this was a low risk way to have one (low-risk in space and money). If I build a better base w/ enclosure for this and put some retractable casters on it to be able to move it around, it looks like this will work out in the end (it’s currently occupying valuable garage space)
Though I have to admit, I’m more excited about aluminum than wood. I’m looking forward to testing its limits on aluminum, but now that I know I can handle a CNC router in my garage, I might end up making a PrintNC-style mill or something. :shrug:
Until then, I’ll have fun carving stuff in wood. Also I will research using it with a laser attachment. That sounds like fun, too
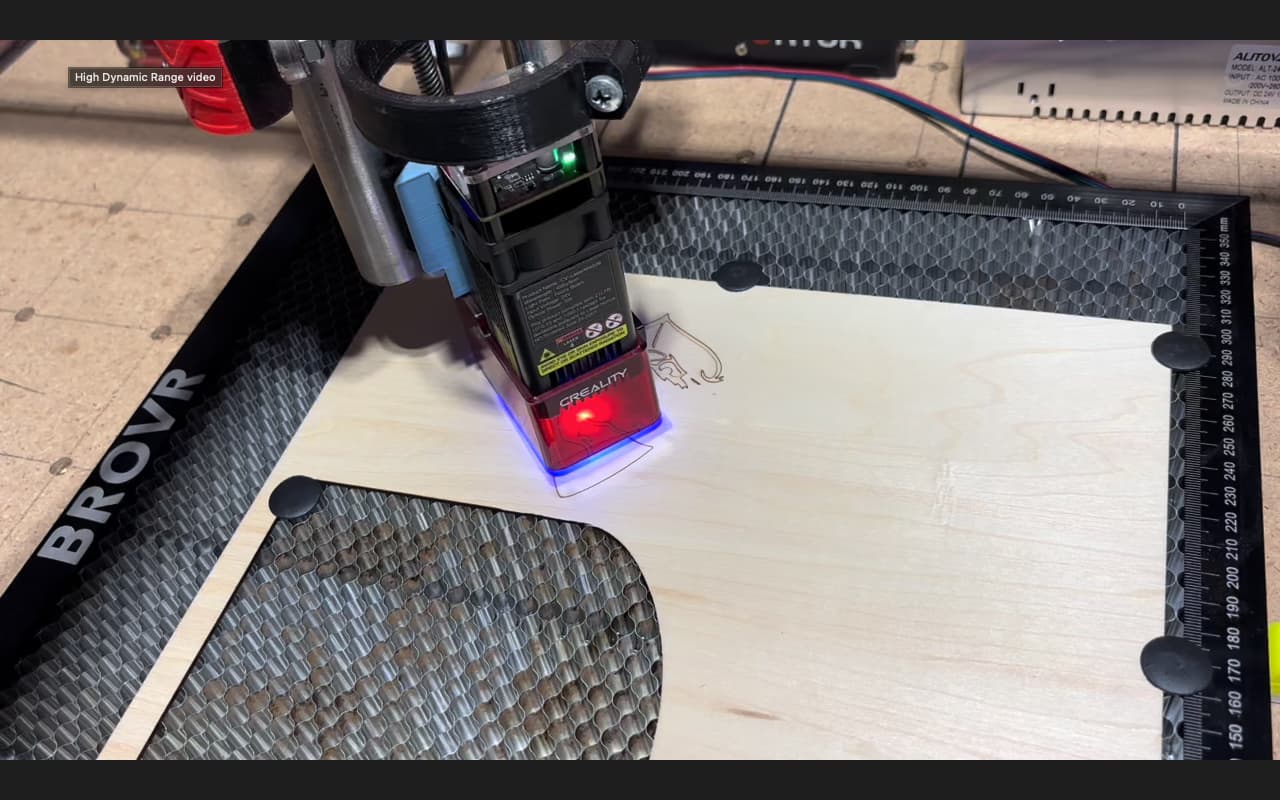
I added a laser to my MPCNC and have really enjoyed using it. I got a Creality 5W during Amazon Prime days. I designed a mount for it and it turned out to be pretty easy to add. I also bought a Jackpot board which works better with a laser.
Same here. I bought my first printer because they had gotten cheap enough that just watching it print was worth the money. Then I saw the MPCNC and decided it would be low cost enough that it didn’t have to cut anything to be worth it. All the years of fun since then have been gravy.
I haven’t done much metals, because I hate the chips. But your build looks like it would be a good size for that. Share your success and failure. We’ll enjoying the process.
I edited your posts to fix the links. I’m pretty sure the regulars like Robert and Aza should be able to do that too. But whatever works.
Great Video, I am still starting to get my MPCNC running.
What machine modell are you using in Fusion 360? Could you possibly post your settings here?
Many besides me would probably appreciate this.
Greetings from Germany
I tweaked a few settings, but nothing major. It mostly just worked. I’m using the Jackpot CNC controller and use the GRBL 1.1 version of the post-processor
 Printed a CNC Machine! #mpcnc #diy")

 Printed a CNC Machine! #mpcnc #diy")