Hello and thanks again for awesome things!
I am putting together my second LowRider 3 (intended to serve as a CNC plasma cutter). I again ran into (and worked around) a minor issue I had encountered the first time I built a LR3. I later realized it was because I was using 3/4" (19mm) thick MDF for the YZ plates.
The instructions indicate the Y motor mounts can be inserted “with a 90 degree twist.” They also give an assembly order that has the motor being installed before that insertion and twist. However, both times, I could not get the twist to happen once the motor was installed. I had to remove the motor, then do the twist to insert the mount, then slide the motor into the semi-positioned mount, mount the motor again, and finally secure the mount.
I am labelling Dan’s original “extra tall YZ plate” as remix “v1.”
Earlier I had asked if Ryan saw any issues with making some small holes a bit larger, for not just tool access (for screws on gantry) but for insertion (and potential removal) of the screws themselves. I got a green light and used that for this second LR3. I am now calling that remix “v2.”
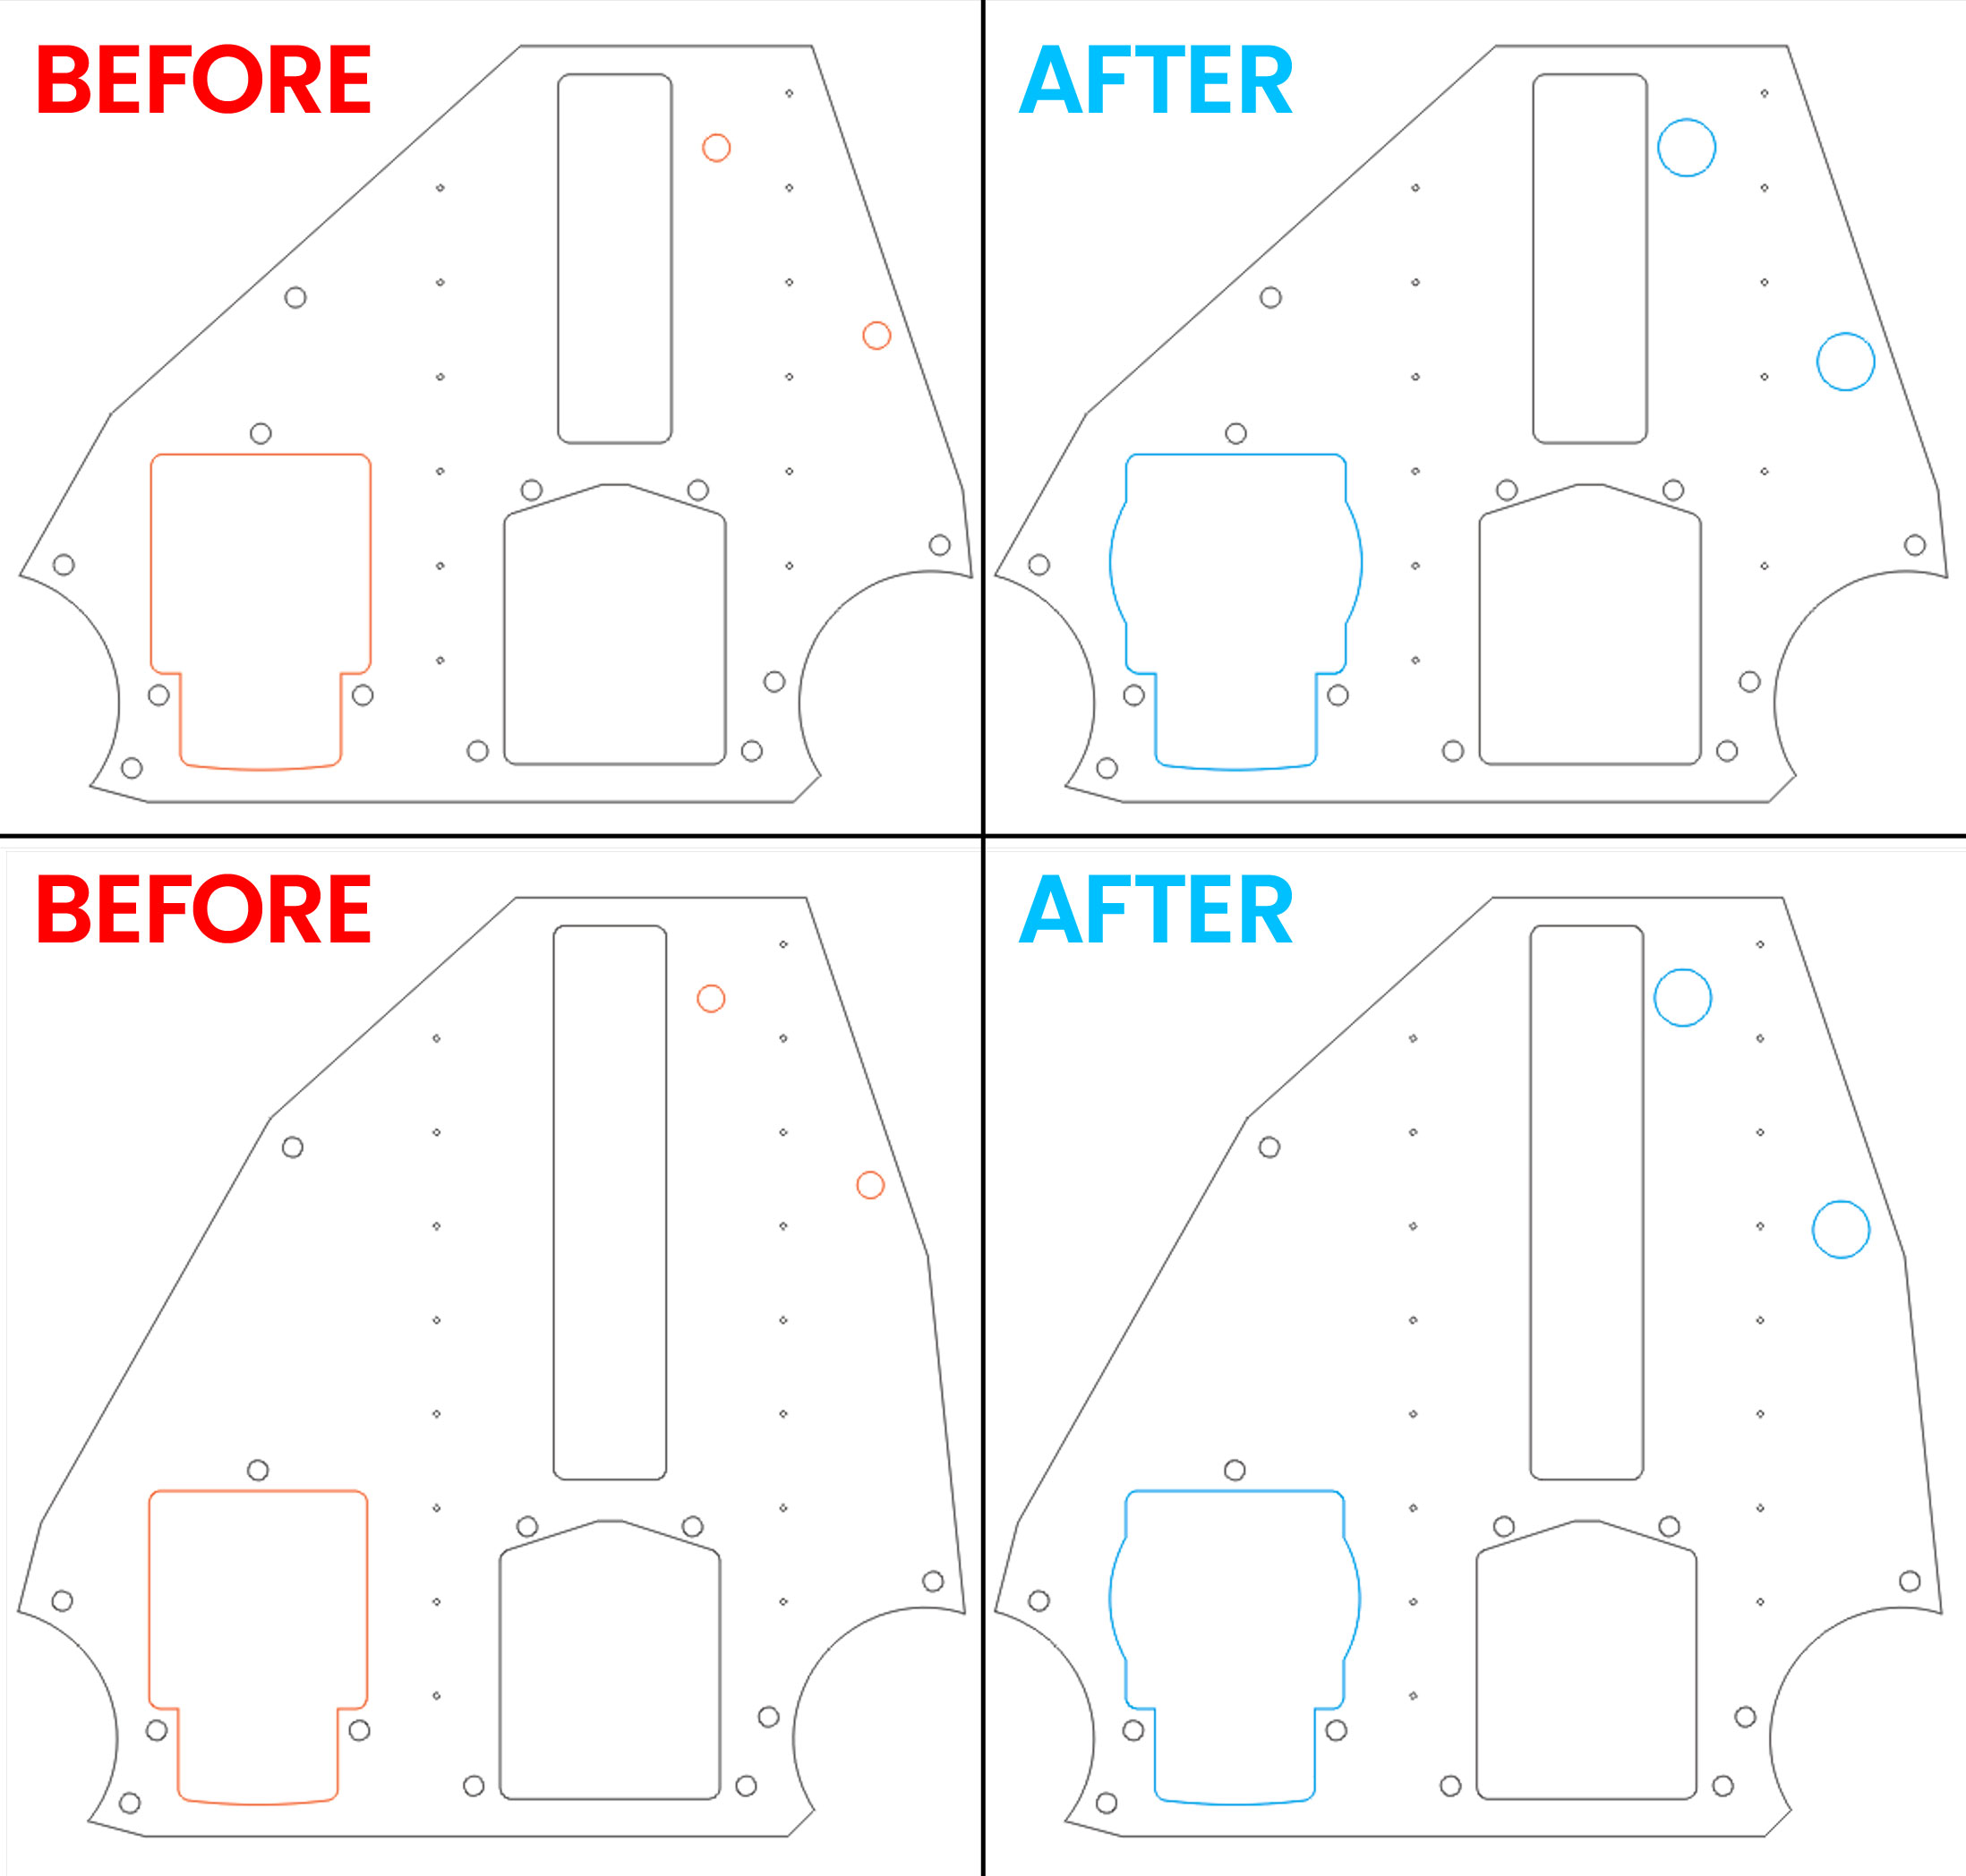
This “v3” remix offers a circular widened area on the hole for the Y motor mount. Again, this is not needed if you are not using 3/4" MDF. The diameter of the circular extra cut (and thus width of the modified Y mount hole) is 66.5 mm. It is intended to be completely covered up by the motor mount once installed. I have not tested this (as it would require making an extra, unneeded YZ plate and moving a motor mounted assembly around), but the theory and hope is that it would allow the 90 degree twist even with the motor installed.
Below is a before and after, and then I will try to attach both a one-off SVG and a mirrored set of 2 SVG.
YZ Plate, MODIFIED BIGGER ACCESS HOLES (v3), mirrored set and one-off.zip (48.5 KB)
Thoughts? Does look like a help or a hurt?