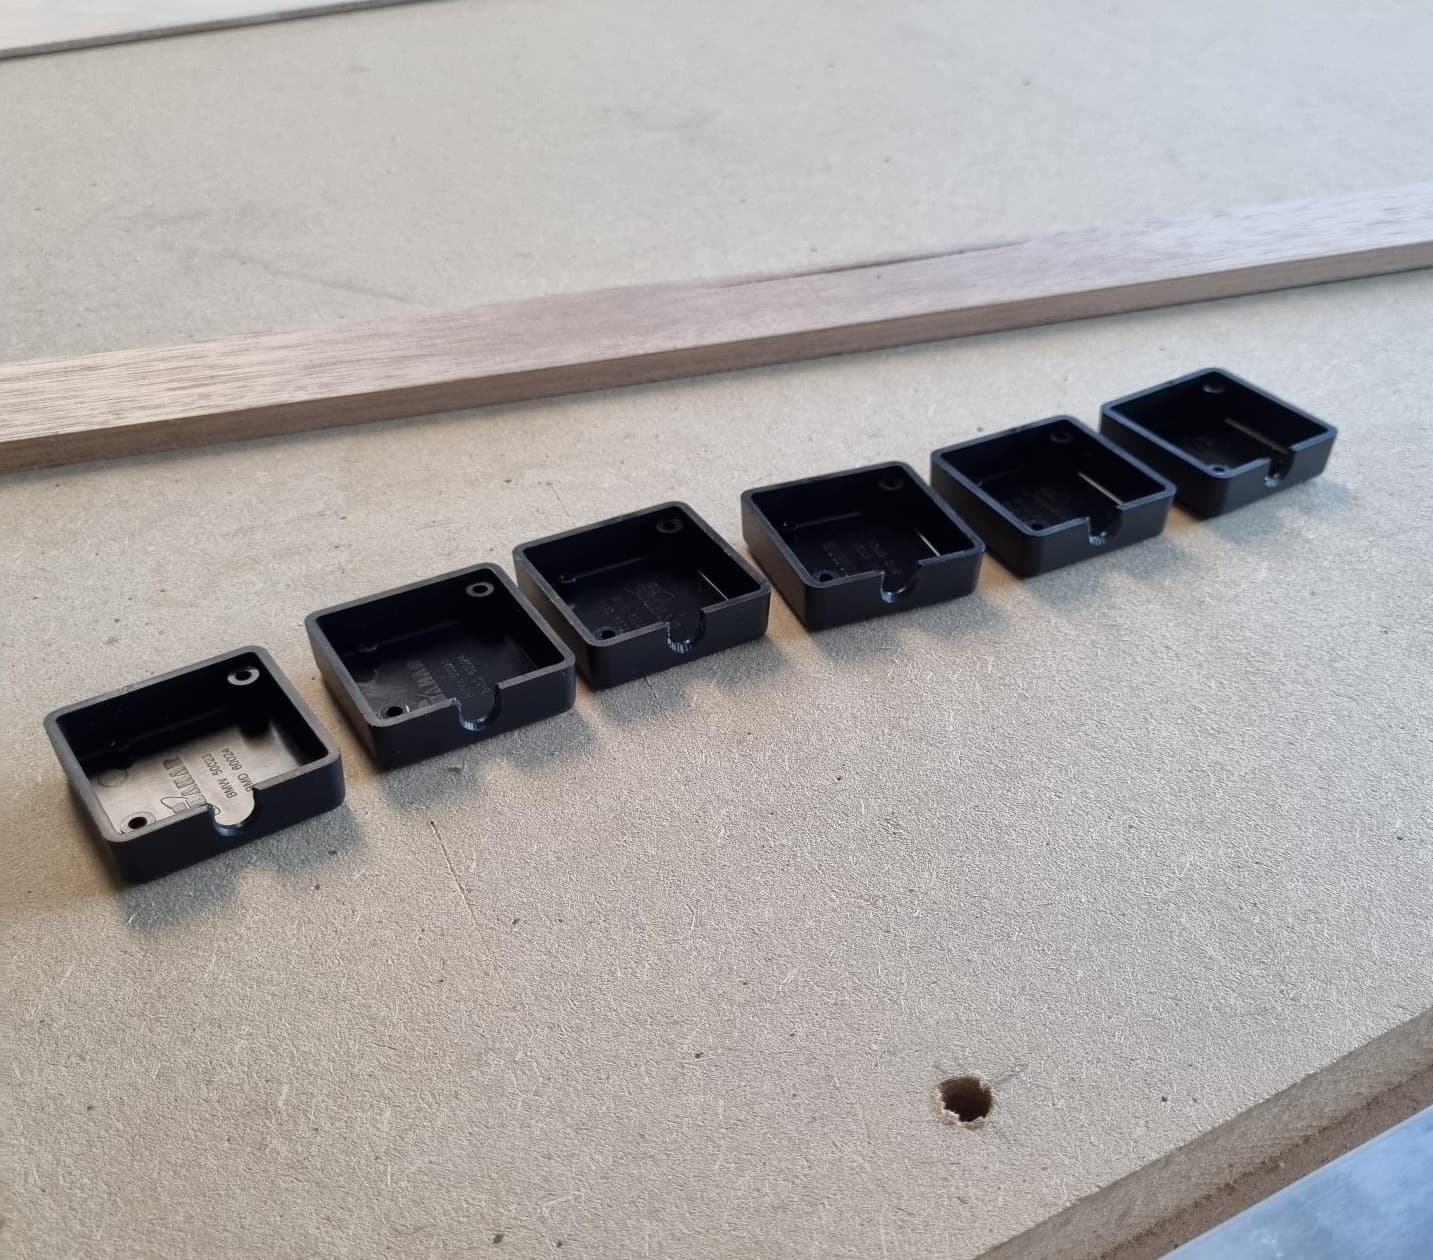
These are the smallest at 40x40x15mm, with a 7mm elongated hole in one side. But there is other sizes as well.
Until now I’ve been drilling them by hand - which is slow and tedious and none of them come out looking particularly perfect.
How easy is routing ABS plastic with the lowrider going to be? or will it just melt and turn into a mess?
What sort of bit should I be using?
Also wondering how I would fixture them. I want to be able to setup a whole batch (at least 20 or more), run the gcode to cut them, and then swap them out for another batch.
I’m considering something with a 3d printed profile of one side, that clamps it against something flat while they are standing upright. But I’m not entirely sure how to go about it exactly.
If anyone has ever done something like this before I would love to know how you set it up.
The ABS is very simple to cut with the tool, mostly just go fast enough not to scorch it.
If you have end stops,.I.would.probably make a series of dies with a known zero point relative.to the end stops. Each die would have a cut out thst fits a box tightly and you could then add whatever holes ate necessary.
I had a one-of job where I cut a rectangle into a piece of scrap that was screwed down to my spoilboard in order to make precise engravings onto a box.
If you need to do 10 of them. The manual way might be best. If you need to do less than 100, then the LR is probably the best. If you need to make more than that, you might use the LR to make a jig and use a drill press. A drill press is really the best tool for drilling. A fixture to make the position precise would help a lot.
Finally got around to doing some more with this. Started with some larger boxes which are always very messy to drill by hand (the plastic goes everywhere, and it seems to stick to everything with static electricity after drilling).
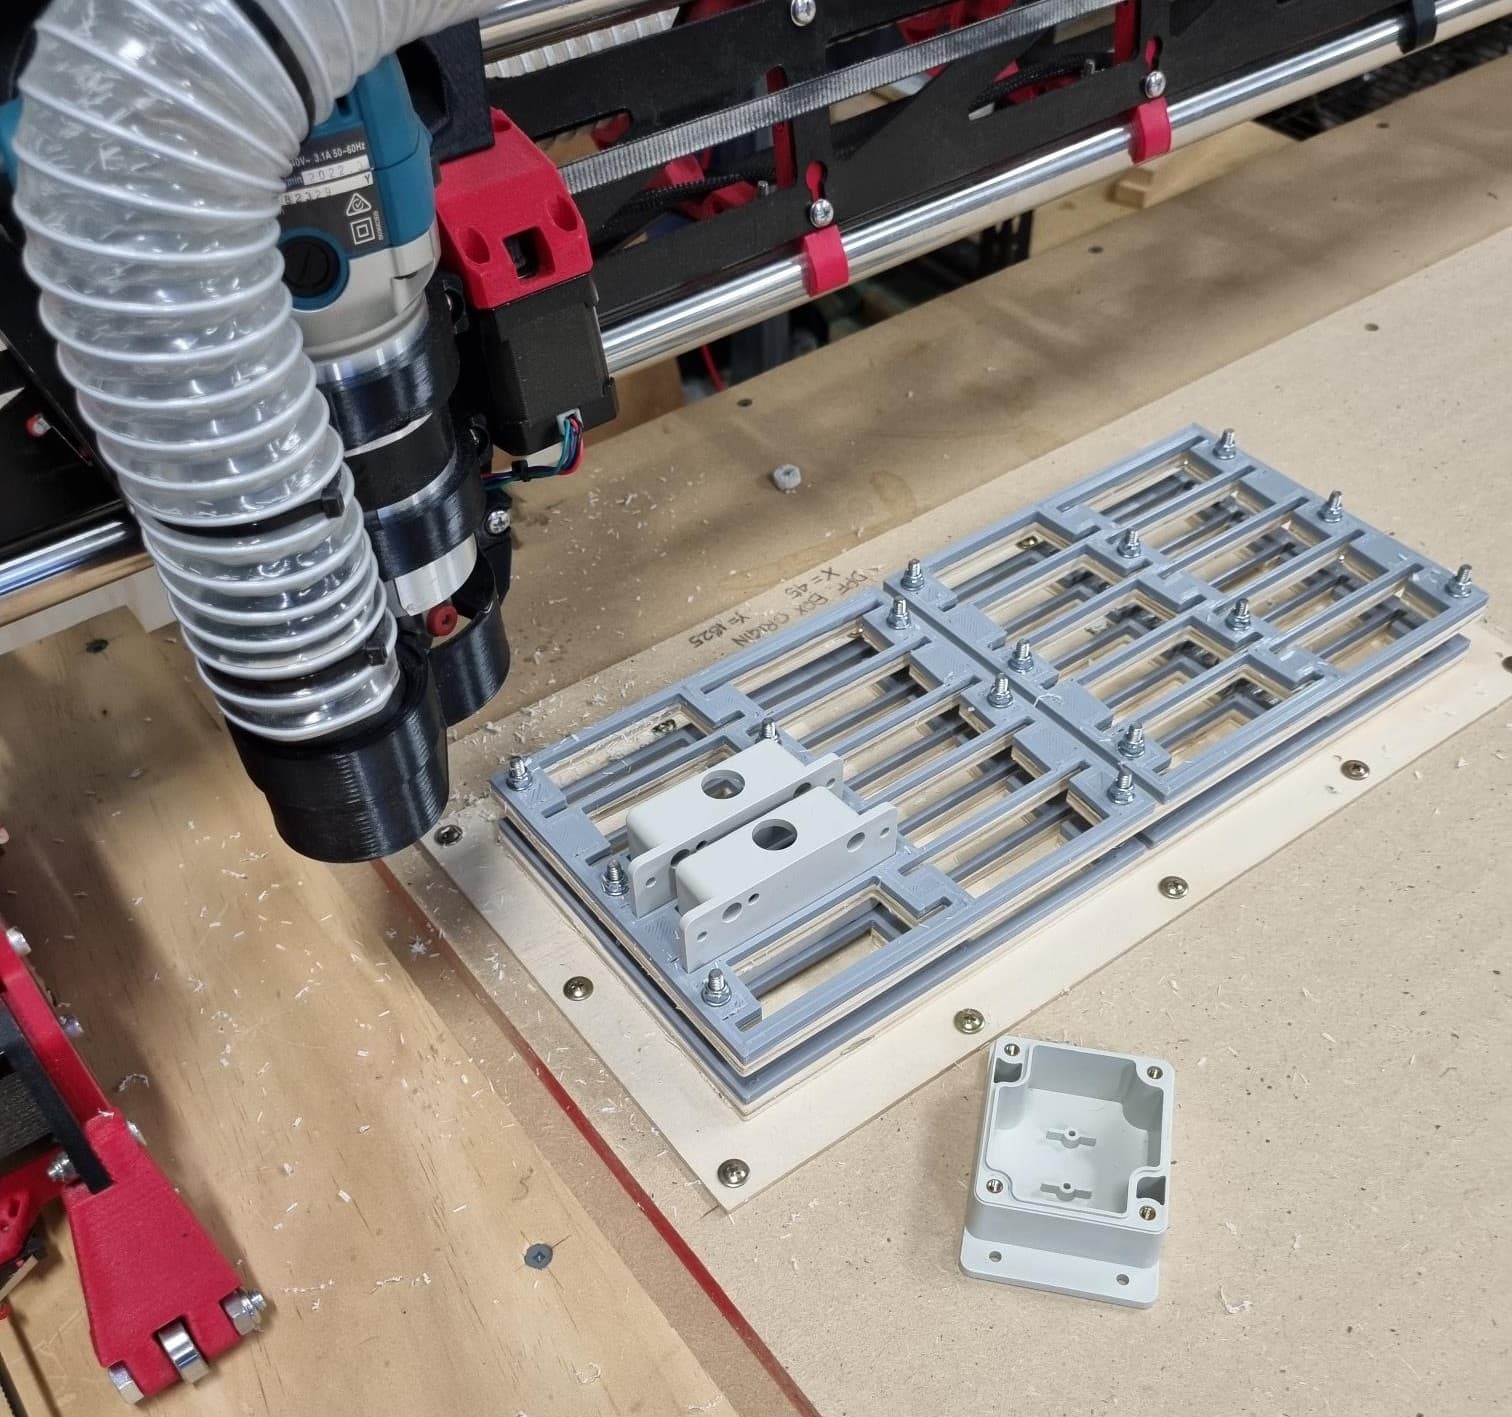
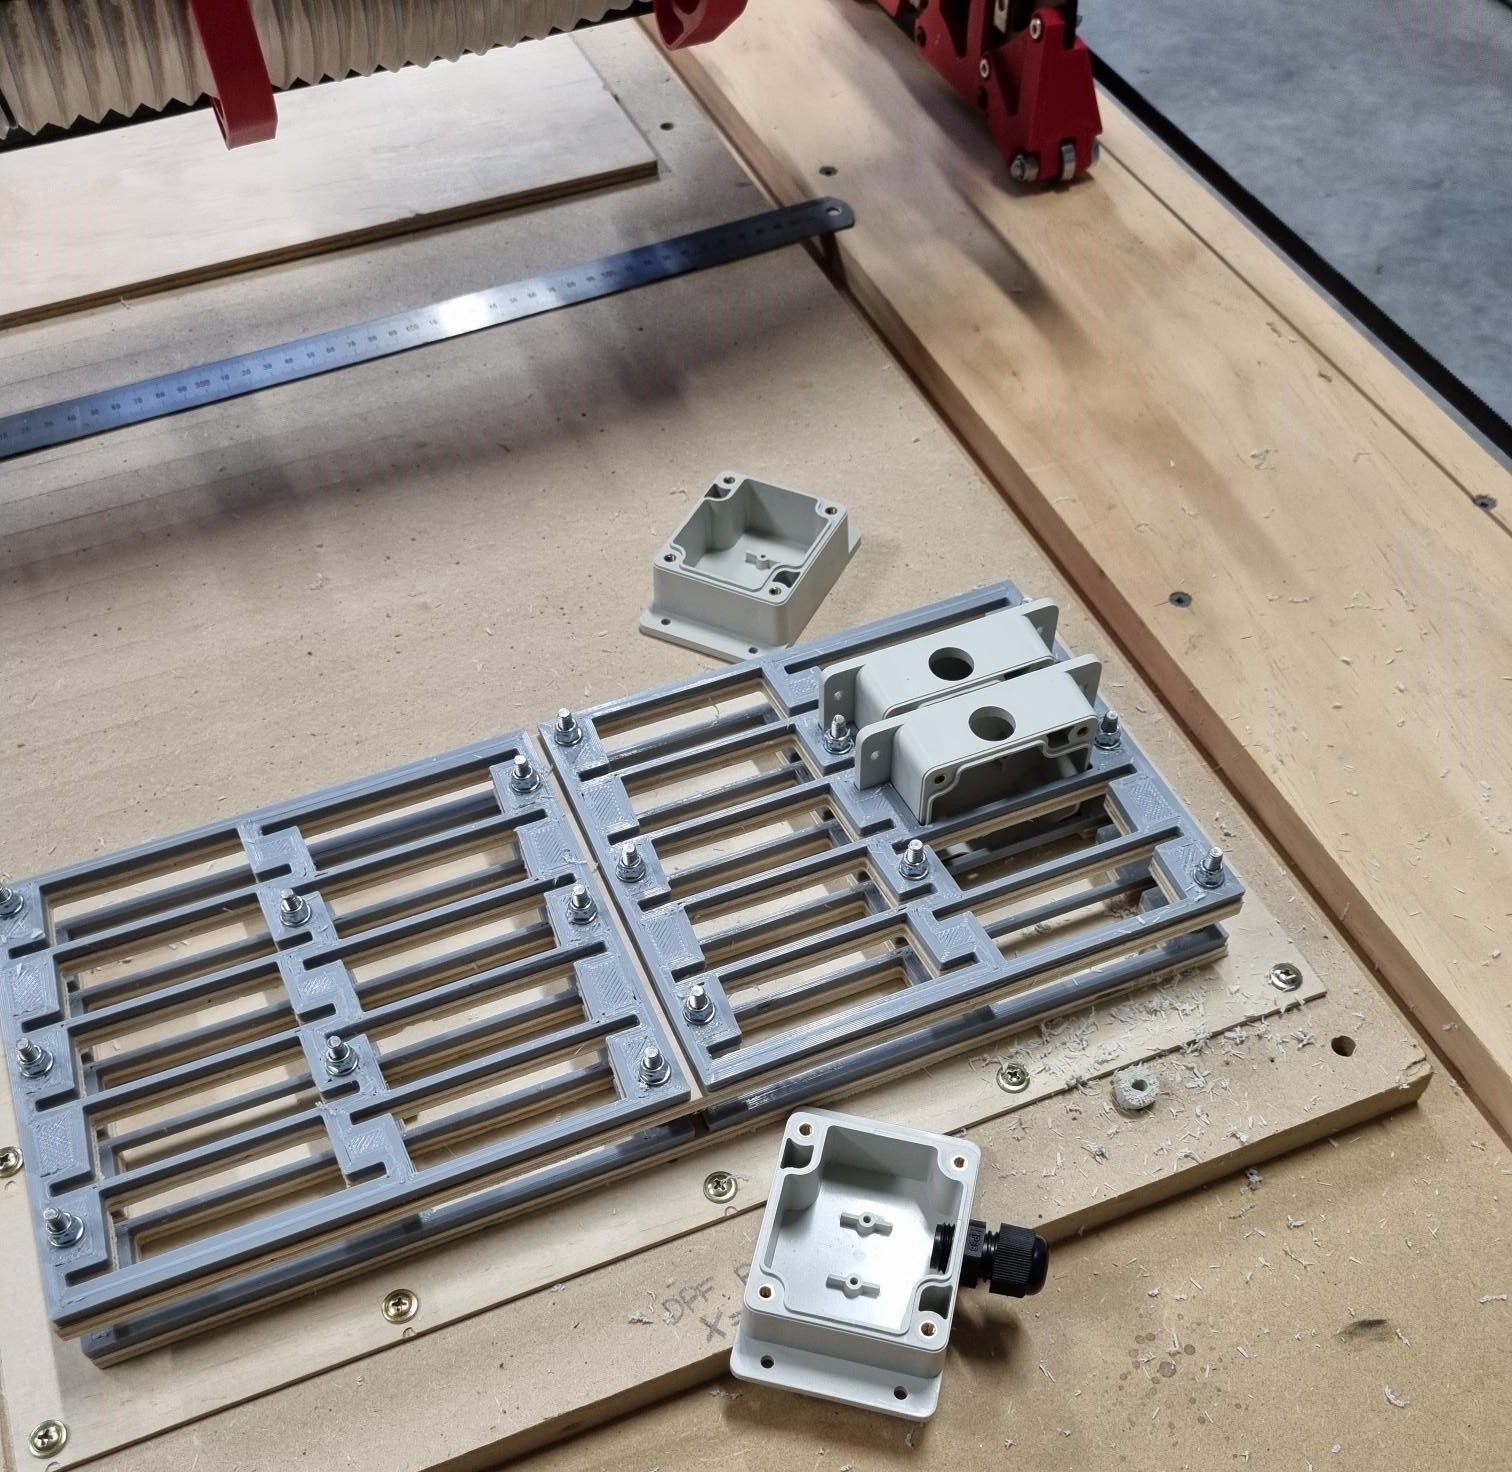
I printed 4x PETG fixture plates which are a nice snug push fit onto the boxes, and routed 2x 6mm plywood fixtures which were meant to be a fairly loose fit.
The plywood ones ended up a bit tight and needed a lot of clean up by hand. I regret not just cutting new ones (but by the time I decided that, I had already decided I invested too much time in them by hand lol).
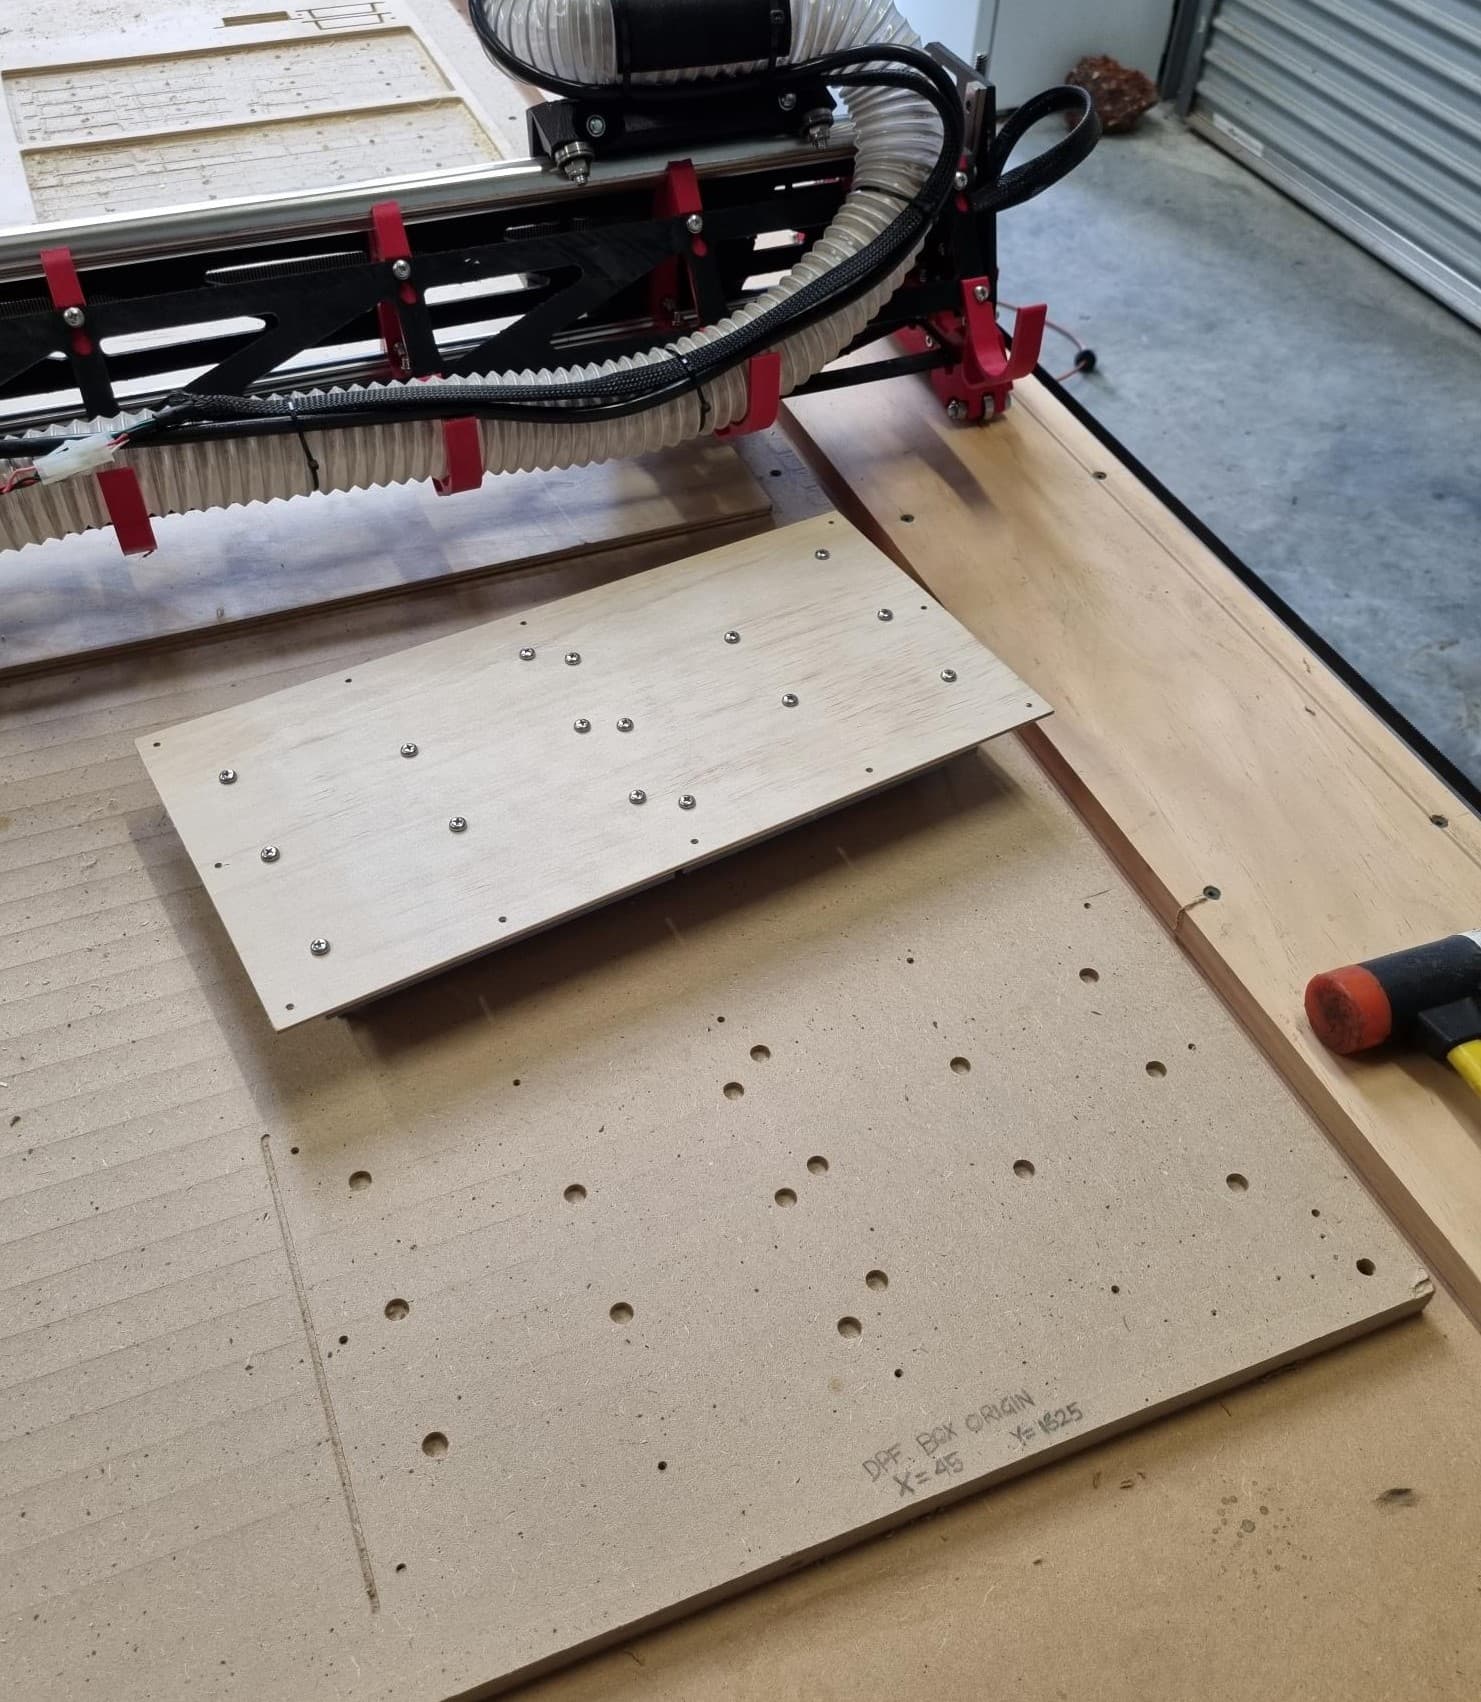
The plates are all bolted down to a 3mm plywood base which I also cut. There’s a stack of nuts in between both sets of plates to space the top set up.
Since the screw heads protrude out the bottom, I cut some clearance holes in the spoil board. The 3mm base plate is screwed down and easily removable if I need the bench space to cut something else.
The idea is the 3d printed plates create the snug fit to hold the boxes. The plywood plates provide the X/Y accuracy to keep the sets of plates aligned with each other (since I can only 3d print up to a certain x/y size).
I’ve cut a few to try and it out and so far I’m very happy with the result.