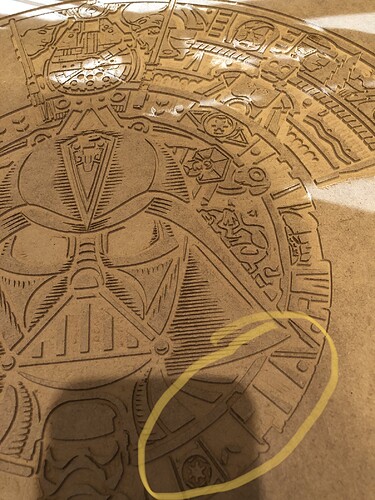
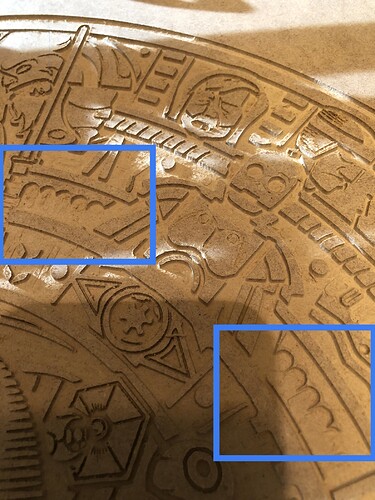
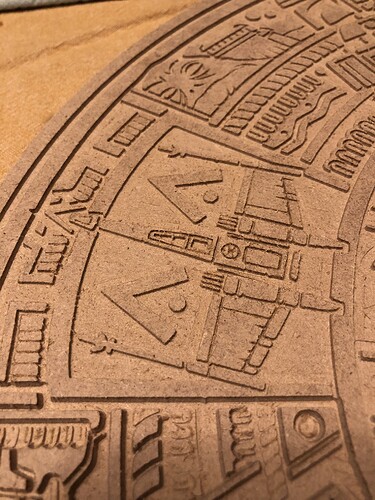
So I’m working on an overly ambitious carve (the Star Wars Mayan calendar). Using a 20 degree bit at a DOC of 2mm, carving in MDF. The initial carves come out looking amazing - I’m thrilled with what this machine is capable of. My problem arises when after the initial carve, it goes to do what I assume is it’s finishing pass, where it loops around the outside of whatever shape it just carved. Any smaller, finer detailed pieces just get obliterated by this process, like this final clean up lap is (significantly) tighter than the original carve. Is there a way to tell Estlcam to just not do this? I’m happy with the initial carve and this pass just destroys all my detail. I’ve tried altering the finishing allowance from anywhere from 0.0 to 0.4 and get the same results. I feel like I’m missing something or doing something wrong, especially when I’ve seen pics of others with all the detail intact. This is already too long - I’ll happily provide any other details needed
I’ve had the same thing happen to me. If you watch I bet it’s bits of mdf just ‘flaking’ off. A downside of it being basically compressed sawdust and glue ![]()
Yeah, basically that’s what’s happening. However, on the first pass, the carve looks great. It isn’t until it goes for its lap around the carve - that’s when it destroys the smaller pieces/cut-outs. I’ve seen pics of very well done ones with the detail intact, so I was hoping either for a way to ignore/cancel the final lap around the carves, or for insight on how to do it properly and keep the detail. I’m doing a section right now where I set the finishing allowance to .7 mm I think and while it hasn’t obliterated the small pieces, I think I pulled out so far I’m not getting the detail either.
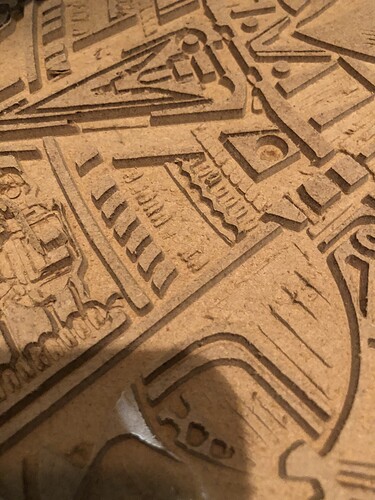
Another example of pieces disappearing:
What you are seeing is not technically a finishing pass. Any changes you make to that variable will not effect the outcome. What its doing is shaving of the small points between the radii of the bit as it ends at its travel. Otherwise you would have little triangles all over the inside of your carves. I’m not quite sure you can get rid of that pass. Unfortunately I also don’t have a solution other than trying a more stable material, or perhaps increasing the over-all size of the piece. ![]()
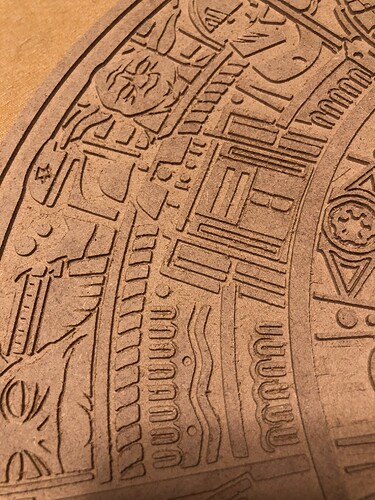
Hmm that’s interesting because on the last 2 segments I did I raised the finishing allowance to .8 on one and .5 on the other and while the carves appear “shallower” (although that may be just compared to one I did where I think I set the Z too low) they retained all of their detail. I’m not in front of my PC, but on Estlcam when I tweak the finishing allowance setting and zoom in on a carve, it shows a grey area that I presume is the initial carve, and red which I presume is the finishing pass, since it widens or narrows depending on what I change the number to. I don’t know if the grey and red truly represent that, but the last two segments I did where I made sure the number was high enough that the red didn’t exceed the border of the grey, I got no blowout at all. So I guess I figured it out on the last segment lol. Does anyone know if I’m interpreting the grey and red on a carve correctly? Anyway, any info or help has been and will continue to be appreciated.
A pic of the last two (successful) segments:
That is super cool prject, can you link to where you got it?
Sorry so late. I believe the original came from sandyeggo.com. I’ve found it online in a couple places, but he/they have it along with a couple other really cool projects
Although now that I look again there are 3 other Mayan calendars but not Star Wars. Maybe I just found it somewhere in the interwebz. If you can’t find it, I think I still have the original svg or dxf file
Look o. Etsy. I saw someone had the file for sale.
