After peeps talking about that sunlu thing that just came out. I have been thinking about how to do my own. I did see this a few times now. And am considering it greatly, but not his 3d printed contraption, not really liking that. In Michigan right now 45% humidity still (here in winter it will change ) but for now, well, I use large Zip Loc Bags. But this Reciculating over Silica seems valid. If I can keep it enclosed. Now topic of discussion is how to that. Been 3d printing for a long time and have many rolls of filament. if I make it large and open the door, when it is HIGH humidity, i can imagine that silica will really fill up quickly. Any thoughts? https://youtu.be/8kIDLIXILKo?si=skGahSChd-i61Lm8
I was thinking about the silica having a door to close to remove it easily and not draw moisture.
how to access filament without having to dry the silica immediately.
I have an old HF solar environment I can power this from (including a battery) and not use any electricity.
So does any body know if you can buy something like the magnetic seal on refrigerators? Nothing stupid expensive, or maybe I make a tpu gasket, now that I have a p1s!
Yes you can buy frig seals easily enough - I’ve just been through that exercise in some detail. I am away till this time tomorrow- will write a summary then when I am not one finger typing on a phone!
Silica doesn’t suck moisture out of the air that fast. Think of it as more of a ‘slow and steady’ moisture removal.
The filament dryer I bought uses heaters and fans to pull moisture out of the air. Then the silica in the bottom helps maintain the lower moisture. I haven’t played with it much, but I also assume when the active dryer is running, it’s pulling moisture back out of the silica too just like putting it in an oven or microwave does.
If you watch the above video, it does, if you have circulation, which I think can be provided easily. If you let it sit, you are quite correct. The circulation brought it down fast. They also talk about using activated alumina, (I think I spelt that correct).
it is a very interesting video. He got sub 20 on that cheesy cabinet he 3d printed!
Now problem one, I am not sure what the humidity is is in Tel Aviv (where he is), is it Michigan humidity? If not, will the solution I use get soaked first time I open it. Humidity was horrible this year. Right now it still is 55% today
This is what I’ve switched to as a desiccant for filament work. I’ve heard some folks say that the silica is faster initially, but my real world experience is that the activated alumina is better overall, and it has been very easy for me to process it in a toaster oven when needed to dry it out.
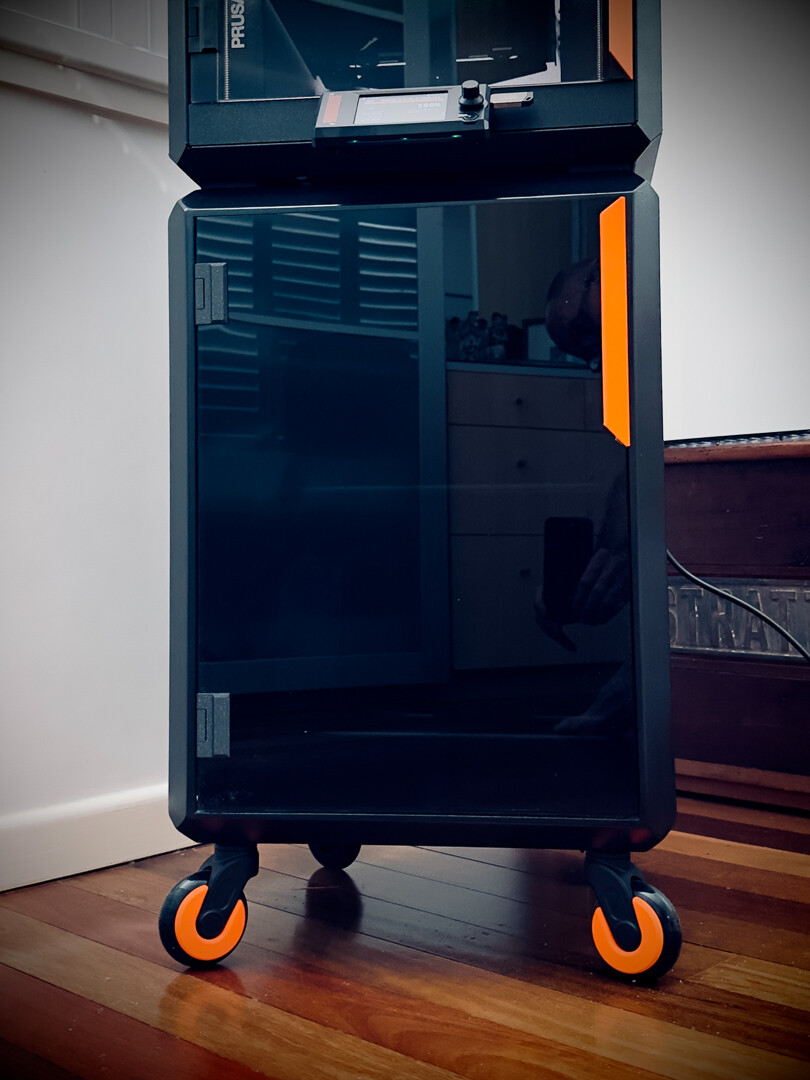
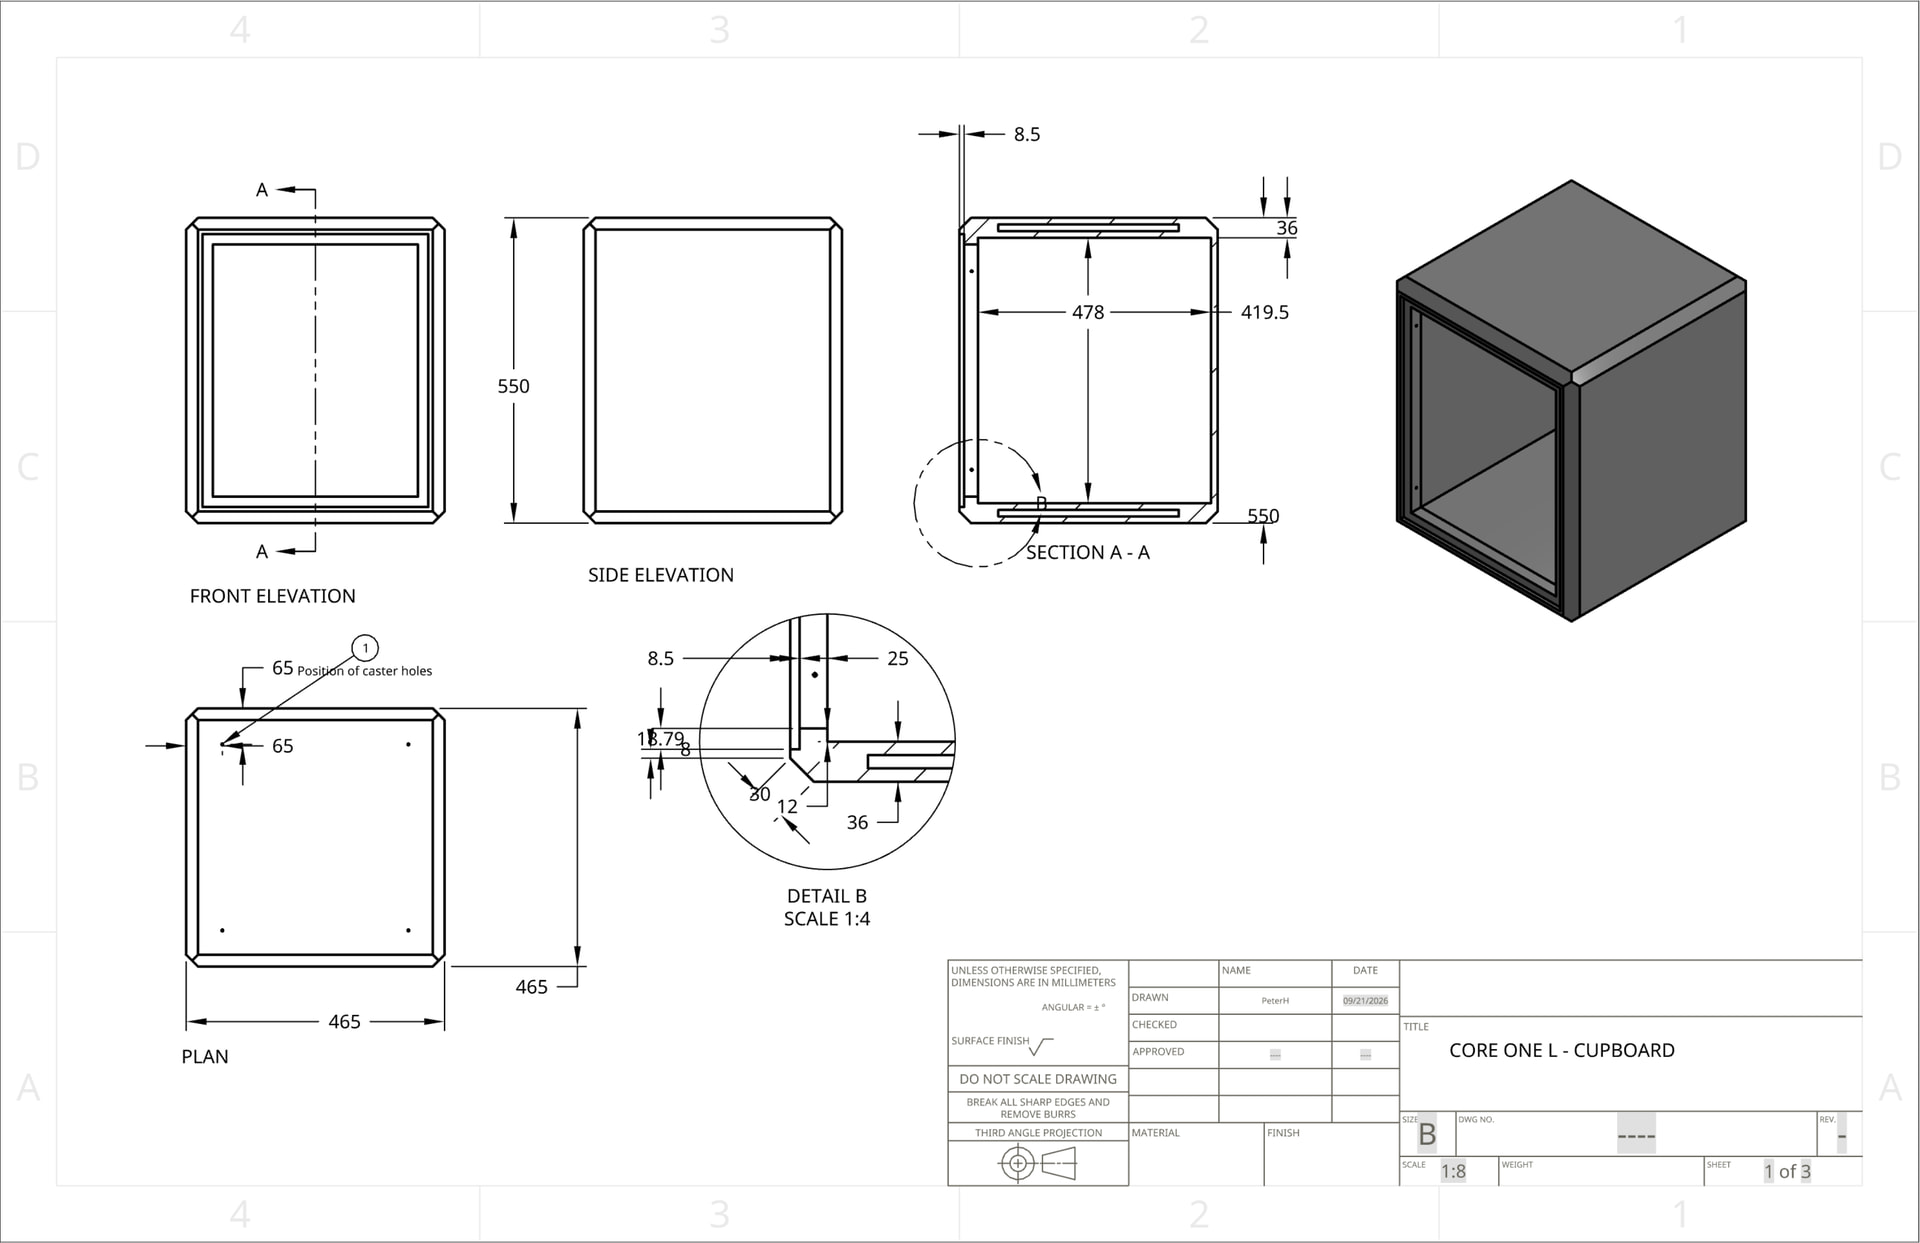
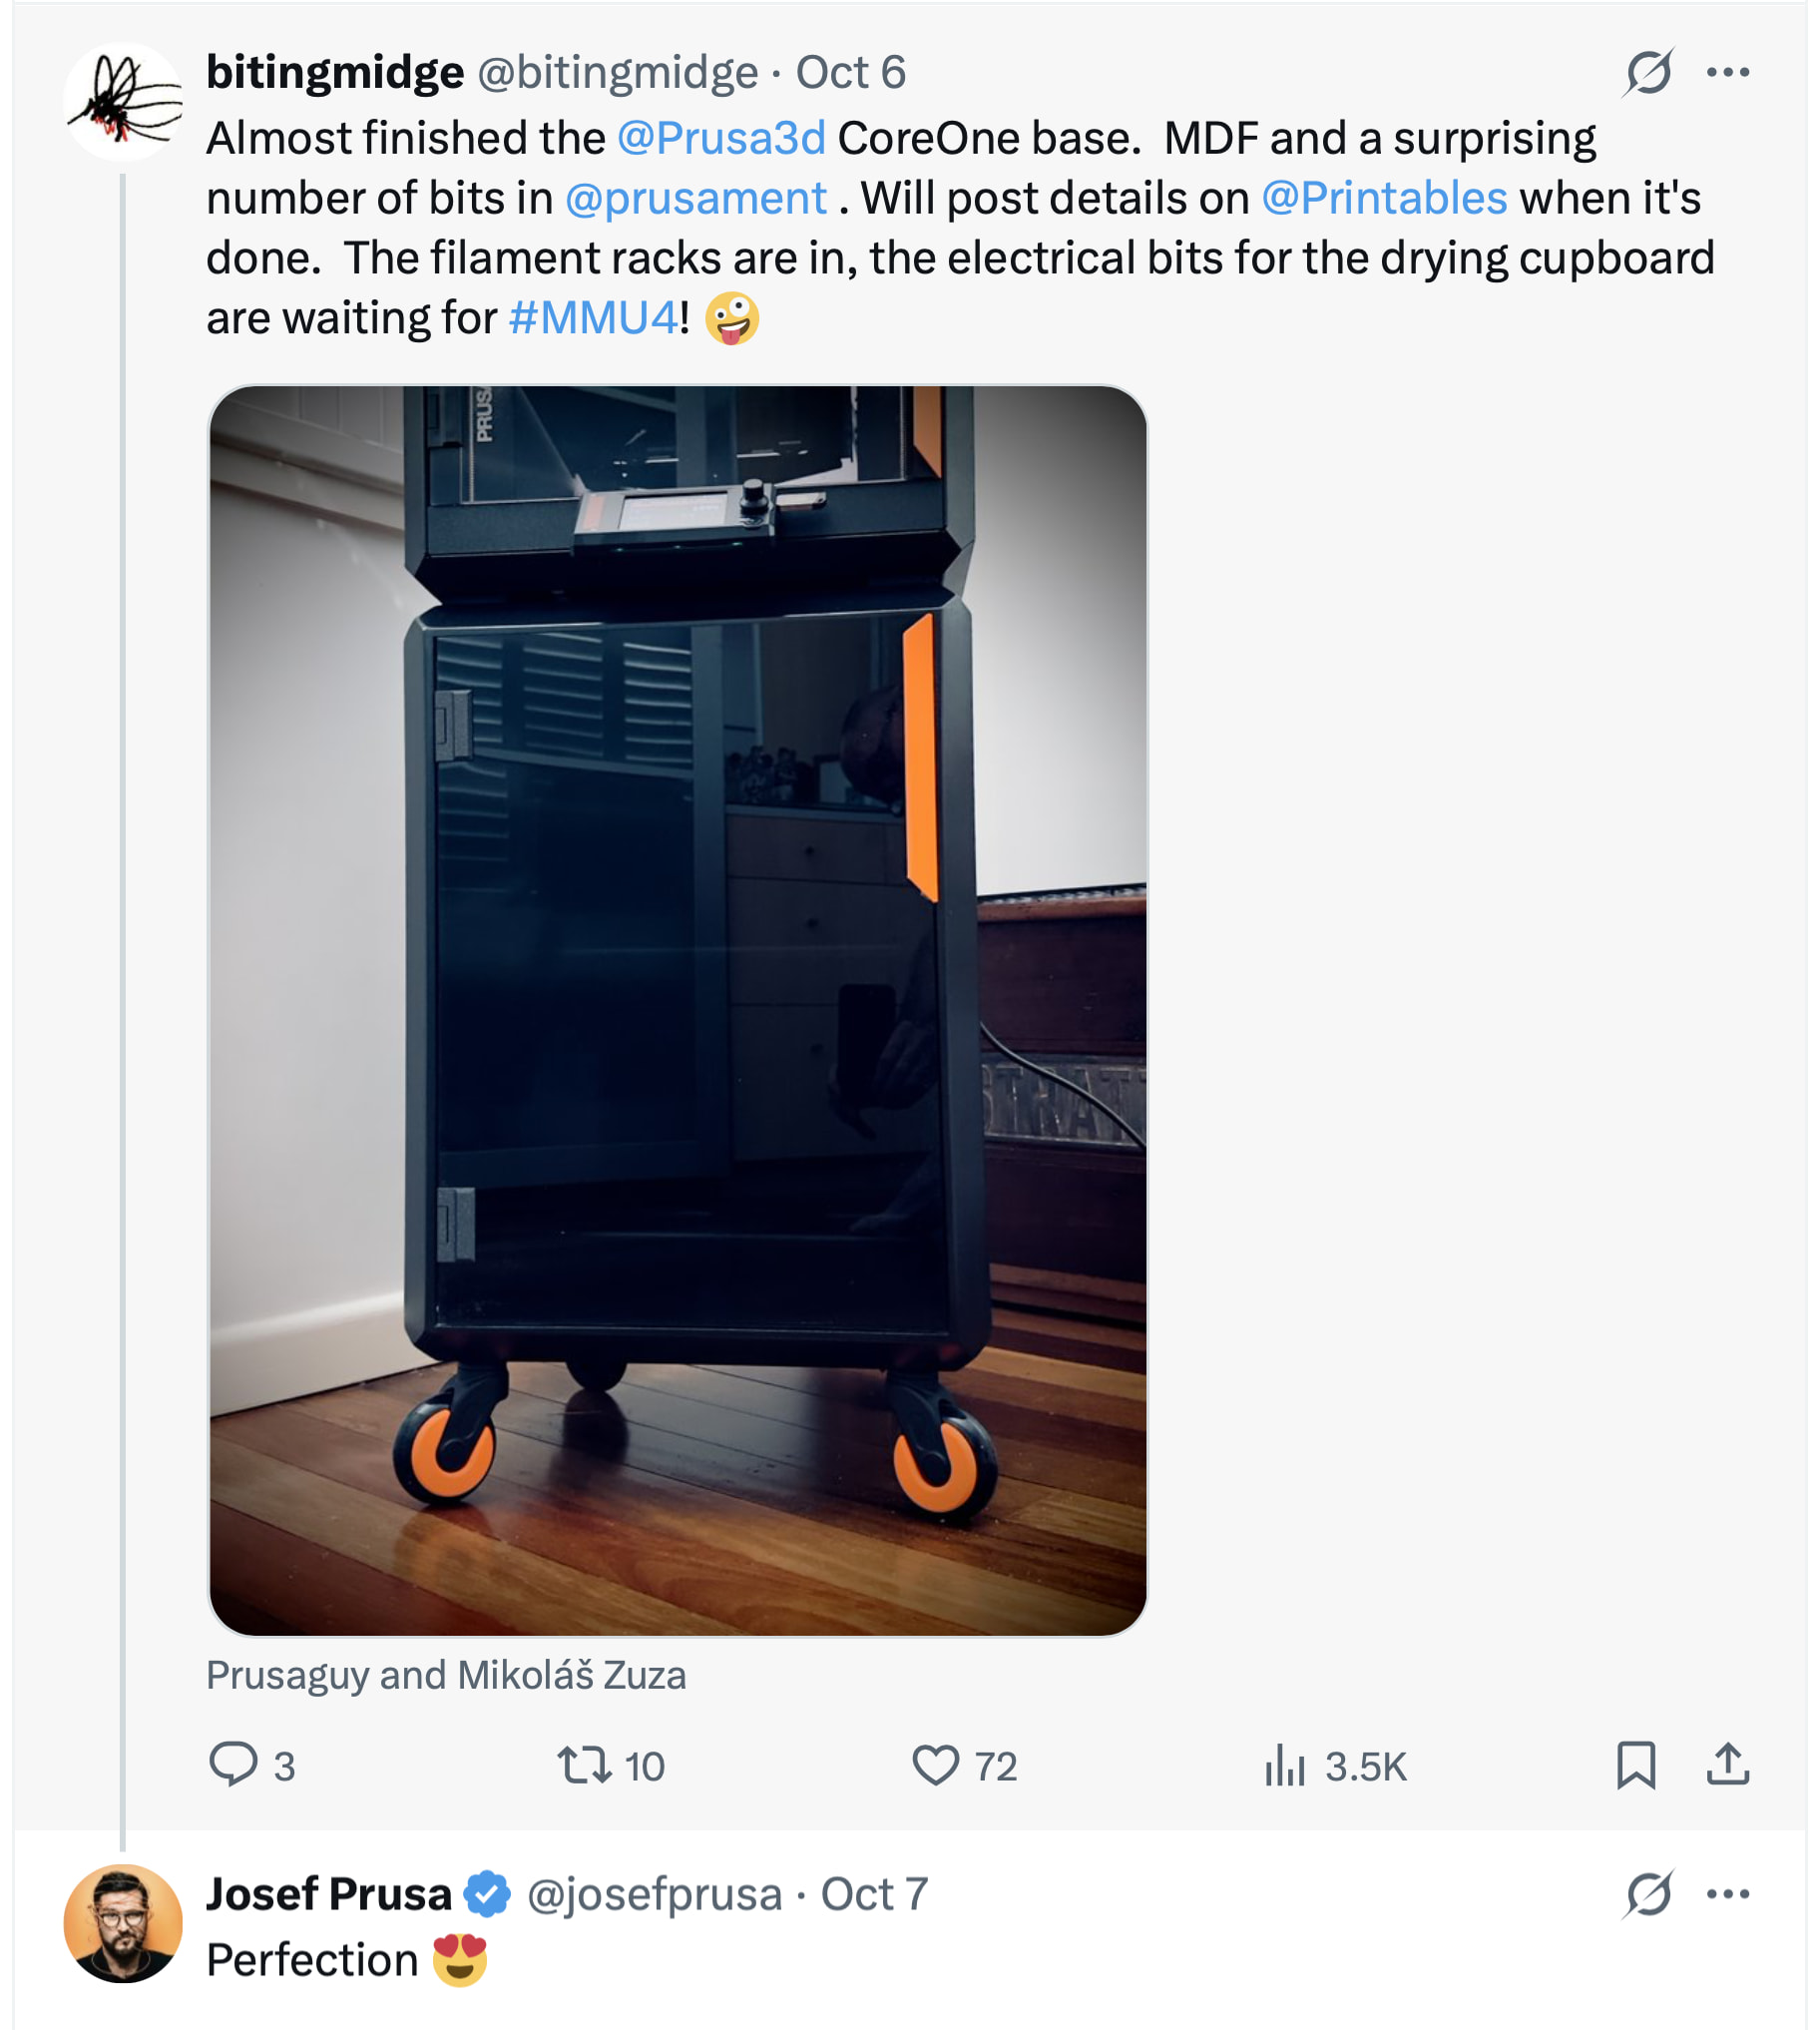
Here’s my current cupboard design, which is the same as the existing one but with dimensions! (normally I just work it out on MDF as I go but I am trying to practice drawing.
I have, for the moment, given up on properly sealed doors, as I have ordered the new magic SunLu cupboard. This box is specifically intended to match the CoreOne style, has a simple neoprene seal and frameless acrylic door.
But I had seriously (and will continue to do so) looked at the above system.
If you search for “magnetic door seals”, you will find a range of refrigerator style and also some “shower door” seals. I don’t think the shower door style will work as they need to be air tight and you need to find a way of sealing them all the way round.
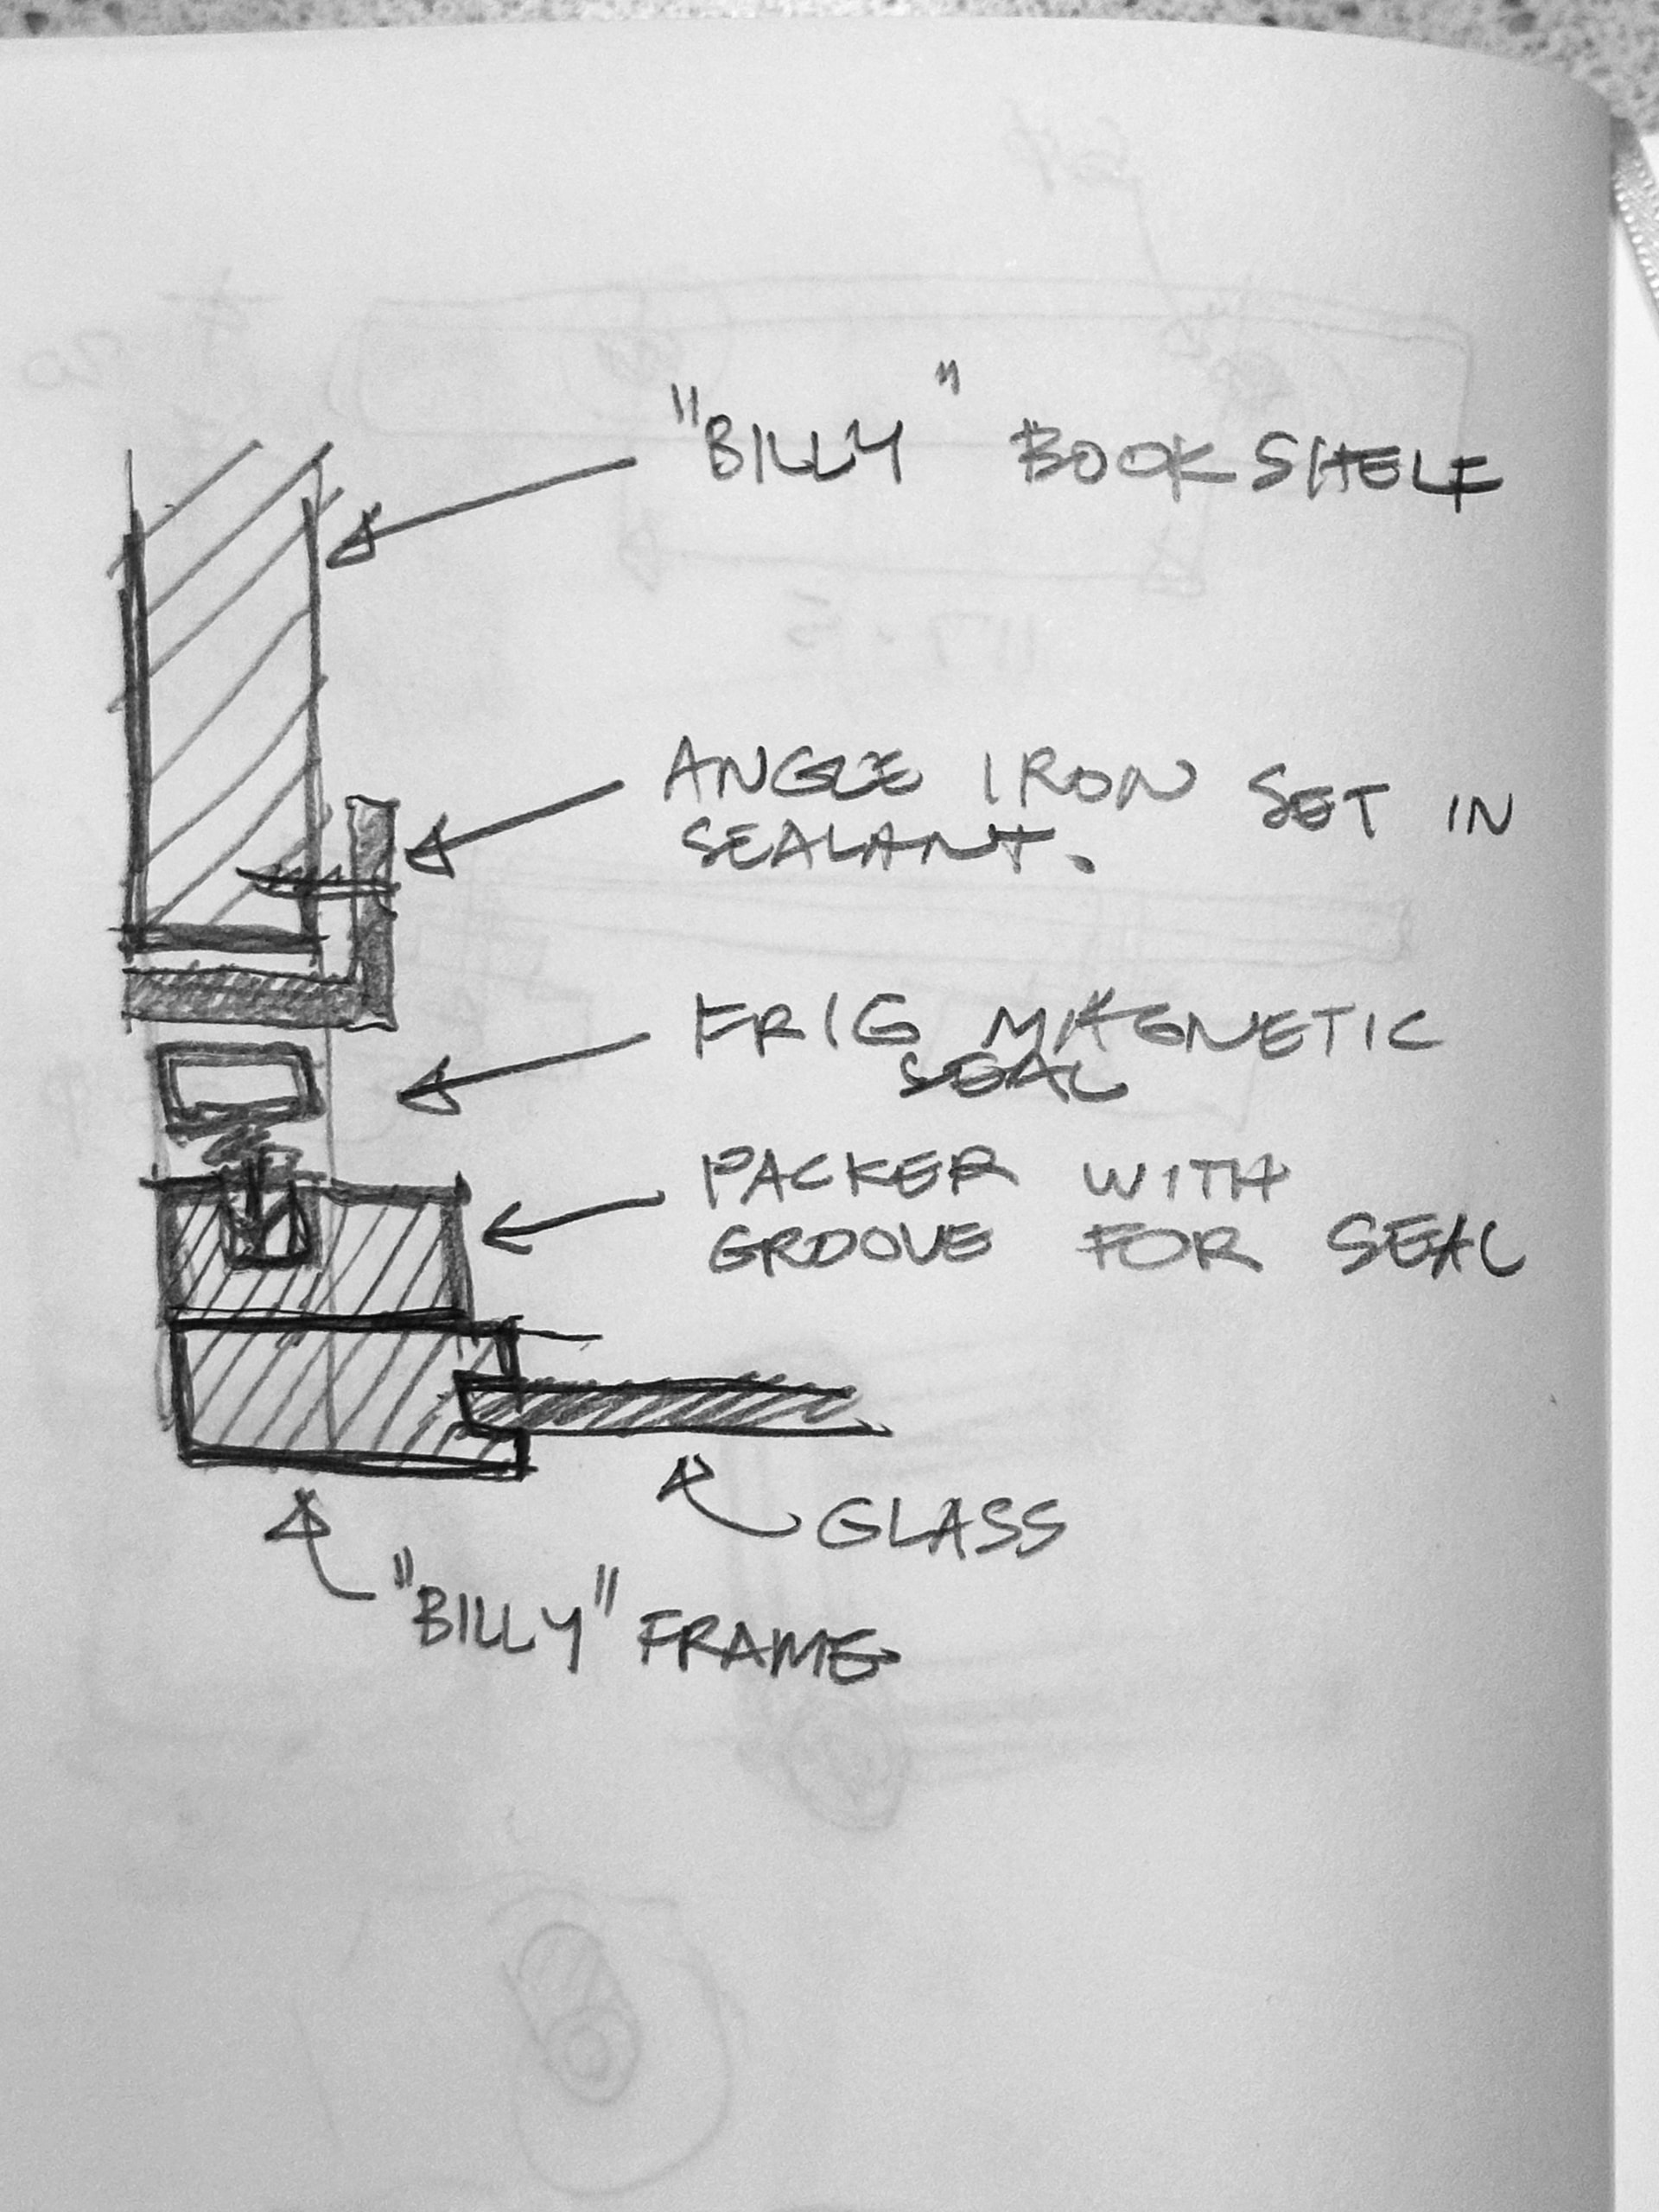
The frig seals need a hefty metal angle to guarantee a seal against and some thought as to how you can hinge them to seal evenly. This isn’t a great problem, I have even given some thought to modifying an Ikea Billy bookshelf and glass doors like so, and am confident that it would work well:-
The elephant in the room of course is cost. Where I live by the time I buy the book case, the angle iron, the seals and the fan setup I could have two of the SunLu boxes (if the first one works well enough I will almost certainly buy another).
A far cheaper option is to use a discarded bar Fridge and modify it with the active ventilation shown, perhaps with a small heater element as well.
So that’s where I am - about to start (tomorrow) the CoreOne L cupboard, fitted out for general storage and rubbish PLA!
ok, so watch the above video. He explains about running air over the silica. I envisioned a long triangular silica vault in which a motor is on the side and blowing over ALL the silica. it would be (in your case) possibly bottom or top back of cabinet, but the air would go over a long trench and that would remove humidity faster.
Air moving over the silica is easy to do, but if the container isn’t airtight, the dry air will be constantly replaced by the moist air from outside and you’ll be just trying to dry the outside air.
The SunLU box has a heat cycle in the dessicant automatically drying it, and that takes away the key problem - the hassle of drying dessicant, and it is a hassle!
I mentioned this in another thread, but I ended up going with the Creality: Amazon.com
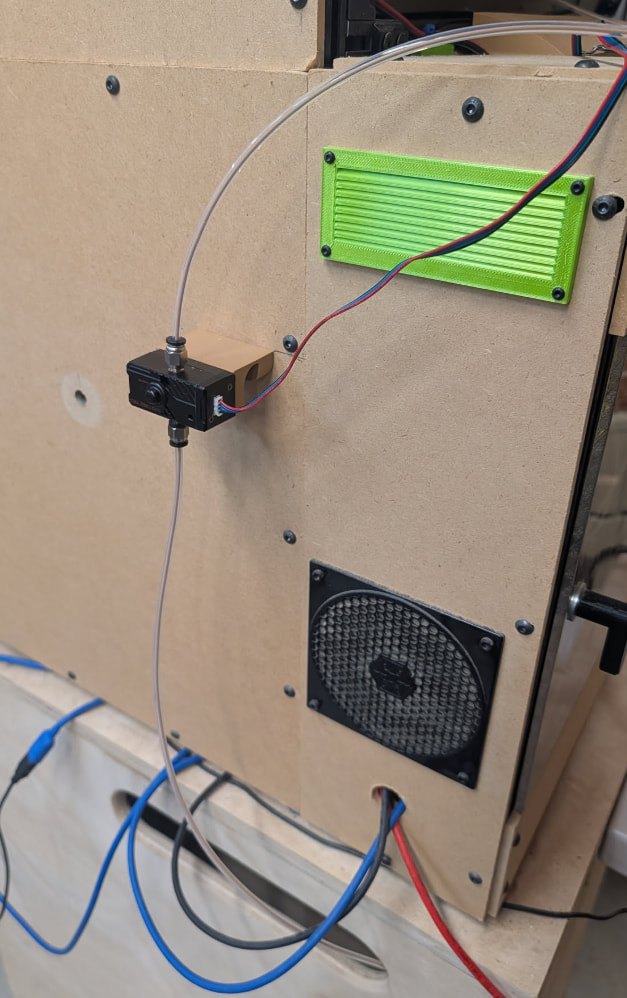
Last night, I finally got around to running the PTFE tube from the dryer around the outside of the printer and up to the print head.
I let the dryer run over night and it dropped the humidity in it from 51% to 29%. I ran a print today with it running and it worked great.
It does make for quite a long filament run, but it seems to work. The dryer is on a shelf under the printer. I moved the sensor to the outside of the printer. When the Bondtech kit shows up, I’ll redesign this mount to hold two sensors and put 2 on each side of the printer.
I had mine designed for quite some time before the CoreOne upgrade kit actually arrived and I could measure it. The INBXX didn’t happen overnight either. It’s hard not to shout “I thought of it first” but the reality is that neither are particularly original, because they really are derived from the CoreOne. None the less I admit that when the INBXX was released with it’s already developed “drying”, I was already concerned that I couldn’t make it work well enough and was waiting for details of INDX (the rumoured MMU4) so put plans to publish on the back burner. A few people have asked for plans so I have developed them over the last couple of weeks and will upload shortly. (I’m building the “L” version as we speak.)
The time line went like this - I uploaded this design, completely built on Twitter on 6 October last year, Jo gave it his “tick” on the 7th, and the INBXX was published on 14th. No, Voxel 3D didn’t do all that work in seven days!
 ) but for now, well, I use large Zip Loc Bags. But this Reciculating over Silica seems valid. If I can keep it enclosed. Now topic of discussion is how to that. Been 3d printing for a long time and have many rolls of filament. if I make it large and open the door, when it is HIGH humidity, i can imagine that silica will really fill up quickly. Any thoughts? https://youtu.be/8kIDLIXILKo?si=skGahSChd-i61Lm8