I should preface this comment with a couple of things for perspective.
First, this is a bit of a special situation. Back when I built my LR3, I found an existing table top of about the right size so that I was able to just mount the entire LR3 without any real modification. There WAS an issue that needed some consideration, and that was that the tabletop has a noticeable crown along the long axis… between 3 and 6mm from an edge to the center.
Of course, depending on the work you are doing, this amount of curvature is not necessarily a problem since for through cuts, you can just go deeper, and if you flatten your spoil board prior to mounting the workpiece, things work pretty well over fairly short distances. But, the crown probably did have an effect as the LR3 had to deal with the slight rise and fall as the machine moved along y.
So now we come to LR4. I decided to expand the table a bit because the previous dimensions were not quite adequate. But, in thinking about how to make it larger (63" → 84" length and 49" → 55" width). So, the question was how to deal with the crown while expanding the table, especially the width.
After considering a number of options, including just scrapping the existing table top and making a new one, or, adopting the unistrut approach, attaching them to the sides of the crowned table, I decided to take a different approach this is actually similar in concept to the unistrut approach, and that is to expand the width by attaching the platforms on which the rail and the belt are mounted to the edge of the existing table with enough clearance to avoid the crown. (The same thing could be accomplished using the strut, but would be much more expensive.)
One issue is how one can attach those platforms assuming something like MDF since the lack of rigidity means that it would have to be supported along the entire length.
Taking a page from Doug Joseph’s strut-based designs where he mounts the rails and drive belts outside the strut by using a 3-printed bracket that is attached to the strut in some fashion, I designed a mounting bracket that is attached to the edge of the table, independent of the crown, so that the platforms upon which the LR4 moves are actually uncrowned. By mounting the spoilboard between the xmin and xmax platforms and flattening it as needed, I believe that one can achieve a good reference surface for the LR4 while also being able to reference the spoilboard/workpiece to these surfaces.
Here are some drawings of the concept and how it is used.
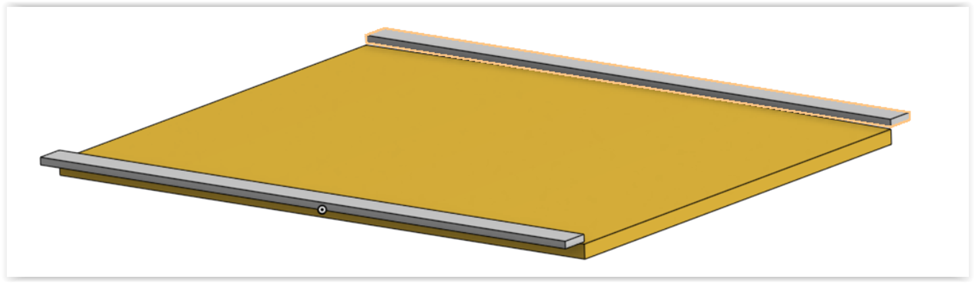
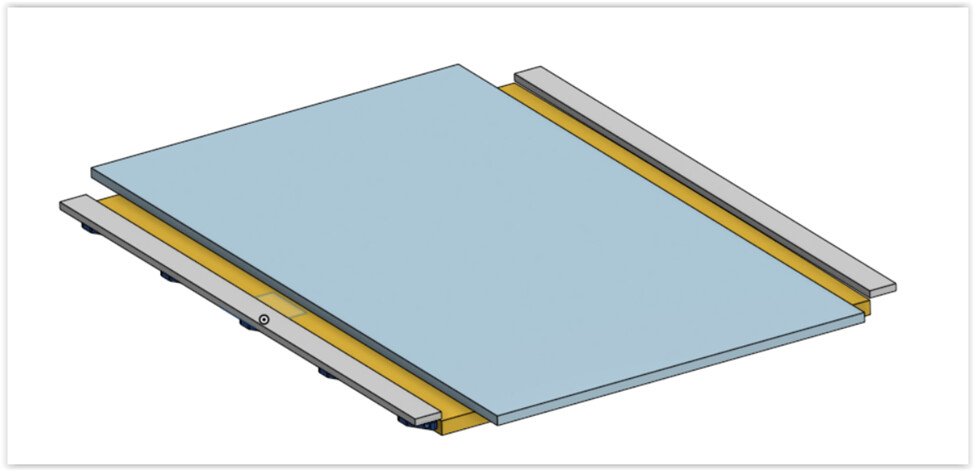
Existing table with crown-free platforms. These are fabricated from 2.5" and 3.5" MDF primed molding from Home Depot.
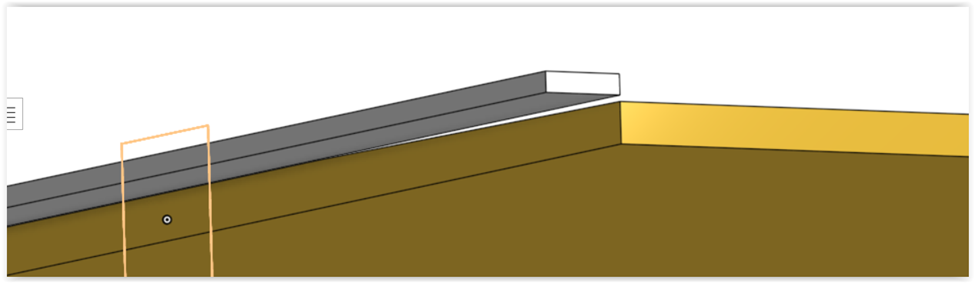
The effect of the original table having a crown. There will be a gap between the table and the MDF.
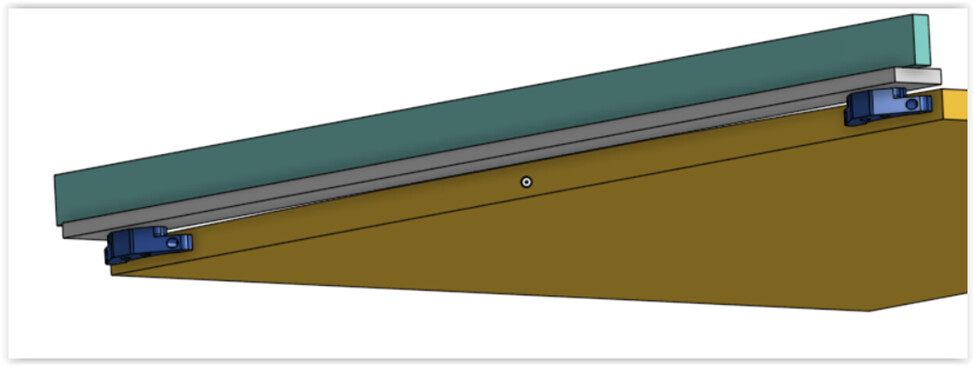
A solution is to attach the MDF strip at the ends using a right angle bracket mounted so that the MDF strip is at the appropriate height to not be affected by the crown. A straightedge (in this case a 6’ long box level from Harbor Freight) is then clamped to the bracket and the MDF strip to establish a straight path, equivalent to what the unistrut does.
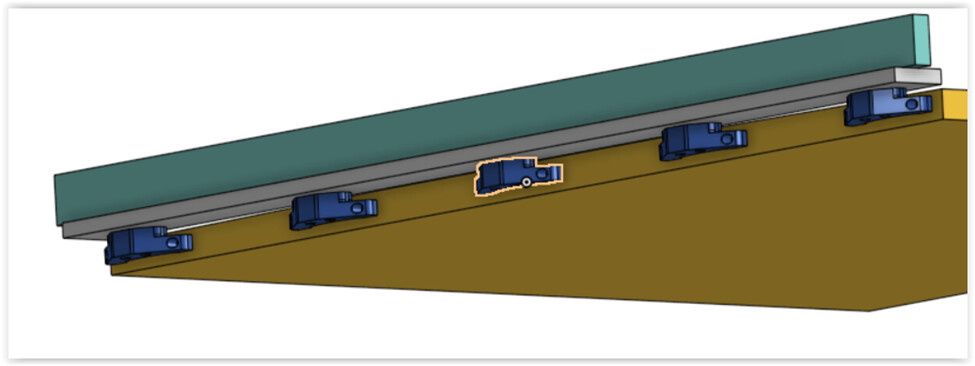
More brackets can be added, again reference to the straightedge clamped to the MDF.

And, after removing the straightedge, the MDF provides the uncrowned surface upon which the LR4 can roll.
And the spoilboard lies between the MDF platforms.
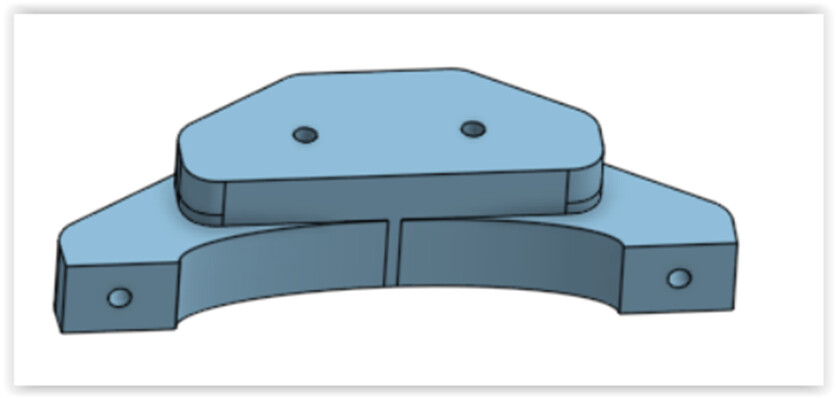
My bracket is actually pretty similar to Doug Joseph’s bracket that he designed for the case which one fills the unistrut with a wooden piece instead of one that that is entirely plastic.
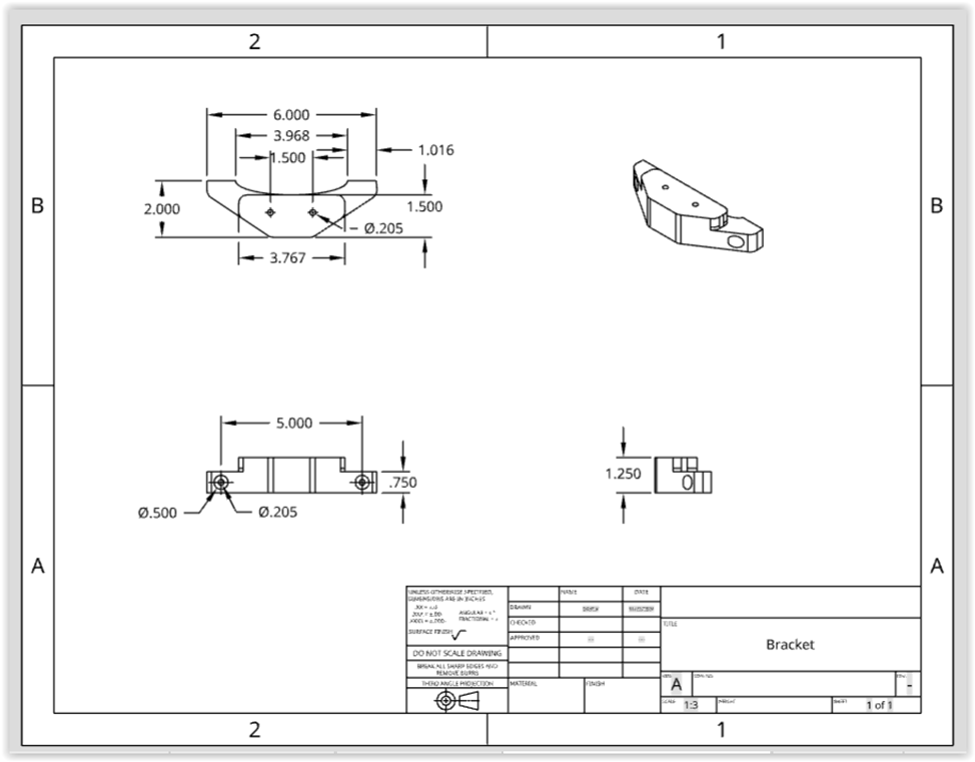
I intend to publish this bracket on Printables and will add the link when done, but, in the meantime, here is a drawing in case this may have application in the work of others.
As I mentioned in the beginning, this is a pretty special situation since I already had the table top and didn’t want to replace it at this point. Nonetheless, maybe others will find something here of value.