I’m considering tearing down my MPCNC and build a LR3, since I do have very little space to allocate in my shop. That’s why I wonder how easy or not easy it is to repeatedly take down and setup the LR3. I will be using it for projects and use it 2-3 weeks in one go and then maybe go weeks without it.
I do have a super sturdy torsion box workbench in which I could place specific mount/index points for the rail that needs to go onto the bench. Is the rest just setting the machine down onto it, tensioning the belt, wiggle wiggle, home and cut? How long does setup and takedown need? Is it feasible?
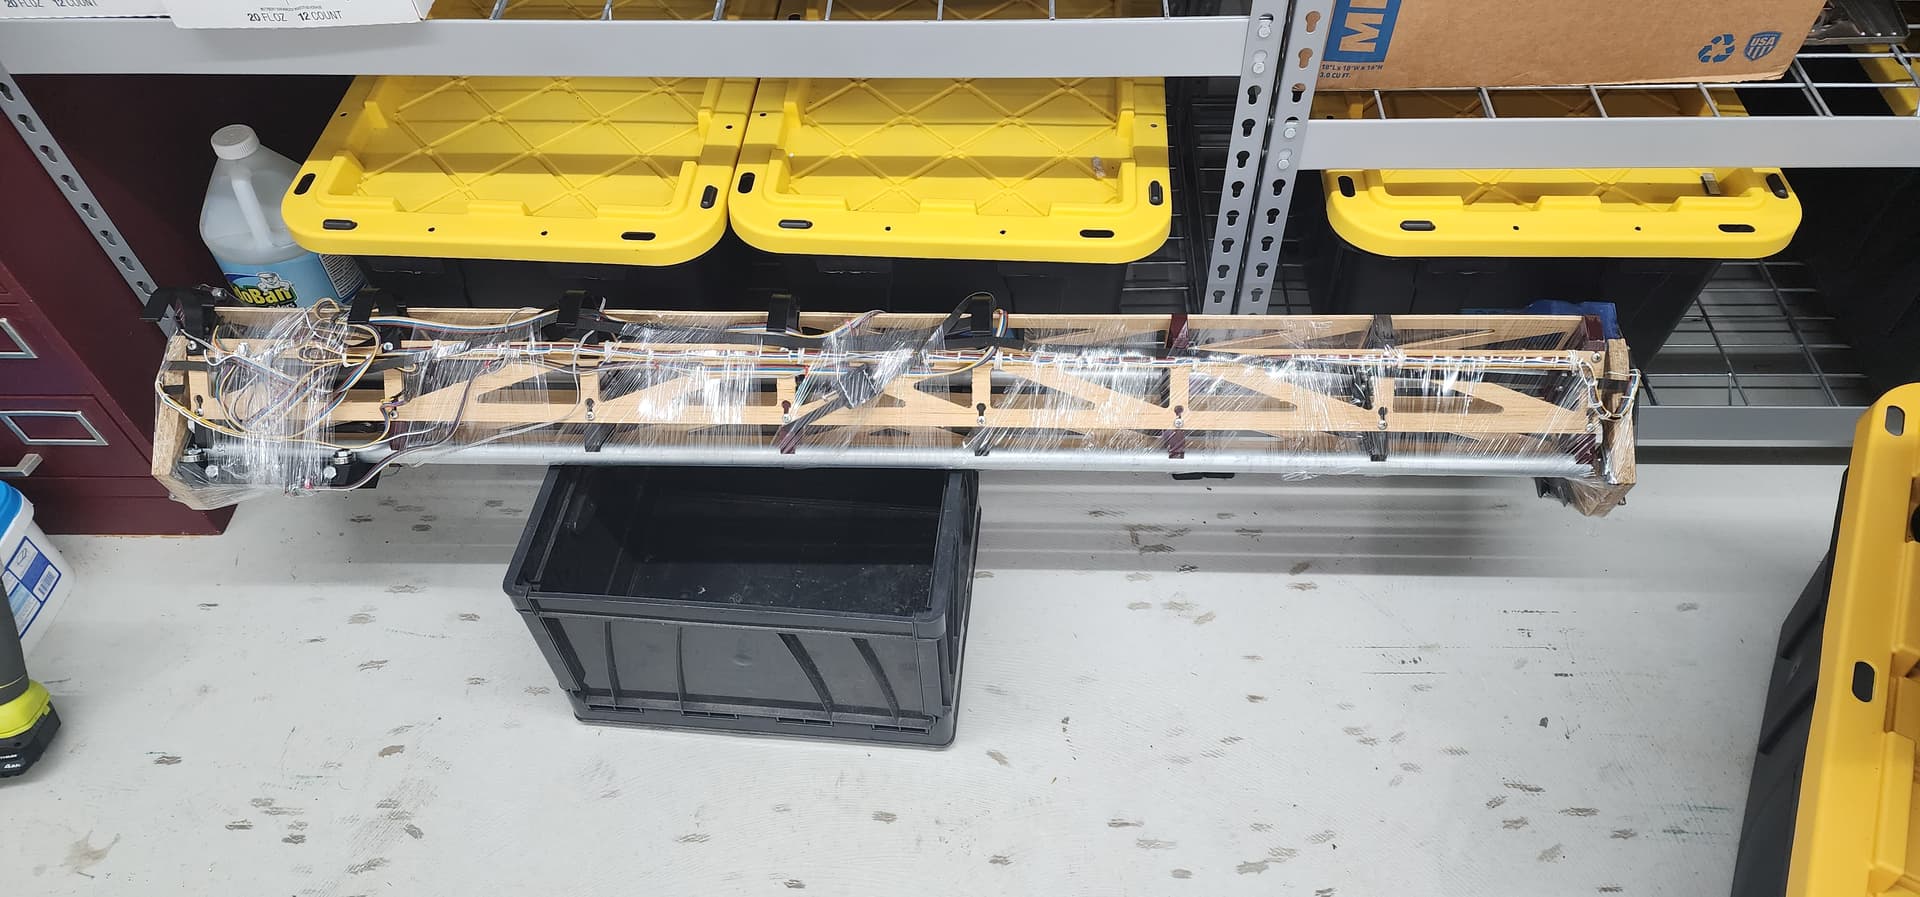
I never thought I would end up in this situation but I had to quickly disassemble my LR3 because my company filed for bankruptcy last week and so all my belongings had to go quickly from the company grounds. The hardest part of the disassembly is all cables that are connected and fastened to everything. So what I did was just cut all cables in a straight line on each side of the x gantry and once I’m up again, instead of soldering everything back I’m thinking of just attaching some quick connectors instead. And so I’ll have 3 pcs detachable
My primary motivation for upgrading my LR2 to LR3 is for this reason as well. I’ll probably build a “coffin” for the gantry with the vacuum hose quick disconnect. Hopefully can keep my table weight down so I can store it. Then I’ll exhume it as needed.
I’ll start a build thread/ recap soon with my experience, I should get to final assembly this weekend.
Yeah the table would stay and there would be a neat cabinet space the LR3 could go into with a small case (we’ll see).
I’m pretty obsessed with cable management so I would try to keep everything tidy and plug&playable as much as possible to keep all moving parts at a minum.
Besides that: is it complicated to recalibrate or is it feasible as long as I make sure to properly re-mount the stuff mostly in the accurate right place for it after having it gone for a few weeks? Or will I spend an afternoon recalibrating everything?
Theoretically it shouldn’t be any different as long as you don’t drop or bump into things with your parts so they have structural changes. I would be more concerned about wood flexing in humid conditions. I’ve seen some use a table resembling a ping pong table and so everything is attached to the table all the time but then the table itself is pivoting and can be stored against a wall. Might be of interest to check out?
One day, if ever I finish it, I’ll summarise my build thread.
I have considered the LR3 Gantry as an “appliance” so this can happen.
The table has permanent wiring and outlet for plugging the LR3.
The beam contains a power box with an outlet for disconnecting the router. If I were to do that again I (and I may yet do this) I would make the router disconnectable near the machine rather than at the “other end” of the cable, so that disconnect does not mean removing the vac hose.
Here’s the business end of what I’m talking about.
Hi, it is very feasible. I have used my lowrider the same way as your planning too. It only takes a few minutes to put the lowrider on the rail and tension the y belts.
It might be useful to have the rail blocks on a separate piece of wood then your workbench.
I didn’t square or level my machine each time i put it back on and honestly never had an issue even with more “acurate” stuff. But even if you would calibrate it, it normally takes me 30-45min to fully calibrate.
The only cable coming from my lr is the power cord. So no reconnecting wires or anything like that.
Good luck, and have fun building your lr3! I have not regretted building it once.
Thank you all for your input, I will take not of everything and keep thinking about it.
A pivoting table for wallmount is not feasible in my space.
I do have electricity, vaccum connector and pressurized air sitting directly at the ceiling above the table.
So if I do it right I assemble the rail onto my bench, lift the LR3 onto it, plug it in and after a few tests it can work like this? That sounds amazing and - for the moment - a little too good to be doable by myself But I learned from MPCNC & ZenXY that V1Engineering is best in class <3
The one from Barry looks exactly how I imagine mine sitting in the corner until the next cut. Thank you all, especially @vSeccelen for your input.
Mine goes a little like this… takes about 25 min to set-up or break-down. As a heads up, my table is a 3 part screw-together top that sits on top of a set of Bora Centipede 4x8 foot legs to make a 6x10 foot surface so it can be stacked up to allow the car to park back in the garage. While this likely isn’t the most calibrated surface to use for CNC purposes, I built mine this way to allow me to do all of this alone, if necessary. When I get a bigger shop space, I’ll cut a permanent torsion box using my current setup.
LowRider v3 Set-Up/Break-Down Procedures
Set-Up
Expand 4x8 Bora Centipede table base fully
Place table sections onto the base in order (marked 1, 2, 3) with first section closest to back wall. Middle section will only balance on a single line of posts, so place this one carefully.
Place 4 star knob screws with washers in holes underneath table sections to connect sections 1&2 and 2&3 together on either side and tighten to form a single 6x10 table top. (You can use a Philips #3 Bit in the impact drill and a driver adapter (Looks like a Pan Head Screw with two nuts on it) to assist with this procedure)
Retrieve linear rail (8 foot 3/4" EM conduit pipe) and fasten to table with screw holes facing inward using 16 - 3/4" 1/4-20 pan head screws (Philips #3 Bit)
Place CNC body on table top at foot of table and roll to the head (that way you don’t have to spin it around awkwardly)
Remove geared belt from velcro strap on one side and connect short end to the belt mount at the head of the table. Carefully unspool the long end and ensure that the belt is not twisted. Then place into the tensioner mount at the foot of the table and tighten 10 half turns using a Philips #2 screwdriver. Repeat with opposite side.
Plug in the power to an extension cord run to the midpoint of the table on the left side (facing the head) of the table and turn on the power.
Connect the dust collector vacuum port to the CNC vacuum hose and the power to the CNC power controller using one of the “normally OFF” receptacles.
Use the CNC controls to raise the Z-axis of the CNC up to 40 mm (Maximum height is 80mm) above the table.
Slide the wasteboard under the CNC and fasten to table using 4 1-in 1/4-20 pan head screws (Philips #3 Bit)
Break-Down
Use the CNC controls to raise the CNC Z-axis up to 40mm (Maximum height is 80mm) above the table and lower the Y-axis to the head of the table.
Unscrew 4 - 1" 1/4-20 pan head screws with Philips #3 bit and place in plastic snap box. Remove wasteboard and place upright along back wall.
Remove the dust collector vacuum port from the CNC vacuum hose and the power from the CNC power controller and store.
Loosen the tension screw 10 half turns using a Philips #2 screwdriver. Remove geared belt from tensioner mount from table floor and roll up towards the table head. Remove geared belt from belt mount and pull tensioner side until mount rests against motor housing. Loop velcro strap over Z-axis lead screw and insert coiled belt into strap to retain. Repeat with opposite side.
Unplug extension cord, coil and store.
Roll CNC body to foot of table and lift and place in storage housing on top of the wide toolbox on the small rail.
Unscrew 16 - 3/4" 1/4-20 pan head screws with Philips #3 bit and store in plastic snap box. Move linear rail to top shelf storage, handle with care as rail mounting blocks are prone to breakage.
Remove 4 - star knob screws from beneath the table top and store in plastic snap box.
Remove the three table sections and store against the back wall with the plastic mounts protected by neighboring sections.
Collapse the Bra Centipede table and store at back wall.
Ok, I would say yes to this, with the caveat that it may not handle anything overly heavy duty, which shouldn’t apply to the LR3, in general. I’m using it right now to cut a trim router table and it’s running great on 1.5mm passes at a 1500 mm/min feed rate with my 1/4” end mill.
I would agree that the Bora Centipede table is far more stable in the vertical direction than the horizontal, but while the CNC does exhibit some horizontal wiggle, it’s not enough for me to call a negative so far. I could probably jump up and down on top of my CNC table and it wouldn’t move at all, but if I walk into it on accident the whole table is going to shake. What would that do to an active CNC work piece? Not too sure at the moment, but my guess is not much since everything is attached to the top of the table by the rail and belts.
I would say it is stable continuously and I don’t see any drawbacks at the moment except for my 3-pc table maintaining perfect flatness after multiple set-up and break-down cycles, which isn’t all that important to me, yet…
I built a 3 piece that bolts together for a larger surface than the 4x8 allowable by the Bora brand table tops. So mine is custom for sizing, providing a 6x10 surface for the CNC to cut full 4x8 sheets. My rail holes are all pre drilled into my custom top with 1/4-20 threaded inserts for durability.
From what I’ve read about the Bora tops, they may provide stability, as they lock in from below and form that grid of connection, but I can’t say from experience whether this would be better or not.
I was actually thinking of cutting my own custom Bora foldable tops with dog holes with my CNC so I could make better use of my 4x4 Bora Centipede.