That is the hard part about the klipper situation. Apparently saving a config will reboot the board. Marlin does not do that.
How long are the steppers disabled for? Long enough for the bed to completely drop gracefully? Do they need to be manually re-enabled at the end of that process?
And yet users still blow up SKR boards with bed drops.
It’s not that you can’t fix it by requiring users to read the documentation and configure things properly in slicer configurations, etc. It’s just that if you give a user an option to screw it up, they will. (Speaking as a user who himself has well demonstrated that the user always screws up eventually ![]() )
)
Depends how fast a config save is. 5 seconds, the bed will not be at teh bottom by then. 20…maybe.
That can be solved with boot with steppers enabled. so if it browns out it is held then boots holding.
I can try it.
A klipper user. That is something I did not know, and kinda the only reason we are going down this path. That reboot on config save is kinda brutal. I assume the bed would rarely be up during config saves but it happened at least twice…
I’d potentially go the other way with it. Boot with steppers disabled specifically, delay turning on the steppers as long as possible which will mean that even in a short reboot, the bed has time to descend gracefully on the brakes and then the brakes will be off anyway by the time everything is done.
Without that reboot thing the relay is a simple fix for power outages if you do not own a UPS.
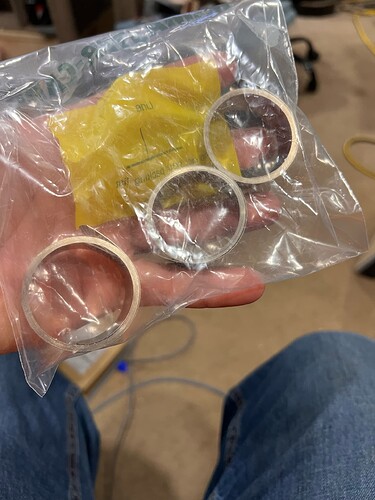
You mean these things???
Ordered Late Monday night and here already!!!
Now you just have to help me figure out how to mount them LOL
I think the TMC’s boot very early, they just do or do not signal the stepper enable. So if it was shorted while they booted they would error out.
Also, for clarity, a lot of this becomes trivial if we have control of the timing/rise rate on the enable line and use that for control. Making the brake disable early as the enable line goes high and enable quickly as the enable line drops is straightforward.
Wrap it around anything at the top and mount the free end to one of the M5 screws to give it a test.
You can make a fancy printed part to Mount to the extrusion if they work.
Do you know if that error is resettable, though? This may not matter if it’s only a rare circumstance such as a short brown-out, for instance.
Not to belabor this too badly, but it wouldn’t just be klipper users, it would be anyone that doesn’t get their slicer end gcode right and doesn’t drive to the bottom before disabling the steppers.
Panels on both sides and back so not really anything to wrap around. Let me see what I can figure out
Ryan: Is this something that absolutely needs to be protected against? Seems to me that this would more be a case of ‘make sure your slicer is configured to do X and, if you’re not sure, test it first in this way’…
Oh… I am not actually sure. that could be a fix. Basically, have it always reset the tmc’s after 30 seconds or something on boot.
The same could be said if they home without enabling the bltouch starting gcode. I provide the starting and ending code. They need to cut and paste it. Currently you even need to edit and compile the firmware to adjust for mesh leveling if you build any other size, so a single line of ending gcode should not be a huge ask.
We provide the hardware and code snippets, if they do not use them we can be faulted for that. I do not think I can be held responsible for everything that can go wrong if we provide a clear solution.
Zipt tie ![]()
The thing I am 90% worried about is power outages. This klipper thing is new and I can’t test it yet so I am unsure about it.
The current build as designed it is not an issue, the bed is so light it barely falls, not fast enough to pop anything so now this new design with a larger standard bed they will drop…I am not sure if it will be fast enough to pop anything. JJ’s is 3-4(?) extra pounds, heavier than the current new as-designed machine will be, so that is sort of a new case. I am not sure that there have been another boards killed this way but knowing he popped 2 boards make me feel like I need to prevent it.
trust me that crossed my mind. I got something I’m going to try. will post pics when I’m done. Its a pain because everything is in the way. xy rails, belts in the back. motors lol
Yeah, looking at my paneled build… You will need to get a screw into the extrusion under the Y rails.
Right, yeah.
I think from my perspective, this seems pretty straightforward, providing the requirements are clear and it doesn’t feature-creep into the stratosphere.
Having the brake only ever be triggered by the steppers changing from enabled to disabled is super easy to do and, aside from the cost/complexity of needing to have the brake able to see the enable line, pretty damn cheap.
If the challenges all lie in the corner cases then that’s great, maybe we just need a list of them brainstormed up and we can go through and start ticking them off. Having the TMC2209s fault if the enable line is only de-asserted briefly is a great example. Perhaps that’s something that gets determined as rare and can be handled with a note that a power cycle of the controller will be needed if this happens. Perhaps resetting the TMC2209s before starting the homing process would solve it. Perhaps making sure that the brake doesn’t fault the TMC2209s would be possible.
I dunno, it really doesn’t seem particularly complex at all. There’s a good chance that means I"m missing a lot of the nuance.
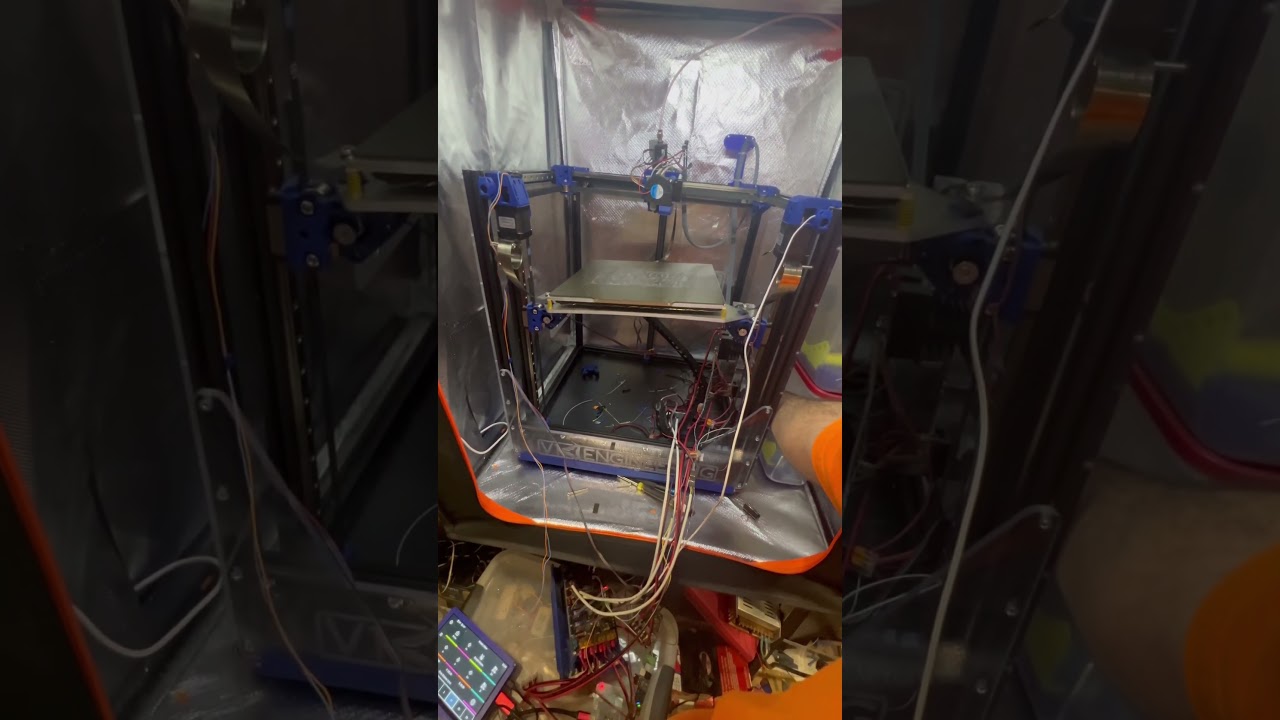
Well after several cuss words and putting the matches down twice I got the springs installed-ish. No way I can print with them installed like they are. This was all I could come up with quick to just get a test. And those damn nuts under the Z motor mount… ![]() I forgot all about them and the first one dropped out. Trying to get it back in and dropped it again… now cant find that thing with a search warrant. luckily I had a few more. fought and fought with that to find out in the end the tip of the screw was messed up. New screw and got that one back in. the other 2 I knew damn well to make sure that nut didn’t fall out LOL.
I forgot all about them and the first one dropped out. Trying to get it back in and dropped it again… now cant find that thing with a search warrant. luckily I had a few more. fought and fought with that to find out in the end the tip of the screw was messed up. New screw and got that one back in. the other 2 I knew damn well to make sure that nut didn’t fall out LOL.
Here is a short video of the test. It didn’t do right. the one on the right side bound up on the motor. After the video I figured that out and bumped it and it lowered down nicely. Only issue I see is how the hell to mount these things where they aren’t in the way. They are not small at all.
That’s possible but will need some kind of 3d printed part to hang it from. Nothing I have around here that I can think of anyways will work. And a zip tie wouldn’t last long. these things are SHARP.

