One of my goals for 2026 is to stop screwing my stock into my spoil board. It takes forever, you risk ruining a bit, the spoil board can only take so much, etc. We’ll see if I can achieve that, but after putting in the effort for this spoil board, I won’t be quick to ruin it!
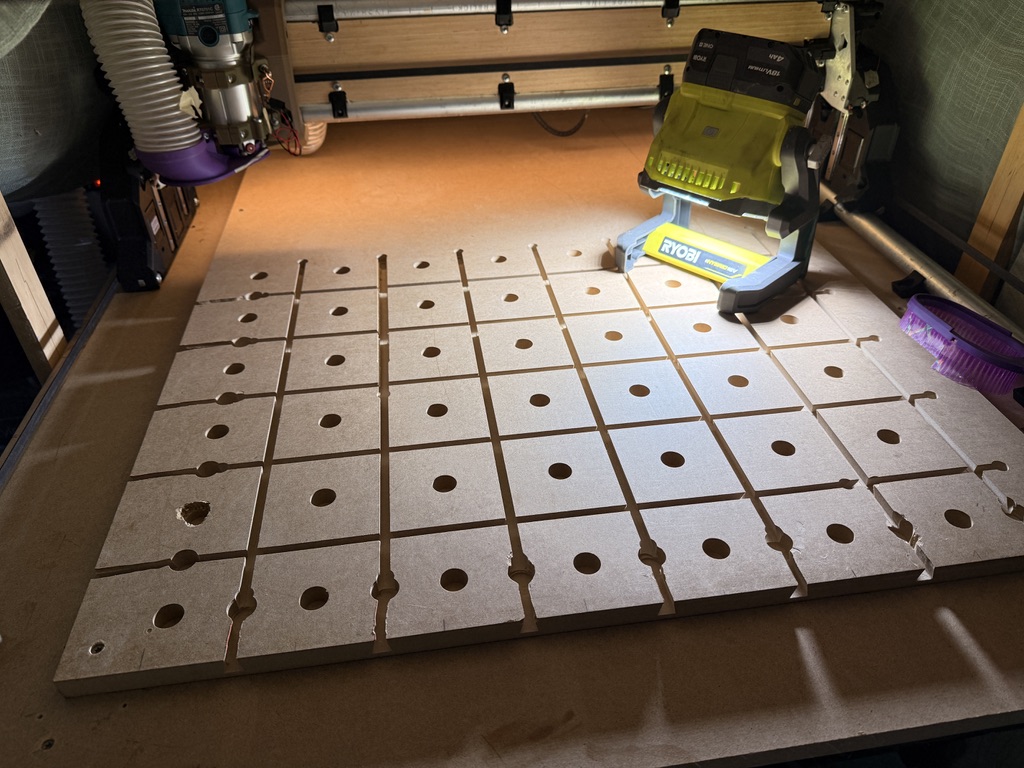
- Used the LR4 to helical drill 20 mm diameter holes, 16 mm deep, spaced center to center:
- First column and last row 32 mm
- The extra holes explained below
- Everywhere else, 96 mm
- The Festool MFT spec, so I can 3D print those toys
- First column and last row 32 mm
- Dovetail slots, 12.7 mm deep, using the de-facto Freud bit.. thing is a tank Amazon.com
- Also spaced 96 mm
- This matches closely enough with the MicroJig MatchFit spec, so I can 3D print those toys too

- Video of the MatchFit system, for those who are unaware: https://www.youtube.com/watch?v=w-_wcaOlbxg
The extra holes are because I thought I’d use the holes as a lead in area for the slotting, pretty brilliant if I say so myself! Minus the fact that the tool paths started in the opposite direction and it drilled its own hole, and then ripped new holes into mine! I also figured I could use the holes-connected-to-slots as an open space to slide the MatchFit jigs into, but the holes weren’t big enough for that…so I routed out entry slots by hand. I also dinged up the table in multiple areas, it was basically my first time using a router by hand lol. Ah well, I have a cool spoil board now!!
I initially did the slotting with 1/4” end mill to remove material so the dovetail bit has an easier go of it. I mistakenly set the DOC of the slots to 1/4” instead of 1/2”. I started running the dovetail job and realized it was too shallow after it had already cut half of a line ![]() (second column, top half of it). I also spent the day getting my Z-axis to stop binding up, but I got that sorted out and was able to cut out the dovetails!
(second column, top half of it). I also spent the day getting my Z-axis to stop binding up, but I got that sorted out and was able to cut out the dovetails!
EstlCAM settings, slow and steady. Note the 12.70 mm DOC is the 1/4” depth of the dovetail..I’d already cut out 6 mm with the end mill, so in this particular job I set it to 12.70 to finish the job it started. I drew it up in AutoCAD, it took a lot of tries, learning different things in both CAD and CAM, but I eventually got it via arrays and deciding to just follow the MFT spacing and stop over thinking lol.

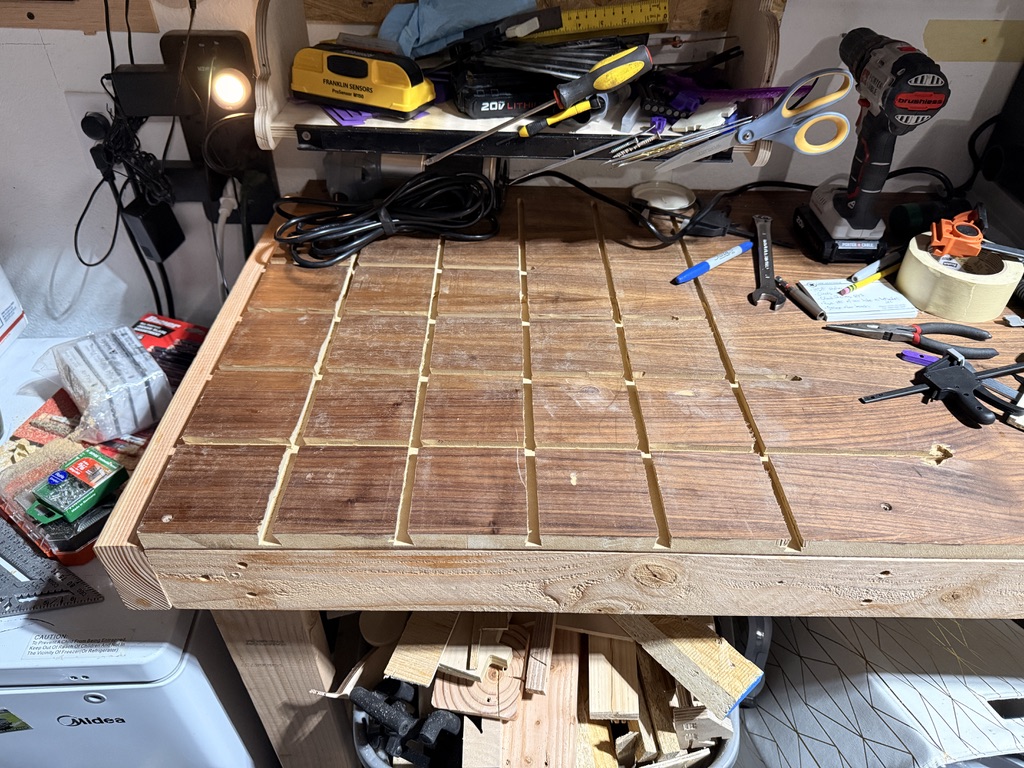
And just for fun, I also added matchfit slots to my work bench.. did this by hand with a 3d printed template. I finally learned how to cut off a piece of a model and scale it individually in bambu slicer, so that was big! Opened up a new world of 3D printing. I also cut these slots too shallow and had to go over them multiple times, but in the end they worked out great! Ignore the junk ![]()
IDK about y’all but I ain’t buying those $50 clamps… $2.50 HF clamp + https://makerworld.com/en/models/718569-dovetail-jaw-pittsburgh-4-in-ratcheting-bar-clamp?from=search#profileId-649428. IDK if the model needs adjusted or if my print settings were bad, but they were a little too wide to fit the slots for me. Whittled a couple down and was able to use them!
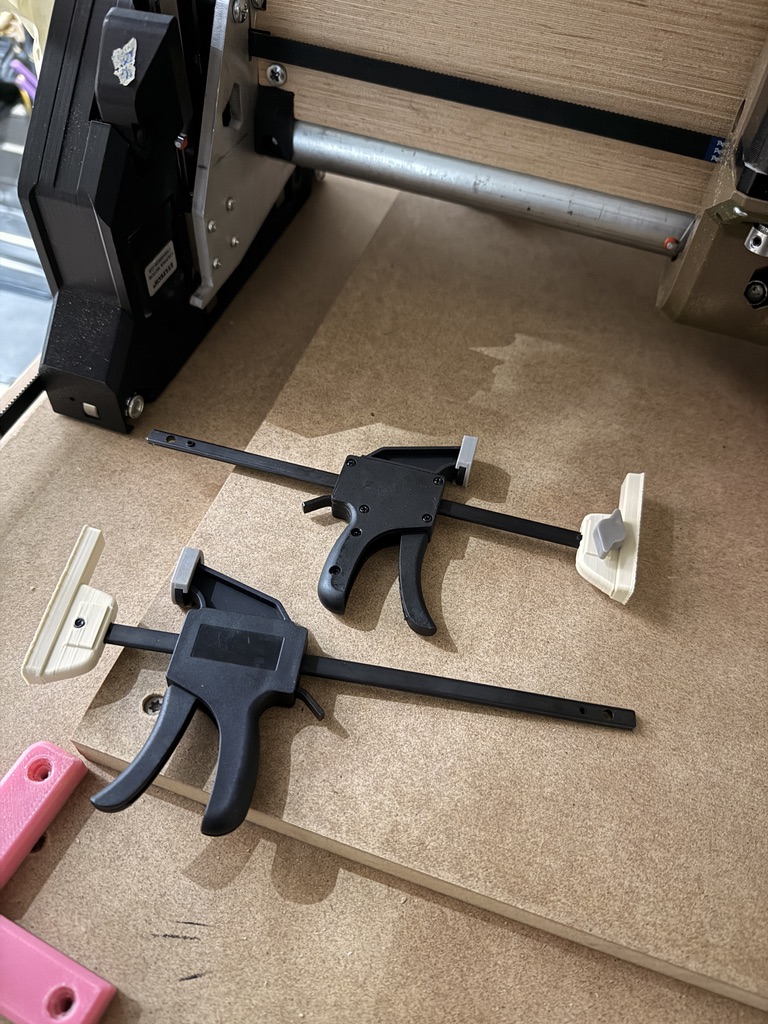
And then these bad boys + M5s for various jigs: https://makerworld.com/en/models/146357-microjig-matchfit-dovetail-fixture-bits-knobs?from=search#profileId-159376. They fit like a dream and slide around on the MDF with ease!
The aforementioned router guide, I tweaked it so the slot would be 6.0 mm to work with my 1/4” end mill.. but I set it to 6.3 mm in the slicer and had to trim it down to ~6.0 with a razor ![]() https://makerworld.com/en/models/1668641-makita-matchfit-grid-router-guide-and-bit-gauge?from=search#profileId-1766332
https://makerworld.com/en/models/1668641-makita-matchfit-grid-router-guide-and-bit-gauge?from=search#profileId-1766332