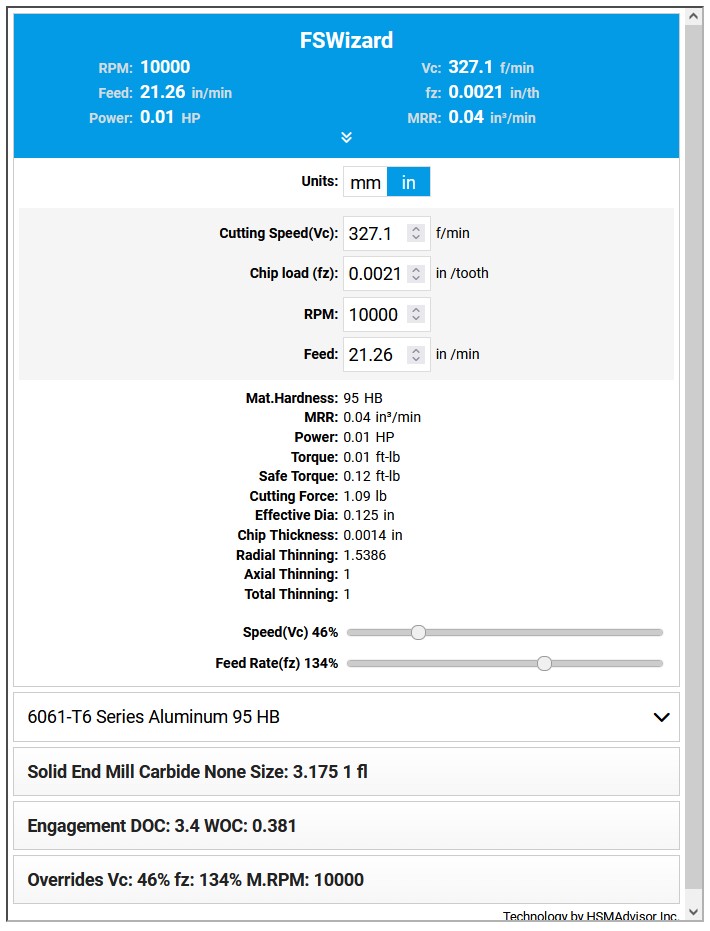
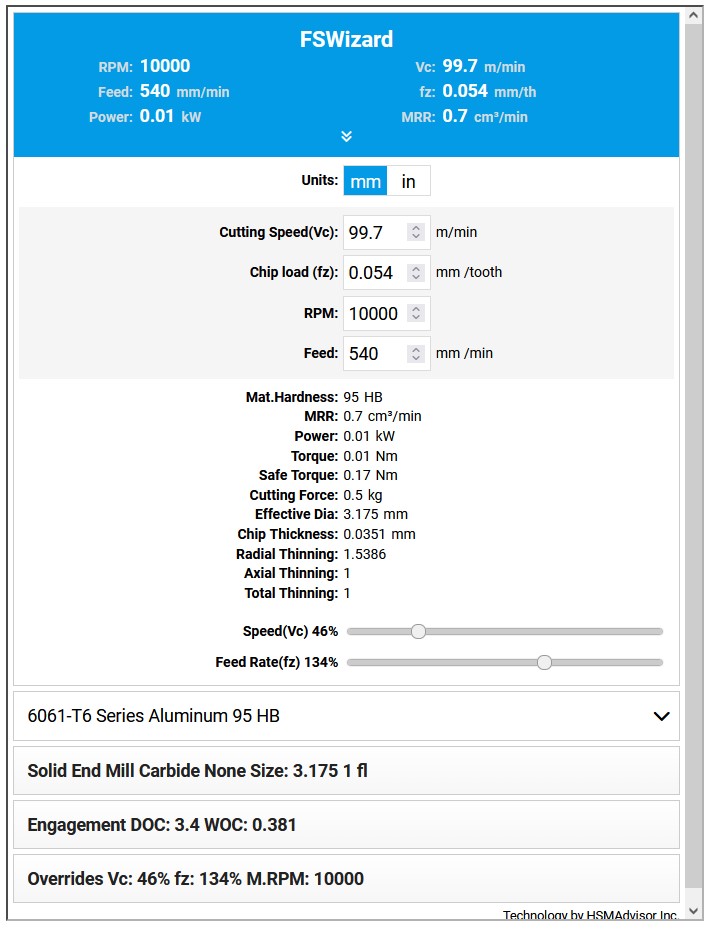
Settings for surfacing with a 1/2" dovetail bit, https://amzn.to/3o6berV. On this part of the cut the material got pretty warm. Super low RPM, I need to increase the feedrate to move larger chips, or decrease stepover.
The Vbit needs a larger tip offset. That was 2mm offset, need to go further to catch a faster moving portion of the blade. This bit, https://amzn.to/42DZ74q
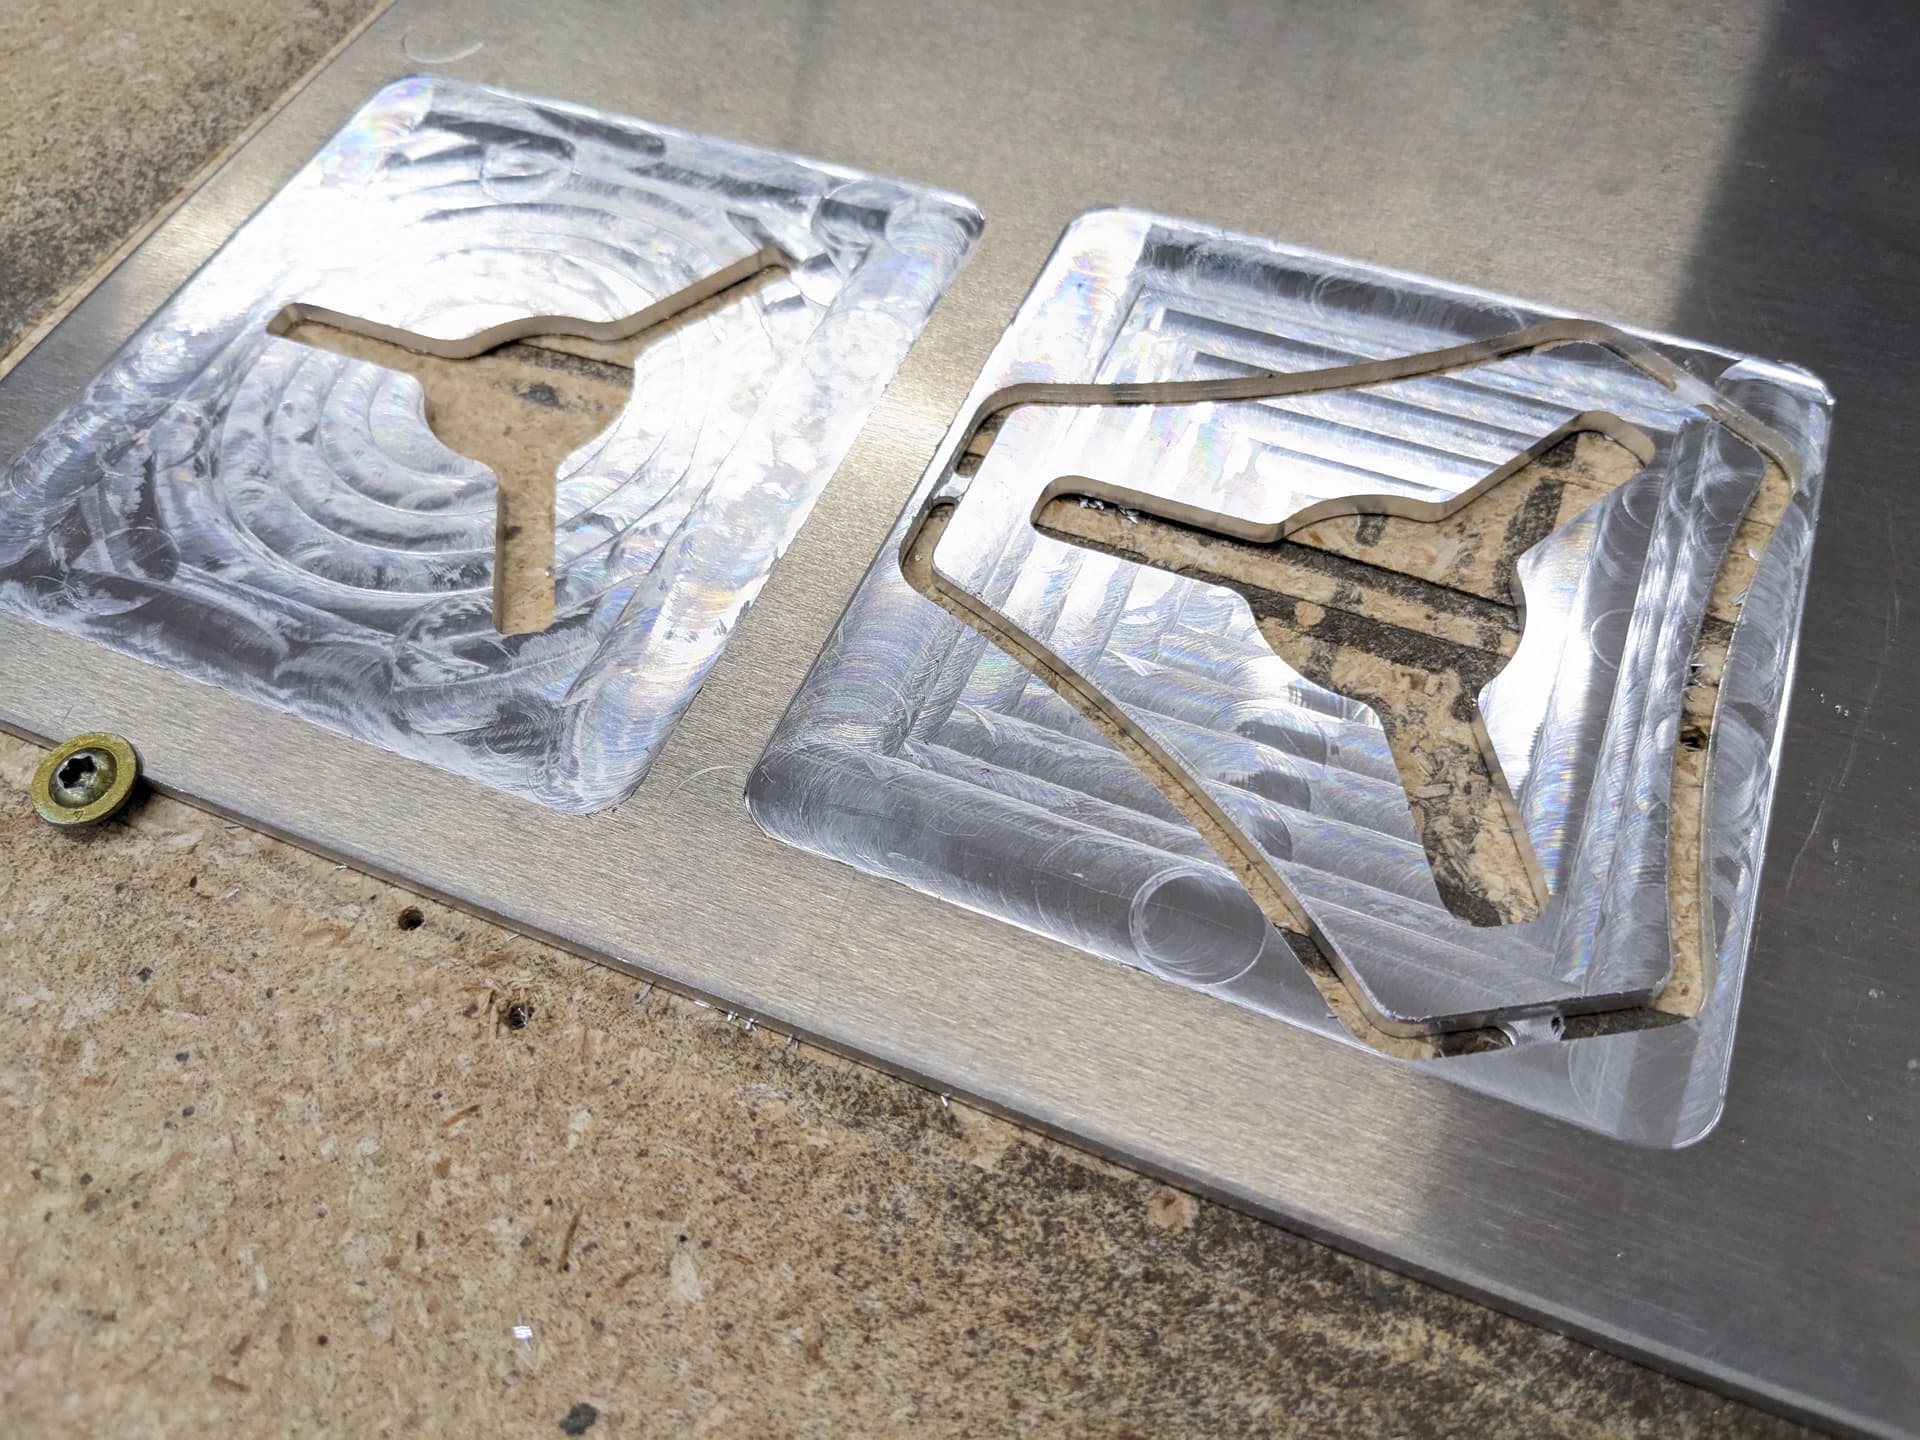
That shape with a little tweak would make a great bed support for the repeat printer.
Room to route cables down from bed through the opening in the center. Should still be fairly stiff.
Nice. I saw the mention of low rpm. Did you happen to try faster rpms? I saw this chart a couple years ago and stopped cutting alunimum slow. Can’t really go slow enough with a 1/8 endmill to drop off the left side of the curve. Can’t really get much to the right of if, either, but spinning faster forced me to feed faster and when that went well it encouraged me to really let it rip.
1/2 inch tool, though, that would do it if you can feed it fat enough to not rub.
I think you can hear it in the video if you are brave enough to turn up the volume. I am messing with the RPM a lot. In the test cuts I did each piece and felt the material and chip temps. I want cool workpiece and hot chips.
So for me, now, If my RPMs are low and the material is cool, I can increase the reedrate and RPM to keep the chipload the same. So if I am at min RPM that signifies I have lots and lots of room to move faster.
I really really hope this is just conservative settings. I think I can go much much faster. With a calc I realized I needed to do faster shallow slots to eject the chips. I was doing trichodial and that takes forever and seems like a bit of a copout. Now that I know I can do safe slots, I am going to start pushing the limits a bit more. I also realized a 10% step over is a good starting point with an 1/8" during a peel, that helps keep one parameter set so there is not so many unknowns.
Thanks for all the tips and tricks man I was having a heck of a time with my fixed rpm setup. I think I should invest in a adjustable router.
I also tried cheap bits and it seemed to make a mess. That Troichoidal is waaay long.
Anyways thanks again.
YESSSS!!!
I know, I’m a little enthusiastic for you, but having cut a fair amount of aluminum on V1 machines, I really want the world to see how fast they can go.
I saved 5 minutes on this cut 20 minutes vs 25, and I could have pushed the trichodial faster for sure where the slot I was doing is probably fast enough. So if you tune it right it isn’t all that different. You can go deeper per pass. So I went shallower and faster but it takes more passes. Trichoidial can go way deeper. So in the end same load they should be pretty similar.
That would be a good test. It makes more sense on something like 1/4" thick to really test. I hope to mess around more. I have two shows coming up so I would like to bring some new stuff to show off.
Circular shapes are awesome with trochoidal. Lines and slots are the real challenge. On 1/4 plate, I’ll predict you end up having to reduce the stepover because of flex and/or router bogging.
Here’s the way I think of it: Your lr3 will easily be able to outrun your router at full depth in that plate. Once you get that full depth cut worked up, calculate how deep you would have to go to match that MRR at something like 75%-80% of the machine’s top speed…fast, but not TOO fast… and 90% stepover. When I did that, it turned out that it was less deep than I could go. So going a smidge deeper than that, much less than full depth, got me a HIGHER mrr with less load on the tool and less flex on the core and not much difference in travel because of the stepovers (instead of 100 travels on 10% stepover, maybe it’s 10-20 on each of 4-5 stepdowns with a 60-80%stepover).
I feel like I’m preaching sometimes, and I really don’t want to be preachy, but this result was very counterintuitive to me, and I want to throw it out there.
I watched a LOT of videos and read a LOT of articles and how-tos, and what didn’t occur to me until last year is that most of the material is aimed at fast routers or slow mills, almost all of which are using larger tools with powerful spindles. We can learn a lot from the HSM guys, but these machines aren’t HSM capable. We can learn a lot from 2ton mill guys, too, but same caveat.
We’re somewhere in the middle, and so are the optimal strategies. I’d expect to find the best reliability where we aren’t quite maxing out the router, the steppers, or the rigidity. And I think getting close to that trifecta isn’t going to be much different from hitting it exactly.
Oh yeah. Not like you’re gonna stall it out or anything, but you can make the rpms drop a LOT. Kinda like that video you made a few years ago when your speed controller didn’t have the PID dialed in.