OK, I got the last iteration print completed, assembled, and tested, and it works great. Hose attachment seems to have no discernible leakage, and it’s a great functional print!

2 Likes
EDIT: Hey, never mind. I see you have a camlock set that suits for smaller connections!
Previous posted question:
Hey, regarding the set shown here:
…can I get something like that, for flex, but for 2.5" ? Do you already have that?
Thanks for all you do!
1 Like
I haven’t checked, but I think you will find that one is the threaded bit that fits on the flex and the other is the the end that fits on the PVC.
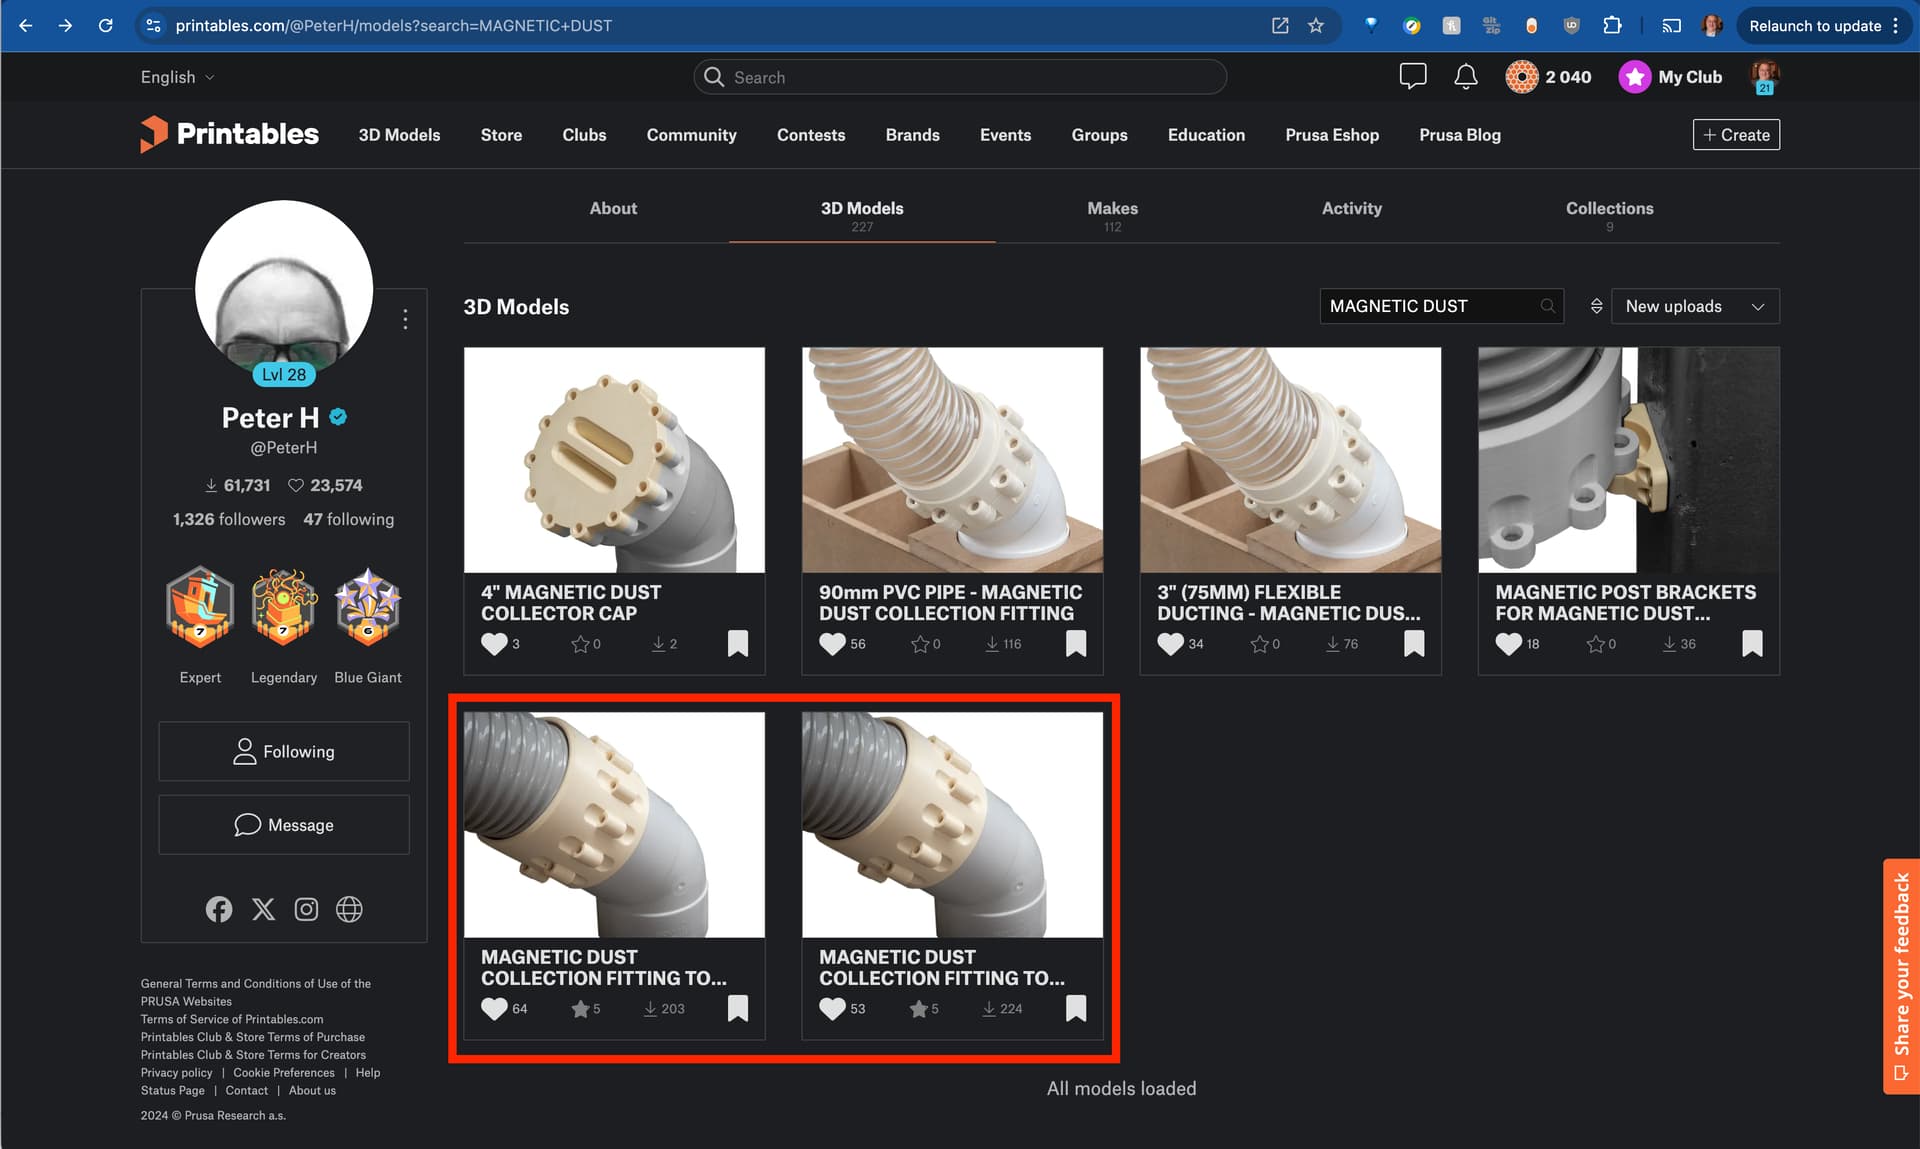
I have 100 and 90, but below that it gets a bit awkward, which is why I developed the camlock ends, but they are for normal 2" vac hose.
That 2.5" is an odd size for me. BTW, thanks for the prompt, I have printed the coupler, will upload both 2 and 2.5" versions tomorrow.
1 Like
Some time ago, I had looked at those twin listings and had figured out how to they go together, and in the interim between then and yesterday, I forgot. (Foggy brain strikes again. I’m about to start spelling “forgot” as “fog-got” as in the brain fog took it.) But then after I posted asking about how they go together, I remembered and revised the post!
You are so kind! Thank you!
I feel your pain (or lack of it) - it struck me post-virus for the latter part of last year. I made sure I was in exile from any machine that could spin, burn, whirr or in any way negatively connect with my body parts for almost six months. That explains in part some of my backlog of projects, and also why I had time to “concentrate” (wrong word in that mind state) on other things!
I hope you recover speedily without too much of the anxiety that makes it even more fun!
1 Like
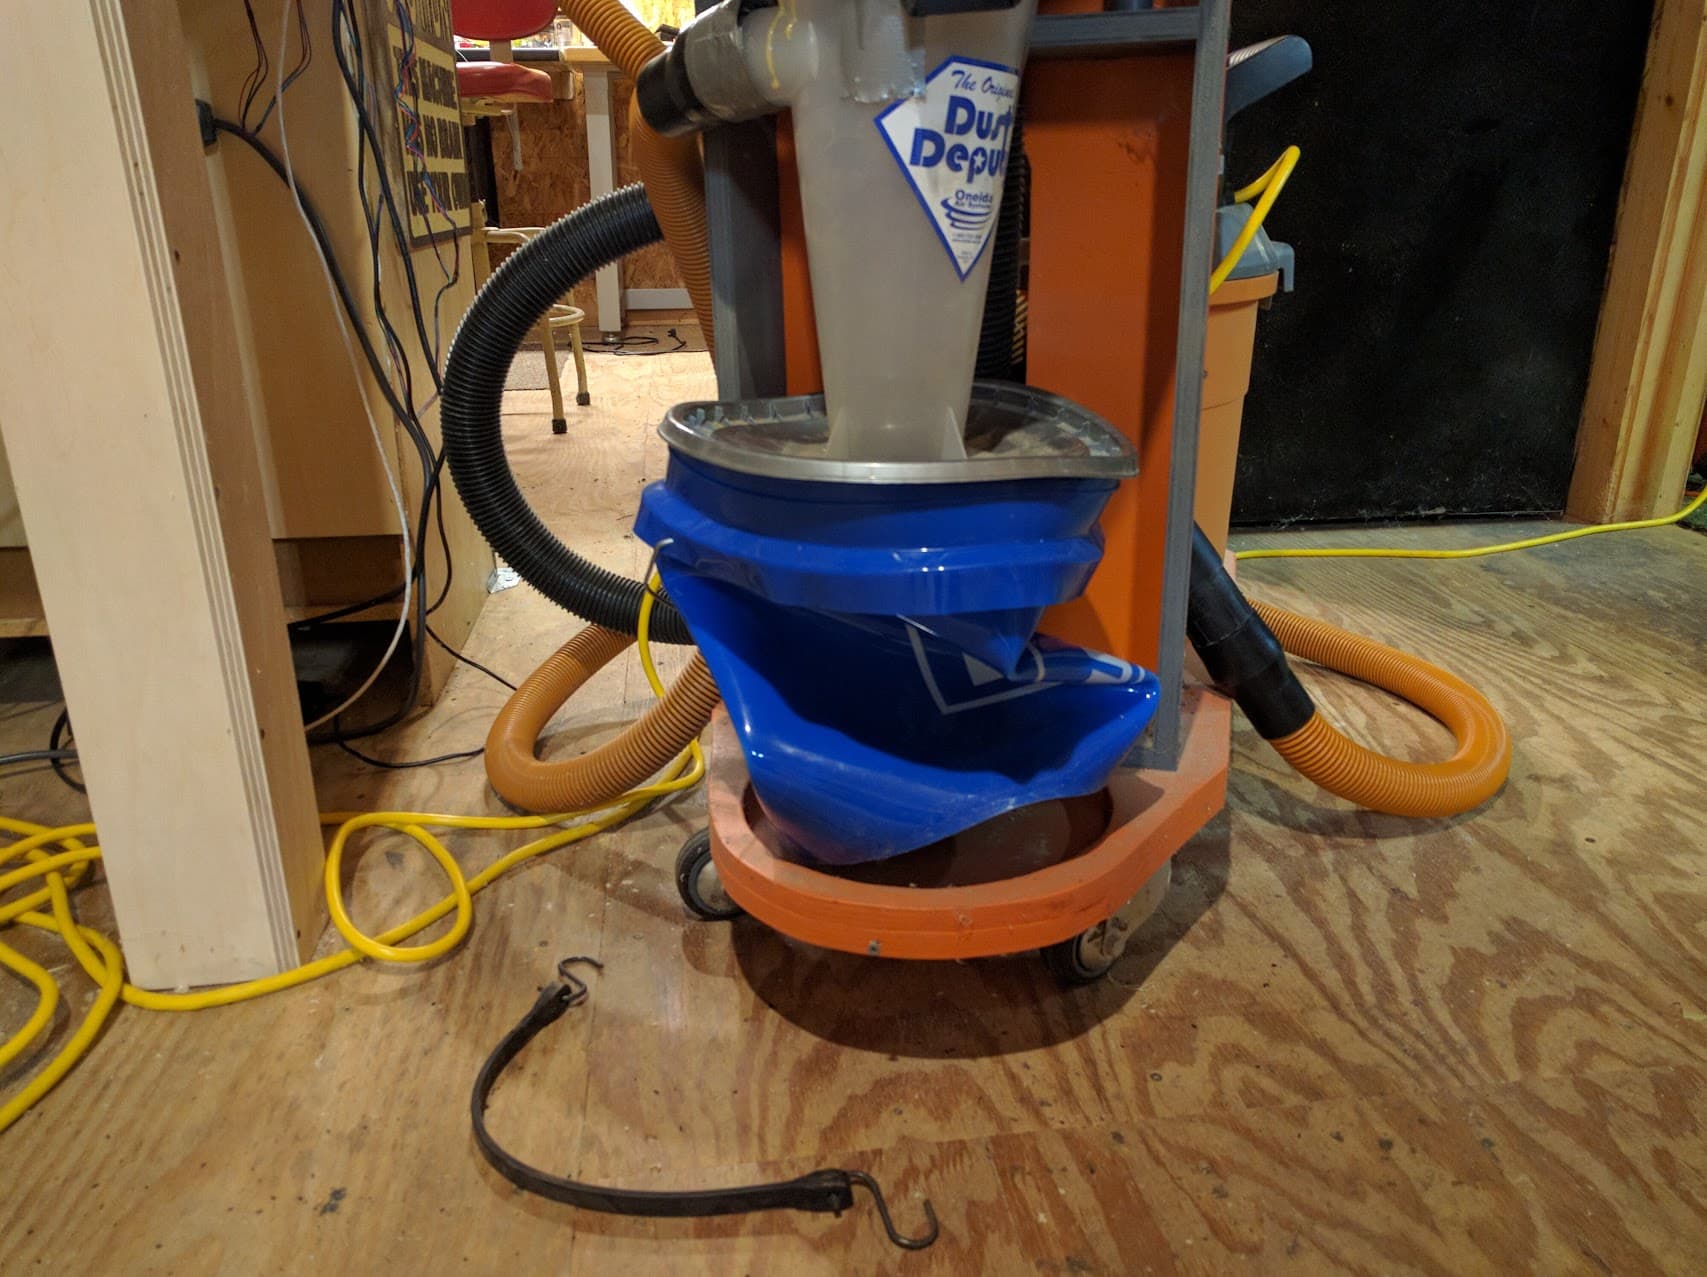
Careful with that metal trashcan. I collapsed one with a regular shopvac and a dust deputy.
1 Like
Will watch it carefully. OK so far after some use.
1 Like
I’m finally getting around to checking my full-size newer LR4 machine (as opposed to my smaller RC3 LR4 machine) for being tram to the table surface, and for being square.
Tram Check
I have run some probe numbers near Min and Max, for checking tram, and it’s decently close to being tram right off the bat. I will need to make a slight adjustment to the pull off on one of the Z steppers. My “range” of sample numbers were tight on all samples, so that speaks to good repeatability. Taking average on all samples, my gantry’s Min and Max probe values are different by only about 0.227 mm.
Remembering that what I’m tramming against is a prior resurfacing of the spoil board that was performed by an earlier version of LowRider, I think this is all really good.
Now, mind you, I only checked for “tramness” on the near side of the big table, but still, I’m pleased with accepting a minor adjustment to pull off based on this.
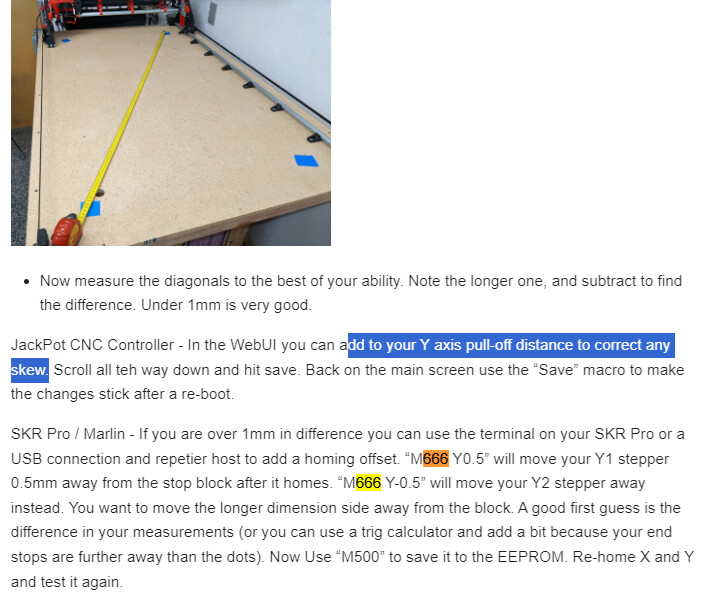
Squareness Check
I ran a squareness check using sharp point bit to poke holes in tape at corners. Measuring diagonals with help from my youngest son, my new full size machine is only “minor” out of square by 2.5 mm. That would be more crucial on a small table, but even on this big table I can adjust to get it better.
Now if I can just remember who posted where … that formula or tool for finding out how much correction that calls for. Anyone remember? Tagging @azab2c and @jamiek and @SupraGuy in case it was one of them.
1 Like
Thank you! Re-reading it now! ![]()
I did something very similar to this with my LR3…
However, for my LR4, I used a 1200mm x 1200mm square.
Whatever the difference between the 2 lengths was, I just adjusted the pulloff by half of that, and ran it again.
I got it square I think in 2 cycles, which in the end took less time than the amount of time I spent in CAD trying to measure it all out the first time
3 Likes
Ended up doing something similar to Dan’s topic, and created a quick sketch with partially constrained dimensions in Fusion360. Just searched and cannot find anywhere, I probably didn’t save ![]()
Vaguely recall @Jonathjon mentioning something similar to Mike’s simpler straight forward approach…
Just double checked docs https://docs.v1e.com/lowrider/#initial-squaring, content looks a bit light on exactly how people should calc pulloff after diagonals are measure to be skewed?
Don’t remember how @jamiek calcs Skew compensation. Guessing he (or someone…) has a web hosted OpenSCAD based Table Skew Compensation calculator that’s linked, or within the LR4 Calc page, currently, or in the future ![]()
4 Likes
Thanks, everyone. I had to leave the workshop to go officiate a wedding (rehearsal tonight and ceremony tomorrow), but before I left, I started doing something in a vector illustration program that was a hybrid between Dan’s approach and Mike’s approach. Will try to get back on this tomorrow!
2 Likes
I agree. It would take a lot less time to do it once, but since I am doing this for the 5th time Once LR2, Twice LR3, and have done once for LR4 RC1 and once LR4 RC3, and will bo doing it again for the release LR4, now the tool has paid off, plus. Sure, doing it ONCE, just do it. more than once is when you need a tool, and for people who really just want to measure and punch in a number, this works.
2 Likes
My intent was not to tell you, or Doug, not to do it that way. I was just offering my perspective.
I made a tool for my LR3. I don’t remember how long it took. Probably not that long. I am certain that I didn’t even bother saving the file because I assumed I would never need it again.
When I went to square my LR4, I went to my computer to do the same thing, and while waiting for Fusion to open, I decided not to bother, and just do the manual method.
It took me all of 5-10 minutes to square it.
That was 2 adjustments. 3 sets of dots on tape. Last one to verify it was accurate.
If anyone wants to create a tool, or feels it helps them, then I’m not against it, and was certainly NOT advocating against it.
But I also would want to be careful about making others think they NEED a tool, when it is absolutely not necessary.
4 Likes
All good points. I’m kinda like Dan, after doing squaring on multiple machines, I am looking for a way to “one and done“ it. The last time I remember doing it, I had to go through a bunch of iterations to get to where I felt like I was close enough. For me, at least in my current level of capacity, I prefer to take some time to do some kind of graphic / mathematical calculation and hopefully nail it on the first go round, and then simply have to confirm that it’s right.
2 Likes
I got it all trammed and squared. ![]()
3 Likes
Hi Doug. Did you ever settle on table extenders for the superstruts for the LR4? I’m taking some time right after Christmas to convert my machine, and that’s the one group of parts I’m still not settled on.
1 Like
I have some that I’m using that seem to be OK, but my machine is in some ways non-standard (as in mirrored), so I’m not certain they will work without some attention. I will package them up in a zip and sent them to you by private message, and you can see if they work.
1 Like