Finally have a bit of motivation to work on a new lamp. I’m having an issue though… My work piece is 3" tall and the legs on my CNC are 4" tall making tall projects impossible. When I built the table I used the pictures on the v1 website so I have a pretty basic table.
It’s time to may maybe build something with a few more adjustments does anyone have suggestions on where to start? Ideally I can somehow modify the table I have so the cutting area and be raised and lowered without affecting the legs/frame.
The idea being that the center surface where you place your work can be lowered. It doesn’t necessarily give you extra working volume, but lets you work on taller pieces.
One of the things that I found that I wanted to do early on was to engrave the top of a box, except that I couldn’t fit the box into the machine. (For that matter, I still can’t.) I’ll be making my LowRider able to do that, but I’ll be building a new table for the Primo, and this is a feature that I want to have.
I’m going to make a build surface that can be raised and lowered. I want to be able to put 6" material under it at a minimum. Another idea was to be able to remove a part of the work surface so that the machine can do some fancy edge joinery, placing long pieces edge upwards under the CNC.
My initial solution when I finished my Primo was a “stackable” spoil board. I built my machine with fairly tall legs, and had a second spoil board composed of three layers of MDF that I could bolt to the initial spoil board, moving the stock up to the router and therefore reducing the leverage on the Z axis. The solution worked, but I found it to be a pain to change between the two settings, used a lot of material, and I ended up living living with the single (short) spoil board most of the time even when the taller one would have been better for the job.
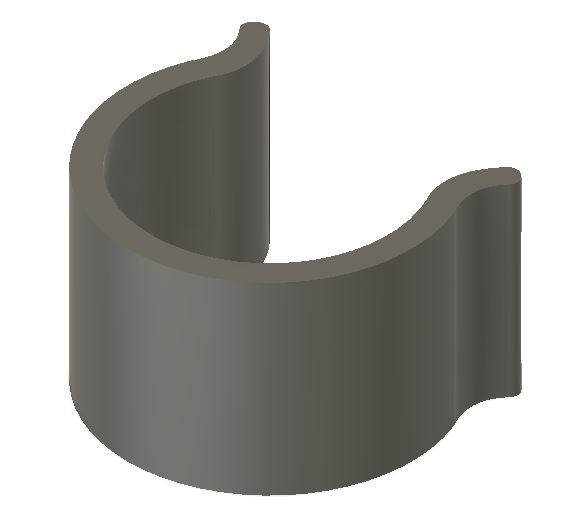
Recently I made a change to approach this problem differently. I drilled out the base board under the legs so that the leg tubes extend through the bottom of the legs, through the base board, and even through the table below. I then 3D printed some spacers that clip on the legs. The plan is to have different height spacers for the different positions I want for the legs. I can loosen the screws holding the legs, remove the four spacers, adjust the height of the table to another set of spacers, and tighten the bolts in the legs. The spacer remain so that if the screws become loose, the legs won’t drop. This is a work in progress. So far, I’ve just used it at its lowest position, so I cannot report how well it works moving between different positions. This is the spacer
So, I went with a low tech solution… Just cut out a part of the table and placed a board on the bottom side of the 2x4 table. This gives me an extra 4.25" of z height on work pieces. with the top spoiler board off.
I’ll have to work out what I can do to true it up to the cutting tool, though for 95% of the projects I’m planning on making with this, being exactly square to the tool head isn’t going to be a huge worry.