that would work too!!!
yank the magnet out and you are half way there.
ya my sister does ceramics, that’s what she said too.
Fixed images and some text. I guess i should inspect my posts after hitting the reply button. Lol
1 Like
I know the pain
That won’t be an easy casting to do. You certainly could make it, but it will take a bit of practice.
As someone already said earlier, print with thin walls (one or two) and little infill.
There is a tiny bit of retraction you should account for, generally I print 1 or 2% larger than the parts needs to be to account for that.
You also need to make the part watertight, so better use some wax all over it or something else to seal all the holes, you don’t want plaster infiltrations in your print.
For this part, you can’t really use sand casting so you need to go with lost PLA and plaster. Get some good plaster, it helps a lot with getting good surface finish. You also need some kind of metal enclosure, because the plaster usually gets extremely brittle after being heated to remove the PLA.
The furnace istelf is easy to build. I chose to make an electric one since it’s silent, doesn’t make a mess and don’t need any consumable. Just need a PID controller, a thermistor, some nichrome wire, aluminum silicate bricks and a few meters of angle iron. You can build one in a day, it’s super easy. If you’re interested you can see the following posts from the time when I was building mine: My MPCNC made in China
If you want to get the tiny details on your part then you’ll have to learn some tricks to lower the surface tension, add some weights, some vents and other stuff to get the material where you need it to be, or even get into some fancy technique like vacuum casting. There are lots of stuff to master in order to get a good casting, but it’s a really nice skill to learn. I recommend you to watch the videos of “myfordboy” on youtube (here: https://www.youtube.com/user/myfordboy/videos ), he explains most of the stuff.
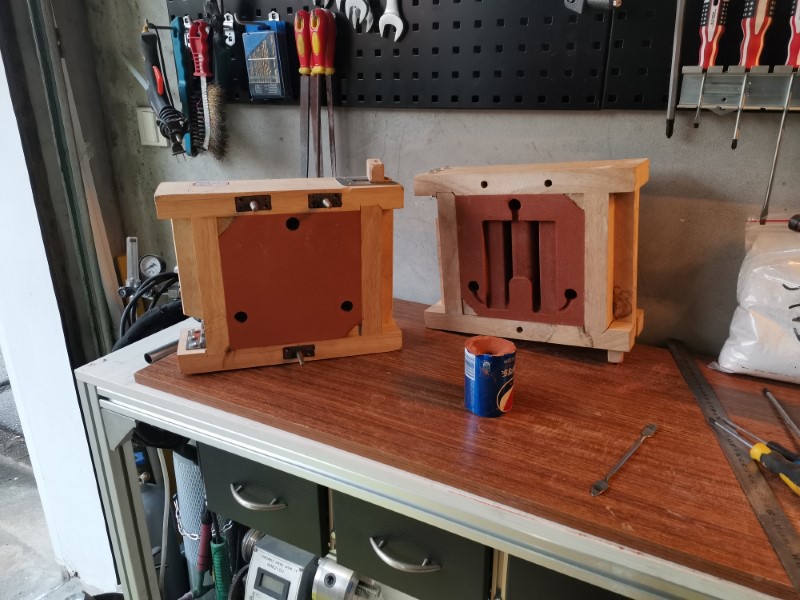
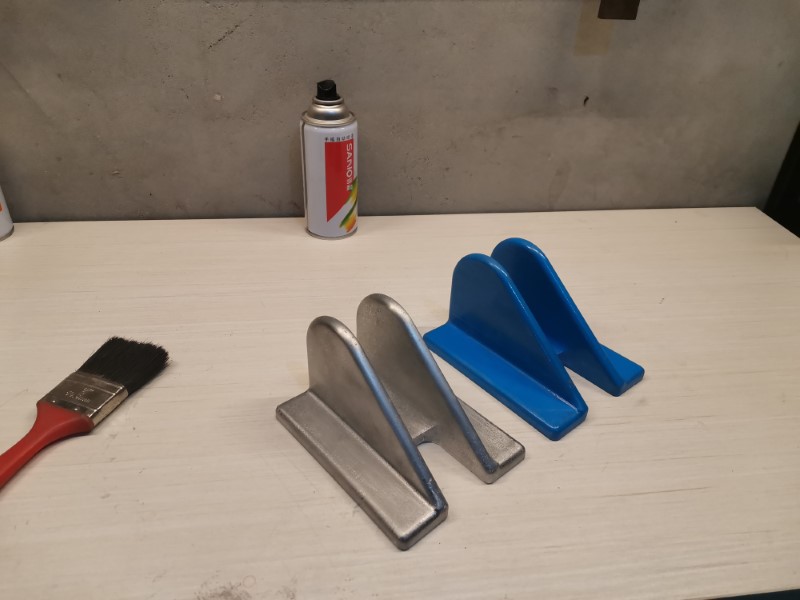
Here is my last aluminum casting, from a few weeks ago (this time using sand casting):
The mold:
Finished part:
1 Like
If he or you does brass, PLEASE ensure its ventilated and you wear PPE masks etc. My uncle died from complications due to inhalation of fumes as he was a brass sculptor.
And thanks to the OP - I will by building a furnace this summer 
Also buying a SLA printer so we can start doing some jewelry and other cool stuff.
For those interested in lost wax casting, this stuff looks amazing and Ill be getting a roll or two - https://www.3djake.uk/polymaker/polycast-natural
1 Like
this a great forum, a lot of great minds and knowledge hidden here, I could spend days reading if I could find the threads I’m looking for … anyway, thanks to you guys for sharing what you know
1 Like
YES, I would like more information!
maybe start a new topic for it.
The search function is actually quite good on this platform… ![]()
1 Like
This is interesting as a fun challenge. I am guessing the original plastic parts are made (or could be made) using a three-part mold, with two halves and a core, like this.
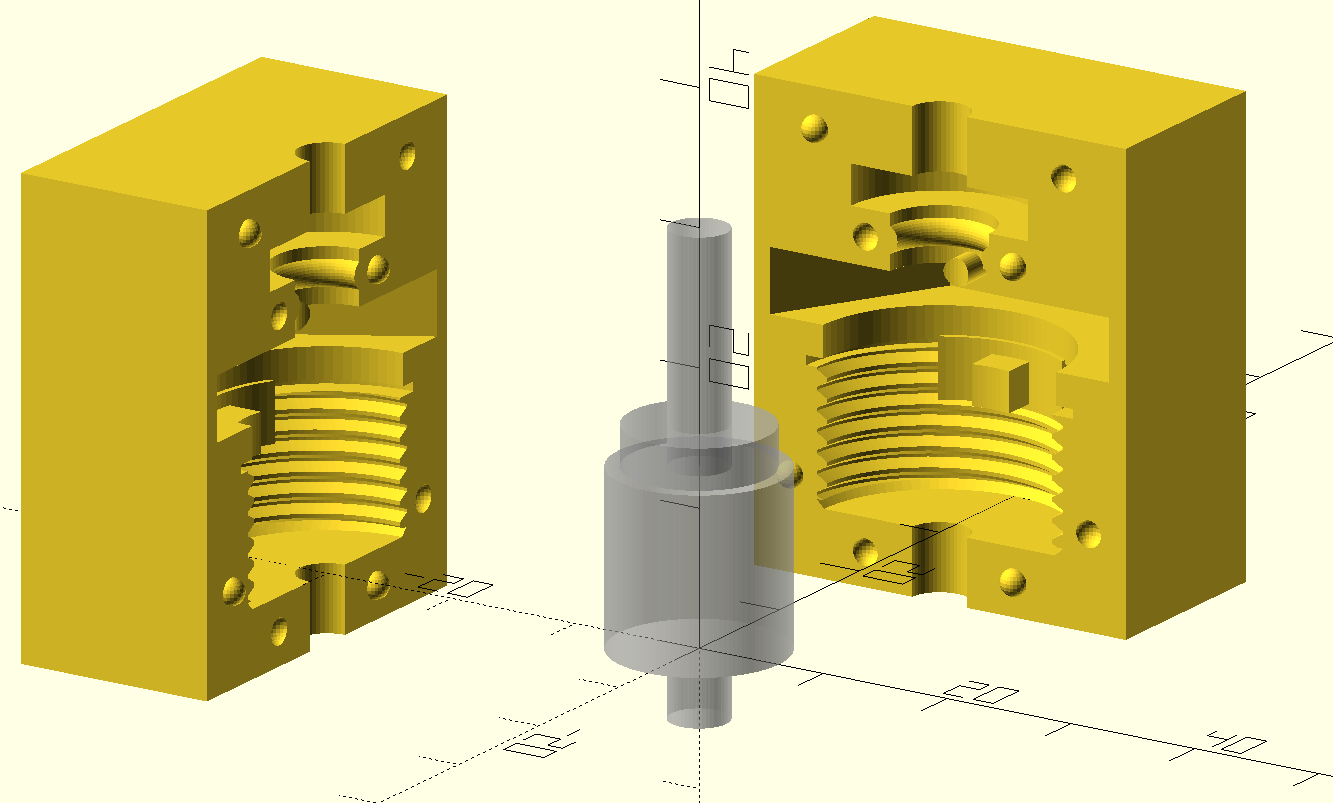
The tricky part is getting the mold and part to release from each other. The standard approach is to design the parts with a draft angle, but you don’t have that luxury.
If you use plaster as the mold for metal, then you can destroy the plaster to get the final part out, so that’s not an issue. If you cast the plaster in PLA, then you will almost certainly have difficulty separating them without destroying the plaster. You could soften the PLA with heat and have a better chance of leaving the plaster intact, but then you are printing two molds for each attempt.
Another possibility is to use silicone instead of plaster, and instead of aluminum, to use bismuth-tin alloy which melts at about 281F (138 C). This is low enough to not damage the silicone, and it’s non-toxic and easy to do on the stove.
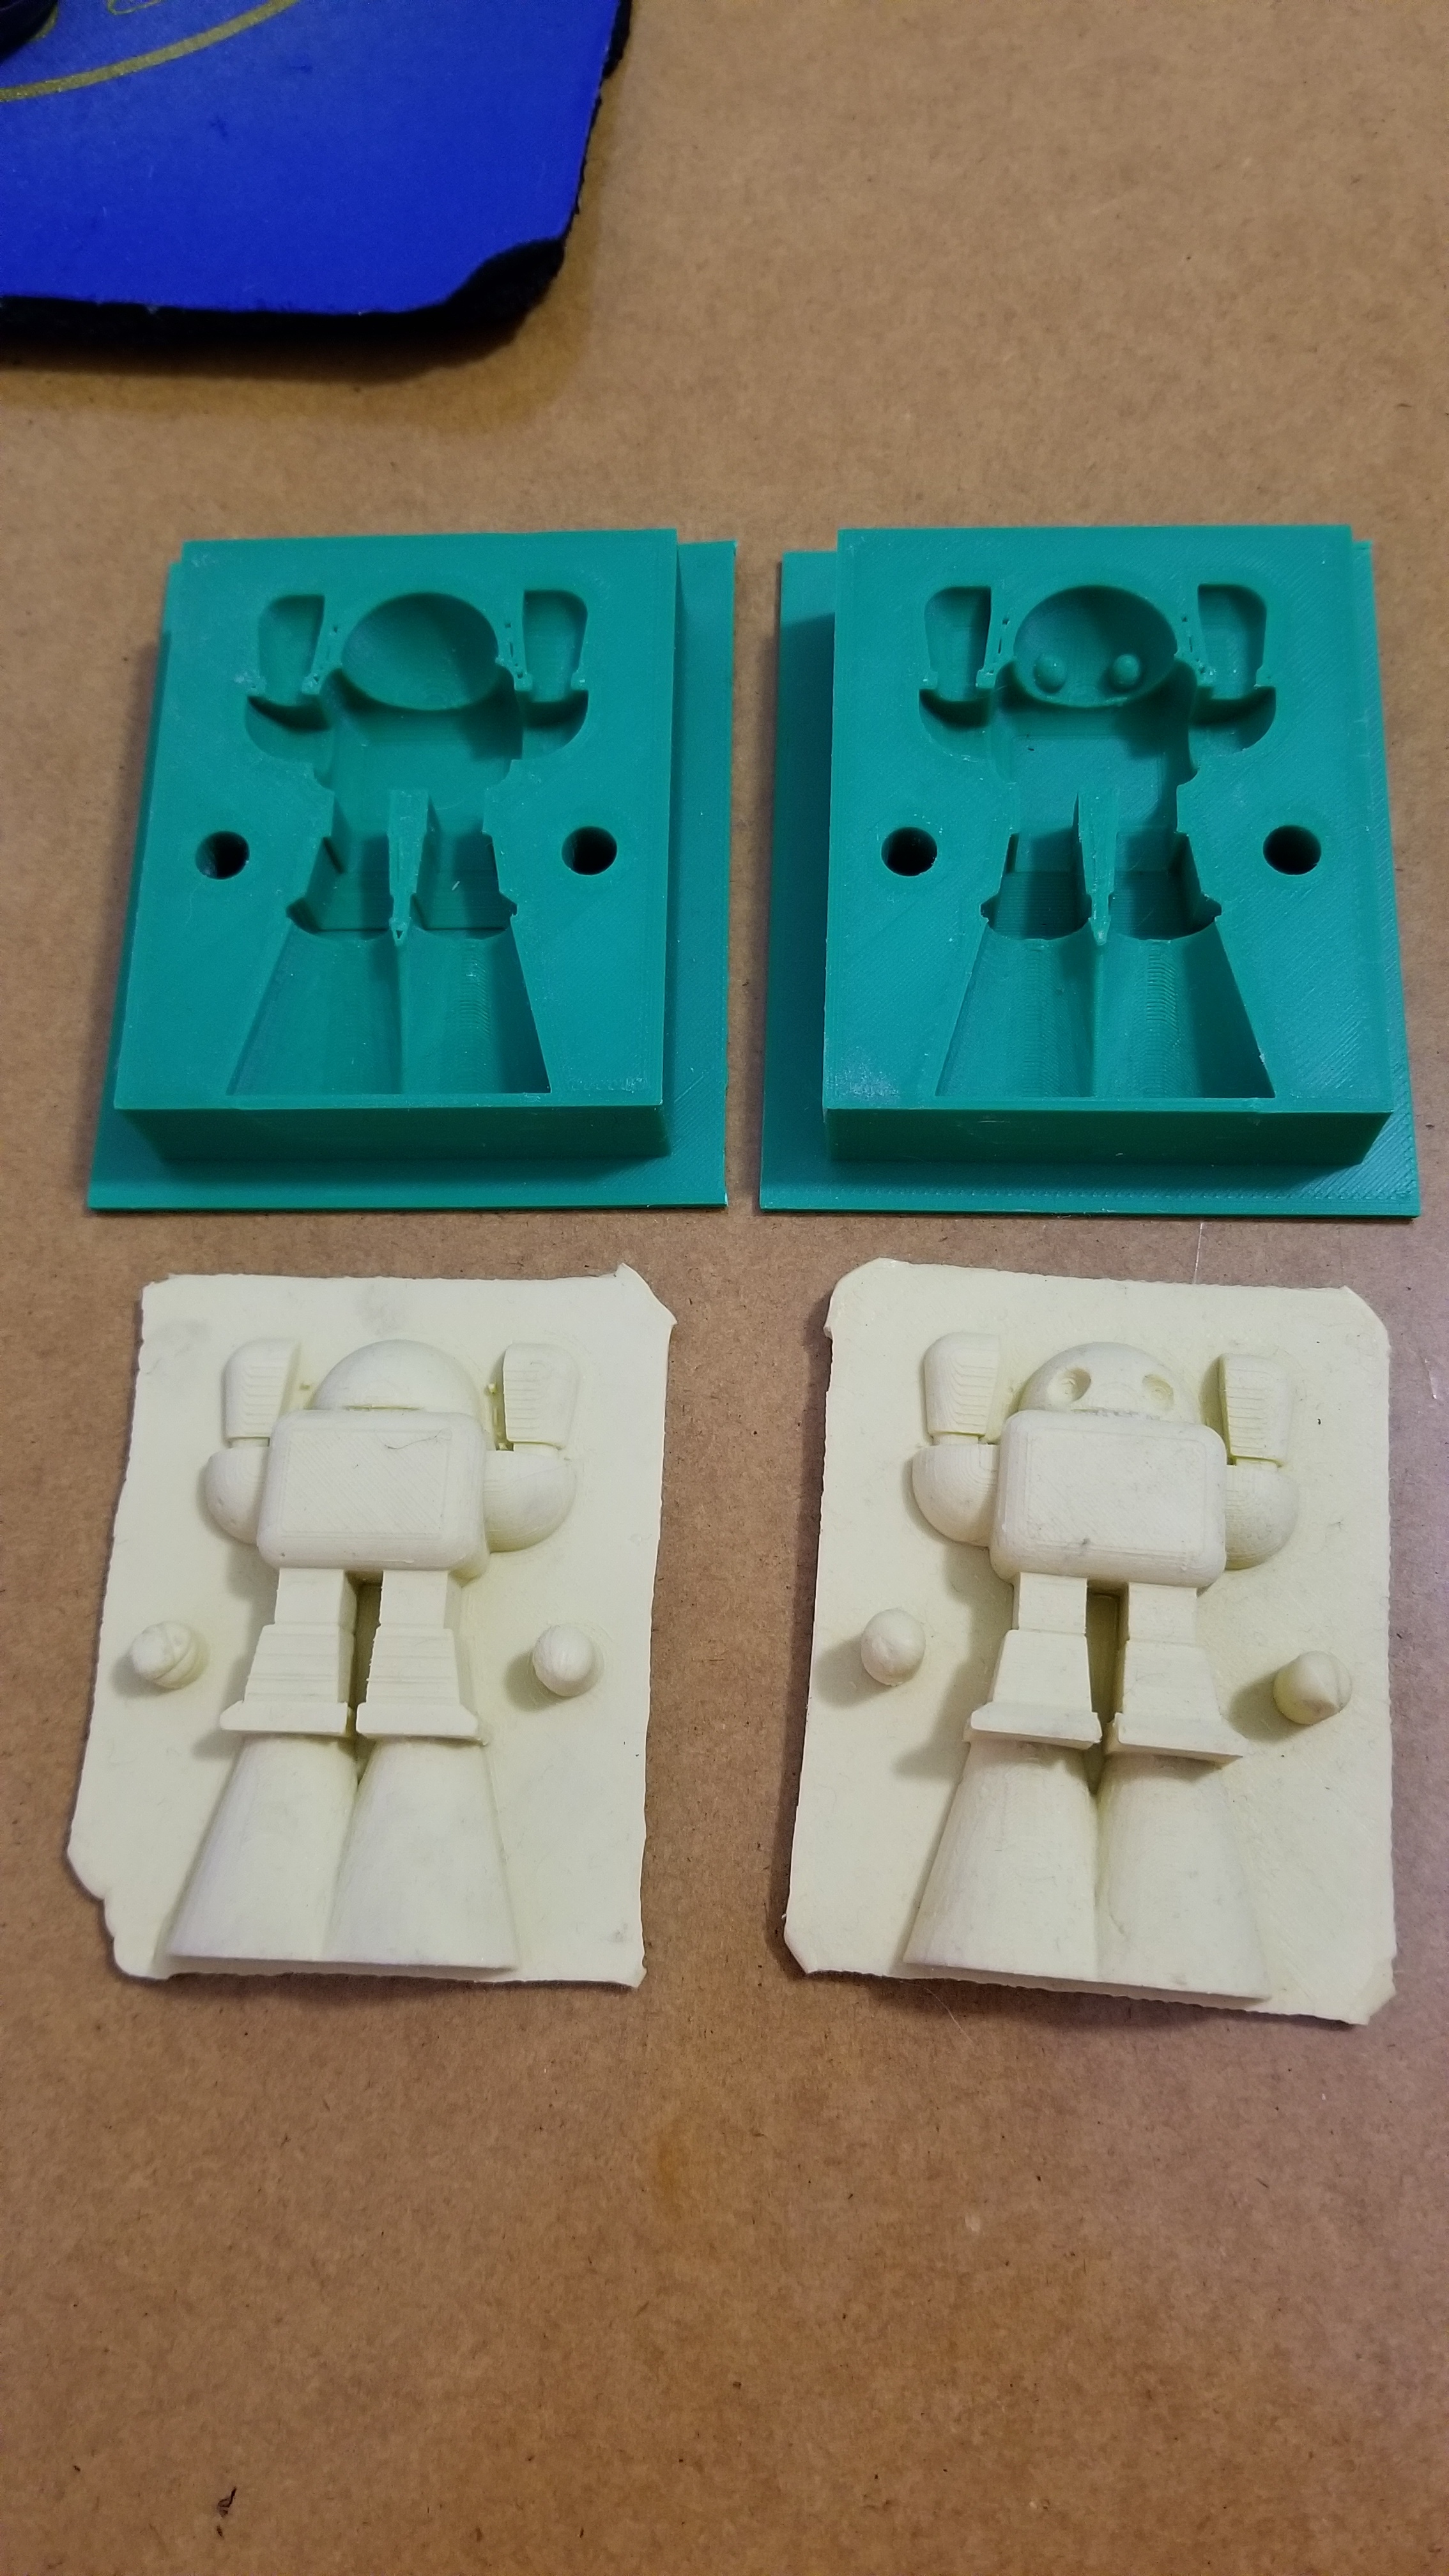
Another approach, if you do want aluminum, is to cast the plaster in silicone instead of PLA, which then requires a negative shape of that in PLA to cast the silicone. I still have the original pieces for when I used this approach to make that metal robot in the other thread. Specifically for the gap between the robot legs I was expecting I would never get that thin wall in plaster to survive without a compliant mold for the plaster.
The foundry in the pictures that i posted above actually contains three elements. Two 1500w 6” stove elements and a 3400w oven broiler element that i wrapped in a coil. Each element has its own 110v power cord. The 220v elements only pull one forth the power on 110v, so in this configuration it pulls 1600w, 375+375+850. I run it with the two 6” elements on full time and the broiler element is controlled by the PID controller.
I used an empty 20LB(?) freon tank that has a 10” diameter and 1” of ceramic insulation. A bit of perlite under the lower element to insulate the bottom. The two 6” elements by themselves were not enough on their own to reach melting temp, but may be capable with more insulation. I added the broiler element to it and it will melt 4 pounds of aluminum in about 45 minutes. That might seem like a long time, but if i put a crucible full of aluminum in and flick the switch, by the time i have a mold or two rammed up it’s ready to pour.
Silent, clean, compact, cheap to build, efficient, and the temperature is easily controlled and maintained. Once it’s up to temp it runs around 400F on the outside. I have more elements to put together another one using a 20# propane tank, which are 12” in diameter allowing room for more insulation. The one we just put together for my friend is using only two of the 8” elements, which puts it at 1050w, and 2” of ceramic insulation. It did melt aluminum. It took over an hour to melt, but he will mainly be using it at lower temps for burn out so the power level is better matched for that. The 2” of insulation maintained about 200F on the outside after the aluminum hit melt temp, so a big improvement in efficiency.
Once I receive my corona cash I’ll do some stimulating and buy some ceramic insulation and maybe a pair of 8” elements to add with the broiler element since the propane tank has the extra room needed for them, which would bring it up to 1800w of fury. I may try and do a video or at least take some pictures, but i’m really horrible at that. It can be hard to do when i’m focused on my work.
A quick video of my first electric foundry that i built a few years ago. 4000w 220v in its original configuration. A real workhorse, but i could only melt about 1.5 pounds at a time, so i was limited to smaller castings. The exposed top row of kanthal being the only issue. One tiny drip from the dross spoon would ruin it. I could splice it back together but it was only a matter of time until it would burn off at the splice. The last configuration was what i had left of roll of kanthal. A single row around 1800w on 110v. Slow but worked, until my stainless steel crucible sprung a leak after years of faithful service. ![]()
The delicate kanthal was the inspiration for the stove element approach. The actual nichrome element is protected inside of the stainless steel tubing. They’re dirt cheap, and no calculating involved. Just don’t try to run them off of 220v. Sure, they’ll heat up faster, but it’s faster than the thermocouple can respond and they fry within 15 seconds. Ask me how i know.
MP15YA 6” 1500w(on 220v) like $7
MP21YA 8” maybe $8
WB44X10015 broiler element $20, but the last time i bought them i got 2 for $20, shipped ![]()
I chose the WB44 for several reasons. Its shape lends itself well to being manipulated into a coil. Cut the mount in half to free the ends, twist the two straight legs of the center U bent 180 degrees , and then all the major bends in the element will be aligned in the same direction to form a coil. This minimizes the possibility of damaging the element.
From my searches i’ve found the WB44 to also be the cheapest oven element available and its wattage is greater than most others, so i feel it’s the perfect choice for this application.
Disclaimer: i take no responsibility for anyones house burning down or personal injury. Just use common sense. If you don’t have any, this may not be for you, or do some research, ask questions, learn and have fun. Every time i open up a mold and reveal something i’ve created cast in metal, it puts a smile on my face. It just never gets old.
TL/DR: I’m sorry.


1 Like
Awesome!
Thank you