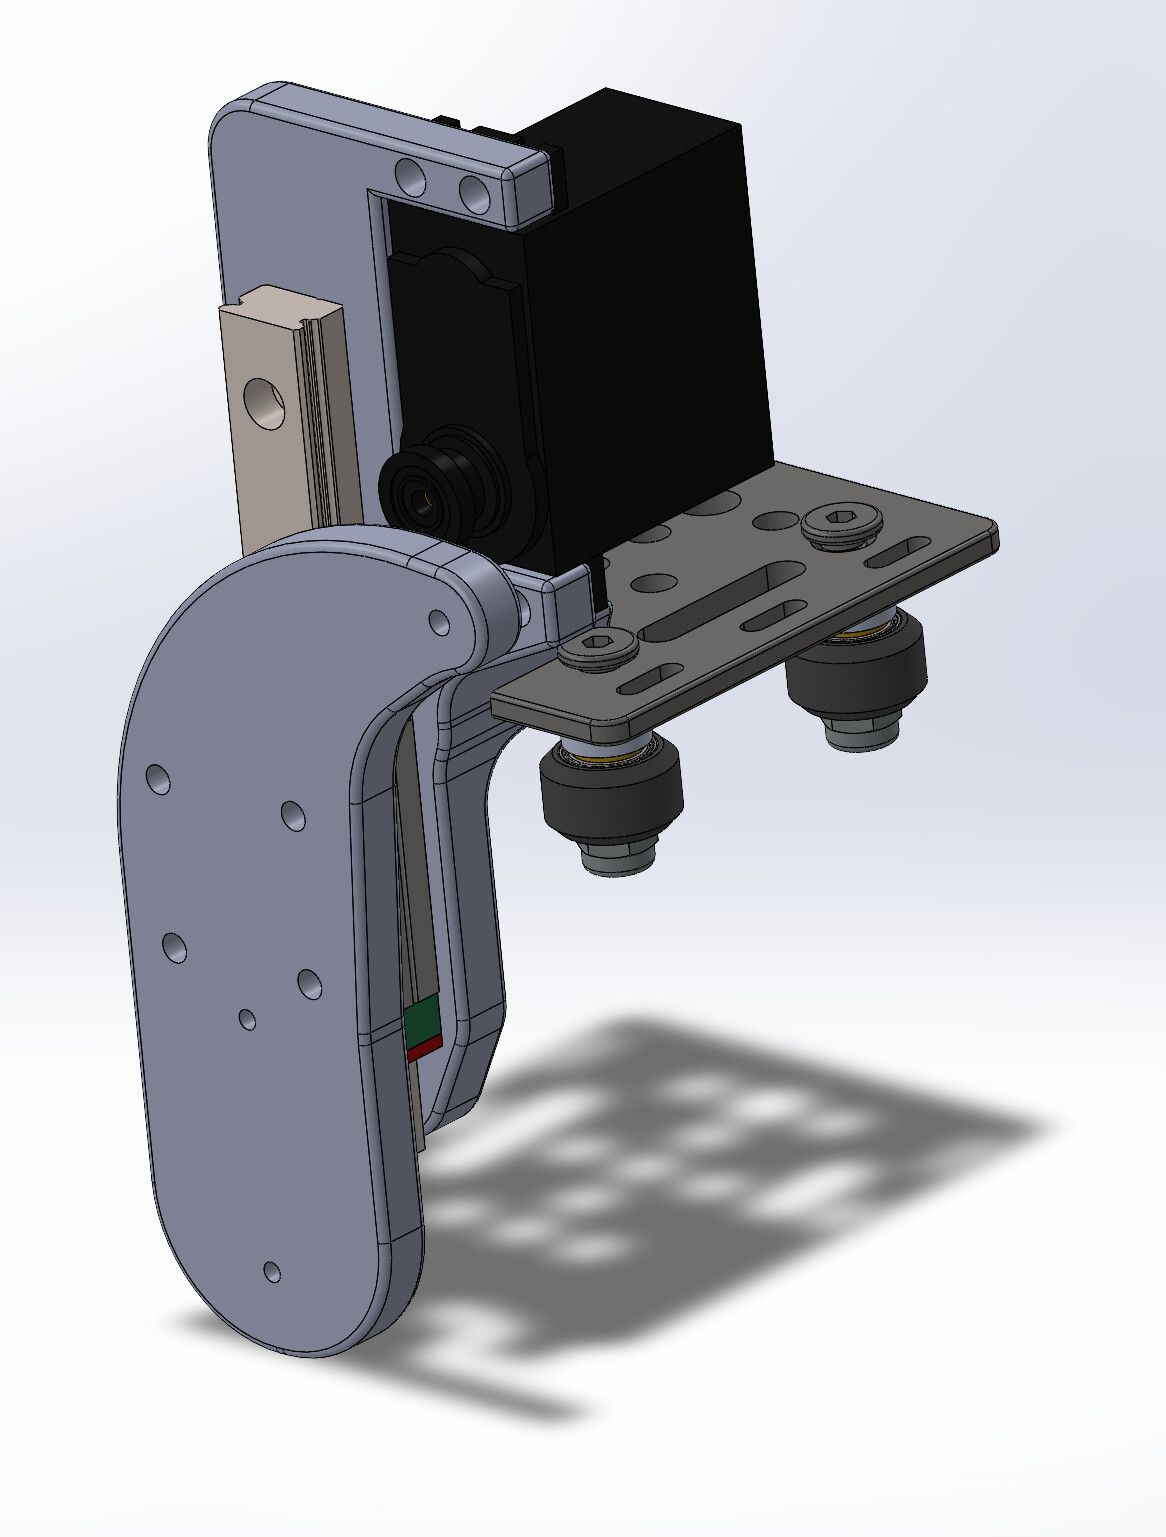
Hi all. I received all the remaining parts from China during the last 3 days. This morning I had a chance to mount all the pieces and also to modify and 3D print the new actuator plate.
Hi Ser Fabio,
I think I have bought the same machine and have the same issues. I am also using FluidNC and have the same stepper drivers but I am having issues with the pen lift and the motor speeds. I see that you ended up heavily modifying your machine from stock, did you ever end up with a functioning config file for the original setup? Have only just started playing around and this thread was the first thing I found.
Best,
Aidan
I messed up manually setting a new config file for the fluidNC. I added too many strange characters, so now I’m not able to delete the file, and its taking up space and I’m not able to upload a new file. I’ve tried reflashing the board, but the web installer is not able to reach boot mode. I have the MKS DLC32 v2.1. I’ve tried shorting GPIO0 and GND, which someone said is enabling boot. I used the .bat-based installer and fluidterm, but it only updated the firmware, it didn’t reflash. Sorry for this mess - I think the main culprit is the stupid file name: <sisteconfig.yaml>\ I’m not able to delete it, neither from terminal nor the webUI folder tool. What can I do?
I ended up with the huge change and sequent configuration. It was too time consuming to make it work with the original hardware and the performances were anyway not satisfying… I’m sorry but I don’t have any config to share apart from the one already in the thread
Hi man! Long time no see. I would proceed with the usb cable and try to flash from scratch using the utilities in the laster FluidNC build on Github. I recently updated to 3.7.1 and it seems to work. Did you tried it already?
Hi there! Yeah I did, but the old settings and files where still there. I find it difficult to understanding what is happening under the hood. There’s something about the fluidnc that is a little opaque to me…
Edit: I asked in the fluidNC Discord, and Bart himself reached out. A little embarassing… he told me to use install-fs.bat. A very obvious solution, when he points it out!!
I’m delighted to come across this topic because I’m struggling with a similar thing. My programming skills are quite basic.
I’ve already designed a plotter using a CNC shield. This is my third attempt at creating a plotter, and I’m satisfied at 80% (compared to 0% for the first and second attempts and 20% for the third). I would like to (once again) design another CNC.
Main modifications:
Larger size
More robust
Extreme usage (extended working hours)
Dual use: plotter and CNC laser
Standalone operation (without a PC)
In terms of design, I’m still working on it using Fusion 360. The current result:
I’m also stuck on the choice of the laser module; I’m still undecided.
My big problem is also the control board. I would like to switch to an MKS DLC32, but I don’t know if it’s possible to easily control both the plotter servo and the laser since this board is designed only for the laser.
I’m trying to follow your discussion, which is very interesting.
Hello Esloch. I would say that the MKS DLC32 is more than capable for you purposes. It can handle 3 independent steppers (silently) and also some servos plus the laser too. I would give it a shot
Hello Ser Fabio,
I am building a very similar open plotter to your system but of course not this much huge like a beast as you said (by the way: my respect sir).
I was wondering did you completely give up on running h-boat configuration with this board? And also if you are doing Cartesian configuration why do you need two separate y motor drivers, aren’t they both work simultaneously?
Thanks mate!
Yeah, I completely gave up cause with hbot it is not possible (afaik) to use the sensorless homing of tmc2209, and I really wanted to have it.
I am using cartesian and I decided to use double Y steppers cause it was easier, more reliable and cheaper to precisely control the movement on the Y axis. The machine is big with a single motor it is not possible to avoid and bending on the Y. I also use two separate drivers that home independently so always reach an accurate horizontal alignment. If you are careful enough btw you can use a single driver with two steppers in parallel (but I recommend not to).
That’s great reason for opting 2 y drivers thanks indeed . My setup is half size of your plotter. It’s A1 size, but I’m having difficulty running servo for the pen lifter without using fluidnc, because fluidnc disables the tft screen that came with my mks dlc32 and I want to have that working. Sensorless homing is not priority for me . Any advise would be highly appreciated for running that digital servo as pen lifter
This website says it is possible to use a small screen with FluidNC. This allows you to display important information, such as the IP address of the board, and the current position of the X, Y, and Z axes. Interesting, no !!??
Hi Ser Fabio.
I complete,y gave up on hbot as well , Cartesian all the way , no more tft screen when the web interface is more than enough. Now i appreciate sensorless homing more. Basically I will do exactly same as your setup with two separate y drivers and servo pen lifter . Can you please help by providing the wiring diagram of your setup mate ?