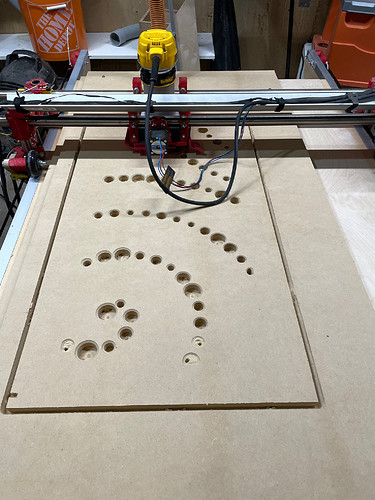
TL,DR: I learned after a year of ownership that you can change bits easily by removing the whole DeWalt 611 router cylinder from the top first. Turns out that’s a lot easier than doing it from below while the router is mounted in the LowRider gantry. 
Long version: I built my LowRider2 a year ago, using a DeWalt 611 router. I’ve done full-depth cuts, explored compression vs upcut bits in melamine, tried out v-carving for signs, … basically had a lot of fun. There were a couple of ideas I always put off though, because they required a bit change while keeping everything registered. In my mind, that involved pausing, raising up the gantry a lot to access the router collet, wrenching off the collet without moving the gantry, sliding the new bit in… generally a hassle with a high chance of ruining the job.
I was today years old when I when I learned you can just slide the whole router out of a DeWalt 611 casing from the top. Amazingly, you can then change the bit in complete comfort, without messing up your gantry position at all.  Thanks to a fellow LowRider owner: I was YouTubing and stumbled on David Peterson’s CNC demo with a tool change, and he just did that swap as casual as could be.
(In my defence, I’ve only ever owned routers with a fixed casing, and when I was building my LowRider I was stressed about all the other build challenges so the DeWalt’s removable design wasn’t top of my mind.)
So I have now tried my first simple tool change and was able to get lovely accuracy on some multi-bit cuts:
- holes (spiral upcut), followed by
- chamfers (V bit)
And it was easy! 

