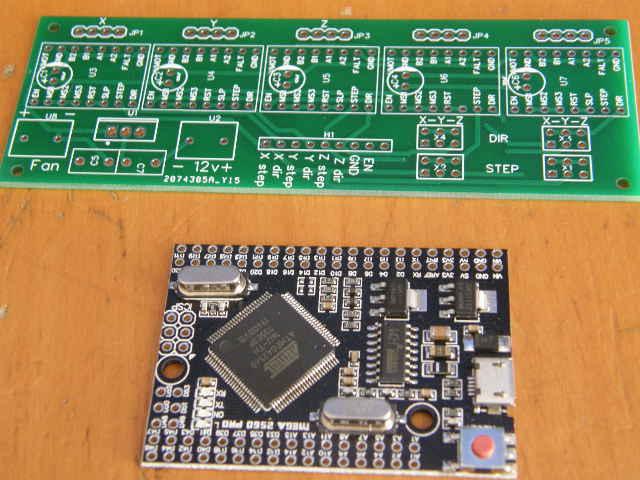
The obvious answer would be you can use a Nano and a cncshield!. anything that utilises the 328p uP would work with vanilla GRBL, I have built a controller using one of the newer Mega2560Pro boards and a separate 5 stepper board of my own design
It runs 1.1f with a mega2560 cpu_map. The unos are getting more expensive and the cncshield didn’t have enough stepper drivers for the LR2.
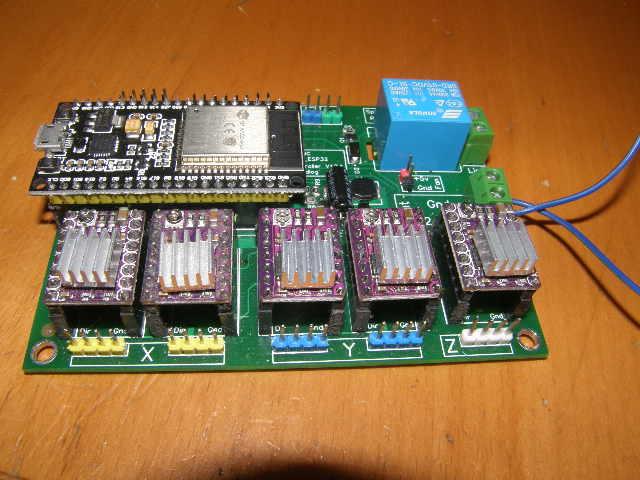
You can also use one of Bart Drings ESP32 boards
or one of the offerings from Arduinoclub.de
All run some form of GRBL (or in the Arduinoclub board’s case firmware for EstlCam which has the same functionality as GRBL)
As you can see you are not limited to just one board with GRBL as some profess.
I was referring to the CH340 chip that seems to not always connect 1st time with the v1pi installation which was discussed v1pi thread about 12 days ago.
Oh, that’s right. I guess I see that as just a Nano problem… and since Nano’s are inexpensive and I have quite a number of spares from different vendors, I’ve just swapped them out until I find one that acts right…
I run with motors in series with all these little controller boards and they do fine. I do prefer the DRV drivers though… they just seem a bit more robust; i.e. I’ve killed fewer of them than the A4988’s
It also affects ESP32’s (in my experience)…so not just a nano thing! You could go buy an actual genuine Nano Dave and enjoy the FTDI serial chip…but they are TEN TIMES the price of a counterfeit one! (especially if you have amazons markup on top!)
I simply meant that a plug-in Nano can be swapped on any of the little controller boards I have and have recommended to other folks; i.e. the boards themselves are not usually the issue. I rarely dabble with new stuff, preferring most times to work out of my stash/junk box when possible, so I don’t have experience with any of the newer, fancier, boards and features… so I must defer to you and your experience on that.
Sure David…it is just these controllers with CH340 serial controllers seem to be a bit iffy…either them or their drivers I am not sure. Certainly the one I had on the ESP32…strike that… the TWO I had with the CH340 controllers did not initialise properly using the wifi serial but worked fine via wifi if you connected the wired serial as well at initialisation. The price you pay for trying to do stuff on the cheap.
I was looking for JST 3pin cables to connect to the laser control on the Eleksmaker board & splice it to the cable that came with the laser. I could not find one with those search perimeters, but after having a hard cider it occurred to me, some limit switch boards come with these. Here is one for $0.85 with a 1meter wire that would be perfect. That is if the picture matches the part, but seems to be as reviewers have photos of their received part.
For future reference, does anyone know what kind of connector it is on the laser end. It does not match the 4 pin JST connectors I have, so it is not that.
The connectors you probably have are called JST-XH, they have a pitch of 2.5mm, they are most commonly used in Li-Po battery balance leads. The connector on the Neje laser modules are called JSH-PH and have a 2mm pitch, so they are practically the same…just a different size (and are a b**** to crimp…better to buy pigtails) https://en.wikipedia.org/wiki/JST_connector
Thanks for the info & links. The 3 wire connection was for the eleksmaker mana board end and not the laser end, but will get some of the JST-PH 4 wire pigtails so I don’t have to cut the wires that came with the laser. I prefer not to crimp those connectors either as I don’t always get it right on the 1st crimp.
I bought a couple of connector kits off aliexpress for a few dollors, 2 and 2.5mm pitch, that way you can fit the 3 wires into a 4 way female block so it fits the laser properly and there is zero risk of inserting the plug offset one pin. This type of purchase is never wasted money as you will always need odd connectors at some time.
Since we had a rainy day today, I put all the files together on thingiverse located: https://www.thingiverse.com/thing:4605853
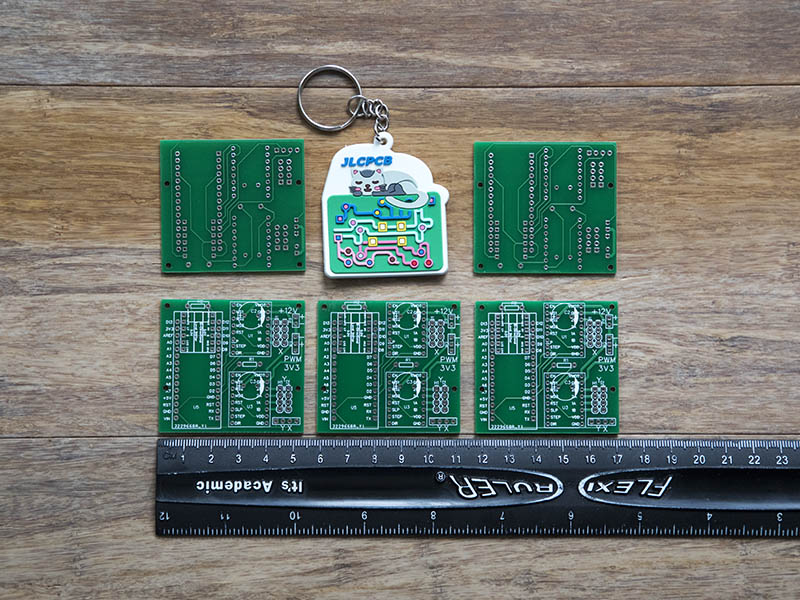
I received my custom PCBs on Tuesday. It took 1 day shy of 2 weeks to get here. I am still waiting on the parts to populate the board with. They even included a cute PCB key ring with it.
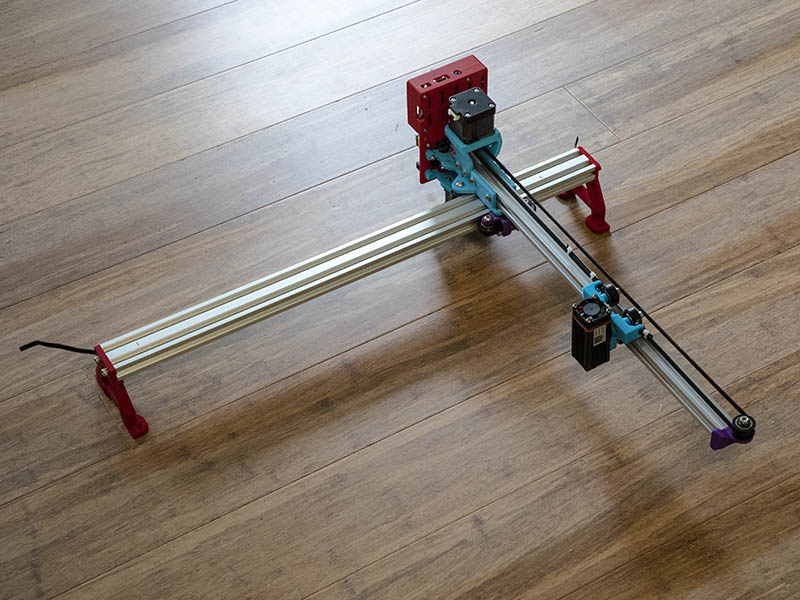
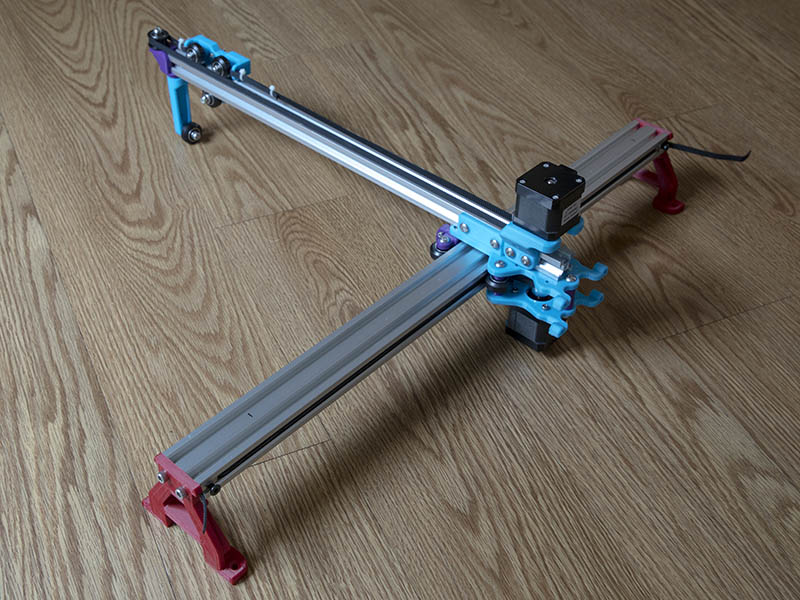
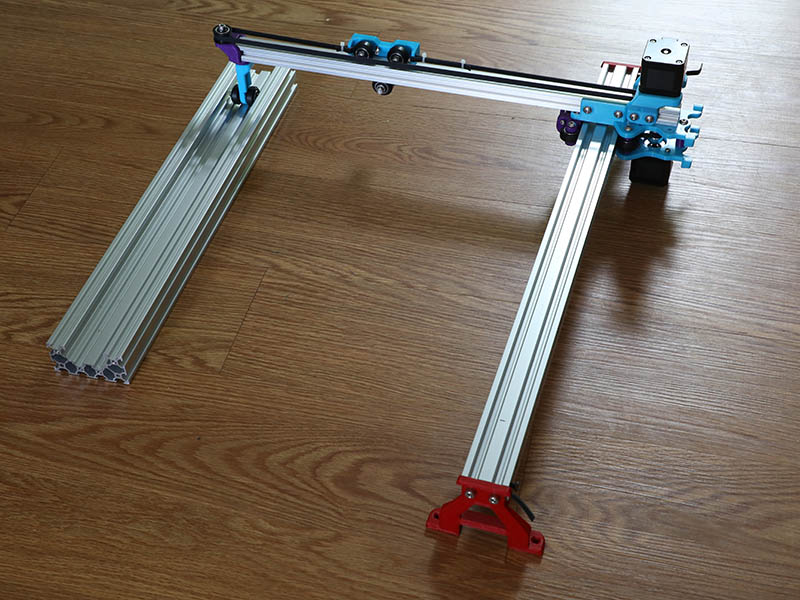
Here is the engraver all put together except for the wiring. Moving the laser carriage around manually near the end, the 500mm length I have maybe a little far for the cantilever, but will see when I actually test it.
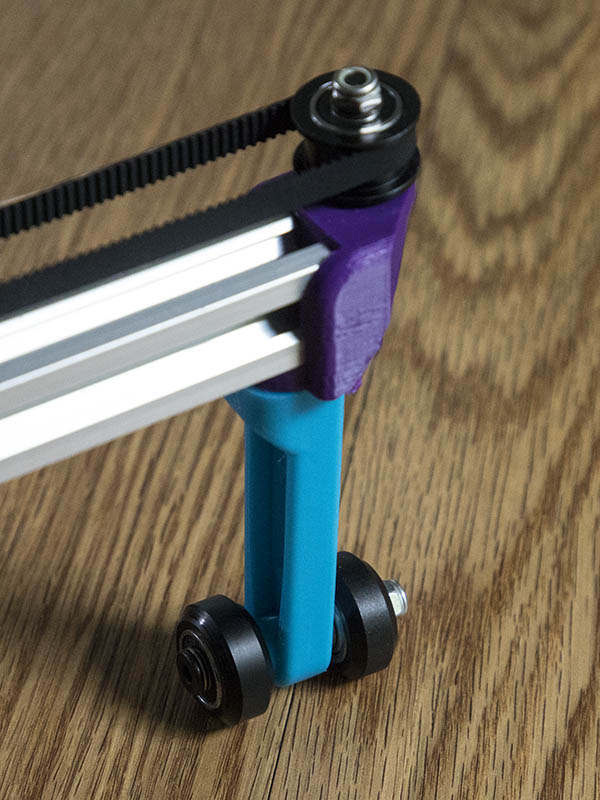
I decided to add a part at the end of the cantilever to give it support & it feels a lot better now. I am using a M5x20mm to connect this Idler part & 2020 & a M5x30mm screw, washer & Locknut for the wheel. This is similar to the idea on https://www.thingiverse.com/thing:3951161 & think this was mentioned earlier in this thread. I was also going to try 2 wheels spaced about 32mm apart, but the one wheel feels adequate. Here are a couple of photos. Guess this is not really cantilevered anymore. Kind of reminds me of the wheel on the front a jet plane.
Since I had a M5x45mm screw, I added another wheel to the other side & think I like this better. I also added a 3mm M5 shim at other side of plastic & a precision shim to other side of 2nd wheel. And I didn’t have to print another part.
Thanks for the advice. I did actually think of that since I ran into the same problems with dust on the rolling plotter wheels. I had another wild idea while thinking of this further. This gets further away from the cantilever design. Since this was simple idea to explore, I made the wheel spacing the same for riding on inside of a C-Beam or 2040 extrusion. My thought on using the C-Beam (I have a spare 500mm length) is the wall would help keep any dust from burn away from the wheels. I Shortened the distance of wheel offset from 2020 extrusion by 17.9mm. Checking dimensions of an openbuild plate that seemed like the correct amount. The C-Beam or 2040 would probably have to be fastened to work surface. Here is what that idea looks like.
I did some more searching for custom circuit boards on easyeda & these looked pretty interesting if someone want to take a look at them. I used the search string “cnc” to find these. I don’t know enough about these to tell how good or if they work, but was interesting to browse thru this site. The 1st two links I thought were interesting in that they were designed to be used with a MPCNC.