Canbus or Davebus?

I hope this is the right topic for this, if not, please feel free to move it!

I got interested some time ago in canbus and went through the motions of setting up my V4 printer. It was brutal to get it going and in the end, it didn’t give me the flexibility I was looking for.

There were a few requirements I felt I absolutely needed in a bus type system for my printer:

  1. It had to be easy to use and not require more than one mcu to run/flash/update.
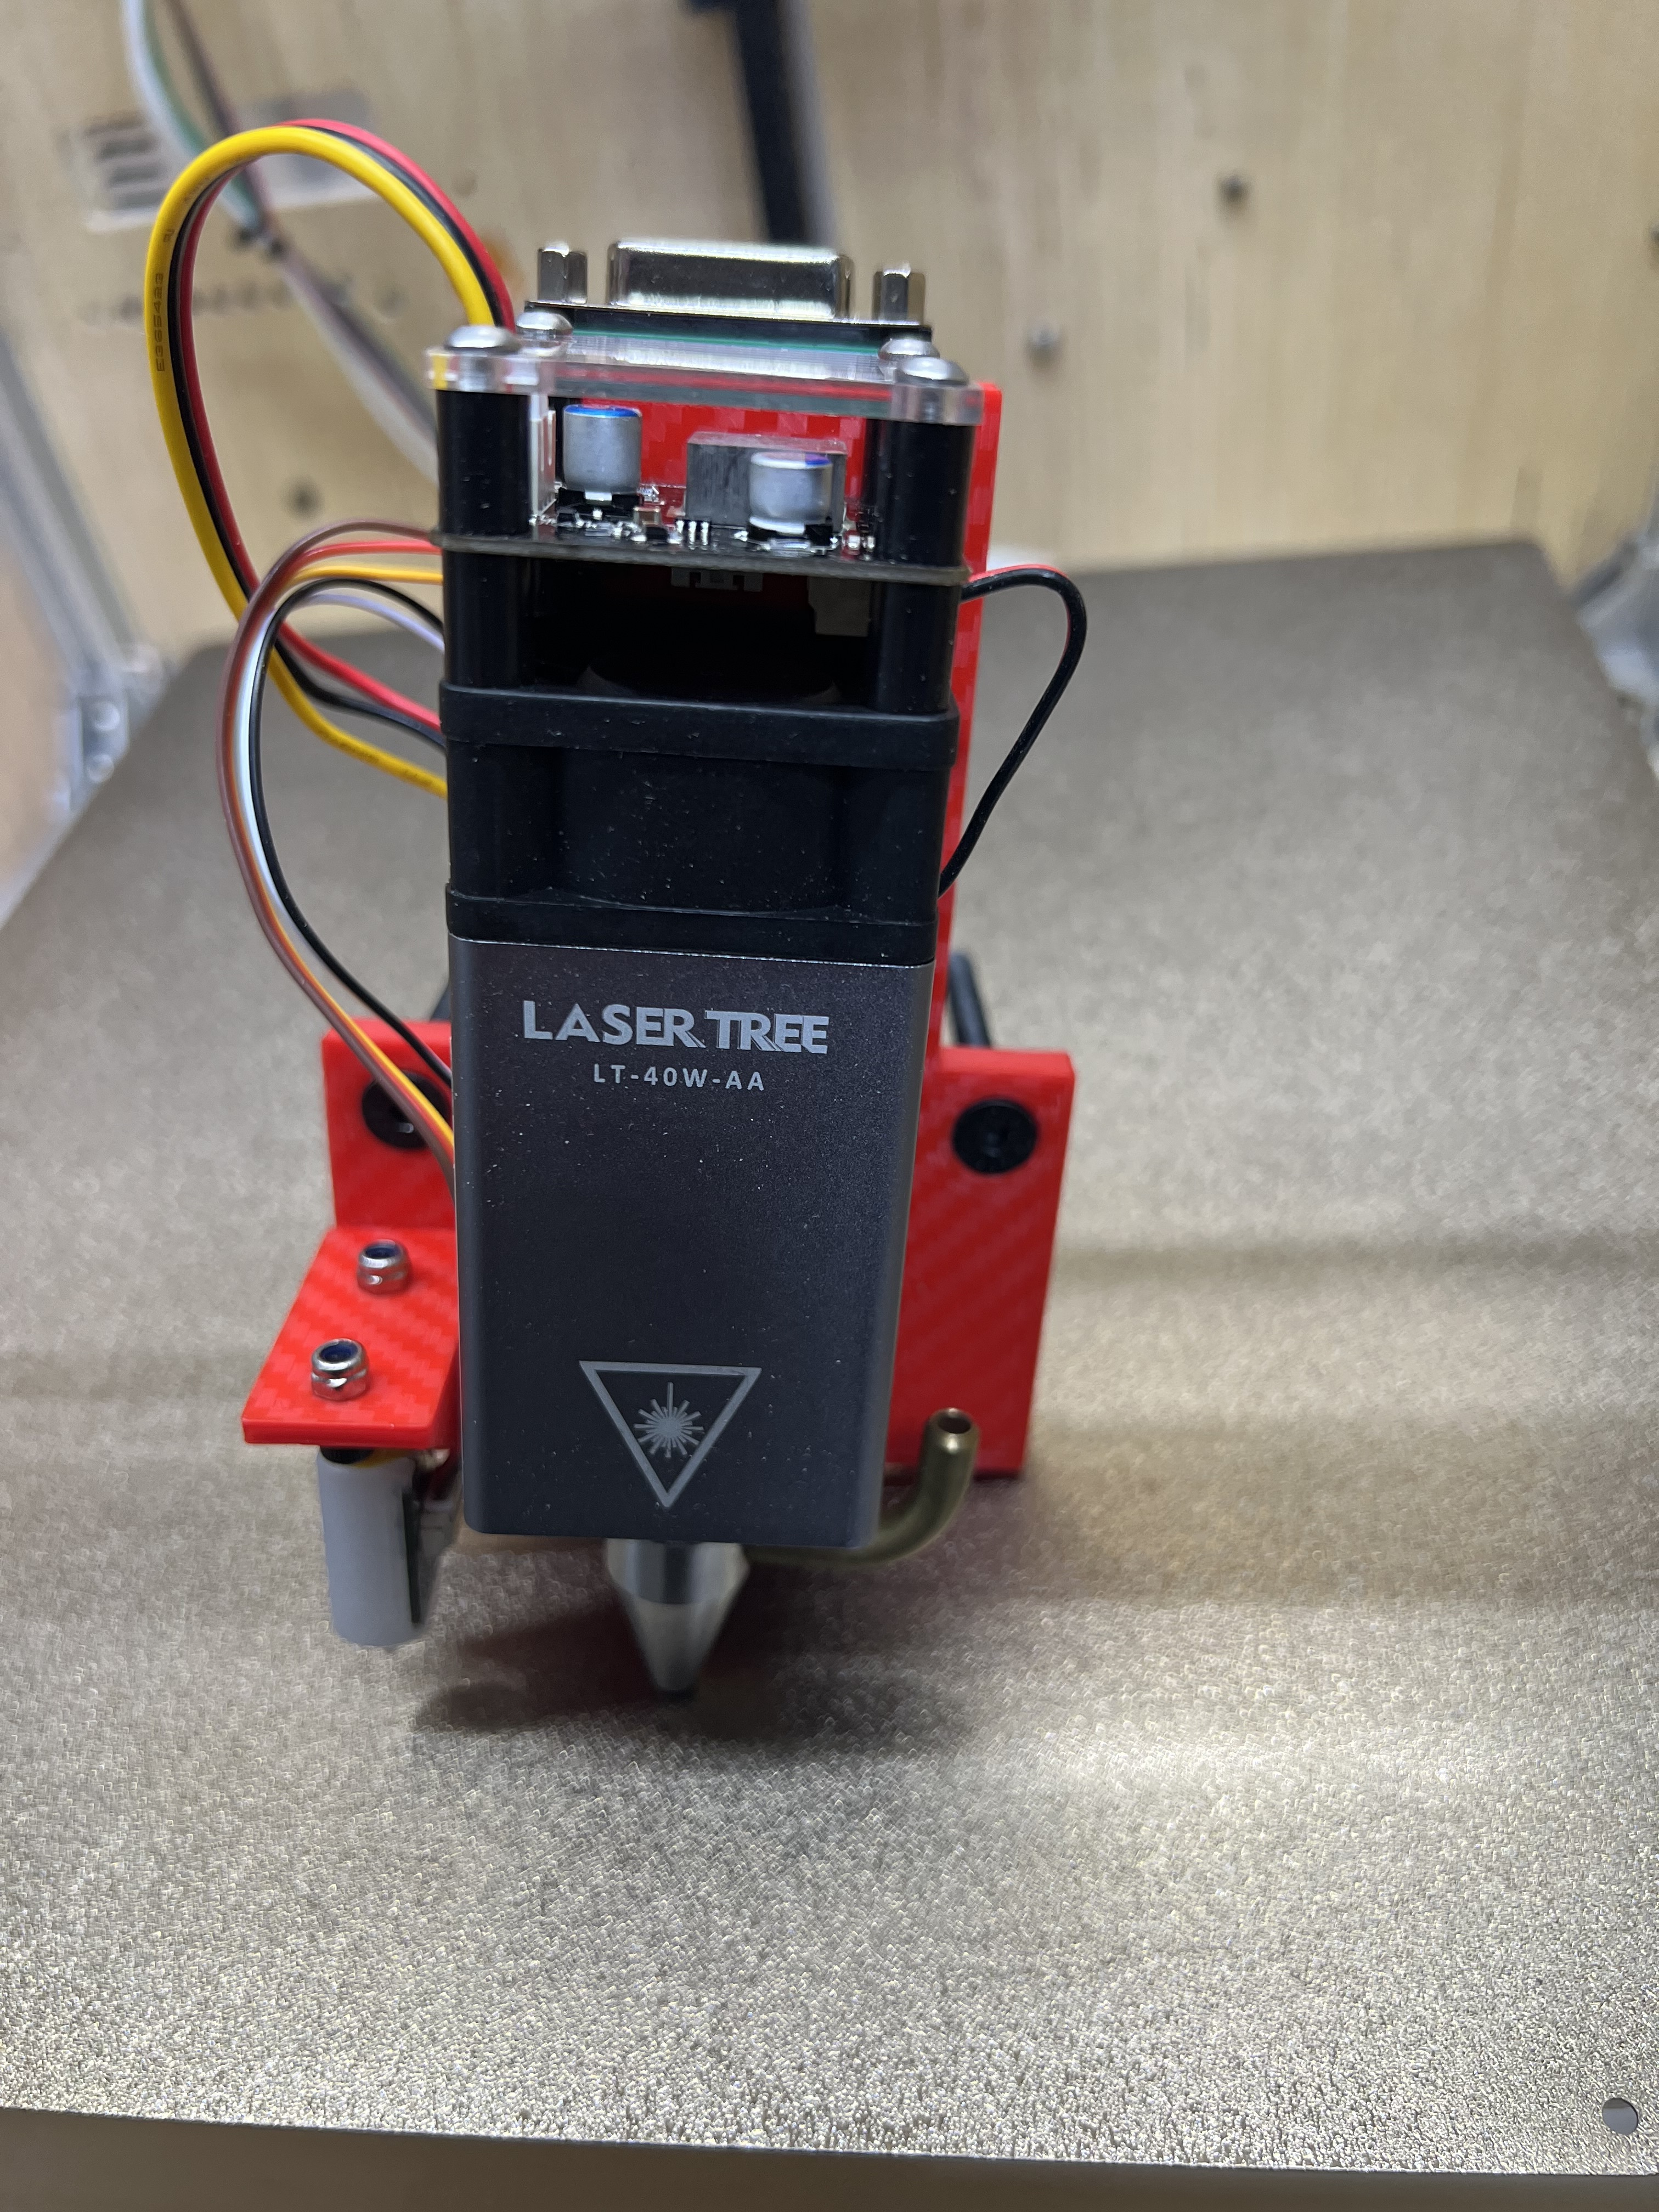
  2. I wanted some kind of tool changing ability for ease of maintenance and to be able to switch to a laser on any of my machines.
  3. I had to be able to draw new/remix/use existing parts for MP3DP without having to build anything crazy.
  4. No more than one cable going to the x-carriage.
  5. Connections had to be super easy.
  6. No other changes required to the MP3DP other than at the x-carriage.

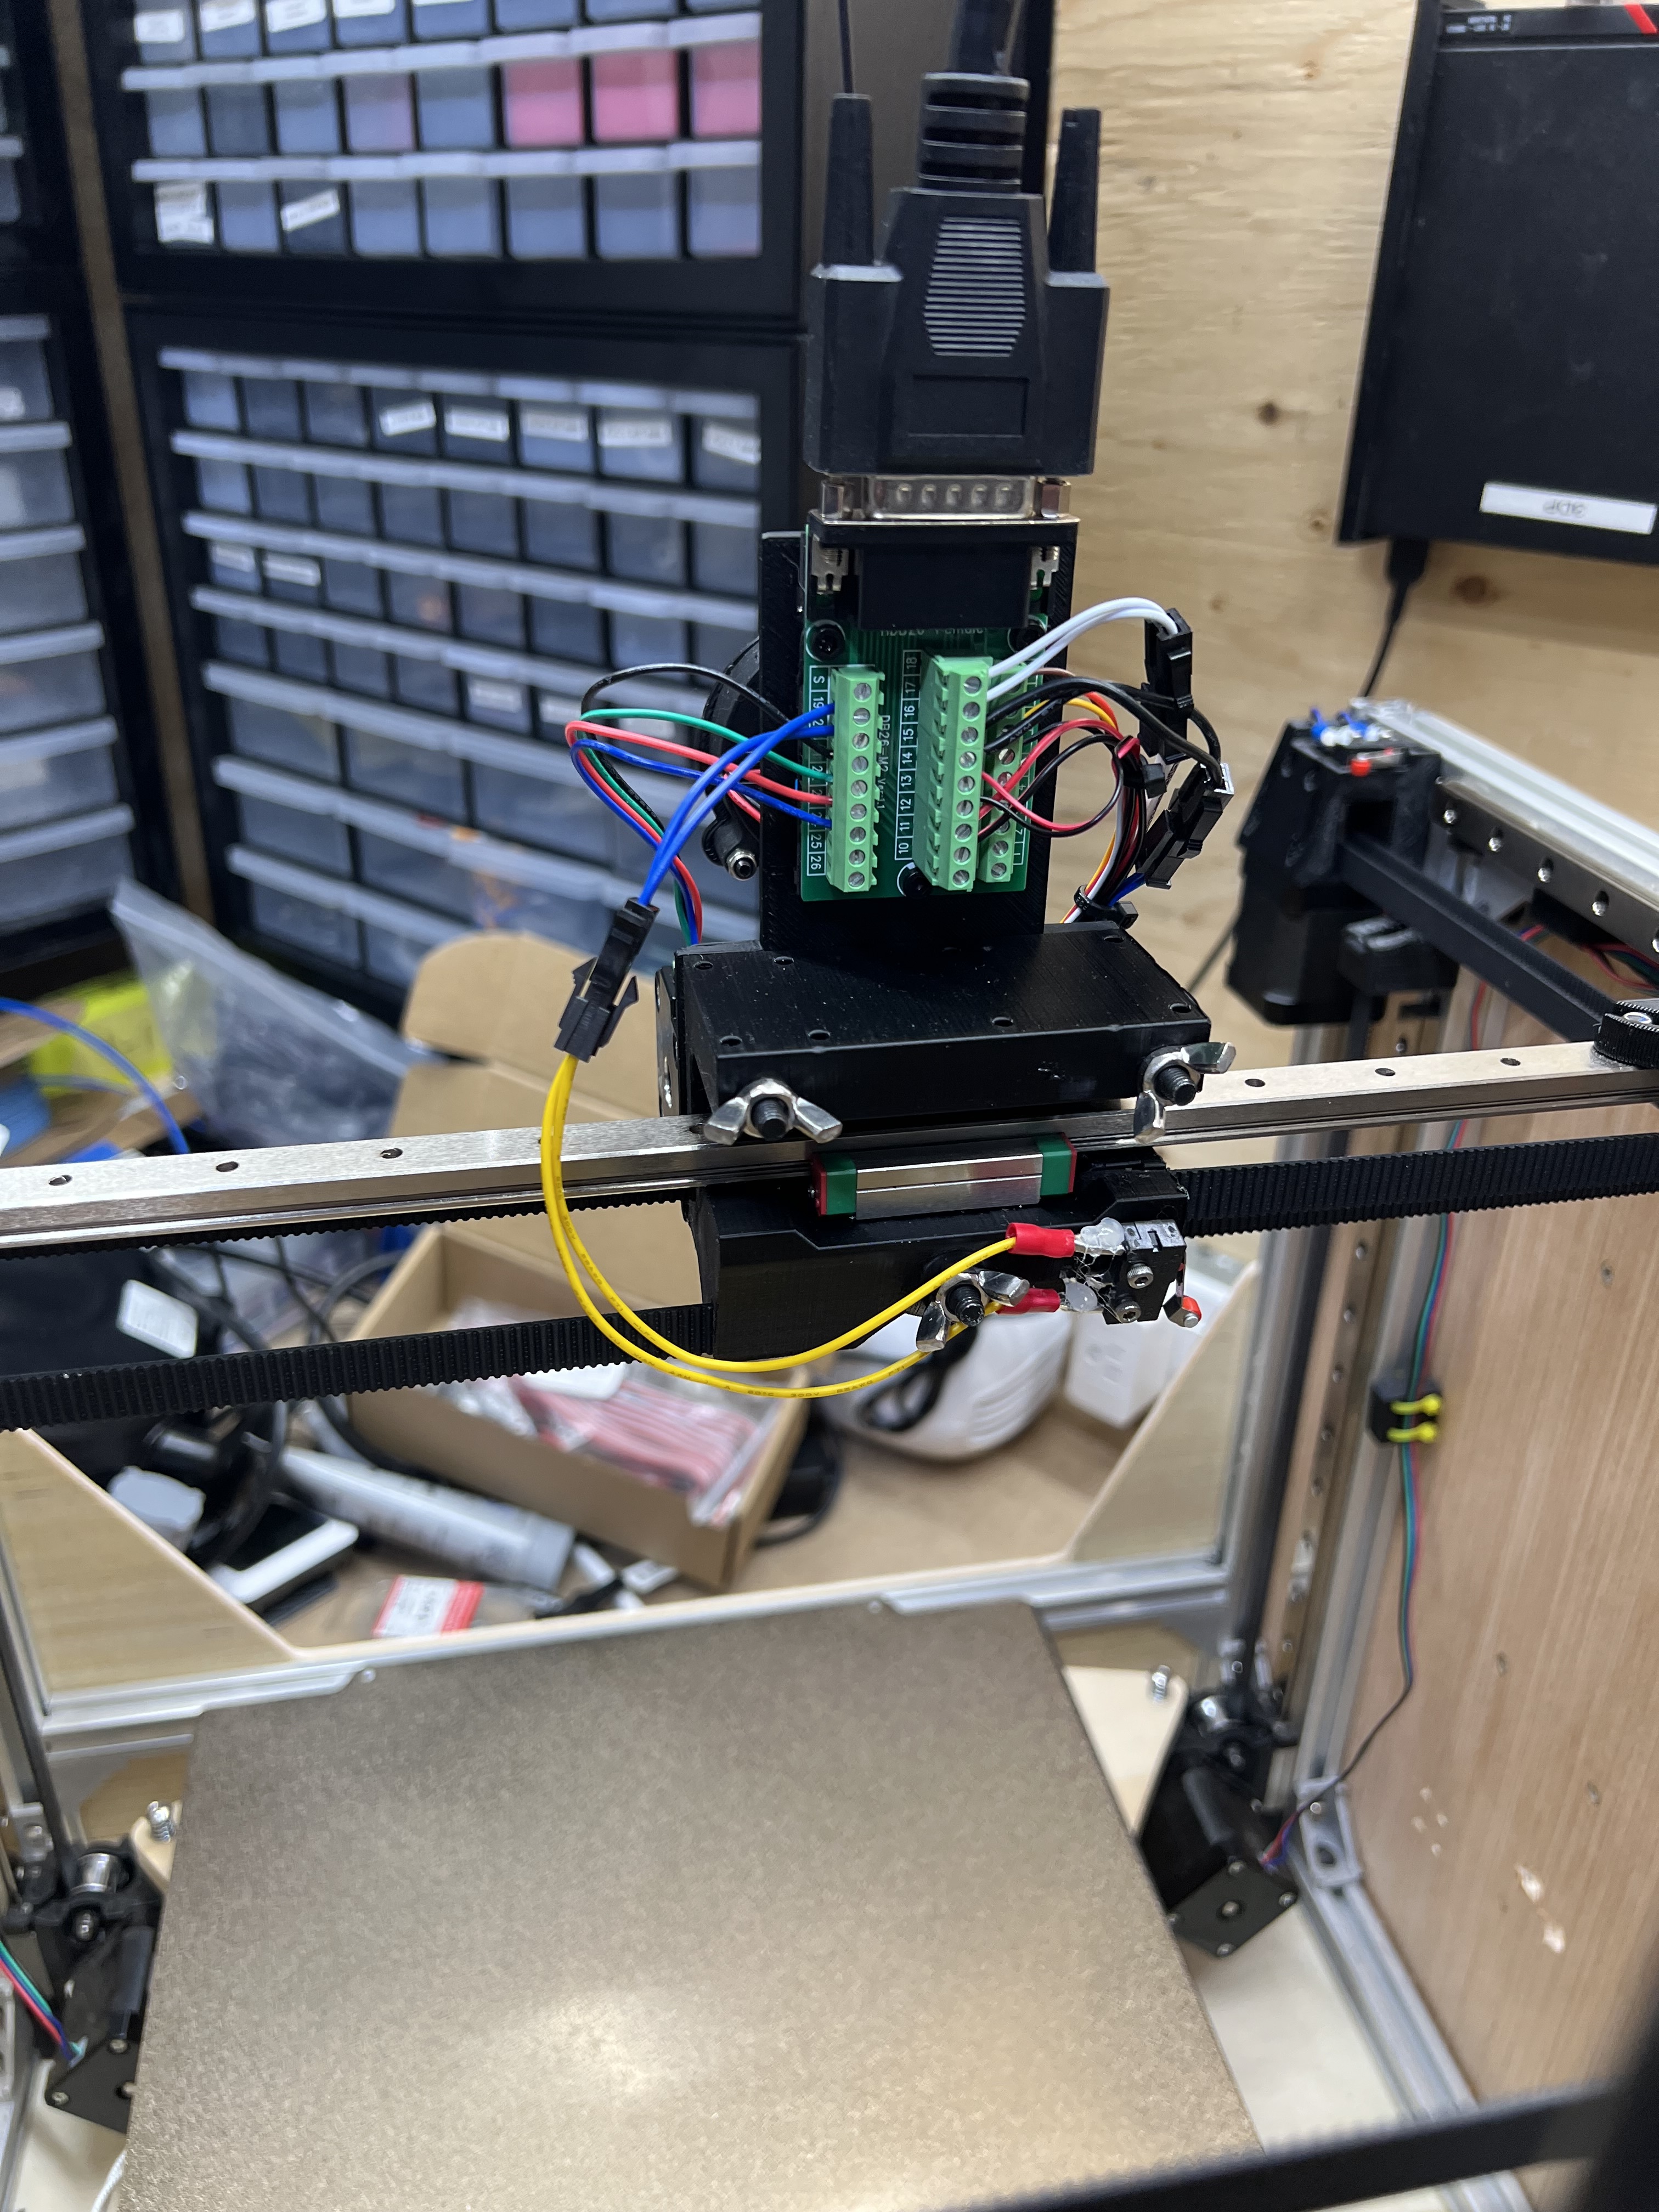
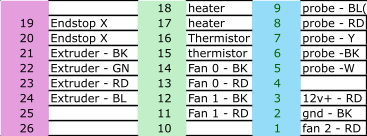
When I counted up the number of wires that need to go to the printhead, I came up with 19 for the 3D printer and another three for my laser including a 12v power supply, ground and pwm for a total of 22.

Enter - Davebus™

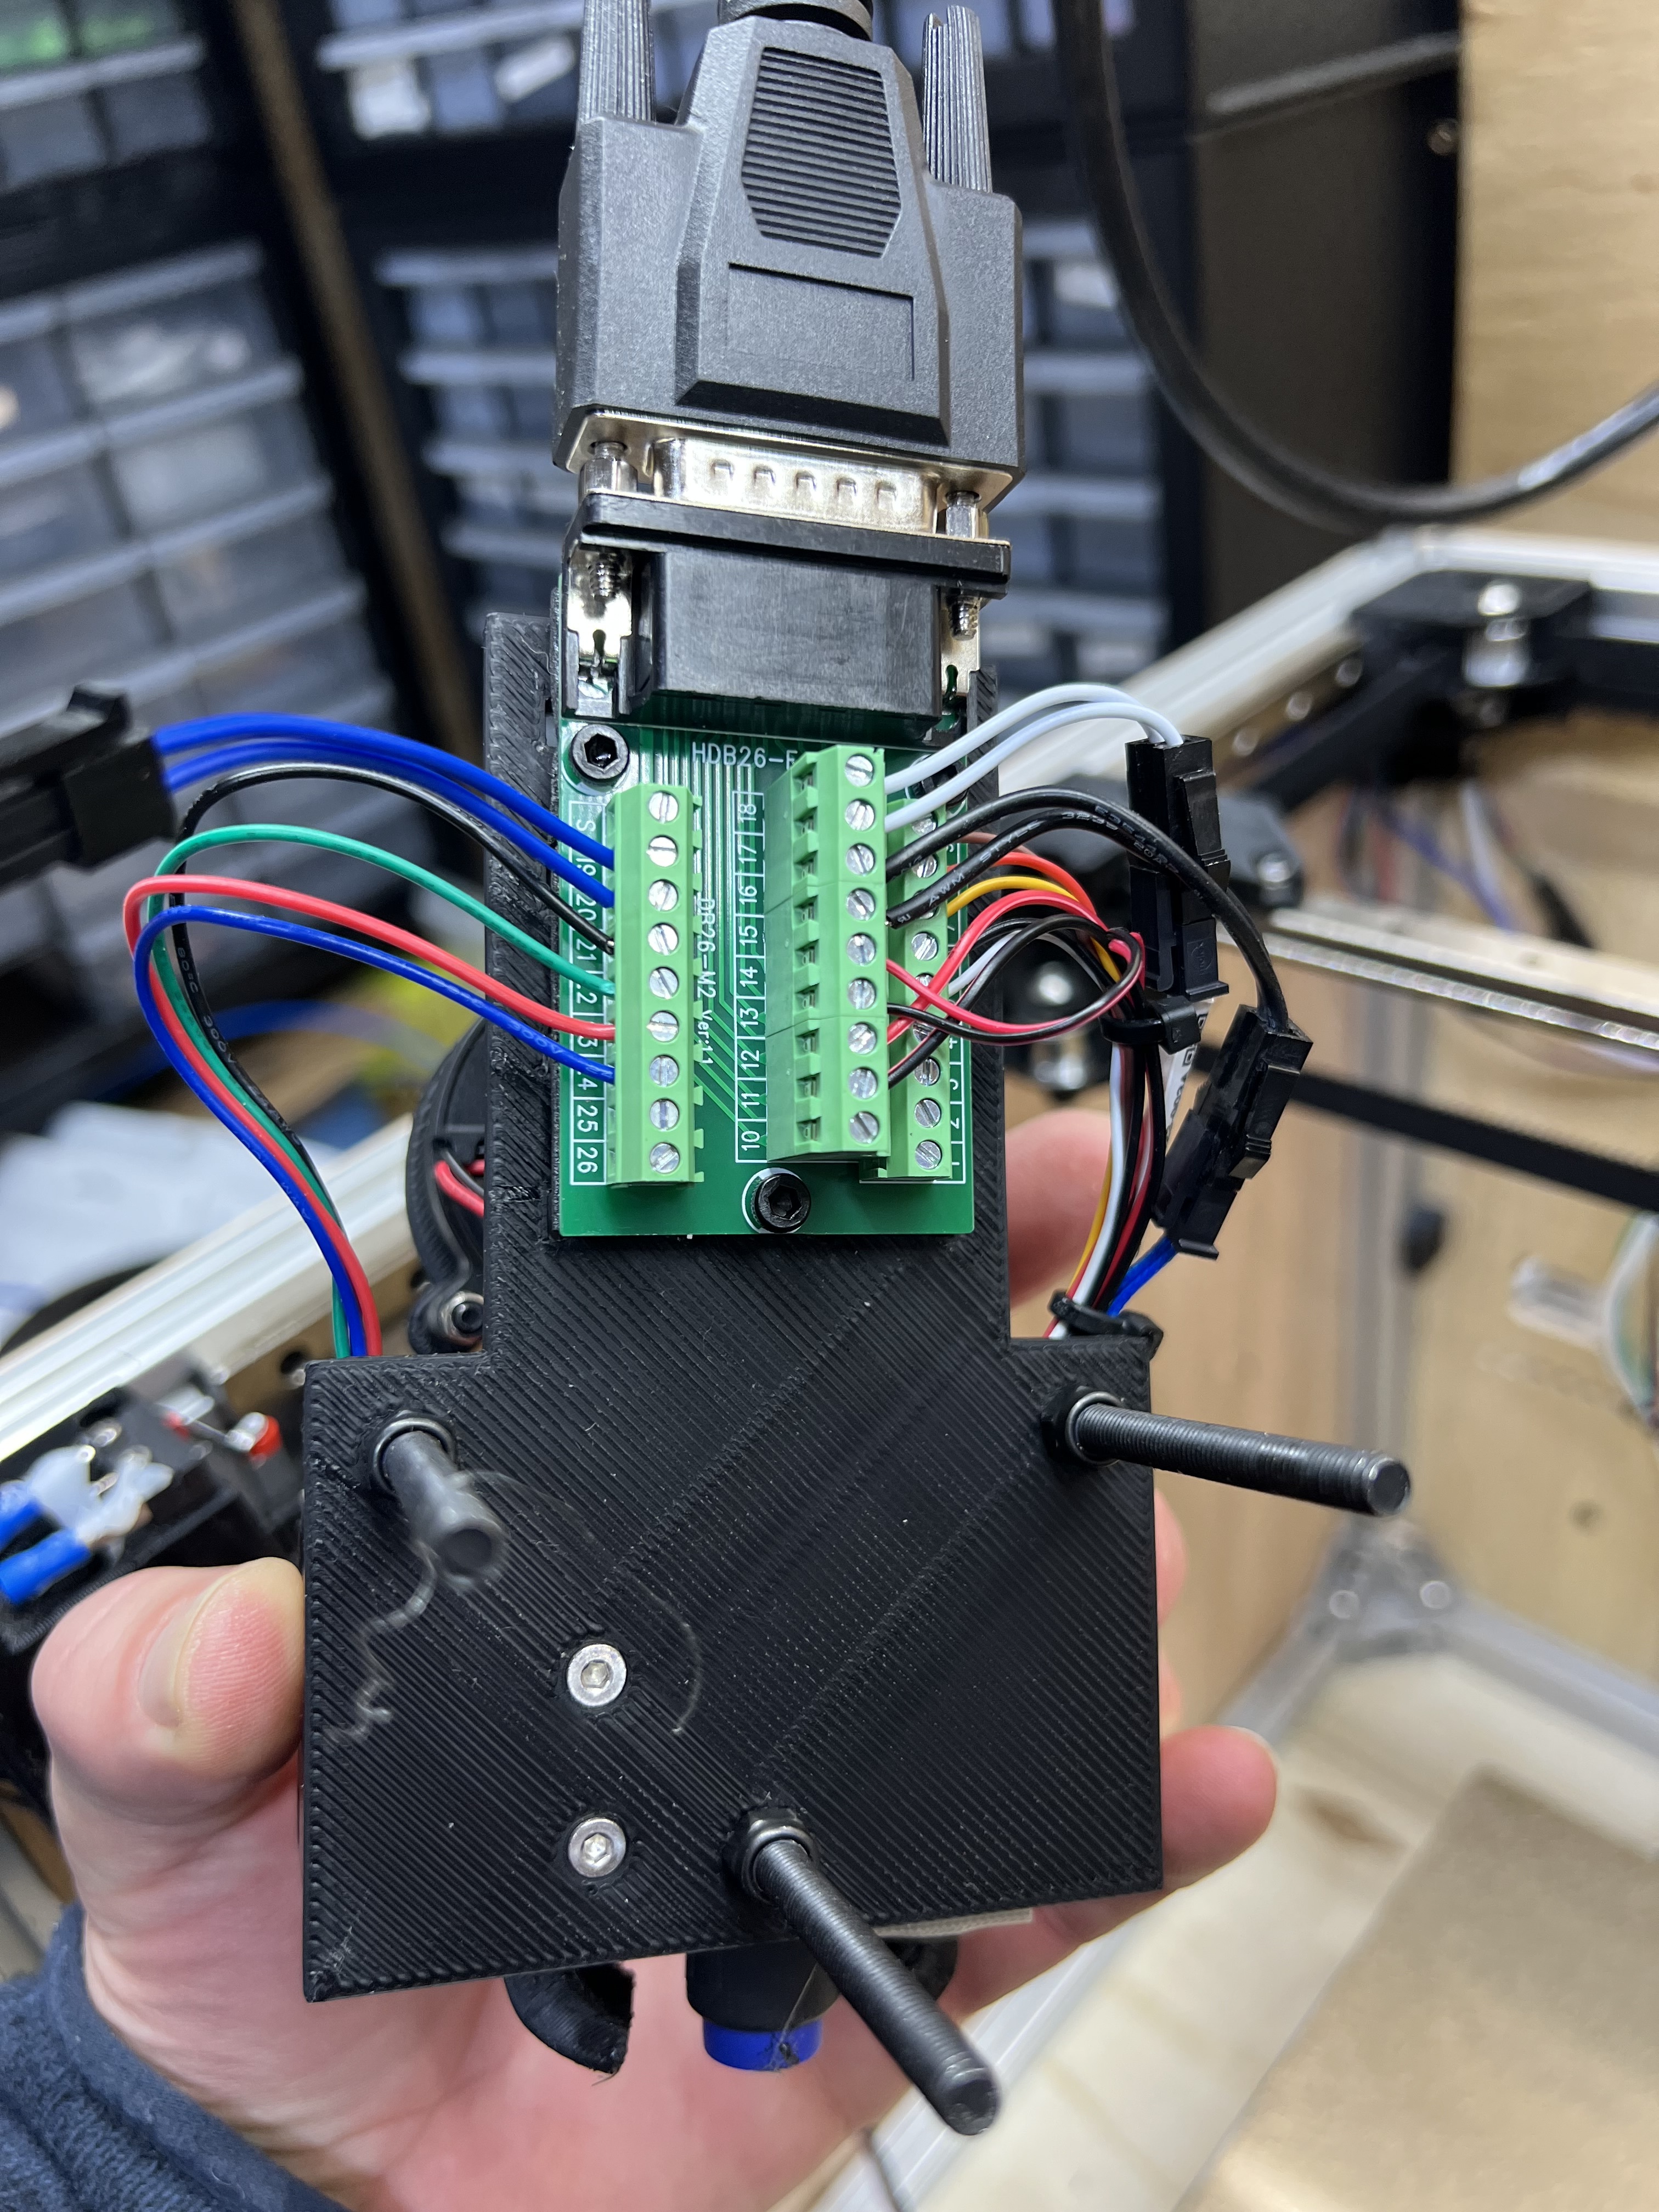
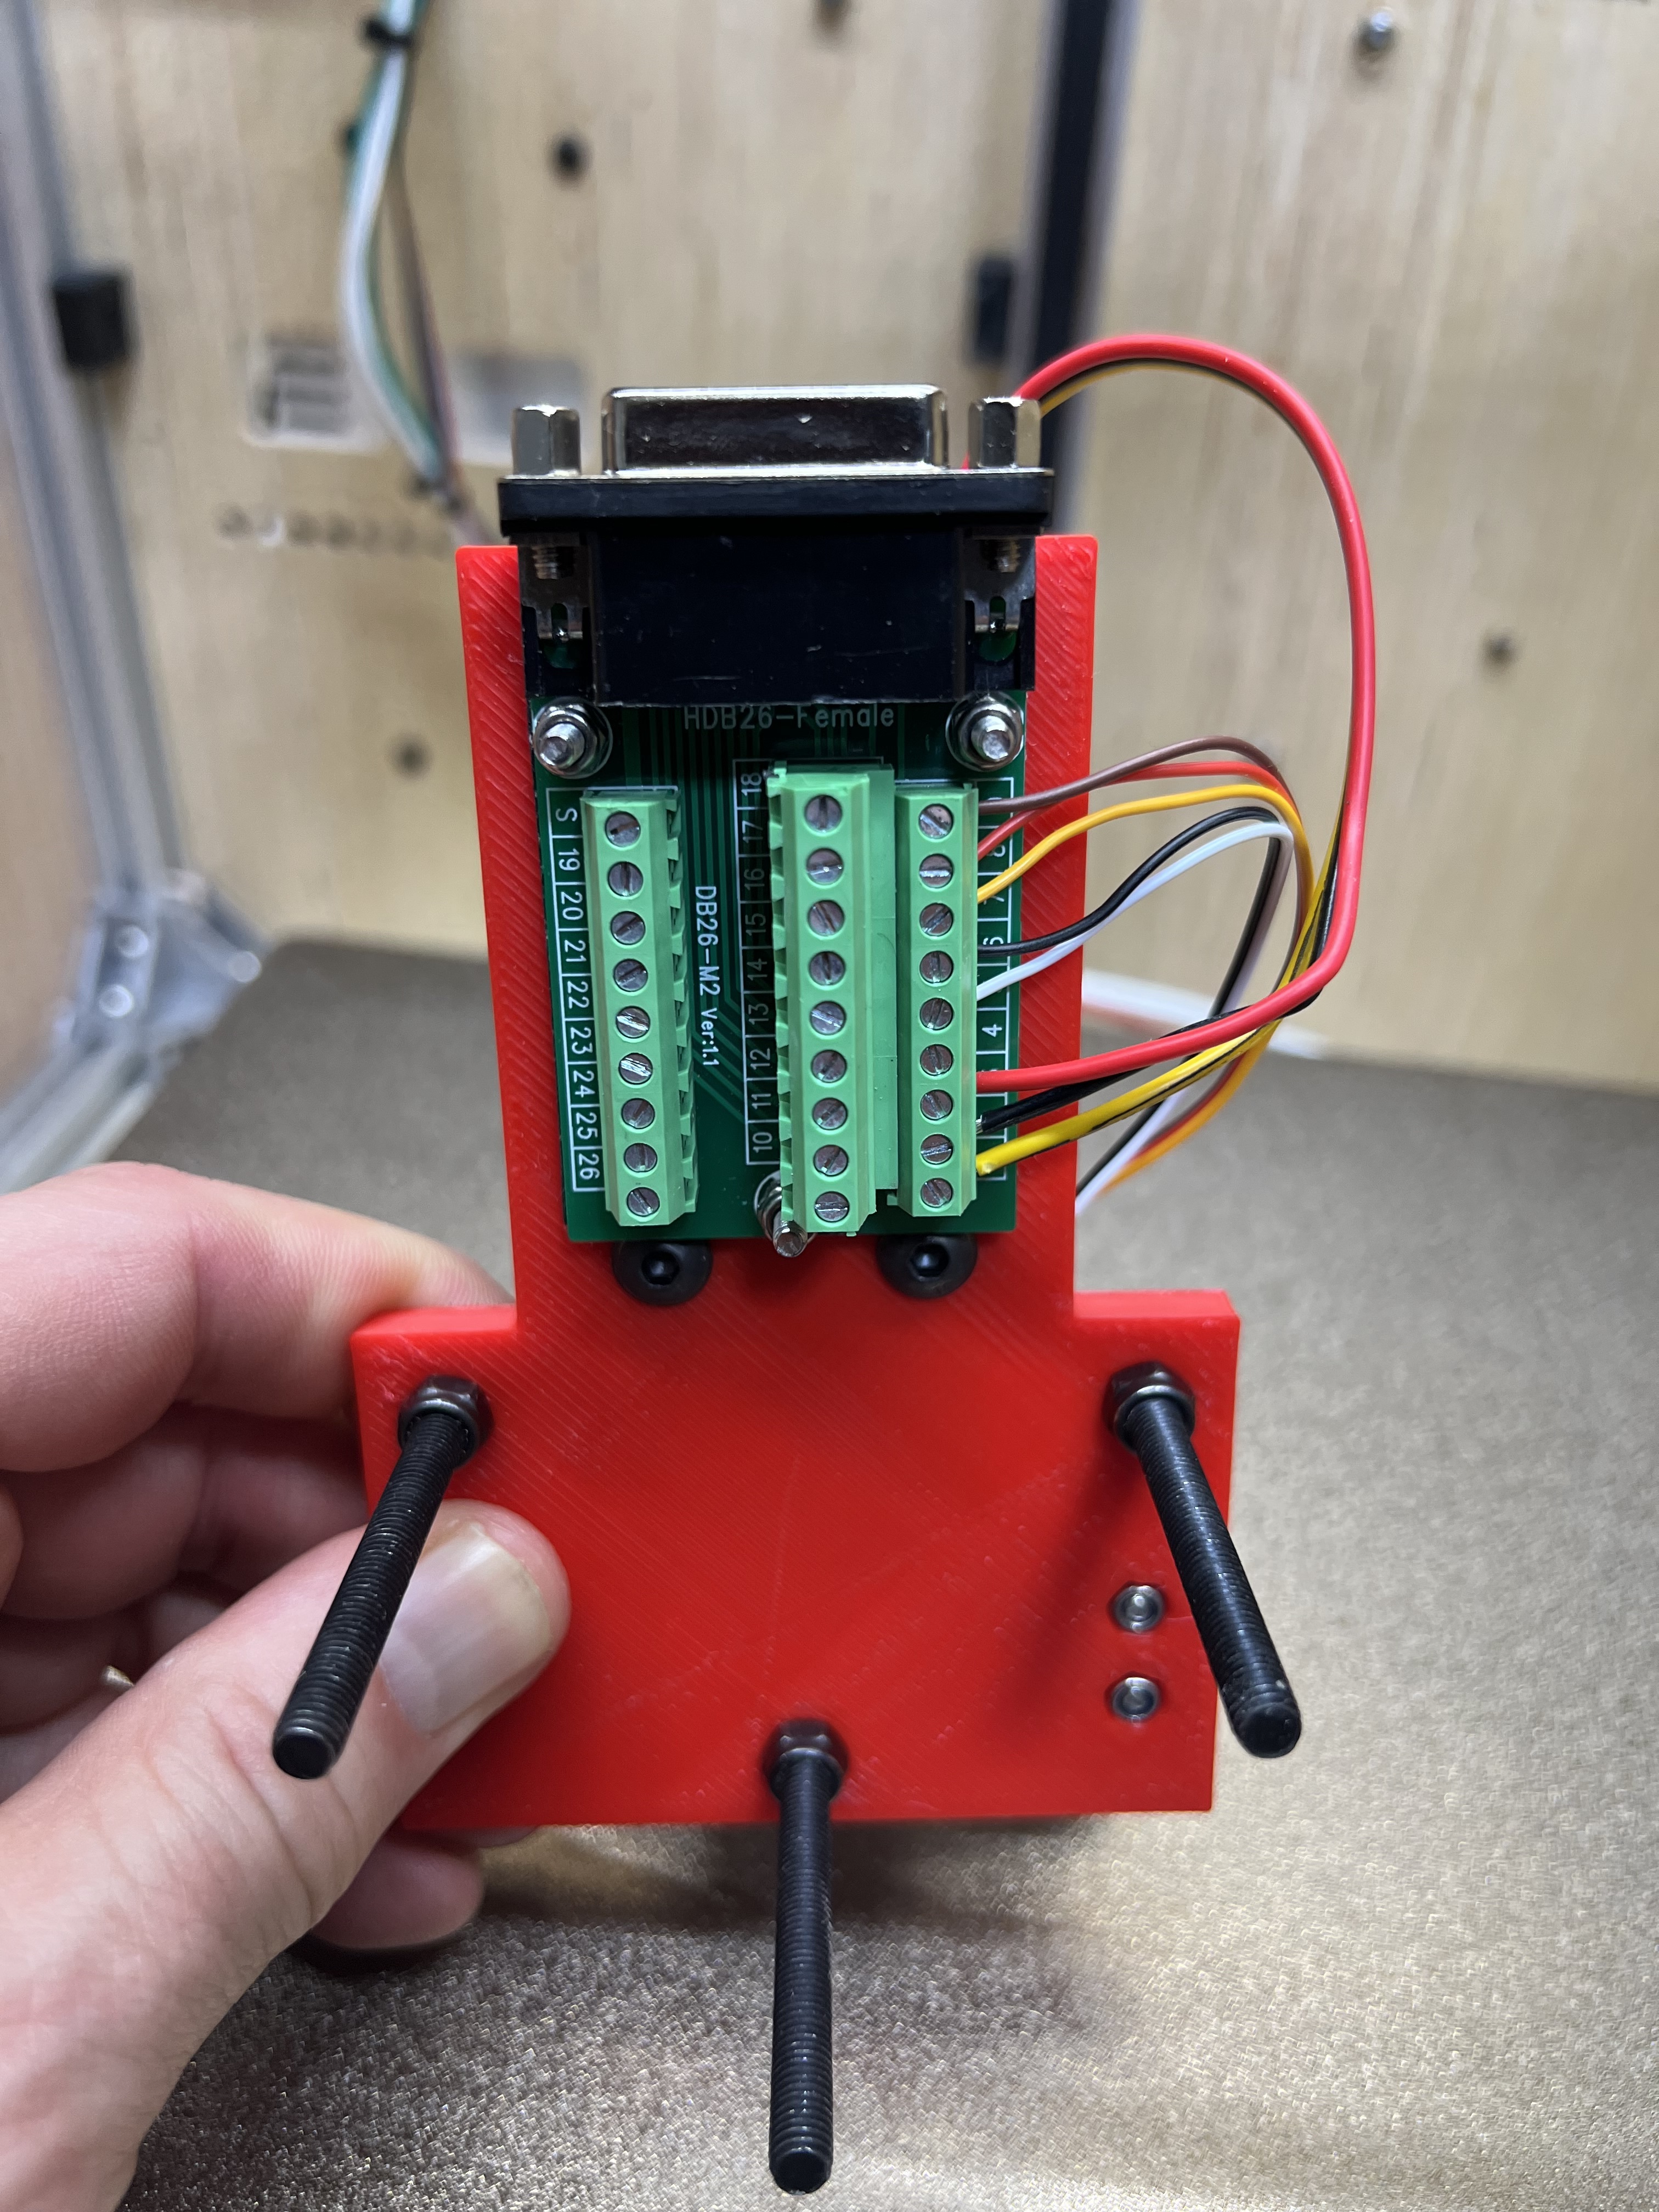
First - I looked for a bundle of wires that came to at least 22. After using RJ45 breakout boards on my LR3 I looked around for a suitable board and cable for this. I decided on the DB26, that would give me what I needed plus 4 other wires for future use.

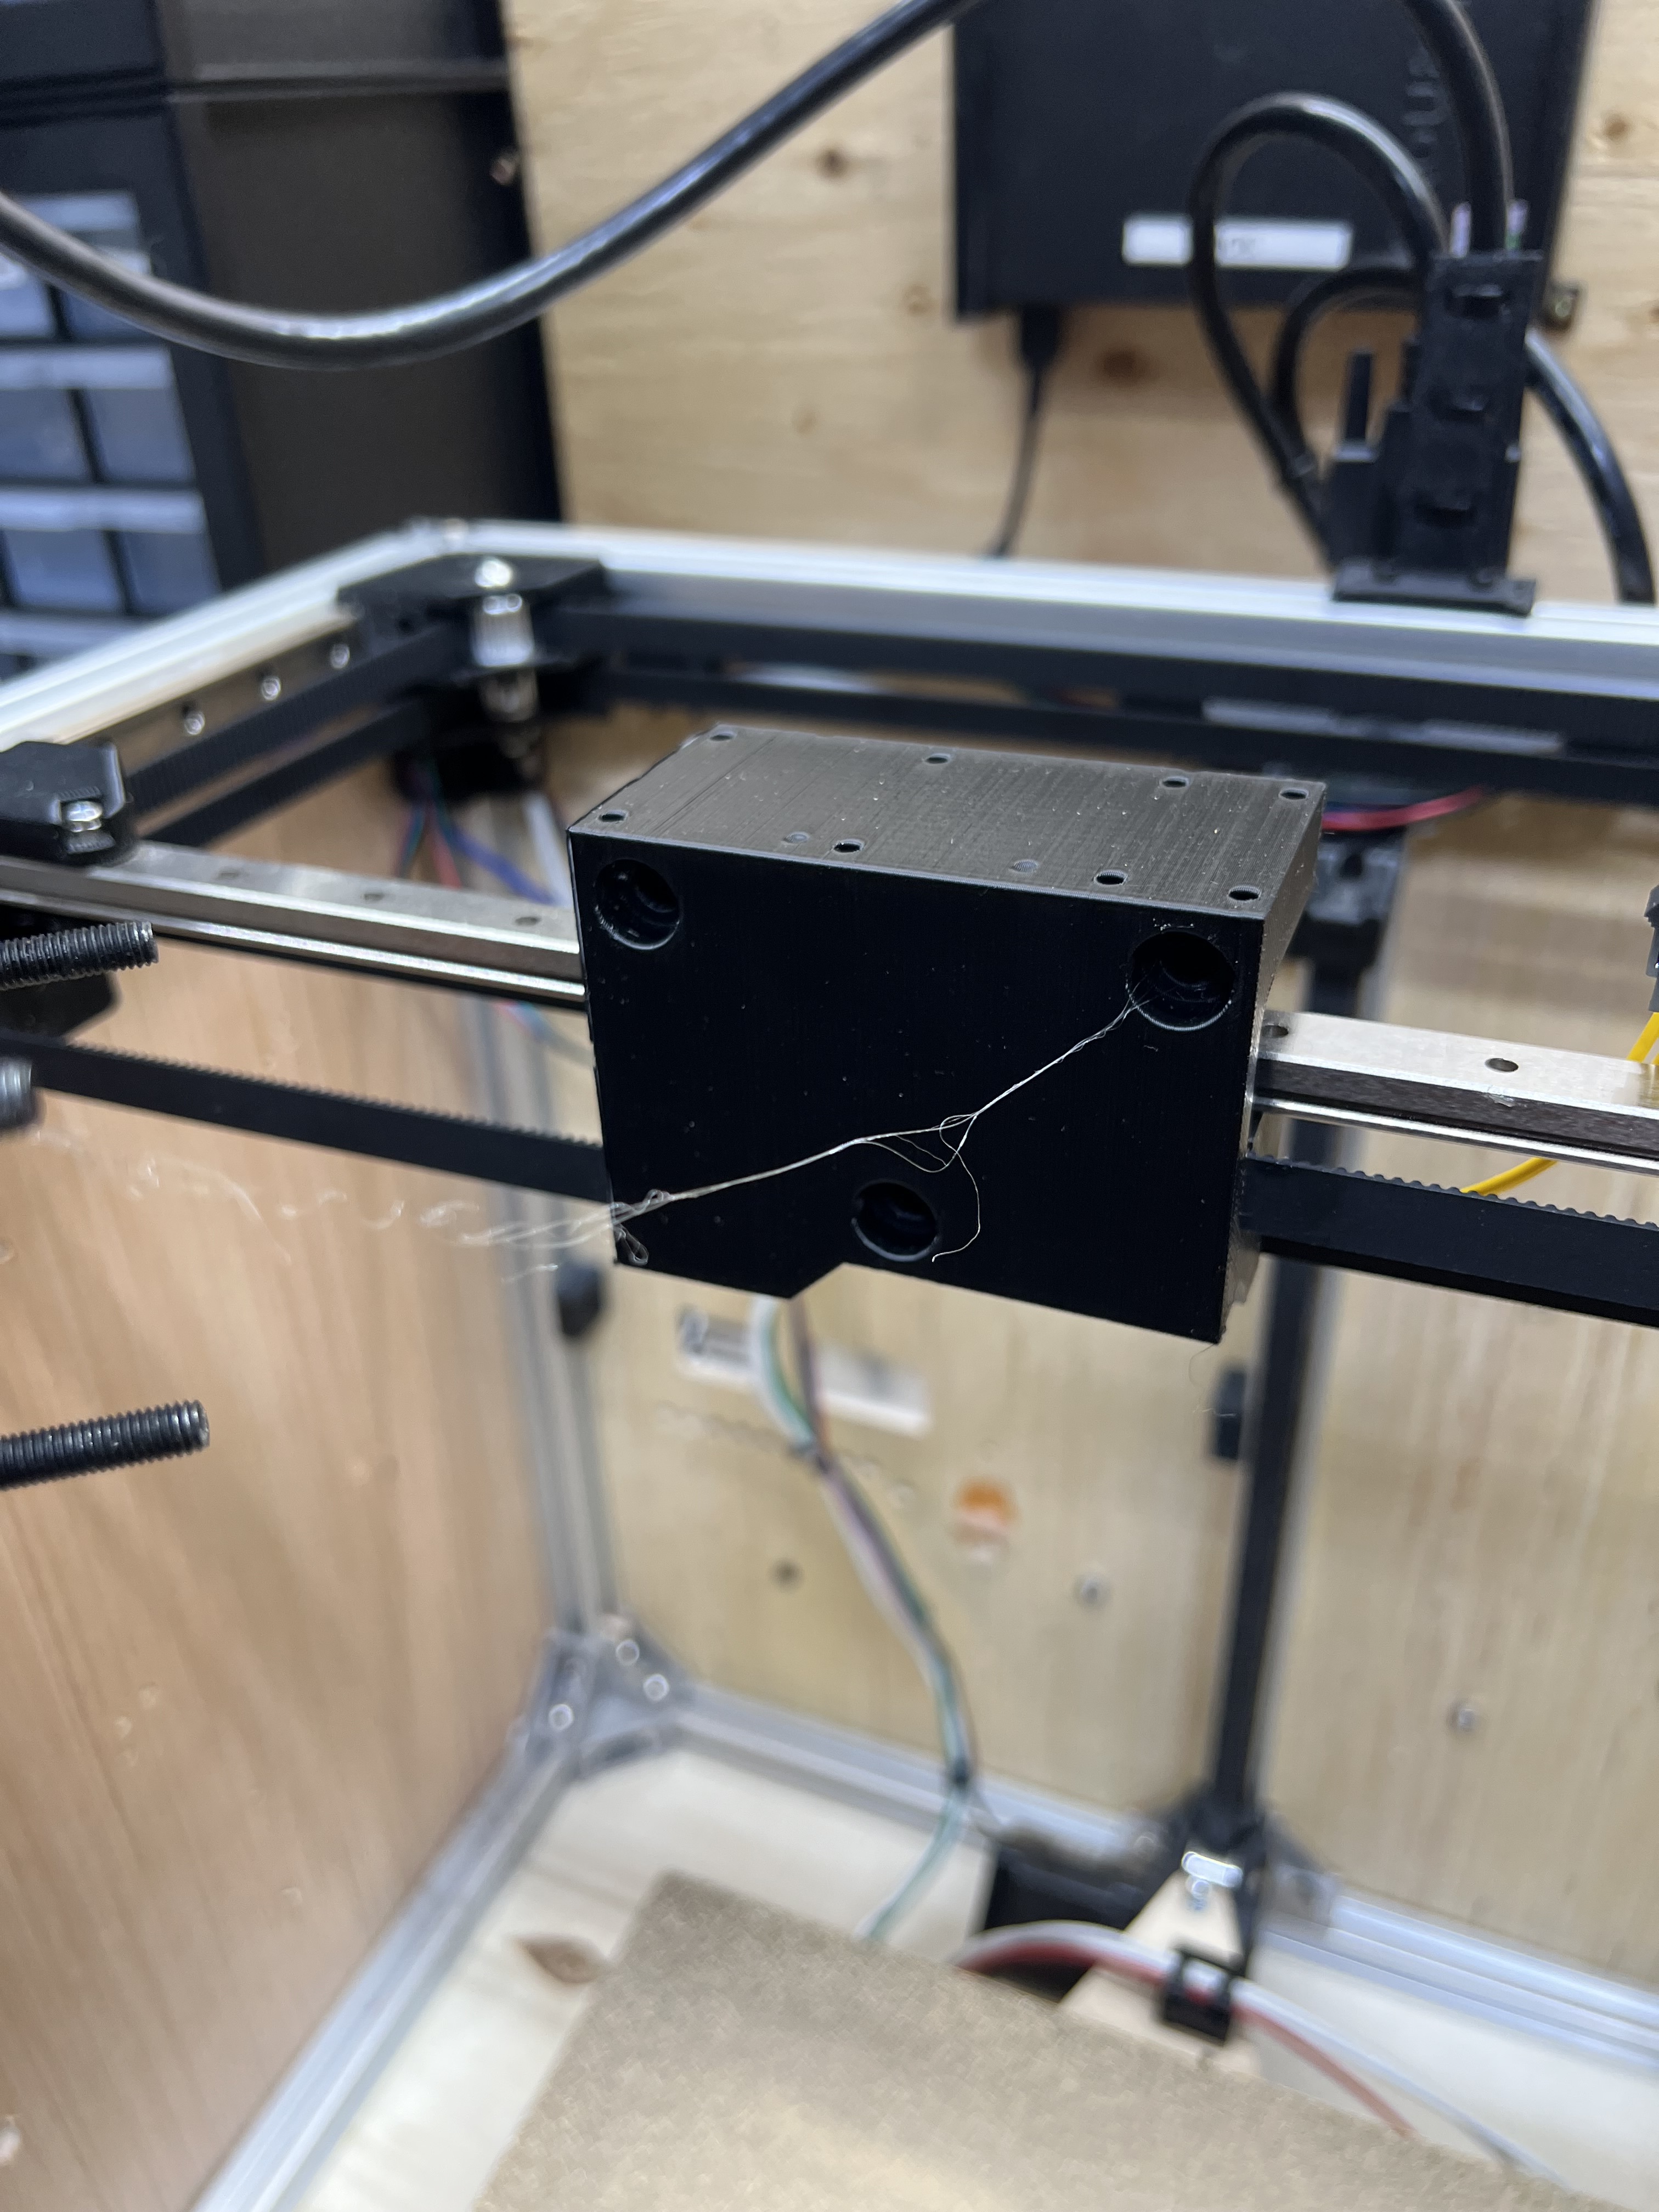
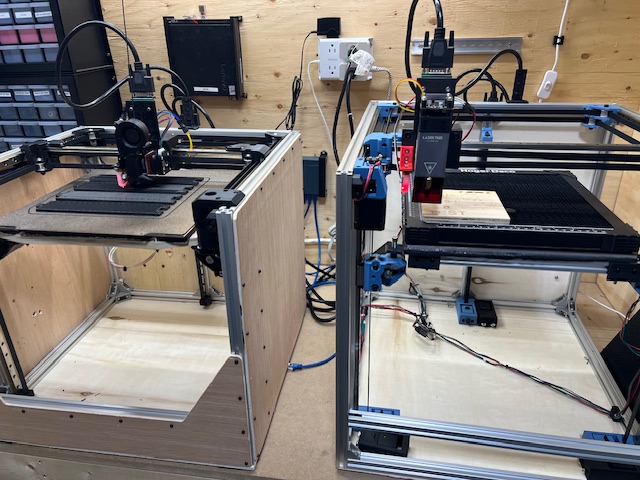
Second - How do I attach/un-attach the tool to the x-carriage. I thought I would like some kind of automatic process for this, but after going down the rabbit hole of what is available on the internet for them, and having a good night’s sleep on it, I decided it would be easier to come up with a manual system. I drew the tool plate with room for the breakout board on the back with long bolts that would go through the x-carriage to hold the tool tightly. Butterfly nuts on the backside are easy to remove as well as easy to keep tight! I redrew the x-carriage to accommodate the toolholder and the nuts on the backside. The nuts also help center the tool plate and keep it from moving.

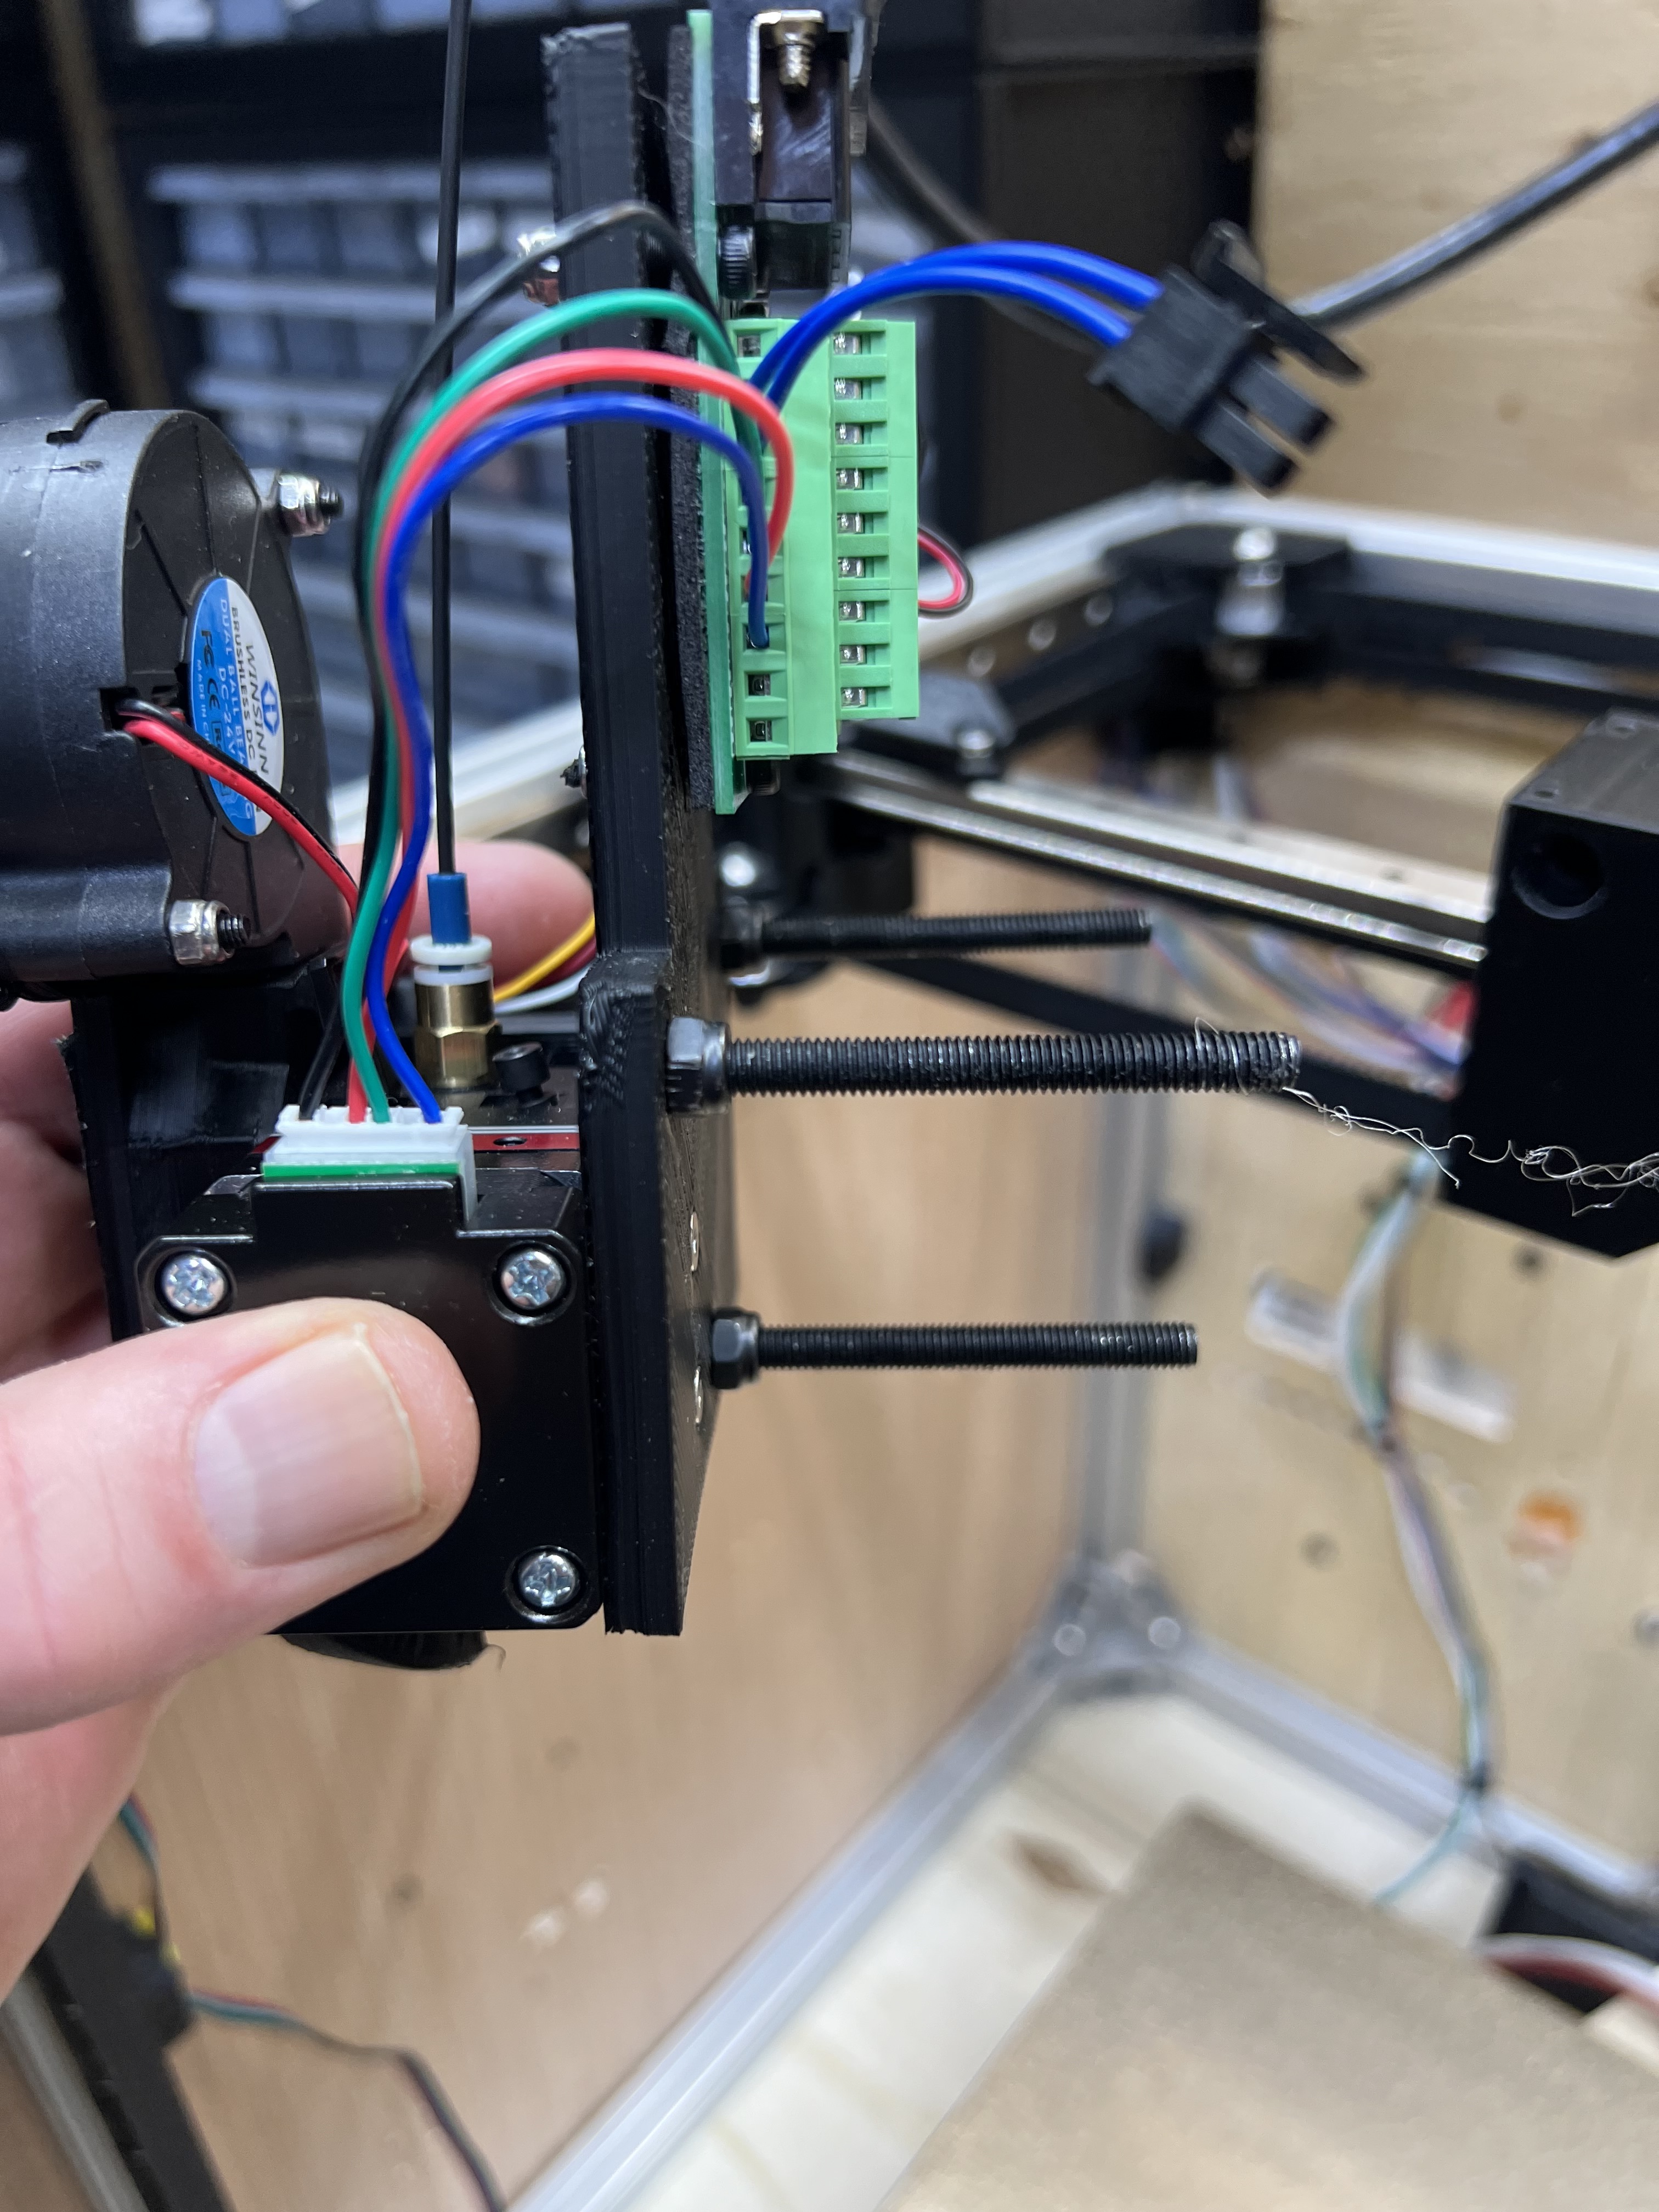
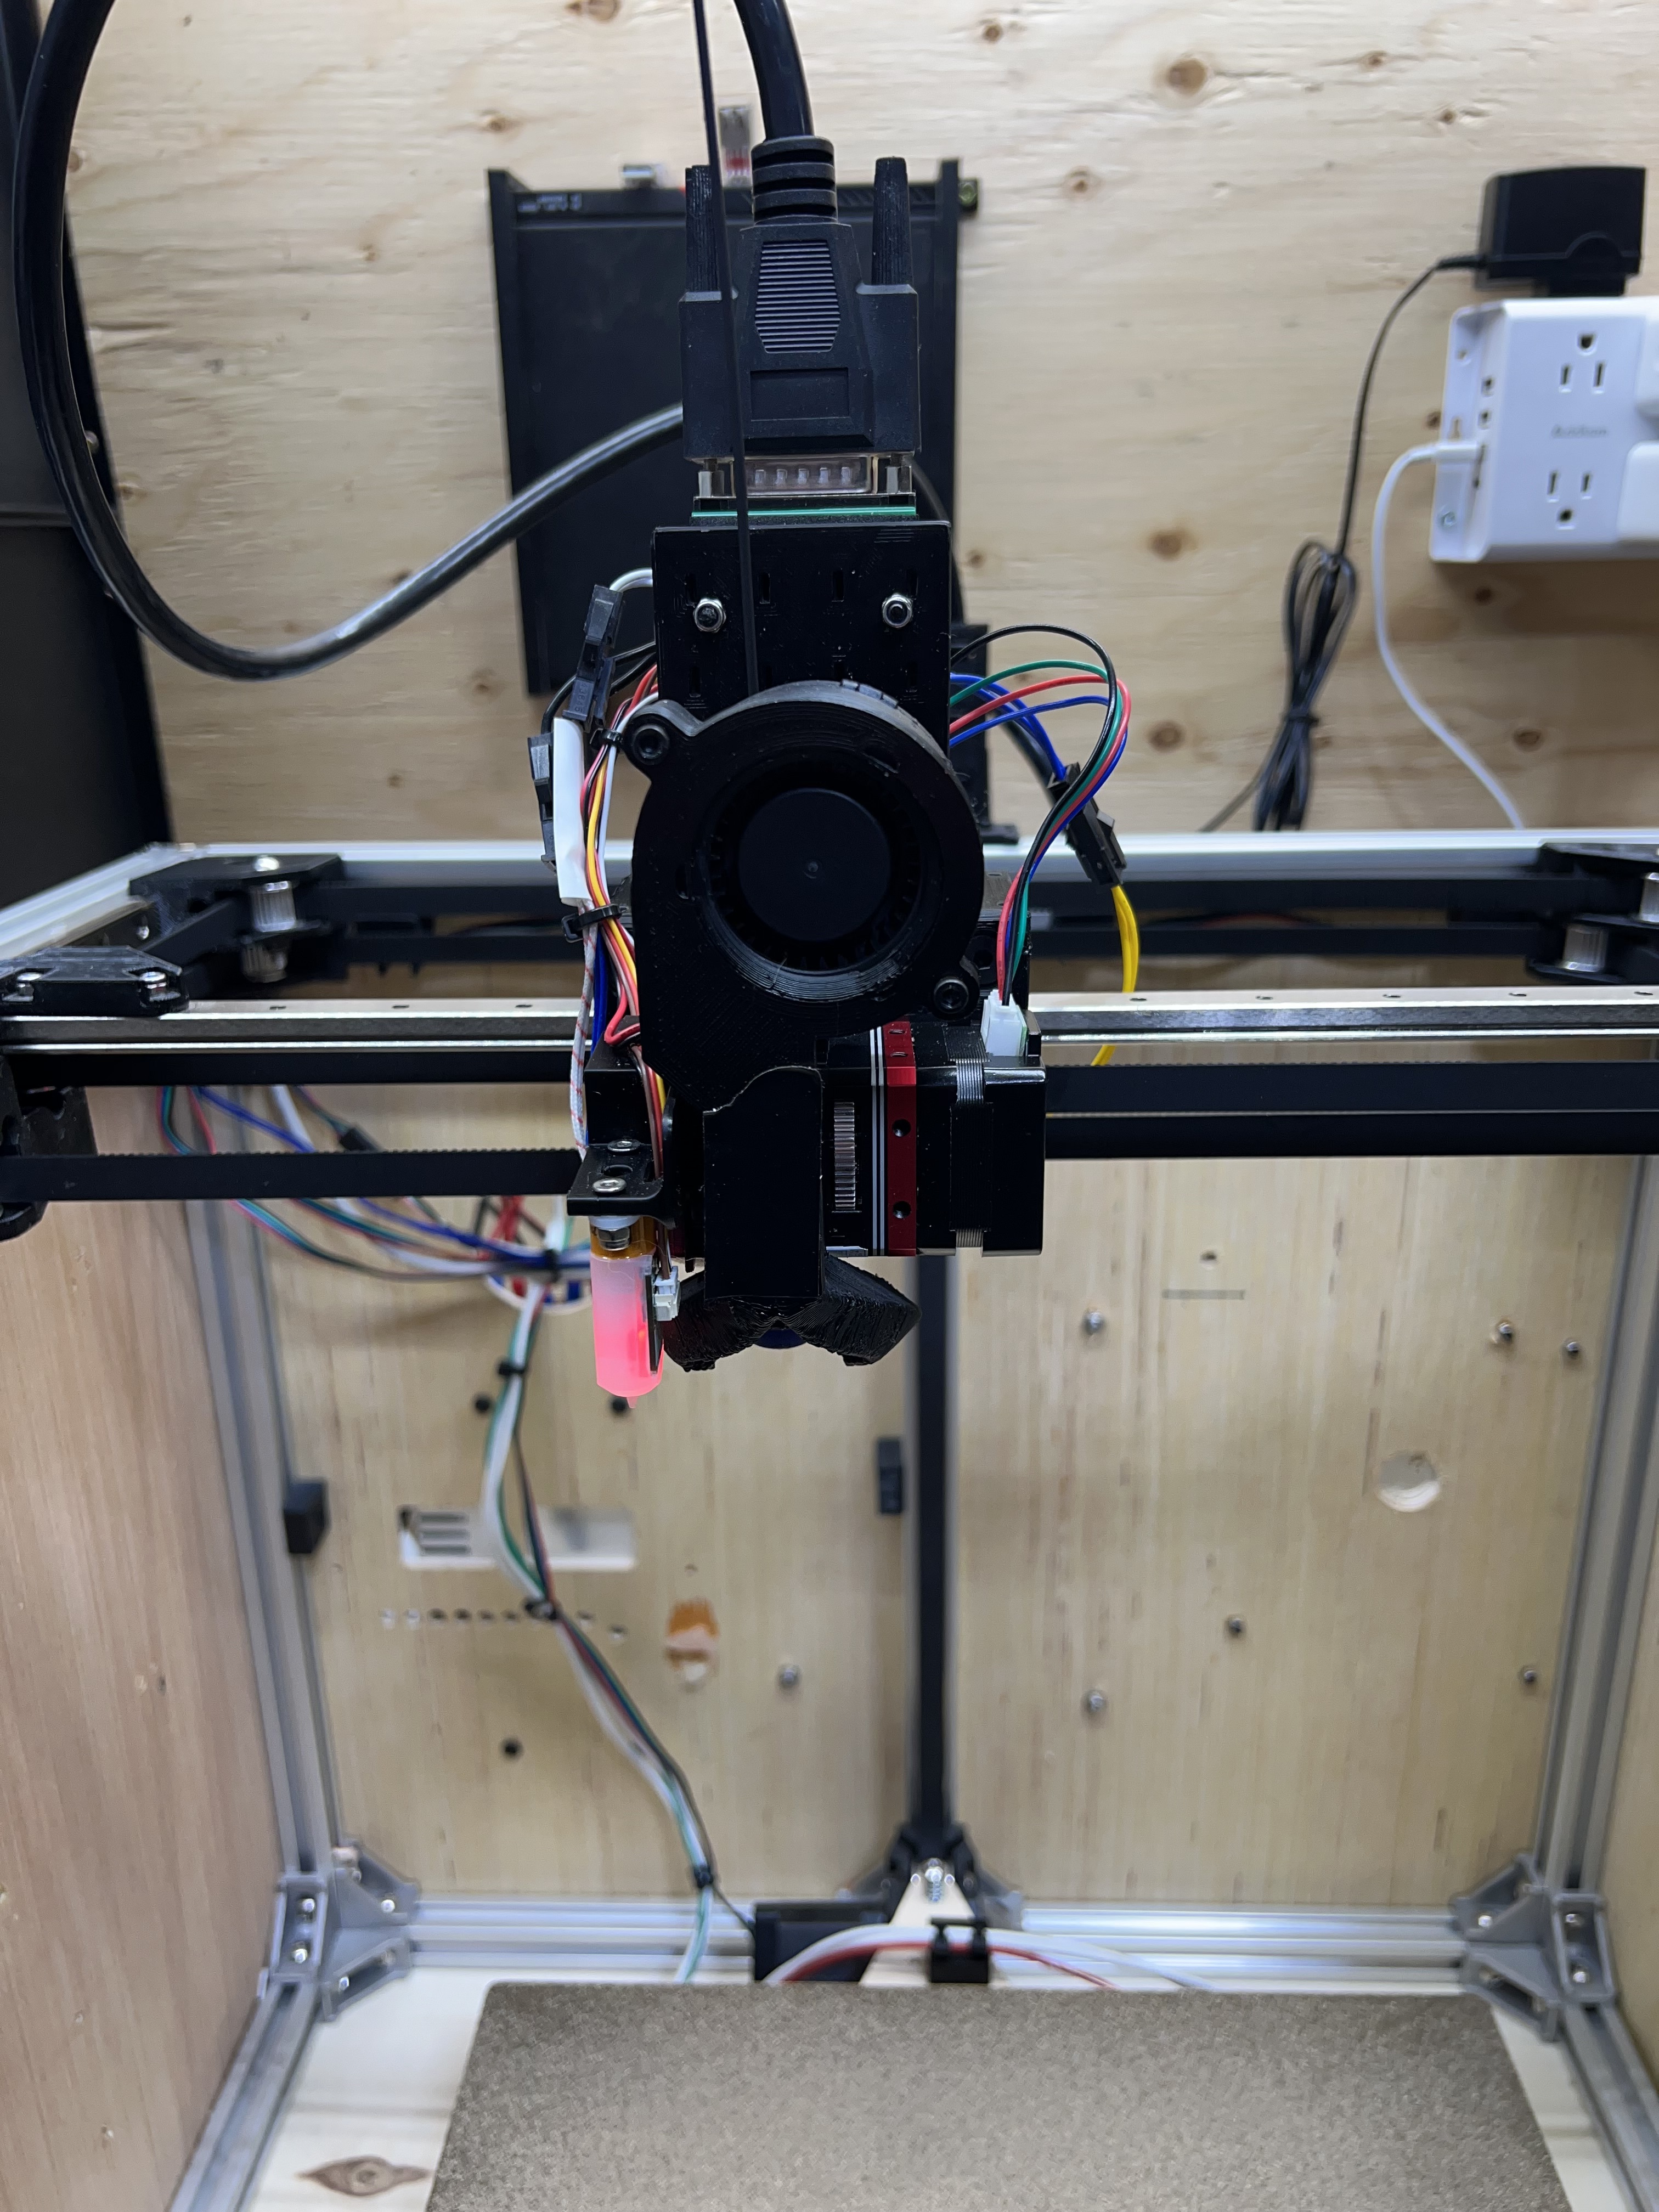
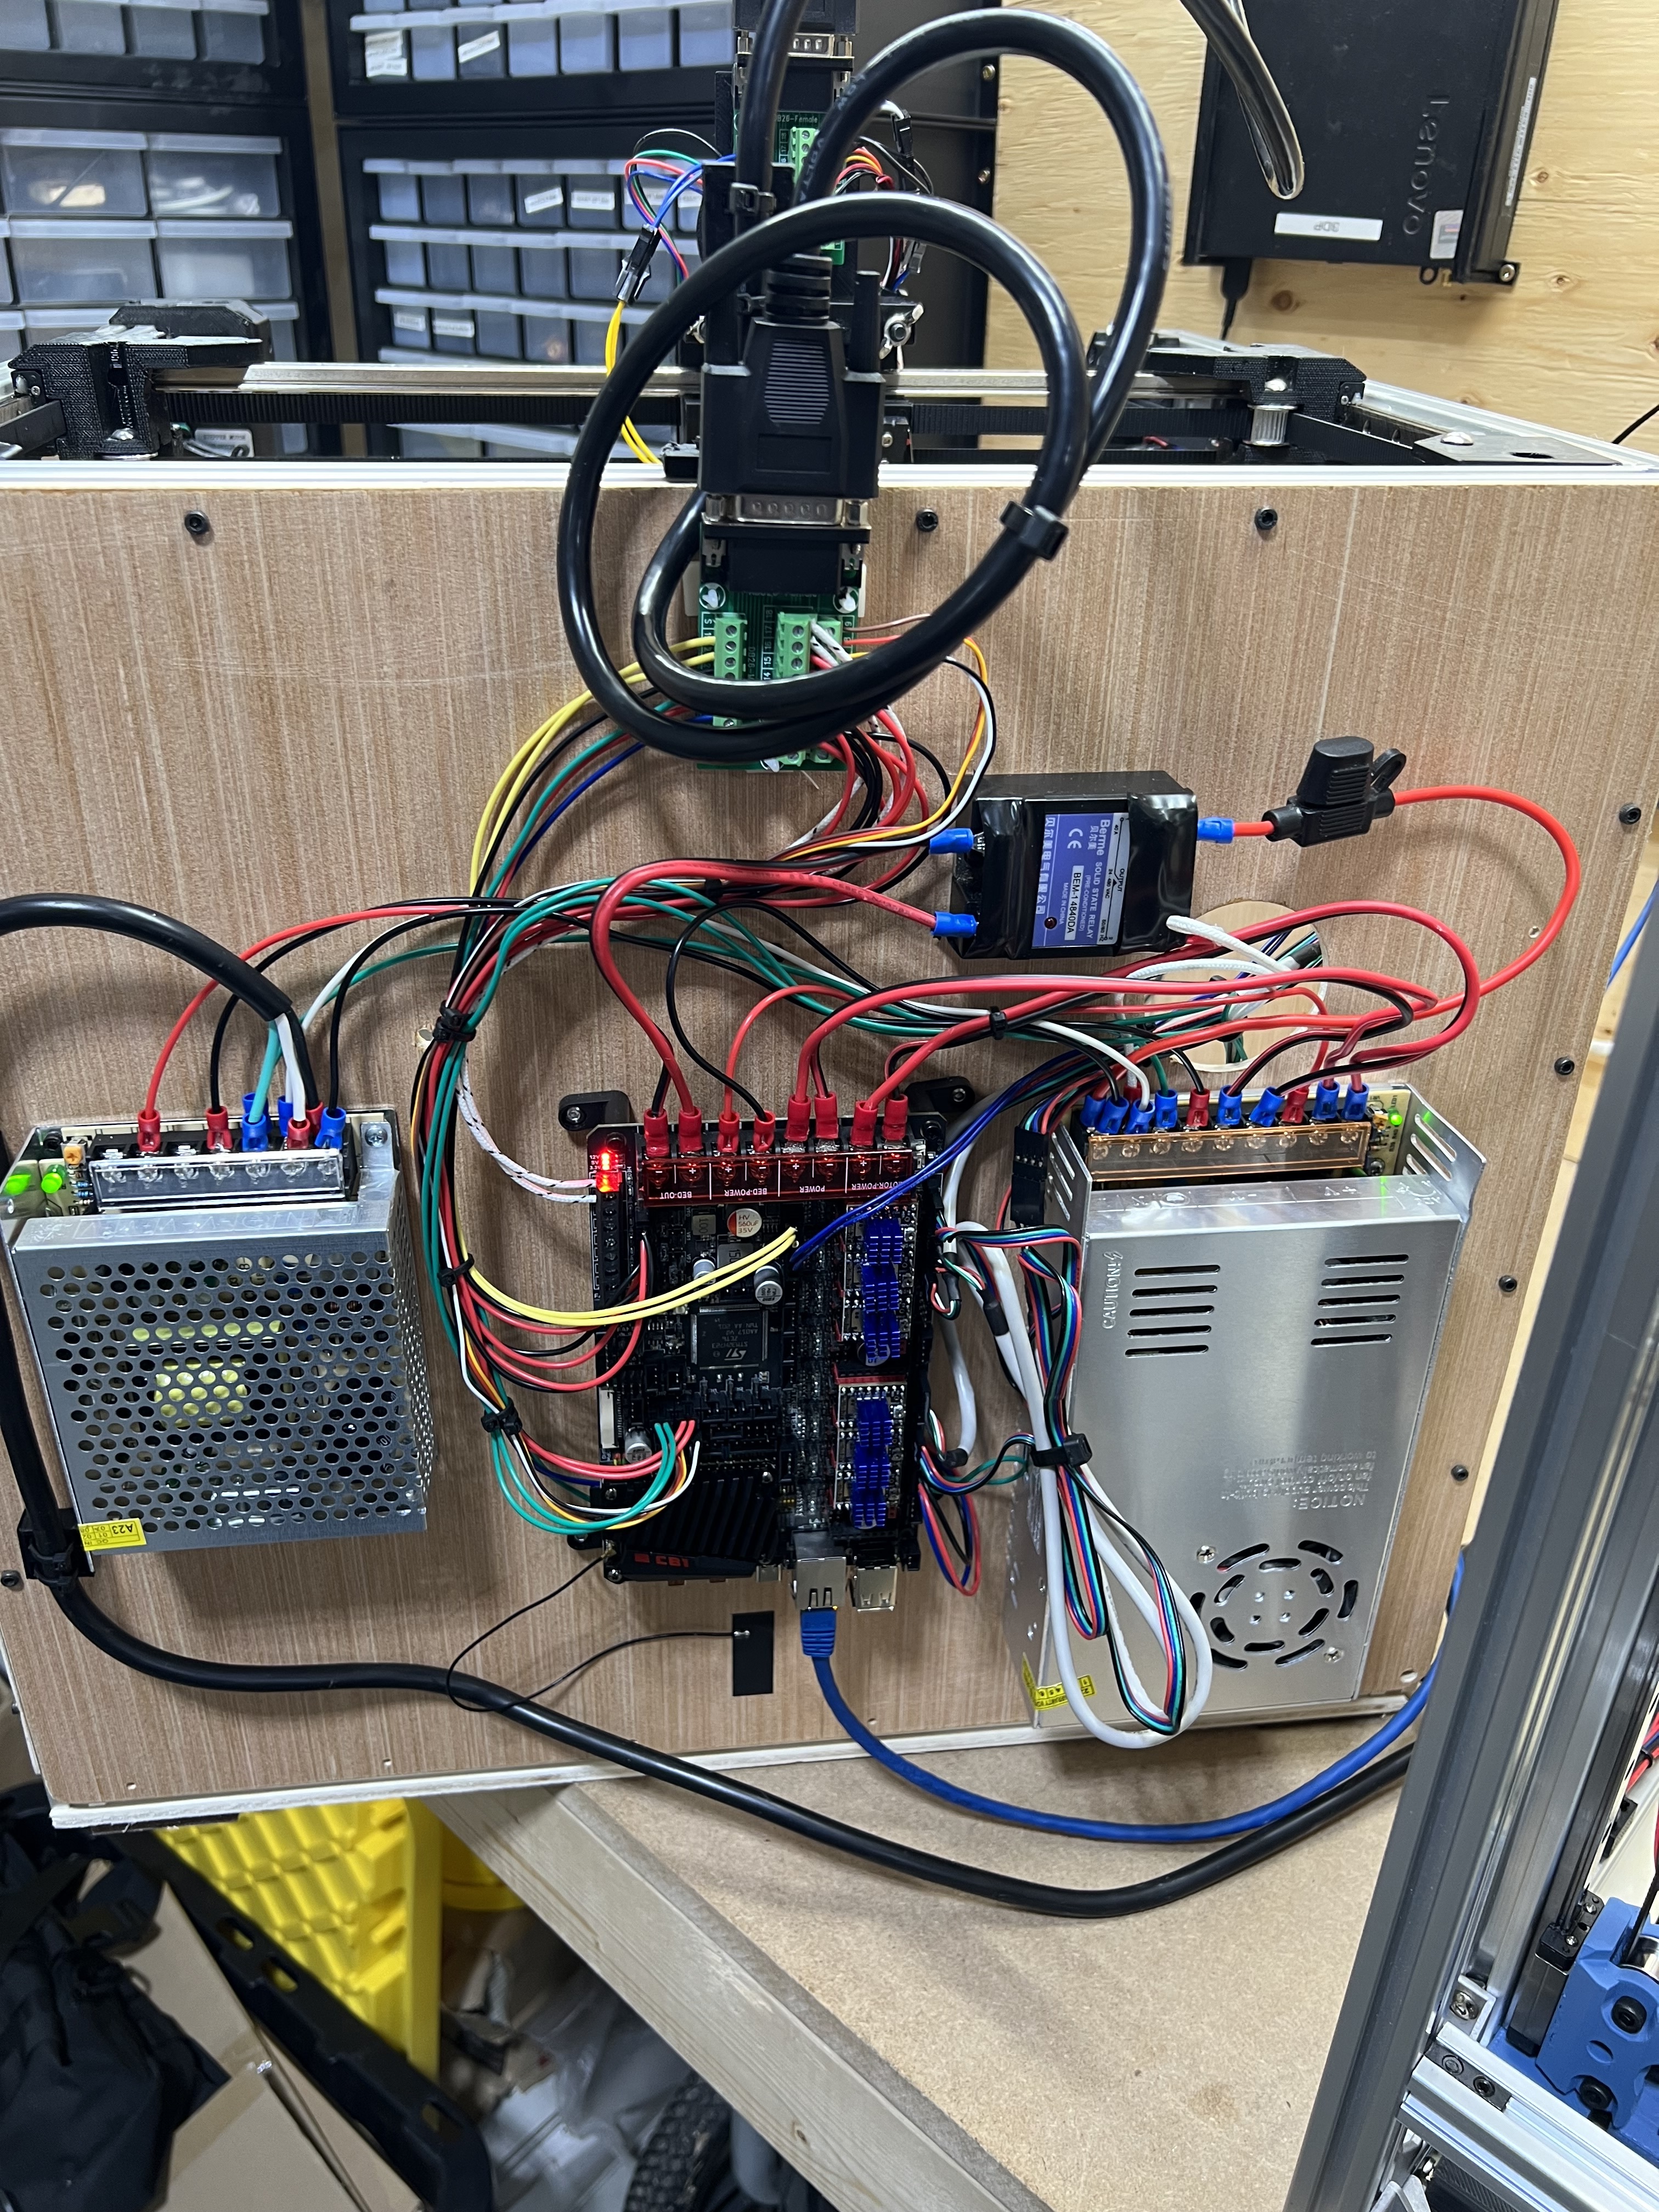
Wiring from the M8P for the x-carriage all goes to another DB26 breakout board on the back. I prewired everything for the extruder and the laser at once, the tools only use the wires they need with 4 wires left for future tools.

The x endstop is wired onto the x-carriage and connects to the toolholder with a clip. This was the only way to keep requirement #6 that I could come up with.

I have been running this now for a couple of weeks and have had no problems. Still working on the klipper config for the laser, but looks promising!

DB26 Terminal $13 CAD on Amazon
DB26 Cable (male to male) $36 CAD on Amazon

What do you think?

pinout

3 Likes

First of all, congratulations on making a very clean setup.

Pros-

  • Single cable, broken out at each end.
  • This makes maintenance like replacing a thermistor or a heater easier.
  • Easier to change tools, and with no overlap (can’t blow the laser by leaving it in extruder config)
  • Might make managing the harness easier and less likely to droop (or not).
  • You’ve got a great handle on remixing to add parts to the assembly.

Cons-

  • Mass. That cable is big, thick, and heavy compared to a couple of twisted pairs.
  • Stiffness- that cable may exert considerable force on the carriage as your printer moves, which may impact print results, particularly at high speeds.
  • Twisting- the 1:1 26 pin cable you bought probably doesn’t have twisting for your power or stepper pairs, which depending on your setup and environment may or may not matter for you. You could probably address this by building your own cable- but proper tooling to do that is a bit expensive.
  • ampacity- what AWG are the wires in your cable? Are you running a 24V system (better), or 12V (worse)? You could end up melting the cable if you are at the lower voltages.
  • Mass. I know I already mentioned that, but this will limit acceleration. You also don’t have an accelerometer on the carriage which would help tune- but would need additional wire pairs, and these would benefit from the twisting that you don’t have.
1 Like

Hey Jim, thanks for the feedback!

I liked that it was stiffer , it doesn’t fall down on my work! It was a concern, both in speed and accuracy with the cable, but it doesn’t seem to be affecting either at this point. I am watching for that though!

These are actually twisted pair cables. I believe I have the pairs setup correctly, but have been known to make mistakes! I originally was going to do this with Cat5e or Cat6 cable, but would have needed 3 cables to make it work - too many.

I looked at this too - a fire in my workshop would be very inconvenient! The 28 awg twisted pairs can carry just over two amps and need to only carry 6-800 mh so should be ok. I have held the wire during a long print and it wasn’t warm so I think this is ok - will do a bit more research to be 100% sure, thanks for brining this up.

Will need to do some research on this one. Klipper has a macro that will determine your maximum accelerations etc and I have it installed, just haven’t had time to run it yet.

Thanks again for taking the time to give input!

dm

What is your hotend heater power?
If it’s 40W and you’re running 24V, that’s 1.7A- which is just barely within the spec.
If you have a 60W heater, then you’ll be at 2.5A - which is not.

Some systems double up pairs for this scenario. If you’re monitoring it, that’s the key step.

You’re welcome. I hope you keep posting details about your setup and use of the printer.
I’d like to see more of your system in action and updates on how your setup works for you.

IMG_1044
Took most of March off to go south and get warm…
I finally got a chance to get the laser working. Really neat!
Klipper and Lightburn work well together for this kind of setup.

Five minute changeover from Laser to Extruder!

1 Like