I want to make a Collett stand for a set of collets and I intend to use a block of wood.
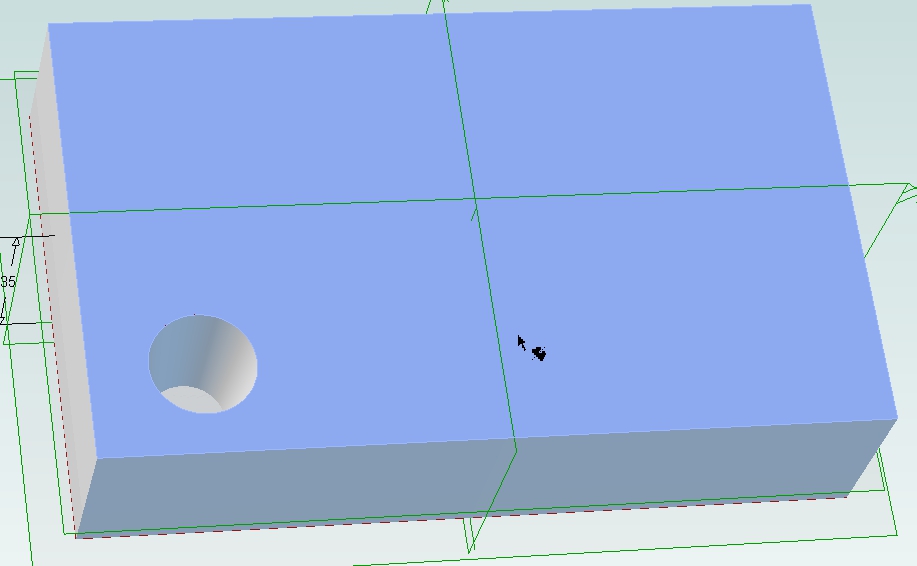
I need to put 12 holes in it that are tapered The top of the taper is 20mm and the bottom is 15mm. The holes to be 24mm deep.
I would like to use an endmill with a flat bottom, if possible.
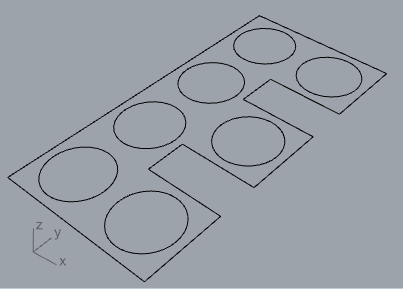
If I can design one hole I can then tile the others where needed.
I was thinking maybe there is some function that I am not aware of for doing this.
I found this video that shows exactly what I need, but maybe Estlcam has an easier way?
I have never seen anything about masking, so I am in the dark about that and how to go about it.
I found out today that my CorelDraw 12 crashes in Windows 11 when I try to export a DFX, but no problems when exporting a PLT.
Also any other graphic output through CorelDraw crashes the system as well. Works perfectly in Windows 10.
Another problem I have on two different computers using Windows 11, the screens go spastic for several minutes for some reason (I am starting to hate Windows 11)
I have been using PLT files in Estlcam for several years now, no problems at all using them.
So I am guessing that I will have to make my file with all 12 holes in place and make a corresponding STL file and then try and figure out how to load them both into Estlcam and make the NC file.
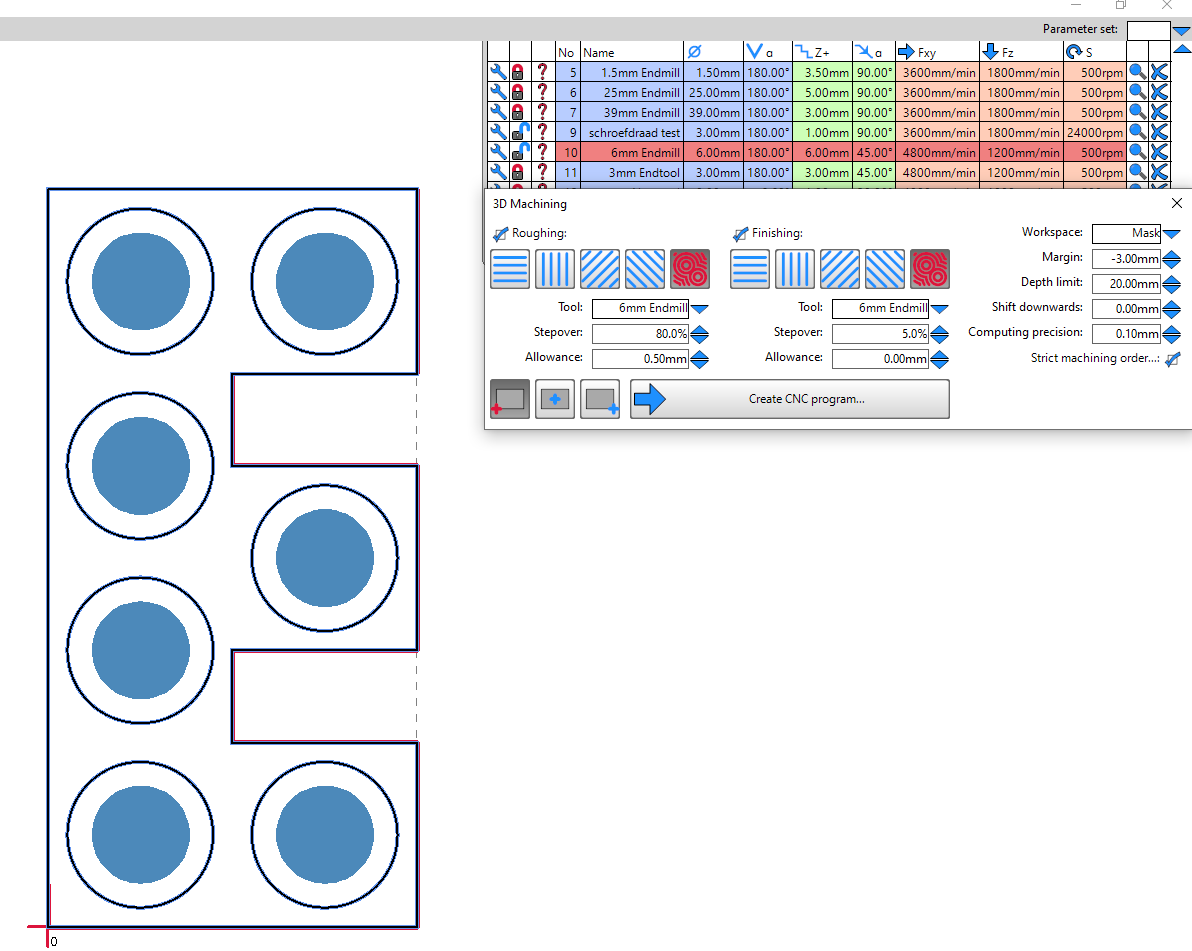
I opend the stl in estlcam, selected freemachining, in the window 3d machining selected workspace “mask” then you can select the dxf or in your case the plt
My advice, make sure to read the help with each setting.
good luck
I have had a play and found a few obstacles that I feel I have overcome.
I decided that the easiest way was to produce a single hole file with the origin at the centre. That way I can mark out the layout with a pencil on the block of wood and position the centre of the file on each mark in turn.
Works fine on the screen, tomorrow in daylight I will have a go for real (too cold out in the workshop tonight)
Was the helical v11 Solid of Revolution a dead end - Having problem generating smooth gcode - #30 by dalrun? I’ve used it to do a series of tapered holes using X,Y commands to shift the origin to the center of each hole and I’m thinking v12 macros can make that process easier.
Can you work on a macro Dave, if you have time. it would be really nice if one was available.
A single hole with a centre origin would probably be the best option as it would have universal uses. The need to have parametric settings for hole sizes and depth would be a bonus too.
I don’t think there is a way to run the program multiple times from a single macro. My thought is four macros, a right, left, front and back. To shift the spindle and origin to the right by 16mm and rerun the program the right macro would contain 3 or 4 lines: (xy,) x16, x=0 and run. The xy is harmless, but only needed if program end is set to above last object instead of at/above origin. This is true even if custom program end text and the corresponding G-code ends with a G00 x0 y0 line - presumably a v12 bug.
I tried an experiment today to try and overcome the problem with Windows 11,
I installed a virtual machine and loaded it with Windows 10 and CorelDraw 12.
It worked fine and now I can use CorelDraw on my Windows 11 computer.
I have a 2T USB drive that I can share between Windows 11 and Windows 10 on the same machine, so that solves another problem.
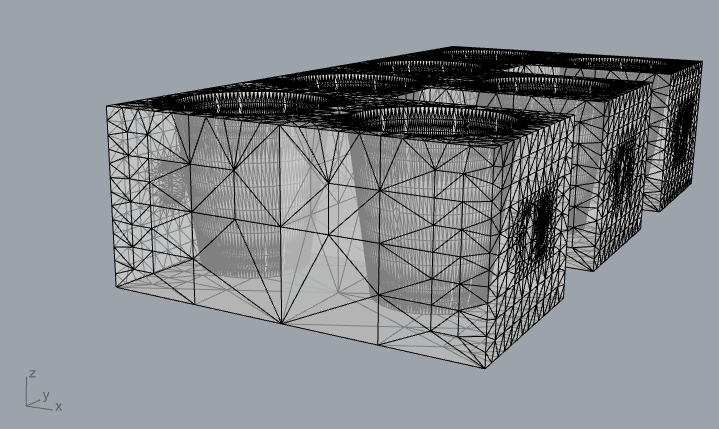
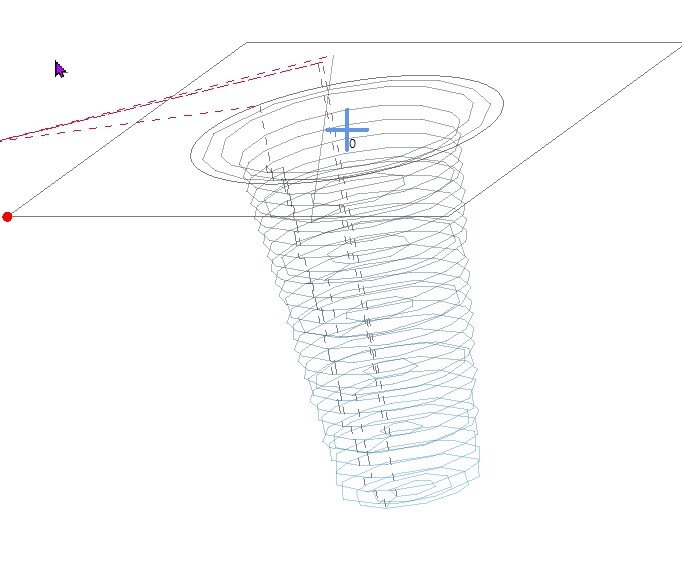
I tried out both linear and waterline and waterline is by far the best result. Both take about the same time, but the finish of waterline is pretty good while linear is missing some detail.
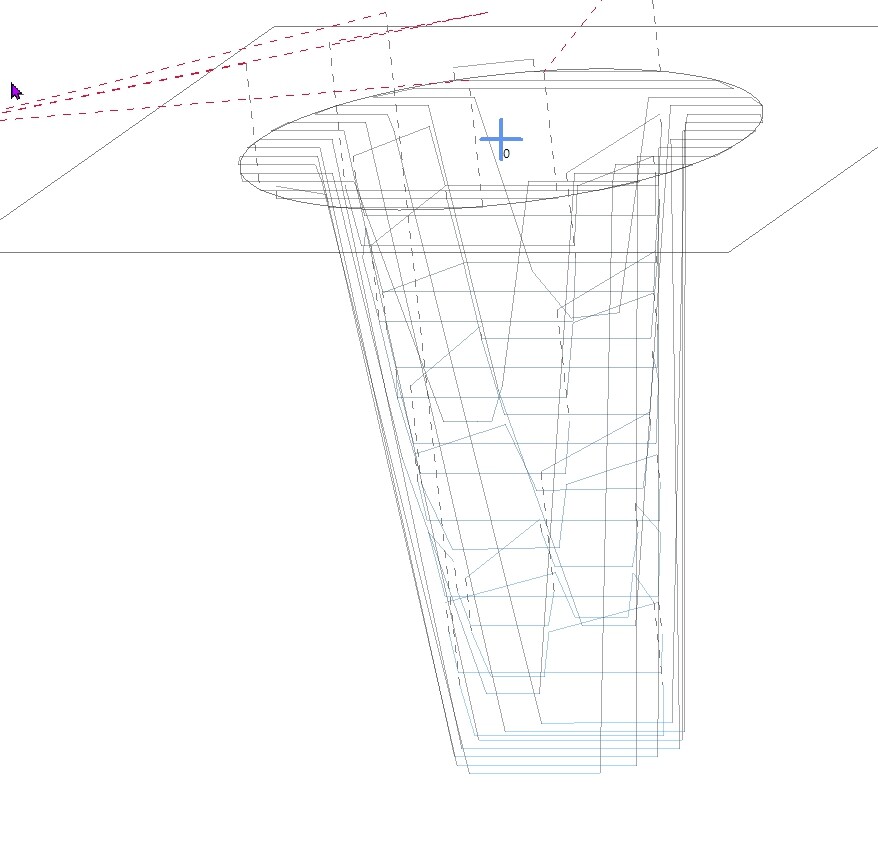
I don’t think Mask is the issue. I tried all sorts of masks and could not get Estlcam to make paths for anything but the unmasked areas. I don’t know squat about STL’s, but where did that straight walled hole (upper right) come from? Have you tired masking all but the good holes (bottom left)?
…oh yeah, another loss in v12 is the ability to save 3D project files (handy for future reference and edits).
No I did not try to make anything from the unmasked areas.
No i did not try anything else
I can send you the stl and the mask so you can try yourself
I find it strange that a part of the mask has the vertical walls