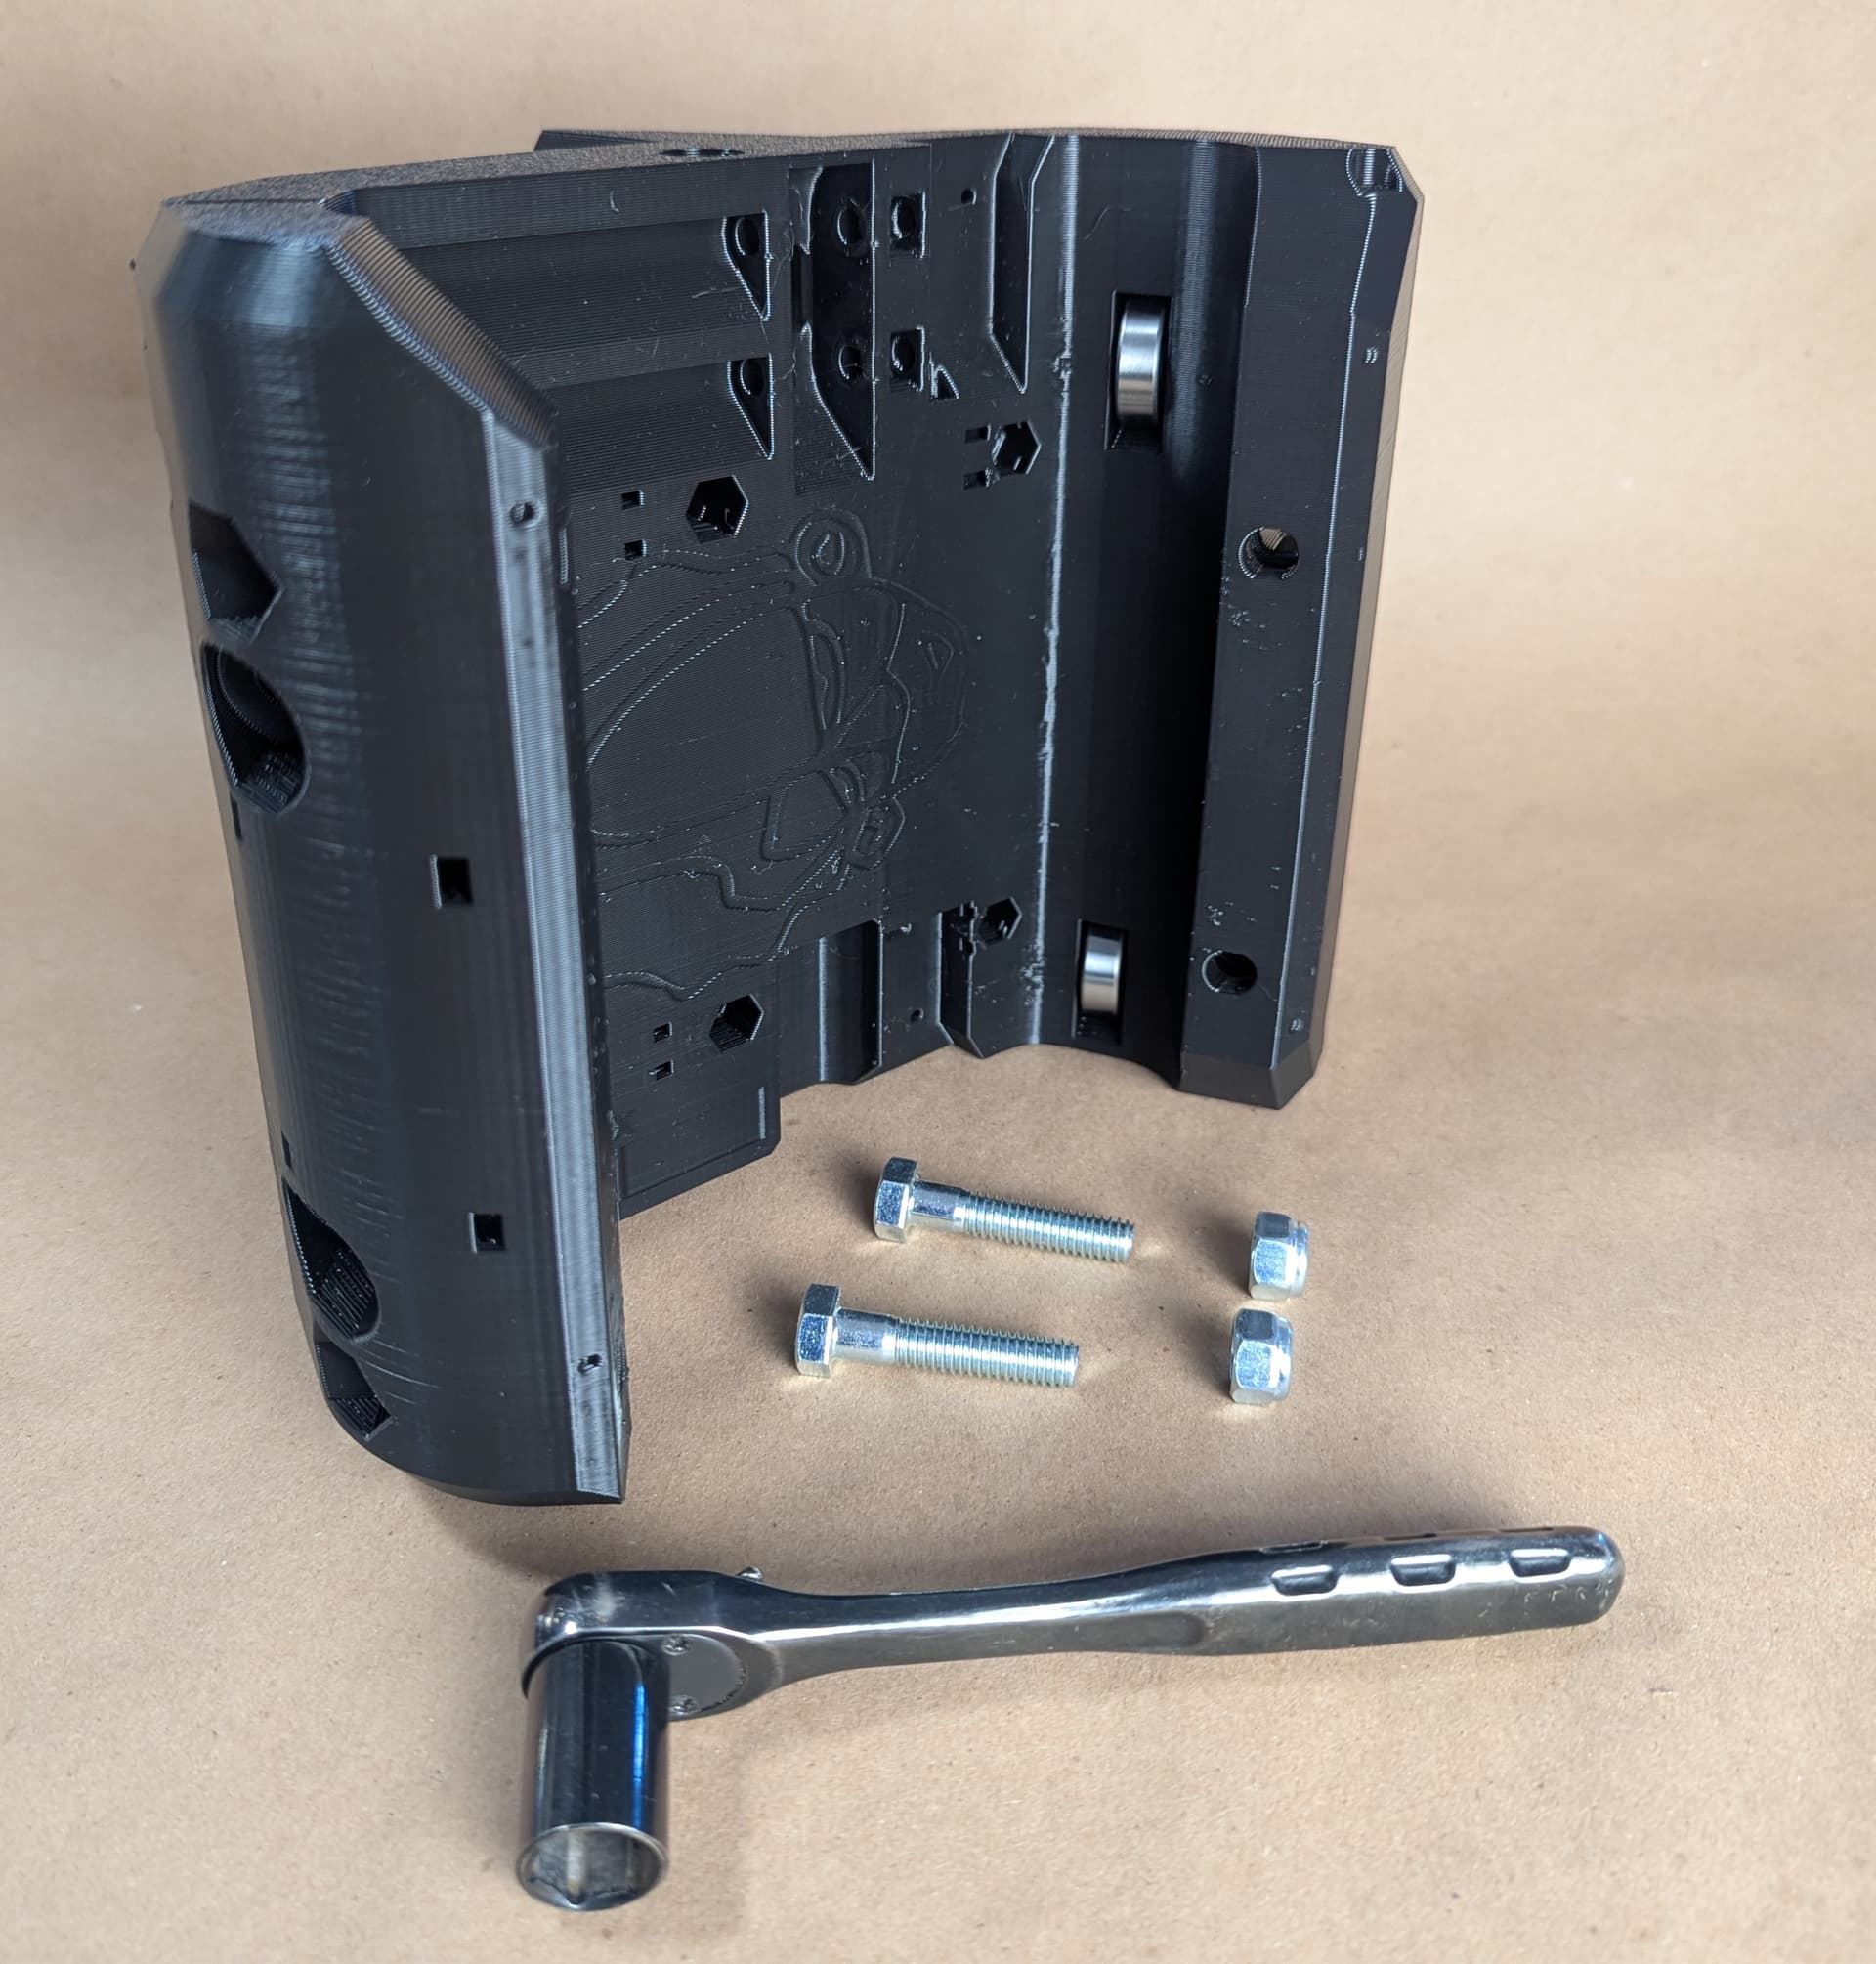
Hello! I’m starting my first CNC build using the hardware kit and a pre-printed parts kit from V1E. I am very hesitant to do anything with the printed parts to damage them, so I’m stuck on the first assembly step.
The bolts shown in this image are too big to fit into the holes indicated without screwing them into unthreaded plastic. I read a few answers to similar questions, with the suggestions to ream out the holes with a drill bit in reverse and/or thread the screws in far enough for the nut to grab and then tighten from the nut. I also read a response that threading into PLA can create enough heat to melt it.
It’s a bit embarrassing to get stuck on the first step like this! I feel pretty confident in my ability to complete this build and I may be overthinking this, but before I get my drill out and ruin this big printed part I want to make sure I’m not making a huge mistake.
Is it a better idea to drill out the holes slightly or just try to screw in the bolts? It feels like I’m maybe missing a key piece of context on something.
Don’t be embarrassed! It’s a perfectly reasonable question.
That’s what I do on a regular basis
First question- where did you get your hardware from, and is it metric or SAE?
If it were me, I’d get a clearance hole drill bit for that bolt, and I’d put it in the chuck of my drill but work the bit by hand slowly to clean up any excess material.
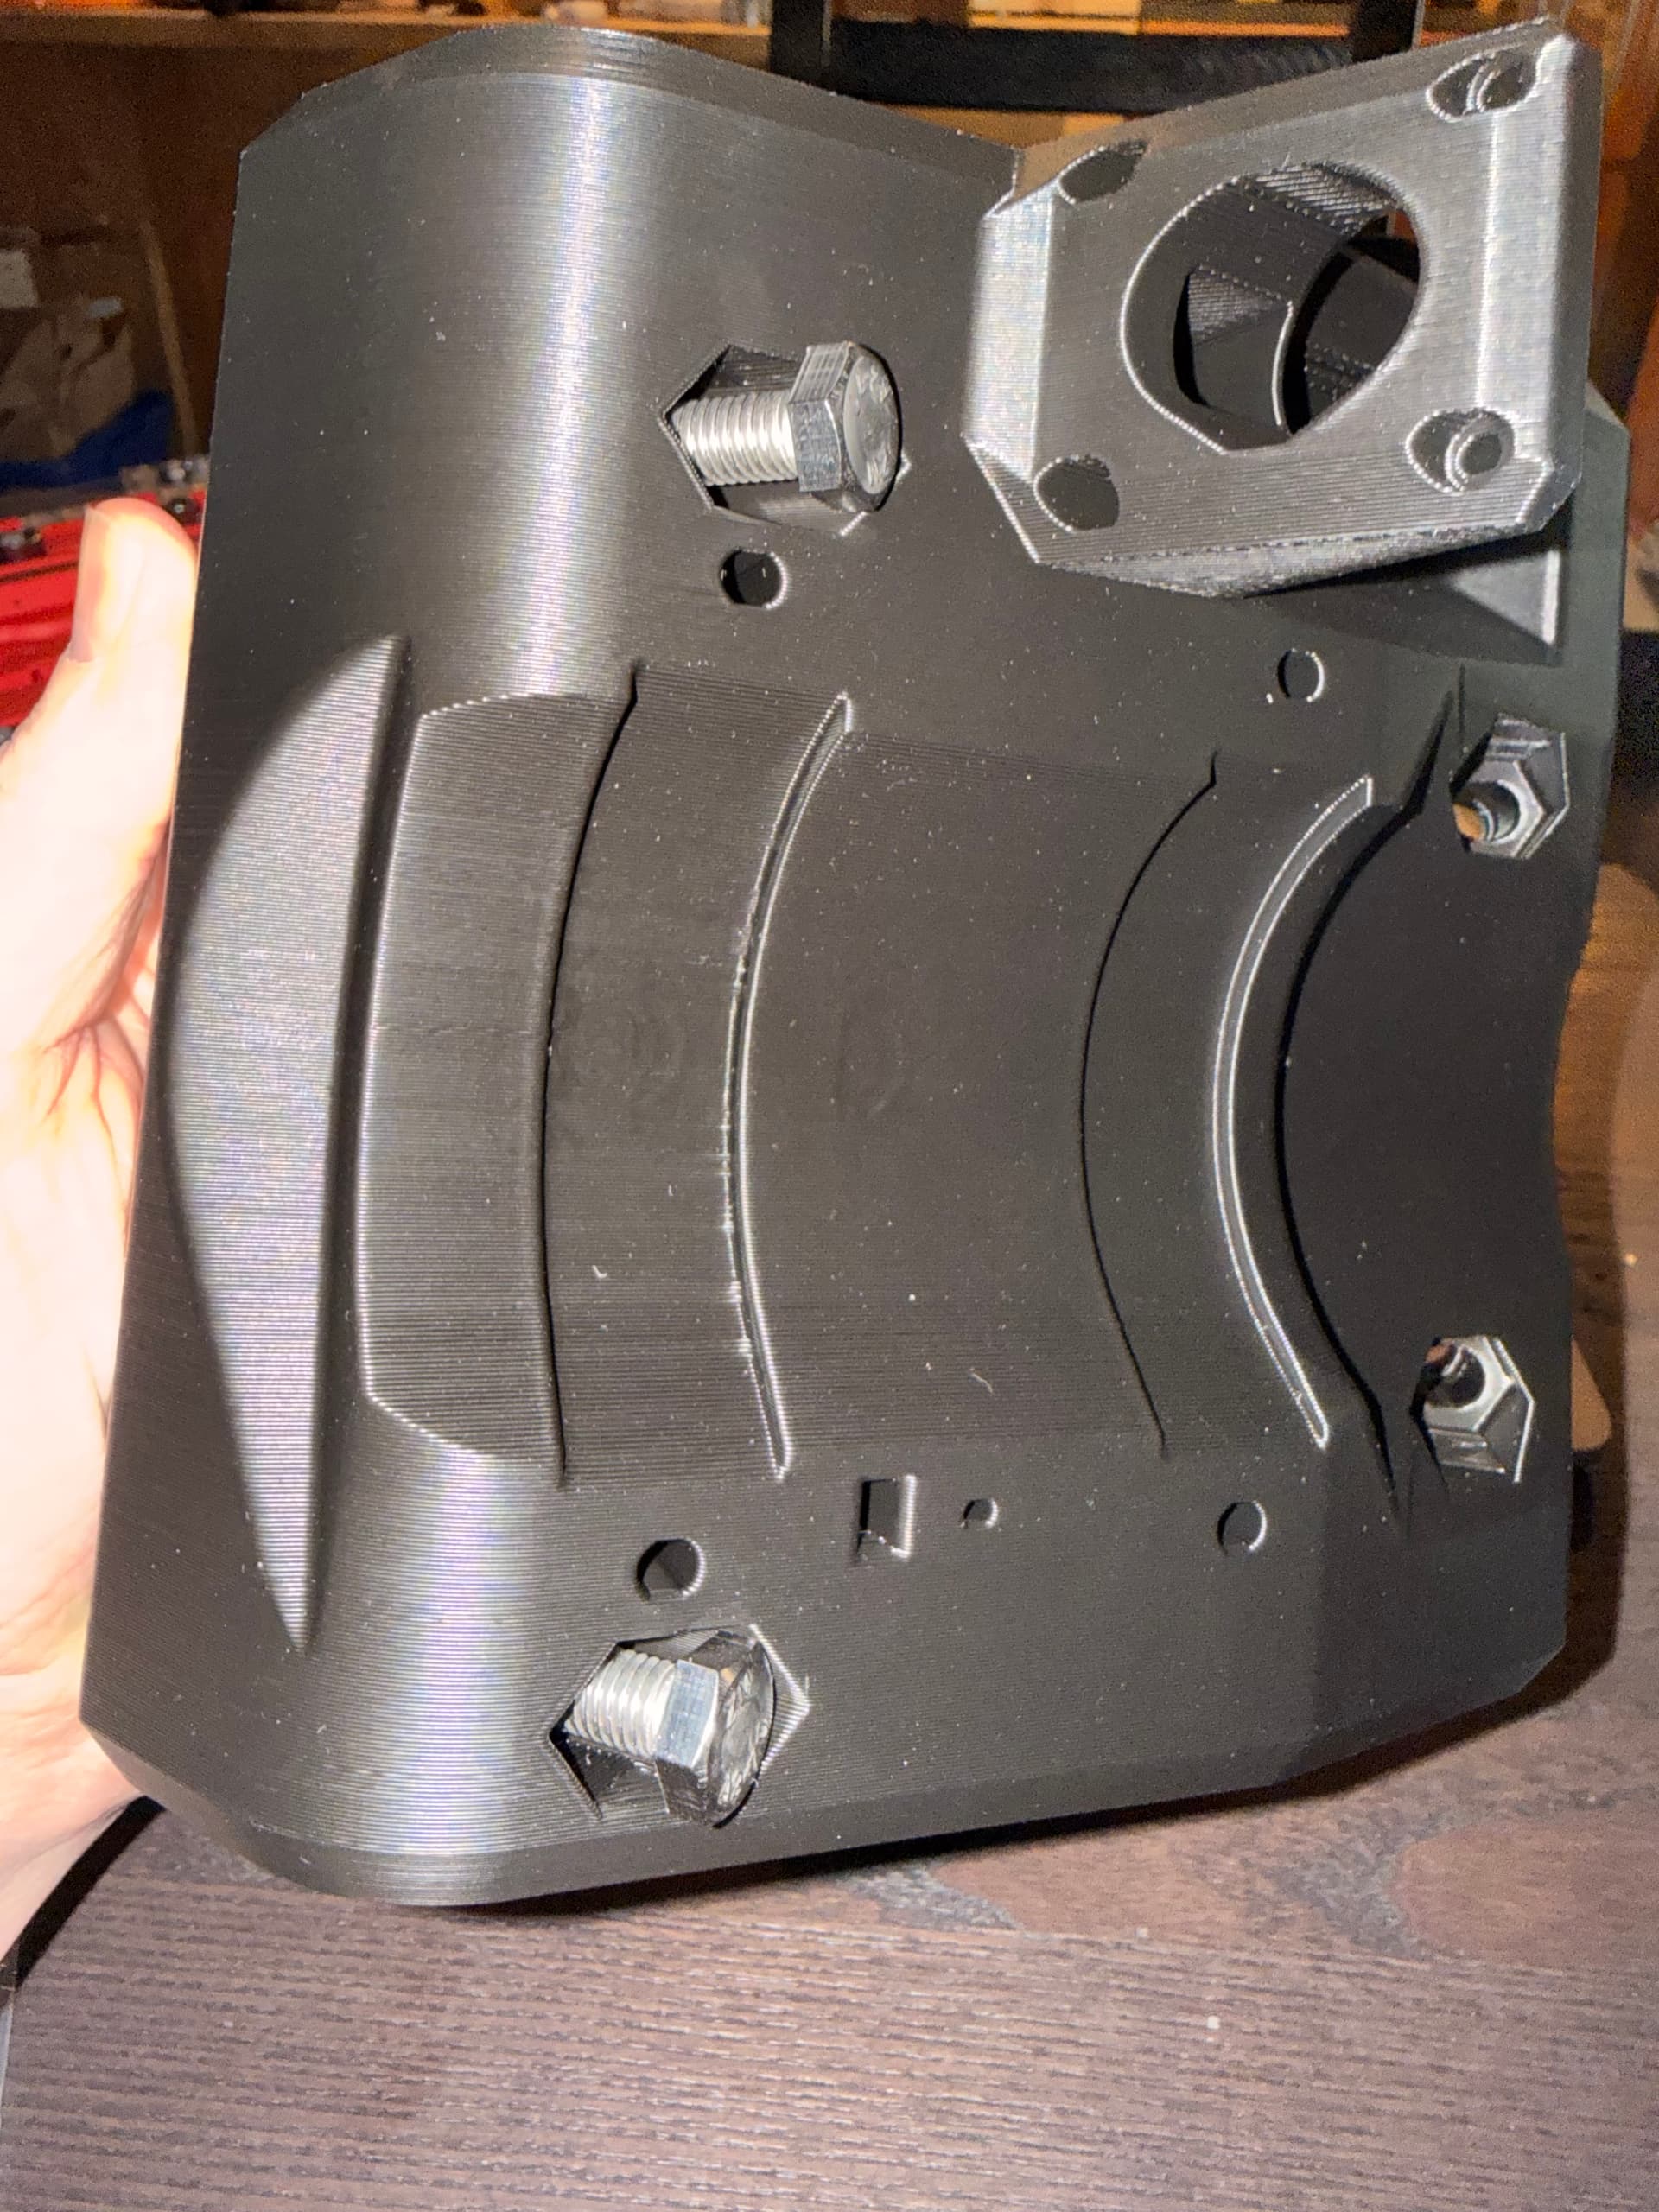
Here is an image of the M8 bolts in the assembly as I am building it. This is after getting the bolt as far in as I can with a socket. Because of the hex-shaped inset, there’s no additional room to screw in any farther with a socket, and the bolt isn’t far enough out to catch the nut from the other side.
Is it generally necessary or advisable to widen the holes in these spots with a drill?
All the hardware is from the V1E shop, and the hex head screws (“bolts”) are M8x40.
My hesitation is coming from the fact that the hex shaped insets for these bolts seem intended to prevent using a socket to screw them in further, and the nut isn’t going to catch the threads still. The only way I can see to accomplish this step is to be able to shove the bolt all the way through both holes and the bearing, which requires drilling out. I’m happy to drill it out if that’s what’s called for.
That’s what I do.
Make sure your drill bit is sized so it’s only taking off a tiny amount of material.
I usually start with a 5/16" (7.94mm) and up size to an 8mm if the bolt still doesn’t fit after light drilling.
Again, I do that by hand and only use the chuck in the drill as a convenient place to hold the bit.
Pay particular attention to the orientation of the nuts and bolt heads, there’s a right and a wrong orientation.
Thank you! This is the path I’m going down. It does seem that this step would be made substantially easier by flipping the hex bolt in order to use a socket on the screw to get it through the hole and one would not need to ream the hole out at all. I imagine that there’s a reason for this, but I guess it is possible that the image is just wrong in the assembly instructions.
Ryan has put a lot of thought into where a hex head versus a nut/bolt protrusion fits and has mechanical clearance considerations. As far as I recall, all of the pictures are correct.