I suspect I’m pushing my new 32”x60” LR4 too hard. My test cuts in 15mm Baltic Birch are not accurate enough for my intended joinery. Looking for feedback on my feeds and speeds.
Using various online resources (and AI), I arrived at the following settings (causing problems):
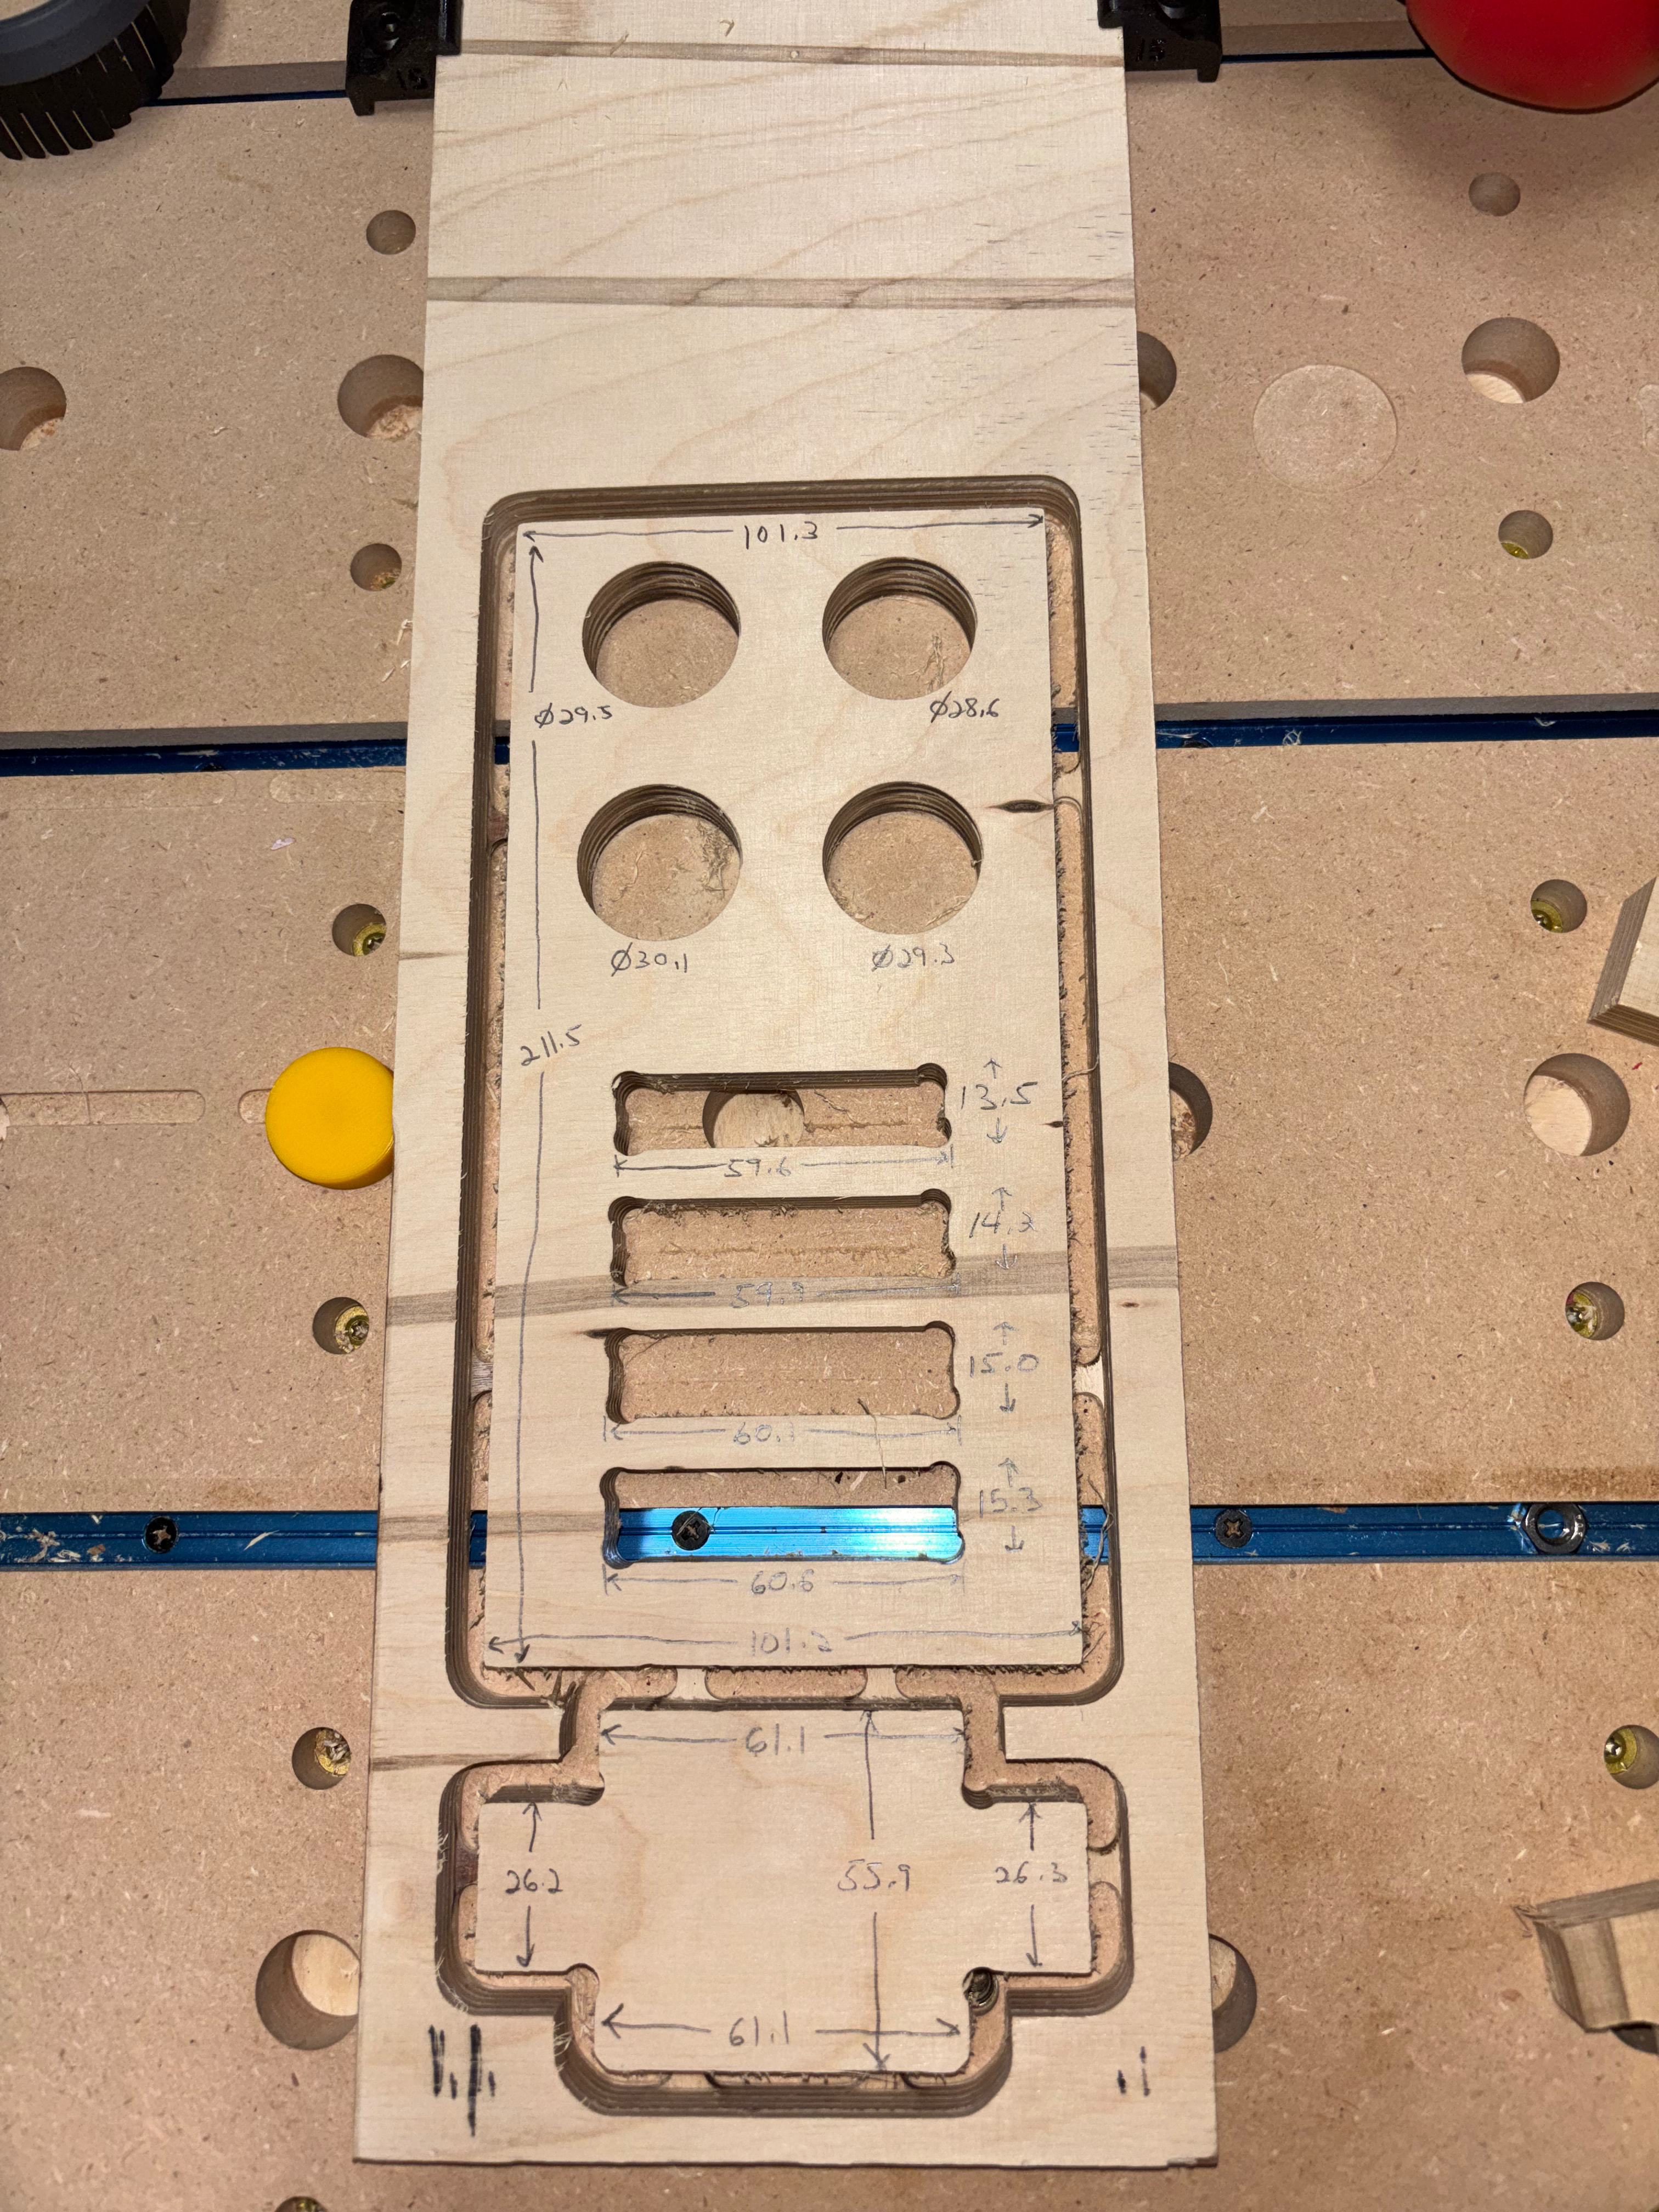
Material: 15mm Baltic Birch
Bit: 1/4” Compression Bit (confirmed at 6.35mm)
Depth per pass: 3.5mm
Total Depth of cut: 15.25mm
Feed XY: 35mm/s
Plunge Speed: 8mm/s
Router Speed: 18000rpm
Finishing pass: 0.3mm at full depth and 18000 rpm
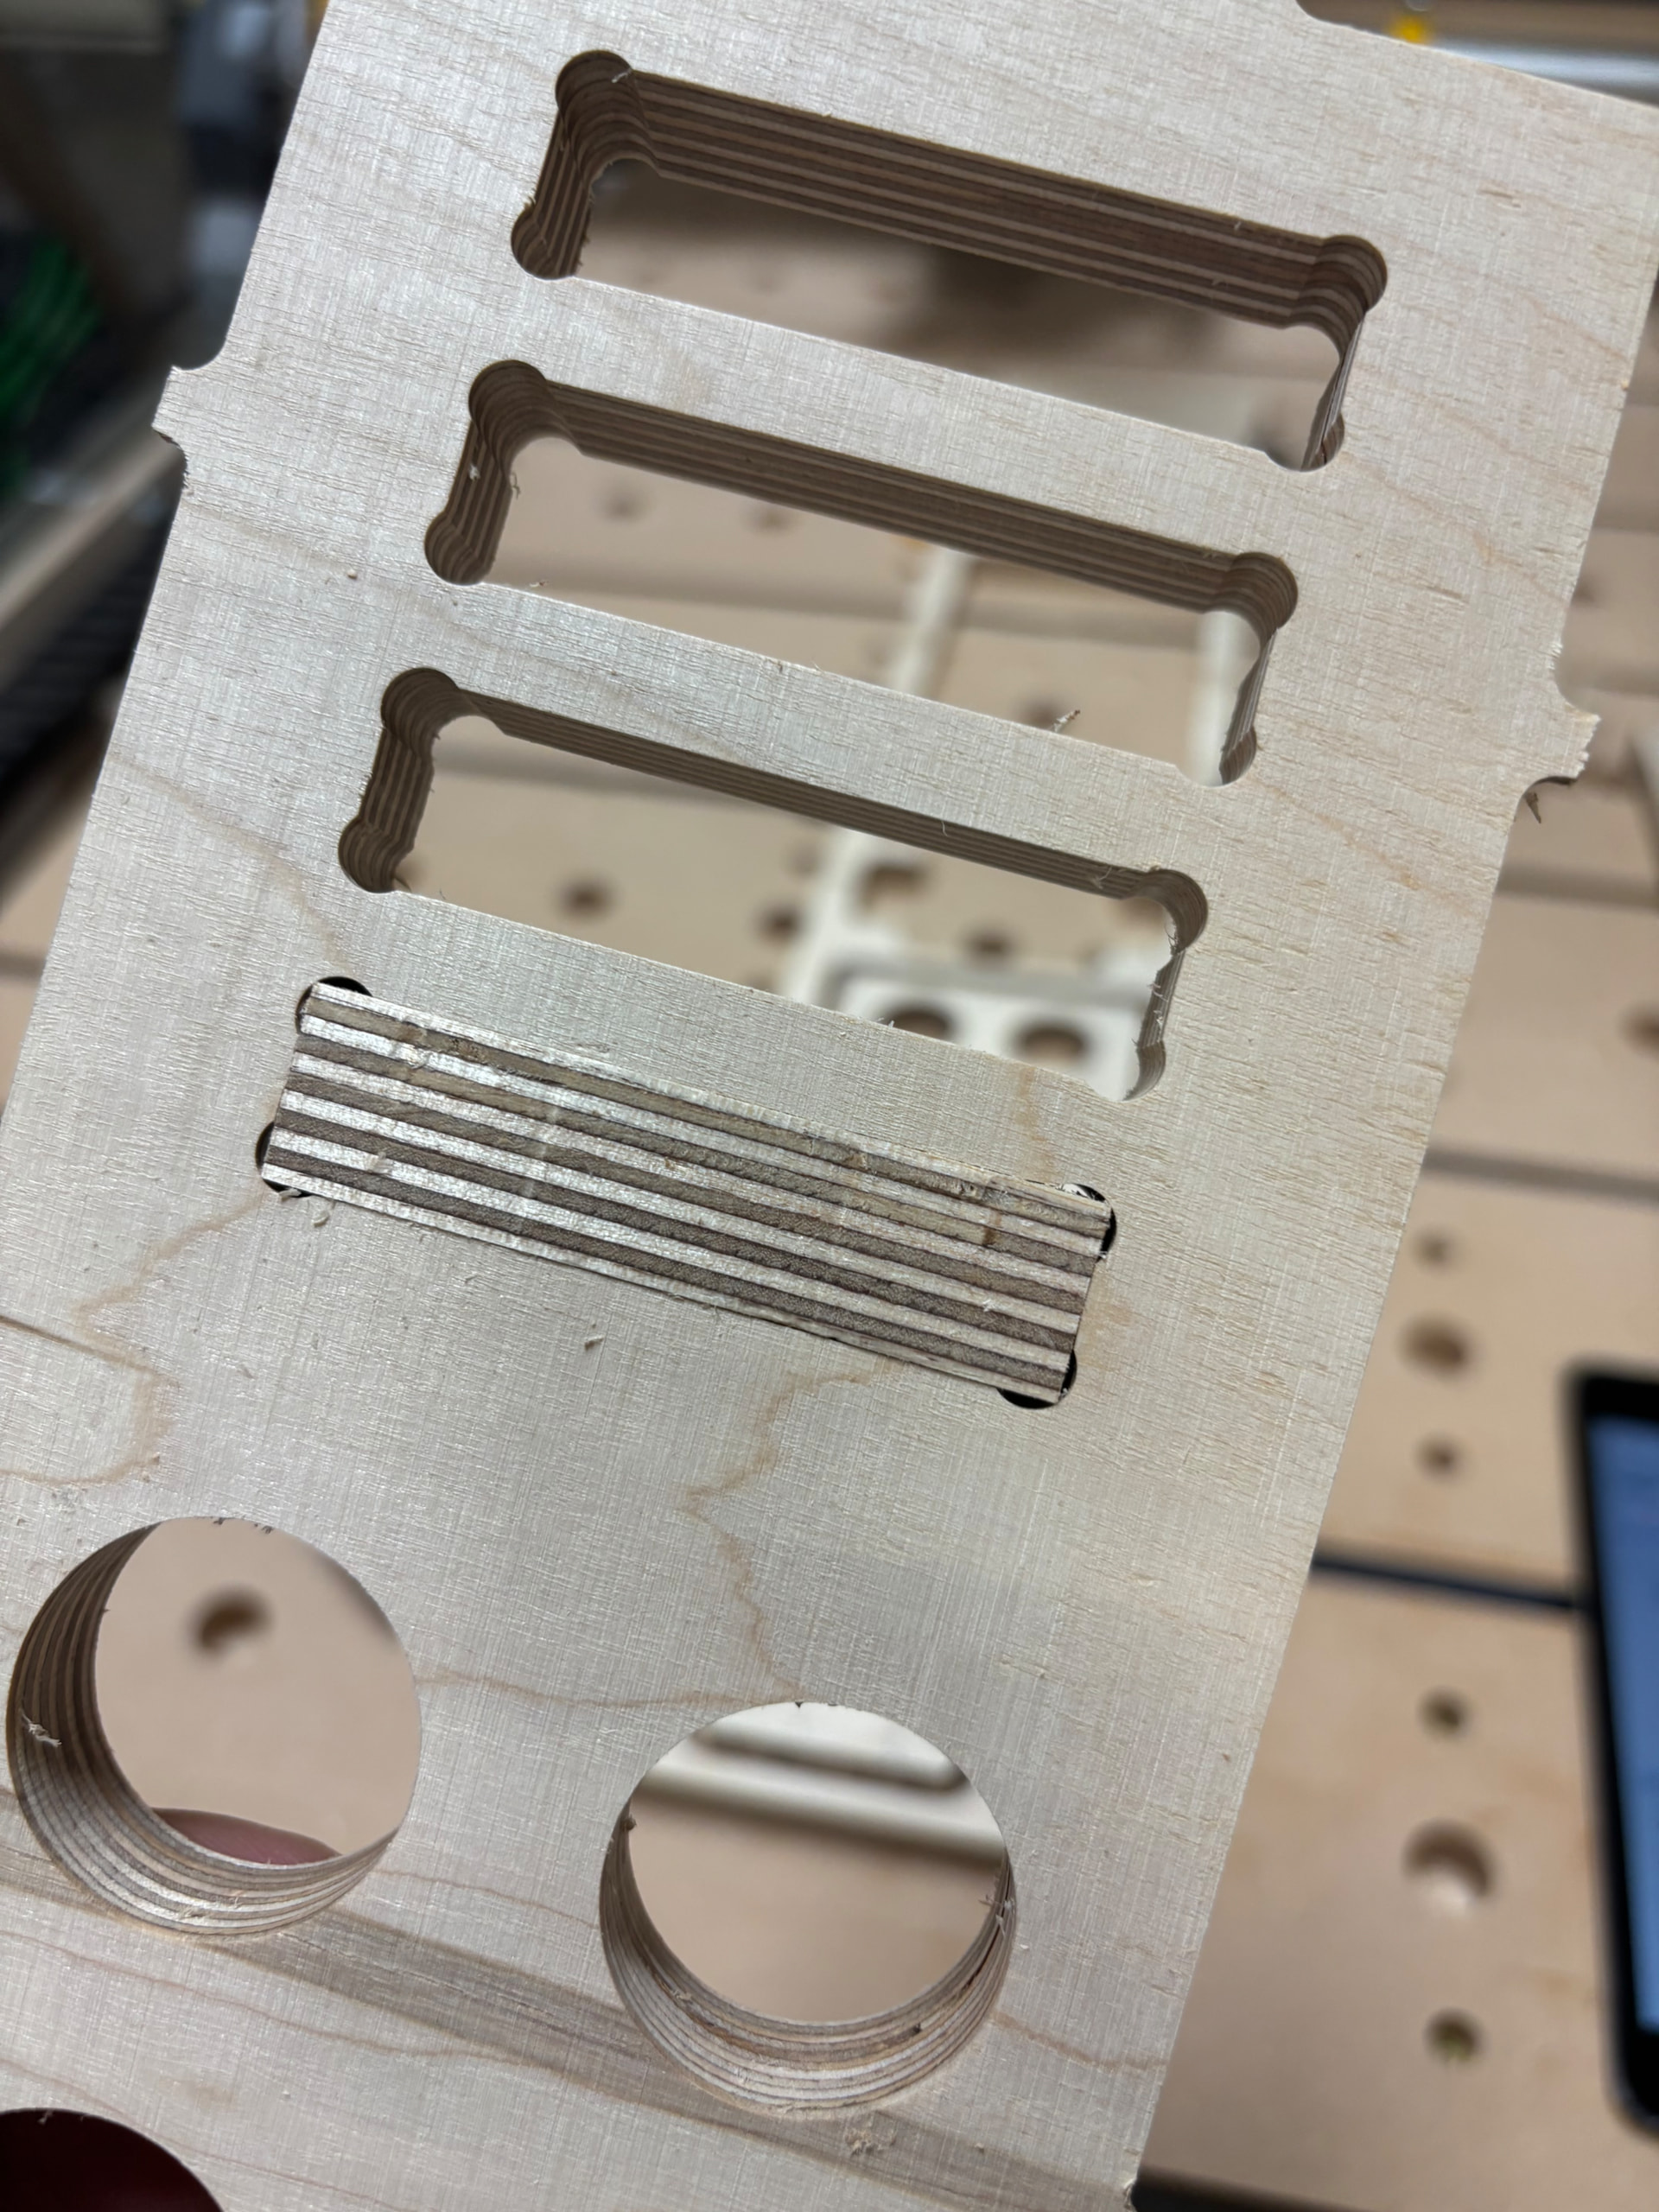
I’m seeing that my pockets are all undersized ~0.6-0.8mm/side and my outside part cuts are all oversized by about the same. On a previous attempt at Baltic Birch, I noticed a bit of play in my core, so I tightened the bolts and also made the belts tighter. Didn’t seem to make a big difference.
My steps/mm are correct, and the machine is well calibrated. I’ve made a couple of very nice V-carve type projects, and I am otherwise happy with how the machine is performing so far.
Am I just pushing this machine too hard and getting a lot of deflection? I also see some vibration or resonance in both X and Y on some of the long consistent cuts. Any suggestions?
How long are the flutes on your bit, and why are you only using 3.5 mm of them? I’d think you’d do better to have a higher DOC and fewer passes. I’d even say you’d be better off with a 3mm or 1/8” bit if you can get one with enough flute depth for your stock. And check the number of flutes on your bit. One or two is best. You really don’t want more than that for these machines. If it can’t cut a decent chip, it ends up just rubbing on the stock, and you get burned stock, dulled bits, and yet another reason to day drink…
Compression bits are really made for full-depth through cuts of laminated stock, where you really want to shear the faces of the stock into the core to prevent chipping or tear-out. if you’re making multiple passes, use an up-cut bit to pull the chips out of the cut and clear the work area.
Tabs too big, slots too small was a big problem for me with the 1/8” bits until I just defined the 1/8” bit as 3.000mm instead of the nominal 3.175mm. Until I did that, I couldn’t get stuff to fit together, it just would not go.
At the time people here told me that there had to be something else wrong with the machine, but later, more people found the same thing.
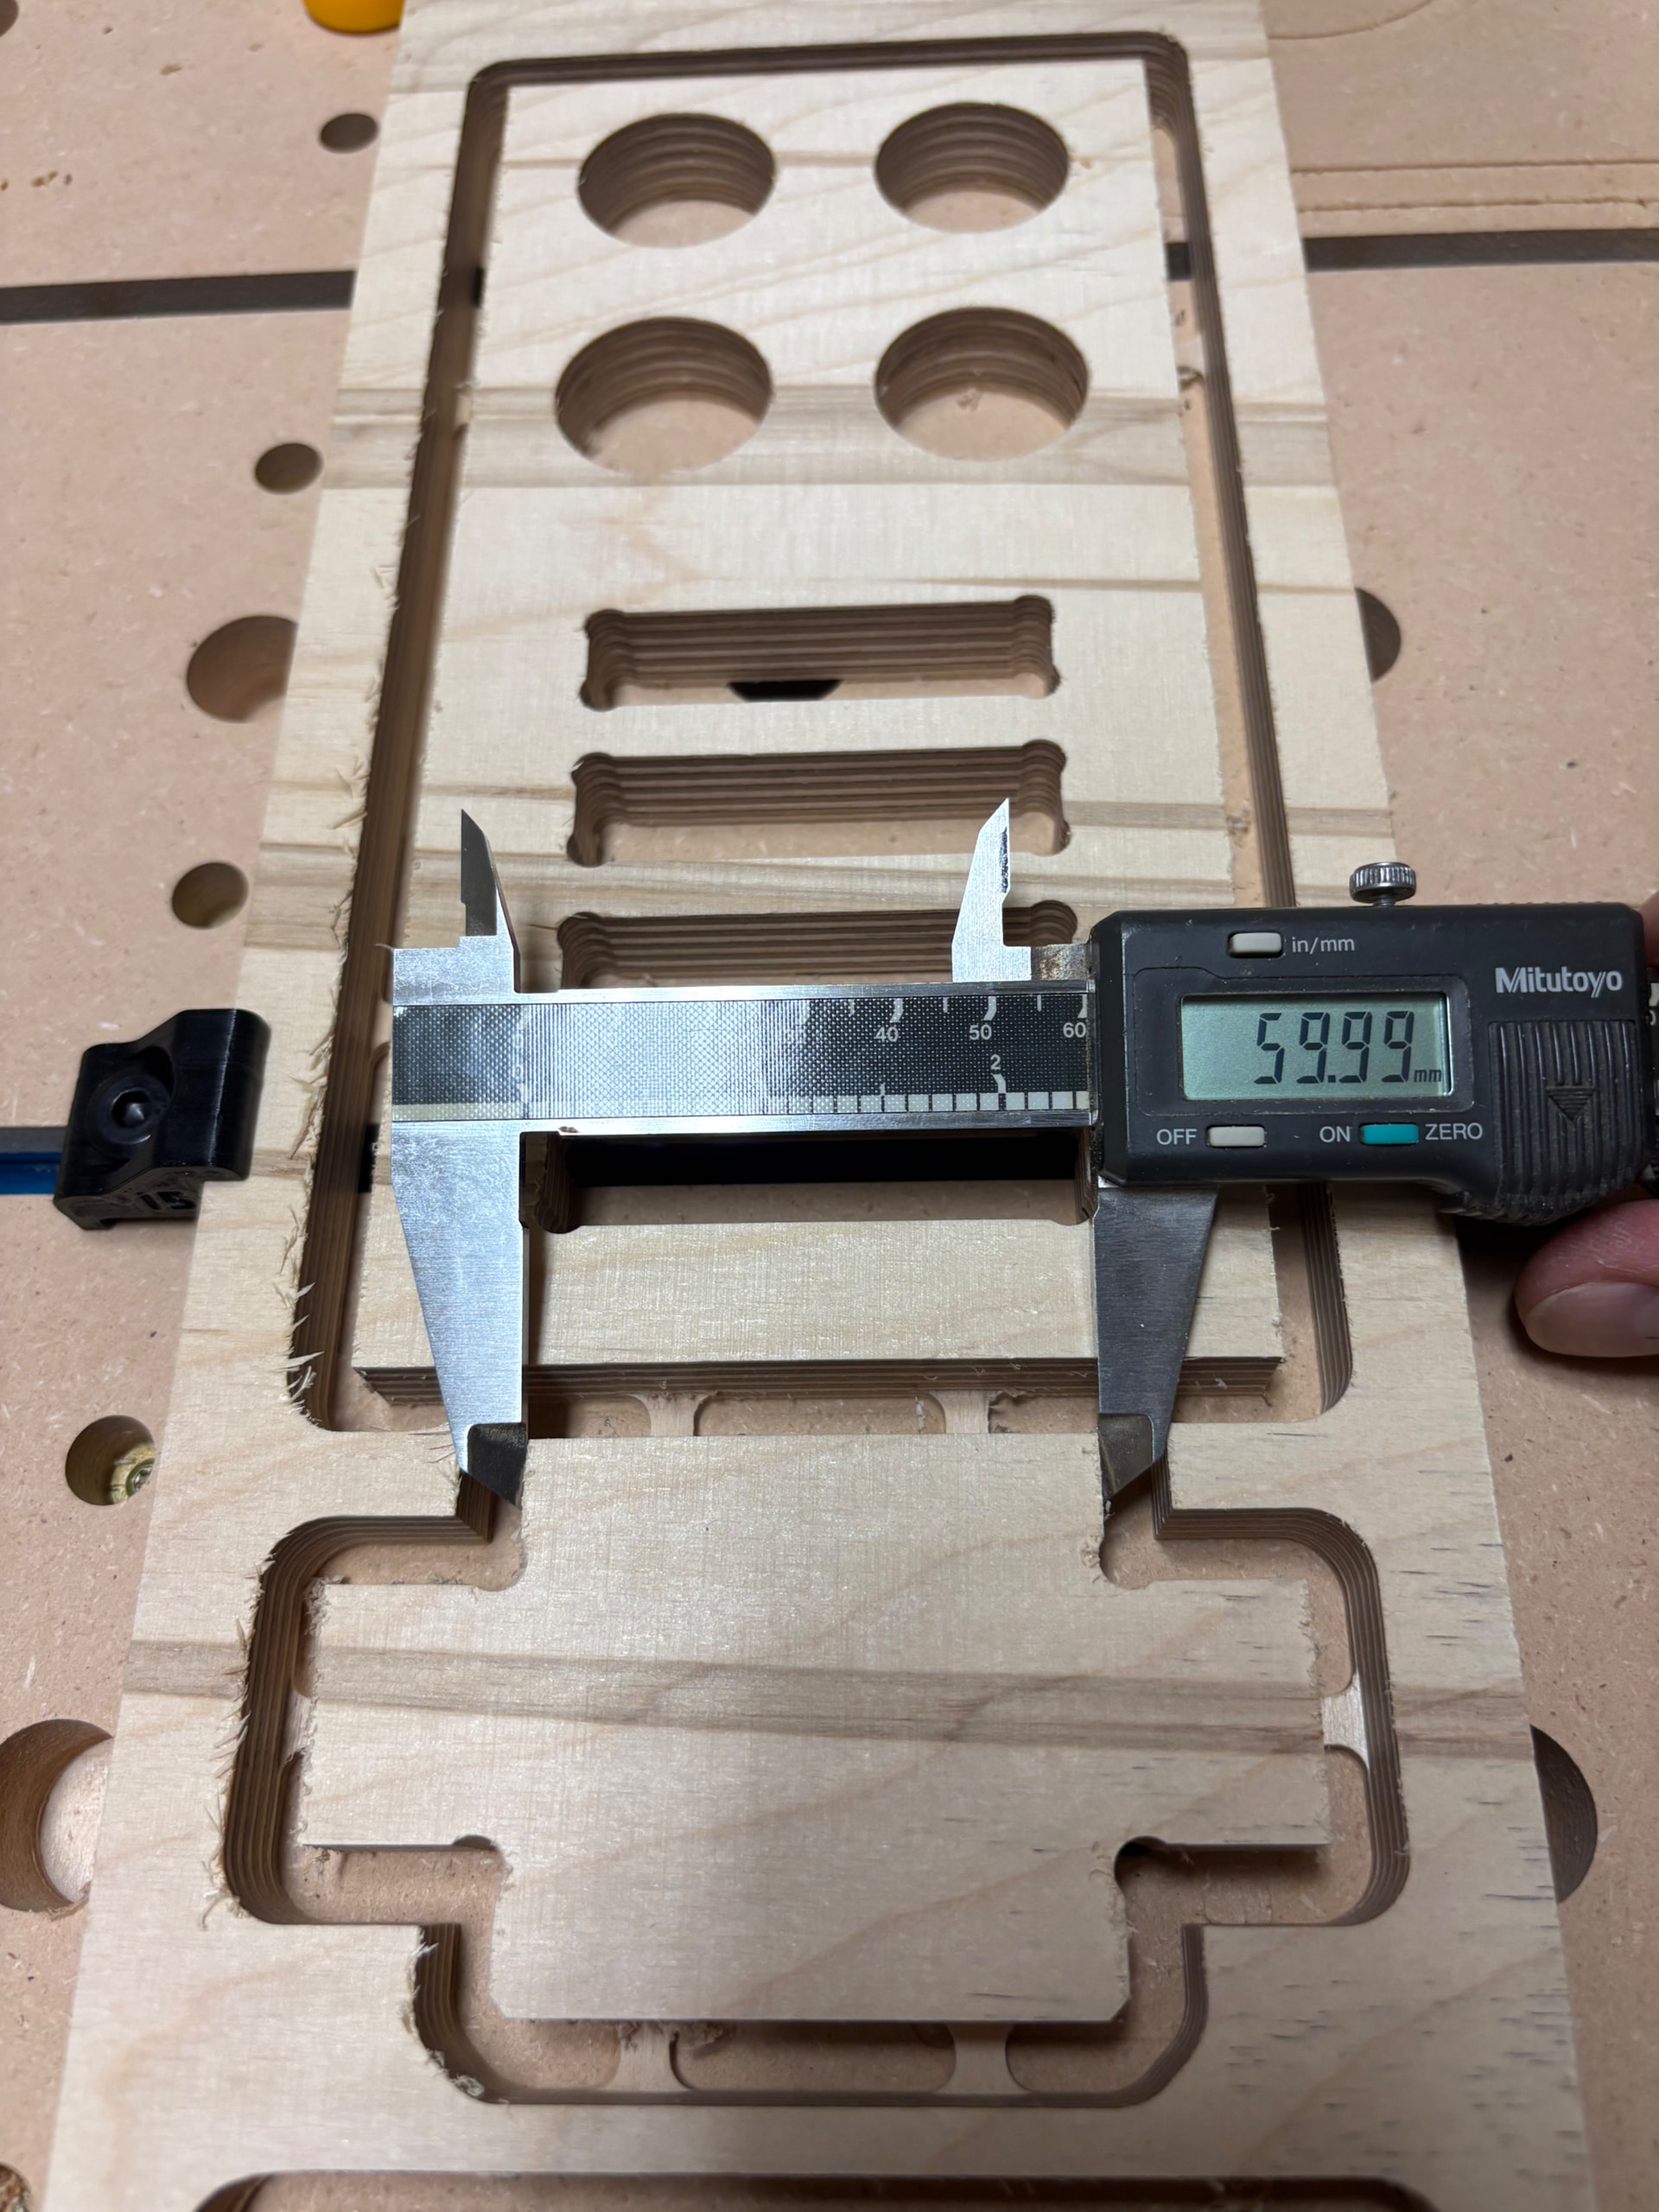
The bit itself seems to be correct, however measuring the actual cut kerf resulted in a smaller profile. My joins are now tight, but not too tight.
Step 1 is checking for flex and backlash. Jaimie’s pattern generator does a wonderful job of that. I have my own, but it’s not a tool for public consumption, lol. Jamie’s tool also is good for:
Step 2 is verify steps/mm. Make sure that an object x mm more than another is the correct difference. Check that 2 slots have the correct difference. Check that a difference of double the previous amount is correct. This takes the bit size out of the equation. You can even use an entirely wrong tool but the differences will show your steps/mm.
Now you know your tool moves the correct distance, and remains consistent, differences between commanded part sizes and actual part sizes are mechanical. I think that these tools generally cut a certain amount smaller than their nominal sizes. If your 50mm tab is 50.32mm long and your 50mm slot is 49.68mm, you aren’t going to get that tab into that slot. Maybe the material “springs back” the extra, and maybe your cutting tool just never cut that width in the first place, but adjusting the tool diameter in CAM was what worked for me.
Get an upcut. Compression bogs down the endmill, makes it re-cut chips and it’s basically as if it cut 15mm at once with the finishing pass which leads to deflection.
Besides that I once had a sheet of birch that was absolutely horrible. There is a loooong thread here somewhere.
Agree with @Tokoloshe compression bits a very hard to get dialed in well. Also check and make sure your core doesn’t have any slop in it. If you grab the endmill, with the router off of course, and move it around do any of your bearings lose contact with the rails? if so very lightly tighten the top 2 bolts where the slit in the core is. No more than 1/16 of a turn at a time just until it doesnt move around anymore.
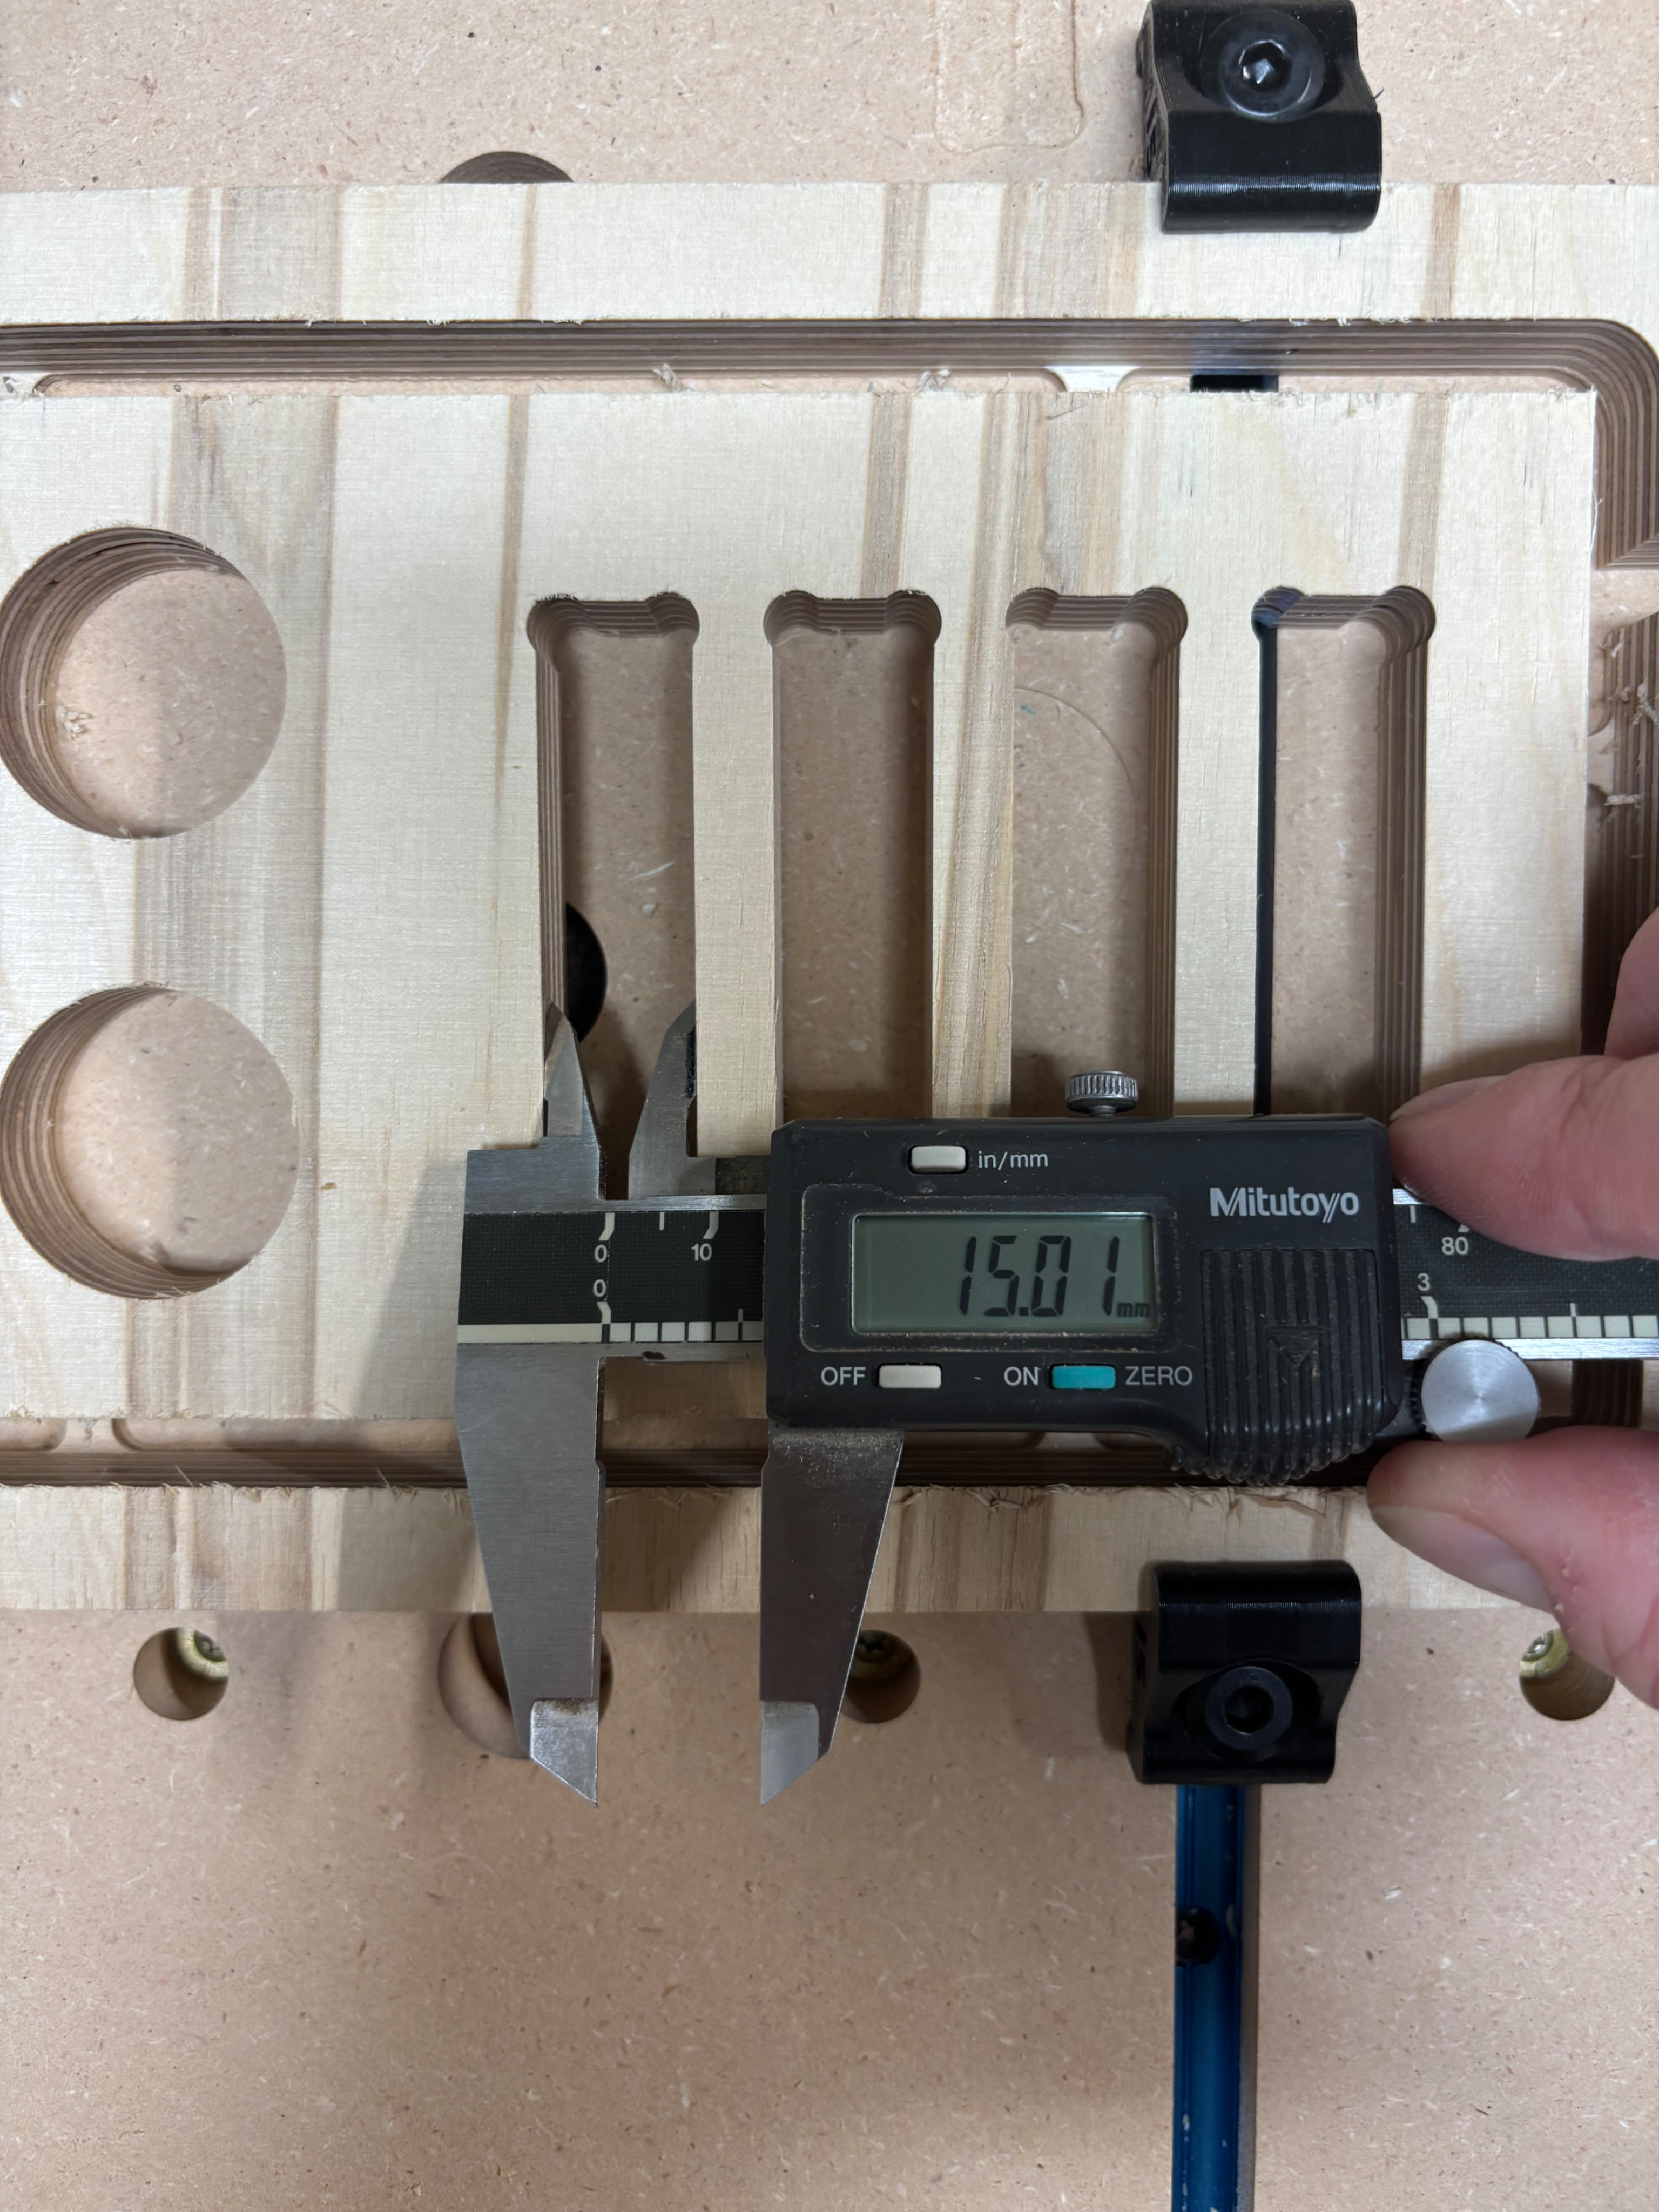
I just tried a few re-cuts and my 1/4” O-Flute bit did the trick.
For anyone interested, settings were:
Material: 15mm Baltic Birch
Bit: 1/4” O-flute Bit (measured at 6.00mm)
Depth per pass: 3.0mm
Total Depth of cut: 15.25mm
Feed XY: 25mm/s
Plunge Speed: 7mm/s
Router Speed: 20000rpm
Finishing pass: NO
I also noticed that if I tried to do a small (0.7mm) finishing pass at full depth, I caused some vibration or resonance especially when climb cutting. So, I tried again without the finishing pass, and it turned out great with no vibration - I don’t think it like the asymmetric side loading. Win-win, no vibration and a faster job.
Thanks for the help. Glad I’m going to be able to cut Baltic Birch on this thing! Just wish I hadn’t wasted half a sheet figuring things out.
He was using the wrong bit (settings). If you are using a compression bit you need to cut at full depth so it to work as intended. The change to an up cut bit results in he being capable of cutting without loosing steps, dulling the bit etc
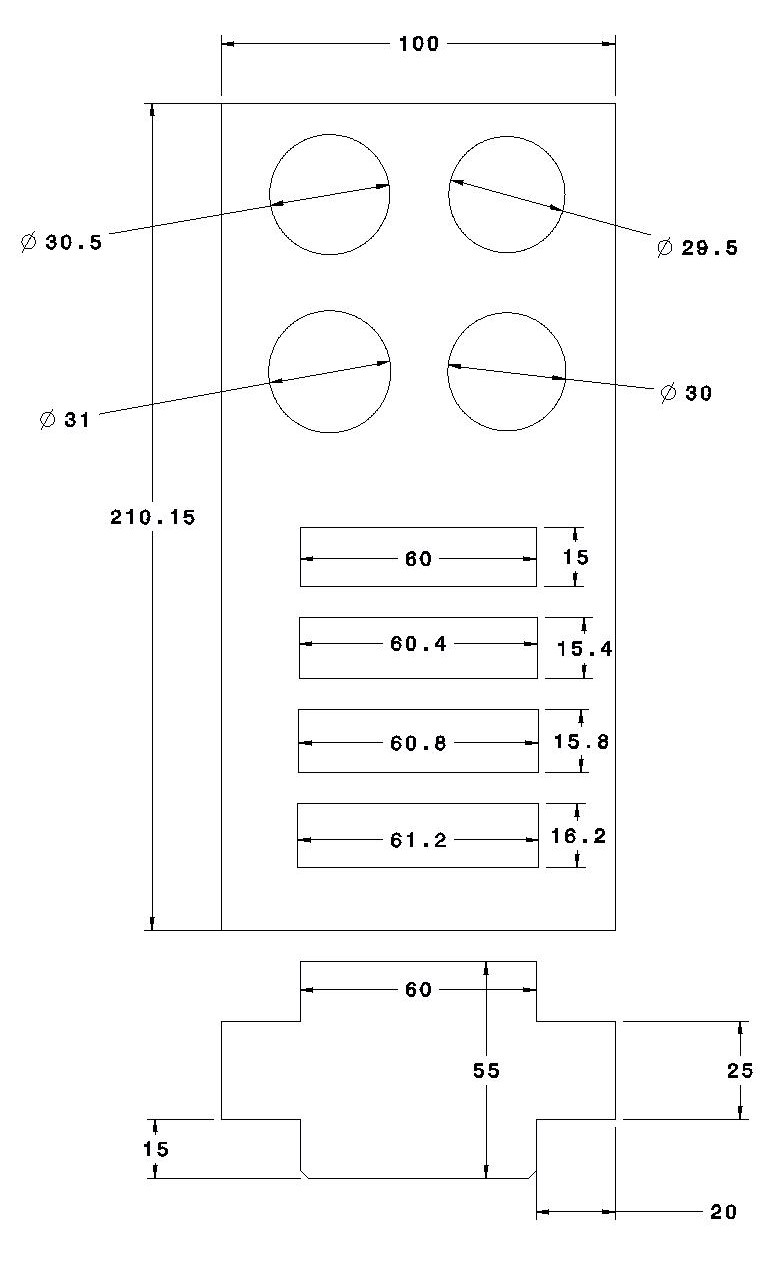
Hmm… I went on to cut a bunch of pieces based on these settings and ended up with some of the slots being under-width by 0.3mm per side in both X and Y. Not a ton, but it meant that I needed to sand all of my tabs in order to make things fit. I got a little too ambitious with the slot sizes based on my test cuts.
Not sure why my accuracy took a hit. The results were fairly consistent, so my precision was pretty good which makes me think this is fixable or at least can be compensated for. My test cuts were on an older scrap from a different batch of Baltic Birch ply, so it could be this stuff was harder and caused some bit flex? Or did the bit already start to dull? It was brand new when I did my test cuts.
I am also seeing a fair bit of x-axis vibration or resonance with certain cuts. I have a fairly long x-span at 32” cutting width. My LR4 is on a torsion box top, but the legs are lacking braces, and the entire table is able to flex pretty easily. I’m planning to add some bracing but haven’t gotten around to it yet.
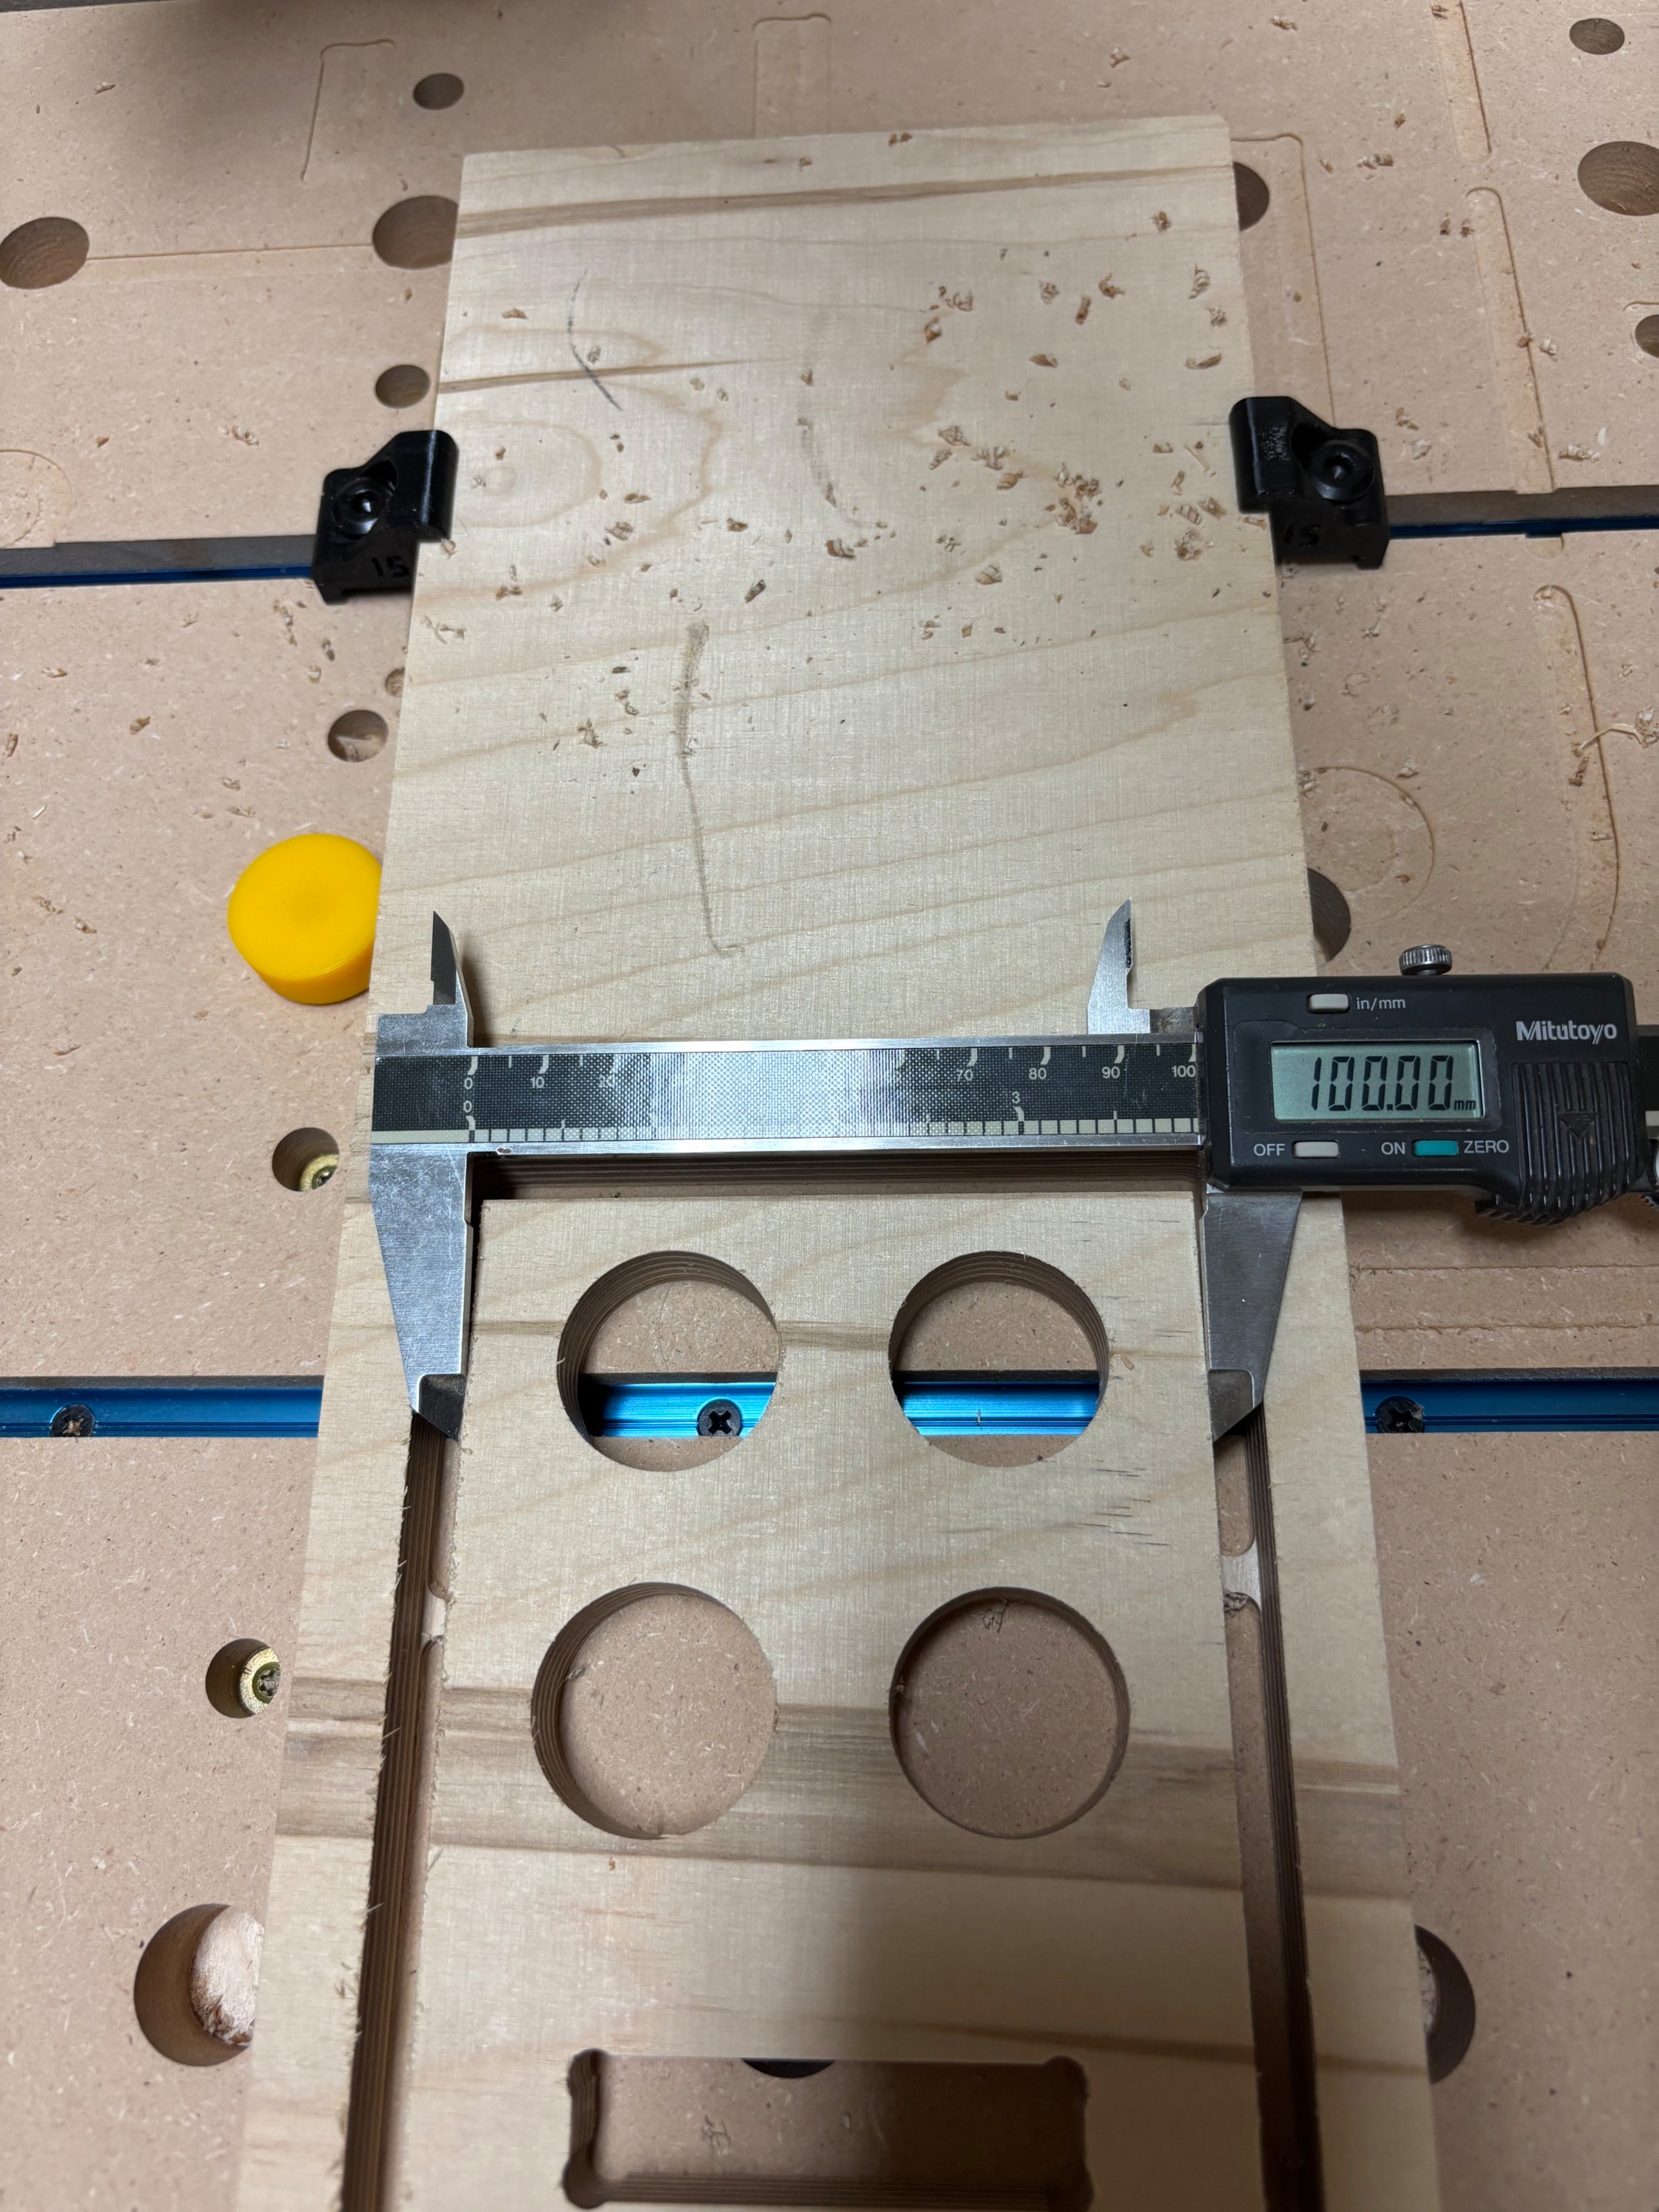
Well I’ll be, I measured my cut pass on my 1/8” bit and it is exactly 3mm. My .4mm went away almost immediately after making the custom bit. My 100x100cm square cut is within .02mm now.