Hi All
Fascinated by the sisyphus I ended up duplicating Robdonson’s scara mechanics (with Eric Mikson’s Mods) combined with an Arduino Uno + CNC Shield + GRBL 1.1
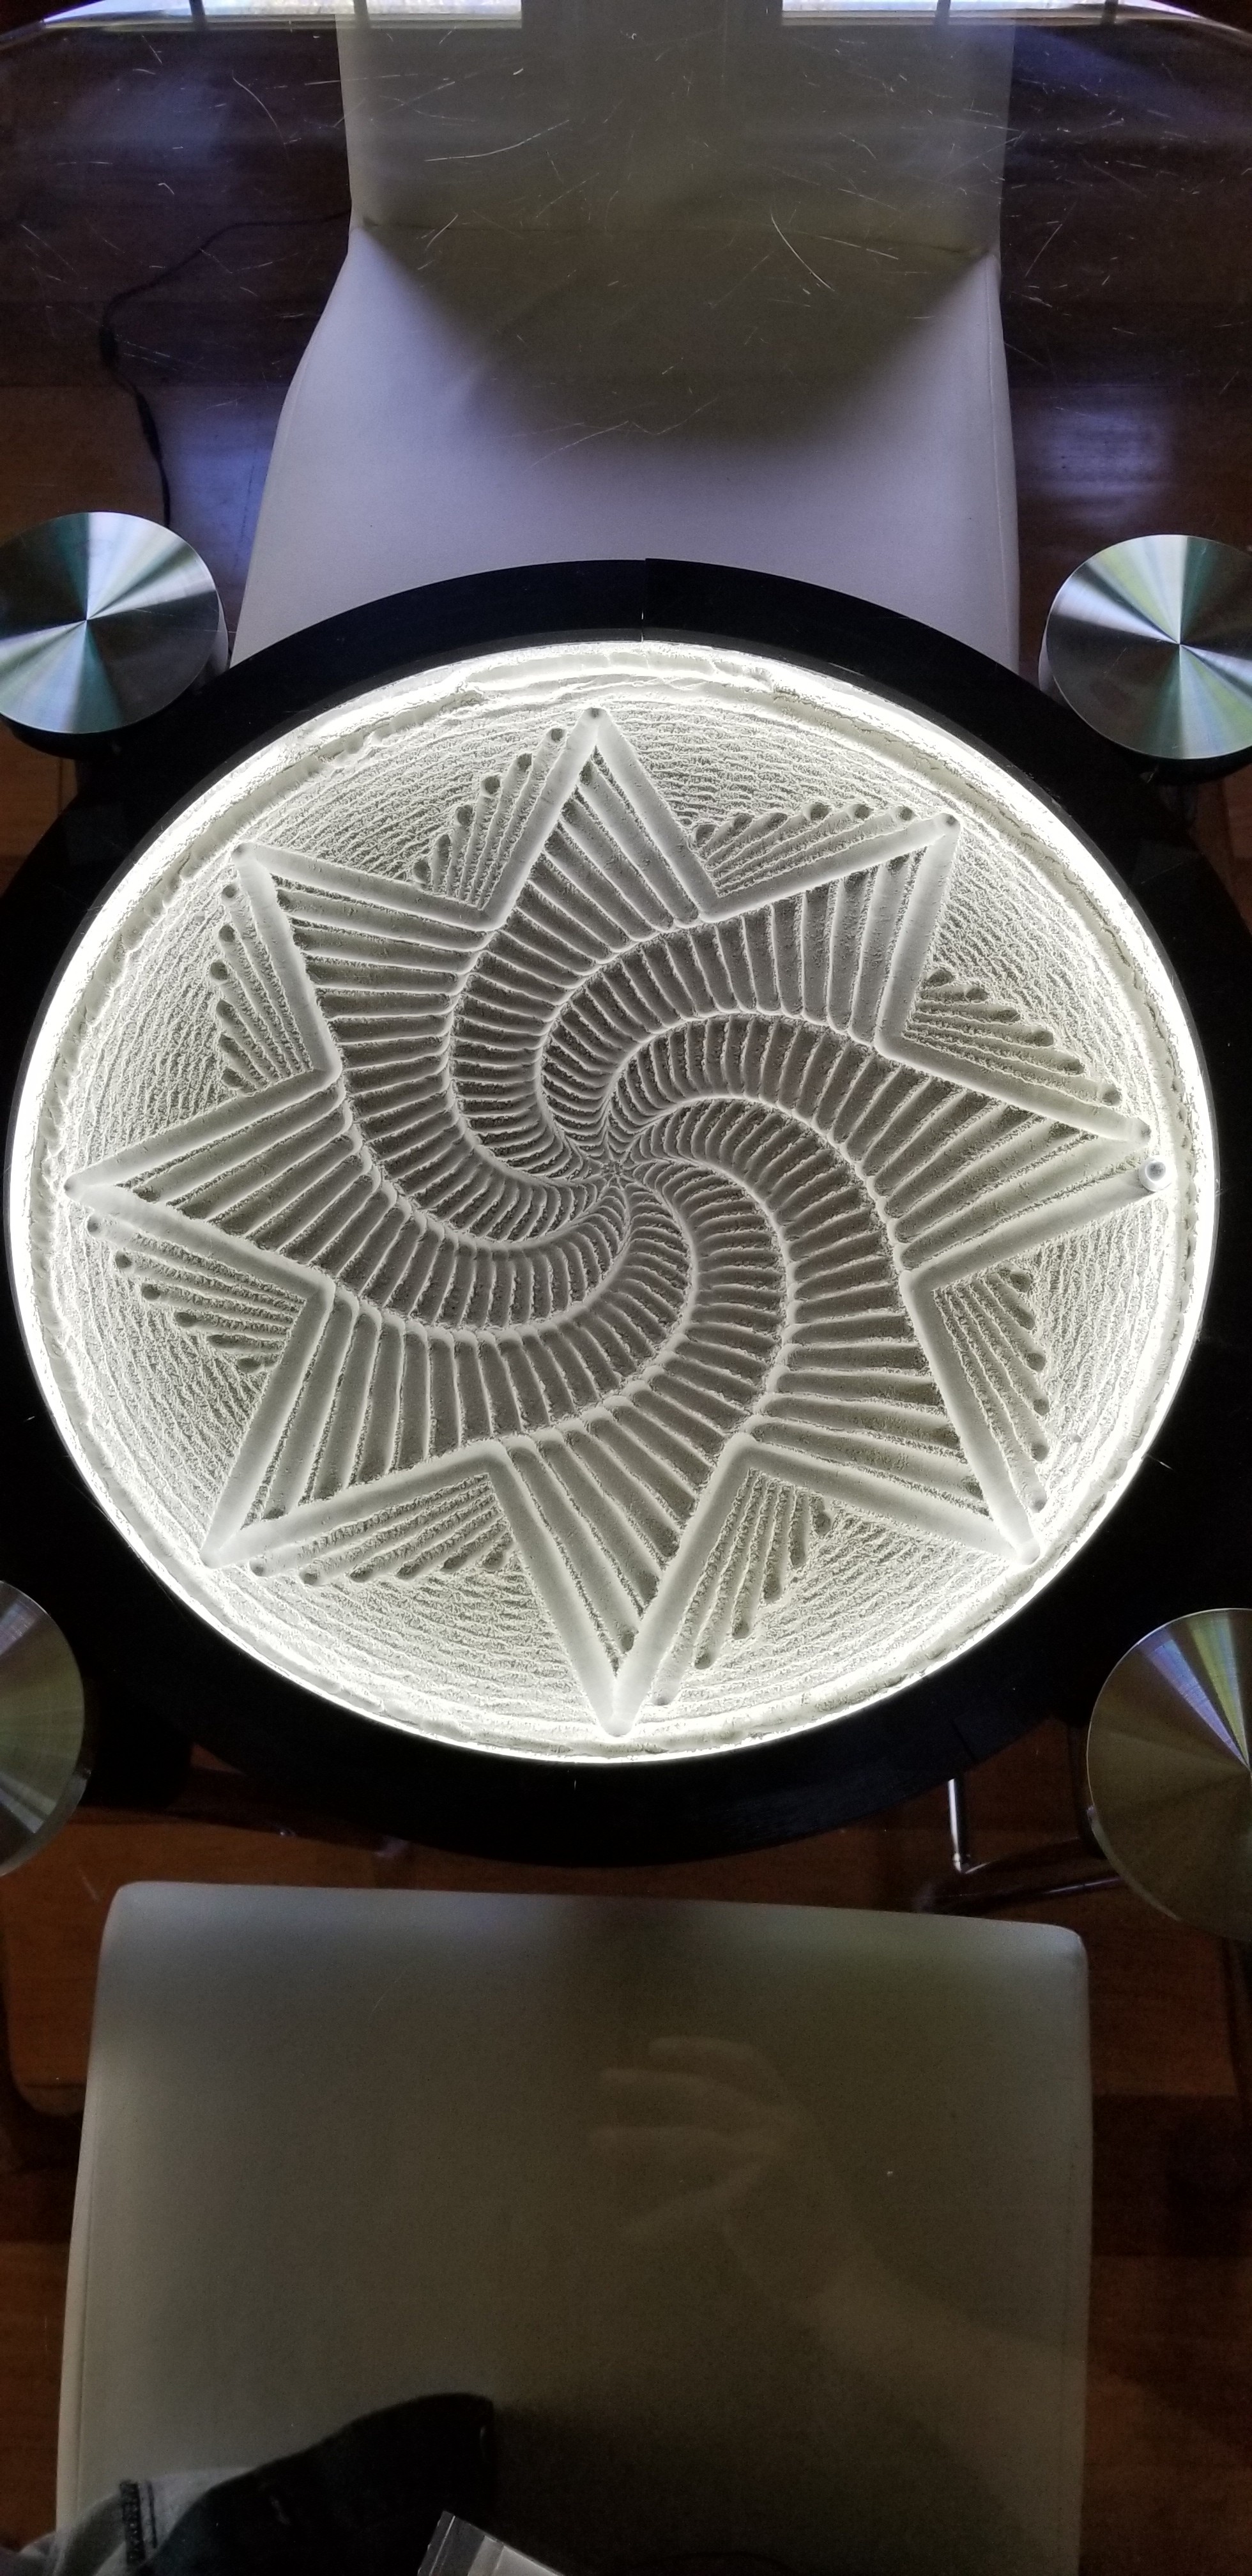
It’s all work in progress but I was able to get the first (cycloid) pattern like movements out of it.
Reading this forum has been very helpful; Thanks to all of the previous contributors to this topic.
he software part is still kind of intimidating (even for a software guy).
I still need some progress on the mechanics; end stops are missing, some axels came out too short to fix them in place, the whole table is still missing Once I’m done I’ll document the whole build and condense all the info in a blog post.
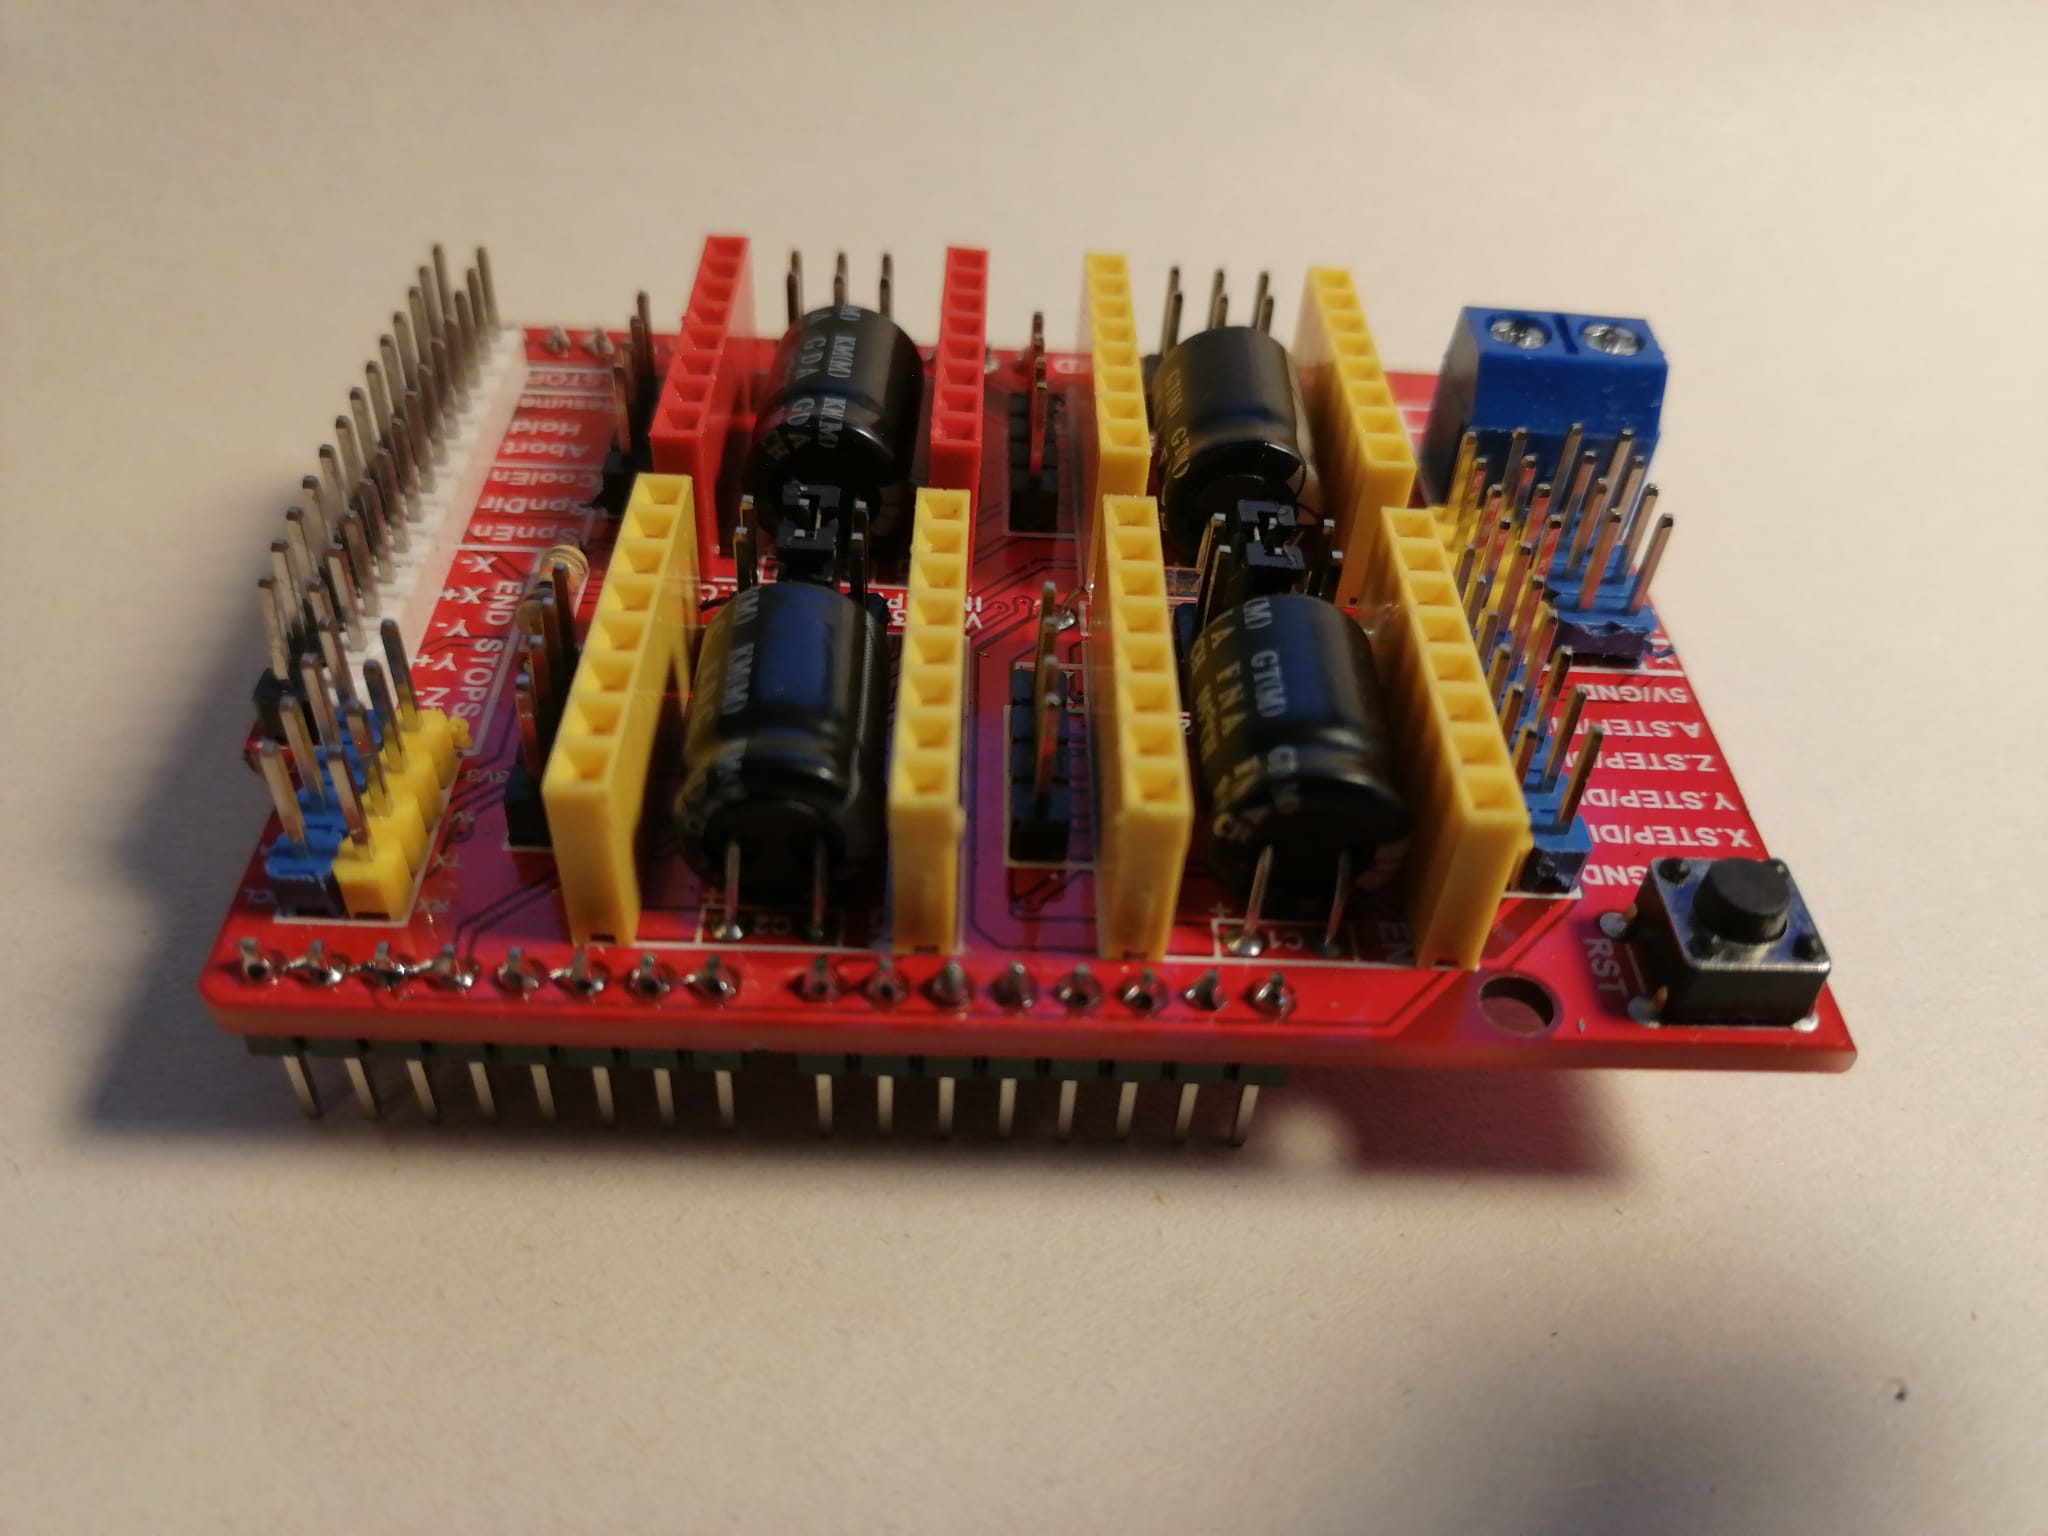
I have started with A4988 stepper drivers and they are loud:
Hi,
I’m using normal grbl 1.1 version. I had some hickups with the Arduino IDE uploading it: occasionally it errors out. Smaller examples like Blink would mostly work. Some resetting and several attempts got it to work.
I created a simple square track on sandify, saved the sandify.thr file, converted it to a gcode file using your phyton script. Then i upload the gcode to grbl using UGS.
One issue I encountered is, grbl or ugs will not accept the generated gcode complaining that G1 command needs a feedrate. I’m not sure whether I could setup a default feedrate in grbl?
I worked around the issue adding F60 to the end of the first G1 command manually.
I plan to use a raspberryPi to manage pattetn files and file list. Not sure yet wish software.
On the weekend when I was trying to get it to work, i got quite lost a bit between the different threads, arduino vs ramps, grbl vs grbl-scara vs msrlin vs marlin-scara…
Some of the info around grbl in the other threads seem to be outdated. Like $10 settings and ? Command for status info.
Once I reach a more final status, I’ll document and share the whole process that worked for me.
Oh yeah. I usually set it in the pre script for gcode, but that doesn’t work for the thr files to scara script. Just adding G1 F60 before the first gcode should work.
Homing sequence with Grbl:
I configured X as first axis and Y as the second axis to home. It will move X till it reaches the limit sensor (hall sensor), back off x mm (setting $27) retry the switch and then backs of xmm again. this makes it impossible for me to have both sensors in alignment. The X axis sequence takes the magnet out of reach when it backs of the x mm. I tried 0mm but then Grbl seems to have issues- I haven’t found a way yet to customise this behaviour. For now I solved it by adding customised sensor holders and move Y out of alignment. the homing works but the arm is not 100% extended. I don’t think this is an issue, still wondering how to solve this.
Vertical alignment:
It seems the main axis of the X arm (reaching down through the core unit) has play and/or the belt tension is pulling it out of the vertical. This messes with sensors and spacing in general.
But I also haven’t properly attached the stepper with a long screw through both plates; this probably will solve the issue.
Lessons learned:
Arduino IDE…
it won’t always upload the Grbl firmware. I couldn’t find the reason yet yet but sporadically it will work. I can upload the smaller example codes without a problem. Just Grbl Resetting, moving the cable, changing programer option (shouldn’t have an effect at all) all of these steps have seemed to worked once in a while
It will make a local copy of any manually added library. So when you modify any configs on the original (download) location, your changes have basically no effect as they are not in the local copy ! it took me a day to realise why in my case the homing sequence wouldn’t move anything; it was still trying to move Z axis although I have changed the config (so I thought)
Hall Sensor:
The CNC shield has two pins for the limit switches Gnd / Signal. The hall sensor has three pins Gnd, Vcc, Signal. I don’t have any electronics background, so just tried to attach Gnd + Signal to the limit switch pins (X-) and Vcc to a 5V pin elsewhere , but this didn’t work at all. I have the feeling the X stepper driver died on this experiment. Eric Mikson gave me a hint (Wiring optical endstops · Issue #806 · gnea/grbl · GitHub). this brought me on track, I had to use a PNP transistor as the hall sensor seems to have the opposite behaviour as the optical sensor, but they work now
China clones:
After trying the hall sensor one of the stepper drivers stopped working, but I didn’t know at that point it was the stepper driver. During my trial and error search I changed the CNC shield. All of a sudden X & Y start to move together. I was busy with the hall sensor and didn’t realise the causality.
Today I found the issue: a bridge on the soldering between X and Y step (pin 3-4 from the left) pins
add the library to Arduino IDE; menu “Sketch” > “Include Library” > “Add .ZIP Library”, select the grbl subfolder form the place where you extracted grbl.
You need to do some changes to config.h for homing (edit it before adding library to Arduino IDE or edit it at the right place):
comment following lines (around line 106):
    #define HOMING_CYCLE_0 (1<<Z_AXIS)                // REQUIRED: First move Z to clear workspace.
    #define HOMING_CYCLE_1 ((1<<X_AXIS)|(1<<Y_AXIS))  // OPTIONAL: Then move X,Y at the same time.
and add:
    #define HOMING_CYCLE_0 (1<<X_AXIS)                // REQUIRED: First move x to clear workspace.
    #define HOMING_CYCLE_1 (1<<Y_AXIS)                // REQUIRED: First move Y to clear workspace.
I added following settings to grbl using UGS (universal g code sender):
$22=1 // homing enabled
$27=0.2 // depends on your sensor location
$100=400 // I’m using 1/4th resolution, value depends on your stepper settings
$101=400 // I’m using 1/4th resolution, value depends on your stepper settings
That’s cool. The sand did that on mine too. I think the grains are just unforgiving. Baking soda works a lot better. It is crazy, but it really does. One box is like $0.99 too.
Are you just sending that G0 X100 Y10000 or something? It looks like what a straight line pattern would be, converted to scara.
I’m sorry, I don’t understand. Can you tell me specifically how to plug programs into the Arduino board through the Arduino IDE? Where to download the program for the Arduino Board、
To be clear, the links that @paraterra provides are for installing the grbl firmware onto the Arduino control board.
Once you have the firmware in place, you will need another method to send gcode commands (whether to manually control the machine or to execute designs). This is called “gcode sender” and runs on a separate computer. There are many options, such as Repetier Host (mac, windows, and Linux versions available), Universal Gcode Sender (UGS), and cncjs (Linux, Raspberry Pi option).
I love Chinchilla bath dust. Its pricey but goes far. I only put in 3- 4mm . It makes crisp designs and is off white, gray/white…
Only thing I have to do with new dust is soft out the few larger grains with cheese cloth and a big bowl. And pour from one bowl to another to help remove the fine dust that clings to glass with static. I little work but we enjoy the look
 homing sequence")