DougJoseph
December 14, 2023, 9:50pm
1
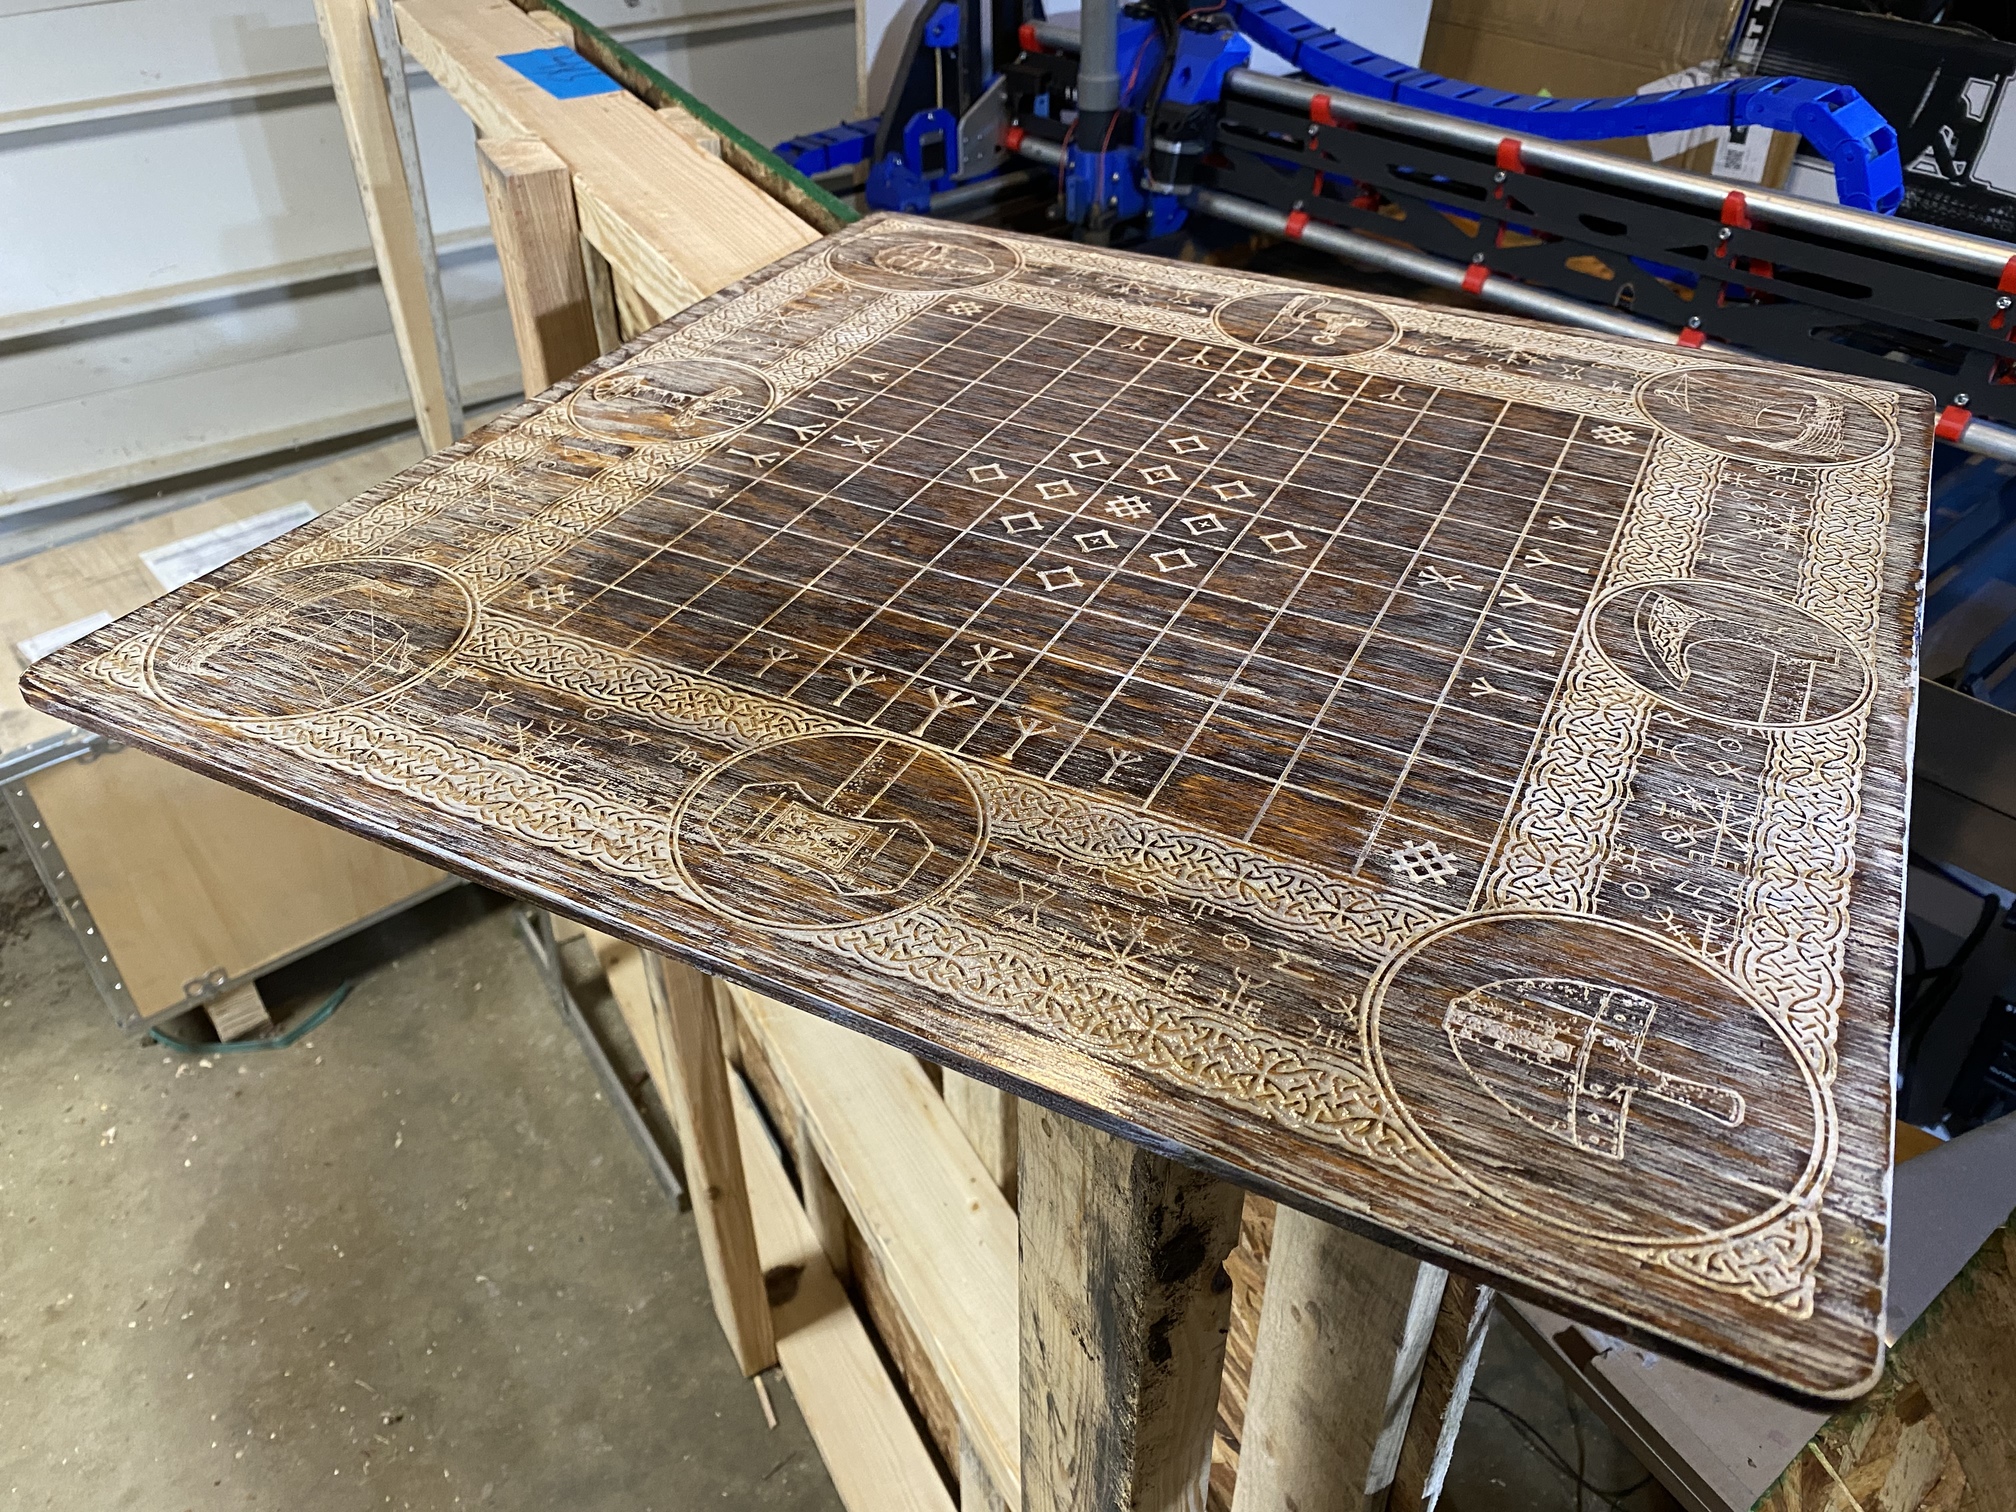
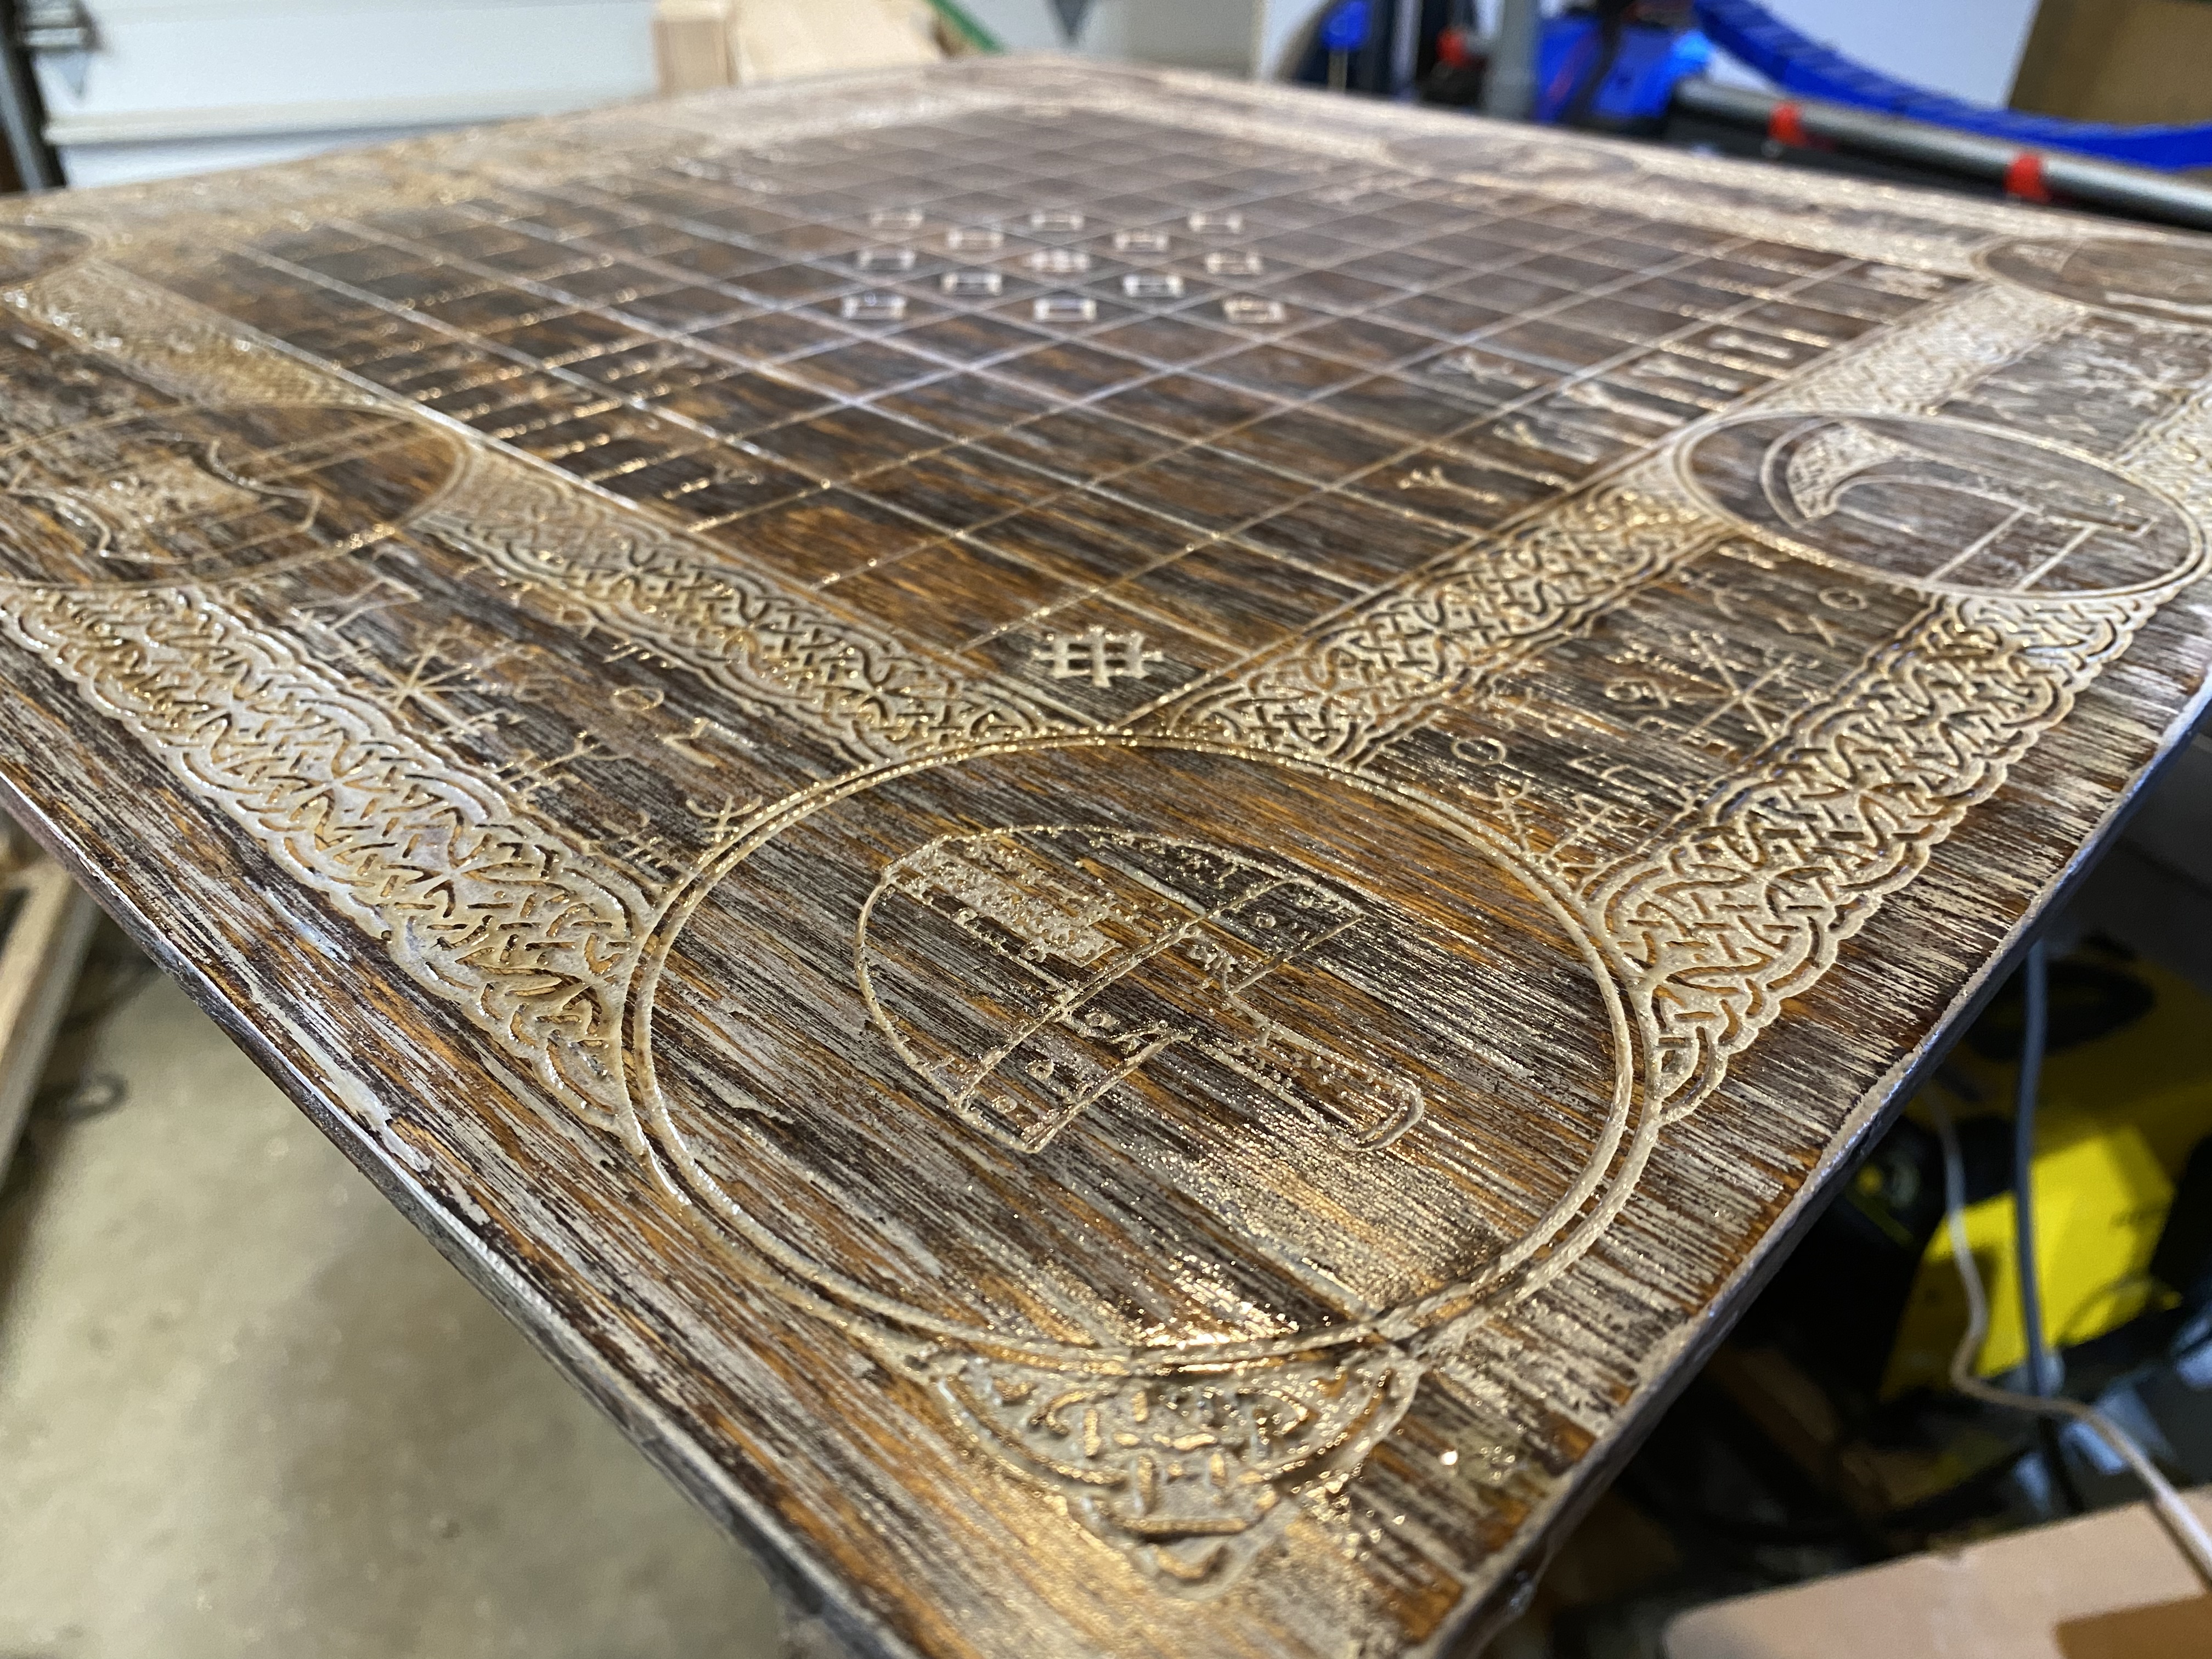
Aging technique for this and other games (or whatever):
Sand as needed
Apply Minwax Pre-Stain Wood Conditioner
Apply Minwax Wood Finish - Red Mahogany 225 (This is a dark stain. Leave it on as long as allowable.)
Wipe off excess Minwax Wood Finish - Red Mahogany 225
Engrave the etched-in lines of the game board (with laser or CNC).
Blow off any soot or dust with compressed air.
Apply polyurethane, thin coat, and allow to dry.
Apply thin coat of white acrylic paint, making sure to get it down into the grooves that were etched with the laser or CNC. Allow to dry.
Sand off most of the white paint.
Blow off any dust with compressed air.
Seal again with polyurethane, thin coat, and allow to dry.
In the following pics, this technique is shown on one of my Hnefetafl game boards that I designed.
For search: “Make things look aged” “Make things look old.”
14 Likes
jeffeb3
December 14, 2023, 10:10pm
2
That is a stunner! Great contribution as always.
2 Likes
DougJoseph
December 14, 2023, 10:12pm
3
Thanks!
I think steps two and seven could be optional depending on the project goals.
DougJoseph
December 14, 2023, 11:08pm
5
Thanks! I’m so pleased with how it turned out!
1 Like
dkeller
December 15, 2023, 12:38pm
6
It really looks like it was found in the basement of a dilapidated mansion on the bayou! I mean that in a good way too! Creepy and totally amazing at the same time!
2 Likes
DougJoseph
March 14, 2024, 3:08pm
7
I should have added, after painting on the thin layer of water-based white acrylic paint, wiping it down with a rag or paper towel that’s wet with water, can remove most of the paint from the surface without removing paint from the grooves, making it easier during the sanding of the next step.
2 Likes
niget2002
March 14, 2024, 5:22pm
8
Nice!
I typically go with the ‘burn it with fire’ approach to aging.
1 Like
vicious1
March 3, 2026, 2:22pm
12
closing old topic to help fight spambots